URL: https://testingbot.com/
# Cross Browser & Mobile App Testing Platform
With over 9 years of experience, our App and Browser Testing service is powerful, easy to use and provides you with a big number of features tailored to help you improve your product.
[Get started free](https://testingbot.com/users/sign_up)[Request a demo](https://testingbot.com/demo)
1+bn
Tests Executed
180k
Active Users
5,500+
Browsers & Devices
Trusted by some of the world's most innovative companies
## Test your websites and mobile apps
### Web Testing
Test on 5200+ real browsers across Windows, macOS and Linux.
[
#### Live / Manual
Interactive browser testing
](https://testingbot.com/features/manual-browser-testing)[
#### Automated
Selenium, Playwright, Puppeteer & Cypress
](https://testingbot.com/features)[
#### AI Testing
No-code test creation
](https://testingbot.com/features/ai-testing)[
#### Visual Testing
Screenshot comparison of websites
](https://testingbot.com/features/screenshot-testing)
### Mobile App Testing
Test on real physical iOS and Android devices.
[
#### Live / Manual
Interactive device testing
](https://testingbot.com/features/manual-mobile-testing)[
#### Automated
Appium, Espresso, XCUITest & Maestro
](https://testingbot.com/mobile/realdevicetesting)[
#### AI Testing
Natural language tests for Apps
](https://testingbot.com/features/ai-testing)[
#### Visual Testing
App screenshot comparison
](https://testingbot.com/features/screenshot-testing)
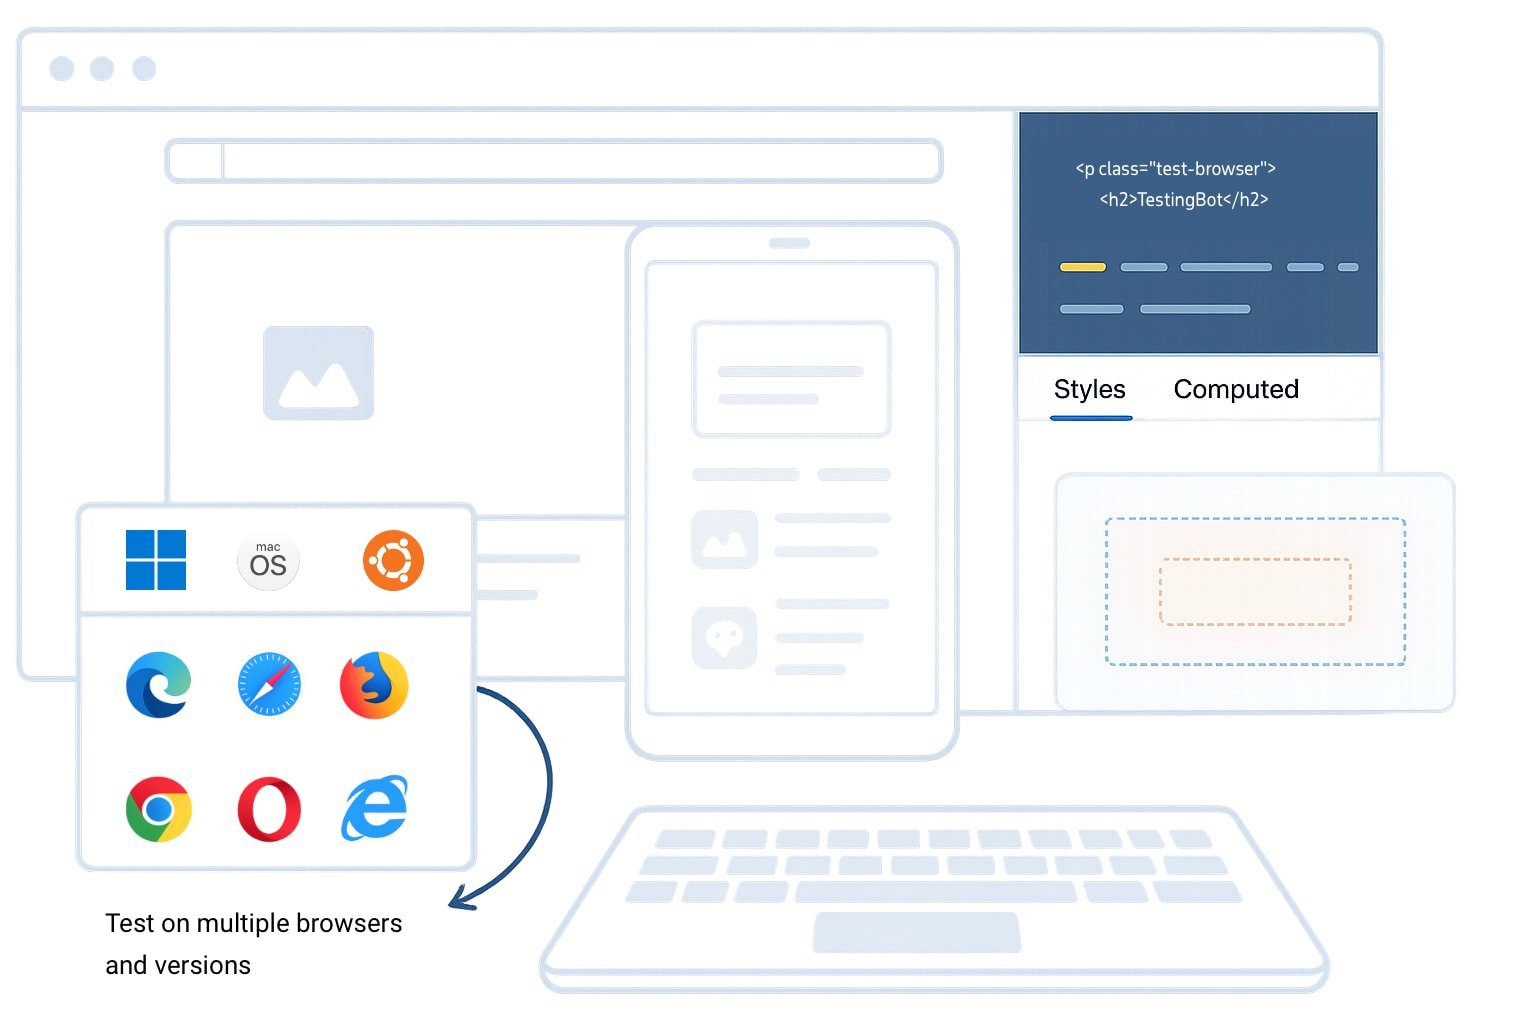
## Cross-Browser Testing Made Simple
Get one-click access to real browsers running on macOS, Windows and Linux platforms. Switch platforms, locations and screen resolutions instantly.
Test across all versions of Internet Explorer (IE8 to IE11), Edge, Chrome, Safari, Firefox and Opera.
Chrome
Safari
Firefox
Edge
[Start Testing](https://testingbot.com/features/manual-browser-testing)
## Why teams choose TestingBot
### Improve test coverage
Cross-browser, real device and visual testing on 5500+ browser and device combinations.
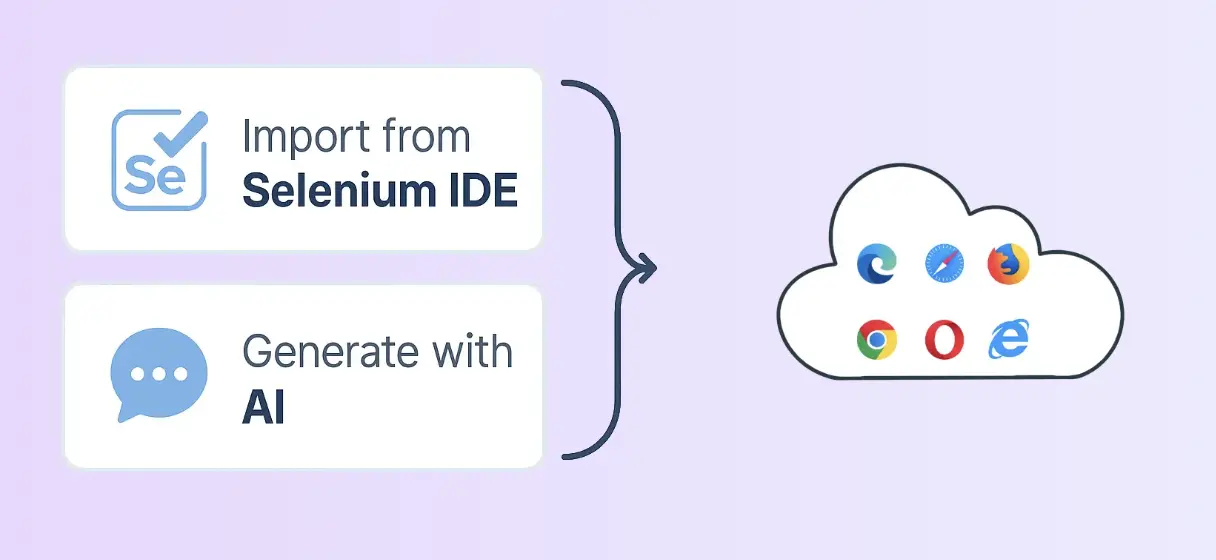
### Boost productivity with AI
AI-powered test creation and execution. Write tests in natural language, let AI do the rest.
### Accelerate testing cycles
Run tests in parallel across multiple browsers and devices. Ship faster with confidence.
## Works with your favorite testing frameworks
Native support for all major web and mobile testing frameworks. Get started in minutes.
### Web Testing
[Selenium](https://testingbot.com/support/web-automate/selenium)[Playwright](https://testingbot.com/support/web-automate/playwright)[Cypress](https://testingbot.com/support/web-automate/cypress)[Puppeteer](https://testingbot.com/support/web-automate/puppeteer)[WebdriverIO](https://testingbot.com/support/web-automate/selenium/webdriverio)[RobotFramework](https://testingbot.com/support/web-automate/selenium/nightwatch)
### Mobile Testing
[Appium](https://testingbot.com/support/app-automate/appium)[Espresso](https://testingbot.com/support/app-automate/espresso)[XCUITest](https://testingbot.com/support/app-automate/xcuitest)[Maestro](https://testingbot.com/support/app-automate/maestro)[Flutter](https://testingbot.com/support/app-automate/appium/flutter)[React Native](https://testingbot.com/support/app-automate/appium)
### Languages & SDKs
[Java](https://testingbot.com/support/web-automate/selenium/java)[Python](https://testingbot.com/support/web-automate/selenium/python)[NodeJS](https://testingbot.com/support/web-automate/selenium/nodejs)[C# / .NET](https://testingbot.com/support/web-automate/selenium/csharp)[Ruby](https://testingbot.com/support/web-automate/selenium/ruby)[phpPHP](https://testingbot.com/support/web-automate/selenium/php)
[View all documentation](https://testingbot.com/support)
Real Device Cloud
## Test on real iOS & Android devices
Access hundreds of real physical devices for manual and automated testing. iPhones, iPads, Samsung Galaxy, Pixel, Smart TVs and more.

Appium

Espresso

XCUITest

Maestro
[Explore device cloud](https://testingbot.com/mobile/realdevicetesting)

AI-Powered Testing
## AI Test Agent
Create and run tests without writing code. Simply describe what you want to test in plain language.
TestingBot AI understands your application and generates reliable test steps automatically.
[Try AI Testing](https://testingbot.com/features/ai-testing)
Accessibility Testing
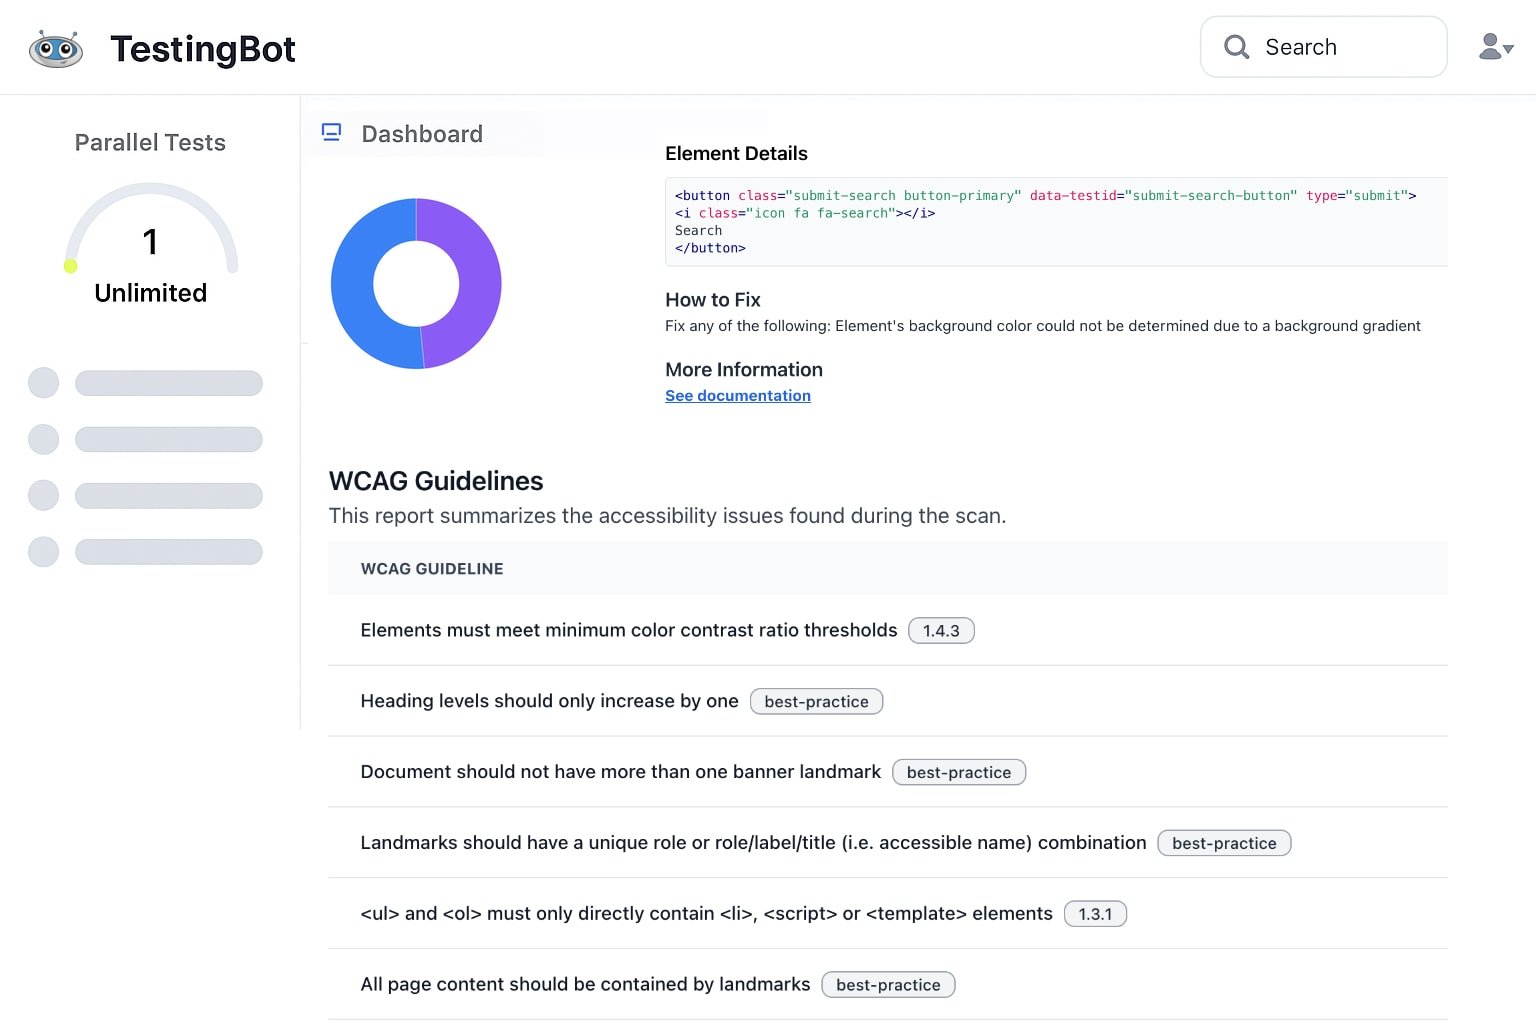
## WCAG Compliance Testing
Identify and fix accessibility issues across your websites. Ensure WCAG compliance and deliver an inclusive experience for all users.
Meet legal requirements like the European Accessibility Act (EAA), reach a broader audience and improve SEO with accessibility best practices.
WCAG 2.1 Compliance
Scheduled Testing
Detailed Reports
Severity Classification
[Explore Accessibility Testing](https://testingbot.com/features/accessibility-testing)
## Trusted by teams worldwide
Join thousands of companies shipping better software with TestingBot
0+
Tests Executed
0+
Active Users
0+
Browsers & Devices
0
Countries
GDPR
Compliant
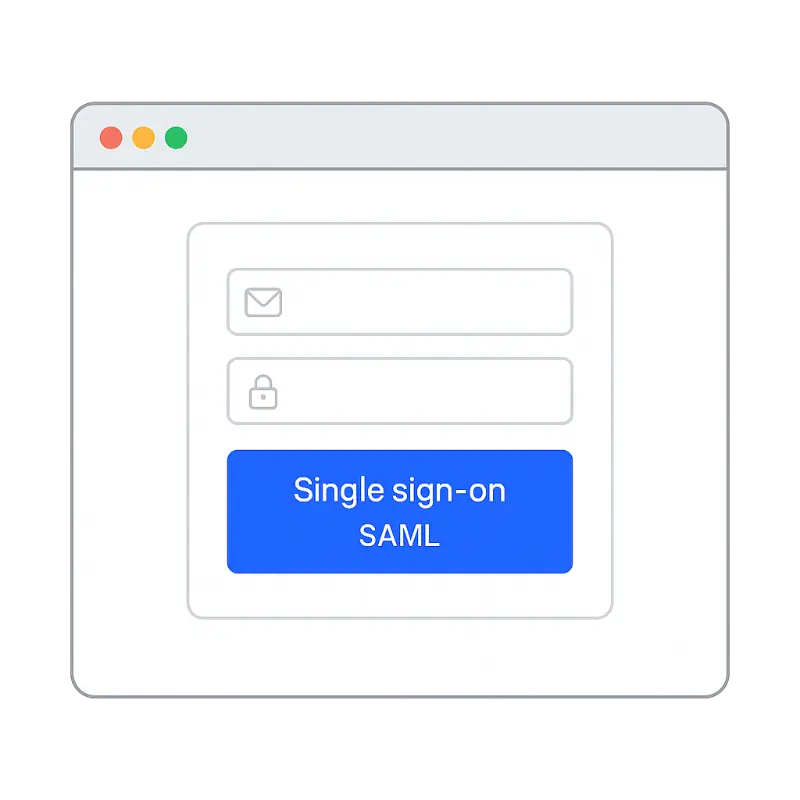
SAML SSO
Single Sign-On
Star Level 1
Certified
99.99%
Uptime SLA
## Seamlessly integrate into your workflow
Connect TestingBot with your CI/CD pipeline, issue trackers and communication tools.
[Jenkins](https://testingbot.com/support/integrations/jenkins)[GitHub](https://testingbot.com/support/integrations/github-actions)[GitLab](https://testingbot.com/support/integrations/gitlab)[CircleCI](https://testingbot.com/support/integrations/circleci)[Travis CI](https://testingbot.com/support/integrations/travis-ci)[Slack](https://testingbot.com/support/integrations/slack)[Jira](https://testingbot.com/support/integrations/jira)[Azure](https://testingbot.com/support/integrations/azure-devops)[Bitbucket](https://testingbot.com/support/integrations/bitbucket)[TeamCity](https://testingbot.com/support/integrations/teamcity)[Bamboo](https://testingbot.com/support/integrations/bamboo)[App Center](https://testingbot.com/support/integrations/app-center)
[View all integrations](https://testingbot.com/integrations)
No credit card required
## Ready to get started?
Join thousands of teams shipping better software with TestingBot
[Start Free Trial](https://testingbot.com/users/sign_up)[View pricing](https://testingbot.com/pricing)
Free 14-day trial
5-minute setup
24/7 support
---
URL: https://testingbot.com/features
# Cross-Browser Testing
Test your website and app on **5200+ real browsers and devices**. Speed up your UI tests with parallel execution on a real browser and device cloud. Catch bugs earlier, release faster and boost developer productivity.
[Get started free](https://testingbot.com/users/sign_up)[Request a demo](https://testingbot.com/demo)

## Trusted by some of the world's most innovative companies
## All-in-one cross browser testing platform
The TestingBot cloud brings you the power to test your website and mobile app on [+5200 browsers & devices](https://testingbot.com/support/web-automate/browsers).
Test across all major browsers and operating systems in our cloud — including Internet Explorer, Edge, Firefox, Chrome, Safari (mobile and desktop) and beyond.
Let us handle your testing infrastructure while you focus on development.
Run tests effortlessly on our maintained cloud of desktop and mobile platforms.
[Get started free](https://testingbot.com/users/sign_up)

## 5200+ real desktop & mobile browser combinations
Test on the widest range of desktop and mobile devices in our real device cloud. We handle setup, procurement and maintenance — so you can focus entirely on testing.
### Windows, macOS & Linux
One-click access to every macOS, Linux and Windows version. From Yosemite to macOS Sequoia, and Windows XP to Windows 11. We've got you covered.
### Every browser, all versions
Edge, Safari, Firefox, Chrome, Opera and IE - constantly updated & instantly available.
### Security
Single-Use VMs and pristine real devices, reset after each use.
### Real Android & iOS devices
Test across real iPhone, iPads, Google, OnePlus, Xiaomi and Samsung phones & tabs.
### No setup & maintenance
Instantly access 5200+ devices and browsers. Experience zero setup or maintenance hassles, and focus only on testing.
### Performance
Our infrastructure is built for performance to eliminate test flakiness and latency.
## Test Automation Frameworks
TestingBot supports these popular Test Automation Frameworks:
[](https://testingbot.com/features/automation/selenium)
### [Selenium](https://testingbot.com/features/automation/selenium)
Popular Browser Automation Framework, using WebDriver, which supports all major browsers.
[](https://testingbot.com/features/automation/appium)
### [Appium](https://testingbot.com/features/automation/appium)
Mobile Automation Framework, using WebDriver, runs on physical devices and simulators/emulators.
[](https://testingbot.com/features/automation/cypress)
### [Cypress](https://testingbot.com/features/automation/cypress)
Javascript based E2E testing on Chrome and Firefox.
[](https://testingbot.com/features/automation/puppeteer)
### [Puppeteer](https://testingbot.com/features/automation/puppeteer)
Chrome DevTools based Automation Framework by Google. Supports Chrome and Edge browsers.
[](https://testingbot.com/features/automation/playwright)
### [Playwright](https://testingbot.com/features/automation/playwright)
Similar to Puppeteer, built by Microsoft, with support for Chrome and Edge.
[](https://testingbot.com/features/automation/espresso)
### [Espresso](https://testingbot.com/features/automation/espresso)
Android Automation Framework, runs on physical devices and emulators.
[](https://testingbot.com/features/automation/xcuitest)
### [XCUITest](https://testingbot.com/features/automation/xcuitest)
iOS Automation Framework, runs on physical devices and simulators.
[](https://testingbot.com/features/automation/maestro)
### [Maestro](https://testingbot.com/features/automation/maestro)
Maestro is a mobile UI testing framework, which supports testing on both iOS and Android.
## Take control of a device
Interact with the remote mobile device, just as you would with a device in hand. Tap, scroll, zoom, swipe and more.

## Test Frameworks
TestingBot integrates with various test frameworks and services. Easily convert your existing Selenium tests and connect with your favorite CI/CD.
### [C#](https://testingbot.com/support/web-automate/selenium/csharp)
### [NodeJS](https://testingbot.com/support/web-automate/selenium/nodejs)
### [Java](https://testingbot.com/support/web-automate/selenium/java)
### [PHP](https://testingbot.com/support/web-automate/selenium/php)
### [Python](https://testingbot.com/support/web-automate/selenium/python)
### [Ruby](https://testingbot.com/support/web-automate/selenium/ruby)

## Test on real mobile & desktop devices
Get one-click access to real browsers running on macOS, Windows and Linux platforms. Cross-browser testing made simple: switch platforms, locations and screen resolutions instantly.
Test across all versions of Internet Explorer (IE8 to IE11), Edge, Chrome, Safari, Firefox and Opera.
[Get started free](https://testingbot.com/users/sign_up)
## Test Staged Websites
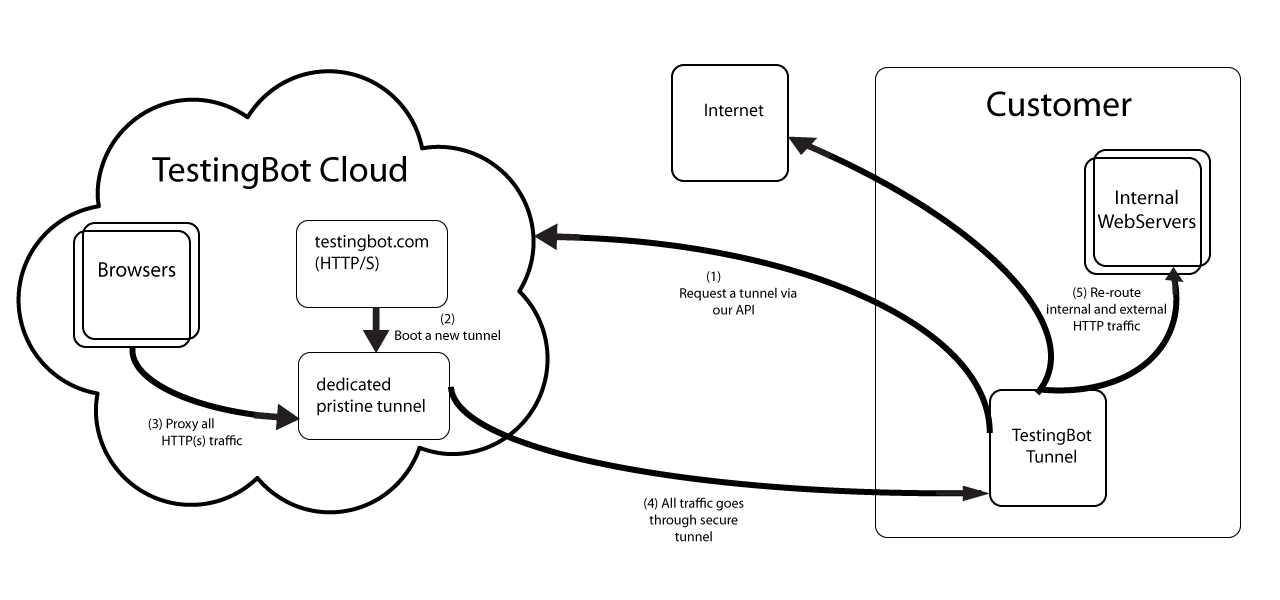
Use the secure TestingBot Tunnel to easily test your staging and development environments across all browsers, ensuring seamless access behind firewalls or private networks.
Test data and websites from behind your firewall on the TestingBot cloud.
[Read more](https://testingbot.com/support/tunnel)
### Sign up for a Free Trial
Start testing your apps with TestingBot.
[Start a free trial](https://testingbot.com/users/sign_up)
---
URL: https://testingbot.com/mobile/realdevicetesting
# Automated Mobile App Testing
TestingBot offers automated testing on a wide variety of physical devices, including iPhone, iPad, Samsung Galaxy, Pixel, Xiaomi and more.
Seamlessly integrate with your favorite mobile testing frameworks like Appium, Espresso, XCUITest and Maestro for comprehensive test coverage.
[Get started free](https://testingbot.com/users/sign_up)[Request a demo](https://testingbot.com/demo)

Trusted by some of the world's most innovative companies
## Reliable Device Farm
Get instant access to a fast, reliable device infrastructure.
### 24/7 device availability
Physical iOS and Android devices, available at any time of the day.
### Zero setup & Maintenance
Focus on testing instead of worrying about setup and maintenance of a mobile device farm.
### Security
Devices located in a datacenter in Europe. Each test runs on a secure and pristine device.
### Real Android & iOS devices
Test across real iPhone, iPads, Google, OnePlus, Xiaomi and Samsung phones & tabs.
### Variety of devices
Test on any device — flagship or budget — with support for the newest and legacy iOS and Android versions.
### Performance
Our infrastructure is built for performance to eliminate test flakiness and latency.
## Test Automation Frameworks
Works instantly with these app automation frameworks:
[](https://testingbot.com/features/automation/appium)
### [Appium](https://testingbot.com/features/automation/appium)
Mobile Automation Framework, using WebDriver, runs on physical devices and simulators/emulators.
[](https://testingbot.com/features/automation/espresso)
### [Espresso](https://testingbot.com/features/automation/espresso)
Android Automation Framework, runs on physical devices and emulators.
[](https://testingbot.com/features/automation/xcuitest)
### [XCUITest](https://testingbot.com/features/automation/xcuitest)
iOS Automation Framework, runs on physical devices and simulators.
[](https://testingbot.com/features/automation/maestro)
### [Maestro](https://testingbot.com/features/automation/maestro)
Maestro is a mobile UI testing framework, which supports testing on both iOS and Android.
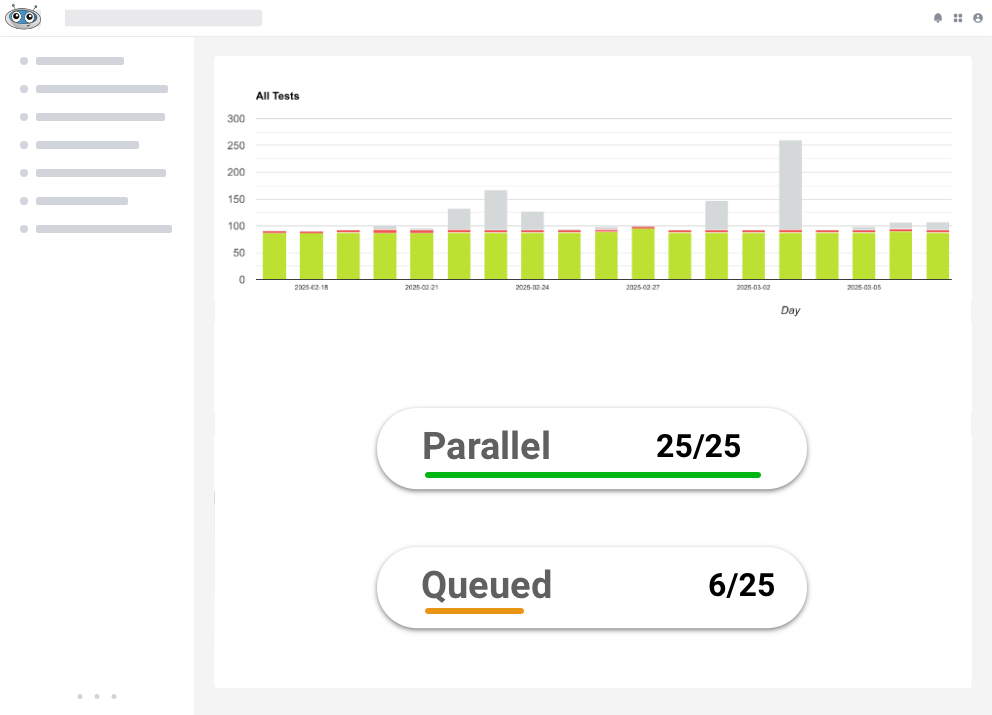
## Parallel Testing
Drastically shorten your total App test duration by running tests simultaneously. TestingBot provides a variety of devices, ready to run your tests in parallel.
[Get started free](https://testingbot.com/users/sign_up)
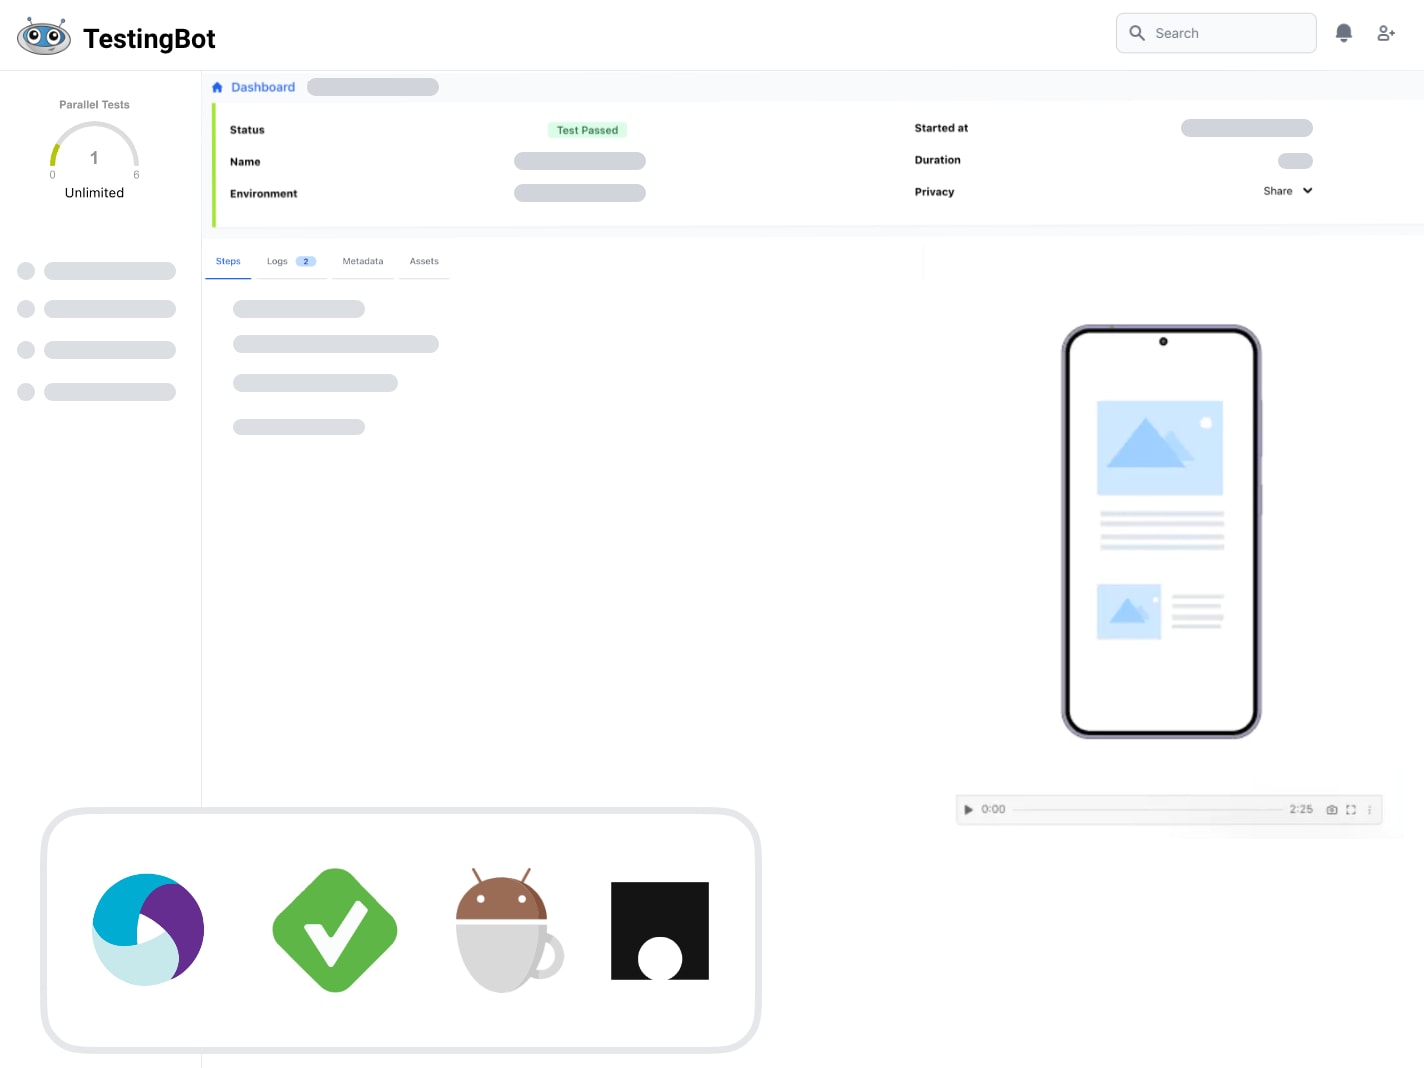
## Video, screenshots & logs
Every mobile test comes with access to generated logs, videos and screenshots.
[Get started free](https://testingbot.com/users/sign_up)
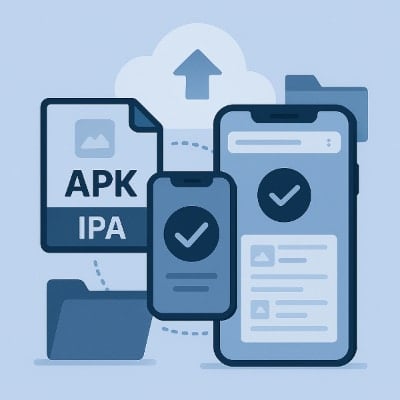
## TestingBot Storage
Upload your native mobile app, as an .apk or .ipa, to [TestingBot Storage](https://testingbot.com/support/api#upload) and start testing immediately.
[Get started free](https://testingbot.com/users/sign_up)
## Test native device features
Access and modify device features to test your app in various real-world conditions.
### Network Simulation
Test for scenarios like connectivity, fluctuating network & many more.
### Localization testing
Test your apps across different timezones, languages and geolocations.
### Dark Mode
Test your app's UI with a dark background to ensure a smooth user experience.
### App Orientation
Test your app in the landscape or portrait mode. Switch between orientations to test your app's response.
### Audio
Record and hear in realtime the audio generated on the device.
### Settings
Control various settings on the device, through ADB or other.
## Your very own Mobile Devices
Choose your own iOS and Android devices. We will purchase these devices, install and configure them in our secure datacenter.
These devices will be only available to you, 24x7.
Private devices can be customised to your needs. Have us install specific profiles and apps, or change specific settings of the device. You decide.
[Contact us](https://testingbot.com/contact/new)


## Test Staged Websites
Use the secure TestingBot Tunnel to easily test your staging and development environments across all browsers, ensuring seamless access behind firewalls or private networks.
Test data and websites from behind your firewall on the TestingBot cloud.
[Read more](https://testingbot.com/support/tunnel)
### Sign up for a Free Trial
Start testing your apps with TestingBot.
[Start a free trial](https://testingbot.com/users/sign_up)
Resources you may like
[](https://testingbot.com/resources/articles/appium-flutter-app-testing)
#### [Testing Flutter Apps with Appium](https://testingbot.com/resources/articles/appium-flutter-app-testing)
Learn how to do automated mobile app testing with Flutter and Appium.
[Read more](https://testingbot.com/resources/articles/appium-flutter-app-testing)
[](https://testingbot.com/resources/articles/localized-testing-mobile-app)
#### [How to do localisation testing for mobile apps](https://testingbot.com/resources/articles/localized-testing-mobile-app)
Find out how to perform localisation testing with mobile apps. Change your language or locale with Appium, XCUITest and Espresso.
[Read more](https://testingbot.com/resources/articles/localized-testing-mobile-app)
[](https://testingbot.com/resources/articles/dark-mode-testing)
#### [Dark Mode Testing with Appium](https://testingbot.com/resources/articles/dark-mode-testing)
Perform dark mode automated testing on iOS and Android with Appium.
[Read more](https://testingbot.com/resources/articles/dark-mode-testing)
---
URL: https://testingbot.com/pricing
# PRICING PLANS
Take your testing to the next level with **TestingBot**.
### Live
Manual testing of websites and apps
$20/month
Billed annually
Or $30 month-to-month
1 User 2 Users 4 Users 10 Users 25 Users
-
**Unlimited** Live Testing
-
**Unlimited** Visual Testing
-
Real iOS & Android devices
-
24x7 Active Support via Email, Chat & Slack
[Upgrade Plan](https://testingbot.com/pricing/1)
### Automated
Automated web and app testing
$50/month
Billed annually
Or $70 month-to-month
1 Parallel Test - 1,000 minutes 2 Parallel Tests - 2,000 minutes 4 Parallel Tests - 4,000 minutes 8 Parallel Tests - 6,000 minutes 16 Parallel Tests - 10,000 minutes 24 Parallel Tests - 20,000 minutes
-
**1000** minutes Automated / month
-
**Unlimited** Live testing
-
**Unlimited** Visual Testing
-
Real iOS & Android devices
-
24x7 Active Support via Email, Chat & Slack
[Upgrade Plan](https://testingbot.com/pricing/6)
MOST POPULAR
### Automated Pro
Unlimited web and app testing
$90/month
Billed annually
Or $120 month-to-month
1 Parallel Test - Unlimited 2 Parallel Tests - Unlimited 4 Parallel Tests - Unlimited 8 Parallel Tests - Unlimited 16 Parallel Tests - Unlimited 24 Parallel Tests - Unlimited
-
**Unlimited** Live Testing
-
**Unlimited** Visual Testing
-
**Unlimited** Automated
-
Real iOS & Android devices
-
24x7 Active Support via Email, Chat & Slack
[Upgrade Plan](https://testingbot.com/pricing/12)
### Enterprise
Enterprise-grade testing for large teams
For Premium features & Enterprise-grade security
10+ Parallel Tests
-
**Unlimited** Testing
-
Single Sign On
-
Priority Support
-
[other Enterprise Features](https://testingbot.com/enterprise)
[Contact us](https://testingbot.com/contact/new)
### Detailed Plan Comparison
Feature List
Live$20/month(Billed annually)
[Upgrade Plan](https://testingbot.com/pricing/1)
Automated$50/month(Billed annually)
[Upgrade Plan](https://testingbot.com/pricing/6)
Pro$90/month(Billed annually)
[Upgrade Plan](https://testingbot.com/pricing/12)
EnterpriseFor Premium features & Enterprise-grade security
[Contact us](https://testingbot.com/contact/new)
Testing Minutes
Unlimited
Starts at 1000 minutes / month
Unlimited
Unlimited
Users
-
Unlimited
Unlimited
Unlimited
Desktop Browsers
Mobile Devices
Visual Testing
Automated Testing
-
AI Testing
Run tests without writing any code. The AI Agent will create and run tests for you.
-
Accessibility Testing
-
Test Analytics
-
Single-Use Machines
TestingBot provides single-use machines: you always start secure, with a clean machine.
REST API Access
Customizations
-
-
-
High Volume Testing
-
-
-
Local testing
Test Local Websites
High Availability Mode
-
-
-
Testing Features
Mobile DevTools
Access to Native DevTools on real browsers and devices.
GPS Geolocation Testing from 100+ countries
Geolocation Testing
Test your application from over 15 geographic locations around the world.
Network Throttling
Simulate various network conditions, such as 3G, 4G and offline modes, to test your application's performance under different connectivity scenarios.
Integrations
Slack
JIRA
GitHub
[CI/CD](https://testingbot.com/support/integrations/ci-cd)
Administration
2-Factor Authentication (2FA)
SAML 2.0 Single sign-on (SSO)
-
-
Analytics per team & team-member
-
-
-
Auto User Provisioning
-
-
-
IP Whitelisting (inbound & outbound)
-
-
-
Support
24x7 Availability
Email Support
Priority Support
-
-
-
## All plans include
-
**Over [5200+ real desktop browsers](https://testingbot.com/support/web-automate/browsers) and [physical mobile devices](https://testingbot.com/support/app-automate/devices)**
-
**Real Browsers on Windows, macOS and Linux**
-
**Range of screen resolutions**
-
**Videos and screenshots of your tests**
-
**Team management**
-
**Local testing**
-
**Android/iOS Native App Testing**
-
**Tech support and Documentation**
-
**Unlimited Screenshots & Manual tests**
### All Plans
Every plan includes all our OS/browser/device platforms with real-time availability of VMs. Also included is video test playback, unlimited manual tests, unlimited screenshots and debugging tools. TestingBot integrates with any language, framework and CI system.
### Do I need a creditcard to register?
No, you do not need a credit card. With our free plan you can try our service for 28 days without paying anything. When you want to upgrade to a paid plan, you can easily upgrade by credit card or wire transfer. Additional payment options are available for EU customers.
### Subscription
Our plans come with a subscription which you can cancel at any time.
If you decide to upgrade your account, the upgrade will take effect immediately. If you had a previous plan, the remaining prorated amount will be refunded. Downgrades take effect on the next billing cycle.
### What is a Parallel Test?
Parallel tests indicate how many tests you can run at the same time.
More parallel tests, means a higher decrease in overal test time. Calculate how many parallel tests you need with the [Parallel Test Calculator](https://testingbot.com/support/parallel-calculator).
### Free Open Source Plan
We love open source projects! If you have an Open-Source project, please [sign up for our open-source plan](https://testingbot.com/open-source).
### Exceeding quota
Once your available testing time for a month has ended you can no longer run any tests during that month.
If you wish to continue running tests, please consider upgrading your plan.
### Forms of payment
We accept credit card payments and wire transfer ([contact us](https://testingbot.com/contact/new)).
## Need help finding the right solution for your needs?
Contact us and we'll help you find the right plan for your needs.
[Contact us](https://testingbot.com/contact/new)
---
URL: https://testingbot.com/enterprise
# Enterprise
We help companies ship code with test-confidence.
TestingBot offers enterprise-grade security, advanced administrative controls and powerful reporting tools.
[Contact Sales](https://testingbot.com/contact/new)

Trusted by some of the world's most innovative companies
## Enterprise-grade Security and Compliance
We adhere to enterprise-grade privacy standards, including GDPR compliance. Learn more on the [Security Overview Page](https://testingbot.com/security) and in the [TestingBot Trust Center](https://trust.testingbot.com).
### Single-Use VMs
-
TestingBot provides single-use VMs for every test, allowing you to customize the OS before each run.
-
Each VM is **firewalled** , ensuring only you can access it.
### Network security
-
Use IP whitelisting or TestingBot tunnel to create a secure connection between your service and TestingBot.
### Data Control
-
User Management: customize permissions and access, assign roles to users in your organization.
-
Data Retention: control how long your data is stored. Indicate which generated test assets you want to keep and for how long.
## Advanced Team Management & Secure Access Controls
Manage teams at scale with granular access controls, enforced 2FA, Single Sign-On (SAML), usage tracking and secure Tunnel sharing.
### Enterprise-Grade Access Control
-
Single Sign-On (SSO): Enhance security and streamline the login experience for your team. Seamlessly integrate with identity providers like Okta, Azure AD, OneLogin and more using pre-built or custom SAML connectors.
-
Two-Factor Authentication (2FA): Add an extra layer of protection with two-step verification. Ensure secure access, reduce unauthorized logins and support compliance requirements for handling sensitive data.
### Auto-provisioning/de-provisioning
-
Seamlessly onboard team members and manage user licenses, roles, teams and product access directly through your Identity Provider.
### Centralized User Management
-
Apply limits to your team members, such as maximum number of parallel tests, or access to specific features.

## Private Device Cloud
With Private Device Cloud, we take care of the setup, configuration and maintenance of dedicated devices exclusively for your company.
Unlike our Public Device Cloud, these devices are reserved only for your team, ensuring full control and privacy.
Select your preferred devices, and we will make them available in our data center for seamless testing.
Run both automated and manual tests on your private iOS and Android devices with full control and security.
[Learn more](https://testingbot.com/enterprise/private-device-cloud)

## Experience Best-in-class TestingBot Support
Get the support you need, when you need, from the experts you trust, to reach your business goals faster.
| Support | Standard | Enterprise |
| --- | --- | --- |
| Custom Legal Terms | | |
| Dedicated Support person & Customer Success Manager | | |
| Dedicated Solution Engineer | | |
| Phone Support | | 24/7 |
| Email Support | 24/5 | 24/7 |
| Chat Support | | |
## How does TestingBot for Enterprise Compare?
| | Standard Plans | Enterprise Plans |
| --- | --- | --- |
| Security & Compliance |
| IP Whitelisting (inbound & outbound) | – | |
| Single-Use VMs + Firewalled | | |
| 2FA enforcement | – | |
| Administration |
| SAML 2.0 Single sign-on (SSO) | – | |
| Sub-teams, parallel sessions per team | – | |
| Analytics per team & team-member | – | |
| Support |
| Dedicated Support person & Customer Success Manager | – | |
| Custom SLA | – | |
| 24/7 priority support via phone and e-mail | – | |
| Product |
| Customize OS / Pre-installed Software | – | |
| Early access to beta features | – | |
| Unlimited Users | – | |
### Contact us
Learn how your business can take full advantage of TestingBot for Enterprise.
[Contact us](https://testingbot.com/contact/new)
---
URL: https://testingbot.com/security
# We take security seriously
TestingBot takes great care of the privacy and security of your data. We take great pride in providing a secure platform service.
[Get started free](https://testingbot.com/users/sign_up)[Download our Security Whitepaper](https://testingbot.com/downloads/testingbot_security_whitepaper.pdf)

[](https://cloudsecurityalliance.org/star/registry/testingbot/services/testingbot/)[](https://testingbot.com/privacy)
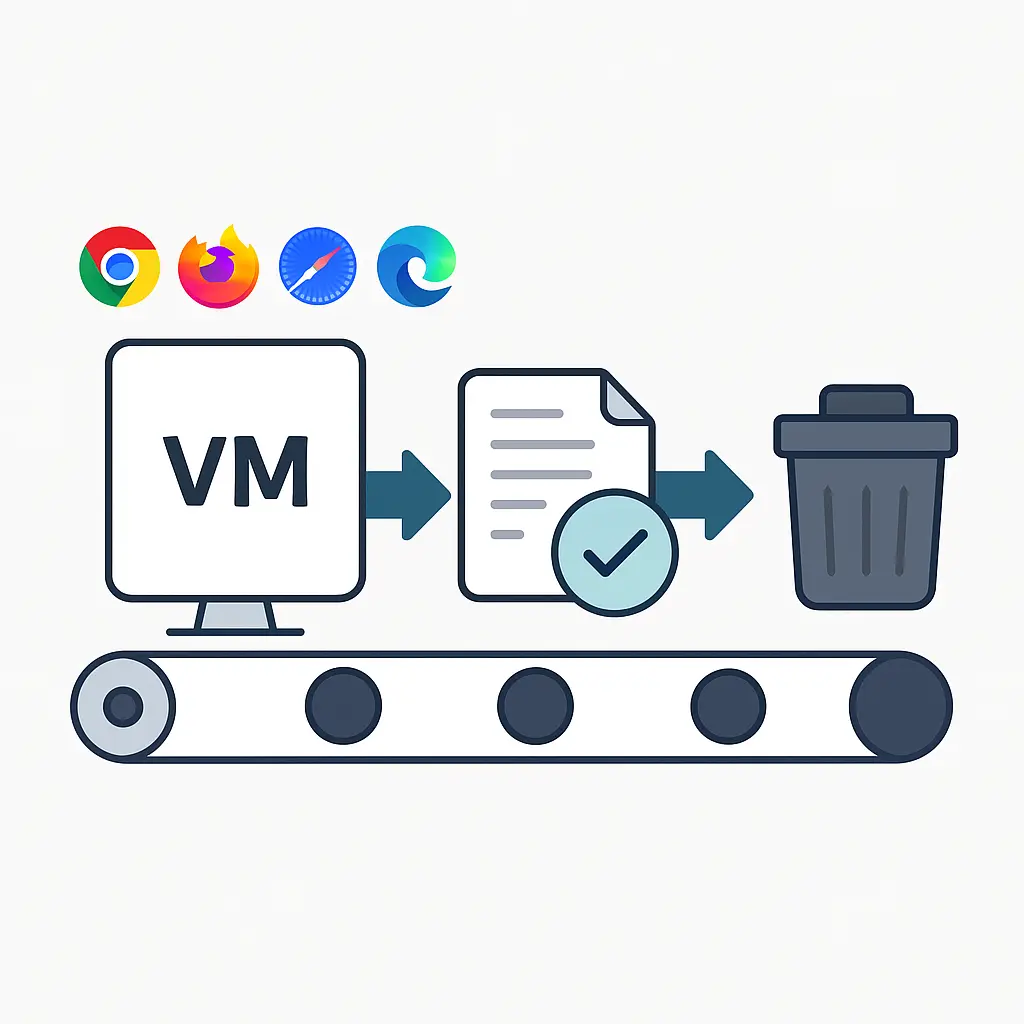
## Single-Use VMs
For every test you run, we spin up a brand new virtual machine (VM) with the platform/browser/device you want to test on.
Every test runs on a pristine, freshly booted machine. Everything your test does on the VM is written to a RAM-disk (memory) through COW (Copy-On-Write).
At the end of your test, after we've collected screenshots, logs and video of the test, we instruct our hypervisor to fully erase the RAM-disk and the VM.
## Firewall
Every test runs on its own, firewalled, VM. TestingBot ensures only you can access the VM, all other traffic is blocked by enforcing a firewall for every VM you run.
VMs can only access the public internet. Or, in case you're running a TestingBot Tunnel, the content on your computer/network.

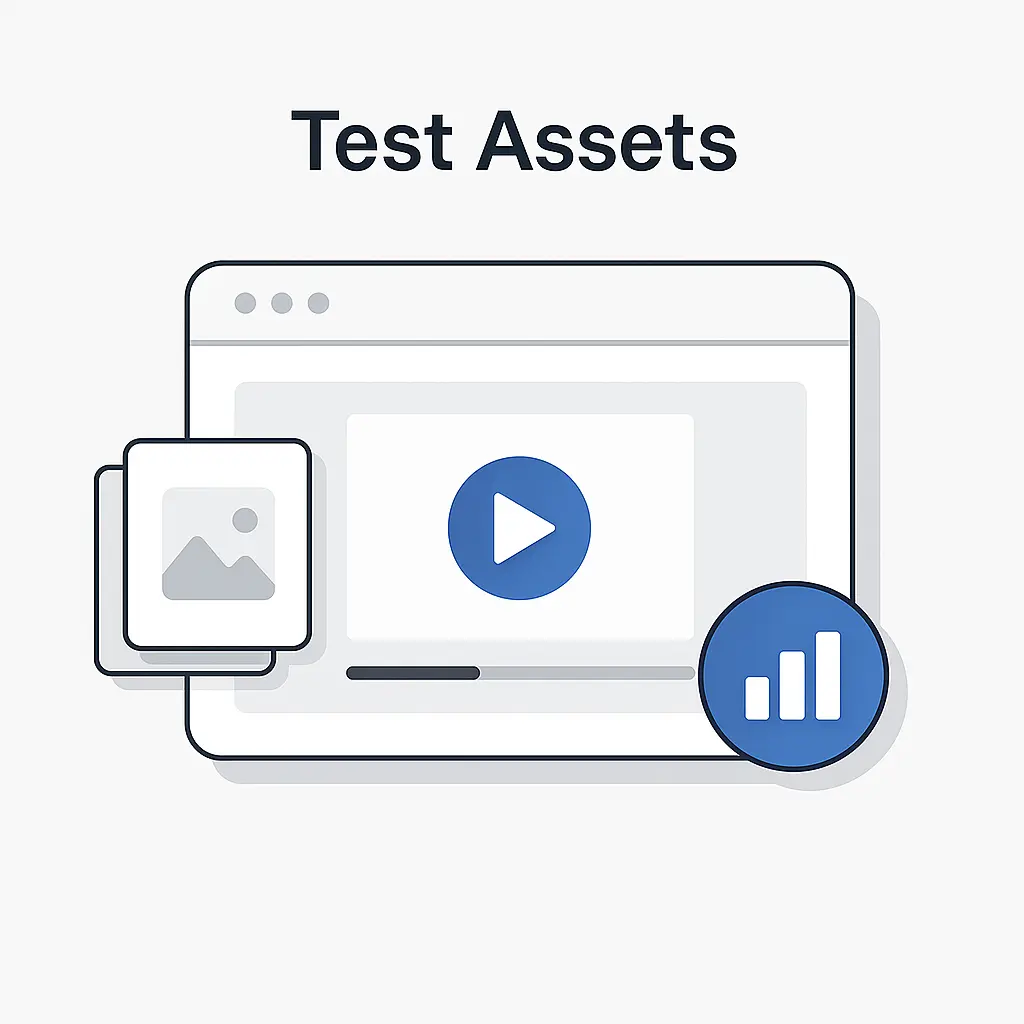
## Test Assets
By default, we take screenshots and a video of your test, together with logging of various components (Selenium Logs, Chrome-Driver Logs, Firefox-Driver Logs, Console Logs, ...)
These assets are uploaded to our assets servers via SSL. Access to these assets is restricted: we create a signed URL for each asset. Each asset is only accessible via SSL for 30 minutes.
You can also disable any logging, screenshot-taking and video-recording. This way we will not record anything that happens during your test.
## Team Policies
Add colleagues to your team and enforce user policies as an account owner, such as:
- Enforce 2FA (Two-Factor Authentication) during login
- Set user-account to read-only
- Reset user credentials
- Promote a user to Administrator level
- Set the maximum number of simultaneous tests
As an owner or administrator, you can distribute the number of parallel tests your subscription is allowed to run between members of your team.
You can see an overview of any user's activity (test runs, logins, ...) and add/remove users to your team.

### Contact us
Learn how your business can take full advantage of TestingBot for Enterprise.
[Contact us](https://testingbot.com/contact/new)
---
URL: https://testingbot.com/enterprise/private-device-cloud
# Private Real Device Cloud
Dedicated iOS and Android devices for you and your team. We provision the devices you want, customized to your needs.
[Contact Sales](https://testingbot.com/contact/new)

Trusted by some of the world's most innovative companies
## Your very own Mobile Devices
Choose your own iOS and Android devices. We will purchase these devices, install and configure them in our secure datacenter.
These devices will be only available to you, 24x7.
Private devices can be customised to your needs. Have us install specific profiles and apps, or change specific settings of the device. You decide.
[Contact us](https://testingbot.com/contact/new)

## Test on Real Carrier Networks with SIM or eSIM
We can equip your devices with a physical SIM or eSIM, enabling true carrier connectivity.
This allows you to test scenarios that are not possible over Wi-Fi, like sending and receiving SMS, making and receiving calls, and verifying mobile data behavior in real-world conditions.

## Private Device Cloud: Devices Dedicated to You
With our Private Device Cloud, your devices are reserved exclusively for your use. While TestingBot thoroughly cleans all public devices after each test, the complexity of mobile systems means complete data removal can't always be guaranteed.
Private devices ensure full test isolation—only you have access, and there's no waiting for others to finish using the device.

### Contact us
Learn how your business can take full advantage of TestingBot for Enterprise.
[Contact us](https://testingbot.com/contact/new)
---
URL: https://testingbot.com/partners
# Partner with TestingBot
Join our partner ecosystem to expand your business opportunities and enhance your product capabilities with TestingBot's next generation testing platform.
[Technology Partners](https://testingbot.com/partners/technology-partners)[Reseller Partners](https://testingbot.com/partners/reseller-partners)
-
1+bn
Tests Executed
-
180k
Active Users
-
5,500+
Browsers & Devices


## Partner Programs
Choose the partnership that best fits your business needs and goals.
### Technology Partners
TestingBot platform integrates with tools that developers use daily. Partner with us to enhance your product capabilities, reduce interruptions for developers and expand customer reach.
- API integration support
- Co-marketing opportunities
- Technical support and documentation
[Learn More](https://testingbot.com/partners/technology-partners)
### Reseller Partners
Expand your business by partnering with TestingBot. Join our Partner Program and earn lucrative commissions, receive dedicated support and gain recognition for your sales success.
- Competitive commission rates
- Dedicated partner support
- Sales and marketing materials
[Learn More](https://testingbot.com/partners/reseller-partners)
### Ready to Partner with Us?
Join TestingBot's growing partner ecosystem and unlock new opportunities for your business.
[See existing integrations](https://testingbot.com/integrations)
---
URL: https://testingbot.com/partners/technology-partners
# Technology Partners
TestingBot platform integrates with tools that developers use daily. Partner with us to enhance your product capabilities, reduce interruptions for developers and expand customer reach.
[Apply now](https://testingbot.com#apply)[All Partner Programs](https://testingbot.com/partners)


## Partner Benefits
Join our technology partner program and unlock powerful integrations with TestingBot's comprehensive testing platform.
### API Integration Support
Get comprehensive technical documentation, SDKs and dedicated engineering support for seamless integration.
### Co-Marketing Opportunities
Joint marketing initiatives, case studies, webinars and placement in our partner directory to expand your reach.
### Technical Documentation
Access to comprehensive technical resources, integration guides and best practices documentation.
### Partner Portal Access
Dedicated partner portal with resources, training materials and integration tracking tools.
### Priority Support
Dedicated technical support channel with priority response times for integration issues.
### Partner Recognition
Featured placement in our partner ecosystem, case studies and recognition at industry events.
## Integration Opportunities
Partner with TestingBot to create powerful integrations that enhance developer workflows and provide seamless testing experiences.
-
**Integrate into your product:** Embed our testing capabilities into your app. Offer automated testing to your customers through TestingBot's whitelabel automated testing offerings, or embed realtime live testing in your product.
-
**Developer Advocate:** Help developers use TestingBot's platform. We supply you with documentation, tools and free extended trial credits.
-
**Integrate your product with TestingBot:** Create an integration between TestingBot and your product.

## Apply to Become a Technology Partner
Ready to integrate with TestingBot? Fill out the form below and our partnership team will be in touch.
Company Name \*
Email Address \*
Tell us about your integration \*
Submit Application
---
URL: https://testingbot.com/partners/reseller-partners
# Reseller Partners
Expand your business by partnering with TestingBot. Resellers in the Partner Program enjoy lucrative commissions, dedicated support and recognition for their sales excellence.
[Apply now](https://testingbot.com#apply)[All Partner Programs](https://testingbot.com/partners)


## Reseller Benefits
Join our reseller program and unlock revenue opportunities with comprehensive support and competitive commission structures.
### Competitive Commissions
Earn attractive commission rates on all TestingBot subscriptions you refer, with performance-based bonuses for top performers.
### Dedicated Support
Get priority access to our partner success team for sales support, technical questions, and customer assistance.
### Sales & Marketing Materials
Access to professional sales collateral, presentations, case studies, and co-branded marketing materials.
### Training & Certification
Comprehensive product training, sales certification programs, and ongoing education to maximize your success.
### Partner Portal
Access to a comprehensive partner portal with commission tracking, customer management, and resource library.
### Partner Recognition
Top performers receive recognition awards, conference invitations, and exclusive networking opportunities.
## Who We're Looking For
We partner with organizations that share our commitment to quality and customer success. There is no partnership fee.
### Ideal Partner Profile
-
Software consultancies and development agencies
-
QA and testing service providers
-
DevOps and infrastructure consultants
-
Technology solution providers
## Apply to Become a Reseller Partner
Ready to join our reseller program? Fill out the form below and our partnerships team will review your application.
Company Name \*
Email Address \*
Tell us about your business \*
Submit Application
---
URL: https://testingbot.com/open-source
# Free Testing for Open-Source Projects
We think it's important to support open-source projects. That's why TestingBot offers an Open-Source plan which is **completely free** and offers **Unlimited Testing** with **2 concurrent tests**.
## Sign up for an Open Source account
Please [Sign Up](https://testingbot.com/users/sign_up) first for a free trial.
Once logged in, you will be able to submit a request on this page to convert your account to an open-source account.
### Browser/OS Combinations
Run your Automated tests on [+5200 Browser/device combinations](https://testingbot.com/support/web-automate/browsers). Make sure your project works on all major browsers and devices.
### CI Testing
Using [Travis-CI](https://testingbot.com/support/integrations/ci-cd/travis-ci), [Circle CI](https://testingbot.com/support/integrations/ci-cd/circleci) or any other Continuous Integration system to build and test your project?
It's easy to use TestingBot in combination with any CI system. Simply modify your tests to use TestingBot's Selenium grid.
### Video/Screenshots/Meta-Data
With every test you have access to the video showing the test, screenshots and additional meta-data (log files).
We provide all these assets to make sure you can easily debug any potential problems during your tests.
### Status Badges & Matrix
We provide [status badges](https://testingbot.com/support/other/status-badges) to display your test results on your project's website.
Together with status badges, we also offer a badge that displays on which browsers your test succeeded/failed: [Browser Matrix](https://testingbot.com/support/other/browser-matrix) .
---
URL: https://testingbot.com/about
# About Us
Founded in 2011, TestingBot aims to provide an easy-to-use platform for cross-browser and mobile testing. By leveraging the power of cloud computing, we can scale effortlessly to meet your testing needs.
We offer flexible plans tailored for both startups and large enterprises, enabling you to test your website across hundreds of real browser and mobile device combinations. Together with **excellent customer service** , we're confident you will enjoy testing your websites with TestingBot.

## Trusted by some of the world's most innovative companies
## Helping developers and teams test. Reliably and at scale.
TestingBot provides a powerful online testing grid with a wide range of real browsers and physical mobile devices.
Our entire infrastructure is hosted in multiple European data centers, located in Belgium, Germany and Finland, ensuring optimal security, performance and reliability.
At TestingBot, we take pride in delivering a stable, fast and secure testing environment for our customers.
+6 million
Tests each month
99.99%
Uptime
12,000
New users annually
## Our journey
TestingBot was founded in 2011 to solve a personal need: the founder wanted an easy way to run automated tests using Selenium on a website. Automated web testing was a tedious task, and the only solution was to set up a Selenium Grid on your own server.
We wanted to change that and started TestingBot to provide a simple solution for automated web testing. Over the years, we've continuously expanded our platform with new features. Explore the timeline below for a complete overview of our journey.
1.
2011
🚀 TestingBot is released to the public as one of the first cloud-based Selenium grids.
2.
2012
Realtime manual testing was added for Desktop browsers.
3.
2013
🖥️ macOS based testing was released: the first company providing test access to remote Safari browsers.
4.
2014
iOS Simulators & Android Emulators are added for mobile testing.
5.
2015
TestingBot Tunnel is released: test websites running on your own computer or private network.
6.
2016
📱 We make our real device farm available to the public. Test your website on physical iOS and Android devices.
7.
2017
🗺️ This year we added geolocation testing, headless testing and various integrations with Slack, TeamCity etc.
8.
2018
We launch codeless automation. Import recorded tests from Selenium IDE and run the tests at specific intervals.
9.
2019
Live App Testing is launched: test your mobile app manually on (physical) mobile devices.
10.
2020
📈 Introducing Test Analytics: keep track of your test analytics. Release Cypress automation support, run your Cypress tests on TestingBot.
11.
2021
We've added Puppeteer Playwright testing to our features. Connect your Puppeteer scripts to the remote TestingBot browser grid.
12.
2022
Android Espresso and XCUITest support. Run tests against native apps on TestingBot's device grid.
13.
2023
Connect your Playwright scripts to the remote TestingBot browser grid.
14.
2024
🔎 Visual Regression Testing is launched: compare snapshots of your website or mobile app against baselines.
15.
2025
✨ Introducing AI-based testing: describe in natural language what you would like to test. TestingBot will monitor your website for failures.
## Our team

#### Jochen
Founder

#### Laura
Support

#### Sander
Marketing
## Want to join our team?
Interested in working on exciting technologies?
[We're hiring](https://testingbot.com/careers)
---
URL: https://testingbot.com/contact/new
# Contact TestingBot
If you need support, have questions, or are interested in purchasing a plan, feel free to reach out — we'll get back to you promptly.
Name
Email
Message
Send message
[Book a Demo](https://testingbot.com/demo)
Address
TestingBot
Vlinderhof 18
9180 Moerbeke
Belgium
VAT. BE 0842.864.474
Support/Sales
Phone: +1 (855) 410-0024
Slack: [#help](https://join.slack.com/t/testingb0t/shared_invite/zt-3bcw9xch-jk19~6XPs_xBrsAgAedkCw)
## Frequently Asked Questions
### What does the TestingBot service offer?
TestingBot provides a service to test your website on multiple browsers and operating systems, automatically or manual. Similarly, you can test your mobile apps on multiple devices, making sure the app works on a wide variety of end-user mobile devices.
### Does TestingBot offer a free trial?
You can [sign up](https://testingbot.com/users/sign_up) for a free trial of 28 days, with 60 minutes of free testing.
### I have a technical question, how can I reach out?
Feel free to contact us with any questions using the form above. Additionally, we have extensive examples and troubleshooting tips in our [documentation](https://testingbot.com/support) section.
---
URL: https://testingbot.com/careers
# Careers
Join our team in maintaining, optimizing and improving our testing cloud.

## Open Positions
- [Technical Content Writer](https://testingbot.com#writer)
## Technical Content Writer
TestingBot is looking for a technical content writer, with experience in Selenium, Cypress, Puppeteer and Playwright.
You will be adding content to our [Blog](https://testingbot.com/blog) and [Resources](https://testingbot.com/resources) section.
### Responsibilities
- Write articles, tutorials and courses about Selenium, Cypress, Puppeteer and Playwright.
- Research interesting topics to write about, related to the online testing ecosystem.
- Add code examples, screenshots and tips & tricks to the articles you write.
### Key Skills
- English writer
- Previous content writing experience
- Faultless grammar and spelling
- IT technical knowledge an advantage, especially if you have knowledge about either of these topics: Selenium, Cypress, Puppeteer or Playwright
- Excellent attention to detail
### Benefits
- Competitive salary
- Flexible schedule
- Work from home (remotely)
Interested? Please send us a brief introduction and resume.
[Apply now](https://testingbot.com/contact/new)
---
URL: https://testingbot.com/terms
# Terms of Service
PLEASE READ CAREFULLY.
THESE TERMS AND CONDITIONS ("THE AGREEMENT") IS A LEGALLY BINDING AGREEMENT BETWEEN YOU ("YOU" OR "YOUR") AND TESTINGBOT. ("TESTINGBOT", "WE" OR "OUR"). BY CHECKING THE APPROPRIATE BOX INDICATING THAT YOU AGREE DURING REGISTRATION OR OTHERWISE ACCESSING THE TESTINGBOT WEBSITE, SERVICES, SOFTWARE OR MATERIALS (COLLECTIVELY THE "SERVICE"), YOU ARE INDICATING THAT YOU HAVE READ THIS AGREEMENT, THAT YOU UNDERSTAND IT, AND THAT YOU CONSENT TO BE BOUND BY ALL OF ITS TERMS AND CONDITIONS. IF YOU DO NOT AGREE WITH ALL OF THE FOLLOWING TERMS AND CONDITIONS, PLEASE DO NOT CONTINUE THE REGISTRATION PROCESS OR USE THE SERVICE.
IF YOU WISH TO USE TESTINGBOT AS AN EMPLOYEE, CONTRACTOR, OR AGENT OF A CORPORATION, PARTNERSHIP OR SIMILAR ENTITY, THEN YOU MUST BE AUTHORIZED TO SIGN FOR AND BIND THE ENTITY IN ORDER TO ACCEPT THE TERMS OF THIS AGREEMENT. THE LICENSES GRANTED AND SERVICES PROVIDED UNDER THIS AGREEMENT ARE EXPRESSLY CONDITIONED UPON ACCEPTANCE BY SUCH AUTHORIZED PERSONNEL.
This End User License Agreement ("Agreement") is entered into by and between TestingBot and the customer (individual or entity) that has procured the TestingBot products or services for use as an end user ("Customer"). "Effective Date" means the date on which accepts the terms and conditions of this Agreement. TestingBot reserves the right, at its sole discretion, to modify or replace this Agreement, or change, suspend, or discontinue any TestingBot Product(s) or Service Descriptions (as those terms are defined below), including without limitation, the availability of any feature, database, or content) at any time by posting a notice on the TestingBot Product(s) or by sending you an email. It is your responsibility to check this Agreement periodically for changes. Your continued use of any TestingBot Product following the posting of any changes to this Agreement constitutes acceptance of those changes.
## 1. Provision of Products
Welcome to TestingBot.com. We provide our customers with online software-as-a-service/platform-as-a-service products.
We use Selenium, an open-sourced browser testing framework to test websites in multiple browsers in an automated way.
We offer several plans according to the needs of the customer. Each plan is provided on a subscription basis for a set term designated at the time of purchase (each, as “Subscription Term”). Customer shall purchase and TestingBot shall provide the specific product and plan as specified at the time of purchase.
Some elements of the Service are available to any User, while other elements ("Subscription Services") are only available to Users who have purchased a subscription from TestingBot according to these terms and conditions. TestingBot may at any time, in its sole discretion, change a freely available element of the Service to a Subscription Service, and vice versa. TestingBot may, it its sole discretion, offer Users a one-time, free trial period during which you may use Subscription Service(s) for free. The time period of any such free trial period may vary from time to time, and will be indicated at the time you register as a User.
Please note that TestingBot does not provide any internet connectivity services, nor does TestingBot provide any computer equipment for Users. You are entirely responsible for securing and paying for any such services and equipment, and for ensuring that such services and equipment meet the minimum requirements for the use of the Services.
General Restrictions; Acceptable Use. Customer shall not: (a) rent, lease, copy, provide access to or sublicense any TestingBot Product to a third party; (b) use any TestingBot Product to provide or incorporate any TestingBot Product into any product or service provided to a third party, (c) reverse engineer, decompile, disassemble, or otherwise seek to obtain the source code or non-public APIs to TestingBot Products, including the Video Playback, except to the extent such restriction is prohibited by applicable law (and only upon advance notice to TestingBot), (d) modify any TestingBot Product or any Documentation, or create any derivative product from any of the foregoing, (e) remove or obscure any proprietary or other notices contained in any TestingBot Product (including any reports or data printed from TestingBot Products) or (f) publicly disseminate information regarding the performance of TestingBot Products.
## 2. Accounts/Customer Data
You may establish one (1) User account (the "Account") per email address you supply to TestingBot. You may not share the Account with anyone. You are liable for all uses of the Account.
If you would like to have several accounts for co-workers or friends, please consider using a sub-account.
Storage of Customer Data. TestingBot does not provide an archiving service. TestingBot agrees only that it shall not intentionally delete any Customer Data which is less than 30 days old from TestingBot Products prior to termination of Customer’s applicable Subscription except as directed by Customer or its Permitted Users. TestingBot expressly disclaims all other obligations with respect to storage. If specified at the time of purchase, TestingBot may charge Customer a fee for storing the Customer Data.
## 3. Registration
During the registration process prior to using the Service, you may be requested to provide certain information (e.g. your birthdate, gender, zip code, name, e-mail address, country or territory of residence, and for paid services, credit card and billing information, such as your telephone number), and you agree to provide true, accurate, current and complete information about yourself as prompted by such process (such information being "Personal Information"). If you open an Account, and any of your Personal Information changes (e.g., new credit card number, expiration date, new address or email address, new phone number, etc.), you must update that information in your Account.
## 4. Subscription Services
If you elect to subscribe to Subscription Services, the fee therefor will be the price specified at the time of purchase. You hereby agree to pay all charges incurred by the Account, including applicable taxes, in accordance with billing terms for access to the Service that are in effect at the time that the fee or charge becomes payable. Your right to access the Service is subject to any limits established by TestingBot or by your credit card issuer, billing service, or other payment methods authorized by TestingBot. TestingBot may, in its sole and absolute discretion, suspend or terminate your access to the Service and disable or delete the Account, if: (i) payment cannot be charged to your credit or debit card; or (ii) your charge is returned to TestingBot for any reason. If at any time you have a balance due on the Account, you agree that TestingBot can charge these unpaid fees to your credit card or debit them from your debit card, as applicable. You agree to reimburse TestingBot for all costs and expenses incurred by TestingBot in collecting payment due hereunder, including without limitation all bank or service charges, and any reasonable attorneys' fees.
By subscribing to any Subscription Service you are representing to us that you are authorized to use the credit card you submit for payment. You agree to take such steps as are appropriate to ensure such compliance and will indemnify and hold TestingBot and TestingBot's affiliates and distribution and syndication partners harmless from any breach of this Agreement.
Your subscription will last for the period chosen in the subscription process (the "Term"). Unless notifying us of your decision to terminate your subscription, your subscription will automatically be renewed at the end of each Term according to the then-current billing terms. TestingBot reserves the right to change the amount of, or basis for determining, any fees it charges, and to institute new fees, effective immediately upon notice to you. You may cancel your automatic membership renewal by contacting info@testingbot.com . Cancellation of your subscription will take effect upon the end of the then-current Term, at which time you will no longer have access to any Subscription Services.
Our payment provider (Stripe or FastSpring) will automatically renew your paid subscription. Payment details such as your credit card number are not saved on this website.
## 5. TestingBot Materials
The Service may require that you install plugins to report back test results to TestingBot. That software, and all new versions, updates, upgrades, bug fixes, modifications and derivative works that TestingBot may make available from time to time are referred to collectively as the "Software." All Software, designs, text, images, photographs, illustrations, audio clips, video clips, artwork, graphic materials, other copyrightable elements, and the selection and arrangements thereof, and all trademarks, service marks, trade dress, trade names, logos and designs and all intellectual property rights therein, provided by TestingBot via the Service (collectively the "Materials") are the property of TestingBot and/or its business partners, affiliates, assigns, licensors or other respective owners and are protected by intellectual property laws, including without limitation, U.S. and international patent, copyright and trademark laws. TestingBot may include in some Materials or in conjunction with your User Supplied Content third party advertisements that appear or are played when those Materials or User Supplied Content are viewed. You hereby consent to the display and playback of these advertisements in conjunction with your User Supplied Content. To the extent you elect to use or access TestingBot Materials or User-Supplied Content from other Users, you also consent to the display of advertisements in those Materials and that User Supplied Content. Content generated during testing like logs, screenshots and videos will stay available for 30 days. After this period, TestingBot will remove the content.
## 6. License from TestingBot
Subject to all of the terms and conditions of this Agreement, TestingBot hereby grants you a personal, limited, non-exclusive, non-transferable, revocable right to (a) view or play back Materials on, your compatible computer or device.
All rights not expressly granted to you are reserved. For the avoidance of doubt, your use of the Service and the Materials is under license and will terminate if this Agreement terminates, regardless of whether the relevant Service or Materials is free or you have paid for it; you will not obtain any ownership interest in any Materials through this Agreement or otherwise.
## 7. Usage Restrictions
You agree not to use, download, reproduce, modify, create derivative works from, display, perform, publish, distribute, disseminate, transmit, broadcast or circulate any Materials to any third party, except as expressly authorized by TestingBot in connection with the Service. The source code and/or object code to the Materials contains confidential and trade secret information belonging to TestingBot and its licensors, and you shall at all times take reasonable steps to protect the confidentiality of such information. You further agree that you will not disassemble, decompile or reverse engineer the Materials (except to the extent that this restriction is expressly prohibited by law, and then only upon providing TestingBot with prior written notice and opportunity to respond). Any unauthorized or prohibited use may subject the offender to civil liability and criminal prosecution under applicable federal and state laws.
As between you and TestingBot, TestingBot owns all elements of the Account. Except as specifically permitted and enabled within the Service, you may not transfer your Account, or any component of your User-Supplied Content to any other person. Through the use of the Service you may not impair or violate the rights of TestingBot or any other party with respect to trademarks, logos, or other intellectual property or rights. You may not display or perform Materials or User Supplied Content in a manner or in a context that is, in TestingBot's sole discretion, unlawful, misleading, defamatory, infringing, libelous, disparaging, obscene, an endorsement of any unrelated product or service, an unauthorized parody, or otherwise objectionable.
## 8. Code of Conduct
You may not: (i) post any User Supplied Content that is illegal, abusive, deceptive, pornographic, obscene, defamatory, slanderous, offensive, or otherwise inappropriate or harmful to any person (including any minor) or entity; (ii) sell, rent, lease, or otherwise assign any rights to any Materials or Service to any third party; (iii) remove any proprietary notices or labels on the Materials or Service; (iv) use the Materials or Service in conjunction with any device or service designed to circumvent technological measures employed to control access to, or the rights in, any content protected by the copyright laws of any jurisdiction; (v) use the Materials or Service for any commercial or illegal purpose or to harm minors in any way; (vi) use the Materials or Service to invade the privacy of, or obtain personal information about, any User, or to obtain a list of Users, or to access or use any User's User Supplied Content in a manner not specifically authorized by such User; (vii) except as expressly permitted by TestingBot, copy, modify, erase or damage any Materials or information contained on any TestingBot or third party servers; (viii) use the Materials or Service to violate any law or legal right of any third party, including any publicity or privacy right, copyright, other intellectual property right, or any contractual, fiduciary or confidentiality obligation or duty, or to take any action that is harassing, libelous, defamatory, abusive, tortious, threatening, harmful or otherwise objectionable; (ix) use the Materials or Service to post or transmit any unsolicited advertising, campaigning or promotional materials or to send any Materials from an anonymous or false address; (x) access or use any password protected, secure or non-public areas of the Service except as specifically authorized in writing by TestingBot (unauthorized individuals attempting to access these areas of the Service may be subject to prosecution); (xi) distribute any software viruses or other computer code designed to interfere with the functionality of the Service or any computer systems, software or hardware; (xii) use any data mining, robots, or similar data gathering, spoofing, or extraction tools in connection with the Materials Service; (xiii) mislead other Users or third parties as to your identity or to the origin of a message or content; or (xiv) frame or link to the Service or Materials except as expressly permitted in writing by TestingBot.
## 9. Objectionable or Explicit Content
TestingBot has the right, but not the obligation, to monitor, modify and/or remove any Materials and/or User Supplied Content in the Service. TestingBot may monitor, modify and remove any Materials and/or User Supplied Content in its sole discretion. TestingBot is not responsible to you for any content or materials constituting all or part of any Materials, any User Supplied Content, or any other aspect of the Service that you might find objectionable. By viewing the Service, you may be exposed to content that you consider offensive. You take sole responsibility for such exposure.
## 10. Privacy
For information regarding TestingBot's use of information collected in connection with the Service, please refer to the [TestingBot Privacy Policy.](https://testingbot.com/privacy)
## 11. Active Participation; Storage and Bandwidth Limits
If you do not have a currently active subscription to the Subscription Service, a condition of your access to the Service is your "Active Participation" in the Service. Active Participation is defined as accessing the Service, including displaying Materials or sending User Supplied Content through the Service, at least once every 180 days. If you do not maintain Active Participation, TestingBot may, with or without providing you with notice, terminate your Account (or any part thereof) and/or your use of the Service, and may remove and discard any content, including any of your User Supplied Content and any related Materials within the Service. Additionally, with or without providing you with notice, we may place a maximum limit on the amount of User Supplied Content that you are allowed to upload into the Service, or the maximum bandwidth that you may utilize each day. We may change these limits in our sole discretion upon providing you with notice. If you exceed these limits, we may refuse to accept and/or remove any User Supplied Content, or we may suspend certain functions of the Service for your Account.
## 12. Changes to the Agreement
We reserve the right, at our sole discretion, to change, modify or otherwise alter these terms and conditions at any time. Such changes and/or modifications shall become effective immediately upon posting. Please review the terms and conditions periodically. If you do not agree to be bound by (or cannot comply with) the Agreement as amended, your only remedy is to cancel your TestingBot Account and to cease using the Service. You will be deemed to have accepted the Agreement as amended thirty (30) days after the amended agreement is posted if you continue to use the Service. All other terms of this Agreement will continue in effect.
## 13. Notices
TestingBot may provide you with any notices under this Agreement by means of a posting on the Service, by e-mail, or by sending a message to you through the Service.
A. A physical or electronic signature of the owner (or person authorized to act on behalf of the owner) of an exclusive right that is allegedly infringed.
B. Specific identification of the copyrighted work claimed to have been infringed, or if multiple copyrighted works are covered by a single notification, a list of each copyrighted work claimed to have been infringed.
C. Information related to the work(s) reasonably sufficient for TestingBot to promptly locate the work (e.g. title of work, location within the Service, etc.).
D. Information reasonably sufficient to permit TestingBot to directly contact the complaining party, such as a complete name and address, telephone number, and an email address.
E. A statement that the complaining party has a good TestingBot belief that use of the work(s) in the manner complained of is not authorized by the copyright owner, its agent, or the law.
F. A statement requesting that TestingBot take a specific act with respect to the alleged infringement (e.g., removal, access restricted or disabled), and
G. A statement that the information in the notification is accurate, and under penalty of perjury, that the complaining party is authorized to act on behalf of the owner of an exclusive right that is allegedly infringed.
## 14. Trademarks
Except as expressly set forth in this Agreement, all trademarks, service marks, trade names, domain names, slogans, logos, and other indicia of origin that appear on or in connection with the Service and Materials are the property of TestingBot and/or its affiliates and licensors. You may not copy, display or use any of these marks without prior written permission of the mark owner.
## 15. International
You agree to abide by U.S and other applicable export control laws and not to transfer, by electronic transmission, the Service, or otherwise, any content or software subject to restrictions under such laws to a national destination or person prohibited under such laws.
## 16. Promotions and Advertising
TestingBot and/or its business partners may present advertisements and promotional materials on or through the Service. Your participation in any TestingBot promotional event is subject to the terms and conditions associated with that event. Your correspondence or business dealings with, or participation in promotions of, any third-party advertisers on or through the Service, including payment and delivery of related goods or services, and any other terms, conditions, warranties or representations associated with such dealings, are solely between you and such third-party. You agree that neither TestingBot nor its business partners shall be responsible or liable for any loss or damage of any sort incurred as the result of any such dealings or as the result of the presence of such third parties on the Service.
## 17. The Website and Links to Third Party Sites
The Website means this web site, as accessed by any of the following domain names: testingbot.com, \*.testingbot.com and any web site owned or controlled by TestingBot (except as otherwise provided on such other site). However, the Website does not refer to any other web site linked to or from the Website, or to any third party site on which the Service may appear. The Service may present links to retailers and/or other third-party websites not owned or operated by TestingBot. Neither TestingBot nor its business partners are responsible for the availability of these outside sites or their contents. You understand and agree that neither TestingBot nor its business partners are responsible or liable, directly or indirectly, for any damage or loss caused or alleged to be caused by or in connection with your use of or reliance on any content of any such site or goods or services available through any such site or from any such advertiser. You should direct any concerns regarding these third-party sites to those sites' administrators.
## 18. Modifications to Service and Materials
TestingBot may, without liability or obligation, in its sole discretion and at any time: (i) make modifications to, or discontinue, any Materials and/or the Service, including deleting any Downloaded Materials we may have placed on your computer, with or without providing you with notice (except as we may expressly agree to provide you with notice elsewhere in this Agreement); and/or (ii) require you to use modified Materials and/or Service (e.g. Software updates) in order to have continued access to the Service and Materials. The modifications may result in certain Materials being unavailable, or incompatible with certain devices. Other Users may similarly delete or cease offering their User Supplied Materials at any time without notice.
Upon TestingBot giving you notice, you shall promptly cease the use of, and destroy, all copies of any specified Materials, or otherwise modify your usage as directed by TestingBot. You agree that neither TestingBot nor the TestingBot Affiliates shall be liable to you or to any third party for any modification, suspension or discontinuance of the Service or Materials.
## 19. Remedies
You understand and agree that any unauthorized use of the Service or the Materials would result in irreparable injury to TestingBot and/or the TestingBot Affiliates for which money damages would be inadequate, and in such event TestingBot and the TestingBot Affiliates, shall have the right, in addition to other remedies available at law and in equity, to immediate injunctive relief against you. Nothing contained in this paragraph or elsewhere in this Agreement shall be construed to limit remedies or relief available pursuant to statutory or other claims that TestingBot and the TestingBot Affiliates may have under separate legal authority, including but not limited to, any claim for intellectual property infringement. You understand and agree that your cancellation of your Account is your sole right and remedy with respect to any dispute with TestingBot. You can cancel your Account by delivering notice to TestingBot at info@testingbot.com.
## 20. Indemnity
You agree to indemnify, and hold harmless, TestingBot, the TestingBot Affiliates, and each of their respective officers, directors, employees, agents, licensors, representatives, and third party providers from and against all claims, actions, demands, causes of action, and other proceedings, and all losses, expenses, fees, fines, damages and costs, including reasonable attorneys' fees and court costs, arising out of or relating to your breach of this Agreement or improper use of the Service or Materials. TestingBot reserves the right to assume, at its sole expense, the exclusive defense and control of any matter subject to indemnification by you, in which event you will fully cooperate with TestingBot in asserting any available defenses.
## 21. Suspension or Termination
TestingBot may, in its sole discretion, terminate this Agreement or suspend your Account at any time with or without notice to you in the event that you breach (or TestingBot reasonably suspects that you have breached) any provision of this Agreement. If TestingBot terminates this Agreement, or suspends your Account for any of the reasons set forth in this paragraph, TestingBot shall have no liability or responsibility to you, and you agree that you forfeit any amounts you have paid TestingBot. TestingBot may terminate this Agreement and your Account for any reason or no reason at the end of the then-current Term by providing notice to you.
You may cancel your Account (including Subscription Services) at any time by contacting info@testingbot.com. All fees paid and charges made prior to termination as provided herein are nonrefundable, including any advance charge or payment for the subscription term during which you terminate your subscription. Termination of your subscription shall not relieve you of any obligations to pay accrued charges.
Upon termination of this Agreement for any reason, all of your rights to use the Service and materials shall immediately terminate, and you shall immediately cease using and destroy all Materials.
## 22. Disclaimers
You understand and agree that your use of the Service and the Materials is at your own sole risk. TestingBot is not responsible or liable for any infections or contamination of your system, or delays, inaccuracies, errors, or omissions arising out of your use of the Service or Materials. The entire risk as to the quality, accuracy, adequacy, completeness, correctness and validity of any Materials rests with you. THE SERVICE AND THE MATERIALS ARE PROVIDED "AS IS" AND "AS AVAILABLE," AND WITHOUT WARRANTY BY TESTINGBOT AND THE TESTINGBOT AFFILIATES, AND, TO THE MAXIMUM EXTENT ALLOWED BY APPLICABLE LAW, TESTINGBOT AND THE TESTINGBOT AFFILIATES EXPRESSLY DISCLAIM ALL WARRANTIES, EXPRESS AND IMPLIED, INCLUDING, BUT NOT LIMITED TO, THE IMPLIED WARRANTIES OF MERCHANTABILITY AND FITNESS FOR A PARTICULAR PURPOSE AND ANY WARRANTY OF NONINFRINGEMENT. THERE IS NO WARRANTY THAT THE SERVICE OR THE MATERIALS WILL MEET YOUR REQUIREMENTS, OR THAT YOUR ACCESS TO THE SAME WILL BE UNINTERRUPTED OR ERROR-FREE. TESTINGBOT AND THE TestingBot AFFILIATES DO NOT WARRANT, GUARANTEE, OR MAKE ANY REPRESENTATIONS REGARDING THE USE OR THE RESULTS OF THE USE OF THE SERVICE OR THE MATERIALS WITH RESPECT TO PERFORMANCE, ACCURACY, RELIABILITY, SECURITY CAPABILITY, CURRENTNESS OR OTHERWISE. YOU WILL NOT HOLD TESTINGBOT AND/OR THE TESTINGBOT AFFILIATES RESPONSIBLE FOR ANY DAMAGES THAT RESULT FROM YOU ACCESSING THE SERVICE OR USING THE SERVICE AND/OR THE MATERIALS. NO ORAL OR WRITTEN INFORMATION OR ADVICE GIVEN BY ANY PERSON SHALL CREATE A WARRANTY IN ANY WAY WHATSOEVER RELATING TO TESTINGBOT AND/OR THE TESTINGBOT AFFILIATES.
UNDER NO CIRCUMSTANCES SHALL TESTINGBOT AND/OR THE TESTINGBOT AFFILIATES BE LIABLE FOR ANY UNAUTHORIZED USE OF THE SERVICE AND/OR THE MATERIALS.
## 23. LIMITATION OF LIABILITY
TO THE FULLEST EXTENT PERMISSIBLE PURSUANT TO APPLICABLE LAW, UNDER NO CIRCUMSTANCES SHALL TESTINGBOT AND/OR THE TESTINGBOT AFFILIATES BE LIABLE TO YOU FOR ANY CONSEQUENTIAL, INCIDENTAL, INDIRECT, SPECIAL OR SIMILAR DAMAGES (INCLUDING, WITHOUT LIMITATION, DAMAGES FOR LOSS OF BUSINESS PROFITS, BUSINESS INTERRUPTION, LOSS OF BUSINESS INFORMATION, AND THE LIKE) ARISING OUT OF THE USE OR INABILITY TO USE THE SERVICE AND/OR THE MATERIALS, EVEN IF TESTINGBOT AND/OR THE TESTINGBOT AFFILIATES, HAVE BEEN ADVISED OF THE POSSIBILITY OF SUCH DAMAGES. BECAUSE SOME JURISDICTIONS DO NOT ALLOW THE EXCLUSION OR LIMITATION OF LIABILITY FOR CONSEQUENTIAL OR INCIDENTAL DAMAGES, THE ABOVE LIMITATION MAY NOT APPLY TO YOU. TO THE EXTENT THAT IN A PARTICULAR CIRCUMSTANCE ANY DISCLAIMER OR LIMITATION ON DAMAGES OR LIABILITY SET FORTH HEREIN IS PROHIBITED BY APPLICABLE LAW, THEN, INSTEAD OF THE PROVISIONS HEREOF IN SUCH PARTICULAR CIRCUMSTANCE, TESTINGBOT AND/OR THE TESTINGBOT AFFILIATES, SHALL BE ENTITLED TO THE MAXIMUM DISCLAIMERS AND/OR LIMITATIONS ON DAMAGES AND LIABILITY AVAILABLE AT LAW OR IN EQUITY BY SUCH APPLICABLE LAW IN SUCH PARTICULAR CIRCUMSTANCE, AND IN NO EVENT SHALL SUCH DAMAGES OR LIABILITY EXCEED TWENTY FIVE DOLLARS ($25). Notwithstanding the foregoing, in no event shall TestingBot's liability to you for any and all claims, damages, losses, and causes of action (whether in contract, tort or otherwise) exceed the amount paid by you, if any, for accessing the Service.
## 24. Claims and Arbitration
Any action hereunder by a User must be brought, if at all, within one (1) year from the accrual of the cause of action. You agree that the all disputes and claims arising out of, or relating to, this Agreement, the Service or Materials, your use of the Service or Materials (including the arbitrability of any claim or dispute and the enforceability of this paragraph), or to any other alleged act or omission by you or TestingBot, shall be determined exclusively by final and binding arbitration. Provided however, that you agree that the terms of this paragraph do not apply to any breach or alleged breach of the ownership or license rights of TestingBot or any of its licensors with respect to any Materials and/or Service, or your (or any third party's) misuse of the Materials and/or Service, and that, in the event of any such breach of alleged breach, TestingBot and its licensors will be irreparably harmed and entitled to equitable and injunctive relief in addition to all other remedies provided by this Agreement or available at law. Except as expressly set forth above in this paragraph, you and TestingBot may litigate in court only to compel arbitration under this Agreement or to confirm, modify, vacate or enter judgment on the award rendered by the arbitrators. To the extent that you have breached or have indicated your intention to breach this Agreement in any manner which violates or may violate TestingBot's or any of its licensor's intellectual property rights, or may cause continuing or irreparable harm to TestingBot (including, but not limited to, any breach that may impact TestingBot's or its licensor's intellectual property rights, or a breach by reverse engineering), TestingBot may seek injunctive relief, or any other appropriate relief, in any court of competent jurisdiction. To the fullest extent permitted by applicable law: no arbitration under this Agreement shall be joined to an arbitration involving any other current or former licensee of TestingBot, whether through class arbitration proceedings or otherwise; no finding or stipulation of fact in any other arbitration, judicial or similar proceeding may be given preclusive or collateral estoppel effect in any arbitration hereunder (unless determined in another proceeding between you and TestingBot); and no conclusion of law in any other arbitration may be given any weight in any arbitration hereunder (unless determined in another proceeding between you and TestingBot).
## 25. Miscellaneous
This Agreement and any other terms or documents referred to herein represent your entire agreement with TestingBot with respect to your use of the Service and Materials. As used in this Agreement the term "licensor" shall not refer to the person at that time entering into the Agreement. You understand and agree that, except as expressly set forth herein, this Agreement is not intended to confer and does not confer any rights or remedies upon any person other than the parties to this Agreement. If any part of this Agreement is held invalid or unenforceable, that portion shall be construed in a manner consistent with applicable law to reflect, as nearly as possible, the original intentions of the parties, and the remaining portions shall remain in full force and effect. TestingBot's failure to pursue any available claim or defense pursuant to this Agreement or otherwise will not be a waiver of such claim or defense. The headings used in this Agreement are for convenience only, and will have no effect on the interpretation or legal enforceability of the terms herein. This Agreement is personal to you and may not be transferred, assigned or delegated to anyone. Any attempt by you to assign, transfer or delegate this Agreement shall be null and void.
Last updated: May 9, 2017
---
URL: https://testingbot.com/privacy
# Privacy Policy
TestingBot knows that you care how information about you is used and shared, and we appreciate your trust that we will do so carefully and sensibly.
By visiting testingbot.com, you are accepting the practices described in this Privacy Policy.
TestingBot knows that you care how information about you is used and shared, and we appreciate your trust that we will do so carefully and sensibly. We process personal information contained in Customer Data on behalf of our customers under the terms and conditions of our [TestingBot Customer Data Processing Addendum](https://trust.testingbot.com).
- [What's your policy about Cookies?](https://testingbot.com#cookies)
- [What personal information does TestingBot gather?](https://testingbot.com#personal)
- [Which information do you share?](https://testingbot.com#information)
- [What Data Subject Rights Do I Have?](https://testingbot.com#rights)
- [How Long Do We Retain Your Personal Data?](https://testingbot.com#duration)
- [Is my information safe on this website?](https://testingbot.com#secure)
- [Which information can I access?](https://testingbot.com#access)
- [Are children allowed to use TestingBot?](https://testingbot.com#children)
- [How can I remove all my information from TestingBot?](https://testingbot.com#delete)
- [Who is the Data Controller?](https://testingbot.com#controller)
- [What Are Our Legal Bases for Processing Personal Data?](https://testingbot.com#legal)
- [Conditions of use, notices, and revisions](https://testingbot.com#changes)
- [Implemented Technologies](https://testingbot.com#technologies)
## What's your policy about Cookies?
Please consult our [Cookie Policy](https://testingbot.com/cookie-policy).
## What personal information does TestingBot gather?
The information we learn from customers helps us personalize and continually improve your experience at testingbot.com.
During signup, you are asked for your first name and last name, together with an e-mail address.
When upgrading your plan, you may be asked for a telephone number and address by our billing provider.
Information from Other Sources: We might receive information about you from other sources and add it to our account information.
You are not required to provide any personal data to us, but if you do not provide any personal data to us, you may not be able to use certain features of our Services...
## Which information do you share?
- **Subcontractors, sub-processors and service providers:** We share your firstname, lastname and email address with our payment providers Stripe and PayPal and with our online chat widget Drift.
- A third party, in order to enforce or defend our rights, or to address financial or reputational risks.
- A third party to respond to requests relating to a criminal investigation or alleged or suspected illegal activity.
- Other recipients where we are authorised or required by law to do so.
- A purchaser or prospective purchaser of all or part of our assets or our business...
## What Data Subject Rights Do I Have?
- **Right of access:** You have the right to obtain from us confirmation as to whether your personal data is being processed...
- **Right to rectification:** You have the right to obtain from us the rectification of inaccurate personal data...
- **Right to erasure:** You have the right to ask us to erase your personal data...
- **Right to restriction of processing:** You have the right to request restriction of processing...
- **Right to data portability:** You have the right to receive your personal data in a structured, commonly used...
- **Right to object:** You have the right to object, on grounds relating to your particular situation...
- **Right to Submit Complaints:** You have a right to lodge a complaint with a supervisory authority.
## How Long Do We Retain Your Personal Data?
If you register for an account on our Services, we retain your personal data for as long as you have an account with us...
## Is my information safe on this website?
TestingBot uses SSL (HTTPs) on all parts of its service/website. SSL encrypts information between you and our website.
Payment data is handled by our payment provider (Stripe/PayPal)...
All sensitive data is encrypted in our database and in our log files. Passwords and security tokens are stripped before they are logged into our system.
We will notify serious data breaches...
We restrict access to Account-Related Information and other Personal Information...
## Are children allowed to use TestingBot?
We do not sell products for purchase by children. If you are under 18, you may use TestingBot only with the involvement of a parent or guardian.
## Which information can I access?
You can access and modify your personal information in our member area.
## How can I remove all my information from TestingBot?
Please log into our member area, click "Account" and click the "Remove account" button.
## Who is the Data Controller?
If you are using our Services, the data controller is TestingBot - Belgium, +1 (855) 410-0024...
## What Are Our Legal Bases for Processing Personal Data?
- **Contract Performance:** We process the personal data of users of our Services as necessary to perform our contractual obligations...
- **Legitimate Interests:** To provide users with a good user experience, to maintain and secure our Services...
- **Legal Obligations:** If we are subject to a lawful access request, engaged in a legal proceeding...
- **Consent:** If we are required to obtain your consent to send you marketing communications...
- **Vital Interests:** In extenuating circumstances, we may need to process your personal data to protect the vital interests...
## Conditions of use, notices, and revisions
If you choose to visit testingbot.com, your visit and any dispute over privacy is subject to this Notice...
We may periodically alter this policy and our Terms of service. Please check these pages frequently to see the most recent changes.
**Last updated: April 9, 2024**
## Implemented Technologies
If you have any questions, complaints or remarks about this Privacy Policy, you can contact our Data Protection Officer at [info@testingbot.com](mailto:info@testingbot.com).
TestingBot
Attn: Data Protection Officer
[info@testingbot.com](mailto:info@testingbot.com)
Telephone number: +1 (855) 410-0024
[Contact TestingBot](https://testingbot.com/contact/new)
---
URL: https://testingbot.com/cookie-policy
# Cookie Policy
TestingBot uses cookies to improve your user experience.
## What's a cookie?
A cookie is a small file which is placed on your computer to remember your preferences.
You can read more about cookies on [AllAboutCookies](https://allaboutcookies.org).
## How are you using cookies?
When you first visit our website, our partner Google Analytics will set a cookie to track which pages you visit.
Next to that, we will set a cookie to determine if you're logged in or not (session cookie). Once you log out, this cookie is destroyed.
We offer online chat as a way to help you with your questions. This 3rd party provider also sets cookies to enhance your user experience.
## Cookie List
Below is the list of cookies we use on TestingBot:
### Strictly Necessary Cookies
These cookies are necessary for the website to function and cannot be switched off in our systems...
#### Cookies used
| Cookie Name | Description | Expiration |
| --- | --- | --- |
| \_testingbot\_gsession | Keep track of whether you're signed in on TestingBot | Until you close your browser |
| remember\_user\_token | If you enabled "Remember me" during login, we will use this cookie to remember your session. | 14 days |
| \_\_stripe\_mid | Used by Stripe. More info on [Stripe's Cookie Policy](https://stripe.com/cookies-policy/legal). | 1 year |
### Performance Cookies
These cookies allow us to count visits and traffic sources so we can measure and improve the performance of our site...
#### Cookies used
| Cookie Name | Description | Expiration |
| --- | --- | --- |
| \_gid | Used by Google Analytics. [More info](https://www.en.advertisercommunity.com/t5/Google-Analytics-Code/Information-about-a-cookie-of-Google-Analytics-named-gid/td-p/1127468). | 30 days |
| \_ga | Used by Google Analytics to identify unique sessions. | 30 days |
### Targeting Cookies
These cookies may be set through our site by our advertising partners...
#### Cookies used
| Domain | Cookies |
| --- | --- |
| youtube.com |
- SID
- HSID
- demographics
- VISITOR\_INFO1\_LIVE
- PREF
- APISID
- SSID
- LOGIN\_INFO
- YSC
- SAPISID
|
| google.com |
- APISID
- SSID
- NID
- PREF
- SID
- SAPISID
- HSID
|
### Social Media Cookies
These cookies are set by a range of social media services that we have added to the site...
#### Cookies used
| Cookie Name | Description | Expiration |
| --- | --- | --- |
| intercom-id-[app\_id] | Anonymous visitor identifier for the online chat functionality. | 9 months |
| intercom-session-[app\_id] | Keeps track of chat sessions. Gives users access to their previous conversations and identifies them in the Messenger. | 1 week |
| intercom-device-id-[app\_id] | Identifier for each unique device that interacts with the Messenger. | 9 months |
This policy was last updated on October 8, 2025.
Please see our [Terms & Conditions](https://testingbot.com/terms) and our [Privacy Policy](https://testingbot.com/privacy) for additional information.
---
URL: https://testingbot.com/features/smart-tv-testing
# Online Test Automation On Smart TVs
OTT test automation on living room devices such as Apple TV, Amazon Fire TV and Chromecast with TestingBot. Manual and automated crossplatform testing on real Apple TV (tvOS) and Android TV devices.
[Get started free](https://testingbot.com/users/sign_up)[Request a demo](https://testingbot.com/demo)

Trusted by some of the world's most innovative companies
## Automated Testing for Smart TV apps
Run Appium tests on TV apps running on Apple TV 4K, Chromecast and more.
Get access to raw video and audio generated from the Smart TV device. Test DRM-protected content, by accessing a device via manual or automated testing.
[Read SmartTV Testing Documentation](https://testingbot.com/support/app-automate/smart-tv)
### Automated Testing with Appium
Upload your Smart TV app and run automated tests with Appium on the remote device.
### Connect to a remote TV device
Access live video and audio generated from the device, through your own browser and control the remote as if it was in your hand.
### Device Coverage
Test on various devices such as Apple TV 4K, Chromecast and more.
## Frequently Asked Questions
### What competitive edge does TestingBot offer with Smart TV testing, compared to its peers?
TestingBot offers both manual and automated testing of apps on Smart TVs. View DRM-protected content, hear live audio of the device under test and manually send remote control (IR signals) to the device.
### How can I test Smart TV applications on a remote Smart TV device?
Simply upload your app to TestingBot Storage and pick a device to test on. TestingBot provides a high quality video and audio stream of the device.
### Manual and Automated Testing on AppleTV and Chromecast
Manually control a device such as Apple TV 4K or ChromeCast device, through your own browser. Run automated tests with Appium on remote smart-tv devices.
### Sign up for a Free Trial
Start testing your apps with TestingBot.
[Start a free trial](https://testingbot.com/users/sign_up)
---
URL: https://testingbot.com/features/manual-browser-testing
# Superfast, Live Cross Browser Testing
Manually control any browser in our cloud directly from your own browser.
Gain instant access to real browsers and preview how your website looks and behaves across multiple platforms in real time.
[Get started free](https://testingbot.com/users/sign_up)[Request a demo](https://testingbot.com/demo)

Trusted by some of the world's most innovative companies

## Test on real mobile & desktop devices
Get one-click access to real browsers running on macOS, Windows and Linux platforms. Cross-browser testing made simple: switch platforms, locations and screen resolutions instantly.
Test across all versions of Internet Explorer (IE8 to IE11), Edge, Chrome, Safari, Firefox and Opera.
[Get started free](https://testingbot.com/users/sign_up)
## 5200+ real desktop & mobile browser combinations
Test on the widest range of desktop and mobile devices in our real device cloud. We handle setup, procurement and maintenance — so you can focus entirely on testing.
### Windows, macOS & Linux
One-click access to every macOS, Linux and Windows version. From Yosemite to macOS Sequoia, and Windows XP to Windows 11. We've got you covered.
### Every browser, all versions
Edge, Safari, Firefox, Chrome, Opera and IE - constantly updated & instantly available.
### Security
Single-Use VMs and pristine real devices, reset after each use.
### Real Android & iOS devices
Test across real iPhone, iPads, Google, OnePlus, Xiaomi and Samsung phones & tabs.
### No setup & maintenance
Instantly access 5200+ devices and browsers. Experience zero setup or maintenance hassles, and focus only on testing.
### Performance
Our infrastructure is built for performance to eliminate test flakiness and latency.
## Take control of a device
Interact with the remote mobile device, just as you would with a device in hand. Tap, scroll, zoom, swipe and more.

## Test in different scenarios
Test your website in different scenarios, such as geolocation, resolution, network speed and device orientation.
### Resolutions
Test your website in various screen resolutions, perform responsive design testing.
### Geolocation Testing
Test your website from various geographical locations, test location-aware features such as currencies or locales.
### Network Speed
Test response to real-world network conditions by simulating Edge, 2G, 3G & 4G network.
### Device orientation
Change the orientation of the device, from portrait to landscape and vice-versa.

## Report bugs & capture metadata while testing
Take and annotate screenshots during a manual test, share with top tools such as Jira, Slack and more. Each manual test also comes with a video recording.

## Test Staged Websites
Use the secure TestingBot Tunnel to easily test your staging and development environments across all browsers, ensuring seamless access behind firewalls or private networks.
Test data and websites from behind your firewall on the TestingBot cloud.
[Read more](https://testingbot.com/support/tunnel)
## Frequently Asked Questions
### Do I need to install anything?
No, you don't need to install anything. Simply sign up for a free account and start testing.
You can interact with a remote browser, just like you would with a local browser, with your own mouse and keyboard. No need to install any plugins or software.
### Can I test with various resolutions and responsive designs?
Yes, you can test with various resolutions and responsive designs. Simply change the resolution during the manual test.
### Can I hear the audio from the remote browser?
Yes, TestingBot will stream the audio from the remote browser, allowing you to test applications that require audio.
### More reasons to love TestingBot
### 24/7 support
Got questions? Ask in the 24/7 in-app customer [chat support](https://testingbot.com#) or [send us an email](https://testingbot.com/contact/new). We are here to help you!
TestingBot Support
Hey 👋 How can we help?
I need support
### Trusted by over 14,000 teams
6M+
Tests
120k+
Users
400+
Enterprises
106
Countries
[Request a demo](https://testingbot.com/demo)
### Developer Documentation
Everything you need to integrate TestingBot into your workflow. Browse guides, API references and SDKs for web and mobile testing.
- [Quickstart tutorials for Selenium](https://testingbot.com/support/web-automate/selenium)
- [Appium Examples](https://testingbot.com/support/app-automate/appium)
- [Integrations](https://testingbot.com/support/integrations)
- [List of browsers & devices](https://testingbot.com/support/web-automate/browsers)
[Explore Documentation](https://testingbot.com/support)
### Enterprise-grade Security
Star level 1
Certified
GDPR
Compliant
SAML SSO
Single Sign-On
99.99%
Uptime SLA
[Visit TestingBot Trust Center](https://trust.testingbot.com/)
### Sign up for a Free Trial
Start testing your apps with TestingBot.
[Start a free trial](https://testingbot.com/users/sign_up)
---
URL: https://testingbot.com/features/manual-mobile-testing
# Live Mobile App Testing
Manually control [a physical mobile device](https://testingbot.com/support/app-automate/devices) in our cloud to test your mobile app. Upload your iOS or Android app and test it on a real device, directly from your own browser.
[Get started free](https://testingbot.com/users/sign_up)[Request a demo](https://testingbot.com/demo)
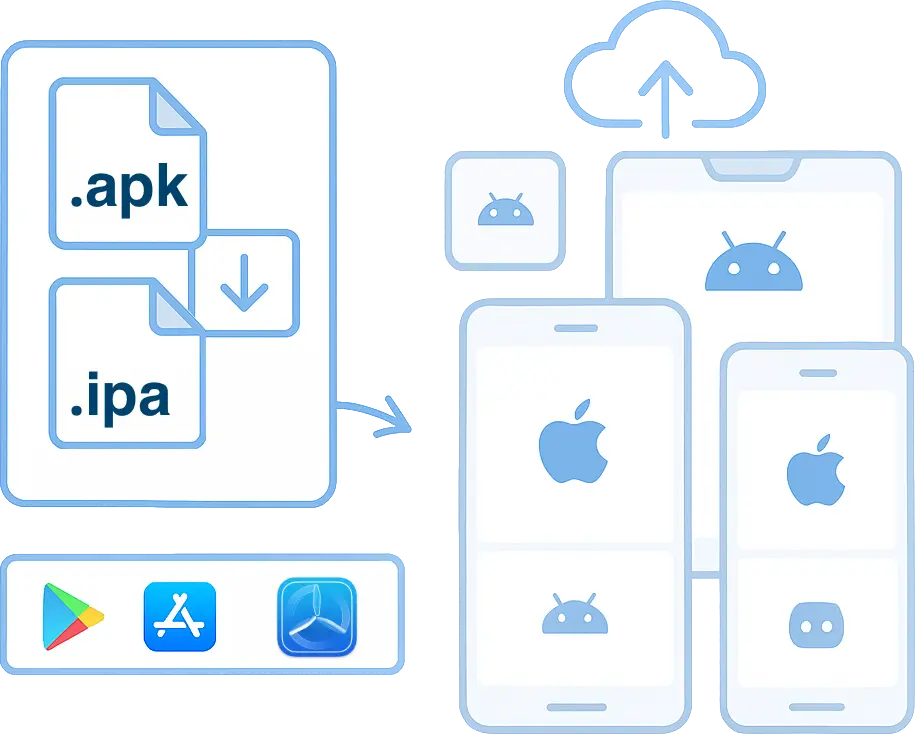
Trusted by some of the world's most innovative companies
## Reliable Device Farm
Get instant access to a fast, reliable device infrastructure.
### 24/7 device availability
Physical iOS and Android devices, available at any time of the day.
### Zero setup & Maintenance
Focus on testing instead of worrying about setup and maintenance of a mobile device farm.
### Security
Devices located in a datacenter in Europe. Each test runs on a secure and pristine device.
### Real Android & iOS devices
Test across real iPhone, iPads, Google, OnePlus, Xiaomi and Samsung phones & tabs.
### Variety of devices
Test on any device — flagship or budget — with support for the newest and legacy iOS and Android versions.
### Performance
Our infrastructure is built for performance to eliminate test flakiness and latency.
## Take control of a device
Interact with the remote mobile device, just as you would with a device in hand. Tap, scroll, zoom, swipe and more.

## Test native device features
Access and modify device features to test your app in various real-world conditions.
### Network Simulation
Test for scenarios like connectivity, fluctuating network & many more.
### Localization testing
Test your apps across different timezones, languages and geolocations.
### Dark Mode
Test your app's UI with a dark background to ensure a smooth user experience.
### App Orientation
Test your app in the landscape or portrait mode. Switch between orientations to test your app's response.
### Audio
Record and hear in realtime the audio generated on the device.
### Settings
Control various settings on the device, through ADB or other.
## Control device
See realtime generated logs from the remote iOS/Android device.
Rotate the device, change its GPS location, modify the system language and more.
Inspect the logs for errors, crashes or stacktraces.
[Get started free](https://testingbot.com/users/sign_up)
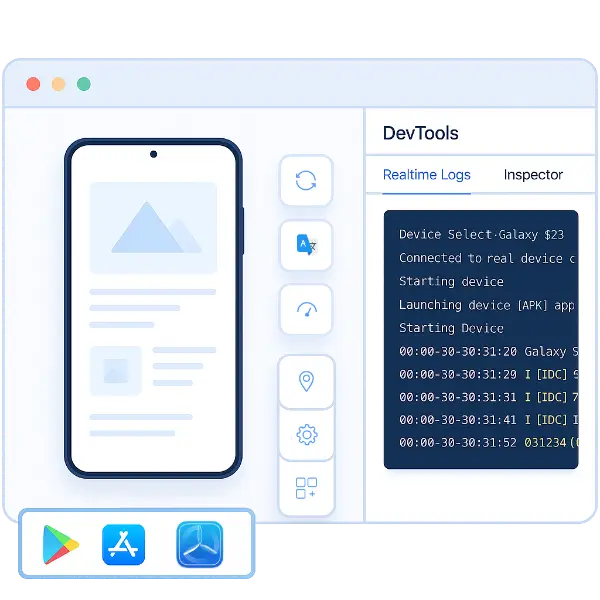
## Inspect your app
Find locators to use in your Automated Tests. TestingBot highlights the area in your layout while you go over the different elements in the layout hierarchy.
Easily locate XPath, XCUITest and Espresso locators which you can then use for Automated Testing.

## TestingBot Storage
Upload your native mobile app, as an .apk or .ipa, to [TestingBot Storage](https://testingbot.com/support/api#upload) and start testing immediately.
[Get started free](https://testingbot.com/users/sign_up)

## Your very own Mobile Devices
Choose your own iOS and Android devices. We will purchase these devices, install and configure them in our secure datacenter.
These devices will be only available to you, 24x7.
Private devices can be customised to your needs. Have us install specific profiles and apps, or change specific settings of the device. You decide.
[Learn more](https://testingbot.com/enterprise/private-device-cloud)


## Test Staged Websites
Use the secure TestingBot Tunnel to easily test your staging and development environments across all browsers, ensuring seamless access behind firewalls or private networks.
Test data and websites from behind your firewall on the TestingBot cloud.
[Read more](https://testingbot.com/support/tunnel)
## Frequently Asked Questions
### Should I use a real device or an emulator?
TestingBot provides both emulators/simulators, as well as physical devices.
Emulators are good if you want to test basic functionality, but they do not provide the same experience as a real device.
We recommend using both real devices and emulators, depending on your needs.
### Where are the devices located?
TestingBot offers physical devices located in Belgium (Europe).
### Which apps can I test?
You can test any app that is available in the Apple App Store or Google Play Store.
You can also upload your own app (.ipa or .apk) and test it on a real device.
### More reasons to love TestingBot
### 24/7 support
Got questions? Ask in the 24/7 in-app customer [chat support](https://testingbot.com#) or [send us an email](https://testingbot.com/contact/new). We are here to help you!
TestingBot Support
Hey 👋 How can we help?
I need support
### Trusted by over 14,000 teams
6M+
Tests
120k+
Users
400+
Enterprises
106
Countries
[Request a demo](https://testingbot.com/demo)
### Developer Documentation
Everything you need to integrate TestingBot into your workflow. Browse guides, API references and SDKs for web and mobile testing.
- [Live Mobile App Testing documentation](https://testingbot.com/support/app-live)
- [Upload your mobile app](https://testingbot.com/support/app-automate/help/upload)
- [Preparing your app for testing](https://testingbot.com/support/app-automate/help/prepare)
- [List of mobile devices](https://testingbot.com/support/app-automate/devices)
[Explore Documentation](https://testingbot.com/support)
### Enterprise-grade Security
Star level 1
Certified
GDPR
Compliant
SAML SSO
Single Sign-On
99.99%
Uptime SLA
[Visit TestingBot Trust Center](https://trust.testingbot.com/)
### Sign up for a Free Trial
Start testing your apps with TestingBot.
[Start a free trial](https://testingbot.com/users/sign_up)
---
URL: https://testingbot.com/features/ai-testing
# AI Test Automation
Create automated tests in a fast and easy way. Generate tests in natural language with Gen AI. Generate your tests, replay on 5200+ browsers and mobile devices.
[Get started free](https://testingbot.com/users/sign_up)[Request a demo](https://testingbot.com/demo)
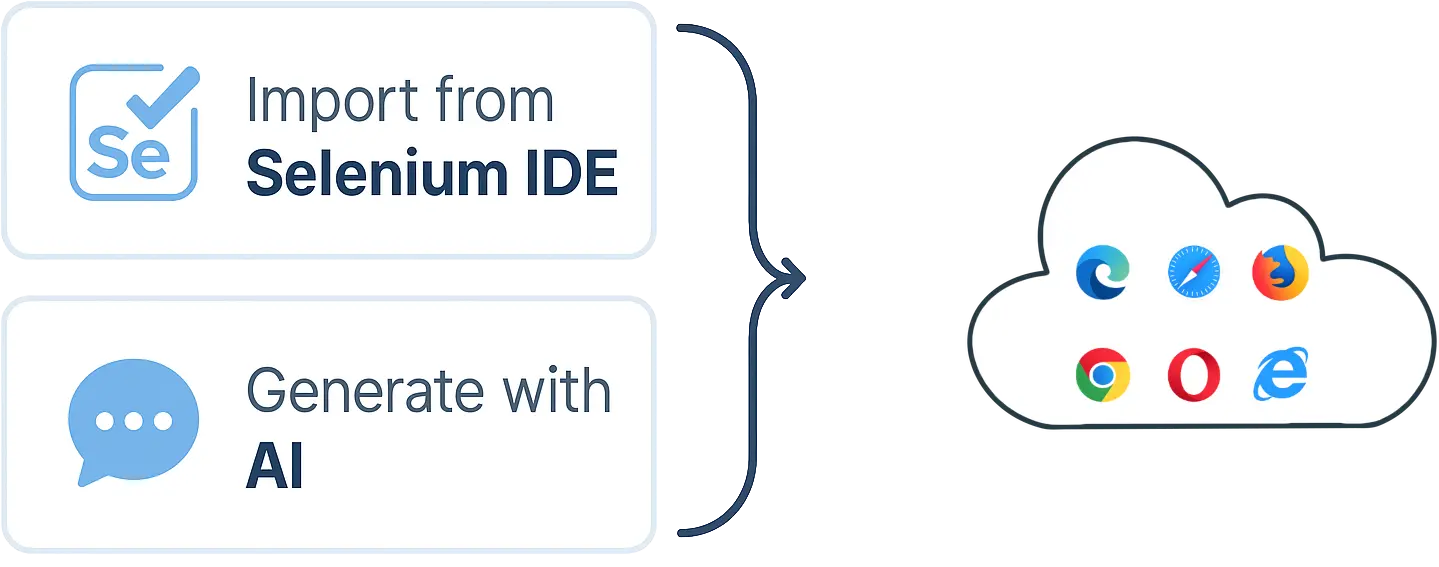
Trusted by some of the world's most innovative companies
## AI Testing
Describe in natural language what your test should do and let Gen AI create the test for you. Save time and resources from your developers and QA engineers by using AI to run tests against your website.
The AI Testing Agent will convert your prompt into an automated test, which you can then schedule to run periodically on remote browsers.
[Get started free](https://testingbot.com/users/sign_up)
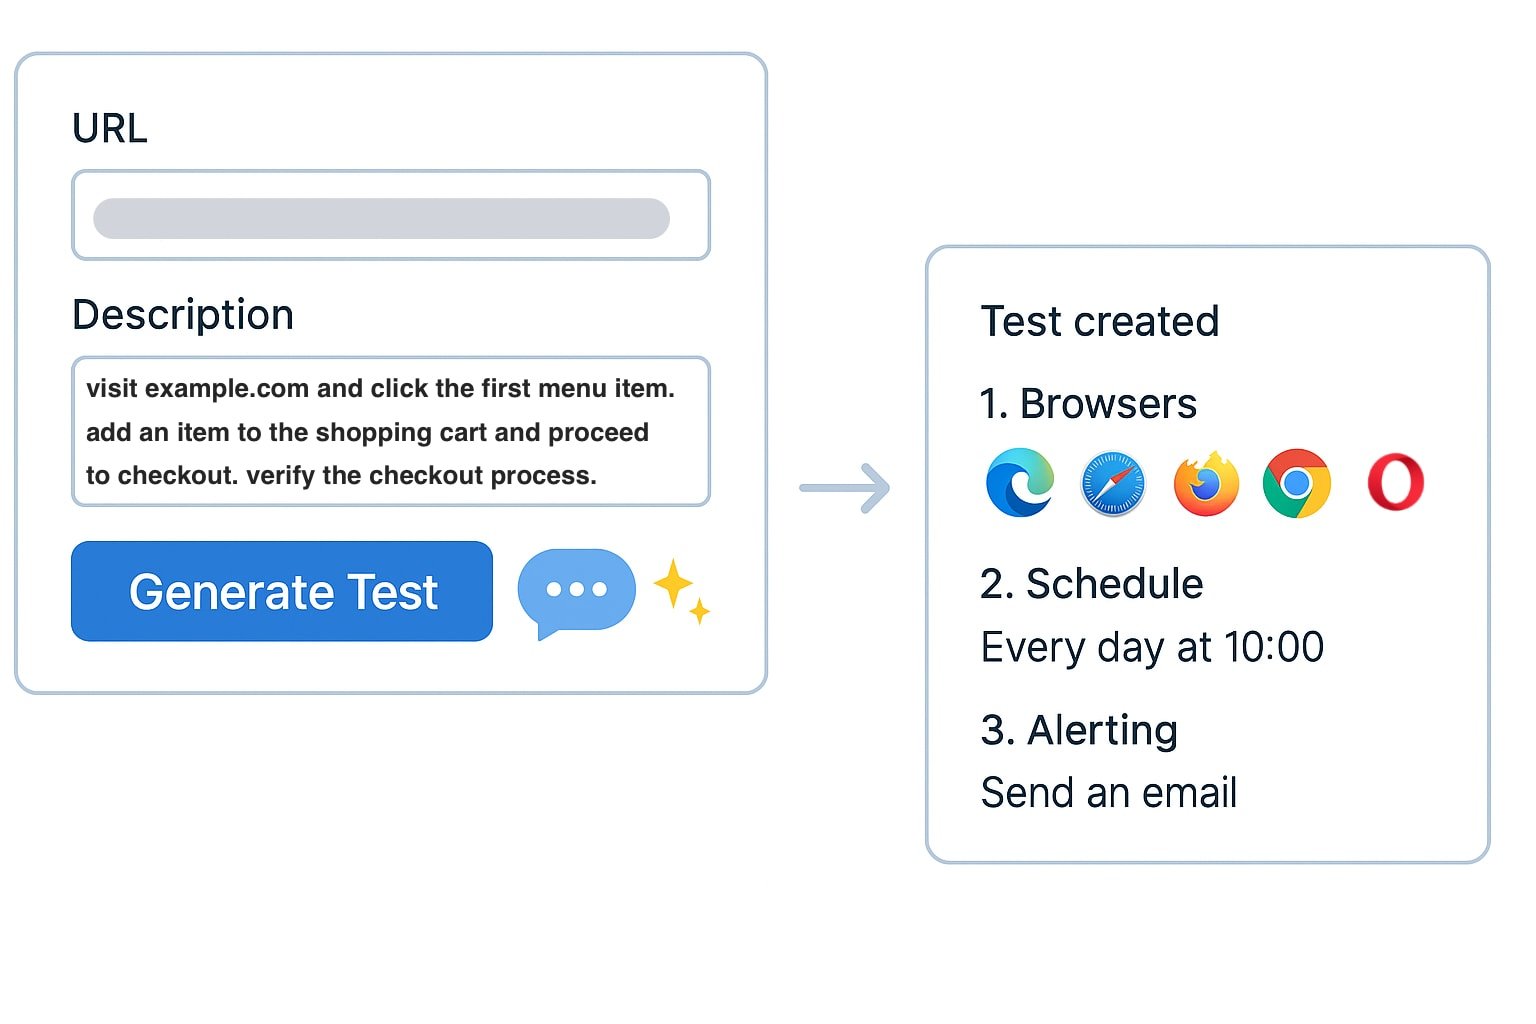
## Example AI usecases to Test Your Website
Use natural language prompts to check critical elements and flows on your site, using Generative AI.
### Shopping Cart
Prompt: Add a product to the shopping cart. Verify on the checkout page that the product is in the shopping cart.
### Handle OCR/Captcha's
Use the AI to handle OCR and captcha's. The AI will perform the necessary actions and validations.
### Skip Locators
The AI will not depend on locators such as XPath or CSS selectors. Simply define elements by their text, such as "Click the button that says 'Submit'".
### Conditional Actions
The AI will be able to perform conditional actions, such as "If the login is successful, check if the user is redirected to the dashboard page".
### Verify video playback
Check if a video is playing correctly on the page. The AI agent will verify the video playback and check for any errors.
### Graph Check
Prompt: Check that the page contains an image of a graph showing positive growth.
### Logo Presence
Prompt: Verify that the company's logo is visible in the page header.
### CTA Button Check
Prompt: Confirm the presence of a “Get Started” button that links to the signup page.
### Form Validation
Prompt: Ensure that submitting an empty form displays an error message.
## AI Chat
Chat with the AI Test Agent and instruct it to perform actions, such as clicking buttons, filling out forms, and verifying elements on the page.
Ask the AI to generate automated test scripts from the actions you specified. Export to Java, Kotlin, Python, C#, Selenium IDE, JavaScript, Ruby and more.
## Record tests
Import your recorded tests from Selenium IDE. TestingBot will run the tests periodically on the remote browsers you specified.
[Get started free](https://testingbot.com/users/sign_up)
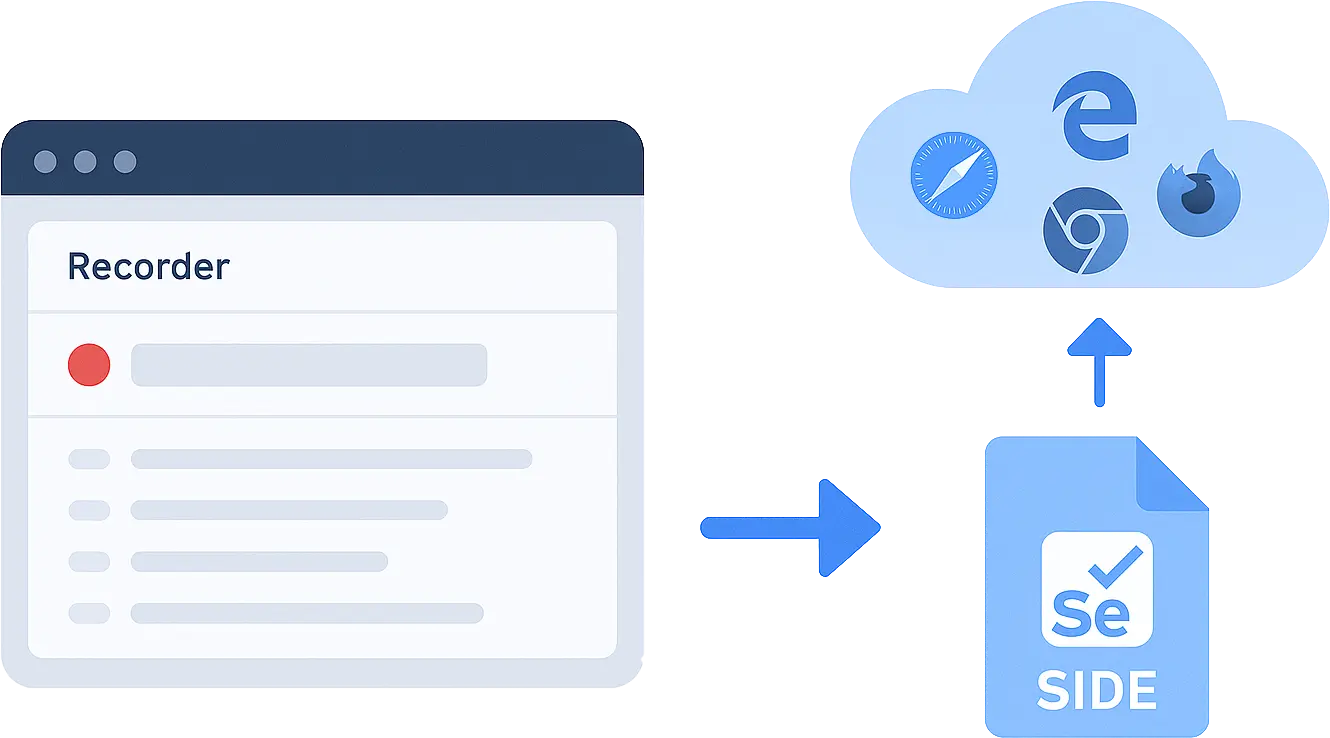
## AI Test Automation
Run tests without writing any code on the TestingBot platform.
### Browsers & OS
Select one or more browsers running on a specific operating system. Specify browser versions to target specific test environments.
### Schedule
Run tests periodically; every minute, hour, day or at a custom interval.
### Alert
When a test fails, you will receive email notifications or text messages.
### Reports
Receive daily reports on the progress of your tests.
### Settings
Set specific settings such as geolocation, screen resolution and more.
### Performance
The tests will run in parallel on TestingBot's performant browser grid.
## Schedule Tests
Schedule your tests to run on specific days and intervals.
Set a cron format to define the exact days and hours you want your tests to run in parallel on our browsers.
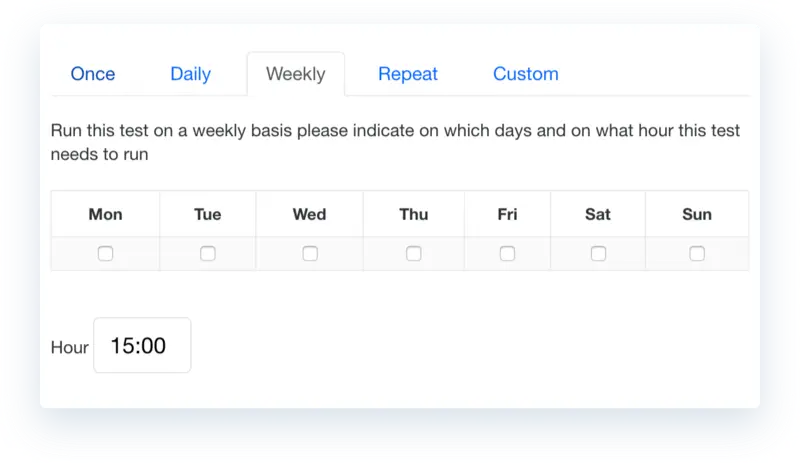
## Frequently Asked Questions
### How can I use AI to create automated tests?
TestingBot allows you to use LLMs to create automated tests in natural language. Simply describe what you want to test, and the AI will generate the test for you.
The AI will generate the test and instruct a remote browser to perform the necessary actions and validations.
### How can I record automated tests?
You can use the official Selenium IDE browser plugin to record your test flow. The recorded test can be imported into TestingBot for execution.
Once imported, you can choose the browsers and devices you want to run the test on, and schedule it to run periodically.
### What are some example AI prompts I can use to create tests?
You can use prompts like "Create a test that logs into my website" or "Create a test that checks if the homepage loads correctly".
Or check if an item can be added to a shopping cart - "Create a test that adds an item to the shopping cart and checks if the cart is updated correctly".
### Why should I use AI to create automated tests?
You can write tests in plain English. Some customers even import their user stories from other platforms such as TestRail, PractiTest or Zephyr into TestingBot AI. It is very easy to explain and understand what is being tested.
Because the TestingBot AI tests are not dependent on XPath or other brittle locators, they are ultra-stable. Customers are running hundreds of tests multiple times a day without a single failure.
### Ready to start AI Testing?
Check out the [codeless testing documentation](https://testingbot.com/support/web-automate/codeless-automation/add-test) to get started.
[View documentation](https://testingbot.com/support/web-automate/codeless-automation/add-test)
Resources you may like
[](https://testingbot.com/blog/testingbot-ai-agent)
#### [Generative AI test agent](https://testingbot.com/blog/testingbot-ai-agent)
TestingBot has launched an AI Test Agent that will help you to create automated tests
[Read more](https://testingbot.com/blog/testingbot-ai-agent)
[](https://testingbot.com/blog/codeless-automation-ios-android)
#### [Codeless Web Automation on iOS and Android](https://testingbot.com/blog/codeless-automation-ios-android)
We now offer Codeless Automation for websites on iOS Simulators and Android Emulators.
[Read more](https://testingbot.com/blog/codeless-automation-ios-android)
### More reasons to love TestingBot
### 24/7 support
Got questions? Ask in the 24/7 in-app customer [chat support](https://testingbot.com#) or [send us an email](https://testingbot.com/contact/new). We are here to help you!
TestingBot Support
Hey 👋 How can we help?
I need support
### Trusted by over 14,000 teams
6M+
Tests
120k+
Users
400+
Enterprises
106
Countries
[Request a demo](https://testingbot.com/demo)
### Developer Documentation
Everything you need to integrate TestingBot into your workflow. Browse guides, API references and SDKs for web and mobile testing.
- [Quickstart tutorials for Selenium](https://testingbot.com/support/web-automate/selenium)
- [Appium Examples](https://testingbot.com/support/app-automate/appium)
- [Integrations](https://testingbot.com/support/integrations)
- [List of browsers & devices](https://testingbot.com/support/web-automate/browsers)
[Explore Documentation](https://testingbot.com/support)
### Enterprise-grade Security
Star level 1
Certified
GDPR
Compliant
SAML SSO
Single Sign-On
99.99%
Uptime SLA
[Visit TestingBot Trust Center](https://trust.testingbot.com/)
---
URL: https://testingbot.com/features/accessibility-testing
# Web Accessibility Testing
TestingBot provides automated accessibility testing to help ensure your web applications comply with WCAG standards and are accessible to all users.
Schedule recurring tests, receive detailed reports with actionable insights, and improve your application's accessibility with ease.
[Get started free](https://testingbot.com/users/sign_up)[Request a demo](https://testingbot.com/demo)

Trusted by some of the world's most innovative companies
## Automated Accessibility Testing
Identify and fix accessibility issues across your websites and web apps.
Ensure WCAG compliance and deliver an inclusive experience for all users.
### WCAG Compliance
Test your web applications against Web Content Accessibility Guidelines (WCAG) to ensure compliance.
### Scheduled Testing
Configure one-time or recurring tests on a daily, weekly, or monthly basis to catch accessibility issues early.
### Detailed Reports
Receive comprehensive reports with detailed information about each accessibility violation and recommended fixes.
### Customizable Alerts
Set up notifications via email, webhooks, or SMS when accessibility issues are detected.
### Severity Classification
Prioritize accessibility issues with clear severity labels to focus on the most critical problems first.
### Secure Testing
Test locally hosted and authenticated pages securely using the [TestingBot Tunnel](https://testingbot.com/support/tunnel).
## Accessibility Testing is Essential
Make your web applications accessible to all users and comply with regulations.
### Legal Compliance
Meet legal requirements, such as the European Accessibility Act (EAA) to avoid any penalties.
### Broader Audience
Reach more users by making your applications accessible to people with disabilities, who represent about 15% of the global population.
### Improved SEO
Boost your search engine rankings as accessibility improvements often align with SEO best practices.
### Better User Experience
Create a better experience for all users by implementing accessibility best practices that often improve usability for everyone.
## Detailed Accessibility Reports
Receive comprehensive reports that identify accessibility issues with detailed information about each violation, its severity and recommendations for fixing the issue.
[Get started free](https://testingbot.com/users/sign_up)


## WCAG Compliance Testing
Automatically test your web applications against WCAG guidelines to ensure they are accessible to users with disabilities and comply with international standards.
[Read more](https://testingbot.com/support/accessibility/web/rules)
## Scheduled Accessibility Tests
Configure one-time or recurring accessibility tests on a daily, weekly, or monthly basis to continuously monitor your web applications for accessibility issues.
[Read more](https://testingbot.com/support/accessibility/web/scheduled)
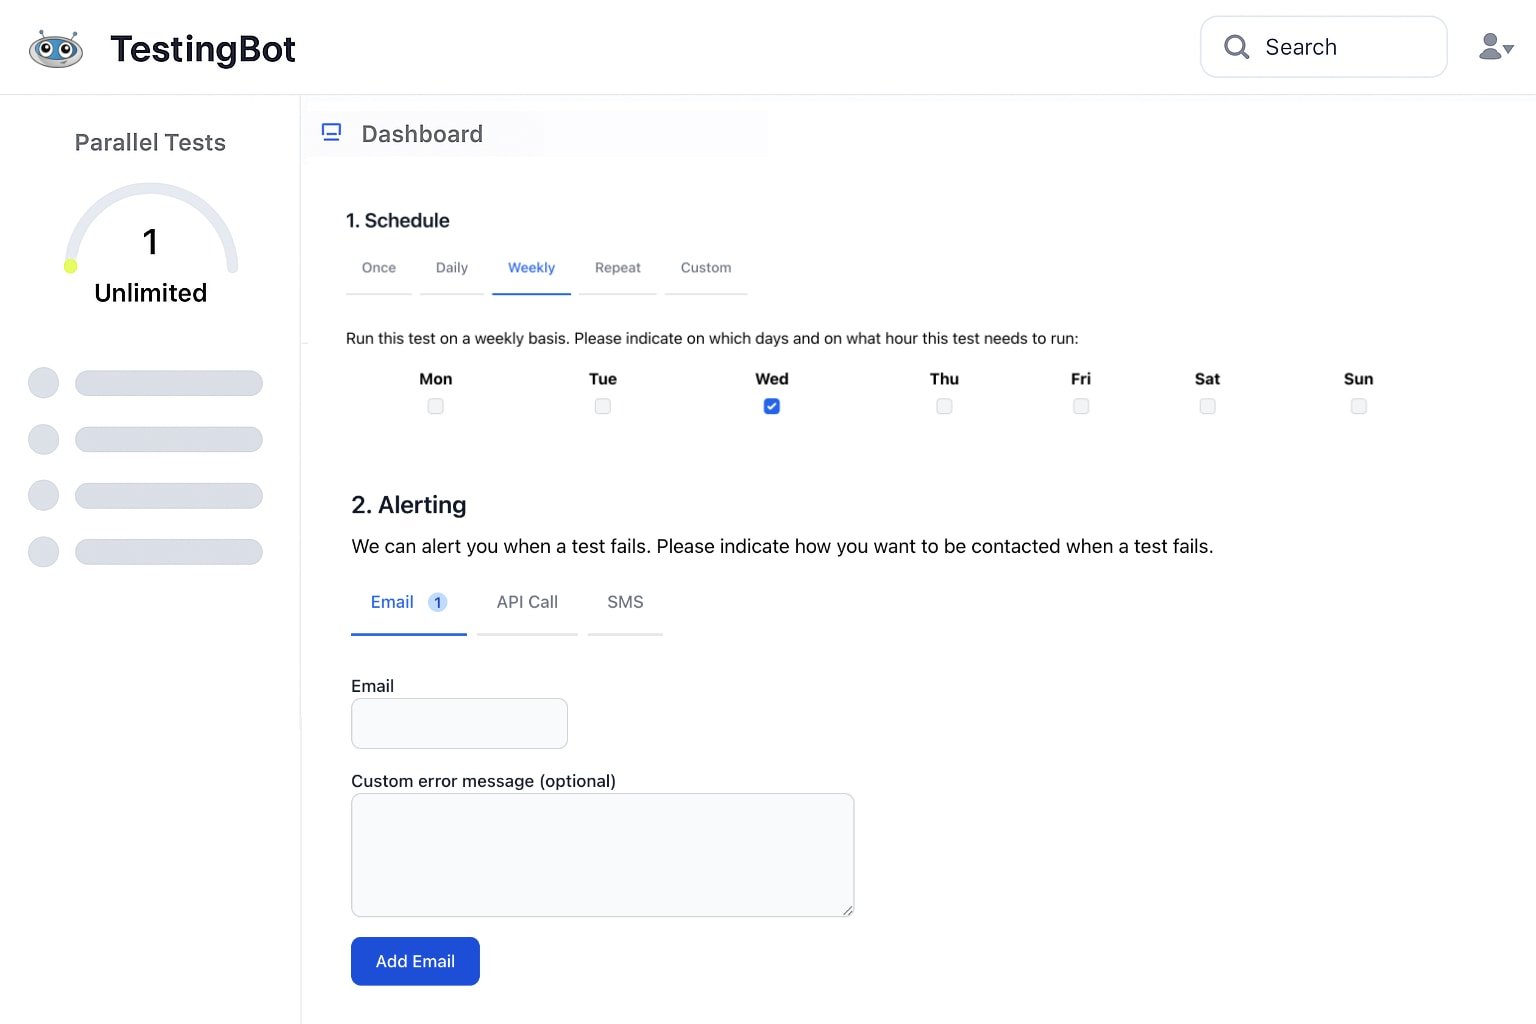
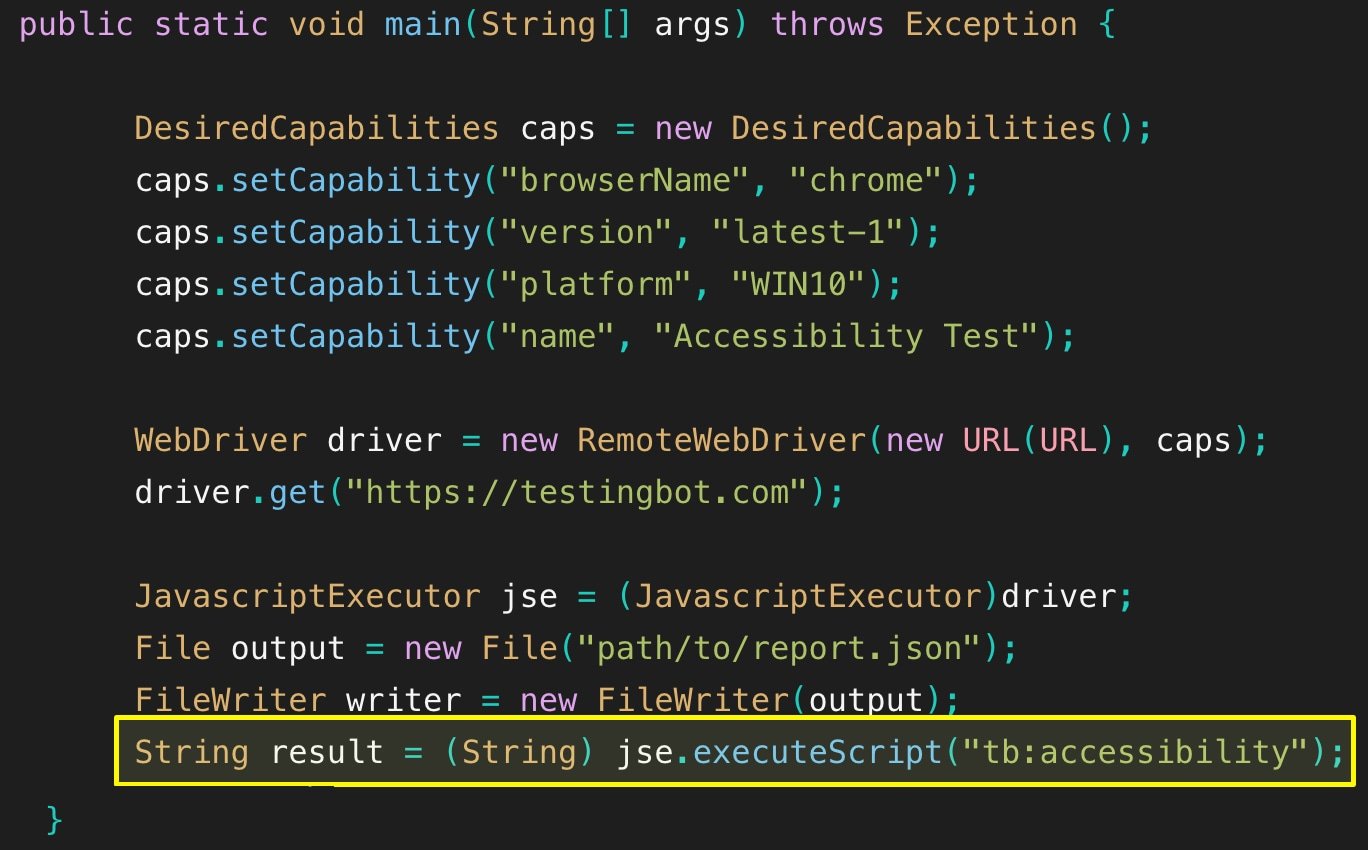
## Integrate into your existing tests
With a few lines of code, you can check for accessibility issues during your automated Selenium tests. No custom SDK, library or framework required.
[Read more](https://testingbot.com/support/accessibility/web/selenium)
### Sign up for a Free Trial
Start testing your apps with TestingBot.
[Start a free trial](https://testingbot.com/users/sign_up)
Resources you may like
[](https://testingbot.com/resources/articles/why-accessibility-testing)
#### [Why is accessibility testing important in web design?](https://testingbot.com/resources/articles/why-accessibility-testing)
Find out why it's important to think about accessibility when designing your webpages.
[Read more](https://testingbot.com/resources/articles/why-accessibility-testing)
[](https://testingbot.com/blog/automated-accessibility-testing)
#### [Automated Accessibility Testing with TestingBot](https://testingbot.com/blog/automated-accessibility-testing)
Start testing for accessibility issues with TestingBot and Axe.
[Read more](https://testingbot.com/blog/automated-accessibility-testing)
---
URL: https://testingbot.com/features/headless
# Headless Browsers
Connect AI agents and test scripts to remote, headless browsers.
Perform automated browser actions, simulate user interactions or perform data-driven tasks with full browser capabilities and zero setup.
[Get started free](https://testingbot.com/users/sign_up)[Request a demo](https://testingbot.com/demo)
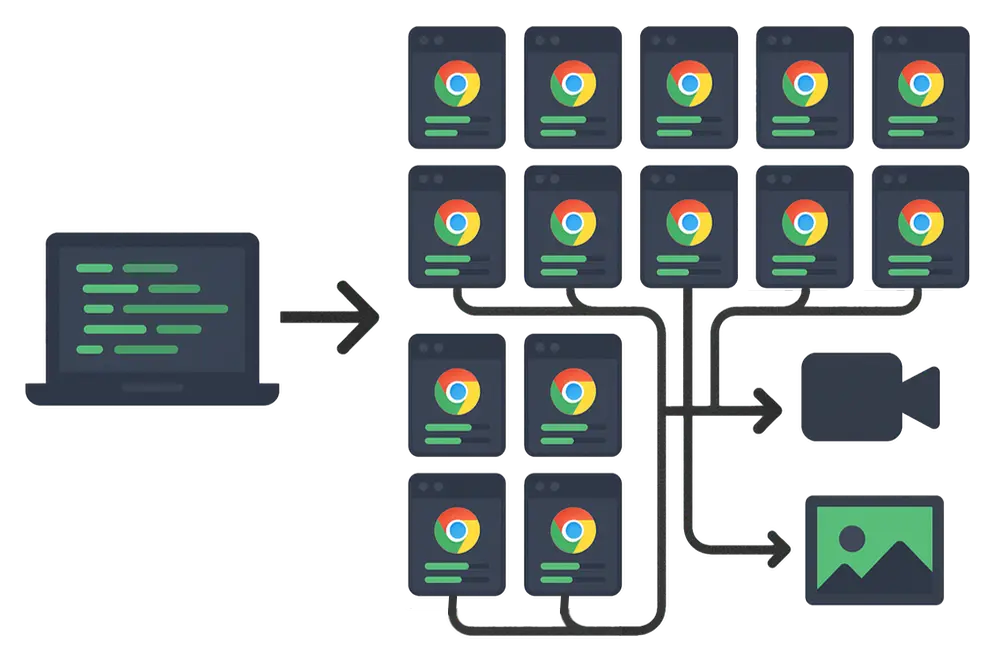
Trusted by some of the world's most innovative companies
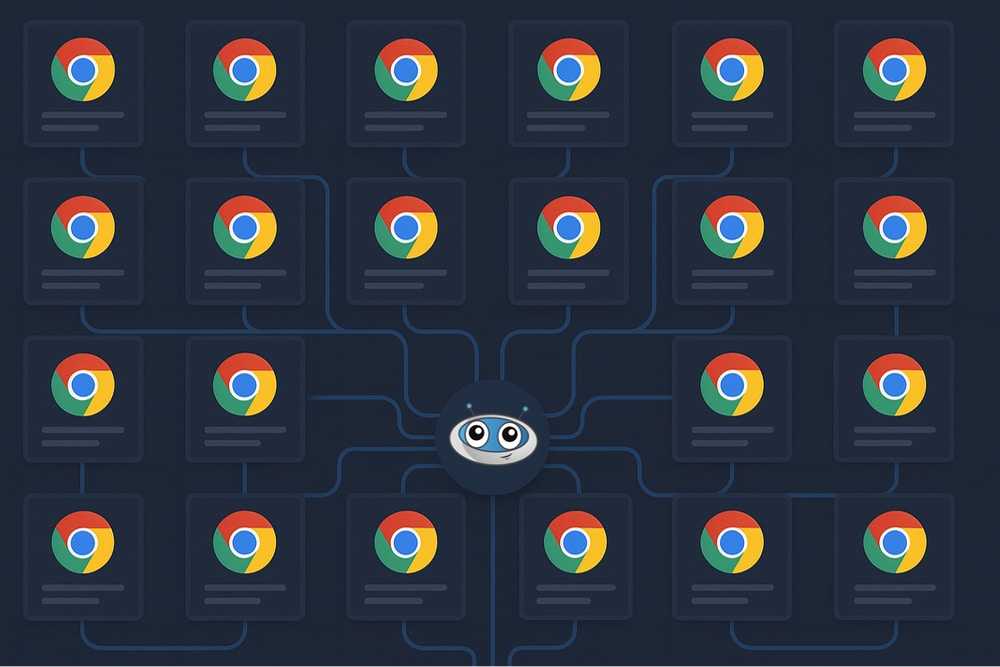
## How it works
TestingBot takes care of the setup and maintenance of the headless browsers. Run your sessions in parallel on our cloud-based grid, optimized for speed and performance.
Take advantage of a high performance platform, with low latency and fast browser startup times.
Extract HTML, bypass bot detectors and use user-in-the-loop functionality with Hybrid Automations.
[Get started free](https://testingbot.com/users/sign_up)
## Browser Frameworks
These automation frameworks support running headless sessions.
[](https://testingbot.com/features/automation/selenium)
### [Selenium](https://testingbot.com/features/automation/selenium)
Popular Browser Automation Framework, using WebDriver, which supports all major browsers.
[](https://testingbot.com/features/automation/puppeteer)
### [Puppeteer](https://testingbot.com/features/automation/puppeteer)
Chrome DevTools based Automation Framework by Google. Supports Chrome and Edge browsers.
[](https://testingbot.com/features/automation/playwright)
### [Playwright](https://testingbot.com/features/automation/playwright)
Similar to Puppeteer, built by Microsoft, with support for Chrome and Edge.

## Instrument native, remote browsers with speed.
Take advantage of increased performance and speed with headless browsers. Test, scrape or fetch information from websites with real browsers. Feed data to your AI agents.
[Get started free](https://testingbot.com/users/sign_up)
## Parallel Sessions
Drastically improve your workflow by running sessions simultaneously. TestingBot provides single-use machines on Windows, Linux and macOS, optimized for speed and stability.
[Get started free](https://testingbot.com/users/sign_up)

## Video, screenshots & logs
Every browser comes with access to generated logs, monitoring, videos and screenshots.
[Get started free](https://testingbot.com/users/sign_up)


## Remote Browser Functions
Use TestingBot Functions to easily scrape URLs, automate actions, generate PDFs/screenshots and more.
[Read more](https://testingbot.com/support/functions)
### More reasons to love TestingBot
### 24/7 support
Got questions? Ask in the 24/7 in-app customer [chat support](https://testingbot.com#) or [send us an email](https://testingbot.com/contact/new). We are here to help you!
TestingBot Support
Hey 👋 How can we help?
I need support
### Trusted by over 14,000 teams
6M+
Tests
120k+
Users
400+
Enterprises
106
Countries
[Request a demo](https://testingbot.com/demo)
### Developer Documentation
Everything you need to integrate TestingBot into your workflow. Browse guides, API references and SDKs for web and mobile testing.
- [Quickstart for Playwright](https://testingbot.com/support/web-automate/playwright)
- [Run Puppeteer on TestingBot](https://testingbot.com/support/web-automate/puppeteer)
- [Functions: scrape, take screenshots and serverless functions](https://testingbot.com/support/functions)
- [Playwright Recorder](https://testingbot.com/support/web-automate/playwright/recorder)
[Explore Documentation](https://testingbot.com/support)
### Enterprise-grade Security
Star level 1
Certified
GDPR
Compliant
SAML SSO
Single Sign-On
99.99%
Uptime SLA
[Visit TestingBot Trust Center](https://trust.testingbot.com/)
### Ready to start your first headless browser session?
Please see the [Playwright documentation](https://testingbot.com/support/web-automate/playwright) to get started.
[View documentation](https://testingbot.com/support/web-automate/playwright)
Resources you may like
[](https://testingbot.com/resources/articles/automated-testing-with-puppeteer)
#### [Automated Testing with Puppeteer](https://testingbot.com/resources/articles/automated-testing-with-puppeteer)
Puppeteer combined with a test framework provides a great way to run automated browser tests. Follow this guide for more information.
[Read more](https://testingbot.com/resources/articles/automated-testing-with-puppeteer)
[](https://testingbot.com/resources/articles/playwright-visual-regression-testing)
#### [Visual Testing with Playwright](https://testingbot.com/resources/articles/playwright-visual-regression-testing)
Playwright provides automated browser testing. It offers a built-in feature to perform visual regression testing for your website.
[Read more](https://testingbot.com/resources/articles/playwright-visual-regression-testing)
[](https://testingbot.com/blog/puppeteer-cloud-testing)
#### [Puppeteer Testing in the Cloud](https://testingbot.com/blog/puppeteer-cloud-testing)
Start running Puppeteer tests in the cloud with TestingBot.
[Read more](https://testingbot.com/blog/puppeteer-cloud-testing)
---
URL: https://testingbot.com/features/screenshot-testing
# Automated Visual UI Regression Testing
Detect and fix visual issues on your webpages and mobile apps before they impact users. Leverage TestingBot's codeless visual UI testing to get instant alerts whenever a visual discrepancy is detected on your site.
[Get started free](https://testingbot.com/users/sign_up)[Request a demo](https://testingbot.com/demo)

Trusted by some of the world's most innovative companies
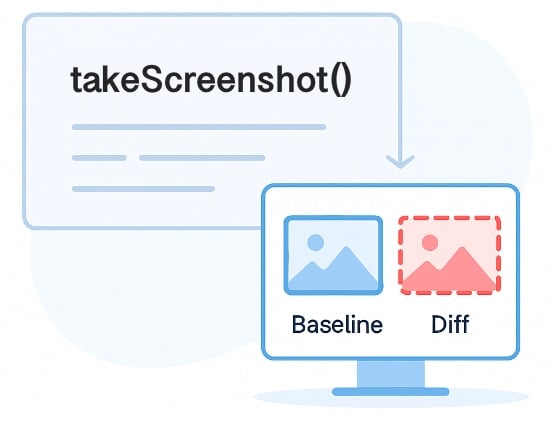
## Effortless Visual Regression Testing
Enable visual regression testing in your existing test framework with a single line of code. Quickly detect layout shifts, UI inconsistencies and visual regressions during your test.
Or enter the URLs you would like to monitor. TestingBot will take screenshots on regular intervals and alert you when a change is detected.
[Get started free](https://testingbot.com/users/sign_up)
## Review and Approve Visual Regressions
You and your team can review visual test results, approving or rejecting specific UI changes. Use a slider to compare the baseline and new screenshots or analyze a diff image highlighting the differences.
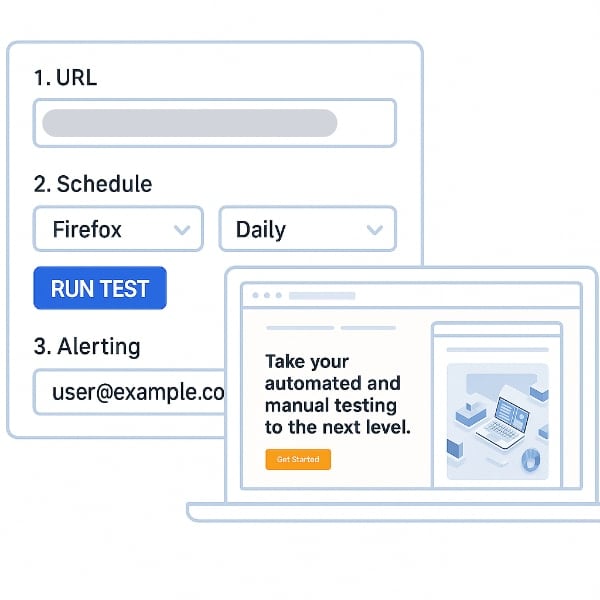
## Codeless Visual UI Testing
Start identifying UI defects on your website in minutes. Just enter your URL, select the browsers you want to test on, and set the testing frequency. Customize alerts to get notified instantly when issues are detected.
When a visual change occurs, you'll receive an instant alert with a screenshot and a diff image highlighting the differences. Keep your UI and UX flawless by catching unexpected changes early.
[Get started free](https://testingbot.com/users/sign_up)
## Optimized for accuracy
We built visual testing with accuracy in mind, preventing false-positives during the UI verification process.
### Freeze animations and videos
Animations and videos are temporarily frozen during the visual snapshot, to prevent false positives.
### Ignore UI elements
We ignore certain UI elements that are prone to change and are irrelevant to the screenshot.
### Pixel Perfect Screenshots
Take full-page, above the fold or chromeless screenshots of your website across hundreds of browsers and devices at once.
## Test Automation Frameworks
TestingBot's UI testing seamlessly integrates with Selenium, Appium, Puppeteer and Playwright. Just add a single line of code to enhance your existing tests with automated visual regression testing.
[](https://testingbot.com/support/visual-testing/automated/selenium)
### [Selenium](https://testingbot.com/support/visual-testing/automated/selenium)
Popular Browser Automation Framework, using WebDriver, which supports all major browsers.
[](https://testingbot.com/support/visual-testing/automated/appium)
### [Appium](https://testingbot.com/support/visual-testing/automated/appium)
Mobile Automation Framework, using WebDriver, runs on physical devices and simulators/emulators.
[](https://testingbot.com/support/visual-testing/automated/playwright)
### [Playwright](https://testingbot.com/support/visual-testing/automated/playwright)
Similar to Puppeteer, built by Microsoft, with support for Chrome and Edge.
[](https://testingbot.com/support/visual-testing/automated/puppeteer)
### [Puppeteer](https://testingbot.com/support/visual-testing/automated/puppeteer)
Chrome DevTools based Automation Framework by Google. Supports Chrome and Edge browsers.
## Frequently Asked Questions
### How can I use this to spot visual defects?
TestingBot performs automated pixel-by-pixel comparisons between an image that you marked as correct and a new screenshot that was just taken. If the amount of different pixels exceeds the threshold, the test is considered as failed.
This can happen when you deploy a new version of your website that has an incorrect CSS styling, positioning or is missing from the page. Catch visual bugs before these cause harm to the UX of your webpages.
### Why can’t functional tests cover visual problems?
You can test for dimensions, positioning and styling with regular functional tests. The disadvantage is that it will soon become a huge burden of checkpoints in your code.
Instead of doing the visual checks in your code, it is much more efficient to take snapshots and compare these. The visual results are also much more easily interpreted by developers and QA.
### When Should I Use Visual Testing?
Ideally you would run visual checks as part of your CI/CD pipeline. It could be run after each check-in of front-end code, making sure new code does not negatively impact your product.
### Can AI be used for visual testing?
Machine learning algorithms can be trained to discover visual differences. AI depends on trained data, so it may report false positives/negatives. It is not a Not a One-Size-Fits-All solution and often fails in comparison with exact pixel matching.
### How does Snapshot Testing work?
Snapshot Testing in the context of visual testing for UI on webpages, captures screenshots of the initial state of a webpage. It then compares them against subsequent renders. Tests are considered failed when one or more changes in visual appearance occur. This helps to ensure that UI elements remain consistent.
### Sign up for a Free Trial
Start visually testing your apps and websites with TestingBot.
[Start a free trial](https://testingbot.com/users/sign_up)
Resources you may like
[](https://testingbot.com/resources/articles/python-visual-testing)
#### [Visual Regression Testing with Python](https://testingbot.com/resources/articles/python-visual-testing)
Find out how to do automated visual UI testing with the power of Python and TestingBot.
[Read more](https://testingbot.com/resources/articles/python-visual-testing)
[](https://testingbot.com/resources/articles/angular-ui-testing)
#### [Angular UI Testing](https://testingbot.com/resources/articles/angular-ui-testing)
Learn more about using Visual UI Testing in combination with Cypress to test Angular UI apps.
[Read more](https://testingbot.com/resources/articles/angular-ui-testing)
[](https://testingbot.com/blog/visual-regression-testing)
#### [Visual Regression Testing](https://testingbot.com/blog/visual-regression-testing)
Learn about TestingBot's visual testing feature, allowing you to easily compare layouts across browsers and devices.
[Read more](https://testingbot.com/blog/visual-regression-testing)
---
URL: https://testingbot.com/features/automation/puppeteer
# Puppeteer Cloud Automation
Connect your Puppeteer scripts to TestingBot's cloud-based browser grid. Run Puppeteer tests on Chrome and Edge across multiple operating systems for seamless cross-browser automation.
[Get started free](https://testingbot.com/users/sign_up)[Request a demo](https://testingbot.com/demo)

Trusted by some of the world's most innovative companies
Platform Features
## Online Puppeteer Browser Grid
Connect your Puppeteer scripts with an online browser grid, consisting of over **50 different browser, OS and version combinations**. Run tests in headless or headful mode. Easily scale from 1 to +100 simultaneous sessions with Puppeteer.
### Parallel Testing
Run multiple Puppeteer tests simultaneously, shortening your total Puppeteer execution time.
### Test artifacts
Every test on TestingBot includes a video screencast of the device, along with logs and other generated artifacts.
### TestingBot Tunnel
Run Puppeteer tests against websites in a secure environment such as a private network, staging environment or local machine.
### Geolocation Testing
Run Puppeteer tests with TestingBot's built-in geo-location testing feature. Choose from up to 20 regions around the globe.
Fast Execution
## Parallel Testing
Run multiple Puppeteer tests simultaneously, shortening your total Puppeteer execution time.
[Get started free](https://testingbot.com/users/sign_up)

Framework Support
## Test Framework Integrations
TestingBot integrates with Puppeteer and popular test frameworks supporting Puppeteer, such as:
- [Jest](https://testingbot.com/support/web-automate/puppeteer/jest)
- [WebdriverIO](https://testingbot.com/support/web-automate/puppeteer/webdriverio)
- [PyTest](https://testingbot.com/support/web-automate/puppeteer/pytest)
Record Puppeteer scripts with the [Puppeteer Recorder](https://testingbot.com/support/web-automate/puppeteer/recorder). Run the recorded Puppeteer scripts on TestingBot's browser grid for maximum coverage.
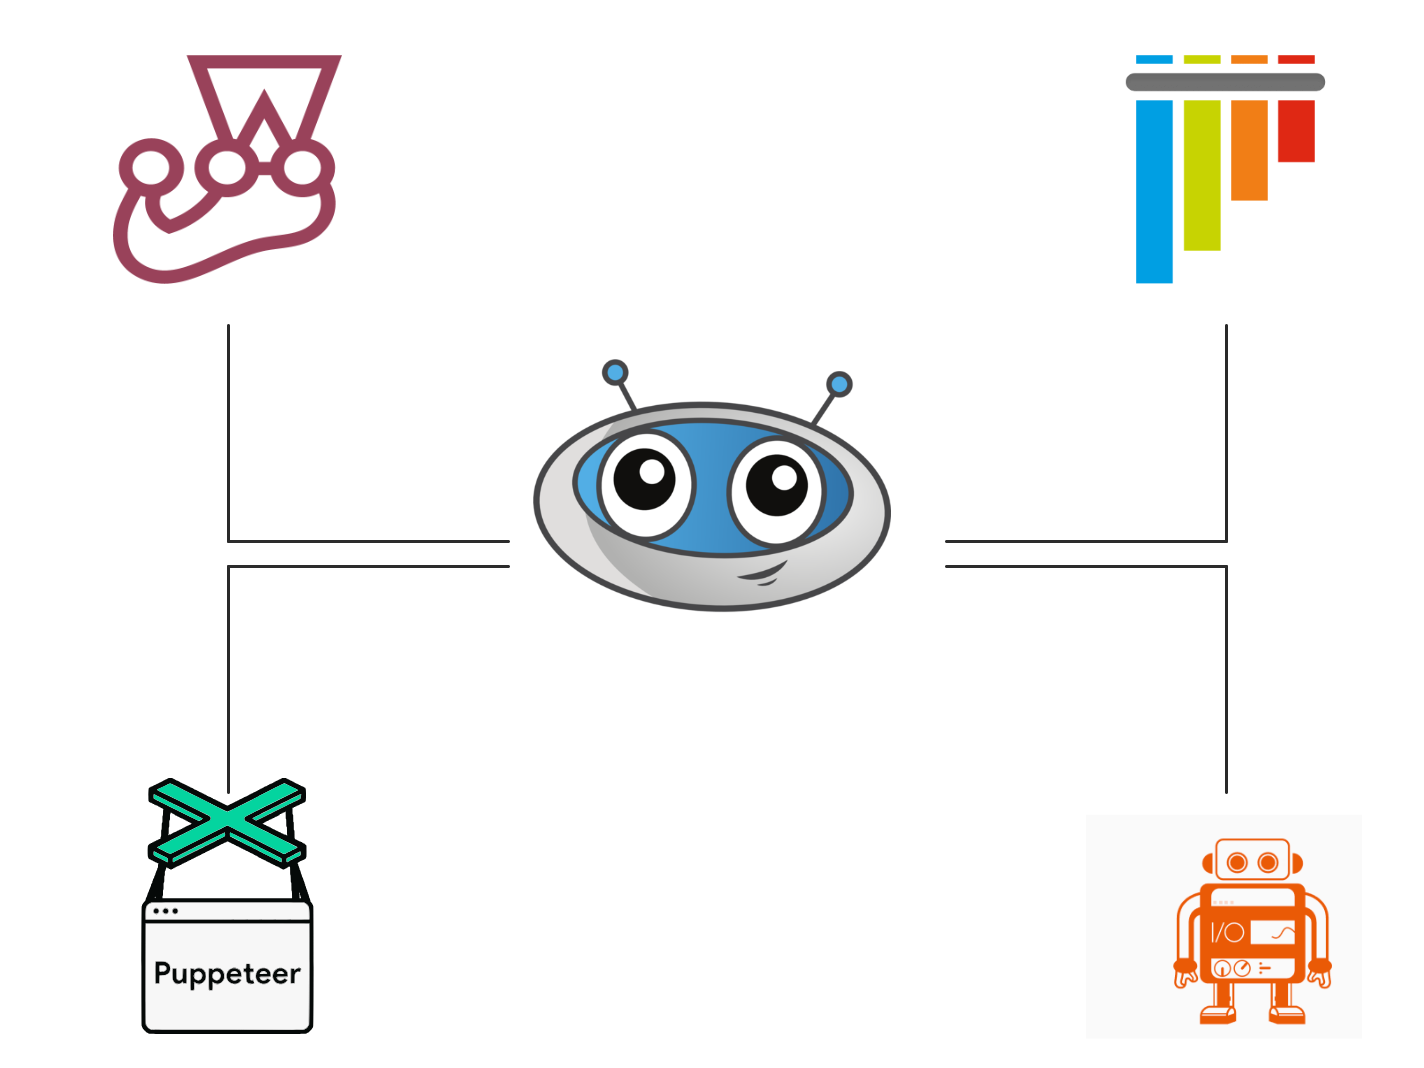
Continuous Integration
## Integrations with CI/CD services
TestingBot integrates with the most popular CI/CD services, including Jenkins, Bamboo, TeamCity, Circle CI, GitLab CI and more.
[

### Jenkins
](https://testingbot.com/support/integrations/ci-cd/jenkins)[

### Bamboo
](https://testingbot.com/support/integrations/ci-cd/bamboo)[

### TeamCity
](https://testingbot.com/support/integrations/ci-cd/teamcity)[

### CircleCI
](https://testingbot.com/support/integrations/ci-cd/circleci)[

### GitLab CI
](https://testingbot.com/support/integrations/ci-cd/gitlab)[

### GitHub
](https://testingbot.com/support/integrations/ci-cd/github-actions)

Secure Tunnel
## Test Staged Websites
Use the secure TestingBot Tunnel to easily test your staging and development environments across all browsers, ensuring seamless access behind firewalls or private networks.
Test data and websites from behind your firewall on the TestingBot cloud.
[Read more](https://testingbot.com/support/tunnel)
## Frequently Asked Questions
### Is Selenium better than Puppeteer?
Selenium and Puppeteer are both powerful browser automation tools, but they serve different needs. Puppeteer is a NodeJS library that provides fast, high-level control over Chrome and Chromium, making it a great choice for projects focused on headless browser testing or web scraping with JavaScript. It is known for its speed and reliability when testing in a Chromium-only environment.
Selenium, on the other hand, is a cross-browser testing framework that supports all major browsers, including Chrome, Firefox, Safari, Edge, and Internet Explorer. It allows you to write tests in multiple programming languages such as Java, Python, C#, Ruby and JavaScript, offering greater flexibility for diverse teams.
If your goal is to test across different browsers and environments, Selenium offers broader test coverage and long-standing industry support. If your project is JavaScript-based and you only need to test in Chrome/Chromium, Puppeteer might be faster and easier to set up.
At TestingBot, we support both Selenium and Puppeteer, allowing you to choose the best tool for your specific testing needs.
### What is Puppeteer Testing?
Puppeteer testing refers to using Puppeteer, a NodeJS library developed by Google, to automate browser tasks for web application testing. Puppeteer provides a high-level API to control Chrome or Chromium browsers, allowing developers and QA teams to script actions like clicking buttons, filling forms, taking screenshots and generating PDFs.
### How do I run Puppeteer tests in the cloud?
You can run Puppeteer tests in the cloud using a service like TestingBot. Instead of running tests locally, you upload your tests or point your script to TestingBot’s cloud grid, which spins up real browsers and devices. This allows you to scale tests across multiple environments and get faster results, without managing your own infrastructure.
### More reasons to love TestingBot
### 24/7 support
Got questions? Ask in the 24/7 in-app customer [chat support](https://testingbot.com#) or [send us an email](https://testingbot.com/contact/new). We are here to help you!
TestingBot Support
Hey 👋 How can we help?
I need support
### Trusted by over 14,000 teams
6M+
Tests
120k+
Users
400+
Enterprises
106
Countries
[Request a demo](https://testingbot.com/demo)
### Developer Documentation
Everything you need to integrate TestingBot into your workflow. Browse guides, API references and SDKs for web and mobile testing.
- [Puppeteer Testing documentation](https://testingbot.com/support/web-automate/puppeteer)
- [Puppeteer Recorder](https://testingbot.com/support/web-automate/puppeteer/recorder)
- [CI/CD integration](https://testingbot.com/support/integrations/ci-cd)
- [Puppeteer & WebdriverIO](https://testingbot.com/support/web-automate/puppeteer/webdriverio)
[Explore Documentation](https://testingbot.com/support)
### Enterprise-grade Security
Star level 1
Certified
GDPR
Compliant
SAML SSO
Single Sign-On
99.99%
Uptime SLA
[Visit TestingBot Trust Center](https://trust.testingbot.com/)
### Ready to start Puppeteer Testing?
To get started, please see our [Puppeteer Testing](https://testingbot.com/support/web-automate/puppeteer) documentation.
[Start a free trial](https://testingbot.com/users/sign_up)
Resources you may like
[](https://testingbot.com/resources/articles/automated-testing-with-puppeteer)
#### [Automated Testing with Puppeteer](https://testingbot.com/resources/articles/automated-testing-with-puppeteer)
Puppeteer combined with a test framework provides a great way to run automated browser tests. Follow this guide for more information.
[Read more](https://testingbot.com/resources/articles/automated-testing-with-puppeteer)
[](https://testingbot.com/blog/puppeteer-cloud-testing)
#### [Puppeteer Testing in the Cloud](https://testingbot.com/blog/puppeteer-cloud-testing)
Start running Puppeteer tests in the cloud with TestingBot.
[Read more](https://testingbot.com/blog/puppeteer-cloud-testing)
---
URL: https://testingbot.com/features/automation/playwright
# Playwright Cloud Automation
Connect your Playwright scripts to a cloud-based browser grid and run tests across multiple browsers and operating systems. Scale your testing effortlessly with real browser environments.
[Get started free](https://testingbot.com/users/sign_up)[Request a demo](https://testingbot.com/demo)

Trusted by some of the world's most innovative companies
Platform Features
## Extensive Online Browser Grid
Connect your Playwright scripts with an online browser grid, consisting of over **100 different browser, OS and version combinations**. Run tests in headless or headful mode. Easily scale from 1 to +100 simultaneous tests with Playwright.
### Parallel Testing
Run Playwright tests at scale with a cloud-based grid. Drastically shorten your total Playwright execution time with TestingBot.
### Test artifacts
Every test on TestingBot includes a video screencast of the device, along with logs and other generated artifacts.
### TestingBot Tunnel
Run Playwright tests against websites in a secure environment such as a private network, staging environment or local machine.
### Geolocation Testing
Run Playwright tests with TestingBot's built-in geo-location testing feature. Choose from up to 20 regions around the globe.
Fast Execution
## Parallel Testing
Run Playwright tests at scale with a cloud-based grid. Drastically shorten your total Playwright execution time with TestingBot.
[Get started free](https://testingbot.com/users/sign_up)

Framework Support
## Test Framework Integrations
Integrate TestingBot with Playwright and popular test frameworks, such as:
- [Jest](https://testingbot.com/support/web-automate/playwright/jest)
- [Mocha](https://testingbot.com/support/web-automate/playwright/mocha)
- [PyTest](https://testingbot.com/support/web-automate/playwright/pytest)
- [Playwright Test](https://testingbot.com/support/web-automate/playwright/playwright-test)
Use the [Playwright Recorder](https://testingbot.com/support/web-automate/playwright/recorder) to generate Playwright scripts without writing code. Run the recorded tests on the TestingBot browser grid.
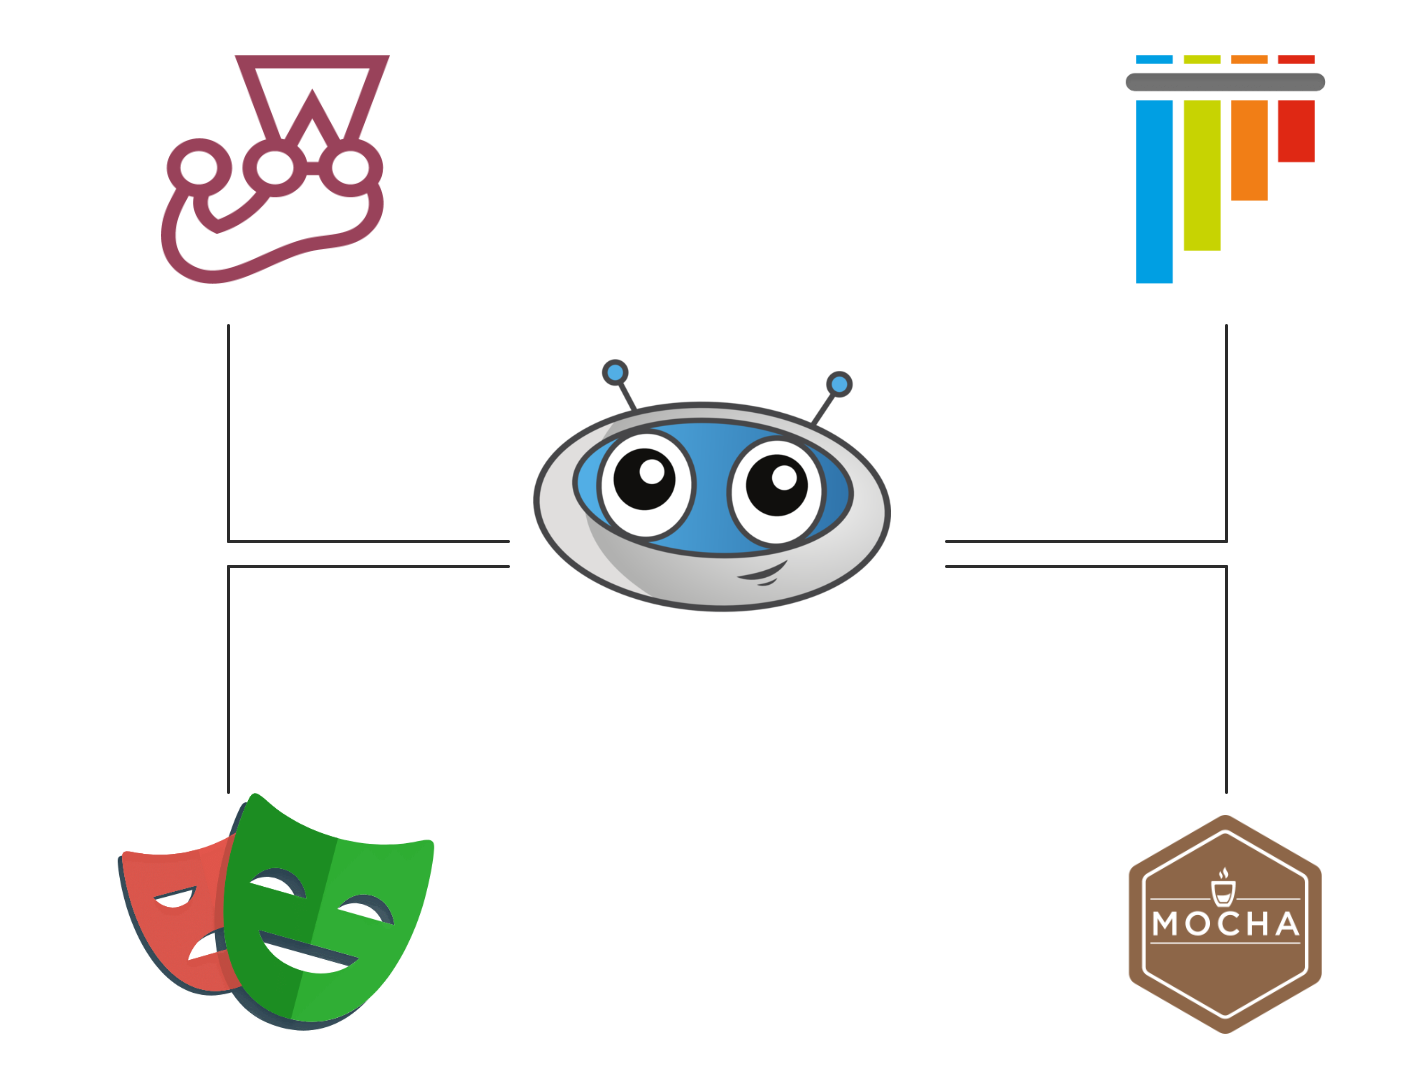
Continuous Integration
## Integrations with CI/CD services
TestingBot integrates with the most popular CI/CD services, including Jenkins, Bamboo, TeamCity, Circle CI, GitLab CI and more.
[

### Jenkins
](https://testingbot.com/support/integrations/ci-cd/jenkins)[

### Bamboo
](https://testingbot.com/support/integrations/ci-cd/bamboo)[

### TeamCity
](https://testingbot.com/support/integrations/ci-cd/teamcity)[

### CircleCI
](https://testingbot.com/support/integrations/ci-cd/circleci)[

### GitLab CI
](https://testingbot.com/support/integrations/ci-cd/gitlab)[

### GitHub
](https://testingbot.com/support/integrations/ci-cd/github-actions)

Secure Tunnel
## Test Staged Websites
Use the secure TestingBot Tunnel to easily test your staging and development environments across all browsers, ensuring seamless access behind firewalls or private networks.
Test data and websites from behind your firewall on the TestingBot cloud.
[Read more](https://testingbot.com/support/tunnel)
Why TestingBot
## TestingBot vs
Microsoft Playwright Testing (MPT)
While Microsoft offers its own cloud-based Playwright testing service—Microsoft Playwright Testing (MPT)—there are several key advantages to using TestingBot:
### Predictable pricing
TestingBot provides plans with unlimited test minutes, unlike MPT which charges per minute and even adds separate charges for reporting.
### Cross-platform support
TestingBot allows Playwright testing on Windows, Linux, and macOS. MPT currently supports only Windows and Linux.
### Real browser testing
TestingBot uses real Chrome browsers, while MPT uses Chromium. With Chromium, you're not testing on the exact browsers your users are using.
### Trusted experience
TestingBot has been providing reliable automated testing since 2012. MPT is a newer, smaller feature within the Microsoft ecosystem.
### Test behind firewalls
TestingBot supports local testing via the TestingBot Tunnel, allowing secure testing of private or staging environments. MPT does not offer this feature.
## Frequently Asked Questions
### How does Playwright differ from Puppeteer?
Both Playwright and Puppeteer are browser automation tools, but Playwright offers native support for all major browsers (Chrome, Firefox, Safari, Edge), while Puppeteer mainly focuses on Chrome and Chromium.
Playwright also provides features like network interception, multi-page/tab support, and out-of-the-box mobile emulation, making it more flexible for complex testing scenarios.
### Can Playwright run tests on real devices?
By default, Playwright supports device emulation, which mimics the behavior of mobile devices. TestingBot supports [running Playwright tests on real Android devices](https://testingbot.com/support/web-automate/playwright/mobile).
### How do I integrate Playwright with CI/CD?
Playwright works seamlessly with popular CI/CD systems such as GitHub Actions, GitLab CI, Jenkins, CircleCI, Travis CI and Bitbucket Pipelines. TestingBot provides ready-made examples and integrations to help you easily connect Playwright with your build pipeline and run tests automatically on every push or pull request.
### More reasons to love TestingBot
### 24/7 support
Got questions? Ask in the 24/7 in-app customer [chat support](https://testingbot.com#) or [send us an email](https://testingbot.com/contact/new). We are here to help you!
TestingBot Support
Hey 👋 How can we help?
I need support
### Trusted by over 14,000 teams
6M+
Tests
120k+
Users
400+
Enterprises
106
Countries
[Request a demo](https://testingbot.com/demo)
### Developer Documentation
Everything you need to integrate TestingBot into your workflow. Browse guides, API references and SDKs for web and mobile testing.
- [Playwright Testing documentation](https://testingbot.com/support/web-automate/playwright)
- [Playwright Recorder](https://testingbot.com/support/web-automate/playwright/recorder)
- [Visual regression testing with Playwright](https://testingbot.com/support/web-automate/playwright/visual-regression-testing)
- [Mobile Playwright Testing](https://testingbot.com/support/web-automate/playwright/mobile)
[Explore Documentation](https://testingbot.com/support)
### Enterprise-grade Security
Star level 1
Certified
GDPR
Compliant
SAML SSO
Single Sign-On
99.99%
Uptime SLA
[Visit TestingBot Trust Center](https://trust.testingbot.com/)
Resources you may like
[](https://testingbot.com/resources/articles/playwright-visual-regression-testing)
#### [Visual Testing with Playwright](https://testingbot.com/resources/articles/playwright-visual-regression-testing)
Playwright provides automated browser testing. It offers a built-in feature to perform visual regression testing for your website.
[Read more](https://testingbot.com/resources/articles/playwright-visual-regression-testing)
[](https://testingbot.com/resources/articles/playwright-recorder)
#### [Record tests with Playwright](https://testingbot.com/resources/articles/playwright-recorder)
Learn how to use a Playwright Recorder to easily record tests.
[Read more](https://testingbot.com/resources/articles/playwright-recorder)
### Ready to start Playwright Testing?
Please see our [Playwright Testing](https://testingbot.com/support/web-automate/playwright) documentation on how to get started.
[Start a free trial](https://testingbot.com/users/sign_up)
---
URL: https://testingbot.com/features/automation/selenium
# Selenium Cloud Automation
Supercharge your Selenium Test Automation with a cloud-based browser and device grid, enabling faster, scalable testing across multiple browsers and devices simultaneously. Connect your Selenium tests with a browser grid of +5200 desktop and mobile browsers.
[Get started free](https://testingbot.com/users/sign_up)[Request a demo](https://testingbot.com/demo)

Trusted by some of the world's most innovative companies
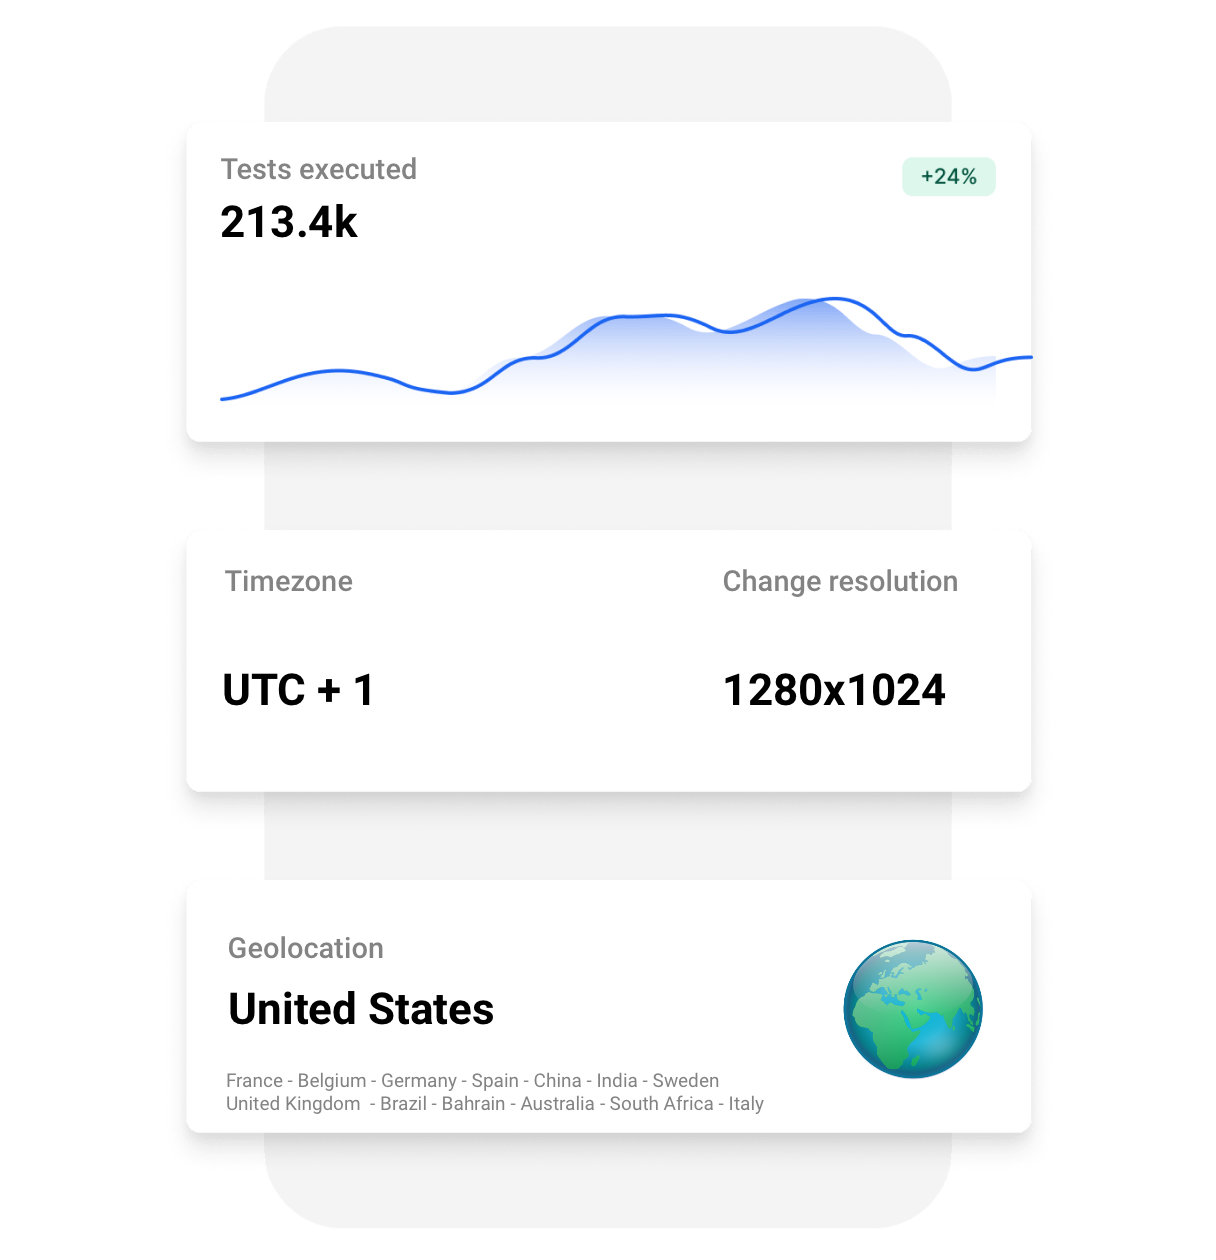
Test Results
## Test Results
Every Selenium test result includes screenshots, logs, and videos.
Easily track test status, access artifacts via REST API, and integrate with your existing tools for seamless reporting and analysis.
Customize Selenium sessions by specifying various options, including:
-
All Selenium versions supported
-
Custom Screen Resolution
-
Custom Timezone
-
Change Geolocation
-
Browser startup flags and [more](https://testingbot.com/support/web-automate/selenium/test-options)
Framework Support
## Selenium Integrations
TestingBot integrates with various test frameworks and services. Easily convert your existing Selenium tests and connect with your favorite CI/CD.
### [C#](https://testingbot.com/support/web-automate/selenium/csharp)
- [NUnit](https://testingbot.com/support/web-automate/selenium/csharp/nunit)
- [MSTest](https://testingbot.com/support/web-automate/selenium/csharp/mstest)
- [xUnit](https://testingbot.com/support/web-automate/selenium/csharp/xunit)
- [SpecFlow](https://testingbot.com/support/web-automate/selenium/csharp/specflow)
### [NodeJS](https://testingbot.com/support/web-automate/selenium/nodejs)
- [NightWatch](https://testingbot.com/support/web-automate/selenium/nodejs/nightwatch)
- [WebDriverIO](https://testingbot.com/support/web-automate/selenium/nodejs/webdriverio)
- [Protractor](https://testingbot.com/support/web-automate/selenium/nodejs/protractor)
- [TestCafe](https://testingbot.com/support/web-automate/selenium/nodejs/testcafe)
### [Java](https://testingbot.com/support/web-automate/selenium/java)
- [JUnit](https://testingbot.com/support/web-automate/selenium/java/junit)
- [Parallel JUnit](https://testingbot.com/support/web-automate/selenium/java/parallel-junit)
- [TestNG](https://testingbot.com/support/web-automate/selenium/java/testng)
- [Selenide](https://testingbot.com/support/web-automate/selenium/java/selenide)
### [PHP](https://testingbot.com/support/web-automate/selenium/php)
- [Behat](https://testingbot.com/support/web-automate/selenium/php/behat-mink)
- [Codeception](https://testingbot.com/support/web-automate/selenium/php/codeception)
- [PHPUnit](https://testingbot.com/support/web-automate/selenium/php/phpunit)
- [SimpleTest](https://testingbot.com/support/web-automate/selenium/php/simpletest)
### [Python](https://testingbot.com/support/web-automate/selenium/python)
- [Behave](https://testingbot.com/support/web-automate/selenium/python/behave)
- [Helium](https://testingbot.com/support/web-automate/selenium/python/helium)
- [PyUnit](https://testingbot.com/support/web-automate/selenium/python/pyunit)
- [PyTest](https://testingbot.com/support/web-automate/selenium/python/pytest)
### [Ruby](https://testingbot.com/support/web-automate/selenium/ruby)
- [Cucumber](https://testingbot.com/support/web-automate/selenium/ruby/cucumber)
- [RSpec](https://testingbot.com/support/web-automate/selenium/ruby/rspec)
- [Test::Unit](https://testingbot.com/support/web-automate/selenium/ruby/testunit)
- [Minitest](https://testingbot.com/support/web-automate/selenium/ruby/minitest)
Location Features
## Geolocation Testing
Perform **geolocation testing** in various regions across the world. Test Geo Targeting, Geo Blocking and Geo Localization in 10 countries, including Australia, Belgium, United Kingdom, United States, Germany, France, Spain, China and more.
Secure Infrastructure
## Accurate Testing
Run your tests in a secure datacenter on real operating systems. Each test runs in an isolated, single-use VM, ensuring high performance and minimal flakiness. VMs are automatically destroyed after each test for maximum security and reliability.
Our infrastructure is optimized for performance and low test flakiness.
[Get started free](https://testingbot.com/users/sign_up)
Fast Execution
## Parallel Testing
Drastically shorten your total Selenium test duration by running tests simultaneously. TestingBot provides single-use VMs on Windows, Linux and macOS, optimized for speed and stability.
[Get started free](https://testingbot.com/users/sign_up)

Continuous Integration
## Integrations with CI/CD services
TestingBot integrates with the most popular CI/CD services, including Jenkins, Bamboo, TeamCity, Circle CI, GitLab CI and more.
[

### Jenkins
](https://testingbot.com/support/integrations/ci-cd/jenkins)[

### Bamboo
](https://testingbot.com/support/integrations/ci-cd/bamboo)[

### TeamCity
](https://testingbot.com/support/integrations/ci-cd/teamcity)[

### CircleCI
](https://testingbot.com/support/integrations/ci-cd/circleci)[

### GitLab CI
](https://testingbot.com/support/integrations/ci-cd/gitlab)[

### GitHub
](https://testingbot.com/support/integrations/ci-cd/github-actions)
Device Cloud
## Mobile Testing
Test on physical iOS and Android mobile devices, or iOS simulators and Android emulators. Test your website functionality and UI on various mobile devices and versions, with geolocation support.
[View Devices](https://testingbot.com/support/app-automate/devices)

Huawei P40

iPhone Air

Pixel 10

iPhone 17

Pixel 9

Galaxy S25

Secure Tunnel
## Test Staged Websites
Use the secure TestingBot Tunnel to easily test your staging and development environments across all browsers, ensuring seamless access behind firewalls or private networks.
Test data and websites from behind your firewall on the TestingBot cloud.
[Read more](https://testingbot.com/support/tunnel)
### More reasons to love TestingBot
### 24/7 support
Got questions? Ask in the 24/7 in-app customer [chat support](https://testingbot.com#) or [send us an email](https://testingbot.com/contact/new). We are here to help you!
TestingBot Support
Hey 👋 How can we help?
I need support
### Trusted by over 14,000 teams
6M+
Tests
120k+
Users
400+
Enterprises
106
Countries
[Request a demo](https://testingbot.com/demo)
### Developer Documentation
Everything you need to integrate TestingBot into your workflow. Browse guides, API references and SDKs for web and mobile testing.
- [Selenium Quickstart Documentation](https://testingbot.com/support/web-automate/selenium)
- [Selenium 4](https://testingbot.com/support/web-automate/selenium/selenium4)
- [CI/CD integration](https://testingbot.com/support/integrations/ci-cd)
- [Selenium BiDi](https://testingbot.com/support/web-automate/selenium/selenium-bidi)
[Explore Documentation](https://testingbot.com/support)
### Enterprise-grade Security
Star level 1
Certified
GDPR
Compliant
SAML SSO
Single Sign-On
99.99%
Uptime SLA
[Visit TestingBot Trust Center](https://trust.testingbot.com/)
### Ready to accelerate your Selenium Testing?
Please see our [Selenium Testing](https://testingbot.com/support/web-automate/selenium) documentation on how to get started.
[Start a free trial](https://testingbot.com/users/sign_up)
Resources you may like
[](https://testingbot.com/resources/articles/generative-ai-selenium)
#### [Selenium and Generative AI](https://testingbot.com/resources/articles/generative-ai-selenium)
Generate realistic looking test data to be used with your Selenium Automated Tests.
[Read more](https://testingbot.com/resources/articles/generative-ai-selenium)
[](https://testingbot.com/blog/selenium-4)
#### [Selenium 4: what's new](https://testingbot.com/blog/selenium-4)
Learn more about what is new Selenium 4.
[Read more](https://testingbot.com/blog/selenium-4)
[](https://testingbot.com/blog/webdriver-bidi)
#### [Selenium WebDriver BiDi](https://testingbot.com/blog/webdriver-bidi)
WebDriver BiDi support is now available on TestingBot. Learn how to use this exciting new improvement with your Selenium tests.
[Read more](https://testingbot.com/blog/webdriver-bidi)
---
URL: https://testingbot.com/features/automation/cypress
# Cypress Cloud Automation
Scale your Cypress Tests with TestingBot. Functional and cross browser testing with Cypress on +40 browsers in the cloud.
[Get started free](https://testingbot.com/users/sign_up)[Request a demo](https://testingbot.com/demo)

Trusted by some of the world's most innovative companies
Cross-Browser Testing
## Cross-Browser testing with Cypress
Run Cypress tests on +40 browsers in the cloud. TestingBot provides Windows and macOS testing for Cypress on multiple browser versions.

### Google Chrome
66 & above

### Mozilla Firefox
60 & above

### Microsoft Edge
80 & above
Getting Started
## How does it work?
Get started with Cypress cloud testing in three simple steps
1
### Install the Runner
Install the TestingBot Cypress CLI to trigger tests and receive test results.
$ npm i testingbot-cypress-cli
2
### Configure the Runner
Configure the JSON file to specify the location of your Cypress test files and other additional options.
[Learn more](https://testingbot.com/support/web-automate/cypress#configure)
3
### Run Cypress Tests
Trigger the tests via the CLI runner. Your Cypress tests will run in parallel and appear in the TestingBot dashboard, with logs and a video.
Global Testing
## Geolocation Testing
Perform **geolocation testing** in various regions across the world. Test Geo Targeting, Geo Blocking and Geo Localization in 10 countries, including Australia, Belgium, United Kingdom, United States, Germany, France, Spain, China and more.

Test Artifacts
## Test Results
Every Cypress test result includes screenshots, logs, and videos.
Easily track test status, access artifacts via REST API, and integrate with your existing tools for seamless reporting and analysis.
Customize Cypress sessions by specifying various options, including:
- Various [Cypress versions](https://testingbot.com/support/web-automate/cypress/version) supported
- Custom Screen Resolution
- Custom Timezone
- Change Geolocation
Fast Execution
## Parallel Testing with Cypress
Speed up your release cycles with Cypress Parallel Testing on TestingBot's Cloud. Run Cypress tests in parallel on multiple browsers, versions and operating systems.
10x
Faster Testing
100+
Concurrent Tests
[Get started free](https://testingbot.com/users/sign_up)

## Frequently Asked Questions
### What is the advantage of running Cypress in the Cloud?
TestingBot provides, and maintains, the infrastructure to run Cypress tests in parallel on multiple browsers, versions and operating systems.
You no longer need to maintain, patch and upgrade virtual machines or docker images.
TestingBot offers high-scale parallelization with easy integration in your CI/CD pipeline.
All Cypress tests come with debug logs, screenshots and video.
### Is it possible to integrate Cypress testing in my CI/CD pipeline?
Starting Cypress tests from your CI/CD is very similar to how you would run the tests from your local machine.
Install the TestingBot-Cypress CLI, provide the necessary configuration and your CI/CD server can run Cypress tests on TestingBot.
The built-in JUnit reporter in the TestingBot-Cypress CLI can show success and failure from inside your CI/CD pipeline.
### Can I run Cypress tests on multiple browsers?
TestingBot allows you to run Cypress tests on multiple browsers, including 40+ versions of Chrome, Edge and Firefox on Windows and macOS.
Specify the browser, version and OS in the testingbot.json file and start your tests.
### Where can I see the Cypress test results?
The Cypress test results will appear in realtime through the TestingBot-Cypress CLI.
When the tests have finished, you can see the Cypress test results in the TestingBot dashboard, together with screenshots, logs and a video.
Resources you may like
[](https://testingbot.com/resources/articles/how-to-debug-cypress-tests)
#### [Tutorial on debugging Cypress tests](https://testingbot.com/resources/articles/how-to-debug-cypress-tests)
This article will focus on how to debug your Cypress tests with Cypress debugger and other developer tools.
[Read more](https://testingbot.com/resources/articles/how-to-debug-cypress-tests)
[](https://testingbot.com/resources/articles/cypress-cucumber-testing)
#### [Cypress and Cucumber Browser Testing](https://testingbot.com/resources/articles/cypress-cucumber-testing)
Cypress and Cucumber is a great combination to write clean and precise end-to-end browser tests.
[Read more](https://testingbot.com/resources/articles/cypress-cucumber-testing)
[](https://testingbot.com/blog/testingbot-cypress)
#### [Run Cypress tests on TestingBot's Browser Grid](https://testingbot.com/blog/testingbot-cypress)
Run Cypress Automated tests on TestingBot's Browser grid.
[Read more](https://testingbot.com/blog/testingbot-cypress)
### More reasons to love TestingBot
### 24/7 support
Got questions? Ask in the 24/7 in-app customer [chat support](https://testingbot.com#) or [send us an email](https://testingbot.com/contact/new). We are here to help you!
TestingBot Support
Hey 👋 How can we help?
I need support
### Trusted by over 14,000 teams
6M+
Tests
120k+
Users
400+
Enterprises
106
Countries
[Request a demo](https://testingbot.com/demo)
### Developer Documentation
Everything you need to integrate TestingBot into your workflow. Browse guides, API references and SDKs for web and mobile testing.
- [Quickstart tutorials for Cypress Cloud Testing](https://testingbot.com/support/web-automate/cypress)
- [Cypress DevTools Recorder](https://testingbot.com/support/web-automate/cypress/devtools)
- [CI/CD integration setup guides](https://testingbot.com/support/integrations)
- [List of browsers for Cypress](https://testingbot.com/support/web-automate/cypress/capabilities)
[Explore Documentation](https://testingbot.com/support)
### Enterprise-grade Security
Star level 1
Certified
GDPR
Compliant
SAML SSO
Single Sign-On
99.99%
Uptime SLA
[Visit TestingBot Trust Center](https://trust.testingbot.com/)
### Ready to start Cypress Testing?
To get started, please see our [Cypress Testing](https://testingbot.com/support/web-automate/cypress) documentation.
[Start a free trial](https://testingbot.com/users/sign_up)
---
URL: https://testingbot.com/features/automation/espresso
# Android Espresso Automation
Scale your Espresso Tests with TestingBot. Run Espresso tests for your native and hybrid apps across physical Android devices and Android emulators.
[Get started free](https://testingbot.com/users/sign_up)[Request a demo](https://testingbot.com/demo)

Trusted by some of the world's most innovative companies
## How does it work?
1
### Build your app & tests
Create an .apk or .aab file of your native Android app, and a .apk file of your Espresso tests. You can use Android Studio or Gradle to create these files, in either Java or Kotlin.
2
### Upload app and tests
Upload your mobile app (.apk or .aab) and tests (.apk) via the TestingBot REST API.
[Learn more](https://testingbot.com/support/app-automate/espresso#upload)
3
### Run Espresso Tests
Trigger the tests via an API call. Your tests will appear in the TestingBot dashboard, with video, logs and more.
Fast Execution
## Parallel Testing with Espresso
Speed up your release cycles with Parallel Testing on Espresso Real Android Devices. Upload multiple apps and execute tests simultaneously for quicker, more efficient results.
[Get started free](https://testingbot.com/users/sign_up)

Java & Kotlin
## Test Android apps with Java and Kotlin
Test your Android apps with Java and Kotlin on real devices with cloud-based Espresso automation.
Device Cloud
## Espresso Real Device Cloud
Test on real Android devices on the TestingBot cloud platform with Espresso. TestingBot provides devices from Android 4.4 up to Android 15.
[View Devices](https://testingbot.com/support/app-automate/devices)

Huawei P40

Pixel 10

Pixel 9

Galaxy S25

Redmi Note 13

Galaxy A55
Continuous Integration
## CI/CD Integration
Integrate TestingBot Espresso Testing with your CI/CD
[

### Jenkins
](https://testingbot.com/support/integrations/ci-cd/jenkins)[

### Bamboo
](https://testingbot.com/support/integrations/ci-cd/bamboo)[

### TeamCity
](https://testingbot.com/support/integrations/ci-cd/teamcity)[

### CircleCI
](https://testingbot.com/support/integrations/ci-cd/circleci)[

### GitLab CI
](https://testingbot.com/support/integrations/ci-cd/gitlab)[

### GitHub
](https://testingbot.com/support/integrations/ci-cd/github-actions)
Enterprise
## Private Device Cloud
With Private Device Cloud, we take care of the setup, configuration and maintenance of dedicated devices exclusively for your company.
Select your preferred devices, and we will make them available in our data center for seamless testing.
[Learn more](https://testingbot.com/enterprise/private-device-cloud)

Huawei P40
Private Device

Pixel 10
Private Device

Pixel 9
Private Device

Galaxy S25
Private Device

Redmi Note 13
Private Device

Galaxy A55
Private Device
## Frequently Asked Questions
### What is the advantage of running Android Espresso tests in the Cloud?
By running Android Espresso tests on TestingBot, you can run tests in parallel on multiple devices and emulators at once.
Running tests in parallel will drastically shorten the total test duration.
TestingBot offers a variety of Android devices, including Samsung, Pixel, Oppo and other brands.
### Is it possible to integrate Android Espresso testing in my CI/CD pipeline?
You can easily add the upload step and run step in your CI/CD pipeline.
As part of your CI/CD, you can then run the Android Espresso tests on TestingBot.
Use the JUnit report XML functionality that TestingBot provides to integrate the test results in your CI/CD.
### What other options are available during Espresso testing?
You can change the network speed, language and locale of the device, change the GeoIP location and more.
The Espresso filters are all available, so you can choose which tests you want to run.
### Where can I see the Espresso test results?
The Espresso test results will appear in the TestingBot dashboard.
You can use the REST API as well to fetch the results.
### More reasons to love TestingBot
### 24/7 support
Got questions? Ask in the 24/7 in-app customer [chat support](https://testingbot.com#) or [send us an email](https://testingbot.com/contact/new). We are here to help you!
TestingBot Support
Hey 👋 How can we help?
I need support
### Trusted by over 14,000 teams
6M+
Tests
120k+
Users
400+
Enterprises
106
Countries
[Request a demo](https://testingbot.com/demo)
### Developer Documentation
Everything you need to integrate TestingBot into your workflow. Browse guides, API references and SDKs for web and mobile testing.
- [Quickstart tutorials for Espresso Cloud Testing](https://testingbot.com/support/app-automate/espresso)
- [Localization testing with Espresso](https://testingbot.com/support/app-automate/espresso/set-localization-options)
- [CI/CD integration setup guides](https://testingbot.com/support/integrations/ci-cd)
- [Taking screenshots with Espresso](https://testingbot.com/support/app-automate/espresso/screenshots)
[Explore Documentation](https://testingbot.com/support)
### Enterprise-grade Security
Star level 1
Certified
GDPR
Compliant
SAML SSO
Single Sign-On
99.99%
Uptime SLA
[Visit TestingBot Trust Center](https://trust.testingbot.com/)
### Ready to start Espresso Testing?
To get started, please see our [Espresso Testing](https://testingbot.com/support/app-automate/espresso) documentation.
[Start a free trial](https://testingbot.com/users/sign_up)
Resources you may like
[](https://testingbot.com/resources/articles/android-espresso-testing)
#### [Android Espresso Tutorial](https://testingbot.com/resources/articles/android-espresso-testing)
Learn more about Android Espresso Testing in this tutorial.
[Read more](https://testingbot.com/resources/articles/android-espresso-testing)
---
URL: https://testingbot.com/features/automation/maestro
# Maestro Cloud Testing
Run Maestro Tests twice as fast with TestingBot at ⅓ the cost. iOS simulators, Android emulators and real devices with zero setup.
[Get started free](https://testingbot.com/users/sign_up)[Request a demo](https://testingbot.com/demo)
https://www.youtube.com/embed/MMWCkBgXFOU
Trusted by some of the world's most innovative companies
## Drop-in Replacement for Maestro Cloud
Switch from Maestro Cloud CLI to TestingBot in seconds. Simply replace `maestro cloud` with `testingbot maestro`
Android Flow Example
-`maestro cloud android.apk flow.yaml`
+`testingbot maestro android.apk flow.yaml`
### Quick Start
$ npm install -g testingbot-cli
$ testingbot maestro app.apk ./flows \
--device "Pixel 8" \
--deviceVersion "14"
### Advanced Options
$ testingbot maestro app.apk ./flows \
-e API_URL=https://staging.example.com
$ testingbot maestro app.apk ./flows \
--include-tags "smoke,critical"
### CLI Options
| Option | Description |
| --- | --- |
| --device | Device name (e.g., "Pixel 8", "iPhone 15") |
| --real-device | Target a physical device (iOS or Android) |
| --deviceVersion | OS version (e.g., "14" for Android, "17.0" for iOS) |
| --maestro-version | Specify Maestro version (e.g., "2.0.10") |
| -e, --env | Pass environment variables to your tests |
| --include-tags | Run only flows with specified tags |
| --exclude-tags | Skip flows with specified tags |
| --name | Custom name for your test run |
| --locale | Set device locale (e.g., "de\_DE", "fr\_FR") |
[View all CLI options](https://testingbot.com/support/app-automate/maestro/options)
[Get Started Free](https://testingbot.com/users/sign_up)
## How can I perform Maestro Cloud Testing?
1
### Upload your mobile app
Upload your mobile app (.apk, .aab or .zip) through CLI, or via the TestingBot REST API.
2
### Upload Maestro Flows
Upload your Maestro test flows.
[Learn more](https://testingbot.com/support/app-automate/maestro)
3
### Run Maestro Tests
Run your Maestro flows in parallel. Flows appear in the TestingBot dashboard with steps, screenshots and video recordings.
## TestingBot vs Other Maestro Cloud Providers
See why TestingBot is the better choice for your Maestro testing needs
| Feature |
TestingBot ✨ Winner
|
Maestro Cloud
|
DeviceCloud
|
| --- | --- | --- | --- |
| 💰 Pricing | 1/3 the cost | 3x more expensive | Pay per test run |
| 📱 Real Physical Devices (iOS and Android) | | | |
| 📲 iPhone/iPad Simulators | | | Pay extra for specific iOS versions and devices |
| 🤖 Android Emulators with Google Play APIs | Full support | Limited | Pay extra |
| 💳 In-App Purchase Testing | Available on Android | | |
| 🔄 Portrait/Landscape Mode | Full control | Basic | |
| 🌍 Geolocation Testing | Any location | | |
| 🌐 Device Locale Testing | 20+ locales | Limited | 9 locales |
| 📹 Real-time Video Streaming | Live streaming | Post-test only | Live streaming |
| 📊 Real-time Logs | Live streaming | Basic | Live streaming |
| ⚡ Performance | 2x faster (Mac Silicon + ARM performance) | Standard speed | Standard speed |
[Start Testing with TestingBot](https://testingbot.com/users/sign_up)
[Request a demo](https://testingbot.com/demo) or [view pricing](https://testingbot.com/pricing)
Fast Execution
## Parallel Testing
Run multiple Maestro flows simultaneously across different sessions and devices. Scale your testing with parallel execution for faster feedback.
[Get started free](https://testingbot.com/users/sign_up)

Real-time Insights
## Real Time Console
View your Maestro test results in real time with detailed logs and insights. Or use the API to fetch your test results.
[Get started free](https://testingbot.com/users/sign_up)
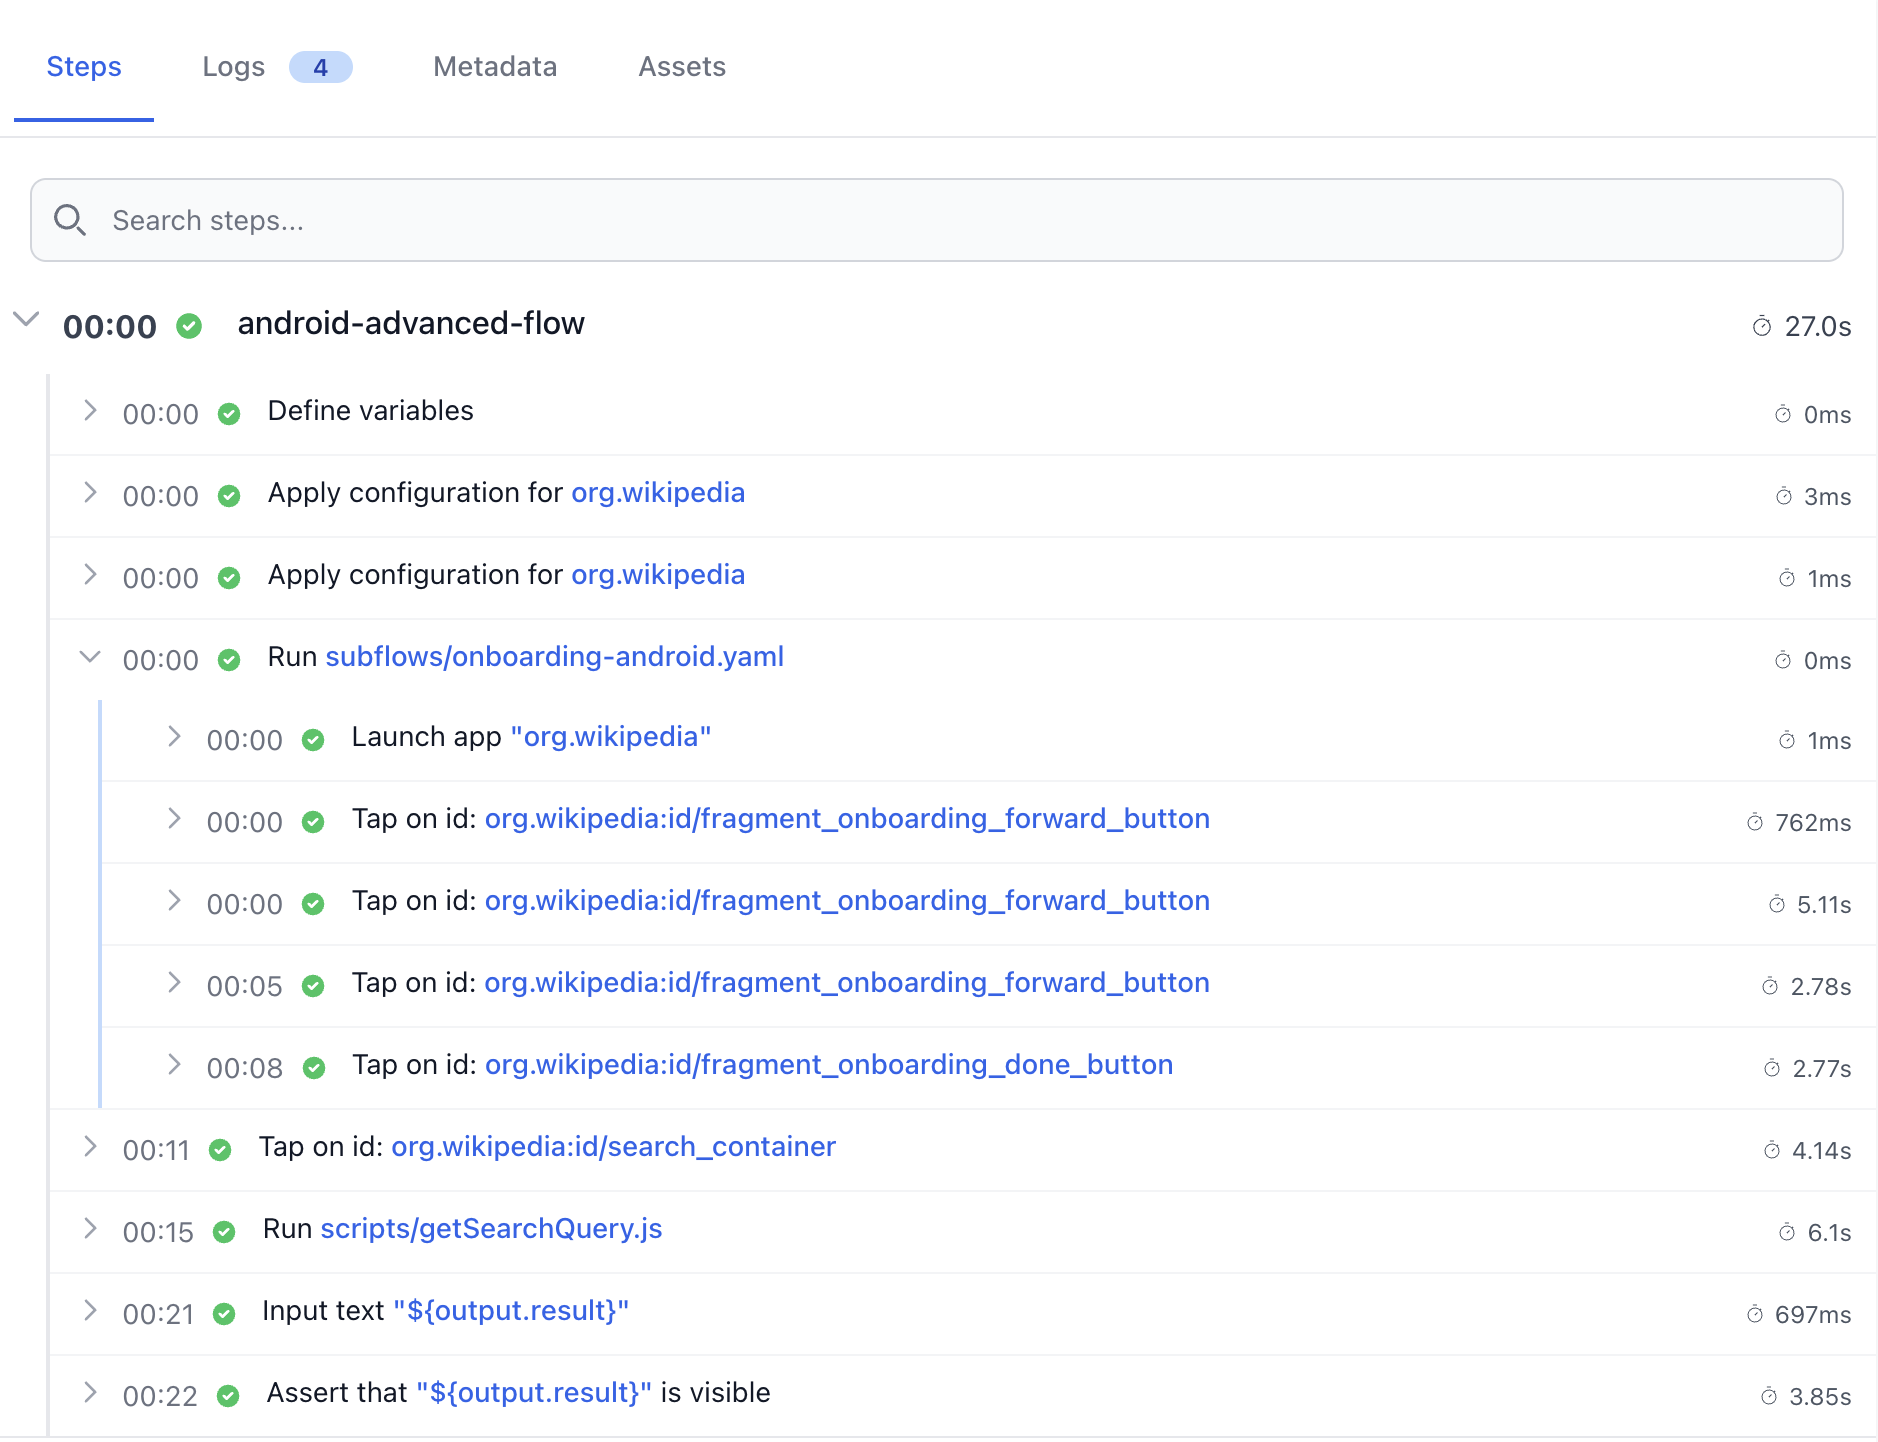
Location Features
## Geolocation Testing
Test your app's location-based features by simulating different geographic locations. Verify location-specific content and functionality.
Device Cloud
## Maestro Device Cloud
Test on physical iOS and Android devices + iOS Simulators and Android emulators. Run tests on iOS 16 up to 26. Android 10 up to 16.
[View Devices](https://testingbot.com/support/app-automate/devices)

Huawei P40

Pixel 10

Pixel 9

Galaxy S25

Redmi Note 13

Galaxy A55
Continuous Integration
## CI/CD Integration
Integrate TestingBot Maestro Testing with your CI/CD
[
### Jenkins
](https://testingbot.com/support/integrations/ci-cd/jenkins)[
### Bamboo
](https://testingbot.com/support/integrations/ci-cd/bamboo)[
### TeamCity
](https://testingbot.com/support/integrations/ci-cd/teamcity)[
### CircleCI
](https://testingbot.com/support/integrations/ci-cd/circleci)[
### GitLab CI
](https://testingbot.com/support/integrations/ci-cd/gitlab)[
### GitHub
](https://testingbot.com/support/integrations/ci-cd/github-actions)
## Frequently Asked Questions
### What is the advantage of running Maestro tests in the Cloud?
TestingBot provides and maintains the infrastructure to run Maestro tests in parallel across multiple iOS and Android devices.
You no longer need to maintain physical devices or simulators locally.
TestingBot offers high-scale parallelization with easy integration in your CI/CD pipeline.
All Maestro tests come with video recordings, logs and detailed execution reports.
### Is it possible to integrate Maestro testing in my CI/CD pipeline?
Yes, you can easily integrate Maestro testing into your CI/CD pipeline using TestingBot's REST API.
Upload your app and test flows, then trigger test execution from your CI/CD system. Results are returned in formats compatible with most CI/CD tools.
TestingBot provides detailed test reports and can integrate with popular CI/CD platforms like Jenkins, GitHub Actions and GitLab CI.
### What devices can I test on with Maestro?
TestingBot supports Maestro testing on various iPhone and Android devices, as well as simulators and emulators.
You can test on different iOS versions, screen sizes and Android API levels to ensure comprehensive coverage.
### Where can I see the Maestro test results?
Test results are available in real-time through the TestingBot dashboard, showing detailed execution logs and screenshots.
Each test includes a complete video recording of the execution, making it easy to debug failures and verify test behavior.
### More reasons to love TestingBot
### 24/7 support
Got questions? Ask in the 24/7 in-app customer [chat support](https://testingbot.com#) or [send us an email](https://testingbot.com/contact/new). We are here to help you!
TestingBot Support
Hey 👋 How can we help?
I need support
### Trusted by over 14,000 teams
6M+
Tests
120k+
Users
400+
Enterprises
106
Countries
[Request a demo](https://testingbot.com/demo)
### Developer Documentation
Everything you need to integrate TestingBot into your workflow. Browse guides, API references and SDKs for web and mobile testing.
- [Quickstart tutorials for Maestro Cloud Testing](https://testingbot.com/support/app-automate/maestro)
- [Specifying Maestro Options](https://testingbot.com/support/app-automate/maestro/options)
- [CI/CD integration setup guides](https://testingbot.com/support/integrations/ci-cd)
[Explore Documentation](https://testingbot.com/support)
### Enterprise-grade Security
Star level 1
Certified
GDPR
Compliant
SAML SSO
Single Sign-On
99.99%
Uptime SLA
[Visit TestingBot Trust Center](https://trust.testingbot.com/)
### Ready to start Maestro Testing?
Please see our [Maestro Testing documentation](https://testingbot.com/support/app-automate/maestro) on how to get started.
[Start a free trial](https://testingbot.com/users/sign_up)
---
URL: https://testingbot.com/features/automation/xcuitest
# XCUITest Cloud for iOS Automation
Accelerate your XCUITesting capabilities with a remote iOS device grid. Upload your native iOS app (in Swift or Objective-C) and run XCUITests on hundreds of iPhone and iPad devices.
[Get started free](https://testingbot.com/users/sign_up)[Request a demo](https://testingbot.com/demo)

Trusted by some of the world's most innovative companies
Getting Started
## How does it work?
Get started with XCUITest testing in three simple steps
1
### 1. Prepare your app & tests
Create an .ipa file of your native iOS app, and a .zip file of your XCUI tests. Using XCode, with Swift or Objective-C. Test on multiple Apple hand held devices.
2
### 2. Upload app and tests
Upload your mobile app (in ipa format) and tests (.zip files) through the TestingBot REST API.
[Learn more](https://testingbot.com/support/app-automate/xcuitest#upload)
3
### 3. Run XCUI Tests
Start the tests through an API call. The test results will appear in the TestingBot member area, together with a video, logs, viewport screenshots and other generated data. Use taps, swipe, zoom, scroll, or long press any element with XCUITest.
Fast Execution
## Parallel Testing with XCUITest
Speed up your release cycles with Parallel Testing on XCUITest Real Devices. Upload multiple apps and execute tests simultaneously for quicker, more efficient results.
10x
Faster Testing
100+
Concurrent Tests
[Get started free](https://testingbot.com/users/sign_up)

Native Testing
## Test iOS apps with Swift and Objective-C
Test your iOS apps with Swift and Objective-C on real devices with cloud-based XCUITest automation.
- Native Swift & Objective-C support
- Full XCUITest API compatibility
- XCode integration
Real Device Cloud
## XCUITest Real Device Cloud
Test on real iPhones and iPads on the TestingBot cloud platform via XCUItest framework. TestingBot provides devices from iOS 12 up to iOS 18.
- Latest iPhone & iPad models
- Multiple iOS versions
- Video recordings & logs
[View Devices](https://testingbot.com/support/app-automate/devices)

iPhone Air

iPhone 17

iPhone 16

iPhone SE 2022

iPhone 15

iPad (8th generation)
Continuous Integration
## CI/CD Integration
Integrate Apple's XCUI Testing with your CI/CD
[

### Jenkins
](https://testingbot.com/support/integrations/ci-cd/jenkins)[

### Bamboo
](https://testingbot.com/support/integrations/ci-cd/bamboo)[

### TeamCity
](https://testingbot.com/support/integrations/ci-cd/teamcity)[

### CircleCI
](https://testingbot.com/support/integrations/ci-cd/circleci)[

### GitLab CI
](https://testingbot.com/support/integrations/ci-cd/gitlab)[

### GitHub
](https://testingbot.com/support/integrations/ci-cd/github-actions)
Dedicated Infrastructure
## Private Device Cloud
With Private Device Cloud, we take care of the setup, configuration and maintenance of dedicated devices exclusively for your company.
Select your preferred devices, and we will make them available in our data center for seamless testing.
- Dedicated devices for your team
- Enhanced security & isolation
- Priority support & SLA
[Learn more](https://testingbot.com/enterprise/private-device-cloud)

iPhone Air
Private Device

iPhone 17
Private Device

iPhone 16
Private Device

iPhone SE 2022
Private Device

iPhone 15
Private Device

iPad (8th generation)
Private Device
## Frequently Asked Questions
### What is the advantage of running XCUITests in the Cloud?
You can run tests in parallel on multiple devices, drastically shortening the time it takes to run your entire test suite.
No more need for an in-house device lab containing various iOS devices with different screen sizes and iOS versions.
Take advantage of remote iOS devices, with various screen sizes and iOS versions. We do not provide jailbroken devices.
### How do I integrate cloud based XCUITesting in my CI/CD?
Depending on the CI/CD service you are using, you can add multiple steps to achieve this.
Create both an upload app step, to upload the files to TestingBot Storage.
Finally, trigger the test run with our API. You can use our API to retrieve a JUnit XML report file, compatible with your CI/CD result parser.
### What other options are available during XCUI testing?
You can change the network speed, language and locale of the device, change the GeoIP location and more.
Test filters are also available. These allow you to control which tests will be executed from the test suite.
### Where can I see the XCUITest results?
You can find the XCUITest results, together with video and logs in the member area.
Using the REST API, you can fetch the results from our own CI/CD as well.
### More reasons to love TestingBot
### 24/7 support
Got questions? Ask in the 24/7 in-app customer [chat support](https://testingbot.com#) or [send us an email](https://testingbot.com/contact/new). We are here to help you!
TestingBot Support
Hey 👋 How can we help?
I need support
### Trusted by over 14,000 teams
6M+
Tests
120k+
Users
400+
Enterprises
106
Countries
[Request a demo](https://testingbot.com/demo)
### Developer Documentation
Everything you need to integrate TestingBot into your workflow. Browse guides, API references and SDKs for web and mobile testing.
- [XCUITest documentation](https://testingbot.com/support/app-automate/xcuitest)
- [Localization testing with XCUITest](https://testingbot.com/support/app-automate/xcuitest/set-localization-options)
- [IP Geolocation testing with XCUITest](https://testingbot.com/support/app-automate/xcuitest/set-ip-geolocation)
- [List of available iOS physical devices](https://testingbot.com/support/app-automate/devices)
[Explore Documentation](https://testingbot.com/support)
### Enterprise-grade Security
Star level 1
Certified
GDPR
Compliant
SAML SSO
Single Sign-On
99.99%
Uptime SLA
[Visit TestingBot Trust Center](https://trust.testingbot.com/)
### Ready to start Appium Testing?
To get started, please see our [XCUITest](https://testingbot.com/support/app-automate/xcuitest) documentation.
[Start a free trial](https://testingbot.com/users/sign_up)
Resources you may like
[](https://testingbot.com/resources/articles/automate-native-ios-apps-xcuitest)
#### [Automate native iOS Apps with XCUITest](https://testingbot.com/resources/articles/automate-native-ios-apps-xcuitest)
Looking to automate native iOS apps? Read our XCUITest tutorial on how to use code for iOS automation.
[Read more](https://testingbot.com/resources/articles/automate-native-ios-apps-xcuitest)
[](https://testingbot.com/blog/ios-18-testing)
#### [Test your website and mobile apps on iOS 18.](https://testingbot.com/blog/ios-18-testing)
Ready to start testing on iOS 18? Get started today with TestingBot: run automated, visual and manual tests on iOS 18.
[Read more](https://testingbot.com/blog/ios-18-testing)
---
URL: https://testingbot.com/features/automation/appium
# Appium Cloud Automation
Appium is an automation tool for testing mobile applications. Run your mobile app automation tests on TestingBot's large grid of physical mobile devices and simulators.
[Get started free](https://testingbot.com/users/sign_up)[Request a demo](https://testingbot.com/demo)

Trusted by some of the world's most innovative companies
Platform Features
## Features of the TestingBot Appium Automation Platform
### Real Devices
Run your Appium tests on physical mobile devices, without maintaining your own in-house device lab.
### Test artifacts
Every test on TestingBot includes a video screencast of the device, along with logs and other generated artifacts.
### Native App Features
Test native apps, push notifications, in-app purchases, media files and apps from the PlayStore, AppStore and through TestFlight.
### Geolocation Testing
Run Appium tests with TestingBot's built-in geo-location testing feature. Choose from up to 20 regions around the globe.
### TestingBot Tunnel
Run Appium tests against websites in a secure environment, such as a private network, staging environment or local machine.
### Gestures and Interactions
Automate taps, swipes, scrolls and other interactions with Appium.
### App Uploads
Upload mobile apps to TestingBot Storage for use in your tests.
### Network Throttling
Throttle network speed to test how your app performs under different network conditions.
Fast Execution
## Reduce Test Execution Time
Run tests in parallel with the TestingBot mobile device cloud and accelerate test execution. Test seamlessly across a range of real devices for faster, more reliable results.
[Get started free](https://testingbot.com/users/sign_up)


Device Lab
## Replace your in-house Device Lab
Skip the hassle of buying, hosting, and maintaining iOS and Android devices. Instantly run your Appium tests on real devices in the TestingBot Mobile Cloud—accessible anytime, anywhere.
Framework Support
## Appium Frameworks
TestingBot integrates with various test frameworks and services. Easily convert your existing Appium tests and connect with your favorite CI/CD.
### [C#](https://testingbot.com/support/app-automate/appium/csharp)
- [CSharp](https://testingbot.com/support/app-automate/appium/csharp)
- [SpecFlow](https://testingbot.com/support/app-automate/appium/csharp/specflow)
### [NodeJS](https://testingbot.com/support/app-automate/appium/nodejs)
- [CodeceptJS](https://testingbot.com/support/app-automate/appium/nodejs/codeceptjs)
- [WebDriverIO](https://testingbot.com/support/app-automate/appium/nodejs/webdriverio)
### [Java](https://testingbot.com/support/app-automate/appium/java)
- [TestNG](https://testingbot.com/support/app-automate/appium/java/testng)
### [PHP](https://testingbot.com/support/app-automate/appium/php)
### [Python](https://testingbot.com/support/app-automate/appium/python)
### [Ruby](https://testingbot.com/support/app-automate/appium/ruby)
Continuous Integration
## Integrations with CI/CD services
TestingBot integrates with the most popular CI/CD services, including Jenkins, Bamboo, TeamCity, Circle CI, GitLab CI and more.
[

### Jenkins
](https://testingbot.com/support/integrations/ci-cd/jenkins)[

### Bamboo
](https://testingbot.com/support/integrations/ci-cd/bamboo)[

### TeamCity
](https://testingbot.com/support/integrations/ci-cd/teamcity)[

### CircleCI
](https://testingbot.com/support/integrations/ci-cd/circleci)[

### GitLab CI
](https://testingbot.com/support/integrations/ci-cd/gitlab)[

### GitHub
](https://testingbot.com/support/integrations/ci-cd/github-actions)
Device Cloud
## Switch to Real Devices for 100% Accuracy
Mobile emulators and simulators provide a basic preview, but they can't fully replicate real-world conditions. For accurate testing, choose TestingBot's real devices.
[View Devices](https://testingbot.com/support/app-automate/devices)

Huawei P40

iPhone Air

Pixel 10

iPhone 17

Pixel 9

Galaxy S25
## Frequently Asked Questions
### How do I integrate Appium tests with my CI/CD pipeline?
TestingBot integrates with all major CI/CD services, including Jenkins, CircleCI, GitLab CI, Travis CI and more.
We provide sample scripts and API keys to get you up and running quickly, so your tests can be automatically triggered on each commit or deployment.
The advantage of using TestingBot is that you can run your tests in parallel on multiple devices, drastically reducing the time it takes to run your entire test suite.
### Can I test native and hybrid apps with Appium on TestingBot?
Yes! TestingBot fully supports testing native, hybrid, and mobile web applications using Appium.
Whether your app is built with Flitter, React Native, Xamarin, Swift, Kotlin or Java, you can run your tests on real devices in the TestingBot cloud.
### Which Appium versions are supported?
TestingBot supports all Appium versions, including Appium 1.x and Appium 2.x.
### Ready to start Appium Testing?
To get started, please see our [Appium Testing](https://testingbot.com/support/app-automate/appium) documentation or [Book a Demo](https://testingbot.com/demo).
[Start a free trial](https://testingbot.com/users/sign_up)
Resources you may like
[](https://testingbot.com/resources/articles/touch-actions-appium)
#### [Using Touch Actions with Appium](https://testingbot.com/resources/articles/touch-actions-appium)
Find out how to use Touch Actions with Appium.
[Read more](https://testingbot.com/resources/articles/touch-actions-appium)
[](https://testingbot.com/resources/articles/appium-2-migration)
#### [Migrate from Appium 1.x to Appium 2.x](https://testingbot.com/resources/articles/appium-2-migration)
Learn how to migrate from Appium 1 to the new Appium 2.
[Read more](https://testingbot.com/resources/articles/appium-2-migration)
[](https://testingbot.com/resources/articles/dark-mode-testing)
#### [Dark Mode Testing with Appium](https://testingbot.com/resources/articles/dark-mode-testing)
Perform dark mode automated testing on iOS and Android with Appium.
[Read more](https://testingbot.com/resources/articles/dark-mode-testing)
### More reasons to love TestingBot
### 24/7 support
Got questions? Ask in the 24/7 in-app customer [chat support](https://testingbot.com#) or [send us an email](https://testingbot.com/contact/new). We are here to help you!
TestingBot Support
Hey 👋 How can we help?
I need support
### Trusted by over 14,000 teams
6M+
Tests
120k+
Users
400+
Enterprises
106
Countries
[Request a demo](https://testingbot.com/demo)
### Developer Documentation
Everything you need to integrate TestingBot into your workflow. Browse guides, API references and SDKs for web and mobile testing.
- [Quickstart tutorials for Appium 3](https://testingbot.com/support/app-automate/appium/appium-versions)
- [Appium Examples](https://testingbot.com/support/app-automate/appium)
- [Integrations](https://testingbot.com/support/integrations)
- [List of browsers & devices](https://testingbot.com/support/web-automate/browsers)
[Explore Documentation](https://testingbot.com/support)
### Enterprise-grade Security
Star level 1
Certified
GDPR
Compliant
SAML SSO
Single Sign-On
99.99%
Uptime SLA
[Visit TestingBot Trust Center](https://trust.testingbot.com/)
---
URL: https://testingbot.com/test-in-internet-explorer
# Internet Explorer Testing
Easily test on Internet Explorer Online! Instant access to any IE Browser versions (7-11). Test your website on real IE browsers. No IE Emulators or Simulators.
Signup & Start Testing for Free!
[Get started free](https://testingbot.com/users/sign_up)[Request a demo](https://testingbot.com)

Trusted by some of the world's most innovative companies
Interactive Testing
## Interactive Testing On Internet Explorer Browsers
### IE 11, IE 10, IE 9, IE 8, IE 7
Run tests on any version of internet explorer, on real Windows desktops.
### Responsive Testing
Each test on TestingBot comes with a video screencast of the device, logs and other generated artifacts.
### No more VMs
No more VMs to be maintained or software to be installed. TestingBot has you covered.
### +5200 combinations
Instant access to any browser on Mac, Linux, Windows and Mobile.
Real Browsers
## IE Emulators vs Real Internet Explorer Browsers
Internet Explorer emulators do not always show correct results. Test on real IE browsers, running on a real Windows operating system.
No Emulators, Simulators or Virtual Machines, try TestingBot and get instant access to a real IE browser.
[Get started free](https://testingbot.com/users/sign_up)
Global Testing
## Geolocation Testing on IE
Perform **geolocation testing** in various regions across the world. Test Geo Targeting, Geo Blocking and Geo Localization in 10 countries, including Australia, Belgium, United Kingdom, United States, Germany, France, Spain, China and more.
Visual Testing
## Automated IE Screenshots
Take automated screenshots of your website on various IE versions. Rapidly test your webpages for visual differences across multiple IE browsers.

Secure Tunnel
## Local Cross Browser IE Testing
Use the secure [TestingBot Tunnel](https://testingbot.com/support/tunnel) to quickly and easily test your staging website on any IE browser version.
Once you download and start our tunnel, you can immediately test your webapps running on your computer or internal network on any browser in our cloud, straight from your browser.
[Read more](https://testingbot.com/support/tunnel)
FAQ
## Frequently Asked Questions
### Why do I need to test my website on Internet Explorer?
Internet Explorer (IE) has a market share of about 5% in the global browser market. Some organizations or websites are designed to only allow IE, while blocking other browsers for security reasons.
IE is the default browser on most of the (older) Windows editions, which means a large portion of Windows users will use this browser.
### What is an Internet Explorer (IE) emulator?
An Internet Explorer emulator acts as if it is an Internet Explorer browser. It tries to help developers and testers to test their websites on Internet Explorer.
Because this is an emulator, it is not accurate enough to use this for testing.
TestingBot recommends using its IE browsers running on real desktops, no emulator.
### Why should I not test with an IE emulator?
IE Emulators only mimic an Internet Explorer browser screen and User-Agent. It runs slower than a real IE browser and is not as accurate.
You cannot accurately test the CSS support of IE with an emulator. If you are using macOS or Linux, your choices are to install a Windows VM or use a cloud service such as TestingBot.
### How does TestingBot help with internet browser testing?
TestingBot provides a grid of real browsers, including IE7 up to IE11, which you can use for automated and manual testing.
Run a manual IE test on Windows 8, 8.1 or 7. Or perform automated tests on IE7 up to IE11.
### Can I use macOS or Linux to test on IE?
If your computer is a macOS or Linux device, we recommend using TestingBot's cloud service to access a IE browser instance.
No need to download, install and maintain a Windows VM. Use TestingBot's interactive, browser-based, remote IE service.
### More reasons to love TestingBot
### 24/7 support
Got questions? Ask in the 24/7 in-app customer [chat support](https://testingbot.com#) or [send us an email](https://testingbot.com/contact/new). We are here to help you!
TestingBot Support
Hey 👋 How can we help?
I need support
### Trusted by over 14,000 teams
6M+
Tests
120k+
Users
400+
Enterprises
106
Countries
[Request a demo](https://testingbot.com/demo)
### Developer Documentation
Everything you need to integrate TestingBot into your workflow. Browse guides, API references and SDKs for web and mobile testing.
- [Quickstart tutorials for Selenium](https://testingbot.com/support/web-automate/selenium)
- [Appium Examples](https://testingbot.com/support/app-automate/appium)
- [Integrations](https://testingbot.com/support/integrations)
- [List of browsers & devices](https://testingbot.com/support/web-automate/browsers)
[Explore Documentation](https://testingbot.com/support)
### Enterprise-grade Security
Star level 1
Certified
GDPR
Compliant
SAML SSO
Single Sign-On
99.99%
Uptime SLA
[Visit TestingBot Trust Center](https://trust.testingbot.com/)
### Ready to start IE Testing?
Start testing your apps with TestingBot.
[Start a free trial](https://testingbot.com/users/sign_up)
---
URL: https://testingbot.com/test-edge-browser
# Online Cross Browser Testing On Microsoft Edge Browser
Easily test on Microsoft Edge Online! Make sure your website works on the latest Edge browser versions that come with Microsoft Windows. Test your website on real Edge browsers.
Signup & Start Testing for Free!
[Get started free](https://testingbot.com/users/sign_up)[Request a demo](https://testingbot.com/demo)

Trusted by some of the world's most innovative companies
Interactive Testing
## Interactive Testing On Internet Explorer Browsers
### Legacy versions up to the latest version
Run tests on various Microsoft Edge versions, on real Windows and macOS desktops.
### Responsive Testing
Each test on TestingBot comes with a video screencast of the device, logs and other generated artifacts.
### No more VMs
No more VMs to be maintained or software to be installed. TestingBot has you covered.
### +5200 combinations
Instant access to multiple Microsoft Edge browsers, on Windows and macOS.
Real Browsers
## Microsoft Edge Emulators vs Real Microsoft Edge Browsers
Microsoft Edge emulators do not always show correct results. Test on real Microsoft Edge browsers, running on a real Windows operating system.
No Emulators, Simulators or Virtual Machines, try TestingBot and get instant access to a real Microsoft Edge browser.
[Get started free](https://testingbot.com/users/sign_up)

Global Testing
## Geolocation Testing on Microsoft Edge
Perform \geolocation testing\ in various regions across the world. Test Geo Targeting, Geo Blocking and Geo Localization in 10 countries, including Australia, Belgium, United Kingdom, United States, Germany, France, Spain, China and more.
Visual Testing
## Automated Microsoft Edge Screenshots
Take automated screenshots of your website on various Microsoft Edge versions. Rapidly test your webpages for visual differences across multiple Microsoft Edge browsers.

Secure Tunnel
## Local Cross Browser Microsoft Edge Testing
Use the secure [TestingBot Tunnel](https://testingbot.com/support/tunnel) to quickly and easily test your staging website on any Microsoft Edge browser version.
Once you download and start our tunnel, you can immediately test your webapps running on your computer or internal network on any browser in our cloud, straight from your browser.
[Read more](https://testingbot.com/support/tunnel)
FAQ
## Frequently Asked Questions
### Why do I need to test my website on Microsoft Edge?
Microsoft Edge is a popular browser that comes by default on new Microsoft Windows installations. It has a market percentage of 6% globally.
It's important to make sure your website looks and behaves correctly on this web browser.
### How does TestingBot help with Microsoft Edge testing?
TestingBot provides an online cloud of Microsoft Edge browsers, running on Windows and macOS machines.
You can run manual tests on Edge browsers, or use WebDriver automation to automatically test your website.
### Can I use Microsoft Edge on macOS?
TestingBot provides macOS machines equipped with multiple versions of Microsoft Edge.
### More reasons to love TestingBot
### 24/7 support
Got questions? Ask in the 24/7 in-app customer [chat support](https://testingbot.com#) or [send us an email](https://testingbot.com/contact/new). We are here to help you!
TestingBot Support
Hey 👋 How can we help?
I need support
### Trusted by over 14,000 teams
6M+
Tests
120k+
Users
400+
Enterprises
106
Countries
[Request a demo](https://testingbot.com/demo)
### Developer Documentation
Everything you need to integrate TestingBot into your workflow. Browse guides, API references and SDKs for web and mobile testing.
- [Quickstart tutorials for Selenium](https://testingbot.com/support/web-automate/selenium)
- [Appium Examples](https://testingbot.com/support/app-automate/appium)
- [Integrations](https://testingbot.com/support/integrations)
- [List of browsers & devices](https://testingbot.com/support/web-automate/browsers)
[Explore Documentation](https://testingbot.com/support)
### Enterprise-grade Security
Star level 1
Certified
GDPR
Compliant
SAML SSO
Single Sign-On
99.99%
Uptime SLA
[Visit TestingBot Trust Center](https://trust.testingbot.com/)
### Ready to start Microsoft Edge Testing?
Start testing your apps with TestingBot.
[Start a free trial](https://testingbot.com/users/sign_up)
---
URL: https://testingbot.com/test-on-safari
# Safari Browser Testing
Test Safari online, running on macOS and iOS. No emulators or simulators, only Safari running on real Apple devices and physical mobile devices.
Signup & Start Testing for Free!
[Get started free](https://testingbot.com/users/sign_up)[Request a demo](https://testingbot.com/demo)

Trusted by some of the world's most innovative companies
Safari Testing
## Test On Different Safari Browsers Online
### Developer Tools
Interactively test your website with Safari's native Developer Tools.
### Safari 12 up to 26
Instant access to different Safari versions, test on real Apple products.
### macOS Desktop
- macOS Tahoe - Safari 26
- macOS Sequoia - Safari 18
- macOS Sonoma - Safari 17
- macOS Ventura - Safari 16
- macOS Monterey - Safari 15
- macOS Big Sur - Safari 14
- macOS Catalina - Safari 13
- macOS Mojave - Safari 12
### Safari iOS
- iOS 26
- iOS 18
- iOS 17
- iOS 16
- iOS 15
- iOS 14
- iOS 13
- iOS 12
Mobile Testing
## Safari Testing On Windows Machines
Are you using Windows on your computer and want to test something on Safari? No need to setup a virtual machine, simply test your website on a remote Safari desktop browser in the cloud. It does not matter if you are using Windows 11, 10, Vista or XP on a laptop, PC or any other device. TestingBot will stream the contents of a remote macOS machine to your screen. Test any version of Safari on Windows, developer tools included.
TestingBot provides access to various Safari versions, ranging from Safari 12 up to 26 on Desktop and Mobile Safari running on iOS 12 up to 26.
[Get started free](https://testingbot.com/users/sign_up)

Global Testing
## Geolocation Testing on Safari
Every test comes with access to generated artifacts, including screenshots, logs and a video of the test.
Visual Testing
## Automated Safari Screenshots
Take automated screenshots of your website on various Safari versions, running on macOS desktops. Perform visual comparison testing with various Safari versions, running on various macOS versions: OSX Yosemite up to macOS Tahoe
[Get started free](https://testingbot.com/users/sign_up)
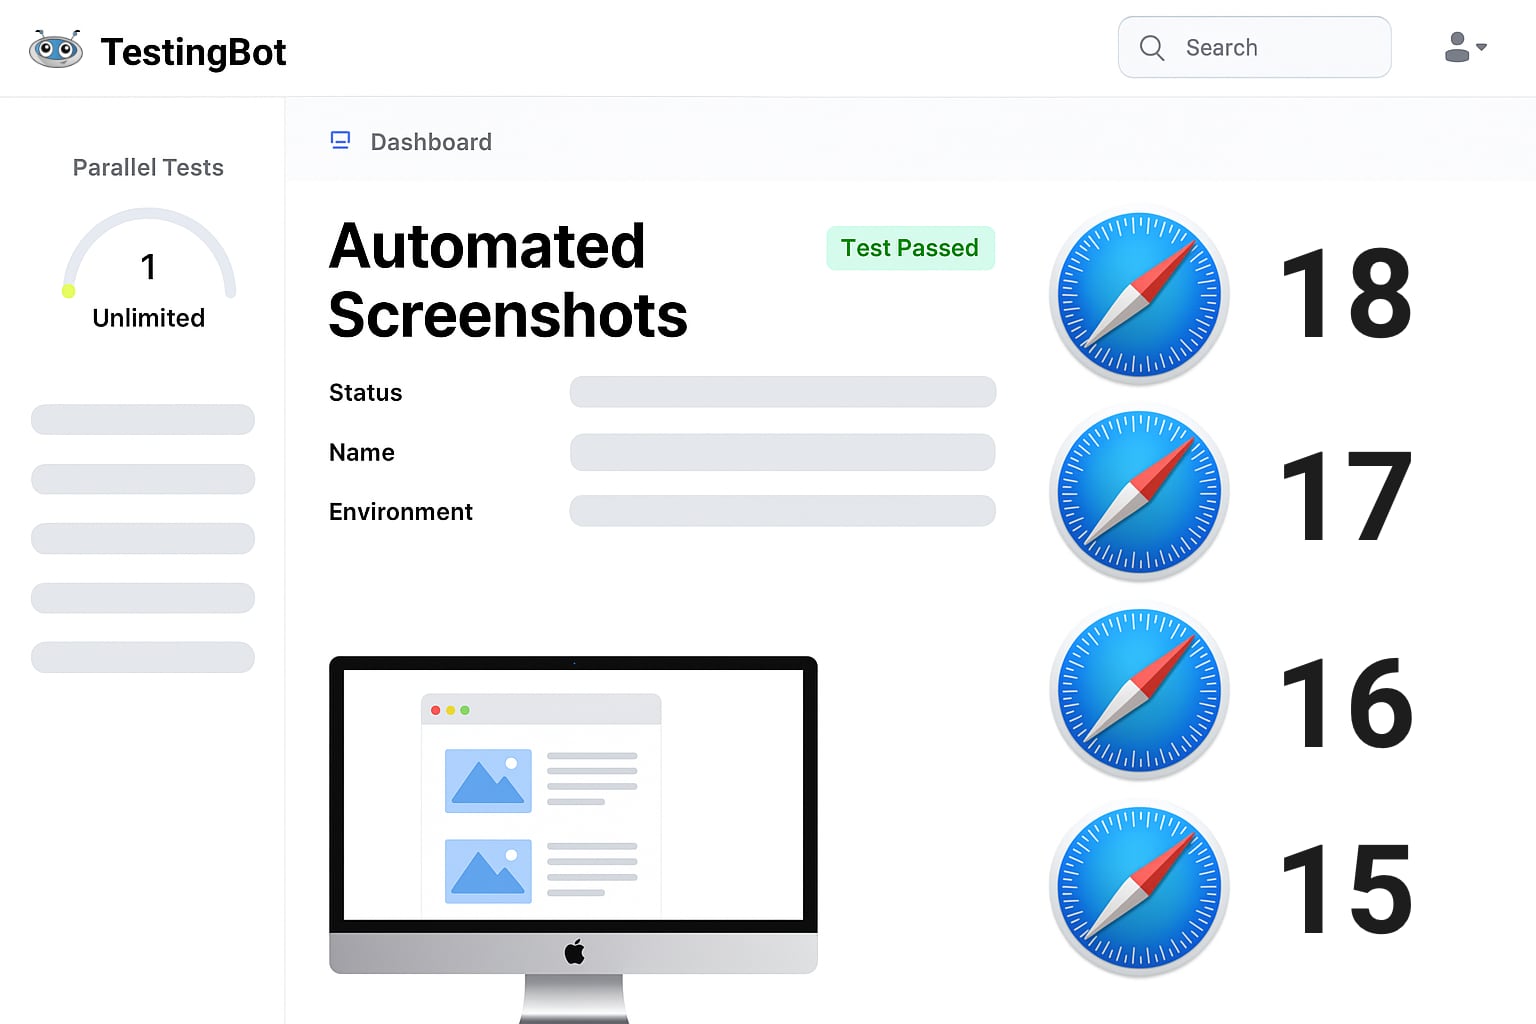
Beta Testing
## Safari Tech Preview & Safari Beta
Manual, Automated and Visual testing on Safari Technology Preview and Safari Beta. Make sure your website works and looks correctly on Apple's upcoming Safari web browser versions.
[Get started free](https://testingbot.com/users/sign_up)

Extensions
## Testing Safari Extensions
Easily load unsigned Safari App Extensions, Web Extensions (Xcode) and Safari Web Extensions (18.4+) on TestingBot, available for manual sessions and CI-driven automated tests.
[More information](https://testingbot.com/support/web-automate/selenium/browser-extension#safari)
Appium Testing

## Automated Mobile Safari Testing with Appium
Use [Appium](https://testingbot.com/features/automation/appium) to connect to our grid of physical iOS devices and run automated mobile Safari tests against your website.
### Parallel Testing
Run multiple Appium tests simultaneously, shortening your total Appium execution time.
### Write your tests in any language
Since Appium uses the WebDriver API, you can write your tests in any language and run on TestingBot.
### Device Coverage
Test on the [devices](https://testingbot.com/support/app-automate/devices) that matter, representing a large share of global device usage.

Secure Tunnel
## Local Cross Browser Safari Testing
Use the secure [TestingBot Tunnel](https://testingbot.com/support/tunnel) to quickly and easily test your staging website on any Safari browser version on macOS and iOS.
Once you download and start our tunnel, you can immediately test your webapps running on your computer or internal network on any browser in our cloud, straight from your browser.
[Read more](https://testingbot.com/support/tunnel)
FAQ
## Frequently Asked Questions
### Why do I need to test my website on Safari?
Safari has a market share of about 4% in the global browser market. This browser is built and maintained by Apple and supports all the latest browser technologies.
Safari is the default browser on all macOS operating systems, which means a large portion of macOS users will use this browser for their day-to-day browsing. Test Safari's private browsing capabilities, open multiple tabs or test the cross site tracking prevention.
### What is Safaridriver?
Safaridriver is a utility, shipped by default in every macOS operating system, which allows Selenium to automate Safari through a HTTP based API.
To use Safaridriver, you need to make sure it is enabled by running this command in a terminal window: `safaridriver --enable`
### How can I automate Mobile Safari?
We recommend using Appium, which has built-in support to communicate with iOS Safari. Simply run your Appium scripts against the TestingBot device grid.
TestingBot will instruct the iOS device to open Safari. Your Appium script will then instrument the mobile Safari browser in an automated way.
### More reasons to love TestingBot
### 24/7 support
Got questions? Ask in the 24/7 in-app customer [chat support](https://testingbot.com#) or [send us an email](https://testingbot.com/contact/new). We are here to help you!
TestingBot Support
Hey 👋 How can we help?
I need support
### Trusted by over 14,000 teams
6M+
Tests
120k+
Users
400+
Enterprises
106
Countries
[Request a demo](https://testingbot.com/demo)
### Developer Documentation
Everything you need to integrate TestingBot into your workflow. Browse guides, API references and SDKs for web and mobile testing.
- [Quickstart tutorials for Selenium](https://testingbot.com/support/web-automate/selenium)
- [Appium Examples](https://testingbot.com/support/app-automate/appium)
- [Integrations](https://testingbot.com/support/integrations)
- [List of browsers & devices](https://testingbot.com/support/web-automate/browsers)
[Explore Documentation](https://testingbot.com/support)
### Enterprise-grade Security
Star level 1
Certified
GDPR
Compliant
SAML SSO
Single Sign-On
99.99%
Uptime SLA
[Visit TestingBot Trust Center](https://trust.testingbot.com/)
### Ready to start Safari Testing?
Start testing your website on Safari, running on macOS and iOS devices.
[Start a free trial](https://testingbot.com/users/sign_up)
---
URL: https://testingbot.com/test-on-chrome
# Chrome Testing
Test on real Chrome browsers, running on Windows, macOS and Linux. Real Chrome browsers from Google, available for automated, visual and manual testing.
Signup & Start Testing for Free!
[Get started free](https://testingbot.com/users/sign_up)[Request a demo](https://testingbot.com/demo)

Trusted by some of the world's most innovative companies
Key Features
## Test On Different Chrome Versions Online
### Developer Tools
Test your website with Chrome's DevTools. Inspect and debug with your mouse and keyboard.
### Responsive Chrome Testing
Each test on TestingBot comes with a video screencast of the device, logs and other generated artifacts.
### Chrome Beta and Dev Testing
Make sure your website works and looks correctly on upcoming Chrome versions.
### Chrome 35 up to latest
Test on previous Chrome versions, from Google Chrome 33 until the latest.
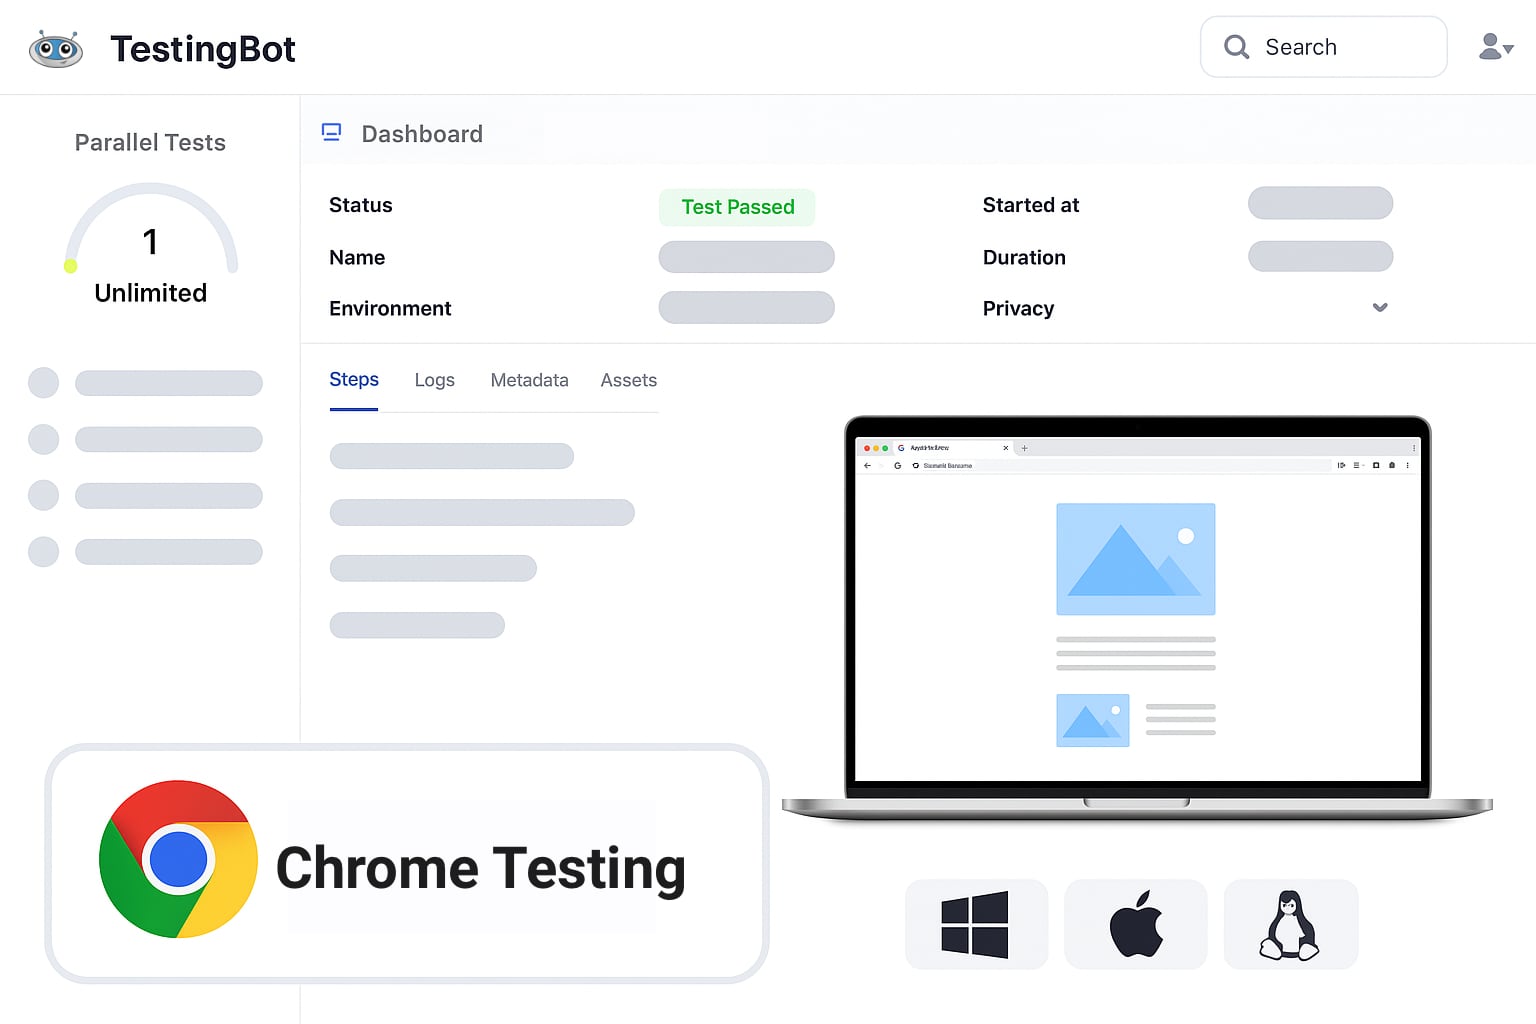
Mobile Testing
## Browser Testing on Real Chrome Browsers
Start testing on real Chrome browsers in the cloud. Interactively test with your mouse and keyboard, or run automated tests on any version of Chrome.
Uncover functional bugs or design mistakes on various version of Google Chrome. Test the performance and compatibility of your website on Google's Chrome browser.
Global Reach
## Geolocation Testing on Chrome
Run Chrome browsers from multiple countries around the world. Test Samsung Galaxy Geo Targeting, Geo Blocking and Geo Localization in 10 countries, including Australia, Belgium, France, Germany, United Kingdom, United States and more.
Supported Frameworks
- [Selenium](https://testingbot.com/features/automation/selenium)
- [Appium](https://testingbot.com/features/automation/appium)
- [Cypress](https://testingbot.com/features/automation/cypress)
- [Puppeteer](https://testingbot.com/features/automation/puppeteer)
- [Playwright](https://testingbot.com/features/automation/playwright)
## Automated Testing on Chrome
Run automated tests with Chrome and the Chrome for Testing browser. You can use Selenium, Puppeteer or Playwright to run automated tests on a virtual browser. The TestingBot online Chrome instances run on Windows, macOS, Linux and Android.
Chrome Testing
## Chrome Beta, Canary and Chrome for Testing
TestingBot uses Chromedriver to run automated and manual tests on Chrome browsers, including the Chrome for Testing browser, Chrome beta browser and Canary builds.
## Chrome Browser Testing
### Performance Testing
Test the performance of your website with speed tests such as Lighthouse and Chrome's DevTools.
### Chrome Extensions
Automated or manual testing of Chrome extensions on various Chrome versions and platforms.
### Camera, Microphone and WebGL Testing
Test with dummy Camera and Microphone. Run WebGL tests in the cloud.

Secure Tunnel
## Local Cross Browser Chrome Testing
Use the secure [TestingBot Tunnel](https://testingbot.com/support/tunnel) to quickly and easily test your staging website on any Chrome browser version. Test localhost websites with Puppeteer, Playwright and Selenium.
Once you download and start our tunnel, you can immediately test your webapps running on your computer or internal network on any browser in our cloud, straight from your browser.
[Read more](https://testingbot.com/support/tunnel)
FAQ
## Frequently Asked Questions
### Why do I need to test my website on Chrome?
Chrome is the most popular webbrowser on the planet, it has over 60% market share globally. You want to make sure that your website looks and functions correctly on this browser.
The browser is promoted and built by Google and is used all around the world, on various platforms and devices.
### What is Chromedriver?
Chromedriver is a program which you can download to automate the Chrome browser. It is used by developers and testers to perform actions in Chrome. For example, with Selenium, Puppeteer and Playwright, it is used to run tests against websites.
Chromedriver depends on the version of Chrome, which means you need to make sure the Chromedriver version matches the browser version. At TestingBot, this is done automatically for you when you run tests.
### What is the difference between Chrome, Chromium and Chrome for Testing?
Chrome is the browser that everyone uses to do their day-to-day browser. It is the browser that TestingBot provides for testing as well.
Chromium uses the same browser engine but does not come with specific branding by Google, it is open-source. Chrome for Testing is a flavor of Google Chrome specifically built for testing, it does not contain the auto-update functionality and is optimized for running automated tests.
### How does TestingBot help with Chrome browser testing?
TestingBot provides a grid of Chrome browsers, from version 35 up to the latest version and beta/dev versions.
All Chrome tests come with a video, logs generated by the browser and Chromedriver, and various other meta-data.
### Is this a Chrome emulator?
All the Chrome browsers on TestingBot are real, they are downloaded straight from Google.
Our virtual browsers run just like they would on any other computer.
### More reasons to love TestingBot
### 24/7 support
Got questions? Ask in the 24/7 in-app customer [chat support](https://testingbot.com#) or [send us an email](https://testingbot.com/contact/new). We are here to help you!
TestingBot Support
Hey 👋 How can we help?
I need support
### Trusted by over 14,000 teams
6M+
Tests
120k+
Users
400+
Enterprises
106
Countries
[Request a demo](https://testingbot.com/demo)
### Developer Documentation
Everything you need to integrate TestingBot into your workflow. Browse guides, API references and SDKs for web and mobile testing.
- [Quickstart tutorials for Selenium](https://testingbot.com/support/web-automate/selenium)
- [Appium Examples](https://testingbot.com/support/app-automate/appium)
- [Integrations](https://testingbot.com/support/integrations)
- [List of browsers & devices](https://testingbot.com/support/web-automate/browsers)
[Explore Documentation](https://testingbot.com/support)
### Enterprise-grade Security
Star level 1
Certified
GDPR
Compliant
SAML SSO
Single Sign-On
99.99%
Uptime SLA
[Visit TestingBot Trust Center](https://trust.testingbot.com/)
### Ready to start Chrome Testing?
Start testing your applications on Chrome browser today with our comprehensive testing platform.
[Start a free trial](https://testingbot.com/users/sign_up)
---
URL: https://testingbot.com/test-on-iphone
# Online Testing on iPhone & iOS devices
Test your iOS mobile app or website on a wide range of real iOS devices. Instant access to devices such as iPhone 15, iPhone 14, iPhone 13, iPhone 12, iPhone XR, iPhone 6s, iPad and more iOS devices.
Signup & Start Testing for Free!
[Get started free](https://testingbot.com/users/sign_up)[Request a demo](https://testingbot.com/demo)

Trusted by some of the world's most innovative companies
Key Features
## Test On Different iPhones Online
### Wide range of iPhone devices
Test your mobile apps and websites on physical mobile iPhones. Choose from a range of iPhones, from iPhone 6s to iPhone 17.
### Real iOS Device Cloud
Each test on TestingBot comes with a video screencast of the device, logs and other generated artifacts.
### Secure and private
TestingBot provides pristine iPhones and the possibility of private iPhone devices.
### Real-time debugging
Debug your websites & mobile apps. Access crash reports and logs to instantly fix bugs.
### Tap, Swipe, Pinch & more
Interact with a physical, remote iOS device, just like you would while holding it in your hand. Tap, swipe, pinch and perform other gestures.
### Test various network speeds
Run iPhone tests with different network speeds: choose between WiFi, 5G, 4G, Edge and more.
iPhone Models
## Real iPhone and iOS Devices for Testing
If you don't have an iPhone device to test on, simply connect to a physical device in TestingBot's datacenter. You will get instant access to a physical iPhone.
TestingBot provides iPhones ranging from iPhone 6s to iPhone 17.
- [iPhone 17 Pro](https://testingbot.com/mobile-testing/apple-iphone-17-pro)
- [iPhone 17](https://testingbot.com/mobile-testing/apple-iphone-17)
- [iPhone Air](https://testingbot.com/mobile-testing/apple-iphone-air)
- [iPhone 16](https://testingbot.com/mobile-testing/apple-iphone-16)
- [iPhone 15](https://testingbot.com/mobile-testing/apple-iphone-15)
- [iPhone 14](https://testingbot.com/mobile-testing/apple-iphone-14)
- [iPhone 14 Plus](https://testingbot.com/mobile-testing/apple-iphone-14-plus)
- [iPhone 14 Pro](https://testingbot.com/mobile-testing/apple-iphone-14-pro)
- [iPhone 14 Pro Max](https://testingbot.com/mobile-testing/apple-iphone-14-pro-max)
- [iPhone 13](https://testingbot.com/mobile-testing/apple-iphone-13)
- [iPhone 13 Pro](https://testingbot.com/mobile-testing/apple-iphone-13-pro)
- [iPhone 13 Pro Max](https://testingbot.com/mobile-testing/apple-iphone-13-pro-max)
- [iPhone 13 Mini](https://testingbot.com/mobile-testing/apple-iphone-13-mini)
- [iPhone 12](https://testingbot.com/mobile-testing/apple-iphone-12)
- [iPhone 12 Pro](https://testingbot.com/mobile-testing/apple-iphone-12-pro)
- [iPhone 12 Pro Max](https://testingbot.com/mobile-testing/apple-iphone-12-pro-max)
- [iPhone 12 Mini](https://testingbot.com/mobile-testing/apple-iphone-12-mini)
- iPhone 11
- iPhone X
- iPhone XR
- iPhone 8

Geolocation
## Geolocation Testing on iPhones
Perform geolocation testing in various regions across the world. Test iPhone Geo Targeting, Geo Blocking and Geo Localization in 10 countries, including Australia, Belgium, United Kingdom, United States, Germany, France, Spain, China and more.
Screenshots
## Responsive Testing On iPhone
Choose between various iPhone devices with different screen sizes to perform responsive testing. Rotate the device for landscape and portrait mode testing.
[Get started free](https://testingbot.com/users/sign_up)


Appium Testing
## Automated iPhone Testing with Appium
Use [Appium](https://testingbot.com/features/automation/appium) to connect to our grid of physical iOS devices and run automated mobile Safari tests against your website.
### Parallel Testing
Run multiple Appium tests simultaneously, shortening your total Appium execution time.
### Write your tests in any language
Since Appium uses the WebDriver API, you can write your tests in any language and run on TestingBot.
### Reliable Service
Test on a reliable platform, with zero test flakiness. Ship your website and mobile app with confidence.

Local Testing
## Local iPhone Testing
Use our [secure tunnel](https://testingbot.com/support/tunnel) to quickly and easily test your staging website on any Safari browser version on macOS and iOS.
Once you download and start our tunnel, you can immediately test your webapps running on your computer or internal network on any iPhone in our cloud, straight from your browser.
[Read more](https://testingbot.com/support/tunnel)
Real Devices
## iOS Real Device Testing
Test your website or mobile app on a real iOS device. Instant access to a physical iPhone or iPad.
[View Devices](https://testingbot.com/support/app-automate/devices)

iPhone Air

iPhone 17

iPhone 16

iPhone SE 2022

iPhone 15

iPad (8th generation)
FAQ
## Frequently Asked Questions
### How to test a mobile app on iPhone?
Testing your iOS app on a variety of iOS devices is important before publishing to the App Store. TestingBot allows you to upload and test your app on a number of different iPhones.
Choose between various iOS versions and screen resolutions, to make sure your mobile app works on all iPhone devices.
### Why use a real device instead of an iOS simulator?
Running an iOS simulator or emulator is slow. It is slow to start up and interact with, since it's mimicking a full OS on a currently running OS.
Simulators do not mimic the exact performance of the iOS device they're simulating. Some apps and services are missing as well, for example the Schoolwork app (using Classkit).
### Why is testing your website on an iPhone necessary?
iPhone has a 28% global market share, it's important to make sure your website looks and behaves correctly on iPhones.
Safari is the default browser on iPhones, so you should test your website on mobile safari to make sure iPhone users have a good experience. Testing on Chrome or Firefox does not represent iPhone users.
### What is TestingBot's Real Device Cloud?
TestingBot provides a grid of physical iPhones, ready to run your manual and automated tests.
No need to purchase, setup and maintain your own collection of iPhones. Rely on TestingBot for your iOS testing.
### Can I test Safari on iPhone?
TestingBot provides access to unaltered iPhones. These come straight from the store and are not jailbroken.
Run your tests on real mobile safari browsers, on physical iPhones in our datacenter.
### Ready to start iPhone Testing?
Get started with iPhone testing in minutes. No credit card required.
[Start a free trial](https://testingbot.com/users/sign_up)
---
URL: https://testingbot.com/integrations
36+ Integrations
# Integrations
TestingBot integrates with various third-party services and products.
### Categories
[Automation Framework 8](https://testingbot.com#automation)[Project Management 4](https://testingbot.com#project)[CI/CD 10](https://testingbot.com#ci)[Record and Playback 7](https://testingbot.com#record)[App Distribution 1](https://testingbot.com#distribution)[Browser Extension 1](https://testingbot.com#extension)[Marketplace 4](https://testingbot.com#marketplace)[Other 1](https://testingbot.com#other)
[Request Integration](https://testingbot.com/contact/new)
## Automation Framework
Run tests with popular testing frameworks
[

### Selenium
Run tests on our grid with 5200+ browsers
](https://testingbot.com/support/web-automate/selenium)[

### Appium
Test native, hybrid and webapps on real devices
](https://testingbot.com/support/app-automate/appium)[

### Cypress
Run Cypress tests on macOS and Windows
](https://testingbot.com/support/web-automate/cypress)[

### Puppeteer
Testing with Puppeteer in the cloud
](https://testingbot.com/support/web-automate/puppeteer)[

### Playwright
Testing with Playwright in the cloud
](https://testingbot.com/support/web-automate/playwright)[

### Espresso
Mobile app testing on Android
](https://testingbot.com/support/app-automate/espresso)[

### XCUITest
Automated testing on iOS
](https://testingbot.com/support/app-automate/xcuitest)[

### Maestro
Testing on iOS and Android
](https://testingbot.com/support/app-automate/maestro)
## Project Management
Connect with your favorite project tools
[

### Slack
Get notified when tests finish or fail
](https://testingbot.com/support/integrations/slack)[

### Jira
Create issues with test meta-data
](https://testingbot.com/support/integrations/jira)[

### Bugsnag
Create issues with screenshots
](https://testingbot.com/support/integrations/bugsnag)[

### ZebRunner
Smart analysis of test results
](https://testingbot.com/support/integrations/zebrunner)
## CI/CD
Integrate with your continuous integration pipeline
[

### TeamCity
Plugin for JetBrains TeamCity
](https://testingbot.com/support/integrations/ci-cd/teamcity)[

### Jenkins
Pipeline + tunnel support
](https://testingbot.com/support/integrations/ci-cd/jenkins)[

### Bamboo
Atlassian Bamboo plugin
](https://testingbot.com/support/integrations/ci-cd/bamboo)[

### Azure DevOps
Integrate with VSTS
](https://testingbot.com/support/integrations/ci-cd/azure)[

### CircleCI
Integrate with CircleCI
](https://testingbot.com/support/integrations/ci-cd/circleci)[

### Bitbucket
Bitbucket Pipelines integration
](https://testingbot.com/support/integrations/ci-cd/bitbucket)[

### GitLab
Integrate with GitLab CI
](https://testingbot.com/support/integrations/ci-cd/gitlab)[

### Travis CI
Integrate with Travis CI
](https://testingbot.com/support/integrations/ci-cd/travis-ci)[

### GitHub Actions
Launch tests from workflows
](https://testingbot.com/support/integrations/ci-cd/github-actions)[

### Bitrise
Mobile app CI/CD integration
](https://testingbot.com/support/integrations/ci-cd/bitrise)
## Record and Playback
Create tests without writing code
[

### Selenium IDE
Record with browser extension
](https://testingbot.com/support/web-automate/codeless-automation/add-test)[

### Katalon Studio
Record and run on TestingBot
](https://testingbot.com/support/web-automate/selenium/katalon-studio)[

### Oxygen IDE
Record and playback tests
](https://testingbot.com/support/web-automate/selenium/oxygen)[

### Ranorex Studio
Record and run tests
](https://testingbot.com/support/integrations/ranorex)[

### Cerberus
Run Cerberus tests
](https://testingbot.com/support/integrations/cerberus)[

### Tricentis Tosca
Run Tosca tests
](https://testingbot.com/support/integrations/tricentis-tosca)[

### QMetry
Codeless test automation
](https://testingbot.com/support/integrations/qmetry)
## App Distribution
Test apps from distribution platforms
[

### App Center
Test apps from Microsoft App Center
](https://testingbot.com/support/integrations/appcenter)
## Browser Extension
Test instantly from your browser
[

### TestingBot Extension
Test any webpage instantly
](https://testingbot.com/support/web-live/extension)
## Marketplace
Available in popular marketplaces
[

### Shopify
Test your Shopify store
](https://apps.shopify.com/testingbot-1)[

### Semrush
Test on 100+ browser combinations
](https://www.semrush.com/apps/ai-website-testing/)[

### Wix
Test your Wix website
](https://www.wix.com/app-market/web-solution/website-testing)[

### AWS Marketplace
License through AWS
](https://aws.amazon.com/marketplace/seller-profile?id=seller-k6mxju5cqvrp4)
## Other
Additional tools and integrations
[

### Appium Inspector
Visualize and inspect mobile app elements
](https://testingbot.com/support/integrations/appium-desktop)
---
URL: https://testingbot.com/test-on-ipad
# Online Testing on iPad Devices
Test your iOS mobile app or website on a wide range of physical iPad devices. We provide access to devices such as iPad 8th generation, iPad 6th generation and more iOS devices.
Signup & Start Testing for Free!
[Get started free](https://testingbot.com/users/sign_up)[Request a demo](https://testingbot.com/demo)

Trusted by some of the world's most innovative companies
Key Features
## Test On Different iPads Online
### Wide range of iPad devices
Test your mobile apps and websites on physical iPads. Choose from a range of iPads, from iPad 6th generation to iPad 8th generation.
### Real iPad Device Cloud
Each test on TestingBot comes with a video screencast of the device, logs and other generated artifacts.
### Secure and private
TestingBot provides pristine iPad devices with the possibility of private iPad devices.
### Real-time debugging
Debug your websites & mobile apps. Access crash reports and logs to instantly fix bugs.
### Tap, Swipe, Pinch & more
Interact with a physical, iPad iOS device. Just like you would, while holding it in your hand. Tap, swipe, pinch and perform other gestures.
### Test various network speeds
Run iPad tests with different network speeds: choose between WiFi, 5G, 4G, Edge and more.
iPad Testing
## Real iPad Devices for Testing
If you don't have an iPad device to test on, simply connect to a physical device in TestingBot's datacenter. You will get instant access to a physical iPad.
TestingBot provides iPads ranging from iPad 6th generation to iPad 8th generation.
[Get started free](https://testingbot.com/users/sign_up)
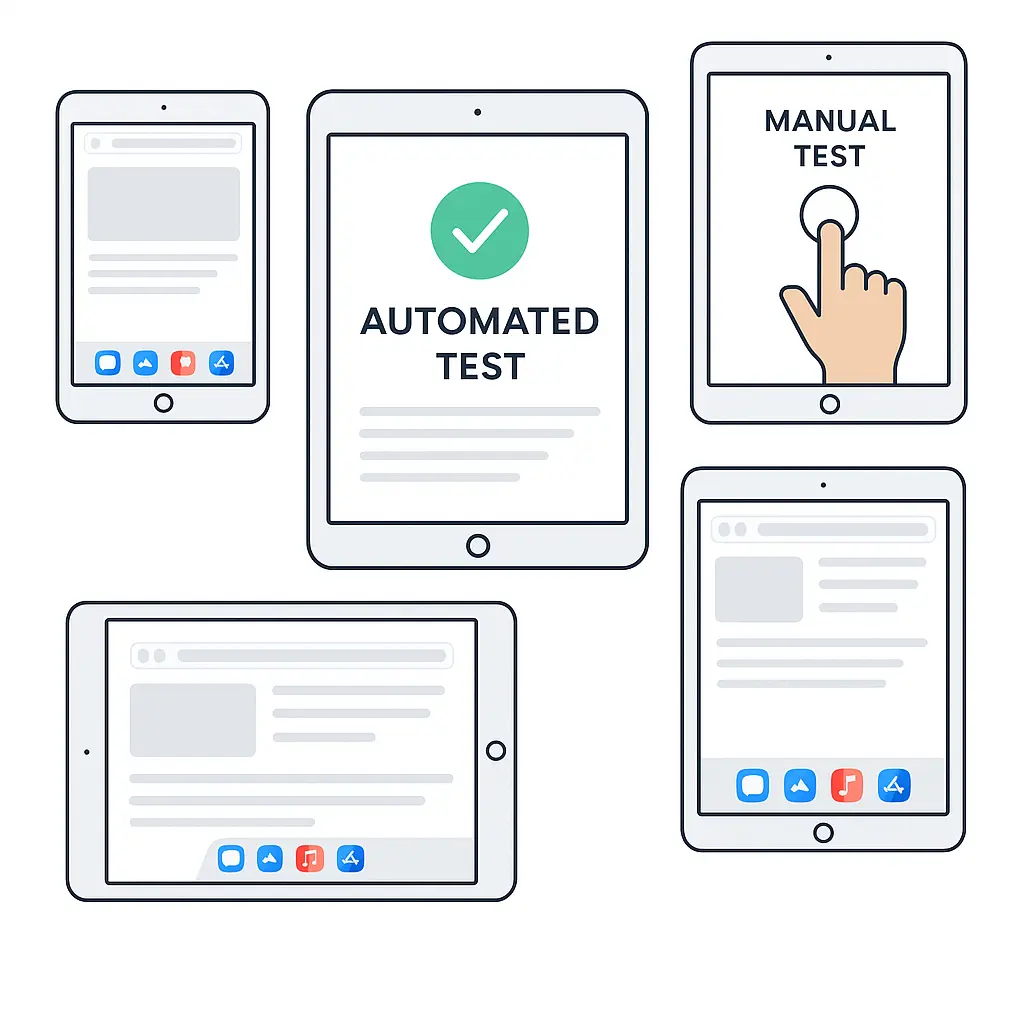
Geolocation
## Geolocation Testing on iPads
Perform geolocation testing in various regions across the world. Test iPad Geo Targeting, Geo Blocking and Geo Localization in 10 countries, including Australia, Belgium, United Kingdom, United States, Germany, France, Spain, China and more.
Screenshots
## Responsive Testing On iPad
Choose between various iPad devices with different screen sizes to perform responsive testing. Rotate the device for landscape and portrait mode testing.
[Get started free](https://testingbot.com/users/sign_up)

Appium Testing

## Automated iPad Testing with Appium
Use [Appium](https://testingbot.com/features/automation/appium) to connect to our grid of physical iPads and run automated mobile tests against your website or mobile app.
### Real Devices
Run your Appium tests on physical mobile devices, without maintaining your own in-house device lab.
### Geolocation Testing
Run Appium tests with TestingBot's built-in geo-location testing feature. Choose from up to 20 regions around the globe.
### Reliable Service
Test on a reliable platform, with zero test flakiness. Ship your website and mobile app with confidence.

Local Testing
## Local iPad Testing
Use our [secure tunnel](https://testingbot.com/support/tunnel) to quickly and easily test your staging website on any Safari browser version on iPad.
Once you download and start our tunnel, you can immediately test your webapps running on your computer or internal network on any iPad in our cloud, straight from your browser.
[Read more](https://testingbot.com/support/tunnel)
FAQ
## Frequently Asked Questions
### How to test a mobile app on iPad?
Testing your iOS app on a variety of iPad devices is important before publishing to the App Store. TestingBot allows you to upload and test your app on a number of different iPads.
Choose between various iOS versions and screen resolutions, to make sure your mobile app works on all iPad devices.
### Why use a real iPad device instead of an iOS simulator?
Running an iOS simulator or iOS emulator is slow to start and use. Simulators are running a virtualized version of iOS and can not be compared to using iOS on a physical device. Physical devices have different chipsets and hardware.
Simulators do not mimic the exact performance of the iOS device they're simulating. Some apps and services are missing as well, for example the Schoolwork app (using Classkit). Simulators can not mimic exact device hardware configurations, which means battery consumption measurements for example can not be performed accurately.
### Why is testing your website on an iPad necessary?
iPads have a 30% global market share, it's important to make sure your website looks and behaves correctly on iPad.
Safari is the default browser on iPad, so you should test your website on mobile safari to make sure iPad users have a good experience. Test your website in portrait and landscape mode to make sure your website and apps work 100% correct on tablets.
### What is TestingBot's Real Device Cloud?
TestingBot provides a grid of physical iPad devices, ready to run your manual and automated tests.
No need to purchase, setup and maintain your own collection of iPad devices. Rely on TestingBot for your iOS testing.
### Can I test Safari on iPad?
TestingBot provides access to unaltered iPads. These come straight from the store and are not jailbroken.
Run your tests on real mobile safari browsers, on physical iPad devices in our datacenter.
### More reasons to love TestingBot
### 24/7 support
Got questions? Ask in the 24/7 in-app customer [chat support](https://testingbot.com#) or [send us an email](https://testingbot.com/contact/new). We are here to help you!
TestingBot Support
Hey 👋 How can we help?
I need support
### Trusted by over 14,000 teams
6M+
Tests
120k+
Users
400+
Enterprises
106
Countries
[Request a demo](https://testingbot.com/demo)
### Developer Documentation
Everything you need to integrate TestingBot into your workflow. Browse guides, API references and SDKs for web and mobile testing.
- [Quickstart tutorials for Selenium](https://testingbot.com/support/web-automate/selenium)
- [Appium Examples](https://testingbot.com/support/app-automate/appium)
- [Integrations](https://testingbot.com/support/integrations)
- [List of browsers & devices](https://testingbot.com/support/web-automate/browsers)
[Explore Documentation](https://testingbot.com/support)
### Enterprise-grade Security
Star level 1
Certified
GDPR
Compliant
SAML SSO
Single Sign-On
99.99%
Uptime SLA
[Visit TestingBot Trust Center](https://trust.testingbot.com/)
### Ready to start iPad Testing?
Start testing your apps on iPad devices today with TestingBot's cloud platform.
[Start a free trial](https://testingbot.com/users/sign_up)
---
URL: https://testingbot.com/test-on-galaxy
# Online Samsung Galaxy Devices
Start testing and interacting with real Android devices, including Samsung Galaxy S24, Galaxy S23, Galaxy S21, Galaxy S20, Galaxy S10, S8, Galaxy Tabs and more.
Signup & Start Testing for Free!
[Get started free](https://testingbot.com/users/sign_up)[Request a demo](https://testingbot.com/demo)

Trusted by some of the world's most innovative companies
Key Features
## Test On Galaxy Devices Online
### Wide range of Samsung Galaxy devices
Test your mobile apps and websites on physical Samsung Galaxy devices. Choose from a range of Android Galaxy versions, including Galaxy S23.
### Physical Android Device Cloud
Each test on TestingBot comes with a video screencast of the device, logs and other generated artifacts.
### Secure and private
TestingBot provides physical Galaxy devices, without any modification.
### Real-time debugging
Debug your websites & mobile apps. Access crash reports and logs to instantly fix bugs.
### Tap, Swipe, Pinch & more
Interact with a physical Galaxy device. Tap, swipe, pinch and perform other gestures, just like you would while holding it in your hand.
### Test various network speeds
Run Android tests with different network speeds: choose between WiFi, 5G, 4G, Edge and more.
Galaxy Devices
## Real Samsung Galaxy Devices for Testing
If you don't have a Galaxy Android device to test on, simply connect to a physical one in TestingBot's datacenter.
- Galaxy S24
- Galaxy S23
- Galaxy S21
- Galaxy S20
- Galaxy S10
- Galaxy Tab
[Get started free](https://testingbot.com/users/sign_up)
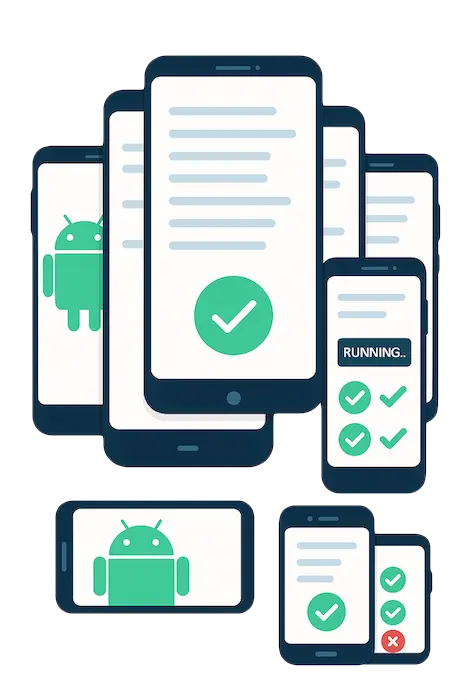
Geolocation
## Geolocation Testing on Samsung Galaxy
Perform geolocation testing in various regions across the world. Test Samsung Galaxy Geo Targeting, Geo Blocking and Geo Localization in 10 countries, including Australia, Belgium, France, Germany, United Kingdom, United States and more.
Screenshots
## Responsive Testing On Samsung Galaxy
Choose between various Samsung Galaxy devices with different screen sizes to perform responsive testing. Rotate the device for landscape and portrait mode testing.
[Get started free](https://testingbot.com/users/sign_up)

 Appium Testing
## Automated Android Testing with Appium
Use [Appium](https://testingbot.com/features/automation/appium) to connect to our grid of physical Samsung Galaxy devices and run automated mobile tests against your website or mobile app.
### Real Devices
Run your Appium tests on physical mobile devices, without maintaining your own in-house device lab.
### Geolocation Testing
Run Appium tests with TestingBot's built-in geo-location testing feature. Choose from up to 20 regions around the globe.
### Reliable Service
Test on a reliable platform, with zero test flakiness. Ship your website and mobile app with confidence.

Secure Tunnel
## Local Android Testing
Use our [secure tunnel](https://testingbot.com/support/tunnel) to quickly and easily test your staging website on a Chrome browser version running on Android.
Once you download and start our tunnel, you can immediately test your webapps running on your computer or internal network on any Samsung Galaxy device in our cloud, straight from your browser.
[Read more](https://testingbot.com/support/tunnel)
FAQ
## Frequently Asked Questions
### Why should I test on Samsung Galaxy devices?
Samsung Galaxy Devices are very popular with close to 28% of the global market share. In some countries, such as Brazil or India, the market share is close to 40%.
It's important to make sure your website and mobile apps work on these devices. TestingBot allows you to test on the most popular Samsung Galaxy phones and tablets.
### Should I use a Samsung Galaxy Emulator?
Emulators do not mimic the full user experience, they are laggy and have subtle differences.
Google recommends testing your apps on real devices, before submitting to the Play Store. Emulators do not provide key features such as placing phone calls or advanced camera usage.
### Why should I use TestingBot to test on Samsung Galaxy?
TestingBot provides physical Samsung devices, ranging from Samsung Galaxy S8 to S23 and Samsung Galaxy Tab devices.
Instantly interact with a remote, physical device, via TestingBot's cloud. Test, debug and fix bugs using native developer tools.
### How can I test for compatibility on Samsung Galaxy S21?
Instead of purchasing a S21 or setting up an emulator, you can simply connect to the TestingBot remote device grid.
Developers and QA teams can use TestingBot's online devices. Test on devices such as Samsung Galaxy S8, S10, S20, S21, S23 and more.
### Can I test Chrome on Android?
All Android devices in the TestingBot cloud come equipped with the default (Chrome) browser.
Our physical devices are not rooted and come with Google Play Store and Chrome.
### More reasons to love TestingBot
### 24/7 support
Got questions? Ask in the 24/7 in-app customer [chat support](https://testingbot.com#) or [send us an email](https://testingbot.com/contact/new). We are here to help you!
TestingBot Support
Hey 👋 How can we help?
I need support
### Trusted by over 14,000 teams
6M+
Tests
120k+
Users
400+
Enterprises
106
Countries
[Request a demo](https://testingbot.com/demo)
### Developer Documentation
Everything you need to integrate TestingBot into your workflow. Browse guides, API references and SDKs for web and mobile testing.
- [Quickstart tutorials for Selenium](https://testingbot.com/support/web-automate/selenium)
- [Appium Examples](https://testingbot.com/support/app-automate/appium)
- [Integrations](https://testingbot.com/support/integrations)
- [List of browsers & devices](https://testingbot.com/support/web-automate/browsers)
[Explore Documentation](https://testingbot.com/support)
### Enterprise-grade Security
Star level 1
Certified
GDPR
Compliant
SAML SSO
Single Sign-On
99.99%
Uptime SLA
[Visit TestingBot Trust Center](https://trust.testingbot.com/)
Get Started
### Ready to start Galaxy Testing?
Start testing on real Galaxy devices in minutes. No credit card required.
[Start a free trial](https://testingbot.com/users/sign_up)
---
URL: https://testingbot.com/support
# Documentation
Welcome to the TestingBot Developer Platform!
The TestingBot platform allows you to test your websites and apps on hundreds of browsers & devices.
### [Automated Web Testing](https://testingbot.com/support/web-automate/selenium/nodejs)
Get started with automated testing of websites.
- [Selenium](https://testingbot.com/support/web-automate/selenium)
- [Cypress](https://testingbot.com/support/web-automate/cypress)
- [Puppeteer](https://testingbot.com/support/web-automate/puppeteer)
- [Playwright](https://testingbot.com/support/web-automate/playwright)
* * *
[List of remote browsers (+5000)](https://testingbot.com/support/web-automate/browsers)
### [Automated App Testing](https://testingbot.com/support/app-automate)
Run automated tests against native mobile apps.
- [Appium](https://testingbot.com/support/app-automate/appium)
- [Espresso](https://testingbot.com/support/app-automate/espresso)
- [XCUITest](https://testingbot.com/support/app-automate/xcuitest)
- [Maestro](https://testingbot.com/support/app-automate/maestro)
* * *
[List of physical devices](https://testingbot.com/support/app-automate/devices)
### [AI Testing](https://testingbot.com/support/ai)NEW
Use AI to test. Connect remote browsers with LLM frameworks.
- [Codeless tests with AI](https://testingbot.com/support/ai/codeless)
- [Generate tests with LLM](https://testingbot.com/support/ai/chat)
- [Test Recorder](https://testingbot.com/support/web-automate/codeless-automation/add-test)
- [Functions](https://testingbot.com/support/functions)
* * *
[AI Integrations](https://testingbot.com/support/ai/integrations)
### Manual Web & App Testing
Control a remote browser or device.
- [Manual Web Testing](https://testingbot.com/support/web-live)
- [Manual App Testing](https://testingbot.com/support/app-live)
### [Visual Website Testing](https://testingbot.com/support/visual-testing)
Capture and compare screenshots.
- [Automated Visual Testing](https://testingbot.com/support/visual-testing/automated)
- [Codeless Visual Testing](https://testingbot.com/support/visual-testing/codeless)
### [Accessibility Web Testing](https://testingbot.com/support/accessibility)
Test the accessibility of your URLs.
- [Selenium + Accessibility](https://testingbot.com/support/accessibility/web/selenium)
- [Scheduled Testing](https://testingbot.com/support/accessibility/web/scheduled)
## More resources
### [Guides & articles](https://testingbot.com/support/web-automate/selenium/nodejs)
Learn more about TestingBot
- [Top Web Development Tools in 2025](https://testingbot.com/resources/articles/web-development-tools)
- [Most popular Screen Resolutions](https://testingbot.com/resources/articles/common-screen-resolutions)
- [Selenium Python Tutorial](https://testingbot.com/resources/articles/python-selenium-web-automation-test)
- [How to Change Browser Settings](https://testingbot.com/resources/articles/how-to-change-browser-settings)
### [TestingBot Platform](https://testingbot.com/support/app-automate)
Learn more about the TestingBot platform.
- [Status](https://status.testingbot.com)
- [Configuration](https://testingbot.com/support/other/configuration)
- [Trust Center](https://trust.testingbot.com)
- Need help? [Contact Support](https://testingbot.com/contact/new) or use the [TestingBot Slack Workspace](https://join.slack.com/t/testingb0t/shared_invite/zt-3bcw9xch-jk19~6XPs_xBrsAgAedkCw)
- Check out our [changelog.](https://testingbot.com/product-updates)
- Questions? [Schedule a demo.](https://testingbot.com/demo)
- LLM? [Read llms.txt.](https://testingbot.com/llms.txt)
---
URL: https://testingbot.com/support/analytics
# Analytics
TestingBot provides a suite of graphs and data tables to help you understand and improve the quality of your tests.
- [Guide](https://testingbot.com/support/analytics/guide)
- [Test Insights](https://testingbot.com/support/analytics/insights)
- [Build Analytics](https://testingbot.com/support/analytics/builds)
Was this page helpful? Yes No
## Looking for More Help?
Have questions or need more information?
You can reach us via the following channels:
- [Email us](https://testingbot.com/contact/new)
- [Join our Slack Channel](https://join.slack.com/t/testingb0t/shared_invite/zt-3bcw9xch-jk19~6XPs_xBrsAgAedkCw)
---
URL: https://testingbot.com/support/analytics/insights
# Test Insights
The Test Insights page provides, for each test you run on TestingBot, a scatter-plot visualization.
This is a great way to visualize how your test is doing with regards to **performance** and **flakiness** over time.
You'll get a visual overview of how the test has been running the previous weeks and months.
Discover trends and outliers and find out how robust your test has run over time.
The only prerequisite is that you've [annotated your webdriver sessions with the same name](https://testingbot.com/support/api#updatetest).
Only then can we track how your test has been performing over time.
## Viewing Test Insights for a test
In our [member dashboard](https://testingbot.com/members), navigate to the test details page of a test session.
Click the `test name` on the `test details page` to open the Test Insights page for this test.
**Important:** Only tests that have a name (and not `unnamed test...`) will show this option.
## Reading the Scatter Plot Visualization
On this page you'll find a scatter plot with some additional metrics on top of the graph.
Performance metrics include:
- **Total Runs:** how many times you've run this test in the past.
- **Total Failures:** how many times in the past did this test fail.
- **Fastest Runtime:** how many seconds did the fastest run of this test take in the past.
- **Slowest Runtime:** how many seconds was the slowest execution of this test in the past.
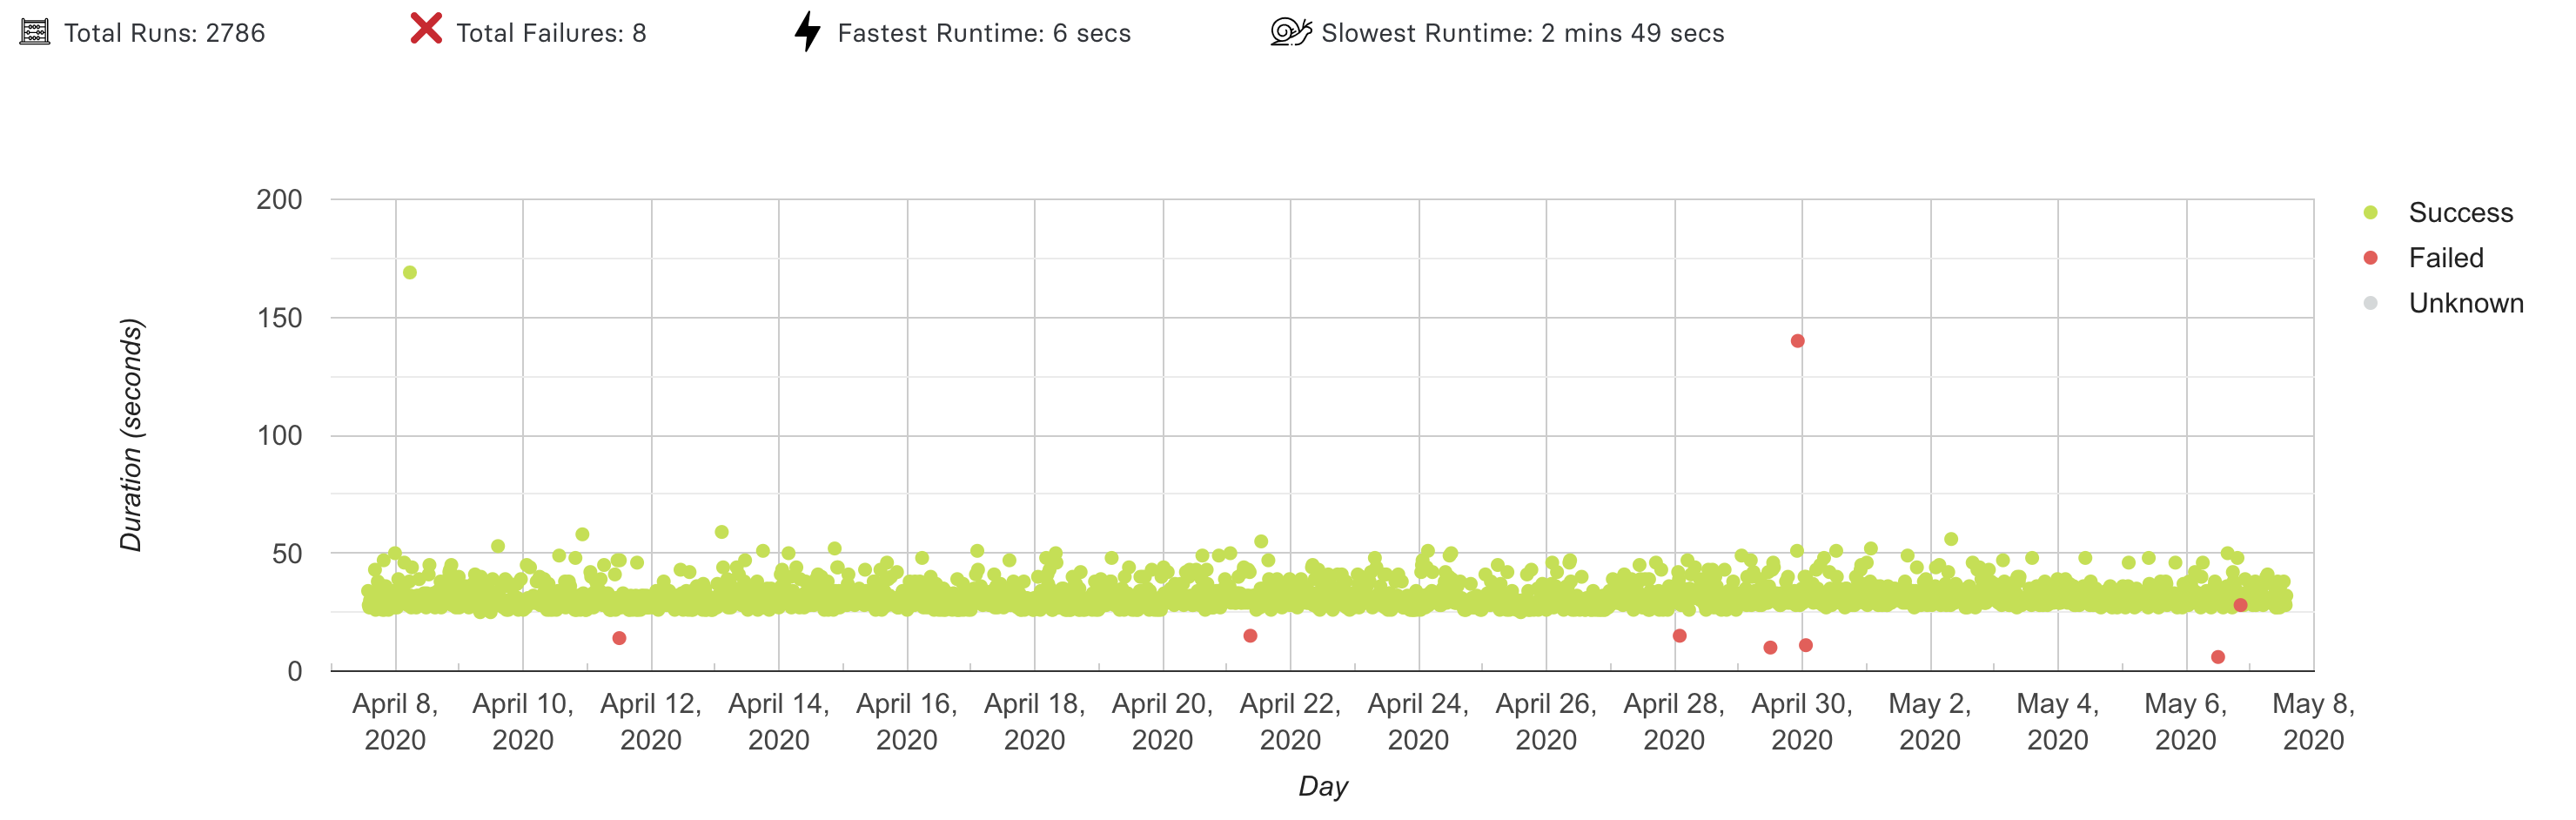
The example graph above shows what to expect from the Test Insights page.
This is a scatter plot, where each dot represents a session with the identical name.
The `X-axis` indicates a time range (which you can specify in the filter below the graph).
The `Y-axis` indicates the duration (in seconds) of each test.
The color of the dot indicates if the test passed (green), failed (red) or unknown (gray).
TestingBot does not know your test status by default, you need to [annotate your tests with a success parameter](https://testingbot.com/support/api#updatetest).
## Interpreting results
You can pan the graph to zoom in or out, and use the filter below the graph to change the time range.
Clicking a dot will navigate to the test details page of that test session.
The example above shows a very consistent graph, with a high pass rate and a couple of (failed) outliers.
Other graphs may show a different story. For example, a flaky test will show a scatter plot with `failures` on first run and `passes` on re-runs.
Was this page helpful? Yes No
## Looking for More Help?
Have questions or need more information?
You can reach us via the following channels:
- [Email us](https://testingbot.com/contact/new)
- [Join our Slack Channel](https://join.slack.com/t/testingb0t/shared_invite/zt-3bcw9xch-jk19~6XPs_xBrsAgAedkCw)
---
URL: https://testingbot.com/support/analytics/builds
# Test Builds
Test Builds are group of tests. This term is usually used in a CI/CD context.
Whenever you want to deploy to production, you'll run a group of tests to verify the build.
It is possible to [annotate your Selenium WebDriver tests with a build identifier](https://testingbot.com/support/web-automate/selenium/test-options#build).
When TestingBot sees a `build identifier` in the desired capabilities of your test, we will add the test to the group you specified.
## Build Graph
In our [member dashboard](https://testingbot.com/members), navigate to the build overview page and click a build name.
You will see a page with a pie-chart of the build's success rate and a table with all tests included in this build.
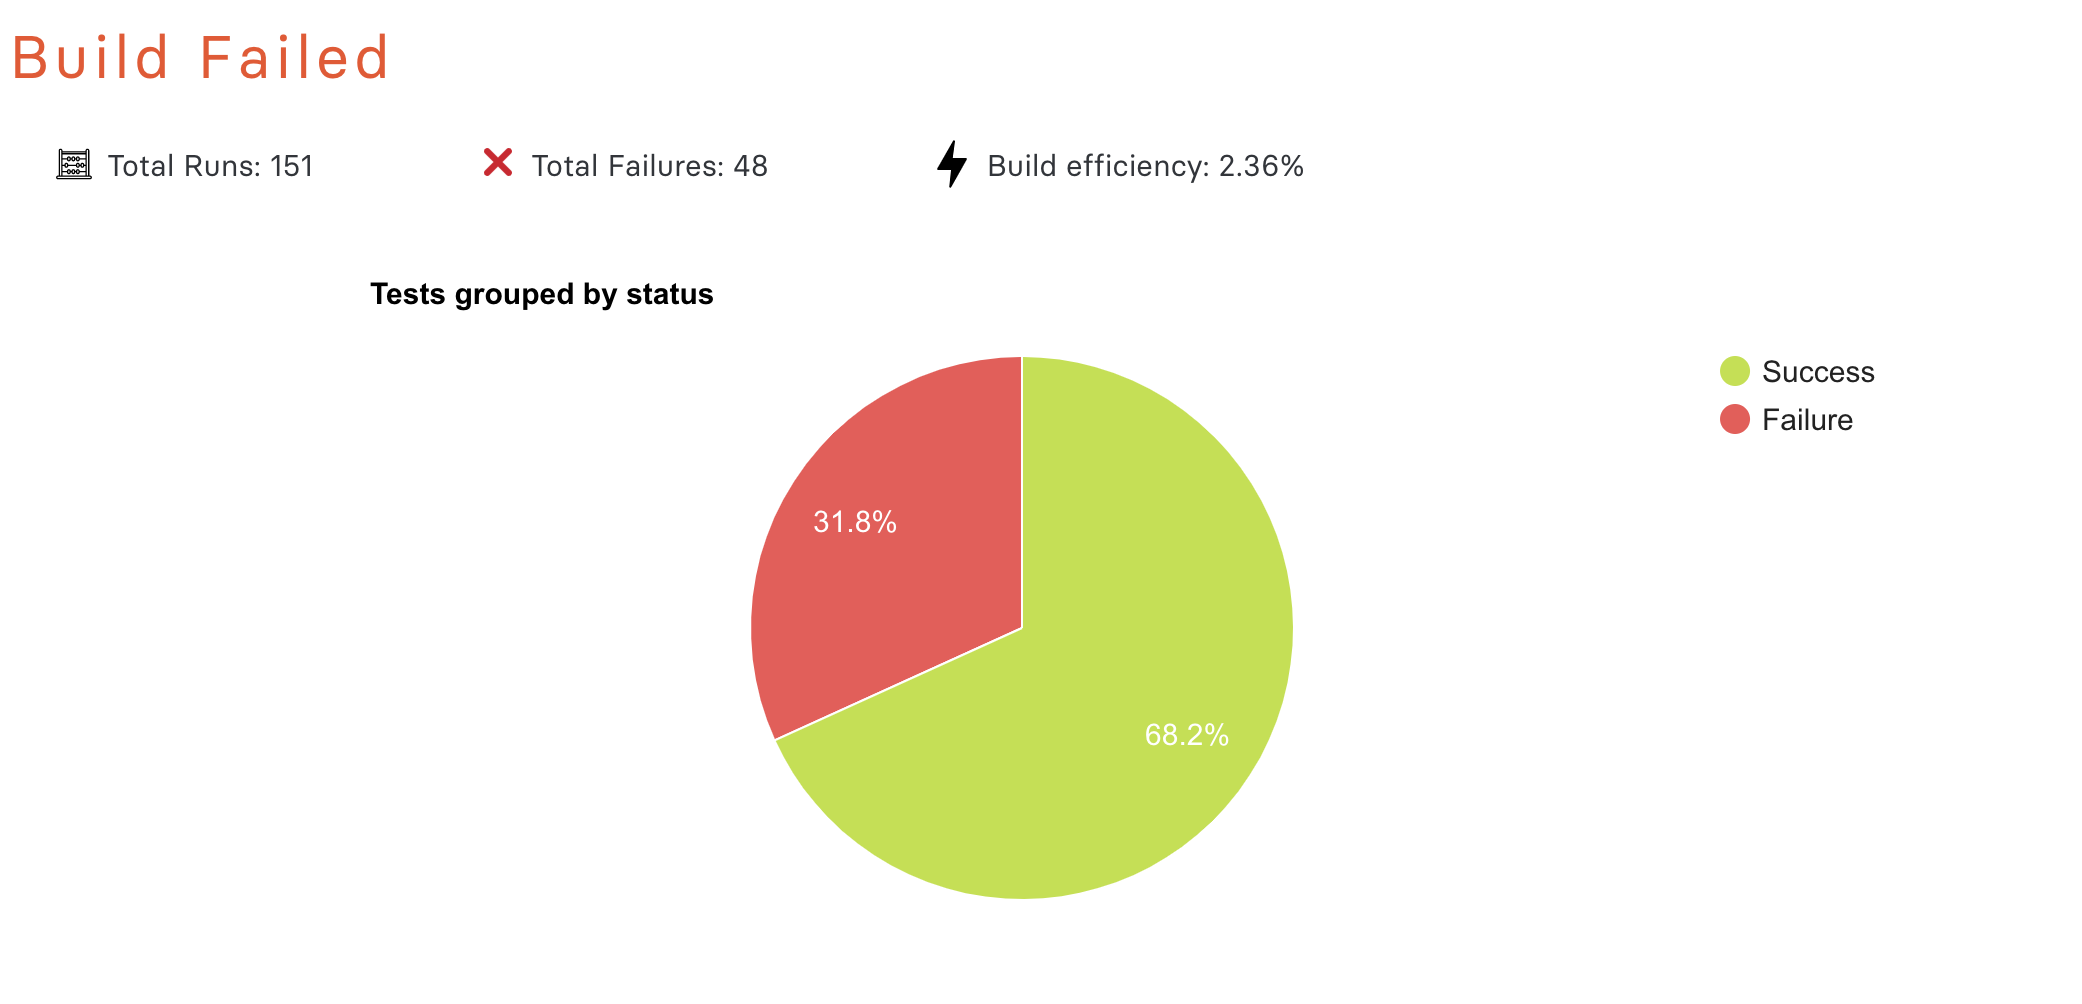
Click the `green` or `red` slice of the pie-chart to see a list of `passed` or `failed` tests.
## Build Efficiency
For each build, we calculate an `efficiency percentage`.
This number indicates how well your test runner has been using `parallelization` to shorten the total test duration of the test build.
One of the advantages of using TestingBot is its `concurrency`: run multiple tests simultaneously to drastically shorten the total time required to run all your tests.
For example:
- Running 10 tests in the build `sequentially`, where each test takes 30 seconds, would result in a total test build duration of **300 seconds**.
- Running these 10 tests in `parallel`, where each test still takes 30 seconds, would result in a total test build duration of **30 seconds**.
The `efficiency percentage` is calculated as a percentage. It is based on how long the build took to run, compared to the duration of the longest test in the build.
Efficiency Percentage | Degree of Parallelization | Description || 0%-20% | Sequential | All your tests have been running sequentially. Consider speeding up your build time with parallelization. |
| 20%-90% | Semi-Parallel | Some of your tests are running in parallel. There is still room for improvement: add more parallelization to run all tests in your build simultaneously. |
| 90%-100% | Full Parallel | You are taking full advantage of parallelization and your test build is optimised for the fastest build time. |
Was this page helpful? Yes No
## Looking for More Help?
Have questions or need more information?
You can reach us via the following channels:
- [Email us](https://testingbot.com/contact/new)
- [Join our Slack Channel](https://join.slack.com/t/testingb0t/shared_invite/zt-3bcw9xch-jk19~6XPs_xBrsAgAedkCw)
---
URL: https://testingbot.com/support/analytics/guide
# Analytics
TestingBot provides detailed analytics about your test sessions. We provide you with graphs and metrics, allowing you to:
- Reduce time spent analyzing test results
- Locate bottlenecks in your test performance
- See for which browsers and platforms your tests are flaky and more prone to failure
- Determine if a build is release quality
## Filters
Our analytics filters allow you to drill down on your metrics and visualize the information you need.
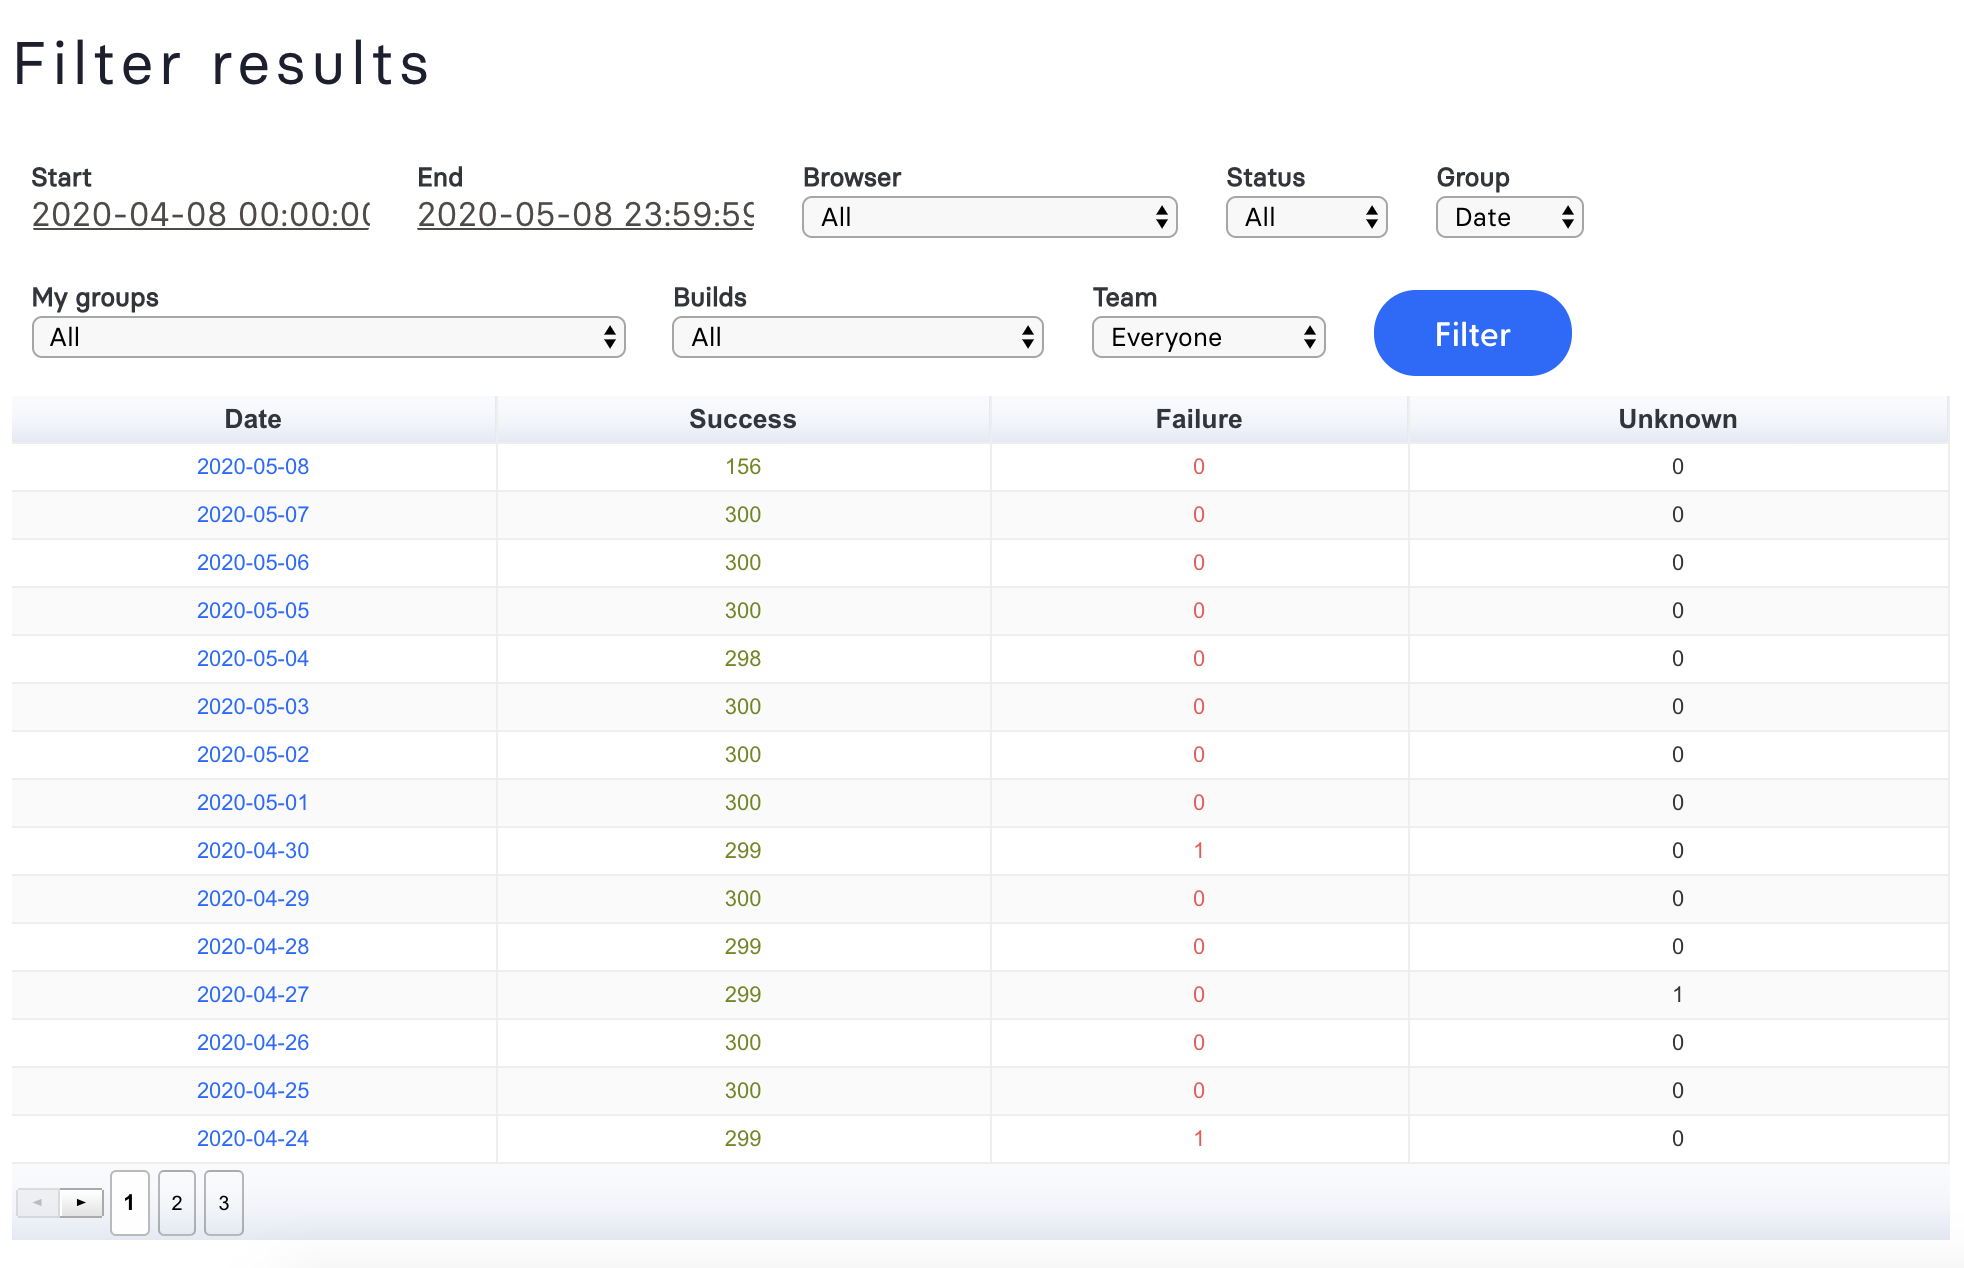
You can filter on several things, including:
- Start/End time of the test
- Browser/Device
- Status (Passed, Failed, Unknown)
- Group by date/status
- Filter by [Build](https://testingbot.com/support/web-automate/selenium/test-options#build)
- Filter by groups: only show tests that have a [group (tag)](https://testingbot.com/support/web-automate/selenium/test-options#grouping) included in their desired capability.
- Filter by [team member](https://testingbot.com/support/team/sub-accounts)
## Graphs
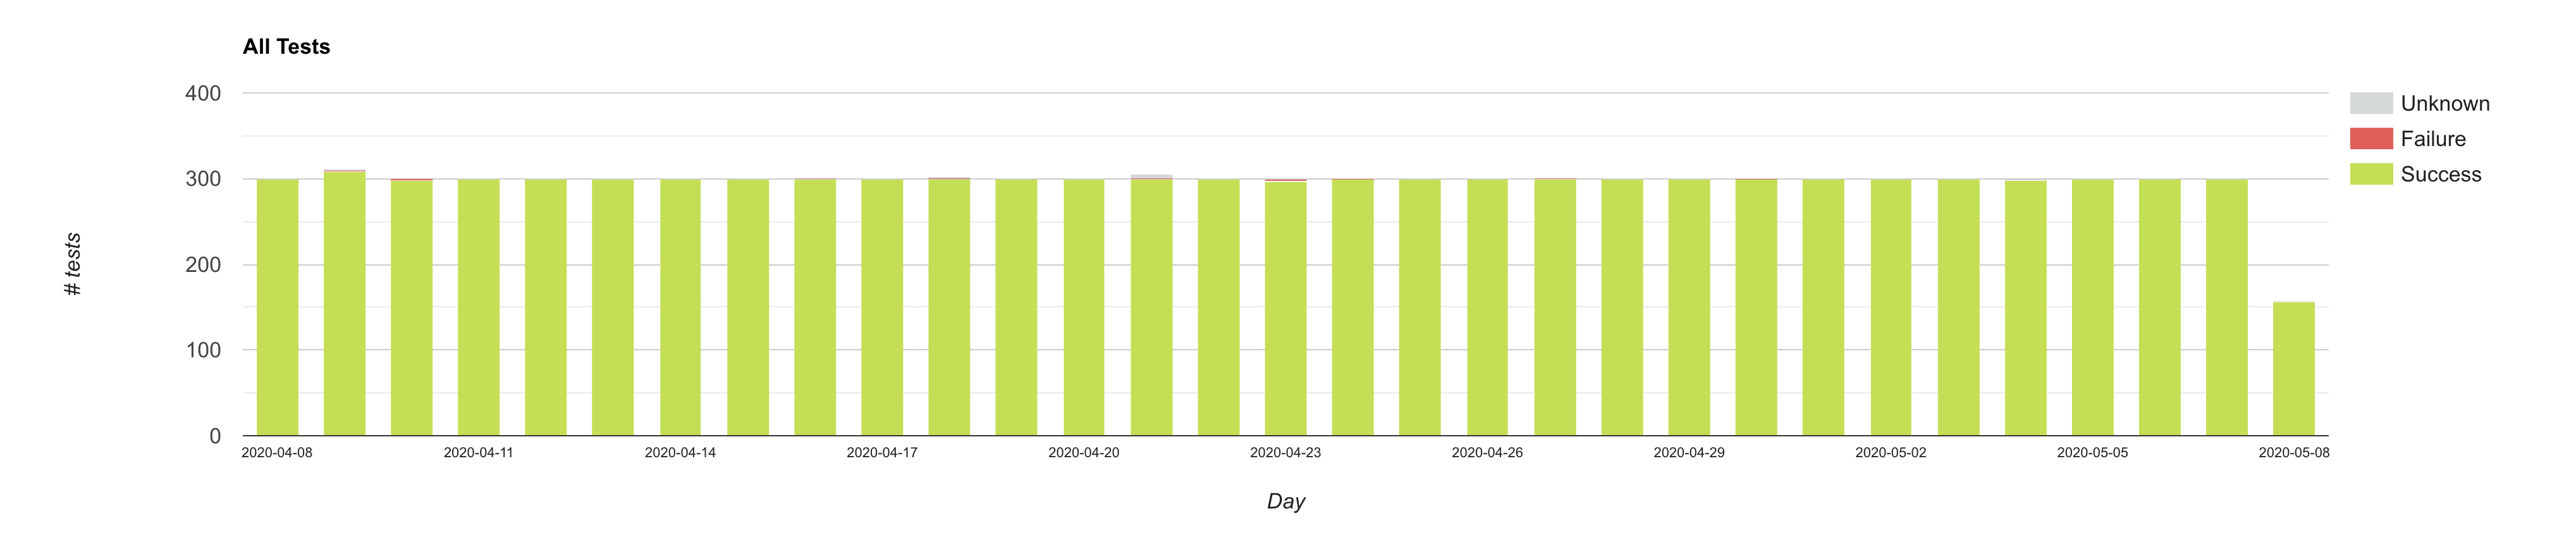
One of the first graphs you'll see is the graph above. This Column Chart shows an overview of the pass/fail rate for all your tests, grouped by day, for the last 31 days.
Each column represents a day, and may include:
- **Passed/Success:** all tests marked as passed
- **Failure:** all tests marked as failed
- **Unknown:** we don't know the status about this test. Please use our API to mark this test as passed/failed.
Using the filter, you can change the date range and filter by various things (see above).
If you click part of the graph, you'll navigate to an overview of all tests for that specific part.
Was this page helpful? Yes No
## Looking for More Help?
Have questions or need more information?
You can reach us via the following channels:
- [Email us](https://testingbot.com/contact/new)
- [Join our Slack Channel](https://join.slack.com/t/testingb0t/shared_invite/zt-3bcw9xch-jk19~6XPs_xBrsAgAedkCw)
---
URL: https://testingbot.com/support/billing
# Billing
- [Payment Options](https://testingbot.com/support/billing/payment-options)
- [Charges](https://testingbot.com/support/billing/charges)
- [Upgrading](https://testingbot.com/support/billing/upgrading)
- [Invoices](https://testingbot.com/support/billing/invoices)
- [Cancel](https://testingbot.com/support/billing/cancel)
Was this page helpful? Yes No
## Looking for More Help?
Have questions or need more information?
You can reach us via the following channels:
- [Email us](https://testingbot.com/contact/new)
- [Join our Slack Channel](https://join.slack.com/t/testingb0t/shared_invite/zt-3bcw9xch-jk19~6XPs_xBrsAgAedkCw)
---
URL: https://testingbot.com/support/billing/payment-options
# Payment Options
You can see the list of our prices on our [pricing page](https://testingbot.com/pricing).
We accept the following payment options:
- Credit card payment
- PayPal
- Wire Transfer ([contact us for wire details](https://testingbot.com/contact/new))
- [AWS Marketplace](https://aws.amazon.com/marketplace/pp/prodview-yv6ds4mf77fao)
TestingBot is PCI compliant. Please view our [SAQ A](https://testingbot.com/pci.pdf).
## Credit Card

Billing occurs as a subscription and is handled by Stripe.com.

All payments happen on a HTTPS secured page.
**Your payment data is never stored or logged on our website.**
Was this page helpful? Yes No
## Looking for More Help?
Have questions or need more information?
You can reach us via the following channels:
- [Email us](https://testingbot.com/contact/new)
- [Join our Slack Channel](https://join.slack.com/t/testingb0t/shared_invite/zt-3bcw9xch-jk19~6XPs_xBrsAgAedkCw)
---
URL: https://testingbot.com/support/billing/charges
# Charges
Billing occurs as a monthly subscription. This means that every month your account will be recharged with testing minutes. How many test minutes are added depends on the subscription you choose.
You can see the various subscriptions on our [pricing page](https://testingbot.com/pricing).
## What if I use more than the provided test minutes?
You will no longer be able to run your tests until the end of the month.
Please consider upgrading to a plan with more capacity.
**We will never automatically re-charge your subscription for extra minutes, no hidden costs.**
## When will I be billed?
You will be billed on the same day of each month. If you started your subscription on the 11th day, then you will be charged the 11th day the next month.
Was this page helpful? Yes No
## Looking for More Help?
Have questions or need more information?
You can reach us via the following channels:
- [Email us](https://testingbot.com/contact/new)
- [Join our Slack Channel](https://join.slack.com/t/testingb0t/shared_invite/zt-3bcw9xch-jk19~6XPs_xBrsAgAedkCw)
---
URL: https://testingbot.com/support/billing/upgrading
# Upgrading subscription
At any time you can [upgrade your current subscription](https://testingbot.com/pricing).
You will not lose your remaining testing minutes for that month.
Minutes will be transferred over immediately when you upgrade your plan.
The number of simultaneous VMs allowed will be automatically increased after your upgrade.
Was this page helpful? Yes No
## Looking for More Help?
Have questions or need more information?
You can reach us via the following channels:
- [Email us](https://testingbot.com/contact/new)
- [Join our Slack Channel](https://join.slack.com/t/testingb0t/shared_invite/zt-3bcw9xch-jk19~6XPs_xBrsAgAedkCw)
---
URL: https://testingbot.com/support/billing/invoices
# Invoices
We provide invoices for all customers with an active subscription.
You can find monthly/yearly invoices (depending on the subscription) in our member area: [Your Account \> Invoices](https://testingbot.com/members/invoices).
You can see the invoices in HTML format or download as PDF.
If you are a sub-account in a team account, you will not be able to see the invoices. Only parent accounts or standalone accounts can see invoices.
## Changing Billing Details
To change the billing details (Company name, address, VAT number, ...) please go to [Your Account](https://testingbot.com/members/user/edit) and fill in the form under "Edit your account details".
When you update your billing details, the invoices will automatically be updated. Simply download the updated invoice.
## VAT number
If your company is located in Europe, please provide your VAT number in the form ["Edit your account details"](https://testingbot.com/members/user/edit).
Was this page helpful? Yes No
## Looking for More Help?
Have questions or need more information?
You can reach us via the following channels:
- [Email us](https://testingbot.com/contact/new)
- [Join our Slack Channel](https://join.slack.com/t/testingb0t/shared_invite/zt-3bcw9xch-jk19~6XPs_xBrsAgAedkCw)
---
URL: https://testingbot.com/support/billing/cancel
# Cancel Subscription
At any time you can choose to stop your subscription.
Simply go to [Your Account \> Invoices](https://testingbot.com/members/invoices) and click "cancel subscription".
Sorry to see you cancel your subscription. Please [let us know](https://testingbot.com/contact/new) how we can improve our service.
Was this page helpful? Yes No
## Looking for More Help?
Have questions or need more information?
You can reach us via the following channels:
- [Email us](https://testingbot.com/contact/new)
- [Join our Slack Channel](https://join.slack.com/t/testingb0t/shared_invite/zt-3bcw9xch-jk19~6XPs_xBrsAgAedkCw)
---
URL: https://testingbot.com/support/parallel-calculator
# Parallel Testing Calculator
Parallel testing allows you to run multiple tests simultaneously across various browsers, devices, and OS combinations. This approach enables more tests to be run at once, significantly decreasing overall testing time. Faster build times mean faster releases and less time spent waiting for builds to complete.
Use this calculator to understand how parallel testing can help you achieve your test coverage and build execution time goals. Simply input your current testing setup and desired build time to calculate the optimal number of parallel tests needed.
| Team | Current State | Desired Future State | Recommendation |
| --- | --- | --- | --- |
| # of Browsers
and/or Devices
(Current) | # of Parallel
Tests | Build Time
(hours) | # of Browsers
and/or Devices
(Desired) | Build Speed |
| --- | --- | --- | --- | --- |
| Team 1 | | | | |
Select...Supersonic (15m)Fast (30m)Basic (2h)Custom
| - |
| + Add Team | Total Recommendation: - |
Calculate Save & Share
Use this URL to view & share these results:
Copy
### Understanding the Calculator
# of Browsers and/or DevicesThe number of unique desktop browser and/or mobile device combinations to test.
# of Parallel TestsThe number of parallel tests you are currently running.
Build TimeTime taken for your entire build to complete.
---
URL: https://testingbot.com/support/team
# TestingBot Team Management
TestingBot provides team accounts, allowing you to share test results with your colleagues.
- [Account Settings](https://testingbot.com/support/team/account)
- [Team & Sub-Accounts](https://testingbot.com/support/team/sub-accounts)
- [Audit Logs](https://testingbot.com/support/team/audit-logs)
- [2FA](https://testingbot.com/support/team/2fa)
- [SSO](https://testingbot.com/support/team/sso)
- [Microsoft Entra](https://testingbot.com/support/team/sso/microsoft-entra)
- [Okta](https://testingbot.com/support/team/sso/okta)
---
URL: https://testingbot.com/support/team/sub-accounts
# Managing Sub-Accounts
Sub-accounts are accounts that can be linked to your account. They're a great way to share your subscription and test results with your team members.
- Everyone in the same group can see each other's tests.
- Each sub-account has its own login credentials to log into our TestingBot member dashboard, and they have their own key/secret credentials to run tests on our Selenium grid.
A sub-account can create/run/delete tests, see test results and interact with the member dashboard. The things **sub-accounts can't do** :
- Access any subscription related items: payment information, invoices, accounting details, ...
- Add/remove any other sub-accounts
## Adding Sub-Accounts
Go to [My Account \> Add Team Members](https://testingbot.com/members/sub/new) to add a new sub-account.
You can choose to either:
- **Invite Someone** : create a new account with email/password combination.
We'll send an activation link to this person's email address so he/she can immediately log in with the newly created sub-account.
- **Add existing TestingBot User** : in case the person you'd like to add to your group already has an account on TestingBot,
then simply fill in the email address they use on TestingBot. They'll receive an invite to join your group account as a sub-account.
## Modifying Sub-Accounts
To remove or edit a sub-account, go to [My Account \> Team Members](https://testingbot.com/members/sub).
### Disconnecting a sub-account
From there, you can **disconnect a sub-account** (clicking the red cross icon).
This disconnects the sub-account from your group.
The account will not be removed from our system, but it will no longer be associated with your account or other sub-accounts.
## Read-Only Sub-Accounts
Making a sub-account Read-Only means the account can only view tests, not modify or remove any results from the team account.
## Permissions
You can choose to create a sub-account with either **USER** permissions or **ADMIN** permissions.
- **USER:** a sub-account does not have any rights to add/remove other team members to the team account.
- **ADMIN:** an admin account can add/remove other users to the team account.
## Concurrency Limit
The Concurrency Limit indicates how many tests a user can run simultaneously. The more tests you run concurrently, the faster you can process all your tests.
By default, a sub-account will have the same amount of concurrency as the parent account (which depends on the pricing plan that the parent account is subscribed to).
It is possible to change the concurrency limit per user. This way, you can for example divide the amount of concurrency you have across various team members.
For example: you have an Enterprise plan with 30 parallel tests: You can assign 10 parallel tests to team member **A** , 15 to team member **B** and 5 to team member **C**. A user can not run more tests concurrently than the maximum amount assigned. If the user tries to run more tests, the tests will be queued in our system, waiting for a slot to free up.
If you do not change this setting for any of the sub-accounts, then all sub-accounts will have access to the maximum amount of concurrency. Whenever this threshold is reached, extra tests for any sub-account will be queued until a slot frees up.
## Tests Overview for Sub-Accounts
To see a list of tests created by a sub-account, click "Tests run by this user".
The list contains tests run by this sub-account (with their own key/secret).
## Team Activity Log
Team admins are able to see an overview of the actions performed by their team members in the Team Activity Log overview page. On the Team Management page, please click the **Activity Log** tab to open the overview.
In this activity log we will show the following events for your team members:
- A user from your team logged in
- A user from your team logged out
- A user was added to your team
- A user was removed from your team
- A team member's user level was upgraded or downgraded
Was this page helpful? Yes No
## Looking for More Help?
Have questions or need more information?
You can reach us via the following channels:
- [Email us](https://testingbot.com/contact/new)
- [Join our Slack Channel](https://join.slack.com/t/testingb0t/shared_invite/zt-3bcw9xch-jk19~6XPs_xBrsAgAedkCw)
---
URL: https://testingbot.com/support/team/2fa
# Why Two-Factor-Authentication (2FA)
Two Factor Authentication allows you to add an extra layer of security to your account.
By supplying us with your mobile phone number, we can send you an extra authentication token every time you managed to successfully log in with your TestingBot username and password.
The token you receive on your mobile device will then have to be entered after logging in on TestingBot in order to access your TestingBot account.
This way there's an extra security layer; if your credentials ever got compromised the attacker would also need access to your mobile device in order to log in on TestingBot.
## Enable 2FA
Log into your TestingBot account and go to [My Account](https://testingbot.com/members/user/edit).
At the bottom of this page, you will find an [enable 2FA](https://testingbot.com/members/2fa/enable) link.
To enable the 2FA, fill in the phone number of your mobile device. Make sure to enter the country code as well.
For example, for a US mobile device, make sure the number starts with `+1`
Once that's done, we'll send a verification code to your mobile device through SMS.
Fill in this verification code on the [enable 2FA](https://testingbot.com/members/2fa/enable) page to complete this process.
Once this process has been completed, the next time you log in you will be required to enter the verification code we'll send to you after logging in with email/password.
## Google Authenticator
It's possible to use [Google Authenticator](https://support.google.com/accounts/answer/1066447?hl=en) to generate the 2FA token required to log in.
Simply scan the QR code to start generating these tokens. The next time you'll log in, you can use the token provided by Google Authenticator to log in via 2FA.
## Disabling 2FA
Log into your TestingBot account and go to [My Account](https://testingbot.com/members/user/edit).
At the bottom of this page, you will find a disable 2FA link.
Click this link to disable 2FA.
Was this page helpful? Yes No
## Looking for More Help?
Have questions or need more information?
You can reach us via the following channels:
- [Email us](https://testingbot.com/contact/new)
- [Join our Slack Channel](https://join.slack.com/t/testingb0t/shared_invite/zt-3bcw9xch-jk19~6XPs_xBrsAgAedkCw)
---
URL: https://testingbot.com/support/team/account
# How to update my account details?
You can update your account details (email, first name, last name) by going to [Members \> Account](https://testingbot.com/members/user/edit).
In the form "Edit your account details" you can update your personal details.
## Resetting Security Tokens
You can find your Security Tokens (`Key` + `Secret`) by going to [Members \> Manage Credentials](https://testingbot.com/members/user/security).
These two identifiers are necessary to authenticate to our Selenium grid.
It is possible to reset these security tokens by clicking the "Generate new keys" link.
**Caution:** resetting these tokens means your existing tests with older key/secret credentials will stop running.
## Change Password
You can change your current password by logging into TestingBot and going to [Members \> Security](https://testingbot.com/members/user/edit).
Click "Change Password". You will be asked to fill in your current password and a new password.
## Active Sessions
On the [Security page](https://testingbot.com/members/user/security) you can find an overview of the active sessions for your account.
Each entry contains the logged-in IP address, device name and last active time.
You can sign out of individual sessions, or sign out everywhere.
Was this page helpful? Yes No
## Looking for More Help?
Have questions or need more information?
You can reach us via the following channels:
- [Email us](https://testingbot.com/contact/new)
- [Join our Slack Channel](https://join.slack.com/t/testingb0t/shared_invite/zt-3bcw9xch-jk19~6XPs_xBrsAgAedkCw)
---
URL: https://testingbot.com/support/team/audit-logs
# TestingBot Audit Logs
Audit logs provide a comprehensive record of all activities performed by team members in your TestingBot organization. These logs help you maintain security, ensure compliance and monitor user behavior across your testing infrastructure.
Only organization administrators can view and manage audit logs. Audit logs are retained for a maximum of 60 days.
## How to Access Audit Logs
To view your organization's audit logs:
1. Log into your TestingBot account
2. Navigate to [Members → Team Activity](https://testingbot.com/members/sub/activity)
3. View the comprehensive activity log for your organization
The audit log interface provides filtering options to help you find specific events by date range, event type or team member.
## Event Types
TestingBot tracks the following types of activities in your audit logs:
| Category | Event | Description |
| --- | --- | --- |
| Authentication | Login | User successfully logged into the TestingBot platform |
| Authentication | Logout | User logged out of the TestingBot platform |
| Account Management | Add Account | New team member was added to the organization |
| Account Management | Remove Account | Team member was removed from the organization |
| Account Management | Profile Update | User updated their profile information (name, email, etc.) |
| Plan & Configuration | Upgrade Level | Account plan was upgraded to a higher tier |
| Plan & Configuration | Downgrade Level | Account plan was downgraded to a lower tier |
| Plan & Configuration | Max Parallel Changed | Maximum parallel test sessions limit was modified |
| Plan & Configuration | Max Parallel Device Changed | Maximum parallel device sessions limit was modified |
| Security | Password Changed | User changed their account password |
| Security | Change Keys | User regenerated their API access keys (Key + Secret) |
| Security | 2FA Enabled | Two-factor authentication was enabled for the account |
| Security | 2FA Disabled | Two-factor authentication was disabled for the account |
| Team Invitations | Invite Sent | Team invitation was sent to a new member |
| Team Invitations | Invite Accepted | Team member accepted their invitation and joined the organization |
| Team Invitations | Invite Denied | Team invitation was declined or rejected |
## Filtering and Searching
The audit log interface provides several filtering options to help you find specific events:
- **Filter by Event Type:** Select specific event types to view only those activities
- **Filter by User:** Show activities performed by a specific team member
- **Filter by Date Range:** Specify a custom date range to narrow down the results
## Data Retention and Export
You can export all audit logs in `.CSV` format.
For compliance and record-keeping purposes, we recommend regularly exporting your audit logs if you need to maintain historical records beyond the 60-day retention period.
Was this page helpful? Yes No
## Looking for More Help?
Have questions or need more information?
You can reach us via the following channels:
- [Email us](https://testingbot.com/contact/new)
- [Join our Slack Channel](https://join.slack.com/t/testingb0t/shared_invite/zt-3bcw9xch-jk19~6XPs_xBrsAgAedkCw)
---
URL: https://testingbot.com/support/team/sso
# Setting Up Single Sign On (SSO)
TestingBot supports Identity Provider (IdP)-initiated and Service Provider (SP)-initiated Single Sign-On (SSO) via the SAML 2.0 protocol. This allows your authorized employees to access TestingBot in a moderated fashion, as an alternative to using passwords.
To start using SSO, please make sure you have an [Identity Provider (IdP)](https://testingbot.com#idp) set up.
## Setting Up Identity Provider
TestingBot provides preconfigured SAML applications for a selection of Identity Providers (IdPs). These applications allow you to integrate SSO with TestingBot in a very easy way. Below is a list of SAML applications available:
- [Microsoft Entra](https://testingbot.com/support/team/sso/microsoft-entra)
- [Okta](https://testingbot.com/support/team/sso/okta)
To set up a custom Identity Provider, such as Salesforce, ForgeRock, Auth0 or others, please follow the steps below.
1. Retrieve the [SAML metadata](https://testingbot.com/users/saml/metadata) from TestingBot.
2. Log in to your identity provider's administrator panel.
3. If your IdP does not allow you to upload the metadata file, you can set up the integration manually.
4. Export SAML metadata of your newly created SAML application. Please [email it to us](https://testingbot.com/contact/new) so that we can set up the connection for you.
## Service Provider SAML Requirements
Below is a list of settings that are required by the TestingBot Service Provider:
Setting Name | Value || Entity ID | `https://testingbot.com/users/saml/metadata` |
| Assertion Consumer Service (ACS URL, Reply URL) | `https://testingbot.com/users/saml/auth` |
| Name ID (Unique User Identifier) | `email` |
| Name ID format/policy | `urn:oasis:names:tc:SAML:2.0:nameid-format:transient
` |
| Binding | `urn:oasis:names:tc:SAML:2.0:bindings:HTTP-POST
` |
| Idp Cert Fingerprint Algorithm | `http://www.w3.org/2000/09/xmldsig#sha256
` |
| Login URL | `https://testingbot.com/users/sign_in` |
### SAML Claims
TestingBot Service Provider supports the following SAML custom claims:
- `email`
- `http://schemas.xmlsoap.org/ws/2005/05/identity/claims/emailaddress`
- `http://schemas.xmlsoap.org/ws/2005/05/identity/claims/email`
- `first_name`
- `http://schemas.xmlsoap.org/ws/2005/05/identity/claims/givenname`
- `last_name`
- `http://schemas.xmlsoap.org/ws/2005/05/identity/claims/surname`
## SSO Options
We provide the following options with Single Sign On:
#### Just-In-Time (JIT) Provisioning
If a user from your organization logs in through SSO, we can automatically create an account for this user on TestingBot, which will be associated to your team. Each user will be able to see the tests created by other members of your organization.
If this setting is disabled, users that are not yet registered with TestingBot will not be able to use TestingBot.
#### Enforce SSO (Big Bang)
When this setting is enabled, users in your organization must log in through SSO.
All other authentication methods will not be allowed.
#### Email verification
New users logging in through SAML for the first time will automatically have their account (and email address) verified.
#### Logout
TestingBot supports both SP-Initiated logout and IdP-initiated logout. If you'd like to set up SP-initiated logout, please [contact us](https://testingbot.com/contact/new) with your IdP SLO endpoint.
## Unsupported Features
We currently do not provide support for these features:
- SCIM (System for Cross-domain Identity Management)
Was this page helpful? Yes No
## Looking for More Help?
Have questions or need more information?
You can reach us via the following channels:
- [Email us](https://testingbot.com/contact/new)
- [Join our Slack Channel](https://join.slack.com/t/testingb0t/shared_invite/zt-3bcw9xch-jk19~6XPs_xBrsAgAedkCw)
---
URL: https://testingbot.com/support/team/sso/microsoft-entra
# Setting up SSO with Microsoft Entra
TestingBot has created a SAML app in Microsoft Entra which you can use to easily enable SSO with Entra and TestingBot.
1. Go to **Browse Microsoft Entra Gallery** and search for **TestingBot**.
2. Click the TestingBot app to go to the detail page. Click the **Create** button to add the app.
3. In the **Credentials Details** section, make sure that the value for **Application username format** is a valid email address. The default format for Okta username is an email address, unless it has been changed in the Okta Admin Console.
4. Click **Single Sign on** in the Manage section, then select **SAML** as the single sign-on method.
5. Make sure you fill in the required information in the **Basic SAML Configuration** , such as the **Identifier (Identity ID)**.
Was this page helpful? Yes No
## Looking for More Help?
Have questions or need more information?
You can reach us via the following channels:
- [Email us](https://testingbot.com/contact/new)
- [Join our Slack Channel](https://join.slack.com/t/testingb0t/shared_invite/zt-3bcw9xch-jk19~6XPs_xBrsAgAedkCw)
---
URL: https://testingbot.com/support/team/sso/okta
# Setting up SSO in Okta
TestingBot has created a SAML app in Okta which you can install to easily enable SSO with Okta and TestingBot.
1. Log in to the **Okta administrator panel** , go to **Applications** and search for TestingBot in the **Browse App Integration Catalog**.
2. Click the TestingBot app to go to the detail page. Click the **Add Integration** button to add the TestingBot app.
3. Change the name of the application to your liking, or leave it as TestingBot, then click **Done**.
4. You can now assign one or more users or groups to use the TestingBot application.
5. Click the **Sign On** tab.
6. In the **Credentials Details** section, make sure that the value for **Application username format** is a valid email address. The default format for Okta username is an email address, unless it has been changed in the Okta Admin Console.
7. In the **SAML Signing Certificates** section, click **Actions** , and then **View IdP metadata**. Please [send the metadata to TestingBot](https://testingbot.com/contact/new).
Was this page helpful? Yes No
## Looking for More Help?
Have questions or need more information?
You can reach us via the following channels:
- [Email us](https://testingbot.com/contact/new)
- [Join our Slack Channel](https://join.slack.com/t/testingb0t/shared_invite/zt-3bcw9xch-jk19~6XPs_xBrsAgAedkCw)
---
URL: https://testingbot.com/support/other/configuration
# TestingBot Configuration
TestingBot provides a distributed grid of browsers and devices.
Connect your Selenium, Appium, Puppeteer, Playwright, Cypress, XCUITest and Espresso tests to this cloud-based grid.
Currently we use: **Selenium 2.53.1** for JWP protocol and **Selenium 3.141.59** for W3C protocol.
## TestingBot Status
Please subscribe to [the TestingBot statuspage](https://status.testingbot.com/) or follow us on [Twitter @testingbotops](https://twitter.com/testingbot_ops) for status updates regarding our service.
[](http://stats.pingdom.com/kwiiczwo3ltc)[](http://stats.pingdom.com/kwiiczwo3ltc)
## TestingBot IP Ranges
Below you will find an up-to-date list of the TestingBot IP ranges used during testing.
- 109.68.162.161
- 109.68.162.165
- 78.20.187.211
- 162.55.135.22
- 95.217.83.184
- 95.216.39.110
- 65.21.76.124
- 95.216.229.109
- 142.132.137.7
You can also fetch this up-to-date list from the [TestingBot REST-API](https://testingbot.com/support/api#ipranges).
### Geolocation IP ranges
TestingBot provides [geolocation testing](https://testingbot.com/support/web-automate/selenium/test-options#geo), allowing you to test from various geographical places around the world. Below are the IP addresses we use for this.
- **AU** Australia: `35.213.216.75`
- **BH** Bahrain: `157.175.63.174`
- **BE** Belgium: `109.68.162.161`
- **BR** Brazil: `35.215.244.91`
- **CA** Canada: `34.47.9.124`
- **CL** Chile: `34.176.132.166`
- **FR** France: `15.236.216.234`
- **DE** Germany: `188.245.92.209`
- **IN** India: `35.207.203.231`
- **IT** Italy: `15.161.57.62`
- **JP** Japan: `35.213.44.184`
- **NO** Norway: `51.120.9.213`
- **SG** Singapore: `18.138.255.42`
- **ZA** South Africa: `13.245.163.253`
- **SE** Sweden: `16.171.19.152`
- **CH** Switzerland: `34.65.52.54`
- **AE** United Arab Emirates: `20.174.25.155`
- **GB** United Kingdom: `35.214.33.251`
- **US** United States: `178.156.132.19`
## Selenium Grid configuration
| Key | Value |
| --- | --- |
| Selenium Version | Selenium 2.53.1 [(change)](https://testingbot.com/support/web-automate/selenium/test-options#seleniumversion) for JWP protocol
Selenium 3.141.59 [(change)](https://testingbot.com/support/web-automate/selenium/test-options#seleniumversion) for W3C protocol |
| HUB URI | hub.testingbot.com |
| HUB Port | 4444, 80 or 443 (HTTPS/SSL) |
| Default Idle Timeout | 130 seconds [(change)](https://testingbot.com/support/web-automate/selenium/test-options#idletimeout) |
| Default Screen Resolution | 1280x1024 [(change)](https://testingbot.com/support/web-automate/selenium/test-options#screenresolution) |
## Appium Grid configuration
| Key | Value |
| --- | --- |
| Appium Version | Latest compatible version according to the specified device and version. [(change)](https://testingbot.com/support/app-automate/appium/options#appiumVersion). |
| HUB URI | hub.testingbot.com |
| HUB Port | 4444, 80 or 443 (HTTPS/SSL) |
| Default Idle Timeout | 130 seconds [(change)](https://testingbot.com/support/web-automate/selenium/test-options#idletimeout) |
## Puppeteer/Playwright configuration
| Key | Value |
| --- | --- |
| Playwright/Puppeteer version | TestingBot uses the same Playwright version as the one you are using, ensuring full compatibility. |
| HUB URI | hub.testingbot.com |
| HUB Port | 4444, 80 or 443 (HTTPS/SSL) |
Was this page helpful? Yes No
## Looking for More Help?
Have questions or need more information?
You can reach us via the following channels:
- [Email us](https://testingbot.com/contact/new)
- [Join our Slack Channel](https://join.slack.com/t/testingb0t/shared_invite/zt-3bcw9xch-jk19~6XPs_xBrsAgAedkCw)
---
URL: https://testingbot.com/support/other/sharing
### Available Topics:
- [Link to a Test](https://testingbot.com#linktest)
- [Link to a Build](https://testingbot.com#linkbuild)
- [Embed Test Info](https://testingbot.com#embedinfo)
- [Embed Test Video](https://testingbot.com#embedvideo)
# Sharing Tests
Below are various ways to share, embed or link to a test or build on TestingBot.
To share, view or link to a test, it is important to know its `sessionId`.
Selenium and Appium will return a `sessionId` when a client starts a new session.
This sesssionId is a unique identifier and changes per test. It is stored as a member variable of the instantiated Driver object. Most of the time it is named `sessionId` or `session_id`, depending on the client you are using.
## Link to a Test
You can easily share a single test result with someone in a safe way, without the other person needing an account.
To share a test result, you'll need to create the following url:
https://testingbot.com/tests/ **sessionId**?auth= **authentication-hash**
The authentication hash is created with md5 in the following format:
[Ruby](https://testingbot.com#)[Python](https://testingbot.com#)[PHP](https://testingbot.com#)[Java](https://testingbot.com#)[NodeJS](https://testingbot.com#)[C#](https://testingbot.com#)
Digest::MD5.hexdigest("#{client_key}:#{client_secret}:#{session_id}")
MessageDigest m=MessageDigest.getInstance("MD5");
String s = "TESTINGBOT_KEY:TESTINGBOT_SECRET:session_id";
m.update(s.getBytes(),0,s.length());
System.out.println("MD5: "+new BigInteger(1,m.digest()).toString(16));
echo md5("TESTINGBOT_KEY:TESTINGBOT_SECRET:$session_id");
import hashlib
print(hashlib.md5("TESTINGBOT_KEY:TESTINGBOT_SECRET:#{session_id}".encode('utf-8')).hexdigest())
var crypto = require('crypto');
crypto.createHash('md5').update("TESTINGBOT_KEY:TESTINGBOT_SECRET:sessionId").digest("hex");
Convert.ToBase64String(new System.Security.Cryptography.MD5CryptoServiceProvider().ComputeHash(System.Text.Encoding.UTF8.GetBytes("TESTINGBOT_KEY:TESTINGBOT_SECRET:sessionId")));
An example link would then be:
https://testingbot.com/tests/9jf392fj3j2f3ojid8?auth=230i439uf3fojf
## Link to a Video
You can easily share a video of a specific test, please see the example below:
To build the URL with the correct authentication hash, the URL should be structured like this:
https://testingbot.com/tests/ **sessionId.mp4**?auth= **authentication-hash**
The authentication hash is created with MD5 in the following format:
[Ruby](https://testingbot.com#)[Python](https://testingbot.com#)[PHP](https://testingbot.com#)[Java](https://testingbot.com#)[NodeJS](https://testingbot.com#)[C#](https://testingbot.com#)
Digest::MD5.hexdigest("#{client_key}:#{client_secret}:#{session_id}")
MessageDigest m=MessageDigest.getInstance("MD5");
String s = "TESTINGBOT_KEY:TESTINGBOT_SECRET:session_id";
m.update(s.getBytes(),0,s.length());
System.out.println("MD5: "+new BigInteger(1,m.digest()).toString(16));
echo md5("TESTINGBOT_KEY:TESTINGBOT_SECRET:$session_id");
import hashlib
print(hashlib.md5("TESTINGBOT_KEY:TESTINGBOT_SECRET:#{session_id}".encode('utf-8')).hexdigest())
var crypto = require('crypto');
crypto.createHash('md5').update("TESTINGBOT_KEY:TESTINGBOT_SECRET:sessionId").digest("hex");
Convert.ToBase64String(new System.Security.Cryptography.MD5CryptoServiceProvider().ComputeHash(System.Text.Encoding.UTF8.GetBytes("TESTINGBOT_KEY:TESTINGBOT_SECRET:sessionId")));
An example link would then be:
https://testingbot.com/tests/9jf392fj3j2f3ojid8.mp4?auth=230i439uf3fojf
## Link to a Build
With TestingBot, it is possible to group several tests under one build identifier.
In our member area, you can then see all the tests grouped by builds.
To link to a build overview, please see this example:
`https://testingbot.com/builds/YOUR_TESTINGBOT_KEY?auth=authentication-hash`
To generate the authentication-hash, you must concatenate user key and user secret, then generate the MD5 hash:
[Ruby](https://testingbot.com#)[Python](https://testingbot.com#)[PHP](https://testingbot.com#)[Java](https://testingbot.com#)[NodeJS](https://testingbot.com#)[C#](https://testingbot.com#)
Digest::MD5.hexdigest("#{client_key}:#{client_secret}")
MessageDigest m=MessageDigest.getInstance("MD5");
String s = "TESTINGBOT_KEY:TESTINGBOT_SECRET";
m.update(s.getBytes(),0,s.length());
System.out.println("MD5: "+new BigInteger(1,m.digest()).toString(16));
echo md5("TESTINGBOT_KEY:TESTINGBOT_SECRET");
import hashlib
print(hashlib.md5("TESTINGBOT_KEY:TESTINGBOT_SECRET".encode('utf-8')).hexdigest())
var crypto = require('crypto');
crypto.createHash('md5').update("TESTINGBOT_KEY:TESTINGBOT_SECRET").digest("hex");
Convert.ToBase64String(new System.Security.Cryptography.MD5CryptoServiceProvider().ComputeHash(System.Text.Encoding.UTF8.GetBytes("TESTINGBOT_KEY:TESTINGBOT_SECRET")));
To link directly to a build, please see this example:
`https://testingbot.com/builds/YOUR_TESTINGBOT_KEY/build-identifier?auth=authentication-hash`
To generate the authentication-hash, you must concatenate user key, user secret and build-identifier, then generate the MD5 hash:
[Ruby](https://testingbot.com#)[Python](https://testingbot.com#)[PHP](https://testingbot.com#)[Java](https://testingbot.com#)[NodeJS](https://testingbot.com#)[C#](https://testingbot.com#)
Digest::MD5.hexdigest("#{client_key}:#{client_secret}:#{build_identifier}")
MessageDigest m=MessageDigest.getInstance("MD5");
String s = "TESTINGBOT_KEY:TESTINGBOT_SECRET:build_identifier";
m.update(s.getBytes(),0,s.length());
System.out.println("MD5: "+new BigInteger(1,m.digest()).toString(16));
echo md5("TESTINGBOT_KEY:TESTINGBOT_SECRET:$build_identifier");
import hashlib
print(hashlib.md5("TESTINGBOT_KEY:TESTINGBOT_SECRET:#{build_identifier}".encode('utf-8')).hexdigest())
var crypto = require('crypto');
crypto.createHash('md5').update("TESTINGBOT_KEY:TESTINGBOT_SECRET:build_identifier").digest("hex");
Convert.ToBase64String(new System.Security.Cryptography.MD5CryptoServiceProvider().ComputeHash(System.Text.Encoding.UTF8.GetBytes("TESTINGBOT_KEY:TESTINGBOT_SECRET:build_identifier")));
The build-identifier is the custom string you can [send as an option to group several tests.](https://testingbot.com/support/web-automate/selenium/test-options#build)
## Embed Test Info
You can embed a test page in any CI detail page, test report or custom website. Please see the example below.
You add a SCRIPT tag in your page which links to the test. Replace sessionId with the correct sessionId of the test.
To generate the authentication-token, you must concatenate user key, user secret and sessionId, then generate the MD5 hash:
[Ruby](https://testingbot.com#)[Python](https://testingbot.com#)[PHP](https://testingbot.com#)[Java](https://testingbot.com#)[NodeJS](https://testingbot.com#)[C#](https://testingbot.com#)
Digest::MD5.hexdigest("#{client_key}:#{client_secret}:#{sessionId}")
MessageDigest m=MessageDigest.getInstance("MD5");
String s = "TESTINGBOT_KEY:TESTINGBOT_SECRET:sessionId";
m.update(s.getBytes(),0,s.length());
System.out.println("MD5: "+new BigInteger(1,m.digest()).toString(16));
echo md5("TESTINGBOT_KEY:TESTINGBOT_SECRET:$sessionId");
import hashlib
print(hashlib.md5("TESTINGBOT_KEY:TESTINGBOT_SECRET:#{sessionId}".encode('utf-8')).hexdigest())
var crypto = require('crypto');
crypto.createHash('md5').update("TESTINGBOT_KEY:TESTINGBOT_SECRET:sessionId").digest("hex");
Convert.ToBase64String(new System.Security.Cryptography.MD5CryptoServiceProvider().ComputeHash(System.Text.Encoding.UTF8.GetBytes("TESTINGBOT_KEY:TESTINGBOT_SECRET:sessionId")));
## Embed Video Info
Next to embedding test info pages, you can also embed the video of the test.
This might be useful to include in test reports or on CI result pages.
To generate the authentication-token, you must concatenate user key, user secret and sessionId, then generate the MD5 hash:
[Ruby](https://testingbot.com#)[Python](https://testingbot.com#)[PHP](https://testingbot.com#)[Java](https://testingbot.com#)[NodeJS](https://testingbot.com#)[C#](https://testingbot.com#)
Digest::MD5.hexdigest("#{client_key}:#{client_secret}:#{sessionId}")
MessageDigest m=MessageDigest.getInstance("MD5");
String s = "TESTINGBOT_KEY:TESTINGBOT_SECRET:sessionId";
m.update(s.getBytes(),0,s.length());
System.out.println("MD5: "+new BigInteger(1,m.digest()).toString(16));
echo md5("TESTINGBOT_KEY:TESTINGBOT_SECRET:$sessionId");
import hashlib
print(hashlib.md5("TESTINGBOT_KEY:TESTINGBOT_SECRET:#{sessionId}".encode('utf-8')).hexdigest())
var crypto = require('crypto');
crypto.createHash('md5').update("TESTINGBOT_KEY:TESTINGBOT_SECRET:sessionId").digest("hex");
Convert.ToBase64String(new System.Security.Cryptography.MD5CryptoServiceProvider().ComputeHash(System.Text.Encoding.UTF8.GetBytes("TESTINGBOT_KEY:TESTINGBOT_SECRET:sessionId")));
Was this page helpful? Yes No
## Looking for More Help?
Have questions or need more information?
You can reach us via the following channels:
- [Email us](https://testingbot.com/contact/new)
- [Join our Slack Channel](https://join.slack.com/t/testingb0t/shared_invite/zt-3bcw9xch-jk19~6XPs_xBrsAgAedkCw)
---
URL: https://testingbot.com/support/other/sikuli
# Sikuli Cloud Testing
Sikuli uses image recognition to identify components you want to interact with on the screen.
While Selenium is limited to interacting with browsers, Sikuli can be used to interact with native GUI components (for example: Windows dialogs, Linux programs or OS-X GUI).
At TestingBot, all our VMs are able to run your Sikuli scripts.
## 1. Download and Setup Sikuli
To get started, please [download Sikuli](http://www.sikulix.com).
Once downloaded, run the file to install Sikuli.
## 2. Create a new Sikuli script
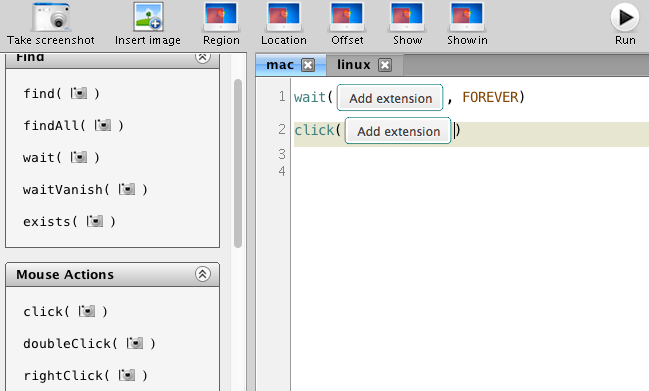
Sikuli uses image-recognition to find the components to interact with.
In this example, we'll take a screenshot of a Chrome dialog asking to install a Chrome extension.
## 3. The Sikuli script
As you can see on the screenshot above, you can use `wait([image], FOREVER)` to have Sikuli wait for something to appear on the screen that looks like the `[image]`.
Once this happens, Sikuli will move on to the next step in the script: clicking the component it detected.
## 4. Integration with TestingBot
At TestingBot, we can run your Sikuli script at the start of your Selenium WebDriver test.
Simply create a zip-file with one or more of your `.sikuli` scripts inside. Then use this URL in your `DesiredCapabilities` when starting a test. This way you can run Sikuli tests in the cloud on all our [platforms](https://testingbot.com/support/web-automate/browsers).
For example:
DesiredCapabilities caps = new DesiredCapabilities();
caps.setCapability("platform", "VISTA");
caps.setCapability("version", "9");
caps.setCapability("browserName", "internet explorer");
caps.setCapability("sikuli", "http://mywebsite.com/sikuli-scripts.zip");
This will make sure TestingBot will download your Sikuli script and run it at the start of your test.
Was this page helpful? Yes No
## Looking for More Help?
Have questions or need more information?
You can reach us via the following channels:
- [Email us](https://testingbot.com/contact/new)
- [Join our Slack Channel](https://join.slack.com/t/testingb0t/shared_invite/zt-3bcw9xch-jk19~6XPs_xBrsAgAedkCw)
---
URL: https://testingbot.com/support/other/errors
### Possible Errors:
- [Minutes Depleted](https://testingbot.com#1)
- [Max Duration Exceeded](https://testingbot.com#2)
- [Test Timeout](https://testingbot.com#3)
- [New session cancelled before start](https://testingbot.com#4)
# Errors/Failures during Testing
Below is a list of various error messages and failures that might happen when running Automated Tests.
## Minutes depleted
#### Description:
The test failed because your account does not have enough minutes left. If your account does not have enough minutes, tests can no longer be started on TestingBot.
#### How to resolve:
Please [consider upgrading your account](https://testingbot.com/pricing) to make sure you have enough credits/minutes to run tests.
## Your test exceeded max duration
#### Description:
The test was terminated because it exceeded the maximum duration allowed. (default is 1800 seconds)
#### Cause:
This might be caused by several things:
- Your test is too long. Consider splitting large tests into multiple smaller tests.
- Tests running on TestingBot can take longer to run than they do locally
- Your test is stuck in an endless loop, where your test keeps sending commands
#### How to resolve:
- Consider breaking up your test into smaller, atomic tests.
- You can use the [maxDuration desired capability option](https://testingbot.com/support/web-automate/selenium/test-options#maxduration) to indicate to TestingBot how long you want TestingBot to wait for your test to complete.
- Check for endless loops in your test
## Your test timed out
#### Description:
This error happens when TestingBot does not receive any new command from your Selenium script for more than 90 seconds (the default timeout duration).
#### Cause:
This might be caused by various things:
- You forgot to add `driver.quit()` at the end of your test. To prevent your test from running forever, TestingBot will stop the test after 90 seconds to prevent this test from consuming all your minutes.
- Your test script crashed, was interrupted or lost internet connectivity.
- Maybe your test command needs more than 90 seconds between commands. In this case, you can specify a [different test idle timeout](https://testingbot.com/support/web-automate/selenium/test-options#idletimeout).
#### How to resolve:
- Make sure your test script has good internet connectivity.
- Don't forget to add `driver.quit()` at the end of your test.
- Specify a [different test idle timeout](https://testingbot.com/support/web-automate/selenium/test-options#idletimeout).
## New session cancelled before test start
#### Description:
Your test runner started a new test on TestingBot, but then closed the connection to TestingBot before TestingBot could make a new test session available.
#### Cause:
This might be caused by several things:
- Client timeout with Android/iOS tests. Please make sure to set the connection timeout in your test runner/framework high enough, as iOS/Android simulators take a while to start up. We recommend at least 2 minutes.
- You might be running too many tests at once. If you're exceeding the total number of simultaneous tests, we still queue the tests. If this queueing takes too long, your test runner might disconnect before the test started.
- High waiting times at TestingBot. If our service has any issues, this error might occur. Follow us on Twitter ([@testingbotops](https://twitter.com/testingbot_ops)) and check our Status Page: [https://status.testingbot.com](https://status.testingbot.com/)
#### How to resolve:
- Increase the connection timeout setting in your test runner/framework.
For example, for WebdriverIO, you can set `connectionRetryTimeout: 210000`
- Make sure you're not exceeding the total allowed simultaneous tests, according to the TestingBot plan you're subscribed to.
Was this page helpful? Yes No
## Looking for More Help?
Have questions or need more information?
You can reach us via the following channels:
- [Email us](https://testingbot.com/contact/new)
- [Join our Slack Channel](https://join.slack.com/t/testingb0t/shared_invite/zt-3bcw9xch-jk19~6XPs_xBrsAgAedkCw)
---
URL: https://testingbot.com/support/other/status-badges
# Status Badges
Status Badges help you keep track of the status of your latest test build.
You can simply embed markdown code or HTML code to your project website to show the status of your most recent test build.
## Builds
In order to show a status badge, you need to make sure that you're running your tests in a group, called a **build**.
For example: you have a project that has a bunch of tests. After every commit you want to make sure the tests still pass.
The tests you want to run are groupped in a **build**.
To make sure your tests are grouped in the same build, use Selenium's Desired Capabilities.
Simple pass `"build" : "build-1XXX"` in your Desired Capabilities:
DesiredCapabilities caps = new DesiredCapabilities();
caps.setCapability("platform", "WIN7");
caps.setCapability("browserName", "Chrome");
caps.setCapability("build", "build-1XXX"); // for example
In our [member area](https://testingbot.com/members) you will then see a new build, `build-1XXX`, which will contain all the tests that ran with the same build identifier.
## Marking a build as passed/failed
To mark a build as passed or failed, your test runner should be configured to send the success state of each test to TestingBot via the [TestingBot API](https://testingbot.com/support/api).
- If for every test in the build we know that the test succeeded, then we'll automatically mark the build as **Passing**.
- If a test failed, the build will automatically be marked as **Failed**.
- If you don't send us the success state for every test in the build, then we can not know the success state of the build. In this case we show an **Unknown** state.
## Status Badge
With our Status Badges, you can easily monitor the status of your most recent build.
The `auth` parameter is generated by concatenating your `api key` and `api secret` with md5.
Below are the different states that your badge can have:
Badge | Status || TestingBotTestingBotpassingpassing | **Passing** |
| TestingBotTestingBotfailedfailed | **Failure** |
| TestingBotTestingBotunknownunknown | **Unknown**
We don't know if this build passed or failed.
Please use our [REST-API](https://testingbot.com/support/api) to send the success state of your individual tests to TestingBot.
|
| TestingBotTestingBoterrorerror | **Error**
The link to the badge might be invalid, or you might not have any builds yet.
|
**Markdown:**
[](https://testingbot.com/builds/YOUR_TESTINGBOT_KEY?auth={authentication})
**HTML:**
 [Ruby](https://testingbot.com#)[Python](https://testingbot.com#)[PHP](https://testingbot.com#)[Java](https://testingbot.com#)[NodeJS](https://testingbot.com#)[C#](https://testingbot.com#)
Digest::MD5.hexdigest("#{client_key}:#{client_secret}")
MessageDigest m=MessageDigest.getInstance("MD5");
String s = "TESTINGBOT_KEY:TESTINGBOT_SECRET";
m.update(s.getBytes(),0,s.length());
System.out.println("MD5: "+new BigInteger(1,m.digest()).toString(16));
echo md5("TESTINGBOT_KEY:TESTINGBOT_SECRET");
import hashlib
print(hashlib.md5("TESTINGBOT_KEY:TESTINGBOT_SECRET".encode('utf-8')).hexdigest())
var crypto = require('crypto');
crypto.createHash('md5').update("TESTINGBOT_KEY:TESTINGBOT_SECRET").digest("hex");
Convert.ToBase64String(new System.Security.Cryptography.MD5CryptoServiceProvider().ComputeHash(System.Text.Encoding.UTF8.GetBytes("TESTINGBOT_KEY:TESTINGBOT_SECRET")));
## Private Accounts
To display badges, or link to builds, you need to generate an **authentication token**.
To generate the authentication token, you must concatenate your TestingBot key, TestingBot secret and optionally an identifier. Finally, take the MD5 hash of the concatenated string:
[Ruby](https://testingbot.com#)[Python](https://testingbot.com#)[PHP](https://testingbot.com#)[Java](https://testingbot.com#)[NodeJS](https://testingbot.com#)
Digest::MD5.hexdigest("#{client_key}:#{client_secret}")
MessageDigest m=MessageDigest.getInstance("MD5");
String s = "TESTINGBOT_KEY:TESTINGBOT_SECRET";
m.update(s.getBytes(),0,s.length());
System.out.println("MD5: "+new BigInteger(1,m.digest()).toString(16));
echo md5("TESTINGBOT_KEY:TESTINGBOT_SECRET");
import hashlib
print(hashlib.md5("TESTINGBOT_KEY:TESTINGBOT_SECRET".encode('utf-8')).hexdigest())
var crypto = require('crypto');
crypto.createHash('md5').update("TESTINGBOT_KEY:TESTINGBOT_SECRET").digest("hex");
## Open Source Accounts
[Open Source](https://testingbot.com/open-source) accounts automatically have their tests and builds set to public. This means no authentication (auth parameter) is required to display badges or link to tests/builds.
## More
- If you like to show status-badges of **multiple projects** , please consider creating a new user account per project.
- We're also providing [browser-matrix images](https://testingbot.com/support/other/browser-matrix), displaying for which browsers your build passed/failed.
Was this page helpful? Yes No
## Looking for More Help?
Have questions or need more information?
You can reach us via the following channels:
- [Email us](https://testingbot.com/contact/new)
- [Join our Slack Channel](https://join.slack.com/t/testingb0t/shared_invite/zt-3bcw9xch-jk19~6XPs_xBrsAgAedkCw)
---
URL: https://testingbot.com/support/other/browser-matrix
# Browser Matrix
With our Browser Matrix image you can quickly see the status for your latest test build for the various browsers/platforms.
You can simply add markdown code or HTML code to your project website to show the status of your most recent test build.
## Builds
In order to show a browser matrix image, you need to make sure that you're running your tests in a group, called a **build**.
For example: you have a project that has a bunch of tests. After every commit you want to make sure the tests still pass.
The tests you want to run are groupped in a **build**.
To make sure your tests are grouped in the same build, use Selenium's Desired Capabilities.
Simple pass `"build" : "build-1XXX"` in your Desired Capabilities:
DesiredCapabilities caps = new DesiredCapabilities();
caps.setCapability("platform", "WIN7");
caps.setCapability("browserName", "Chrome");
caps.setCapability("build", "build-1XXX"); // for example
In our [member area](https://testingbot.com/members/builds) you will then see a new build, `build-1XXX`, which will contain all the tests that ran with the same build identifier.
## Marking tests passed/failed
To mark tests as passed or failed, your test runner should be configured to send the success state of each test to TestingBot via the [TestingBot API](https://testingbot.com/support/api#updatetest).
The browser matrix image will then show the success state for every browser/platform in your build.
## Browser Matrix
Below is an example of how the browser matrix image looks like, and information on how to embed this image on your website.
**Markdown:**
[](https://testingbot.com/builds/YOUR_TESTINGBOT_KEY?auth={authentication})
**HTML:**
[Ruby](https://testingbot.com#)[Python](https://testingbot.com#)[PHP](https://testingbot.com#)[Java](https://testingbot.com#)[NodeJS](https://testingbot.com#)[C#](https://testingbot.com#)
Digest::MD5.hexdigest("#{client_key}:#{client_secret}")
MessageDigest m=MessageDigest.getInstance("MD5");
String s = "TESTINGBOT_KEY:TESTINGBOT_SECRET";
m.update(s.getBytes(),0,s.length());
System.out.println("MD5: "+new BigInteger(1,m.digest()).toString(16));
echo md5("TESTINGBOT_KEY:TESTINGBOT_SECRET");
import hashlib
print(hashlib.md5("TESTINGBOT_KEY:TESTINGBOT_SECRET".encode('utf-8')).hexdigest())
var crypto = require('crypto');
crypto.createHash('md5').update("TESTINGBOT_KEY:TESTINGBOT_SECRET").digest("hex");
Convert.ToBase64String(new System.Security.Cryptography.MD5CryptoServiceProvider().ComputeHash(System.Text.Encoding.UTF8.GetBytes("TESTINGBOT_KEY:TESTINGBOT_SECRET")));
## Private Accounts
To display badges, or link to builds, you need to generate an **authentication token**.
To generate the authentication token, you must concatenate your TestingBot key, TestingBot secret and optionally an identifier. Finally, take the MD5 hash of the concatenated string:
[Ruby](https://testingbot.com#)[Python](https://testingbot.com#)[PHP](https://testingbot.com#)[Java](https://testingbot.com#)[NodeJS](https://testingbot.com#)
Digest::MD5.hexdigest("#{client_key}:#{client_secret}")
MessageDigest m=MessageDigest.getInstance("MD5");
String s = "TESTINGBOT_KEY:TESTINGBOT_SECRET";
m.update(s.getBytes(),0,s.length());
System.out.println("MD5: "+new BigInteger(1,m.digest()).toString(16));
echo md5("TESTINGBOT_KEY:TESTINGBOT_SECRET");
import hashlib
print(hashlib.md5("TESTINGBOT_KEY:TESTINGBOT_SECRET".encode('utf-8')).hexdigest())
var crypto = require('crypto');
crypto.createHash('md5').update("TESTINGBOT_KEY:TESTINGBOT_SECRET").digest("hex");
## Open Source Accounts
[Open Source](https://testingbot.com/open-source) accounts automatically have their tests and builds set to public. This means no authentication (auth parameter) is required to display badges or link to tests/builds.
## More
- If you like to show status-badges of **multiple projects** , please consider creating a new user account per project.
- We're also providing [browser-matrix images](https://testingbot.com/support/other/browser-matrix), displaying for which browsers your build passed/failed.
Was this page helpful? Yes No
## Looking for More Help?
Have questions or need more information?
You can reach us via the following channels:
- [Email us](https://testingbot.com/contact/new)
- [Join our Slack Channel](https://join.slack.com/t/testingb0t/shared_invite/zt-3bcw9xch-jk19~6XPs_xBrsAgAedkCw)
---
URL: https://testingbot.com/support/other/browser-matrix
# Browser Matrix
With our Browser Matrix image you can quickly see the status for your latest test build for the various browsers/platforms.
You can simply add markdown code or HTML code to your project website to show the status of your most recent test build.
## Builds
In order to show a browser matrix image, you need to make sure that you're running your tests in a group, called a **build**.
For example: you have a project that has a bunch of tests. After every commit you want to make sure the tests still pass.
The tests you want to run are groupped in a **build**.
To make sure your tests are grouped in the same build, use Selenium's Desired Capabilities.
Simple pass `"build" : "build-1XXX"` in your Desired Capabilities:
DesiredCapabilities caps = new DesiredCapabilities();
caps.setCapability("platform", "WIN7");
caps.setCapability("browserName", "Chrome");
caps.setCapability("build", "build-1XXX"); // for example
In our [member area](https://testingbot.com/members/builds) you will then see a new build, `build-1XXX`, which will contain all the tests that ran with the same build identifier.
## Marking tests passed/failed
To mark tests as passed or failed, your test runner should be configured to send the success state of each test to TestingBot via the [TestingBot API](https://testingbot.com/support/api#updatetest).
The browser matrix image will then show the success state for every browser/platform in your build.
## Browser Matrix
Below is an example of how the browser matrix image looks like, and information on how to embed this image on your website.

**Markdown:**
[](https://testingbot.com/builds/YOUR_TESTINGBOT_KEY?auth={authentication})
**HTML:**
 ## Private Accounts
To display the matrix image, or link to builds, you need to generate an **authentication token**.
To generate the authentication token, you must concatenate your TestingBot key, TestingBot secret
and optionally an identifier. Finally, take the MD5 hash of the concatenated string:
[Ruby](https://testingbot.com#)[Python](https://testingbot.com#)[PHP](https://testingbot.com#)[Java](https://testingbot.com#)[NodeJS](https://testingbot.com#)
Digest::MD5.hexdigest("#{client_key}:#{client_secret}")
MessageDigest m=MessageDigest.getInstance("MD5");
String s = "TESTINGBOT_KEY:TESTINGBOT_SECRET";
m.update(s.getBytes(),0,s.length());
System.out.println("MD5: "+new BigInteger(1,m.digest()).toString(16));
echo md5("TESTINGBOT_KEY:TESTINGBOT_SECRET");
import hashlib
print(hashlib.md5("TESTINGBOT_KEY:TESTINGBOT_SECRET".encode('utf-8')).hexdigest())
var crypto = require('crypto');
crypto.createHash('md5').update("TESTINGBOT_KEY:TESTINGBOT_SECRET").digest("hex");
## Open Source Accounts
[Open Source](https://testingbot.com/open-source) accounts automatically have their tests and builds set to public. This means no authentication (auth parameter) is required to display matrix images or link to tests/builds.
## More
- If you like to show browser matrix images of **multiple projects** , please consider creating a new user account per project.
- We're also providing [status badges](https://testingbot.com/support/other/status-badges), displaying if your build passed/failed.
Was this page helpful? Yes No
## Looking for More Help?
Have questions or need more information?
You can reach us via the following channels:
- [Email us](https://testingbot.com/contact/new)
- [Join our Slack Channel](https://join.slack.com/t/testingb0t/shared_invite/zt-3bcw9xch-jk19~6XPs_xBrsAgAedkCw)
---
URL: https://testingbot.com/support/tunnel/commandline
# Tunnel Commandline Reference
The tunnel requires both a TestingBot Key and TestingBot Secret being passed via the commandline, except in the following cases:
- If you have a `.testingbot` file located in your `$HOME` directory, then the tunnel will fetch the key and secret from this file.
- If you pass the following environment variables with valid key/secret:
TESTINGBOT_KEY=""
and
TESTINGBOT_SECRET=""
| -a,--auth \ | Performs Basic Authentication for specific hosts, only works with HTTP. |
| -b,--nobump | Do not perform SSL bumping. |
| -d,--debug | Enables debug messages. Will output request/response headers. |
| -dns,--dns | Use a custom DNS server. For example: 8.8.8.8 |
| --doctor | Perform sanity/health checks to detect possible misconfiguration or problems. |
| --extra-headers \ | Inject extra headers in the requests the tunnel makes. |
| -f,--readyfile \ | This file will be touched when the tunnel is ready for usage |
| -F,--fast-fail-regexps \ | Specify domains you don't want to proxy, comma separated. |
| -h,--help | Displays help text |
| -i,--tunnel-identifier \ | Add an identifier to this tunnel connection.
In case of multiple tunnels, specify this identifier in your desired capabilities to use this specific tunnel. |
| -j,--localproxy \ | The port to launch the local proxy on (default 8087). |
| -l,--logfile \ | Write logging to a file. |
| --metrics-port \ | Use the specified port to access metrics. Default port 8003 |
| -P,--se-port \ | The local port your Selenium test should connect to. Default port is 4445 |
| -p,--hubport \ | Use this if you want to connect to port 80 on our hub instead of the default port 4444 |
| --pac \ | Proxy autoconfiguration. Should be a http(s) URL |
| -q,--nocache | Bypass our Caching Proxy running on our tunnel VM. |
| -v,--version | Displays the current version of the Tunnel |
| -w,--web \ | Point to a directory for testing. Creates a local webserver. |
| -x,--noproxy | Do not start a local proxy (requires user provided proxy server on port 8087) |
| -Y,--proxy \ | Specify an upstream proxy. |
| -z,--proxy-userpwd \ | Username and password required to access the proxy configured with --proxy. |
Was this page helpful? Yes No
## Looking for More Help?
Have questions or need more information?
You can reach us via the following channels:
- [Email us](https://testingbot.com/contact/new)
- [Join our Slack Channel](https://join.slack.com/t/testingb0t/shared_invite/zt-3bcw9xch-jk19~6XPs_xBrsAgAedkCw)
---
URL: https://testingbot.com/support/tunnel/multiple
# Multiple Tunnels
It is possible to run up to 3 simultaneous tunnels.
Either you run multiple tunnels with your own account, or you're a sub-account of a team where other colleagues have tunnels running as well.
To make it possible to go through a specific tunnel, you can use the `--tunnel-identifier` option with the tunnel's commandline options.
With this option you simply pass an identifier as string.
For example:
java -jar testingbot-tunnel.jar key secret --tunnel-identifier myTunnel
Now you or your team members can use this specific tunnel in your tests:
{
"browserName":"firefox",
"version":"latest",
"platform":"WIN10",
"tunnel-identifier":"myTunnel"
}
Was this page helpful? Yes No
## Looking for More Help?
Have questions or need more information?
You can reach us via the following channels:
- [Email us](https://testingbot.com/contact/new)
- [Join our Slack Channel](https://join.slack.com/t/testingb0t/shared_invite/zt-3bcw9xch-jk19~6XPs_xBrsAgAedkCw)
---
URL: https://testingbot.com/support/tunnel/changelog
# Tunnel Changelog
| Version / Release Date | Changes |
| --- | --- |
| **4.4**
Released October 2025 |
- Update dependencies
- Improve `--proxy` and `--proxy-userpwd`
|
| **4.3**
Released August 2025 |
- Update dependencies (Jetty + SSH lib)
- Improve monitoring + retry mechanisms
- Drop support for JDK 8
- Improve `--doctor` checks
|
| **4.0**
Released December 2024 |
- Update dependencies (Jetty 11)
- Websocket + Server Sent Events support
- Introduced `--nobump` argument to disable SSL bumping
|
| **3.5**
Released May 2023 |
- Updated dependencies
- Upgraded secure connection cipher
|
| **3.2**
Released February 2021 |
- Updated dependencies
|
| **3.1**
Released February 2020 |
- Updated dependencies
- Don't poll tunnel indefinitely
- Built with JDK8
- Code cleanup
|
| **3.0**
Released September 2019 |
- Various minor fixes
- Updated Jetty Dependencies
|
| **2.9**
Released January 2019 |
- Various minor fixes (timeouts, doctor checks, ..)
- Prevent duplicate ports
|
| **2.8**
Released June 2018 |
- Fix NPE in ConnectHandler
|
| **2.7**
Released June 2018 |
- Rename jettyport option to localport
- If started with --nocache, send to API for Manual Testing
- Implemented upstream proxying for HTTPs via CONNECT (--proxy)
- Updated pom.xml depndencies
- No more hardcoded ports to listen to
|
| **2.6**
Released April 2018 |
- Remove incorrect Java version check
- Remove deprecated features: --boost and --ssl
- Add option to supply extra HTTP headers during requests
- Add option to supply basic auth credentials for various hosts, which the tunnel will automatically use
- Make the --nocache option clearer: Do not cache any HTTP requests
|
| **2.5**
Released September 2017 |
- Improved --doctor checks, check if necessary ports can be opened
- Add support for --pac to set a PAC url (Proxy) for your test sessions
|
| **2.4**
Released August 2017 |
- Add --tunnel-identifier to identify different tunnels for the same account
- Improved logging (formatting, log to file, debug levels, ...)
- Improved handling of connection errors (re-establish connection to tunnel VM upon connection failures)
- Added option where you can specify a local directory to be set up as a webserver, for example to test static files
- Added an embedded statistics REST api to fetch details about the running instance, by default runs on port 8003
|
| **2.3**
Released October 2016 |
- Add --doctor to troubleshoot misconfigurations
- Debugmode will now output HTTP headers
|
Was this page helpful? Yes No
## Looking for More Help?
Have questions or need more information?
You can reach us via the following channels:
- [Email us](https://testingbot.com/contact/new)
- [Join our Slack Channel](https://join.slack.com/t/testingb0t/shared_invite/zt-3bcw9xch-jk19~6XPs_xBrsAgAedkCw)
---
URL: https://testingbot.com/support/tunnel/examples
# Examples
Below you will find some examples on how to use the Tunnel.
To start your Tunnel, [download the Java based Tunnel](https://testingbot.com/downloads/testingbot-tunnel.zip) and run from the commandline:
java -jar testingbot-tunnel.jar key secret
Below you will find an example demonstrating how to adjust your tests to use the Tunnel.
**Before:**
urlhub = "http://key:secret@hub.testingbot.com/wd/hub"
client = Selenium::WebDriver::Remote::Http::Default.new
**After:**
urlhub = "http://key:secret@localhost:4445/wd/hub"
client = Selenium::WebDriver::Remote::Http::Default.new
Notice how we now use `localhost:4445`, which will send the test commands through the Tunnel.
## Tunnel Identifiers
You can choose to use a tunnel identifier to connect to a specific tunnel.
For example, launch a tunnel:
java -jar testingbot-tunnel.jar key secret -i myTunnel
This tunnel now has an identifier "myTunnel". You can instruct your tests to go through this specific tunnel with Desired Capabilities:
{
"browserName":"firefox",
"version":"latest",
"platform":"WIN10",
"tunnel-identifier":"myTunnel"
}
## Adding Extra Headers
TestingBot tunnel allows you to add extra headers to the HTTP requests it will make during testing.
For example, to add a custom header:
java -jar testingbot-tunnel.jar key secret \
--extra-headers '{"MyOwnHeader": "HeaderValue"}'
## Upstream Proxy
You can instruct TestingBot Tunnel to use a specific upstream proxy.
For example, your company network requires all traffic to go through a specific proxy.
Or, you'd like to do geo-location testing and want to use a proxy in a different geographical location.
You can specify `-Y address:port` to indicate which proxy you'd like to use.
If your proxy requires authentication, you can pass the credentials with:
-z username:password
For example:
java -jar testingbot-tunnel.jar key secret -Y myproxy:9000 -z username:password
## Basic Authentication
If you need to test a website or pages that require Basic Authentication, then you can instruct TestingBot tunnel to automatically enter the correct credentials during testing.
You can specify `-a host:port:user:passwd` to indicate which credentials to use for which host (+port).
If your website is not running on a specific port, you can use port 80.
java -jar testingbot-tunnel.jar key secret -a mywebsite.com:80:myusername:mypassword
Was this page helpful? Yes No
## Looking for More Help?
Have questions or need more information?
You can reach us via the following channels:
- [Email us](https://testingbot.com/contact/new)
- [Join our Slack Channel](https://join.slack.com/t/testingb0t/shared_invite/zt-3bcw9xch-jk19~6XPs_xBrsAgAedkCw)
---
URL: https://testingbot.com/support/tunnel/faq
# Frequently Asked Questions
Below is a list of questions and answers that may help you with setting up or troubleshooting TestingBot Tunnel.
## How do I use the tunnel with manual (live) testing?
When you, or a team member, starts a TestingBot tunnel, all future manual tests will automatically use the latest active tunnel.
Whether you do a live test on a Desktop VM, a sim/emu device or a physical device, the tunnel will automatically be used.
## My Mobile App uses Certificate Pinning. How can I add the TestingBot Tunnel CA certificate?
All our VMs and mobile devices trust a TestingBot CA certificate that we generated. You can [download this CA certificate](https://testingbot.com/downloads/testingbot-ssl-bumping.crt) and add it to your app.
By default, TestingBot tunnel will bump all SSL traffic to use the TestingBot CA certificate. We do this to prevent issues with self-signed certificates.
If you do not wish to use this SSL bumping, you can pass `noSSLBump: true` as a capability or use the `--nocache` tunnel option.
## How many TestingBot Tunnels can I keep open simultaneously?
The maximum amount of simultaneous tunnels depends on the license your account has. By default, you can run up to 2 tunnels simultaneously.
## Can I use localhost with the tunnel?
You can use `localhost` on all our Desktop VMs while using TestingBot Tunnel.
By default we support proxying these ports for localhost testing: `[443, 80, 8080, 3030, 3000, 3001, 3400]`.
If you need additional ports, please pass an array of port numbers to either `localHttpPorts` or `localHttpsPorts`
On physical mobile devices and simulators/emulators, you cannot use `localhost`.
To test on mobile devices, please define a local domain name rather than localhost (127.0.0.1). You can define a local domain in your hosts file (`/etc/hosts`) on the machine where the TestingBot Tunnel program is running.
For example, you can add `127.0.0.1 mywebsite` to your `/etc/hosts` file, then use `http://mywebsite` in your tests.
## Can I use websockets or SSE with the tunnel?
With TestingBot Tunnel v4 and higher, it is possible to test websites or mobile apps that are using WebSockets (`ws://` and `wss://`), as well as Server-Sent Events (SSE).
To get started, please make sure to pass both the `--nobump` and `--nocache` flags when using WebSockets. This is necessary because by default, TestingBot will bump SSL to get around common SSL problems (expired certificates, self-signed certificates, etc.).
java -jar testingbot-tunnel.jar --nocache --nobump
It is currently not possible to use localhost for `ws` and `wss` requests. To get around this, you can add a custom host in your `/etc/hosts` that points to localhost and then use that custom host instead.
The Tunnel will forward the request to the machine running your tunnel endpoint and use it, as if it was localhost.
127.0.0.1 localhost
127.0.0.1 testingbot.com # add this for example, and use in ws://testingbot.com:80
## How can I improve the performance of the tunnel?
You can use the `-F,--fast-fail-regexps` option when starting the tunnel to specify a list of domains that should not be proxied at all.
You can fast-fail trackers, ads and other resources that have no impact on your test or its results. This will decrease the amount of HTTP(s) requests that need to be proxied by TestingBot Tunnel.
## Can I run tests on Virtual Devices and Real Devices using the same TestingBot Tunnel?
You can use the same instance of a tunnel for both virtual devices and real devices.
Was this page helpful? Yes No
## Looking for More Help?
Have questions or need more information?
You can reach us via the following channels:
- [Email us](https://testingbot.com/contact/new)
- [Join our Slack Channel](https://join.slack.com/t/testingb0t/shared_invite/zt-3bcw9xch-jk19~6XPs_xBrsAgAedkCw)
---
URL: https://testingbot.com/support/tunnel/upstream-proxy
# Upstream Proxy
Our tunnel has built-in support to use an upstream proxy, for example a GeoIP proxy.
You can test your website from various locations around the world, by utilizing HTTP proxies.
java -jar testingbot-tunnel.jar --proxy --proxy-userpwd :
## More Information
- TestingBot Tunnel will proxy both HTTP and HTTPs URLs to the upstream proxy (the GeoIP proxy address).
Was this page helpful? Yes No
## Looking for More Help?
Have questions or need more information?
You can reach us via the following channels:
- [Email us](https://testingbot.com/contact/new)
- [Join our Slack Channel](https://join.slack.com/t/testingb0t/shared_invite/zt-3bcw9xch-jk19~6XPs_xBrsAgAedkCw)
---
URL: https://testingbot.com/support/tunnel

# TestingBot Tunnel
Windows, Linux, BSD and macOS supported.[**Download Testingbot Tunnel v.4.4**](https://testingbot.com/downloads/testingbot-tunnel.zip)
SHA1 Checksum: 042c23c96abcb1669fc0dda336fd6a2a615412a7
v.4.4 released October 3, 2025 (Requires Java 11 or higher)
[Source code on GitHub](https://github.com/testingbot/Testingbot-Tunnel)
Maven groupId: com.testingbot | artifactId: TestingBotTunnel | version: 4.4
Docker: `docker pull testingbot/tunnel`
Whether you want to test your website on your local computer (localhost), on a **staging server inside your private network** or on a computer across VPN, the TestingBot Tunnel makes all of this possible in a secure and reliable way.
You will no longer need to open up ports on your firewall or whitelist the TestingBot IP range to run tests on your staging environment. Below are some of the key features of the TestingBot Tunnel.
- **Fast** : We cache static content on our side of the tunnel, reducing traffic and improving performance.
- **Secure** : When you initiate the Tunnel, a dedicated VM server is created just for you, remaining active only for the duration of the session.
- **Robust** : Full HTTP(s) + WebSockets support, built with Java for stability and performance.
- **Easy** : Simple to set up and use.
## Run tests in your local environment
The Tunnel makes it easy to run tests with TestingBot in your private staging environment.
Whether you're testing a new feature or a major code refactor, the Tunnel allows you to easily run regression tests and ensure everything still works as expected. Just point your tests to `http://localhost` on port `4445`, instead of connecting to our grid at `https://hub.testingbot.com`.
The Tunnel is a Java-based program (`.jar`) that includes a **secure HTTP(s) + WebSocket proxy**, which relays requests to the TestingBot browser and device grid.
## Optimized for Speed
Setting up a Tunnel means we provision a **dedicated VM server just for you** , which takes no longer than a minute to launch.
On our end, we use an accelerator that **caches static content** passing through the tunnel, speeding up the process.
The Tunnel uses compression to minimize the traffic going through the tunnel.
You can run multiple tunnels with a single account, allowing you to dedicate several machines on your private network to different tunnels. This setup ensures **High Availability** for your tests and services.
## Secure Tunnel
All requests to and from our servers are securely routed through the Tunnel, which is built on the **SSH protocol**.
A dedicated VM is provisioned just for you, and once your tests are complete, both the Tunnel and the VM server are automatically destroyed.
## Robust Tunnel
The Tunnel is designed to **handle heavy traffic, even during parallel testing** , ensuring reliable performance.
Built with Java, the Tunnel runs on any standard JVM.
It supports HTTP, HTTPS, WebSockets, SSE, HTTP/1, HTTP/2 and HTTP/3 protocols.
The standalone Tunnel application is compatible with all major operating systems: Windows, Linux, and macOS.
## Easy Setup
Setting up and using the Tunnel is easy.
Download the `.jar` file from our website and run it from your commandline, or use the provided Docker image (`testingbot/tunnel`).
Replace the `TESTINGBOT_KEY` and `TESTINGBOT_SECRET` with [your own key and secret](https://testingbot.com/members/user/edit).
Once your Tunnel is ready, you will see the message "You may start your tests."
The Tunnel creates a `~/.testingbot` file on your local system to store the `TESTINGBOT_KEY` and `TESTINGBOT_SECRET`
## System Requirements
The system requirements depend on how you are going to use the tunnel.
If you intend to do parallel testing, you will need to increase the CPU and RAM of the machine running the tunnel.
A machine with 4GB ram and 2 CPU cores should run the Tunnel just fine.
## Shutting down tunnel
For a proper shutdown, it's recommended to exit the Tunnel gracefully. If not, the Tunnel may remain active in our system because we did not receive a shutdown command.
To do a graceful exit, please use `CTRL+C` in the process window or remove the TestingBot PID file. This will trigger a graceful exit, send the shutdown command to TestingBot and clean up everything.
Alternatively, you can send a `kill -SIGUSR1` signal to the `PID` of the Tunnel process.
## Tunnel Clients
We have created a NodeJS based launcher which you can use in your NodeJS tests and projects:
[testingbot-tunnel-launcher](https://github.com/testingbot/testingbot-tunnel-launcher)
[](https://testingbot.com/assets/tunnel-diagram.png "How the TestingBot Tunnel works")
Was this page helpful? Yes No
## Looking for More Help?
Have questions or need more information?
You can reach us via the following channels:
- [Email us](https://testingbot.com/contact/new)
- [Join our Slack Channel](https://join.slack.com/t/testingb0t/shared_invite/zt-3bcw9xch-jk19~6XPs_xBrsAgAedkCw)
---
URL: https://testingbot.com/support/web-automate/mobile
# Mobile Testing
TestingBot provides iOS and Android testing on both [simulators/emulators](https://testingbot.com/support/web-automate/browsers) and [real/physical devices](https://testingbot.com/support/app-automate/devices).
## Configuring capabilities
TestingBot's mobile simulators and emulators can be accessed using Appium. You can use the device picker below to select the capabilities you want to use for your tests.
iOS 18.6›iPhone 16
Loading environments...
Please wait while we load the available devices and platforms.
W3C Protocol
W3C is the newest WebDriver protocol, TestingBot recommends using W3C.
JSONWP
JSONWP is the legacy protocol which is no longer actively maintained.
JavaPythonNodeJSC#RubyPHP
MutableCapabilities capabilities = new MutableCapabilities();
capabilities.setCapability(CapabilityType.BROWSER_NAME, "safari");
capabilities.setCapability(CapabilityType.BROWSER_VERSION, "18.6");
capabilities.setCapability("appium:deviceName", "iPhone 16");
capabilities.setCapability(CapabilityType.PLATFORM_NAME, "iOS");`
You can configure more options by using the [Appium capabilities generator](https://testingbot.com/support/app-automate/appium/capabilities).
## Portrait/Landscape
It's possible to rotate the device before and during your test. Please see these examples:
**Rotate before test (iOS only):**
desired_capabilities = { "orientation" : "LANDSCAPE " } # or PORTRAIT
**Rotate during test:**
((AppiumDriver) driver).rotate(ScreenOrientation.LANDSCAPE);
## Specifying Appium Version
TestingBot will use the most recent, compatible, Appium version according to the device, OS and version you specify.
If you'd like to specify your own Appium version, you can do this with the `appiumVersion` capability.
To learn more about the available Appium versions, please see our [Appium versions documentation](https://testingbot.com/support/app-automate/appium/appium-versions).
[Java](https://testingbot.com#)[NodeJS](https://testingbot.com#)[Python](https://testingbot.com#)[C#](https://testingbot.com#)[Ruby](https://testingbot.com#)[PHP](https://testingbot.com#)
caps = {
platformName: "iOS",
deviceName: "iPhone 15",
browserVersion: "17.4",
browserName: 'safari',
"tb:options" => {
"appiumVersion" : "2.4.1"
}
}
ChromeOptions chromeOpts = new ChromeOptions();
chromeOpts.setExperimentalOption("w3c", true);
MutableCapabilities tbOptions = new MutableCapabilities();
tbOptions.setCapability("key", "api_key");
tbOptions.setCapability("secret", "api_secret");
tbOptions.setCapability("appiumVersion", "2.4.1");
DesiredCapabilities caps = new DesiredCapabilities();
caps.setCapability(ChromeOptions.CAPABILITY, chromeOpts);
caps.setCapability("platformName", "iOS");
caps.setCapability("tb:options", tbOptions);
caps.setCapability("deviceName", "iPhone 16");
caps.setCapability("browserVersion", "18.6");
caps.setCapability("browserName", "safari");
$options = new ChromeOptions();
$capabilities = DesiredCapabilities::safari();
$capabilities->setPlatform('iOS');
$capabilities->setCapability('tb:options', array(
'appiumVersion' => "2.4.1"
));
$capabilities->setCapability(ChromeOptions::CAPABILITY, $options);
tbOptions = {
'name': 'W3C Sample',
'appiumVersion': "2.4.1"
}
chromeOpts = {
'browserName': "safari",
'platformName': "iOS",
'browserVersion': "18.6",
'deviceName': "iPhone 16",
'goog:chromeOptions': {'w3c': True},
'tb:options': tbOptions
}
self.driver = webdriver.Remote(remote_url, desired_capabilities=chromeOpts)
driver = await new webdriver.Builder().withCapabilities({
"browserName": 'safari',
"platformName": 'iOS',
"deviceName": 'iPhone 16',
"browserVersion": '18.6',
/** Google requires "w3c" to be set in "goog:chromeOptions" as true if you're using ChromeDriver version 74 or lower.
* Based on this commit: https://chromium.googlesource.com/chromium/src/+/2b49880e2481658e0702fd6fe494859bca52b39c
* ChromeDriver now uses w3c by default from version 75+ so setting this option will no longer be a requirement **/
"goog:chromeOptions" : { "w3c" : true },
"tb:options": {
"key": "api_key",
"secret": "api_secret",
"appiumVersion": "2.4.1"
}
}).usingServer("https://hub.testingbot.com/wd/hub").build();
var chromeOptions = new ChromeOptions()
{
BrowserVersion = "18.6",
PlatformName = "iOS",
DeviceName = "iPhone 16",
BrowserName = "safari",
UseSpecCompliantProtocol = true
};
var tbOptions = new Dictionary
{
["key"] = "api_key",
["secret"] = "api_secret",
["appiumVersion"] = "2.4.1"
};
chromeOptions.AddAdditionalCapability("tb:options", tbOptions, true);
driver = new RemoteWebDriver(new Uri("https://hub.testingbot.com/wd/hub"),
chromeOptions.ToCapabilities(), TimeSpan.FromSeconds(600));
## Testing Internal/Staged Websites
We've built [TestingBot Tunnel](https://testingbot.com/support/tunnel), to provide you with a secure way to run tests against your staged/internal webapps.
Please see our [TestingBot Tunnel documentation](https://testingbot.com/support/tunnel) for more information about this easy to use tunneling solution.
Was this page helpful? Yes No
## Looking for More Help?
Have questions or need more information?
You can reach us via the following channels:
- [Email us](https://testingbot.com/contact/new)
- [Join our Slack Channel](https://join.slack.com/t/testingb0t/shared_invite/zt-3bcw9xch-jk19~6XPs_xBrsAgAedkCw)
---
URL: https://testingbot.com/support/web-automate/codeless-automation
# Codeless Web Testing
Codeless Web Automated Testing allows you to run your pre-recorded Selenium tests on the TestingBot cloud grid.
- [Add a test](https://testingbot.com/support/web-automate/codeless-automation/add-test)
- [Test Suites](https://testingbot.com/support/web-automate/codeless-automation/suites)
- [Schedule a test](https://testingbot.com/support/web-automate/codeless-automation/schedule)
- [Test alerts](https://testingbot.com/support/web-automate/codeless-automation/alerts)
- [Supported commands](https://testingbot.com/support/web-automate/codeless-automation/commands)
- [Variables](https://testingbot.com/support/web-automate/codeless-automation/variables)
- [FAQ](https://testingbot.com/support/web-automate/codeless-automation/faq)
Was this page helpful? Yes No
## Looking for More Help?
Have questions or need more information?
You can reach us via the following channels:
- [Email us](https://testingbot.com/contact/new)
- [Join our Slack Channel](https://join.slack.com/t/testingb0t/shared_invite/zt-3bcw9xch-jk19~6XPs_xBrsAgAedkCw)
---
URL: https://testingbot.com/support/web-automate/codeless-automation/add-test
# Add Codeless Automation test
TestingBot can create and run automated web tests against your website on regular intervals and alert you when a test fails.
There are 2 options to create a codeless web automation test:
- You can [record your actions](https://testingbot.com#record) with Selenium IDE, [upload the steps](https://testingbot.com#upload) and replay the steps on TestingBot.
- You can choose to describe tests in natural language and have the [TestingBot AI agent](https://testingbot.com/support/ai/codeless) create and run the test for you.
## Record your actions

### Installing Selenium IDE
To get started, please make sure to [download the Selenium IDE](https://github.com/SeleniumHQ/selenium-ide/releases/). This is an Electron app that will run on Windows and macOS and will allow you to record and playback actions on a website and allow you to save these actions as Selenium scripts (`.side` files).
You can also install the package through NPM: `npm install -g selenium-ide`
### Recording a test
#### Creating a test
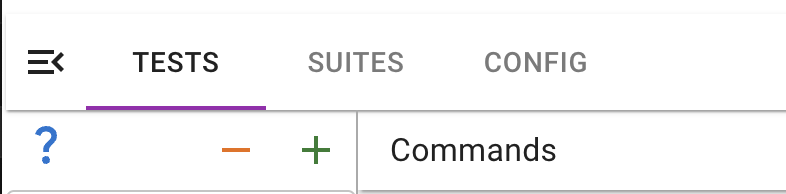
Once you have the Selenium IDE program running, you can create a new testcase by clicking the plus icon (+). Enter a name for your test. Next, open the URL you want to test in the right side of the Selenium IDE. Once the page is loaded, interact with the page. You will see new commands are added to the left sidebar, which means the IDE is recording all your actions.
#### Adding verifications
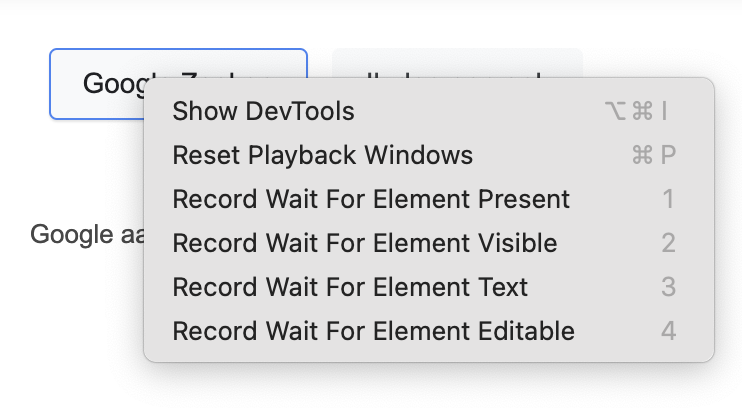
For example, if you tap an element on the webpage, you will see a new `Click` command appear. At any given point, you can right-click an element on the page you are testing and add a verification, for example: `Record Wait For Element Present`.
### Saving test
Once you've finished recording your test, you can choose to save it as a `.side` file, which is basically a JSON file that describes all the actions and verifications you added during the recording.
Choose `Save Project As` and save the file. You can now [upload this file](https://testingbot.com#upload) to TestingBot and instruct TestingBot to run this test on a scheduled interval, running on the browsers & operating systems you want.
## Upload a codeless test
Once you have a `.side` file, you can upload it in the [Codeless Test](https://testingbot.com/members/lab) area of TestingBot.
Click the upload button in the **Import a Selenium Test** section and upload the file.
Once uploaded, you will be redirected to a test configuration page. Here you can configure various options:
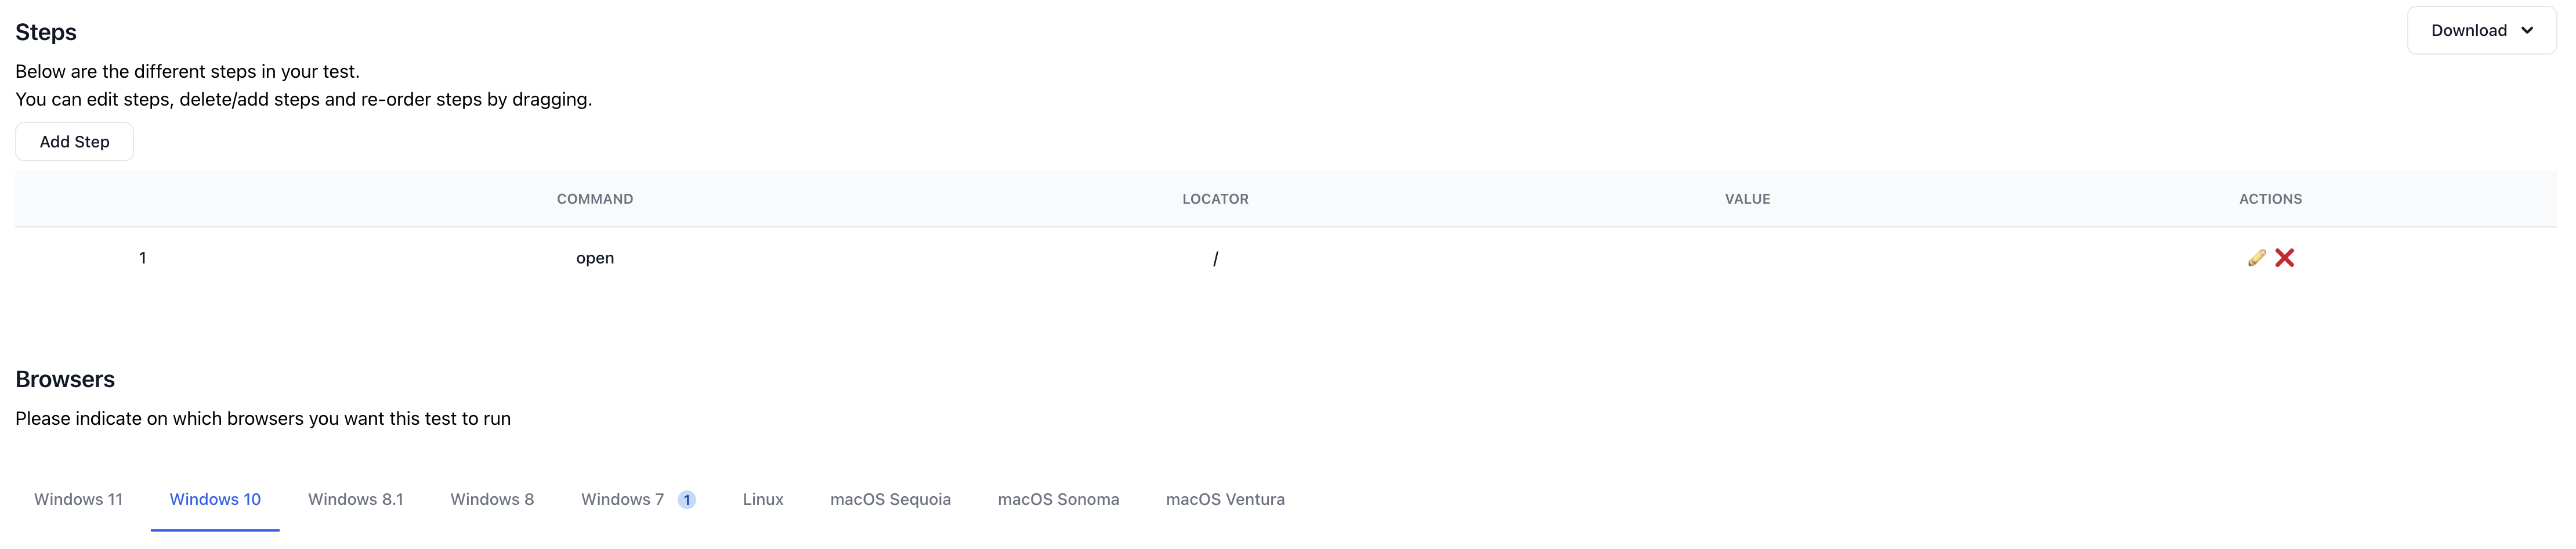
### Steps
We will display the same steps that were recorded before. You have the option to re-order the steps, edit steps or remove steps.
### Browsers
A selection of browsers & operating systems will be available to choose from. Select one or more browsers that you want to run your test on.
### Settings
You can configure various settings for your test:
- Schedule when the test should run; a specific time, interval, day. Or maybe every 15 minutes. You indicate how often the test will run.
- Manage timeouts, screen resolution, screenshots and videos.
- Daily and hourly reporting of your tests via email.
- Automatically retry a failed test and if the retry succeeds, ignore the failed test.
- Receive an alert via email or text message when a test fails.
- Test from various geographical locations
## Run Test
Now that the test has been added to TestingBot, you can choose to run it immediately.
Click the **Run test** button on the top right of the edit test page, or from within the test overview page.
TestingBot will run the test on the browser(s) you specified and alert you when a test failed.
Each test comes with screenshots, a video and generated log files.
## API Reference
You can use the [TestingBot API](https://testingbot.com/support/api) to add, edit, remove and [run Codeless Automation tests](https://testingbot.com/support/api#runlabtest).
Use our [integrations](https://testingbot.com/support/integrations) to improve your workflow. For example, configure a [Slack Bot](https://testingbot.com/support/integrations/slack) to notify you when a codeless automation test failed.
Was this page helpful? Yes No
## Looking for More Help?
Have questions or need more information?
You can reach us via the following channels:
- [Email us](https://testingbot.com/contact/new)
- [Join our Slack Channel](https://join.slack.com/t/testingb0t/shared_invite/zt-3bcw9xch-jk19~6XPs_xBrsAgAedkCw)
---
URL: https://testingbot.com/support/web-automate/codeless-automation/suites
# Add a Test Suite
In our TestLab we offer the possibility to upload test-suites (called **Projects** in Selenium IDE) generated by [Selenium IDE](https://www.selenium.dev/selenium-ide/).
A test suite is a collection of tests, generated by the Selenium IDE extension.
To upload the suite, please upload the exported (`.side`) file:
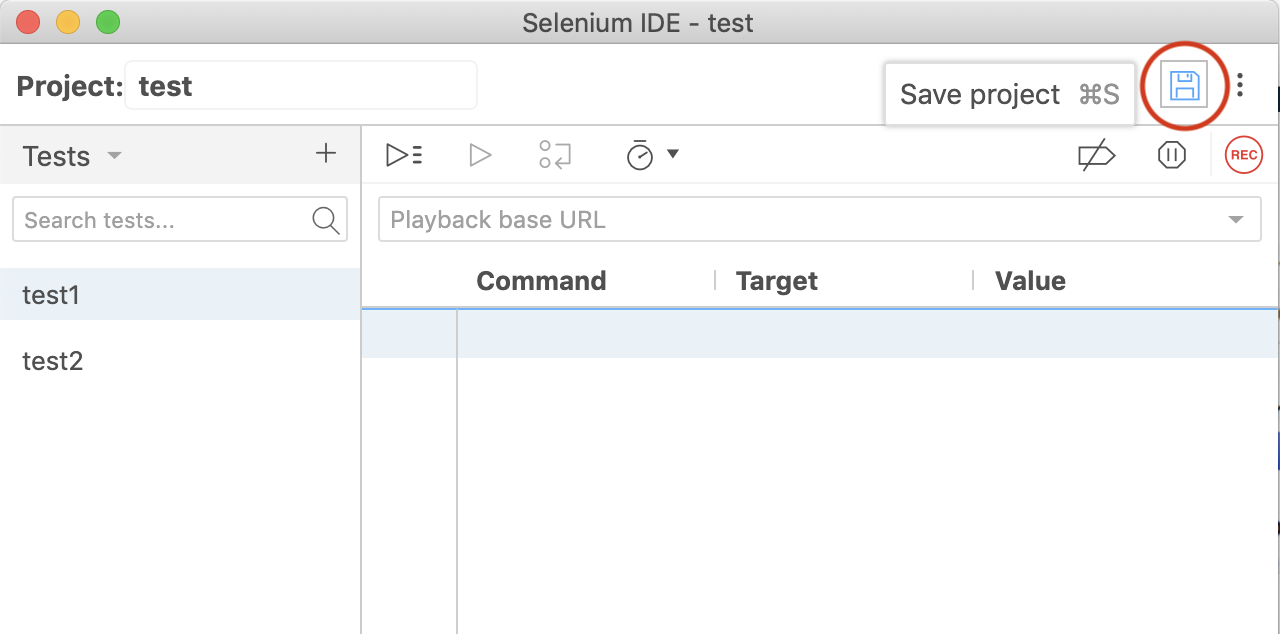
## Managing Test Suites
Once uploaded to our TestLab, you will see page detailing the Project you just uploaded.
It will include a list of the tests that this project contains.
On this page, you can change on which browser(s) the tests should run, change alert/scheduling options and more.
Changing a setting in the project affects all tests for this project.
If you like to only change a single test, click through to the test edit page and make the necessary changes there.
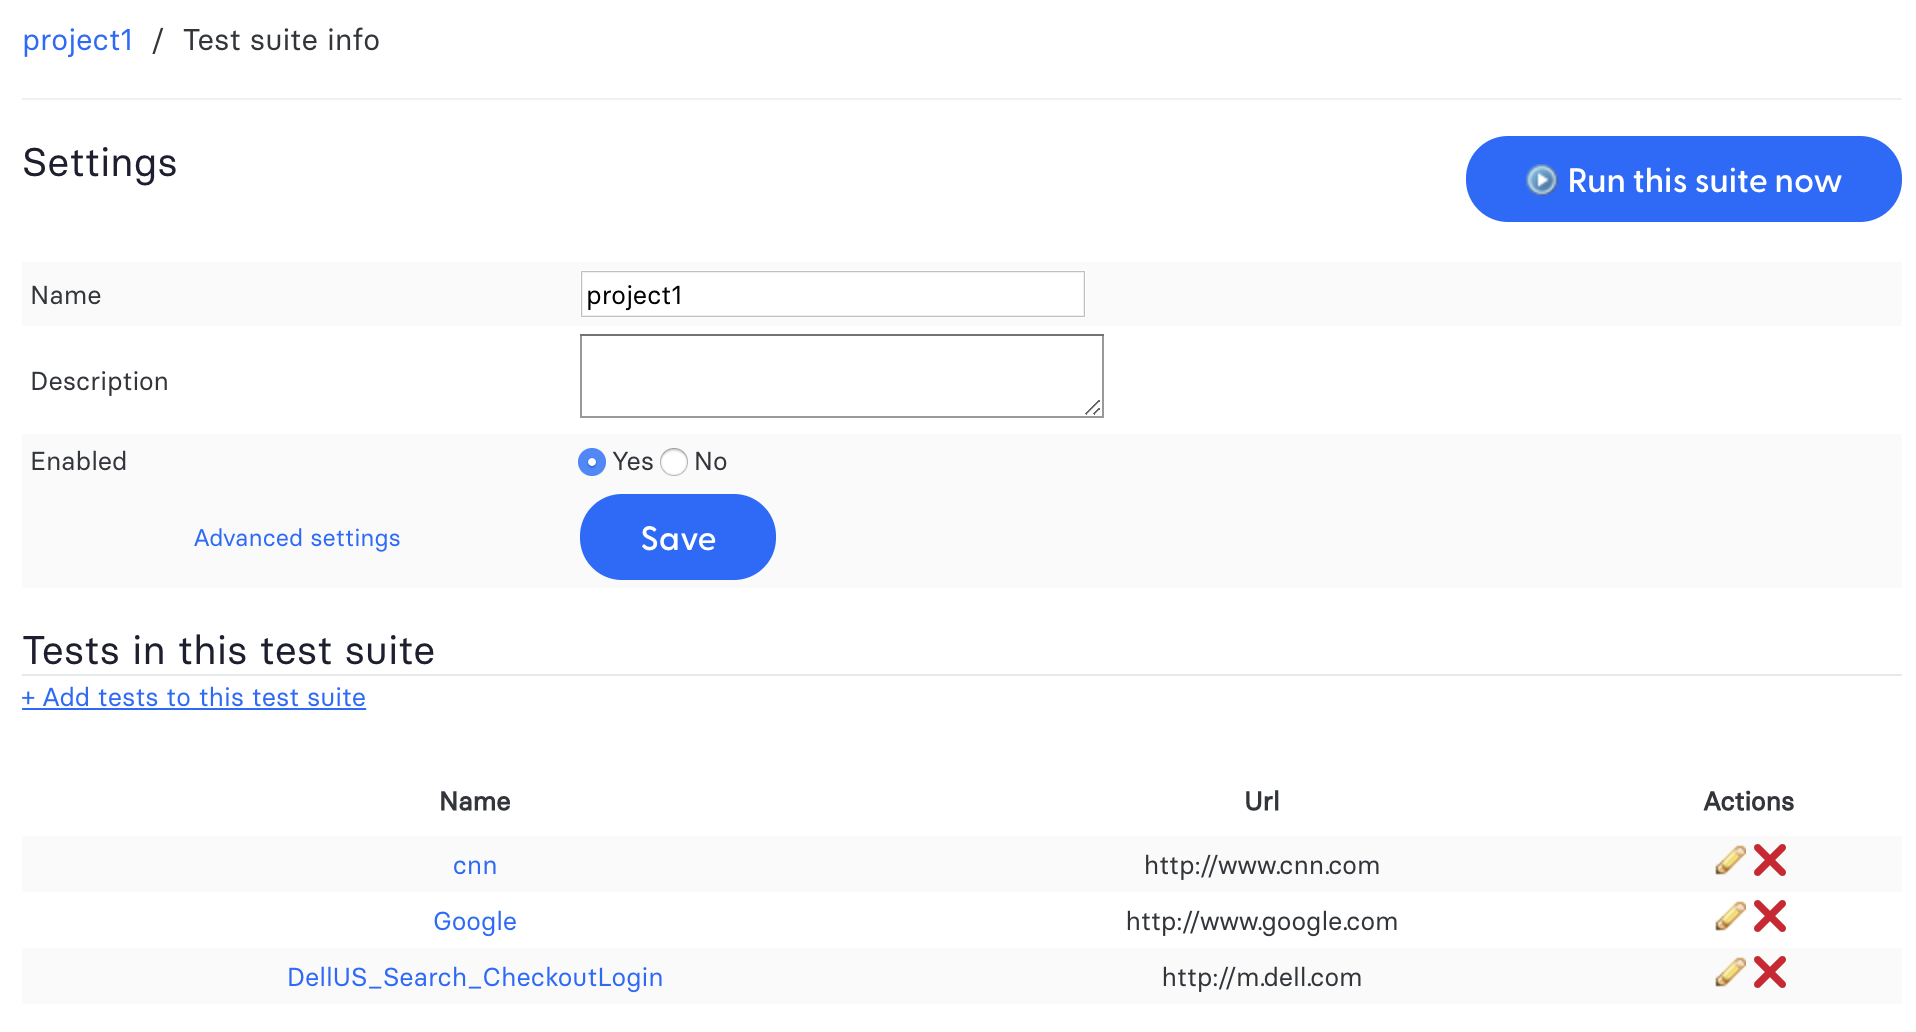
Was this page helpful? Yes No
## Looking for More Help?
Have questions or need more information?
You can reach us via the following channels:
- [Email us](https://testingbot.com/contact/new)
- [Join our Slack Channel](https://join.slack.com/t/testingb0t/shared_invite/zt-3bcw9xch-jk19~6XPs_xBrsAgAedkCw)
---
URL: https://testingbot.com/support/web-automate/codeless-automation/schedule
# Schedule a test
When you have [added a test](https://testingbot.com/support/web-automate/codeless-automation/add-test), you can specify when we should run the test, and how many times we should run it (interval).
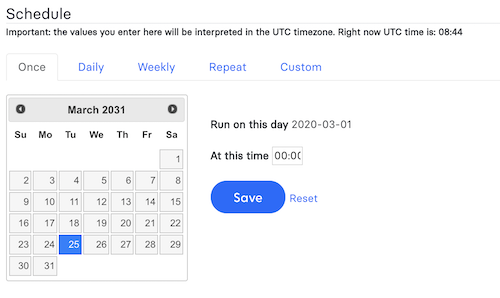
You can have your test either run once, every day, every week, repeat every `..` time or use a custom CRON format.
Once scheduled, you can specify when you want to be [alerted of failed tests](https://testingbot.com/support/web-automate/codeless-automation/alerts).
Was this page helpful? Yes No
## Looking for More Help?
Have questions or need more information?
You can reach us via the following channels:
- [Email us](https://testingbot.com/contact/new)
- [Join our Slack Channel](https://join.slack.com/t/testingb0t/shared_invite/zt-3bcw9xch-jk19~6XPs_xBrsAgAedkCw)
---
URL: https://testingbot.com/support/web-automate/codeless-automation/alerts
# Alerts
When a test in Codeless Automation fails, we can notify you by sending you an email, Webhook, Push Notification or SMS/text message.
You can choose to be alerted immediately, or once a day.
## Alert Types
We offer 3 ways to alert you:
- Email
- SMS/Text message
- Webhook to a URL you specify.
The message you will receive will contain the URL, number of errors and an error message trace.
## Email Alerts
To receive an alert via email, fill in your email address.
We will send an email with the failure of the test.
You can customize the error message by filling in your own text.
We offer these variables to customize your error text: `%test_name%` and `%browser%`.
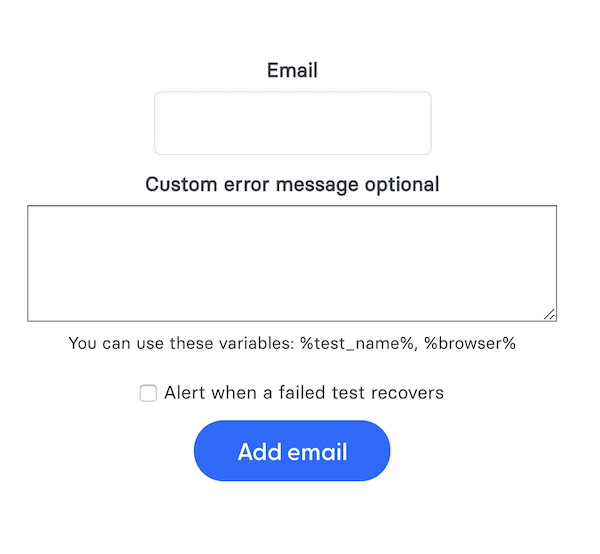
## SMS Text Message
Fill in your phone number (with country code) to receive an SMS message when a test fails.
You can customize the error message by filling in your own text.
We offer these variables to customize your error text: `%test_name%` and `%browser%`.
There's also the possibility to be alerted when the test recovers.
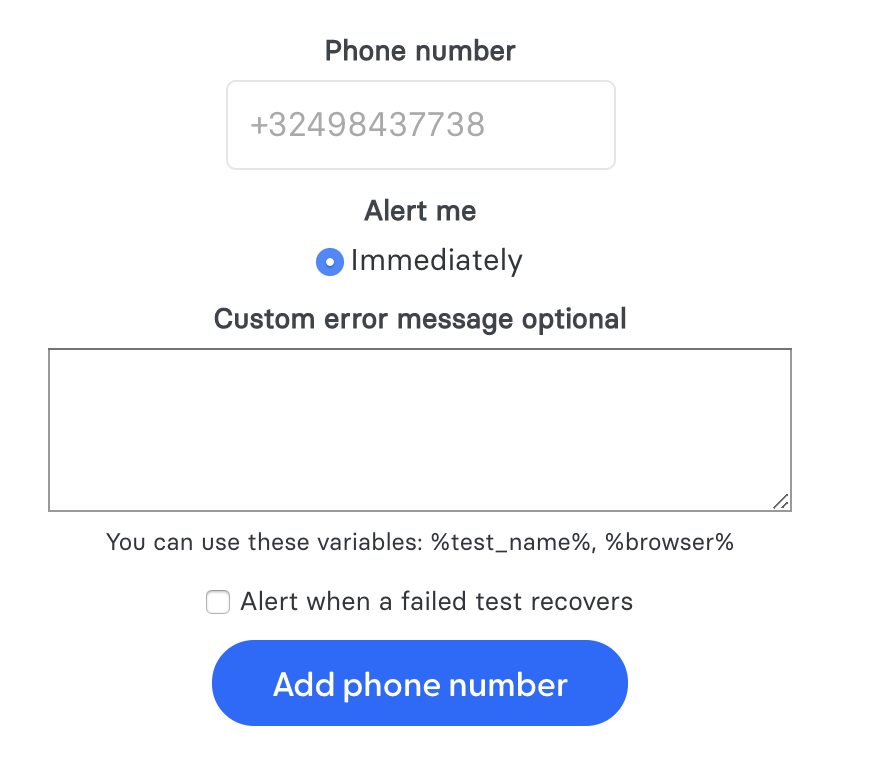
## Webhook
We will call a URL you specify whenever a test fails.
The URL needs to be publicly available, otherwise TestingBot cannot reach the URL.
The URL will receive a POST request from us with the following fields:
- `success` (boolean)
- `job_id` (int) - internal id
- `test_ids[]` (string[]) webdriver sessionIds
- `errors[]` (string[]) error messages
Was this page helpful? Yes No
## Looking for More Help?
Have questions or need more information?
You can reach us via the following channels:
- [Email us](https://testingbot.com/contact/new)
- [Join our Slack Channel](https://join.slack.com/t/testingb0t/shared_invite/zt-3bcw9xch-jk19~6XPs_xBrsAgAedkCw)
---
URL: https://testingbot.com/support/web-automate/codeless-automation/commands
# Supported Selenium IDE Commands
Below is a list of the commands we currently support in our Codeless Automation.
## Browsing
- **close**
Simulates the user clicking the "close" button in the titlebar of a popup window or tab.
- **closeAndWait**
Simulates the user clicking the "close" button in the titlebar of a popup window or tab.
- **goBack**
Simulates the user clicking the "back" button on their browser.
- **goBackAndWait**
Simulates the user clicking the "back" button on their browser.
- **open**
(url)
Opens an URL in the test frame. This accepts both relative and absolute URLs. The "open" command waits for the page to load before proceeding, ie. the "AndWait" suffix is implicit. Note: The URL must be on the same domain as the runner HTML due to security restrictions in the browser (Same Origin Policy). If you need to open an URL on another domain, use the Selenium Server to start a new browser session on that domain.
- **openAndWait**
(url)
Opens an URL in the test frame. This accepts both relative and absolute URLs. The "open" command waits for the page to load before proceeding, ie. the "AndWait" suffix is implicit. Note: The URL must be on the same domain as the runner HTML due to security restrictions in the browser (Same Origin Policy). If you need to open an URL on another domain, use the Selenium Server to start a new browser session on that domain.
- **openWindow**
(url - windowID)
Opens a popup window (if a window with that ID isn't already open). After opening the window, you'll need to select it using the selectWindow command. This command can also be a useful workaround for bug SEL-339. In some cases, Selenium will be unable to intercept a call to window.open (if the call occurs during or before the "onLoad" event, for example). In those cases, you can force Selenium to notice the open window's name by using the Selenium openWindow command, using an empty (blank) url, like this: openWindow("", "myFunnyWindow").
- **openWindowAndWait**
(url - windowID)
Opens a popup window (if a window with that ID isn't already open). After opening the window, you'll need to select it using the selectWindow command. This command can also be a useful workaround for bug SEL-339. In some cases, Selenium will be unable to intercept a call to window.open (if the call occurs during or before the "onLoad" event, for example). In those cases, you can force Selenium to notice the open window's name by using the Selenium openWindow command, using an empty (blank) url, like this: openWindow("", "myFunnyWindow").
- **refresh**
Simulates the user clicking the "Refresh" button on their browser.
- **refreshAndWait**
Simulates the user clicking the "Refresh" button on their browser.
- **selectFrame**
(locator)
Selects a frame within the current window. (You may invoke this command multiple times to select nested frames.) To select the parent frame, use "relative=parent" as a locator; to select the top frame, use "relative=top". You can also select a frame by its 0-based index number; select the first frame with "index=0", or the third frame with "index=2". You may also use a DOM expression to identify the frame you want directly, like this: dom=frames["main"].frames["subframe"]
- **selectFrameAndWait**
(locator)
Selects a frame within the current window. (You may invoke this command multiple times to select nested frames.) To select the parent frame, use "relative=parent" as a locator; to select the top frame, use "relative=top". You can also select a frame by its 0-based index number; select the first frame with "index=0", or the third frame with "index=2". You may also use a DOM expression to identify the frame you want directly, like this: dom=frames["main"].frames["subframe"]
- **selectWindow**
(windowID)
Selects a popup window using a window locator; once a popup window has been selected, all commands go to that window. To select the main window again, use null as the target. Window locators provide different ways of specifying the window object: by title, by internal JavaScript "name," or by JavaScript variable. title=My Special Window: Finds the window using the text that appears in the title bar. Be careful; two windows can share the same title. If that happens, this locator will just pick one. name=myWindow: Finds the window using its internal JavaScript "name" property. This is the second parameter "windowName" passed to the JavaScript method window.open(url, windowName, windowFeatures, replaceFlag) (which Selenium intercepts). var=variableName: Some pop-up windows are unnamed (anonymous), but are associated with a JavaScript variable name in the current application window, e.g. "window.foo = window.open(url);". In those cases, you can open the window using "var=foo". If no window locator prefix is provided, we'll try to guess what you mean like this: 1.) if windowID is null, (or the string "null") then it is assumed the user is referring to the original window instantiated by the browser). 2.) if the value of the "windowID" parameter is a JavaScript variable name in the current application window, then it is assumed that this variable contains the return value from a call to the JavaScript window.open() method. 3.) Otherwise, selenium looks in a hash it maintains that maps string names to window "names". 4.) If that fails, we'll try looping over all of the known windows to try to find the appropriate "title". Since "title" is not necessarily unique, this may have unexpected behavior. If you're having trouble figuring out the name of a window that you want to manipulate, look at the Selenium log messages which identify the names of windows created via window.open (and therefore intercepted by Selenium). You will see messages like the following for each window as it is opened: debug: window.open call intercepted; window ID (which you can use with selectWindow()) is "myNewWindow" In some cases, Selenium will be unable to intercept a call to window.open (if the call occurs during or before the "onLoad" event, for example). (This is bug SEL-339.) In those cases, you can force Selenium to notice the open window's name by using the Selenium openWindow command, using an empty (blank) url, like this: openWindow("", "myFunnyWindow").
- **selectWindowAndWait**
(windowID)
Selects a popup window using a window locator; once a popup window has been selected, all commands go to that window. To select the main window again, use null as the target. Window locators provide different ways of specifying the window object: by title, by internal JavaScript "name," or by JavaScript variable. title=My Special Window: Finds the window using the text that appears in the title bar. Be careful; two windows can share the same title. If that happens, this locator will just pick one. name=myWindow: Finds the window using its internal JavaScript "name" property. This is the second parameter "windowName" passed to the JavaScript method window.open(url, windowName, windowFeatures, replaceFlag) (which Selenium intercepts). var=variableName: Some pop-up windows are unnamed (anonymous), but are associated with a JavaScript variable name in the current application window, e.g. "window.foo = window.open(url);". In those cases, you can open the window using "var=foo". If no window locator prefix is provided, we'll try to guess what you mean like this: 1.) if windowID is null, (or the string "null") then it is assumed the user is referring to the original window instantiated by the browser). 2.) if the value of the "windowID" parameter is a JavaScript variable name in the current application window, then it is assumed that this variable contains the return value from a call to the JavaScript window.open() method. 3.) Otherwise, selenium looks in a hash it maintains that maps string names to window "names". 4.) If that fails, we'll try looping over all of the known windows to try to find the appropriate "title". Since "title" is not necessarily unique, this may have unexpected behavior. If you're having trouble figuring out the name of a window that you want to manipulate, look at the Selenium log messages which identify the names of windows created via window.open (and therefore intercepted by Selenium). You will see messages like the following for each window as it is opened: debug: window.open call intercepted; window ID (which you can use with selectWindow()) is "myNewWindow" In some cases, Selenium will be unable to intercept a call to window.open (if the call occurs during or before the "onLoad" event, for example). (This is bug SEL-339.) In those cases, you can force Selenium to notice the open window's name by using the Selenium openWindow command, using an empty (blank) url, like this: openWindow("", "myFunnyWindow").
- **windowFocus**
Gives focus to the currently selected window
- **windowFocusAndWait**
Gives focus to the currently selected window
- **windowMaximize**
Resize currently selected window to take up the entire screen
- **windowMaximizeAndWait**
Resize currently selected window to take up the entire screen
## Clicks
- **click**
(locator)
Clicks on a link, button, checkbox or radio button. If the click action causes a new page to load (like a link usually does), call waitForPageToLoad.
- **clickAndWait**
(locator)
Clicks on a link, button, checkbox or radio button. If the click action causes a new page to load (like a link usually does), call waitForPageToLoad.
- **clickAt**
(locator - coordString)
Clicks on a link, button, checkbox or radio button. If the click action causes a new page to load (like a link usually does), call waitForPageToLoad.
- **clickAtAndWait**
(locator - coordString)
Clicks on a link, button, checkbox or radio button. If the click action causes a new page to load (like a link usually does), call waitForPageToLoad.
- **doubleClick**
(locator)
Double clicks on a link, button, checkbox or radio button. If the double click action causes a new page to load (like a link usually does), call waitForPageToLoad.
- **doubleClickAndWait**
(locator)
Double clicks on a link, button, checkbox or radio button. If the double click action causes a new page to load (like a link usually does), call waitForPageToLoad.
- **doubleClickAt**
(locator - coordString)
Doubleclicks on a link, button, checkbox or radio button. If the action causes a new page to load (like a link usually does), call waitForPageToLoad.
- **doubleClickAtAndWait**
(locator - coordString)
Doubleclicks on a link, button, checkbox or radio button. If the action causes a new page to load (like a link usually does), call waitForPageToLoad.
- **dragAndDrop**
(locator - movementsString)
Drags an element a certain distance and then drops it
- **dragAndDropAndWait**
(locator - movementsString)
Drags an element a certain distance and then drops it
- **dragAndDropToObject**
(locatorOfObjectToBeDragged - locatorOfDragDestinationObject)
Drags an element and drops it on another element
- **dragAndDropToObjectAndWait**
(locatorOfObjectToBeDragged - locatorOfDragDestinationObject)
Drags an element and drops it on another element
## Form Fields
- **addSelection**
(locator - optionLocator)
Add a selection to the set of selected options in a multi-select element using an option locator. @see #doSelect for details of option locators
- **addSelectionAndWait**
(locator - optionLocator)
Add a selection to the set of selected options in a multi-select element using an option locator. @see #doSelect for details of option locators
- **check**
(locator)
Check a toggle-button (checkbox/radio)
- **checkAndWait**
(locator)
Check a toggle-button (checkbox/radio)
- **focus**
(locator)
Move the focus to the specified element; for example, if the element is an input field, move the cursor to that field.
- **focusAndWait**
(locator)
Move the focus to the specified element; for example, if the element is an input field, move the cursor to that field.
- **removeAllSelections**
(locator)
Unselects all of the selected options in a multi-select element.
- **removeAllSelectionsAndWait**
(locator)
Unselects all of the selected options in a multi-select element.
- **removeSelection**
(locator - optionLocator)
Remove a selection from the set of selected options in a multi-select element using an option locator. @see #doSelect for details of option locators
- **removeSelectionAndWait**
(locator - optionLocator)
Remove a selection from the set of selected options in a multi-select element using an option locator. @see #doSelect for details of option locators
- **select**
(selectLocator - optionLocator)
Select an option from a drop-down using an option locator. Option locators provide different ways of specifying options of an HTML Select element (e.g. for selecting a specific option, or for asserting that the selected option satisfies a specification). There are several forms of Select Option Locator. label=labelPattern: matches options based on their labels, i.e. the visible text. (This is the default.) label=regexp:^[Oo]ther value=valuePattern: matches options based on their values. value=other id=id: matches options based on their ids. id=option1 index=index: matches an option based on its index (offset from zero). index=2 If no option locator prefix is provided, the default behaviour is to match on label.
- **selectAndWait**
(selectLocator - optionLocator)
Select an option from a drop-down using an option locator. Option locators provide different ways of specifying options of an HTML Select element (e.g. for selecting a specific option, or for asserting that the selected option satisfies a specification). There are several forms of Select Option Locator. label=labelPattern: matches options based on their labels, i.e. the visible text. (This is the default.) label=regexp:^[Oo]ther value=valuePattern: matches options based on their values. value=other id=id: matches options based on their ids. id=option1 index=index: matches an option based on its index (offset from zero). index=2 If no option locator prefix is provided, the default behaviour is to match on label.
- **setCursorPosition**
(locator - position)
Moves the text cursor to the specified position in the given input element or textarea. This method will fail if the specified element isn't an input element or textarea.
- **setCursorPositionAndWait**
(locator - position)
Moves the text cursor to the specified position in the given input element or textarea. This method will fail if the specified element isn't an input element or textarea.
- **submit**
(formLocator)
Submit the specified form. This is particularly useful for forms without submit buttons, e.g. single-input "Search" forms.
- **submitAndWait**
(formLocator)
Submit the specified form. This is particularly useful for forms without submit buttons, e.g. single-input "Search" forms.
- **uncheck**
(locator)
Uncheck a toggle-button (checkbox/radio)
- **uncheckAndWait**
(locator)
Uncheck a toggle-button (checkbox/radio)
- **getSelectedLabels**
(selectLocator)
Gets all option labels (visible text) for selected options in the specified select or multi-select element.
- **getSelectedLabel**
(selectLocator)
Gets option label (visible text) for selected option in the specified select element.
- **getSelectedValues**
(selectLocator)
Gets all option values (value attributes) for selected options in the specified select or multi-select element.
- **getSelectedValue**
(selectLocator)
Gets option value (value attribute) for selected option in the specified select element.
- **getSelectedIndexes**
(selectLocator)
Gets all option indexes (option number, starting at 0) for selected options in the specified select or multi-select element.
- **getSelectedIndex**
(selectLocator)
Gets option index (option number, starting at 0) for selected option in the specified select element.
- **getSelectedIds**
(selectLocator)
Gets all option element IDs for selected options in the specified select or multi-select element.
- **getSelectedId**
(selectLocator)
Gets option element ID for selected option in the specified select element.
- **verifyAllButtons**
(equalTo)
- **verifyAllFields**
(equalTo)
- **verifyChecked**
(locator)
- **isChecked**
(locator)
Gets whether a toggle-button (checkbox/radio) is checked. Fails if the specified element doesn't exist or isn't a toggle-button.
- **verifyCursorPosition**
(locator - equalTo)
- **verifyEditable**
(locator)
- **waitForElementEditable**
(locator)
- **verifyNotAllButtons**
(equalTo)
- **verifyNotAllFields**
(equalTo)
- **verifyNotChecked**
(locator)
- **verifyNotCursorPosition**
(locator - equalTo)
- **verifyNotEditable**
(locator)
- **verifyNotSelectedIds**
(selectLocator - equalTo)
- **verifyNotSelectedIndexes**
(selectLocator - equalTo)
- **verifyNotSelectedLabels**
(selectLocator - equalTo)
- **verifyNotSelectedValues**
(selectLocator - equalTo)
- **verifyNotSelectedOptions**
(selectLocator - equalTo)
- **verifyNotSomethingSelected**
(selectLocator)
- **verifyNotValue**
(locator - equalTo)
- **verifySelectedIds**
(selectLocator - equalTo)
- **verifySelectedIndexes**
(selectLocator - equalTo)
- **verifySelectedLabels**
(selectLocator - equalTo)
- **verifySelectedValues**
(selectLocator - equalTo)
- **verifySelectOptions**
(selectLocator - equalTo)
- **verifySomethingSelected**
(selectLocator)
- **isSomethingSelected**
(selectLocator)
Determines whether some option in a drop-down menu is selected.
- **verifyValue**
(locator - equalTo)
- **assertAllButtons**
(equalTo)
- **assertAllFields**
(equalTo)
- **assertChecked**
(locator)
- **assertCursorPosition**
(locator - equalTo)
- **assertEditable**
(locator)
- **assertNotAllButtons**
- **assertNotAllFields**
- **assertNotChecked**
(locator)
- **assertNotCursorPosition**
(locator - equalTo)
- **assertNotEditable**
(locator)
- **assertNotSelectedIds**
(selectLocator - equalTo)
- **assertNotSelectedIndexes**
(selectLocator - equalTo)
- **assertNotSelectedLabels**
(selectLocator - equalTo)
- **assertNotSelectedValues**
(selectLocator - equalTo)
- **assertNotSelectOptions**
(selectLocator - equalTo)
- **assertNotSomethingSelected**
(selectLocator)
- **assertNotValue**
(locator - equalTo)
- **assertSelectedIds**
(selectLocator - equalTo)
- **assertSelectedIndexes**
(selectLocator - equalTo)
- **assertSelectedLabels**
(selectLocator - equalTo)
- **assertSelectedValues**
(selectLocator - equalTo)
- **assertSelectOptions**
(selectLocator - equalTo)
- **assertSomethingSelected**
(selectLocator)
- **assertValue**
(locator - equalTo)
- **waitForAllWindowIds**
(equalTo)
- **waitForAllWindowNames**
(equalTo)
- **waitForAllWindowTitles**
(equalTo)
- **waitForAttributeFromAllWindows**
(attributeName - equalTo)
- **waitForLocation**
(equalTo)
- **waitForNotAllWindowIds**
(equalTo)
- **waitForNotAllWindowNames**
(equalTo)
- **waitForNotAllWindowTitles**
(equalTo)
- **waitForNotAttributeFromAllWindows**
(attributeName - equalTo)
- **WaitForNotLocation**
(equalTo)
- **waitForNotTitle**
(equalTo)
- **waitForTitle**
(equalTo)
- **storeAllButtons**
- **storeAllFields**
- **storeChecked**
(locator - variable)
- **storeCursorPosition**
(locator - variable)
- **storeEditable**
(locator - variable)
- **storeSelectedIds**
(selectLocator - variable)
- **storeSelectedIndexes**
(selectLocator - variable)
- **storeSelectedLabels**
(selectLocator - variable)
- **storeSelectedValues**
(selectLocator - variable)
- **storeSelectOptions**
(selectLocator - variable)
- **storeSomethingSelected**
(selectLocator - variable)
- **storeValue**
(locator - variable)
## Keyboard Events
- **keyDown**
(locator - keySequence)
Simulates a user pressing a key (without releasing it yet).
- **keyDownAndWait**
(locator - keySequence)
Simulates a user pressing a key (without releasing it yet).
- **keyPress**
(locator - keySequence)
Simulates a user pressing and releasing a key.
- **keyPressAndWait**
(locator - keySequence)
Simulates a user pressing and releasing a key.
- **keyUp**
(locator - keySequence)
Simulates a user releasing a key.
- **keyUpAndWait**
(locator - keySequence)
Simulates a user releasing a key.
- **type**
(locator - value)
Sets the value of an input field, as though you typed it in. Can also be used to set the value of combo boxes, check boxes, etc. In these cases, value should be the value of the option selected, not the visible text.
- **typeAndWait**
(locator - value)
Sets the value of an input field, as though you typed it in. Can also be used to set the value of combo boxes, check boxes, etc. In these cases, value should be the value of the option selected, not the visible text.
- **typeKeys**
(locator - value)
Simulates keystroke events on the specified element, as though you typed the value key-by-key. This is a convenience method for calling keyDown, keyUp, keyPress for every character in the specified string; this is useful for dynamic UI widgets (like auto-completing combo boxes) that require explicit key events. Unlike the simple "type" command, which forces the specified value into the page directly, this command may or may not have any visible effect, even in cases where typing keys would normally have a visible effect. For example, if you use "typeKeys" on a form element, you may or may not see the results of what you typed in the field. In some cases, you may need to use the simple "type" command to set the value of the field and then the "typeKeys" command to send the keystroke events corresponding to what you just typed.
- **sendKeys**
(locator - value)
- **typeKeysAndWait**
(locator - value)
Simulates keystroke events on the specified element, as though you typed the value key-by-key. This is a convenience method for calling keyDown, keyUp, keyPress for every character in the specified string; this is useful for dynamic UI widgets (like auto-completing combo boxes) that require explicit key events. Unlike the simple "type" command, which forces the specified value into the page directly, this command may or may not have any visible effect, even in cases where typing keys would normally have a visible effect. For example, if you use "typeKeys" on a form element, you may or may not see the results of what you typed in the field. In some cases, you may need to use the simple "type" command to set the value of the field and then the "typeKeys" command to send the keystroke events corresponding to what you just typed.
## Keyboard Modifiers
- **altKeyDown**
Press the alt key and hold it down until doAltUp() is called or a new page is loaded.
- **altKeyDownAndWait**
Press the alt key and hold it down until doAltUp() is called or a new page is loaded.
- **altKeyUp**
Release the alt key.
- **altKeyUpAndWait**
Release the alt key.
- **controlKeyDown**
Press the control key and hold it down until doControlUp() is called or a new page is loaded.
- **controlKeyDownAndWait**
Press the control key and hold it down until doControlUp() is called or a new page is loaded.
- **controlKeyUp**
Release the control key.
- **controlKeyUpAndWait**
Release the control key.
- **metaKeyDown**
Press the meta key and hold it down until doMetaUp() is called or a new page is loaded.
- **metaKeyUp**
Release the meta key.
- **metaKeyUpAndWait**
Release the meta key.
- **shiftKeyDown**
Press the shift key and hold it down until doShiftUp() is called or a new page is loaded.
- **shiftKeyDownAndWait**
Press the shift key and hold it down until doShiftUp() is called or a new page is loaded.
- **shiftKeyUp**
Release the shift key.
- **shiftKeyUpAndWait**
Release the shift key.
## Mouse Events
- **mouseDown**
(locator)
Simulates a user pressing the left mouse button (without releasing it yet) on the specified element.
- **mouseDownAndWait**
(locator)
Simulates a user pressing the left mouse button (without releasing it yet) on the specified element.
- **mouseDownAt**
(locator - coordString)
Simulates a user pressing the left mouse button (without releasing it yet) at the specified location.
- **mouseDownAtAndWait**
(locator - coordString)
Simulates a user pressing the left mouse button (without releasing it yet) at the specified location.
- **mouseDownRight**
(locator)
Simulates a user pressing the right mouse button (without releasing it yet) on the specified element.
- **mouseDownRightAndWait**
(locator)
Simulates a user pressing the right mouse button (without releasing it yet) on the specified element.
- **mouseDownRightAt**
(locator - coordString)
Simulates a user pressing the right mouse button (without releasing it yet) at the specified location.
- **mouseDownRightAtAndWait**
(locator - coordString)
Simulates a user pressing the right mouse button (without releasing it yet) at the specified location.
- **mouseMove**
(locator)
Simulates a user pressing the mouse button (without releasing it yet) on the specified element.
- **mouseMoveAndWait**
(locator)
Simulates a user pressing the mouse button (without releasing it yet) on the specified element.
- **mouseMoveAt**
(locator - coordString)
Simulates a user pressing the mouse button (without releasing it yet) on the specified element.
- **mouseMoveAtAndWait**
(locator - coordString)
Simulates a user pressing the mouse button (without releasing it yet) on the specified element.
- **mouseOut**
(locator)
Simulates a user moving the mouse pointer away from the specified element.
- **mouseOutAndWait**
(locator)
Simulates a user moving the mouse pointer away from the specified element.
- **mouseOver**
(locator)
Simulates a user hovering a mouse over the specified element.
- **mouseOverAndWait**
(locator)
Simulates a user hovering a mouse over the specified element.
- **mouseUp**
(locator)
Simulates the event that occurs when the user releases the mouse button (i.e., stops holding the button down) on the specified element.
- **mouseUpAndWait**
(locator)
Simulates the event that occurs when the user releases the mouse button (i.e., stops holding the button down) on the specified element.
- **mouseUpAt**
(locator - coordString)
Simulates the event that occurs when the user releases the mouse button (i.e., stops holding the button down) at the specified location.
- **mouseUpAtAndWait**
(locator - coordString)
Simulates the event that occurs when the user releases the mouse button (i.e., stops holding the button down) at the specified location.
- **mouseUpRight**
(locator)
Simulates the event that occurs when the user releases the right mouse button (i.e., stops holding the button down) on the specified element.
- **mouseUpRightAndWait**
(locator)
Simulates the event that occurs when the user releases the right mouse button (i.e., stops holding the button down) on the specified element.
- **mouseUpRightAt**
(locator - coordString)
Simulates the event that occurs when the user releases the right mouse button (i.e., stops holding the button down) at the specified location.
- **mouseUpRightAtAndWait**
(locator - coordString)
Simulates the event that occurs when the user releases the right mouse button (i.e., stops holding the button down) at the specified location.
## Popups and Menus
- **answerOnNextPrompt**
(answer)
Instructs Selenium to return the specified answer string in response to the next JavaScript prompt [window.prompt()].
- **answerOnNextPromptAndWait**
(answer)
Instructs Selenium to return the specified answer string in response to the next JavaScript prompt [window.prompt()].
- **chooseCancelOnNextConfirmation**
By default, Selenium's overridden window.confirm() function will return true, as if the user had manually clicked OK; after running this command, the next call to confirm() will return false, as if the user had clicked Cancel. Selenium will then resume using the default behavior for future confirmations, automatically returning true (OK) unless/until you explicitly call this command for each confirmation. Take note - every time a confirmation comes up, you must consume it with a corresponding getConfirmation, or else the next selenium operation will fail.
- **chooseCancelOnNextConfirmationAndWait**
By default, Selenium's overridden window.confirm() function will return true, as if the user had manually clicked OK; after running this command, the next call to confirm() will return false, as if the user had clicked Cancel. Selenium will then resume using the default behavior for future confirmations, automatically returning true (OK) unless/until you explicitly call this command for each confirmation. Take note - every time a confirmation comes up, you must consume it with a corresponding getConfirmation, or else the next selenium operation will fail.
- **chooseOkOnNextConfirmation**
Undo the effect of calling chooseCancelOnNextConfirmation. Note that Selenium's overridden window.confirm() function will normally automatically return true, as if the user had manually clicked OK, so you shouldn't need to use this command unless for some reason you need to change your mind prior to the next confirmation. After any confirmation, Selenium will resume using the default behavior for future confirmations, automatically returning true (OK) unless/until you explicitly call chooseCancelOnNextConfirmation for each confirmation. Take note - every time a confirmation comes up, you must consume it with a corresponding getConfirmation, or else the next selenium operation will fail.
- **chooseOkOnNextConfirmationAndWait**
Undo the effect of calling chooseCancelOnNextConfirmation. Note that Selenium's overridden window.confirm() function will normally automatically return true, as if the user had manually clicked OK, so you shouldn't need to use this command unless for some reason you need to change your mind prior to the next confirmation. After any confirmation, Selenium will resume using the default behavior for future confirmations, automatically returning true (OK) unless/until you explicitly call chooseCancelOnNextConfirmation for each confirmation. Take note - every time a confirmation comes up, you must consume it with a corresponding getConfirmation, or else the next selenium operation will fail.
- **contextMenu**
(locator)
Simulates opening the context menu for the specified element (as might happen if the user "right-clicked" on the element).
- **contextMenuAndWait**
(locator)
Simulates opening the context menu for the specified element (as might happen if the user "right-clicked" on the element).
- **contextMenuAt**
(locator - coordString)
Simulates opening the context menu for the specified element (as might happen if the user "right-clicked" on the element).
- **contextMenuAtAndWait**
(locator - coordString)
Simulates opening the context menu for the specified element (as might happen if the user "right-clicked" on the element).
- **selectPopUp**
(windowID)
Simplifies the process of selecting a popup window (and does not offer functionality beyond what selectWindow() already provides). If windowID is either not specified, or specified as "null", the first non-top window is selected. The top window is the one that would be selected by selectWindow() without providing a windowID . This should not be used when more than one popup window is in play. Otherwise, the window will be looked up considering windowID as the following in order: 1) the "name" of the window, as specified to window.open(); 2) a javascript variable which is a reference to a window; and 3) the title of the window. This is the same ordered lookup performed by selectWindow .
- **deselectPopUp**
Selects the main window. Functionally equivalent to using selectWindow() and specifying no value for windowID.
- **getAlert**
Retrieves the message of a JavaScript alert generated during the previous action, or fail if there were no alerts. Getting an alert has the same effect as manually clicking OK. If an alert is generated but you do not consume it with getAlert, the next Selenium action will fail. Under Selenium, JavaScript alerts will NOT pop up a visible alert dialog. Selenium does NOT support JavaScript alerts that are generated in a page's onload() event handler. In this case a visible dialog WILL be generated and Selenium will hang until someone manually clicks OK.
- **getConfirmation**
Retrieves the message of a JavaScript confirmation dialog generated during the previous action. By default, the confirm function will return true, having the same effect as manually clicking OK. This can be changed by prior execution of the chooseCancelOnNextConfirmation command. If an confirmation is generated but you do not consume it with getConfirmation, the next Selenium action will fail. NOTE: under Selenium, JavaScript confirmations will NOT pop up a visible dialog. NOTE: Selenium does NOT support JavaScript confirmations that are generated in a page's onload() event handler. In this case a visible dialog WILL be generated and Selenium will hang until you manually click OK.
- **getPrompt**
Retrieves the message of a JavaScript question prompt dialog generated during the previous action. Successful handling of the prompt requires prior execution of the answerOnNextPrompt command. If a prompt is generated but you do not get/verify it, the next Selenium action will fail. NOTE: under Selenium, JavaScript prompts will NOT pop up a visible dialog. NOTE: Selenium does NOT support JavaScript prompts that are generated in a page's onload() event handler. In this case a visible dialog WILL be generated and Selenium will hang until someone manually clicks OK.
- **getWhetherThisFrameMatchFrameExpression**
(currentFrameString - target)
Determine whether current/locator identify the frame containing this running code. This is useful in proxy injection mode, where this code runs in every browser frame and window, and sometimes the selenium server needs to identify the "current" frame. In this case, when the test calls selectFrame, this routine is called for each frame to figure out which one has been selected. The selected frame will return true, while all others will return false.
- **getWhetherThisWindowMatchWindowExpression**
(currentWindowString - target)
Determine whether currentWindowString plus target identify the window containing this running code. This is useful in proxy injection mode, where this code runs in every browser frame and window, and sometimes the selenium server needs to identify the "current" window. In this case, when the test calls selectWindow, this routine is called for each window to figure out which one has been selected. The selected window will return true, while all others will return false.
## Browser Window
- **verifyAllWindowIds**
(equalTo)
- **verifyAllWindowNames**
(equalTo)
- **verifyAllWindowTitles**
(equalTo)
- **verifyAttributeFromAllWindows**
(attributeName - equalTo)
- **verifyLocation**
(equalTo)
- **verifyNotAllWindowIds**
(equalTo)
- **verifyNotAllWindowNames**
(equalTo)
- **verifyNotAttributeFromAllWindows**
(attributeName - equalTo)
- **verifyNotLocation**
(equalTo)
- **verifyNotTitle**
(equalTo)
- **verifyTitle**
(equalTo)
- **assertAllWindowIds**
(equalTo)
- **assertAllWindowNames**
(equalTo)
- **assertAllWindowTitles**
(equalTo)
- **assertAttributeFromAllWindows**
(attributeName - equalTo)
- **assertLocation**
(equalTo)
- **assertNotAllWindowIds**
(equalTo)
- **assertNotAllWindowNames**
(equalTo)
- **assertNotAllWindowTitles**
(equalTo)
- **assertNotAttributeFromAllWindows**
(attributeName)
- **assertNotLocation**
(equalTo)
- **assertNotTitle**
(equalTo)
- **assertTitle**
(equalTo)
- **assert**
Check that a variable is an expected value. The variable's value will be converted to a string for comparison. The test will stop if the assert fails.
- **validateXml**
Custom command by TestingBot. Validates if the document contents is valid XML.
- **waitForAlert**
(equalTo)
- **waitForAlertNotPresent**
- **waitForAlertPresent**
- **waitForConfirmation**
(equalTo)
- **waitForConfirmationNotPresent**
- **waitForConfirmationPresent**
- **waitForNotAlert**
(equalTo)
- **waitForNotConfirmation**
(equalTo)
- **waitForNotPrompt**
(equalTo)
- **waitForPrompt**
(equalTo)
- **waitForPromptNotPresent**
- **waitForPromptPresent**
- **storeAllWindowIds**
- **storeAllWindowNames**
- **storeAllWindowTitles**
- **storeAttributeFromAllWindows**
(attributeName - variable)
- **storeLocation**
- **storeTitle**
- **storeAllWindowHandles**
- **storeNewWindowHandle**
- **storeWindowHandle**
- **setWindowSize**
(size)
Sets the current window size.
## Cookies
- **verifyCookie**
(equalTo)
- **verifyCookieByName**
(name - equalTo)
- **verifyCookieNotPresent**
(name)
- **verifyCookiePresent**
(name)
- **verifyNotCookie**
(equalTo)
- **verifyNotCookieByName**
(name - equalTo)
- **assertCookie**
(equalTo)
- **assertCookieByName**
(name - equalTo)
- **assertCookieNotPresent**
(name)
- **assertCookiePresent**
(name)
- **assertNotCookie**
(equalTo)
- **assertNotCookieByName**
(name - equalTo)
- **createCookie**
(nameValuePair - optionsString)
Create a new cookie whose path and domain are same with those of current page under test, unless you specified a path for this cookie explicitly.
- **deleteAllVisibleCookies**
Calls deleteCookie with recurse=true on all cookies visible to the current page. As noted on the documentation for deleteCookie, recurse=true can be much slower than simply deleting the cookies using a known domain/path.
- **deleteCookie**
(name - optionsString)
Delete a named cookie with specified path and domain. Be careful; to delete a cookie, you need to delete it using the exact same path and domain that were used to create the cookie. If the path is wrong, or the domain is wrong, the cookie simply won't be deleted. Also note that specifying a domain that isn't a subset of the current domain will usually fail. Since there's no way to discover at runtime the original path and domain of a given cookie, we've added an option called 'recurse' to try all sub-domains of the current domain with all paths that are a subset of the current path. Beware; this option can be slow. In big-O notation, it operates in O(n\*m) time, where n is the number of dots in the domain name and m is the number of slashes in the path.
- **storeCookie**
- **storeCookieByName**
(name - variable)
- **storeCookiePresent**
(name - variable)
## Page Content
- **verifyAllLinks**
(equalTo)
- **verifyAttribute**
(attributeLocator - equalTo)
- **verifyBodyText**
(equalTo)
- **verifyElementNotPresent**
(locator)
- **verifyElementPresent**
(locator)
- **verifyHtmlSource**
(equalTo)
- **verifyNotAllLinks**
(equalTo)
- **verifyNotAttribute**
(attributeLocator)
- **verifyNotBodyText**
(equalTo)
- **verifyNotHtmlSource**
(equalTo)
- **verifyNotOrdered**
(locator1 - locator2)
- **verifyNotTable**
(tableCellAddress - equalTo)
- **verifyNotText**
(locator - equalTo)
- **verifyNotVisible**
(locator)
- **verifyOrdered**
(locator1 - locator2)
- **verifyTable**
(tableCellAddress - equalTo)
- **verifyText**
(locator - equalTo)
- **verifyTextNotPresent**
(pattern)
- **verifyTextPresent**
(pattern)
- **verifyVisible**
(locator)
- **assertAllLinks**
(equalTo)
- **assertAttribute**
(attributeLocator - equalTo)
- **assertBodyText**
(equalTo)
- **assertElementNotPresent**
(locator)
- **assertElementPresent**
(locator)
- **assertHtmlSource**
(equalTo)
- **assertNotAllLinks**
(equalTo)
- **assertNotAttribute**
(attributeLocator - equalTo)
- **assertNotBodyText**
(equalTo)
- **assertNotHtmlSource**
(equalTo)
- **assertNotOrdered**
(locator1 - locator2)
- **assertNotTable**
(tableCellAddress - equalTo)
- **assertNotText**
(locator - equalTo)
- **assertNotVisible**
(locator)
- **assertOrdered**
(locator1 - locator2)
- **assertTable**
(tableCellAddress - equalTo)
- **assertText**
(locator - equalTo)
- **assertTextNotPresent**
(pattern)
- **assertTextPresent**
(pattern)
- **assertVisible**
(locator)
- **waitForAllLinks**
(equalTo)
- **waitForAttribute**
(attributeLocator - equalTo)
- **waitForBodyText**
(equalTo)
- **waitForElementPresent**
(locator)
- **waitForHtmlSource**
(equalTo)
- **waitForNotAllLinks**
(equalTo)
- **waitForNotAttribute**
(attributeLocator - equalTo)
- **waitForNotBodyText**
(equalTo)
- **waitForElementNotPresent**
(locator)
- **waitForElementNotVisible**
(locator)
- **waitForElementVisible**
(locator)
- **waitForNotHtmlSource**
(equalTo)
- **waitForNotOrdered**
(locator1 - locator2)
- **waitForNotTable**
(tableCellAddress - equalTo)
- **waitForNotText**
(locator - equalTo)
- **waitForNotVisible**
(locator)
- **waitForOrdered**
(locator1 - locator2)
- **waitForTable**
(tableCellAddress - equalTo)
- **waitForText**
(locator - equalTo)
- **waitForTextNotPresent**
(pattern)
- **waitForTextPresent**
(pattern)
- **waitForVisible**
(locator)
- **storeAllLinks**
- **storeAttribute**
(attributeLocator - variable)
- **storeBodyText**
- **storeElementPresent**
(locator - variable)
- **storeHtmlSource**
- **storeTable**
(tableCellAddress - variable)
- **storeText**
(locator - variable)
- **storeTextPresent**
(pattern - variable)
- **storeVisible**
(locator - variable)
## Page Positioning
- **verifyElementHeight**
(locator - equalTo)
- **verifyElementIndex**
(locator - equalTo)
- **verifyElementPositionLeft**
(locator - equalTo)
- **verifyElementPositionTop**
(locator - equalTo)
- **verifyElementWidth**
(locator - equalTo)
- **verifyNotElementHeight**
(locator - equalTo)
- **verifyNotElementIndex**
(locator - equalTo)
- **verifyNotElementPositionLeft**
(locator - equalTo)
- **verifyNotElementPositionTop**
(locator - equalTo)
- **verifyNotElementWidth**
(locator - equalTo)
- **assertElementHeight**
(locator - equalTo)
- **assertElementIndex**
(locator - equalTo)
- **assertElementPositionLeft**
(locator - equalTo)
- **assertElementPositionTop**
(locator - equalTo)
- **assertElementWidth**
(locator - equalTo)
- **assertNotElementHeight**
(locator - equalTo)
- **assertNotElementIndex**
(locator - equalTo)
- **assertNotElementPositionLeft**
(locator - equalTo)
- **assertNotElementPositionTop**
(locator - equalTo)
- **assertNotElementWidth**
- **storeElementHeight**
(locator - variable)
- **storeElementIndex**
(locator - variable)
- **storeElementPositionLeft**
(locator - variable)
- **storeElementPositionTop**
(locator - variable)
- **storeElementWidth**
(locator - variable)
## Popups
- **verifyAlert**
(equalTo)
- **verifyAlertNotPresent**
- **verifyAlertPresent**
- **isAlertPresent**
Has an alert occurred? This function never throws an exception
- **verifyConfirmation**
(equalTo)
- **verifyConfirmationNotPresent**
- **verifyConfirmationPresent**
- **isConfirmationPresent**
Has confirm() been called? This function never throws an exception
- **verifyNotAlert**
(equalTo)
- **verifyNotConfirmation**
(equalTo)
- **verifyNotPrompt**
(equalTo)
- **verifyPrompt**
(equalTo)
- **verifyPromptNotPresent**
- **verifyPromptPresent**
- **isPromptPresent**
Has a prompt occurred? This function never throws an exception
- **assertAlert**
(equalTo)
- **assertAlertNotPresent**
- **assertAlertPresent**
- **assertConfirmation**
(equalTo)
- **assertConfirmationNotPresent**
- **assertConfirmationPresent**
- **assertNotAlert**
(equalTo)
- **assertNotConfirmation**
(equalTo)
- **assertNotPrompt**
(equalTo)
- **assertPrompt**
(equalTo)
- **assertPromptNotPresent**
- **assertPromptPresent**
- **waitForElementHeight**
(locator - equalTo)
- **waitForElementIndex**
(locator - equalTo)
- **waitForElementPositionLeft**
(locator - equalTo)
- **waitForElementPositionTop**
(locator - equalTo)
- **waitForElementWidth**
(locator - equalTo)
- **waitForNotElementHeight**
(locator - equalTo)
- **waitForNotElementIndex**
(locator - equalTo)
- **waitForNotElementPositionLeft**
(locator - equalTo)
- **waitForNotElementPositionTop**
(locator - equalTo)
- **waitForNotElementWidth**
(locator - equalTo)
- **waitForPopUp**
(windowID - timeout)
Waits for a popup window to appear and load up.
- **storeAlert**
- **storeAlertPresent**
- **storeConfirmation**
- **storeConfirmationPresent**
- **storePrompt**
- **storePromptPresent**
## Selenium
- **verifyEval**
(script - equalTo)
- **verifyExpression**
(expression - equalTo)
- **verifyMouseSpeed**
- **verifyNotEval**
(script - equalTo)
- **verifyNotExpression**
(expression - equalTo)
- **verifyNotMouseSpeed**
- **verifyNotSpeed**
- **verifyNotXpathCount**
(xpath - equalTo)
- **verifySpeed**
- **verifyXpathCount**
(xpath - equalTo)
- **assertEval**
(script - equalTo)
- **assertExpression**
(expression - equalTo)
- **assertMouseSpeed**
(equalTo)
- **assertNotEval**
(script - equalTo)
- **assertNotExpression**
(expression - equalTo)
- **assertNotMouseSpeed**
(equalTo)
- **assertNotSpeed**
(equalTo)
- **assertNotXpathCount**
(xpath - equalTo)
- **assertSpeed**
(equalTo)
- **assertXpathCount**
(xpath - equalTo)
- **waitForAllButtons**
(equalTo)
- **waitForAllFields**
(equalTo)
- **waitForChecked**
(locator)
- **waitForCursorPosition**
(locator - equalTo)
- **waitForCondition**
(script - timeout)
Runs the specified JavaScript snippet repeatedly until it evaluates to "true". The snippet may have multiple lines, but only the result of the last line will be considered. Note that, by default, the snippet will be run in the runner's test window, not in the window of your application. To get the window of your application, you can use the JavaScript snippet selenium.browserbot.getCurrentWindow(), and then run your JavaScript in there
- **waitForEditable**
(locator)
- **waitForEval**
(script - equalTo)
- **waitForExpression**
(expression - equalTo)
- **waitForMouseSpeed**
(equalTo)
- **waitForNotAllButtons**
(equalTo)
- **waitForNotAllFields**
(equalTo)
- **waitForNotChecked**
(locator)
- **waitForNotCursorPosition**
(locator - equalTo)
- **waitForNotEditable**
(locator)
- **waitForNotEval**
(script - equalTo)
- **waitForNotExpression**
(expression - equalTo)
- **waitForNotMouseSpeed**
(equalTo)
- **waitForNotSelectedIds**
(selectLocator - equalTo)
- **waitForNotSelectedIndexes**
(selectLocator - equalTo)
- **waitForNotSelectedLabels**
(selectLocator - equalTo)
- **waitForNotSelectedValues**
(selectLocator - equalTo)
- **waitForNotSelectOptions**
(selectLocator - equalTo)
- **waitForNotSomethingSelected**
(selectLocator)
- **waitForNotSpeed**
(equalTo)
- **waitForNotValue**
(locator - equalTo)
- **waitForNotXpathCount**
(xpath - equalTo)
- **waitForSelectedIds**
(selectLocator - equalTo)
- **waitForSelectedIndexes**
(selectLocator - equalTo)
- **waitForSelectedLabels**
(selectLocator - equalTo)
- **waitForSelectedValues**
(selectLocator - equalTo)
- **waitForSelectOptions**
(selectLocator - equalTo)
- **waitForSomethingSelected**
(selectLocator)
- **waitForSpeed**
(equalTo)
- **waitForValue**
(locator - equalTo)
- **waitForXpathCount**
(xpath - equalTo)
- **storeEval**
(script - variable)
- **storeExpression**
(expression - variable)
- **store**
(expression - variable)
This command is a synonym for storeExpression.
- **storeMouseSpeed**
- **storeSpeed**
- **storeXpathCount**
(xpath - variable)
## Screenshots
- **captureEntirePageScreenshot**
(filename - kwargs)
Saves the entire contents of the current window canvas to a PNG file. Contrast this with the captureScreenshot command, which captures the contents of the OS viewport (i.e. whatever is currently being displayed on the monitor), and is implemented in the RC only. Currently this only works in Firefox when running in chrome mode, and in IE non-HTA using the EXPERIMENTAL "Snapsie" utility. The Firefox implementation is mostly borrowed from the Screengrab! Firefox extension. Please see http://www.screengrab.org and http://snapsie.sourceforge.net/ for details.
## Selenium Settings
- **waitForCookie**
(equalTo)
- **waitForCookieByName**
(name - equalTo)
- **waitForCookieNotPresent**
(name)
- **waitForCookiePresent**
(name)
- **waitForNotCookie**
(equalTo)
- **waitForNotCookieByName**
(name - equalTo)
- **addLocationStrategy**
(strategyName - functionDefinition)
Defines a new function for Selenium to locate elements on the page. For example, if you define the strategy "foo", and someone runs click("foo=blah"), we'll run your function, passing you the string "blah", and click on the element that your function returns, or throw an "Element not found" error if your function returns null. We'll pass three arguments to your function: locator: the string the user passed in inWindow: the currently selected window inDocument: the currently selected document The function must return null if the element can't be found.
- **allowNativeXpath**
(allow)
Specifies whether Selenium should use the native in-browser implementation of XPath (if any native version is available); if you pass "false" to this function, we will always use our pure-JavaScript xpath library. Using the pure-JS xpath library can improve the consistency of xpath element locators between different browser vendors, but the pure-JS version is much slower than the native implementations.
- **ignoreAttributesWithoutValue**
(ignore)
Specifies whether Selenium will ignore xpath attributes that have no value, i.e. are the empty string, when using the non-native xpath evaluation engine. You'd want to do this for performance reasons in IE. However, this could break certain xpaths, for example an xpath that looks for an attribute whose value is NOT the empty string. The hope is that such xpaths are relatively rare, but the user should have the option of using them. Note that this only influences xpath evaluation when using the ajaxslt engine (i.e. not "javascript-xpath").
- **setBrowserLogLevel**
(logLevel)
Sets the threshold for browser-side logging messages; log messages beneath this threshold will be discarded. Valid logLevel strings are: "debug", "info", "warn", "error" or "off". To see the browser logs, you need to either show the log window in GUI mode, or enable browser-side logging in Selenium RC.
- **setMouseSpeed**
(pixels)
Configure the number of pixels between "mousemove" events during dragAndDrop commands (default=10). Setting this value to 0 means that we'll send a "mousemove" event to every single pixel in between the start location and the end location; that can be very slow, and may cause some browsers to force the JavaScript to timeout. If the mouse speed is greater than the distance between the two dragged objects, we'll just send one "mousemove" at the start location and then one final one at the end location.
- **setSpeed**
(value)
Set execution speed (i.e., set the millisecond length of a delay which will follow each selenium operation). By default, there is no such delay, i.e., the delay is 0 milliseconds.
- **getSpeed**
Get execution speed (i.e., get the millisecond length of the delay following each selenium operation). By default, there is no such delay, i.e., the delay is 0 milliseconds. See also setSpeed.
- **setTimeout**
(timeout)
Specifies the amount of time that Selenium will wait for actions to complete. Actions that require waiting include "open" and the "waitFor\*" actions. The default timeout is 30 seconds.
- **useXpathLibrary**
(libraryName)
Allows choice of one of the available libraries.
## Special
- **addScript**
(scriptContent - scriptTagId)
Loads script content into a new script tag in the Selenium document. This differs from the runScript command in that runScript adds the script tag to the document of the AUT, not the Selenium document. The following entities in the script content are replaced by the characters they represent: \< \> & The corresponding remove command is removeScript.
- **assignId**
(locator - identifier)
Temporarily sets the "id" attribute of the specified element, so you can locate it in the future using its ID rather than a slow/complicated XPath. This ID will disappear once the page is reloaded.
- **echo**
(message)
Prints the specified message into the third table cell in your Selenese tables. Useful for debugging.
- **fireEvent**
(locator - eventName)
Explicitly simulate an event, to trigger the corresponding "onevent" handler.
- **highlight**
(locator)
Briefly changes the backgroundColor of the specified element yellow. Useful for debugging.
- **rollup**
(rollupName - kwargs)
Executes a command rollup, which is a series of commands with a unique name, and optionally arguments that control the generation of the set of commands. If any one of the rolled-up commands fails, the rollup is considered to have failed. Rollups may also contain nested rollups.
- **runScript**
(script)
Creates a new "script" tag in the body of the current test window, and adds the specified text into the body of the command. Scripts run in this way can often be debugged more easily than scripts executed using Selenium's "getEval" command. Beware that JS exceptions thrown in these script tags aren't managed by Selenium, so you should probably wrap your script in try/catch blocks if there is any chance that the script will throw an exception.
- **getEval**
(command)
Gets the result of evaluating the specified JavaScript snippet. The snippet may have multiple lines, but only the result of the last line will be returned. Note that, by default, the snippet will run in the context of the "selenium" object itself, so this will refer to the Selenium object. Use window to refer to the window of your application, e.g. window.document.getElementById('foo') If you need to use a locator to refer to a single element in your application page, you can use this.browserbot.findElement("id=foo") where "id=foo" is your locator.
- **getLocation**
Gets the absolute URL of the current page.
- **getTitle**
Gets the title of the current page.
- **getBodyText**
Gets the entire text of the page.
- **getValue**
(locator)
Gets the (whitespace-trimmed) value of an input field (or anything else with a value parameter). For checkbox/radio elements, the value will be "on" or "off" depending on whether the element is checked or not.
- **getText**
(locator)
Gets the text of an element. This works for any element that contains text. This command uses either the textContent (Mozilla-like browsers) or the innerText (IE-like browsers) of the element, which is the rendered text shown to the user.
- **getTable**
(tableCellAddress)
Gets the text from a cell of a table. The cellAddress syntax tableLocator.row.column, where row and column start at 0.
- **pause**
(time)
Wait for the specified amount of time (in milliseconds)
- **comment**
(text)
Custom command by TestingBot. Add a comment between your test steps. This will show up in the test results.
- **getHtmlSource**
Returns the entire HTML source between the opening and closing "html" tags.
- **stopTest**
(condition)
Custom command by TestingBot. Will stop the test if the supplied condition is met. Other steps, which resulted in an error, after a successful stopTest, will no longer indicate a test as failed.
## Common
- **waitForPageToLoad**
(timeout)
Waits for a new page to load. You can use this command instead of the "AndWait" suffixes, "clickAndWait", "selectAndWait", "typeAndWait" etc. (which are only available in the JS API). Selenium constantly keeps track of new pages loading, and sets a "newPageLoaded" flag when it first notices a page load. Running any other Selenium command after turns the flag to false. Hence, if you want to wait for a page to load, you must wait immediately after a Selenium command that caused a page-load.
Was this page helpful? Yes No
## Looking for More Help?
Have questions or need more information?
You can reach us via the following channels:
- [Email us](https://testingbot.com/contact/new)
- [Join our Slack Channel](https://join.slack.com/t/testingb0t/shared_invite/zt-3bcw9xch-jk19~6XPs_xBrsAgAedkCw)
---
URL: https://testingbot.com/support/web-automate/codeless-automation/faq
# Selenium IDE FAQ
TestingBot supports importing and running Selenium IDE tests on all our browsers and devices.
Please find some questions and answers below.
## FAQ
- **How do I use `selenium-side-runner` with TestingBot?**
You can easily run your tests with `selenium-side-runner`, try this command for example
selenium-side-runner --server http://key:secret@hub.testingbot.com/wd/hub -c "browserName='internet explorer' version='11.0' platform='Windows 8.1'" my-test-file.side
This will run the test on our Grid on IE11 - the test results will appear in the TestingBot dashboard.
- **Do you support the old Selenium IDE format? What about the .SIDE format?**
We support both versions in our TestLab. You can upload the old format (in `HTML` format) or newly generated tests (in `SIDE` format).
- **Do you support control flow?**
We do not yet support control flow, like `if`, `else`, `while`, ...
If you need this feature, please [contact us](https://testingbot.com/contact/new).
- **Do you support mobile testing with Codeless Automation?**
We support running your tests on our iOS and Android simulators/emulators.
Please consider using `css selectors` as much as possible, as Appium (which we use to control iOS/Android) does not support XPath selectors.
Was this page helpful? Yes No
## Looking for More Help?
Have questions or need more information?
You can reach us via the following channels:
- [Email us](https://testingbot.com/contact/new)
- [Join our Slack Channel](https://join.slack.com/t/testingb0t/shared_invite/zt-3bcw9xch-jk19~6XPs_xBrsAgAedkCw)
---
URL: https://testingbot.com/support/web-automate/codeless-automation/variables
# Storing Selenium IDE Variables
With Selenium IDE it is possible to `store` variables.
These variables can then be used in later commands during the same test flow.
## How to store a variable
To store a variable during a test, please use the `store` command:
store - javascript(return "test" + Math.floor(Math.random()*11111) + "@test.com") - emailAddress
This example will store a variable called `emailAddress` and its value will be a random `"test....@test.com"` string.
Storing a variable happens in the context of the page. You can use any kind of javascript and reference DOM elements or other functions available on the page. The return value is stored.
## How to use a variable
Once you have stored a variable, you can use it in subsequent steps like this: `${emailAddress}`
## Examples
Below are some examples on how to [store and use variables](https://www.selenium.dev/selenium-ide/docs/en/api/commands#store).
storeText("css=.container:nth-child(1) > span:nth-child(3)","myVar")
This will store the text from element with CSS selector `.container:nth-child(1) > span:nth-child(3)` in a variable called `myVar`.
type('id=inputField','${myVar}')
This will type the text stored in the `myVar` variable to an element with `ID=inputField`
Was this page helpful? Yes No
## Looking for More Help?
Have questions or need more information?
You can reach us via the following channels:
- [Email us](https://testingbot.com/contact/new)
- [Join our Slack Channel](https://join.slack.com/t/testingb0t/shared_invite/zt-3bcw9xch-jk19~6XPs_xBrsAgAedkCw)
---
URL: https://testingbot.com/support/ai
# AI Testing
TestingBot provides AI solutions for QA and developers to automate their tests and other tasks. Here are some of the AI solutions we are providing:
- [TestingBot AI Chat](https://testingbot.com/support/ai/chat)
Chat with an AI operator and instruct a remote browser. Generate automated tests from your instructions.
- [Codeless Tests](https://testingbot.com/support/ai/codeless)
Instruct our AI agent what to test. The AI agent will run tests against your website on regular intervals and alert if a test fails.
- [TestingBot MCP Server](https://testingbot.com/support/ai/mcp)
Connect TestingBot with AI models, using the TestingBot MCP Server.
- [Other AI integrations such as Functions and Browser-Use](https://testingbot.com/support/ai/integrations)
Was this page helpful? Yes No
## Looking for More Help?
Have questions or need more information?
You can reach us via the following channels:
- [Email us](https://testingbot.com/contact/new)
- [Join our Slack Channel](https://join.slack.com/t/testingb0t/shared_invite/zt-3bcw9xch-jk19~6XPs_xBrsAgAedkCw)
---
URL: https://testingbot.com/support/ai/integrations
# TestingBot's Remote Browser Cloud
TestingBot offers a battle-tested remote browser cloud, available to run both automated tests and AI tasks.
When it comes to running AI-driven browser automation tasks, selecting the right remote browser grid is crucial. **TestingBot** offers a scalable, feature-rich alternative to platforms like Browserbase, Steel.dev, Browserless and Lightpanda.
At TestingBot we've been operating a browser grid since 2012, providing unmatched reliability, global coverage and enterprise-grade security.
### Comparison Table
| Feature | TestingBot | Browserbase | Steel.dev | Browserless | Lightpanda |
| --- | --- | --- | --- | --- | --- |
| Real Browsers & Devices | ✅ Yes | ❌ No | ❌ No | ❌ No | ❌ No |
| Headless Browsers | ✅ Yes | ✅ Yes | ✅ Yes | ✅ Yes | ✅ Yes |
| Global Testing Locations | ✅ Yes | ✅ Yes | ❌ No | ❌ No | ❌ No |
| Parallel Sessions | ✅ Unlimited | ❌ Limited | ✅ Yes | ❌ Limited | ❌ Limited |
| Security & Compliance | ✅ Enterprise-Grade | ❌ Basic | ❌ Basic | ❌ Basic | ❌ Basic |
## AI Integrations
TestingBot is capable of connecting remote browsers to various AI frameworks and libraries, including the following popular options:
- [AgentKit](https://testingbot.com/support/ai/integrations/agentkit) - Create AI agents that can run browser automation tasks using TestingBot's remote browser grid and AgentKit.
- [Browser-Use](https://testingbot.com/support/ai/integrations/browser-use) - A Python library for browser automation using AI agents.
- [Braintrust](https://testingbot.com/support/ai/integrations/braintrust) - Create tools to leverage AI for testing and automation.
- [Stagehand](https://testingbot.com/support/ai/integrations/stagehand) - An AI Browser Automation Framework that allows you to create and manage browser automation tasks using AI.
- [Magnitude](https://testingbot.com/support/ai/integrations/magnitude) - An AI framework using Vision to perform automated browser automation with LLMs.
- [Notte](https://testingbot.com/support/ai/integrations/notte) - A reliable and fast AI browser agent.
## Scraping data with real browsers
Looking to obtain data from the world wide web with real browsers? You can connect your [Puppeteer](https://testingbot.com/support/web-automate/puppeteer) and [Playwright](https://testingbot.com/support/web-automate/playwright) scripts to the large TestingBot browser grid, or use functions to perform tasks without writing any code:
- [Take screenshots](https://testingbot.com/support/functions/screenshot)
- [Generate PDFs](https://testingbot.com/support/functions/pdf)
- [Scrape Webpages](https://testingbot.com/support/functions/scrape)
- [Serverless Functions](https://testingbot.com/support/functions/serverless)
Was this page helpful? Yes No
## Looking for More Help?
Have questions or need more information?
You can reach us via the following channels:
- [Email us](https://testingbot.com/contact/new)
- [Join our Slack Channel](https://join.slack.com/t/testingb0t/shared_invite/zt-3bcw9xch-jk19~6XPs_xBrsAgAedkCw)
---
URL: https://testingbot.com/support/ai/integrations/agentkit
# Using AgentKit with TestingBot
Create AI agents that can run browser automation tasks using TestingBot's remote browser grid and AgentKit (by inngest).
## Dependencies
To install all dependencies, please follow these steps:
[npm](https://testingbot.com#)[pnpm](https://testingbot.com#)[yarn](https://testingbot.com#)
npm install @inngest/agent-kit playwright-core
pnpm add @inngest/agent-kit playwright-core
yarn add @inngest/agent-kit playwright-core
## Create a TestingBot service
In the example below, we'll show an example tool that will use Algolia to search Hacker News (HN) posts. The TestingBot remote browser grid will be used to perform the actions and return the results.
The example below uses the `chromium.connect` method to connect to a remote browser in the TestingBot cloud.
There are a lot of [Playwright Options](https://testingbot.com/support/web-automate/playwright/options) you can use to customize the browser session.
Make sure to replace `key` and `secret` with your TestingBot API key and secret.
import "dotenv/config";
import {
anthropic,
createAgent,
createNetwork,
createTool,
} from "@inngest/agent-kit";
import { createServer } from "@inngest/agent-kit/server";
import { z } from "zod";
import { chromium } from "playwright-core";
const searchHN = createTool({
name: "search_hn",
description: "Search HN posts and comments",
parameters: z.object({
query: z.string().describe("The search query for HN"),
}),
handler: async ({ query }, { step }) => {
return await step?.run("search-on-hn", async () => {
const browser = await chromium.connect({
wsEndpoint: `wss://cloud.testingbot.com/playwright?key=${testingBotKey}&secret=${testingBotSecret}&browserName=chrome&browserVersion=latest`,
});
try {
const page = await browser.newPage();
// Construct the search URL
const searchUrl = `https://hn.algolia.com/?dateRange=all&page=0&prefix=false&query=${query}&sort=byPopularity&type=story`;
await page.goto(searchUrl);
// Wait for results to load
await page.waitForSelector(".SearchResults", { timeout: 10000 });
// Extract search results
const results = await page.evaluate(() => {
const posts = document.querySelectorAll(".SearchResults .Story ");
return Array.from(posts).map((post) => ({
title: post.querySelector(".Story_title span")?.textContent?.trim(),
}));
});
return results.slice(0, 5); // Return top 5 results
} finally {
await browser.close();
}
});
},
});
// Create the search agent
const searchAgent = createAgent({
name: "hn_searcher",
description: "An agent that searches HN for relevant information",
system:
"You are a helpful assistant that searches HN through algolia for relevant information.",
tools: [searchHN],
});
// Create the network
const hnSearchNetwork = createNetwork({
name: "hn-search-network",
description: "A network that searches HN using TestingBot",
agents: [searchAgent],
maxIter: 2,
defaultModel: anthropic({
model: "claude-3-5-sonnet-latest",
defaultParameters: {
max_tokens: 4096,
},
}),
});
// Create and start the server
const server = createServer({
networks: [hnSearchNetwork],
});
server.listen(3010, () =>
console.log("HN Search Agent server is running on port 3010")
);
Was this page helpful? Yes No
## Looking for More Help?
Have questions or need more information?
You can reach us via the following channels:
- [Email us](https://testingbot.com/contact/new)
- [Join our Slack Channel](https://join.slack.com/t/testingb0t/shared_invite/zt-3bcw9xch-jk19~6XPs_xBrsAgAedkCw)
---
URL: https://testingbot.com/support/ai/integrations/braintrust
# Using BrainTrust with TestingBot
## Braintrust Organization
To get started, make sure you create [a new Braintrust organization](https://www.braintrust.dev/docs/guides/projects). Next, install the necessary dependencies:
## Install dependencies
To use Braintrust with TestingBot, you need to install the following dependencies:
npm install zod braintrust playwright-core
## Variables
To use TestingBot with Braintrust, you need to set the following environment variables: `TESTINGBOT_KEY` and `TESTINGBOT_SECRET`.
You will also need to set up the AI API Key that you are using. Braintrust supports various AI providers, such as OpenAI, Anthropic and others.
## Tools
Braintrust allows you to create [tools](https://www.braintrust.dev/docs/guides/functions/tools) that can be used by agents. In this example, we will create a tool that takes a URL parameter and will use Readability to convert the HTML.
import * as braintrust from "braintrust";
import { z } from "zod";
import { chromium } from "playwright-core";
async function loadPage({ url }: { url: string }) {
const { id } = await createSession();
const browser = await chromium.connectOverCDP(
wsEndpoint: `wss://cloud.testingbot.com/playwright?key=${testingBotKey}&secret=${testingBotSecret}&browserName=chrome&browserVersion=latest`,
);
const defaultContext = browser.contexts()[0];
const page = defaultContext.pages()[0];
await page.goto(url);
const readable: { title?: string; textContent?: string } =
await page.evaluate(`
import('https://cdn.skypack.dev/@mozilla/readability').then(readability => {
return new readability.Readability(document).parse()
})`);
const text = `${readable.title}\n${readable.textContent}`;
return { page: text };
}
const project = braintrust.projects.create({ name: "TestingBot API Tool" });
project.tools.create({
handler: loadPage,
parameters: z.object({
url: z.string(),
}),
returns: z.object({
page: z.string(),
}),
name: "Load page",
slug: "load-page",
description: "Load a page from the internet",
ifExists: "replace",
});
## Deploy tool
You can now deploy the tool to Braintrust. You can do this by running the following command:
npx braintrust push testingbot.ts
Once the tool is deployed, you will see the tool listed in the Library's Tools section. Now you can specify a URL and use the "Load page" tool to use the TestingBot tool.
Was this page helpful? Yes No
## Looking for More Help?
Have questions or need more information?
You can reach us via the following channels:
- [Email us](https://testingbot.com/contact/new)
- [Join our Slack Channel](https://join.slack.com/t/testingb0t/shared_invite/zt-3bcw9xch-jk19~6XPs_xBrsAgAedkCw)
---
URL: https://testingbot.com/support/ai/integrations/browser-use
# Browser Use Cloud API
Browser-Use is a Python library that allows you to create browser automation scripts using AI. You can use multiple models such as GPT-4o, DeepSeek, Gemini-2.0, Claude and more. Local models such as Qwen 2.5 are also supported. The library essentially uses a Playwright browser instance to execute tasks on a (remote) browser. You can perform tasks such as:
- Navigate to Google and search for TestingBot
- Go to Reddit and open an article
- Open a new tab and go to CNN
By using the TestingBot remote browser grid, you can run multiple AI agents in parallel without worrying about setting up and managing the browsers yourself.
Additionally, TestingBot records each session with a video, logs and generated metadata are saved as well.
You can run browsers from [various geographical locations](https://testingbot.com/support/web-automate/playwright/options#geo) and use different browser versions, on multiple operating systems.
To install browser use, please follow these steps:
- Install the Browser-Use library: `pip install browser-use`
- Install the Playwright library: `pip install playwright`
## Connecting to a remote browser
Please see the example below on how to connect your Browser-Use agent to a remote browser in the TestingBot cloud.
The `wss` URL points to the TestingBot cloud, where you can specify the browser and platform you want to use. You can also specify the name of the session.
Make sure to replace `key` and `secret` with your TestingBot API key and secret.
import json
import httpx
import os
import asyncio
import logging
from browser_use.browser import BrowserSession
from browser_use.agent.service import Agent
from browser_use.llm import ChatOpenAI
capabilities = {
"tb:options": {
"name": "Browser Use Example",
"key": os.environ["TESTINGBOT_KEY"],
"secret": os.environ["TESTINGBOT_SECRET"],
},
"browserName": "chrome",
"browserVersion": "latest",
"platform": "WIN10"
}
async def create_testingbot_session():
try:
async with httpx.AsyncClient(timeout=600.0) as client:
response = await client.post(
"https://cloud.testingbot.com/session",
json={ "capabilities": capabilities },
)
response.raise_for_status()
session_data = response.json()
logging.info(
"TestingBot session created successfully: %s",
json.dumps(session_data, indent=2)
)
return session_data
except Exception as e:
logging.error("Failed to create TestingBot session: %s", e)
async def main():
session_data = await create_testingbot_session()
cdp_url = session_data["cdp_url"]
browser_session = BrowserSession(cdp_url=cdp_url)
agent = Agent(
task="Go to the TestingBot homepage and click the pricing menu item",
llm=ChatOpenAI(model="gpt-4o"),
browser_session=browser_session,
)
try:
await agent.run()
finally:
await browser_session.close()
if __name__ == " __main__":
asyncio.run(main())
When you run this example, the Browser-Use agent will connect to a remote browser in the TestingBot cloud, and execute the task specified in the `task` variable.
Was this page helpful? Yes No
## Looking for More Help?
Have questions or need more information?
You can reach us via the following channels:
- [Email us](https://testingbot.com/contact/new)
- [Join our Slack Channel](https://join.slack.com/t/testingb0t/shared_invite/zt-3bcw9xch-jk19~6XPs_xBrsAgAedkCw)
---
URL: https://testingbot.com/support/ai/integrations/stagehand
# TestingBot & Stagehand
Stagehand is an AI Browser Automation Framework that allows you to create and manage browser automation tasks using AI. It is available in both NodeJS and Python.
By connecting Stagehand to TestingBot's remote browser grid, you can run multiple AI-driven browser automation tasks in parallel, without the need to manage the browsers yourself. Each session is video recorded and available for replay in the TestingBot dashboard. You can run browsers from [various geographical locations](https://testingbot.com/support/web-automate/playwright/options#geo) and use different browser versions, on multiple operating systems.
## Connecting to a remote browser
To get started, please install these packages:
- Install the Stagehand library: `@browserbasehq/stagehand`
- Install the TestingBot library: `npm install testingbot-api`
We can now run a simple example. This will connect Stagehand with a remote TestingBot browser session. Use the AI prompt to test a specific scenario, by describing what you want to test in your own natural language.
const { Stagehand } = require("@browserbasehq/stagehand");
const TestingBot = require("testingbot-api");
(async () => {
const tb = new TestingBot({
api_key: process.env.TESTINGBOT_KEY,
api_secret: process.env.TESTINGBOT_SECRET
});
const options = {
capabilities: {
browserName: 'chrome',
browserVersion: 'latest',
platform: 'WIN11'
}
};
const session = await tb.createSession(options);
const stagehand = new Stagehand({
env: "LOCAL",
localBrowserLaunchOptions: {
cdpUrl: session['cdp_url']
}
});
await stagehand.init();
const page = stagehand.page;
await page.goto("https://testingbot.com/pricing");
const extractResult = await page.extract("Extract the pricing plans from this page");
console.log(`Extract result:\n`, extractResult);
})();
Make sure to replace `TESTINGBOT_KEY` and `TESTINGBOT_SECRET` with your actual TestingBot API key and secret.
In the example above, we create a new TestingBot session with the desired capabilities. We then pass the `cdpUrl` to Stagehand, which allows it to connect to the remote browser session on TestingBot.
You can now use Stagehand's AI capabilities to interact with the page, extract information, or perform other actions as needed.
For more information on using Stagehand, please refer to the [Stagehand documentation](https://docs.stagehand.dev/first-steps/quickstart).
Was this page helpful? Yes No
## Looking for More Help?
Have questions or need more information?
You can reach us via the following channels:
- [Email us](https://testingbot.com/contact/new)
- [Join our Slack Channel](https://join.slack.com/t/testingb0t/shared_invite/zt-3bcw9xch-jk19~6XPs_xBrsAgAedkCw)
---
URL: https://testingbot.com/support/ai/integrations/magnitude
# Magnitude AI
[Magnitude](https://github.com/magnitudedev/magnitude) is an AI browser automation framework that allows you to run browser automation scripts using AI models. It uses Vision AI to understand the webpage and interact with it, making it possible to automate tasks that require visual understanding.
You can use the framework to automate tasks on webpages, test functionality, extract data and verify any specific behavior on the webpage, just like a normal user would do.
## Running Magnitude AI tests on TestingBot
To run Magnitude AI tests on TestingBot, you can use the following steps and example code to get started:
- `npx create-magnitude-app`
- Next, modify the `src/index.tsx` file that was generated, add a `browser` option to the `startBrowserAgent` function.
import { startBrowserAgent } from "magnitude-core";
import z from 'zod';
import dotenv from 'dotenv';
dotenv.config();
const capabilities = {
'tb:options': {
key: process.env.TESTINGBOT_KEY,
secret: process.env.TESTINGBOT_SECRET,
},
browserName: 'chrome',
browserVersion: 'latest'
}
async function main() {
const agent = await startBrowserAgent({
// Starting URL for agent
url: 'https://docs.magnitude.run/getting-started/quickstart',
// Show thoughts and actions
narrate: true,
browser: {
cdp: `wss://cloud.testingbot.com/puppeteer?capabilities=${encodeURIComponent(JSON.stringify(capabilities))}`
}
});
// Intelligently extract data based on the DOM content matching a provided zod schema
const gettingStarted = await agent.extract('Extract how to get started with Magnitude', z.object({
// Agent can extract existing data or new insights
difficulty: z.enum(['easy', 'medium', 'hard']),
steps: z.array(z.string()),
}));
// Navigate to a new URL
await agent.nav('https://magnitasks.com');
// Magnitude can handle high-level tasks
await agent.act('Create a task', {
// Optionally pass data that the agent will use where appropriate
data: {
title: 'Get started with Magnitude',
description: gettingStarted.steps.map(step => `• ${step}`).join('\n')
}
});
// It can also handle low-level actions
await agent.act('Drag "Get started with Magnitude" to the top of the in progress column');
// Stop agent and browser
await agent.stop();
}
main();
When you run this example, the Magnitude AI agent will use a remote TestingBot browser to interact with. Results will appear on your machine.
Was this page helpful? Yes No
## Looking for More Help?
Have questions or need more information?
You can reach us via the following channels:
- [Email us](https://testingbot.com/contact/new)
- [Join our Slack Channel](https://join.slack.com/t/testingb0t/shared_invite/zt-3bcw9xch-jk19~6XPs_xBrsAgAedkCw)
---
URL: https://testingbot.com/support/ai/integrations/notte
# Notte Browser Agent
[Notte](https://github.com/nottelabs/notte) is Browser AI agent that allows you to run browser automation scripts using AI models. It is a web agent framework built for speed, cost-efficiency, scale and reliability.
You can use the framework to automate tasks on webpages, test functionality, extract data and verify any specific behavior on the webpage, just like a normal user would do.
## Running Notte Browser Agent tasks with TestingBot
Notte allows you to specify a `CDP` endpoint, enabling it to connect to remote browser instances.
To run Notte Browser Agent tasks on TestingBot, you can use the following steps and example code to get started:
- `pip install notte litellm[proxy]`
- Add your OpenAI or Gemini API credentials to the `.env` file:
GEMINI_API_KEY="..."
import notte
from dotenv import load_dotenv
load_dotenv()
cdp_url = "wss://cloud.testingbot.com?key={key}&secret={secret}&browserName=chrome&browserVersion=latest"
with notte.Session(cdp_url=cdp_url) as session:
agent = notte.Agent(session=session, reasoning_model='gemini/gemini-2.5-flash', max_steps=30)
response = agent.run(task="extract pricing plans from https://testingbot.com")
Replace the `key` and `secret` with your TestingBot credentials. You can find more CDP options on [this page](https://testingbot.com/support/web-automate/puppeteer/options).
When you run this example, a remote browser session will be started on TestingBot. Notte will use the Gemini LLM to interact with the remote browser and run the task you specified.
By using TestingBot as the CDP endpoint, you can run Notte Browser Agent tasks on any of the available browsers in the TestingBot cloud, with speed, scale and reliability.
Was this page helpful? Yes No
## Looking for More Help?
Have questions or need more information?
You can reach us via the following channels:
- [Email us](https://testingbot.com/contact/new)
- [Join our Slack Channel](https://join.slack.com/t/testingb0t/shared_invite/zt-3bcw9xch-jk19~6XPs_xBrsAgAedkCw)
---
URL: https://testingbot.com/support/ai/chat
# What is TestingBot AI Chat?
TestingBot AI Chat is an innovative, codeless test automation tool that harnesses Generative AI and Large Language Models (LLMs) to let users interact with an AI agent in a chat-based interface. Instead of writing complex scripts or manually locating elements, simply type a prompt and the AI agent will operate a remote browser in real time.
Your prompts can be transformed into automated test cases, allowing you to reuse them for continuous testing of your website or web application. Additionally, the AI agent can generate Selenium WebDriver, Playwright or Puppeteer test scripts based on its recorded interactions with the remote browser.
To get started, upgrade your account and go to the [TestingBot member dashboard](https://testingbot.com/members). Click **AI Chat** in the left-hand menu to launch the AI Chat interface.
https://www.youtube.com/embed/dEu7sKL0pMo?si=vaAP1L51M37z244y&rel=0
## Example Prompts
Below are some example prompts that you can use with TestingBot AI Chat:
-
Navigate to https://cnn.com and click on the first article. Verify that it loads correctly. Generate a Playwright test for this.
-
Go to https://testingbot.com/pricing and click on the Enterprise plan. Verify that the pricing details are correct. Generate a Puppeteer test for this.
-
Open a new tab and go to https://github.com. Search for "TestingBot" and click on the first result. Verify that the page loads correctly. Generate a Selenium WebDriver test for this.
Was this page helpful? Yes No
## Looking for More Help?
Have questions or need more information?
You can reach us via the following channels:
- [Email us](https://testingbot.com/contact/new)
- [Join our Slack Channel](https://join.slack.com/t/testingb0t/shared_invite/zt-3bcw9xch-jk19~6XPs_xBrsAgAedkCw)
---
URL: https://testingbot.com/support/ai/codeless
# AI Codeless Web Testing
TestingBot provides AI solutions for QA and developers to automate their tests and other tasks. Simply instruct our AI agent what to test and the AI agent will create and run tests against your website on regular intervals, alerting you if a test fails.
Enter a URL and a prompt to instruct the AI agent what to test. The AI agent will run the test on a real browser in the TestingBot cloud.
When an error is detected, the AI agent will alert you.
Instead of generating test code from ChatGPT or Claude, you can instruct the AI agent to run tests based on natural language prompts.
Unlike traditional test scripts, which can break as soon as the website's UI changes, AI-driven tests dynamically interpret your instructions each time they run. This ensures your tests remain adaptable and up-to-date, even as the website evolves.
## Getting Started
To get started, please go to the [Codeless Testing](https://testingbot.com/members/lab) section and click the **Create a new AI test** button.
[Create a new AI test](https://testingbot.com/members/lab) 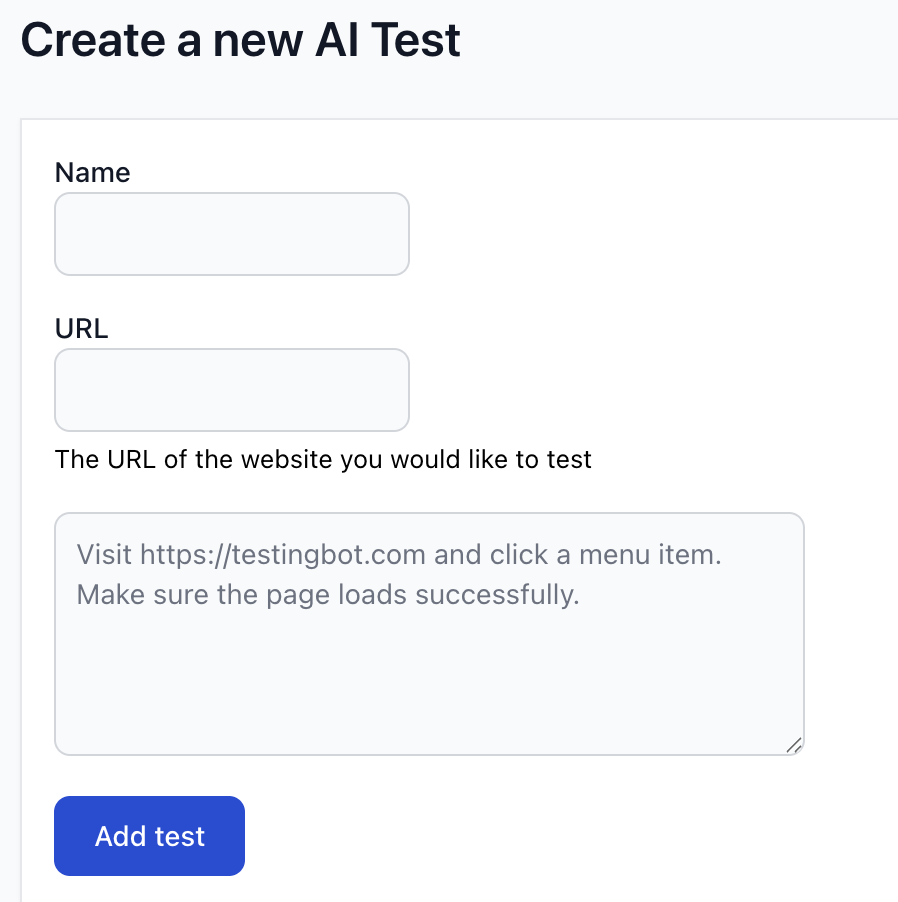
### Create a new test
You will see the form below, where you can add a name for the test and the webpage you want to start the test with.
In the textarea you can write the test prompt in your own language. You can find example prompts in the next [prompts section](https://testingbot.com#prompts).
## Prompts
The AI agent will run tests based on the prompts you provide. A prompt is a set of instructions for the AI agent to follow.
We recommend keeping test prompts as concise as possible. For example, you can instruct the AI agent to:
- Click on a button
- Fill in a form
- Test a checkout flow
- Verify that an element is visible or not visible
- Verify that an element contains specific text
- Verify that an element does not contain specific text
- Verify that an element has or does not have a specific attribute
### Example Prompts
Below are some example prompts you could use to test a website:
#### User Authentication & Account Management
- Click on the "Sign In" button and verify that the login form appears.
- Try logging in with an incorrect password and confirm that an error message appears.
#### Forms & Input Validation
- Fill in the registration form with valid data and submit it.
- Try submitting the registration form without entering required fields and verify that validation errors appear.
- Enter an invalid email format and check that an error message is displayed.
#### Navigation & UI Elements
- Click on the "Home" link in the navigation menu and ensure it redirects correctly.
- Open the mobile menu and confirm that all expected links are visible.
- Scroll down the homepage and check that the footer loads correctly.
- Hover over the dropdown menu and verify that all submenu items appear.
#### E-Commerce & Payment Testing
- Add a product to the cart and verify that the cart updates.
- Enter invalid credit card details and ensure an error message appears.
#### Content & Accessibility
- Check that all images on the homepage load properly.
- Verify that all links on the website are clickable and lead to the correct pages.
- Use keyboard navigation to tab through elements and ensure accessibility compliance.
- Enable dark mode (if available) and confirm that the UI adjusts correctly.
- Resize the browser window and confirm that the website is responsive.
#### Performance & Security
- Try opening the website in an incognito window and verify that session-based content does not persist.
- Attempt to submit a form with script injection and confirm that it is sanitized.
- Check if the website forces HTTPS and does not allow unsecured connections.
#### Multilingual & Localization Testing
- Switch the website language to French and confirm that all text updates correctly.
- Change the currency on the pricing page and verify that the prices are updated.
## Browsers
You can select one or more browsers to run your tests on. The AI agent will run the tests on the selected browsers.
Run your tests on the latest versions of Chrome and Edge, on Windows and Linux.
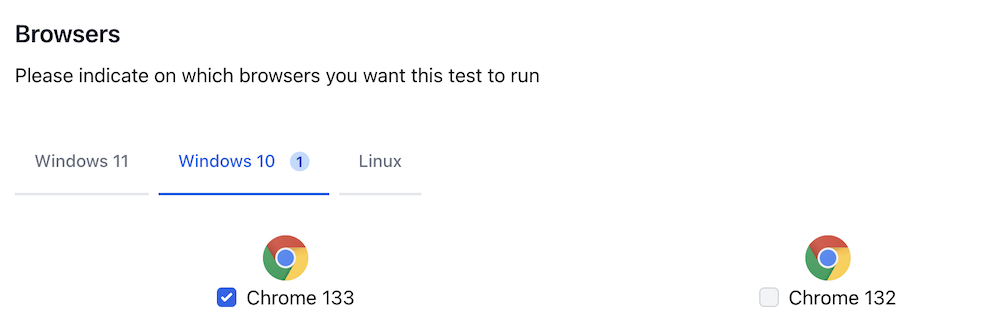
## Schedule
Indicate when and at which interval, you would like to run the test.
You can choose to run the test once, on a daily basis, weekly, or repeat every xx minutes/hours.
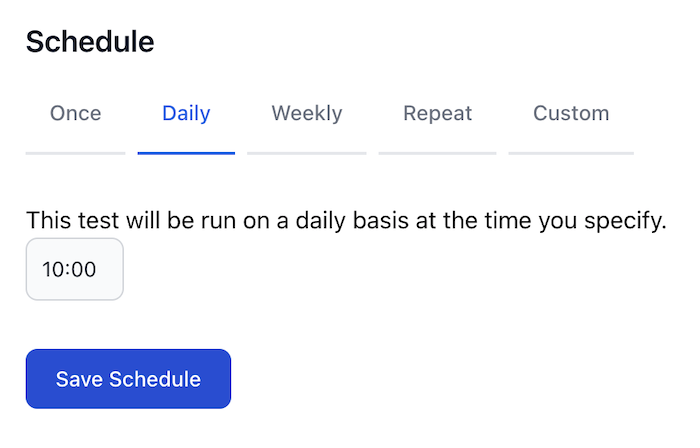
## Alerting
When a test fails, you can choose to be alerted via e-mail, API call (webhook) or SMS text message.
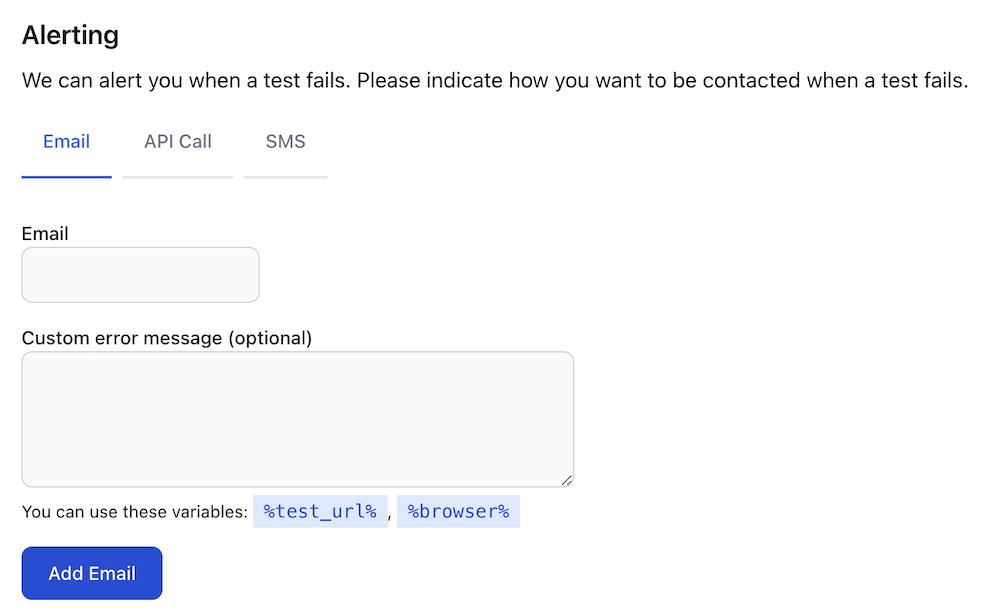
## API
You can use the TestingBot REST-API to [create AI tests from prompts](https://testingbot.com/support/api#createtest). Create one or more tests with your prompt, assign browsers and set a schedule.
Use [webhooks](https://testingbot.com/support/integrations/webhooks) to get notified of the results.
Was this page helpful? Yes No
## Looking for More Help?
Have questions or need more information?
You can reach us via the following channels:
- [Email us](https://testingbot.com/contact/new)
- [Join our Slack Channel](https://join.slack.com/t/testingb0t/shared_invite/zt-3bcw9xch-jk19~6XPs_xBrsAgAedkCw)
---
URL: https://testingbot.com/support/ai/mcp
# What is TestingBot MCP?
The TestingBot MCP server (Model-Controller-Processor) is a service that allows AI agents and Large Language Models (LLMs) to interact with TestingBot’s testing infrastructure and features through natural language prompts.
You can manage your TestingBot tests, view test results, run tests, manage team members and more by simply sending natural language commands to your AI agent connected to the MCP server.
## Features
The TestingBot MCP server offers a range of features to enhance your testing experience with your favorite AI tools such as Claude, Cursor, VS Code and more. You can simply issue commands, request information, and manage your TestingBot account using natural language.
- **Natural Language** : Manage tests, team members, tunnels and more using simple natural language commands.
- **Test Result Analysis** : Retrieve test results and generated assets through conversational queries.
- **Team Collaboration** : Manage team members and permissions using AI-driven commands.
- **Storage** : Manage and upload native mobile apps for testing on physical devices.
- **CDP sessions** : Start and manage CDP sessions for browser automation through natural language.
### How does it work?
The MCP server will run as a local process on your machine. It will receive natural language commands from your AI agent or LLM and translate these into API calls to TestingBot's services. The response is then returned back to the AI client in a conversational format.
## Getting Started
To get started with the TestingBot MCP server, follow the steps below.
### 1-click installers
We provide 1-click installers for Visual Studio Code and Cursor. Click on one of the options below to automatically configure the TestingBot MCP server:
#### Visual Studio Code
Install the TestingBot MCP server for Visual Studio Code with a single click. This will automatically configure the MCP settings in your VS Code environment.
[Install for VS Code](https://testingbot.com/mcp/install?client=vscode)
#### Cursor
Install the TestingBot MCP server for Cursor with a single click. This will automatically configure the MCP settings in your Cursor editor.
[Install for Cursor](https://testingbot.com/mcp/install?client=cursor)
#### Claude
Install the `mcp-server.mcpb` file from the [MCP releases page](https://github.com/testingbot/mcp-server/releases). Claude will automatically set up the TestingBot MCP server.
You will need your TestingBot API key and secret to complete the setup. You can find these in your [account settings](https://testingbot.com/members/user/security).
### Manual Installation
If you prefer to install the MCP server manually, or if you're using a different AI client, you can follow the instructions below:
#### Prerequisites
- Node.js 18 or higher
- TestingBot API key and secret
- An MCP-compatible client (Claude Desktop, VS Code, Cursor, etc.)
[VS Code](https://testingbot.com#)[Cursor](https://testingbot.com#)[Claude](https://testingbot.com#)[GitHub (Manual)](https://testingbot.com#)
Follow these steps to install and set up the TestingBot MCP server for Visual Studio Code:
1. Open Visual Studio Code.
2. Open the command palette by pressing `Ctrl+Shift+P` (or `Cmd+Shift+P` on macOS).
3. Type in "MCP: Add Server"
4. A dropdown will appear with options. Choose the NPM Package method.
5. You can now enter the NPM package: `@testingbot/mcp-server`
6. You will see a confirmation screen requesting to install the TestingBot MCP server.
7. Click "Install". Enter your TestingBot Key and Secret which you can obtain from [the member area](https://testingbot.com/members/user/edit).
Follow these steps to install and set up the TestingBot MCP server for Cursor:
1. Create or open the file `.cursor/mcp.json`.
2. Add the configuration to the `mcp.json` file:
{
"mcpServers": {
"testingbot": {
"command": "npx",
"args": ["-y", "@testingbot/mcp-server@latest"],
"env": {
"TESTINGBOT_KEY": "",
"TESTINGBOT_SECRET": ""
}
}
}
}
3. Restart Cursor - the MCP server will now be available.
Follow these steps to install and set up the TestingBot MCP server for Claude:
1. Create or open the file `claude_desktop_config.json`.
2. Add the configuration to the `claude_desktop_config.json` file:
{
"mcpServers": {
"testingbot": {
"command": "npx",
"args": ["-y", "@testingbot/mcp-server@latest"],
"env": {
"TESTINGBOT_KEY": "",
"TESTINGBOT_SECRET": ""
}
}
}
}
3. Restart Claude (Desktop) - the MCP server will now be available.
You can install the MCP server locally from the [TestingBot MCP GitHub repository](https://github.com/testingbot/mcp-server).
## Example prompts
Here are some example prompts you can use with the TestingBot MCP server:
### Manual Testing
> "Start a live testing session on Chrome latest with Windows 11 for https://example.com"
> "Open https://myapp.com on iPhone 14 with iOS 16 for manual testing"
### Browsers & Devices
> "List all available browsers and versions"
> "Show me all available real devices for mobile testing"
### Test Management
> "Show me my last 20 tests"
> "Mark test abc123 as passed"
### Screenshots
> "Take a screenshot of https://example.com on the latest Chrome and Firefox on Windows 11"
> "Screenshot https://testingbot.com on a iOS 26 mobilesafari simulator"
### TestingBot Storage
> "Upload https://example.com/app.ipa to TestingBot"
### Team Management
> "Show me all team members"
### CDP Session
> "Create a CDP session on Chrome latest with Windows 11"
### TestingBot Tunnel
> "Show me all active tunnels"
## FAQ
##### Is this MCP server compatible with various AI models or specific to a particular provider?
MCP servers are LLM-agnostic, which means they work with any LLM model that supports the Model Context Protocol.
##### Is the information that I feed through MCP used to train?
No, the MCP server does not send any information to an LLM. It's the LLM that is requesting information from the MCP server. The MCP server will perform API calls to the TestingBot API.
##### How does authentication to TestingBot happen?
When configuring the MCP server, you will need to specify the TestingBot Key and Secret which you can obtain from the member area. These credentials are stored on your local machine, it's the credentials that the MCP Server uses to communicate with the TestingBot API.
Was this page helpful? Yes No
## Looking for More Help?
Have questions or need more information?
You can reach us via the following channels:
- [Email us](https://testingbot.com/contact/new)
- [Join our Slack Channel](https://join.slack.com/t/testingb0t/shared_invite/zt-3bcw9xch-jk19~6XPs_xBrsAgAedkCw)
---
URL: https://testingbot.com/support/web-live
# Manual Testing
- [Is usage limited in terms of minutes or users?](https://testingbot.com#usage)
- [What do I get with a Free Trial?](https://testingbot.com#trial)
- [Is manual testing on TestingBot secure?](https://testingbot.com#secure)
- [How can I test my website on my own computer or network?](https://testingbot.com#tunnel)
- [Do I need to download any software?](https://testingbot.com#software)
- [Which browsers and platforms do you provide for testing?](https://testingbot.com#browsers)
- [What kind of Developer Tools are pre-installed on the browsers?](https://testingbot.com#tools)
- [Is audio enabled during testing?](https://testingbot.com#audio)
- [Can I embed manual app/web testing in my own website or product?](https://testingbot.com#embed)
## Is usage limited in terms of minutes or users?
With an [upgraded plan](https://testingbot.com/pricing) you can use as many minutes as you like with as many friends and co-workers as you wish. There are no limits with manual browser testing.
Trial accounts can use up to 60 manual testing minutes.
## What do I get with a Free Trial?
Trial accounts can use up to 60 free minutes in manual testing.
Once you open a browser in our cloud, you'll get 5 minutes of unlimited access to the browser.
With an upgraded plan, you'll enjoy unlimited minutes of manual testing, without any restrictions.
## Is manual testing on TestingBot secure?
None of your data is stored in our cloud, for each test you receive a VM with a pristine environment.
VMs use up-to-date security patches and are located in a secure datacenter with firewalls.
## How can I test my website on my own computer or network?
You can use TestingBot to test your staging website in our cloud.
For example: you're working on a new feature and want to make sure it looks and behaves ok in all browsers, before releasing it to the public.
With our [Tunnel](https://testingbot.com/support/tunnel) you can easily and securely connect your network with our cloud.
## Do I need to download any software?
You do not need to download any software or plugins.
In our member area, you can pick on which browser you'd like to test. Once we've booted a Virtual Machine for you, you can control the machine from inside your browser.
You can for example control an IE9 browser located in our cloud from inside your own Chrome browser.
## Which browsers and platforms do you provide for testing?
We provide the latest and most used browsers, versions and platforms.
Ranging from IE6-IE11 on Windows, to Chrome on Linux, or Safari 14 on Mac to Firefox 81 on Windows 10.
See our full [list of supported browsers](https://testingbot.com/support/web-automate/browsers).
## What kind of Developer Tools are pre-installed on the browsers?
All browsers have their built-in developer tools enabled by default.
## Is audio enabled during testing?
Audio is available during all manual tests on Desktop machines and simulators/emulators.
Audio is available on manual physical Android device testing, for devices with Android 12 and higher.
On physical iOS devices, audio is available on a select number of devices, with iOS version higher than 14.
## Can I embed manual app/web testing in my own website or product?
Yes, you can embed TestingBot's manual testing interface in your own website or product using an iframe.
1. Start a manual session through an API call.
2. Fetch the `sessionId` of the session and generate an `authentication hash`.
3. Pass the `sessionId` and `authentication hash` to a liveview URL and embed it with an iframe.
const TestingBot = require('testingbot-api');
const tb = new TestingBot({
api_key: process.env.TESTINGBOT_KEY,
api_secret: process.env.TESTINGBOT_SECRET
});
const options = {
capabilities: {
browserName: 'chrome',
browserVersion: 'latest',
platform: 'WIN11',
'tb:manual': true,
}
};
const session = await tb.createSession(options);
const sessionId = session.session_id;
const authHash = tb.getAuthenticationHashForSharing(sessionId);
const liveViewUrl = `https://testingbot.com/tests/${sessionId}/live?auth=${authHash}`;
You can then embed the live view URL in an iframe as follows:
You will have a fully functional manual testing interface embedded in your own application.
---
URL: https://testingbot.com/support/web-live/extension
# Browser Extension
- [What is the TestingBot Browser Extension?](https://testingbot.com#usage)
- [Installation](https://testingbot.com#installation)
- [Using the Browser Extension](https://testingbot.com#usage)
## What is the TestingBot Browser Extension?
The TestingBot Browser Extension can be installed on your [Chrome](https://chrome.google.com/webstore/detail/testingbot/nhjmiaiamlfblfagaodhkeabfbnmdmff) or [Firefox](https://addons.mozilla.org/addon/testingbot/) browser, for free.
Once installed, you can visit any website with your own Chrome or Firefox browser, and click the TestingBot extension icon. A window will pop up, allowing you to choose on which remote browser you want to test the current page on.
Upon selecting a browser, the current page will be available for testing on a remote TestingBot browser.
For example, you are using Chrome but want to make sure that the website you are currently seeing looks and functions correctly on a macOS Safari browser. With the extension, you can simply choose the remote browser configuration. You will be redirected to a live view of the remote browser, where you can use your mouse and keyboard to interact and test the webpage.
## Installation
The TestingBot Browser Extension is currently available for [Chrome](https://chrome.google.com/webstore/detail/testingbot/nhjmiaiamlfblfagaodhkeabfbnmdmff) and [Firefox](https://addons.mozilla.org/addon/testingbot/).
Simply click the **Add Extension** button to add the extension to your browser.
A TestingBot icon will now appear in your browser's navigation bar. You can pin the extension to make sure it remains visible at all times.
## Using the Browser Extension
After installation, you can simply navigate to any website you want to test. Click the TestingBot extension icon to open a popup with browser choices.
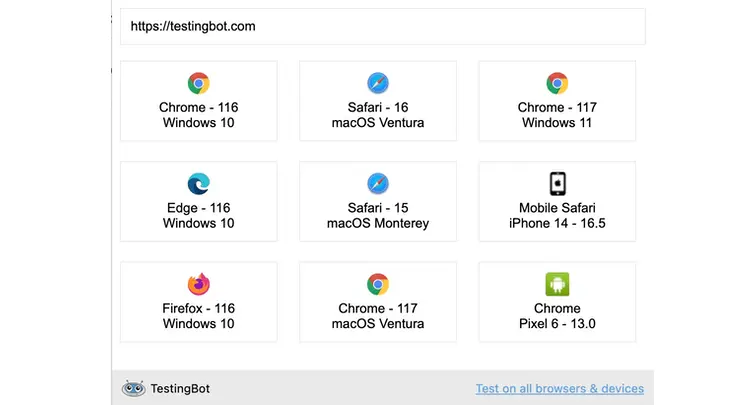
Make sure you are logged in to TestingBot while using the extension.
---
URL: https://testingbot.com/support/web-live/chromeos
# ChromeOS Manual Testing
TestingBot gives you the ability to test your website on a remote ChromeOS device emulator, such as a Chromebook.
Simply enter the URL of the website you want to test and choose between 3 different ChromeOS configurations:
- ChromeOS Small: 1366x768 - 160dpi
- ChromeOS Medium: 3840x2160 - 320dpi
- ChromeOS Large: 1920x1080 - 160dpi
## Starting a live ChromeOS session
Simply [start a new manual session](https://testingbot.com/members/manual/new) by clicking the Android category and choosing one of the three ChromeOS configurations.
A remote session will be started and you will be able to interact with the ChromeOS device emulator with your own mouse and keyboard.
An audio stream will be started, so you can hear the sounds from the ChromeOS device emulator.
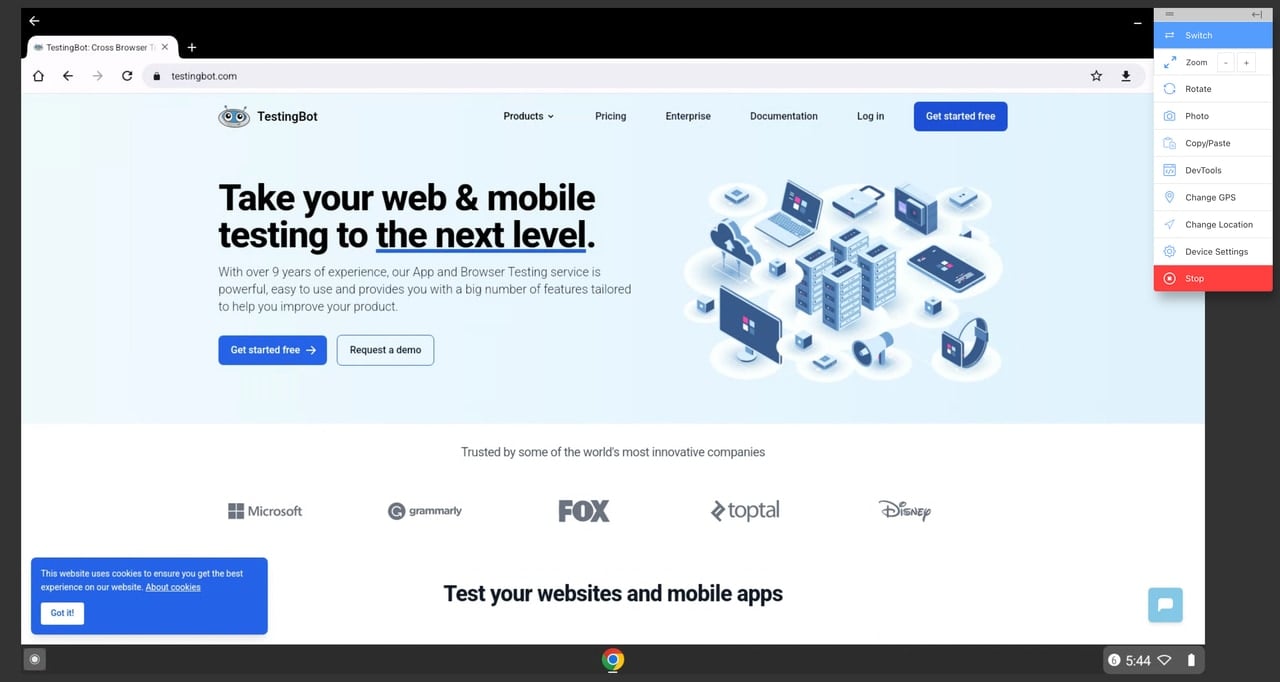
## Enabling/disabling Dark Mode
You can easily enable or disable Dark Mode in the ChromeOS emulator by clicking the "Device Settings" button in taskbar, then toggling the "Enable Dark Mode" switch.
## Taking screenshots
To take a live screenshot of the current ChromeOS session, simply click the "Photo" button in the taskbar. This will capture the current view and open the screenshot in a photo editor, which you can use to annotate or modify the screenshot, before downloading or sharing it.
## Change GPS
You can use the "GPS" button in the taskbar to change the GPS location of the ChromeOS device emulator. This is useful for testing location-based features on your website.
---
URL: https://testingbot.com/support/app-live
# Live Mobile App Testing
Take control over our real devices with your mouse and keyboard, straight from your own browser, without having to install any plugin or program.
Simply upload your iOS or Android app to TestingBot, [pick the device](https://testingbot.com/support/app-automate/devices) you want to test on, and TestingBot will give you a live session with the real device.
## Uploading a mobile App
You can upload your mobile app either through the TestingBot UI or via an [API call](https://testingbot.com/support/api#upload).
### Upload via the UI
To upload a mobile app through the TestingBot UI, simply go to the member dashboard and:
- Click **Live App Testing**
- Under **Select Source** click **Uploaded Apps**
- Either drag your mobile application on the page, or click **Upload App** to browse for the file
Currently we accept these file formats:
- `.aab`, `.apk` for Android
- `.ipa`, `.zip` for iOS
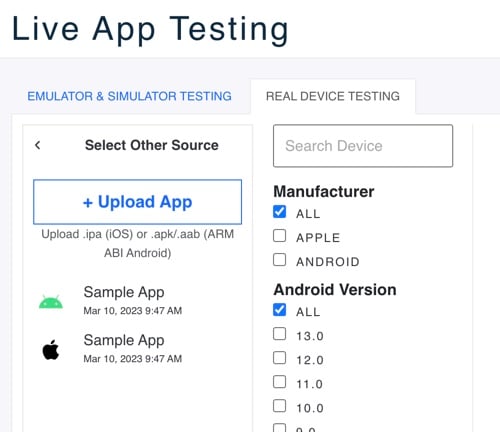
## Deleting a mobile App
To delete a mobile app, you can use the TestingBot UI or use our [REST API](https://testingbot.com/support/api#filedelete).
### Delete via the UI
To delete a mobile app through the TestingBot UI, simply go to the member dashboard and:
- Click **Live App Testing**
- Under **Select Source** click **Uploaded Apps**
- Click the trash icon in the bottom right corner of the list
- Select one or more apps you wish to delete
- Click **Delete Apps**
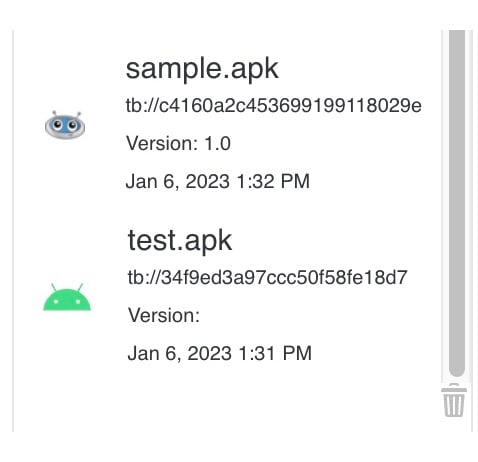 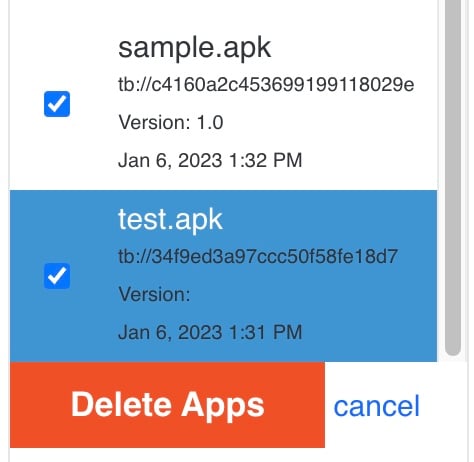
## Selecting a Mobile Device
Once you've selected a mobile app, you will need to select the device you want to run tests on. You can choose to select a Virtual Device or a Real Device by using the navigation tabs on the page.
### Real Devices
To use a Real Device, click the [Real Device Testing](https://testingbot.com/members/apps/devices/new) tab.
- Click an available device from the devices list
- Make sure to select an iOS device if you've selected an iOS app (`.ipa`), or an Android device if you've selected an Android app (`.apk`)
- Click the **Start** button
### Virtual Devices
To use a Virtual Device, click the [Emulator & Simulator Testing](https://testingbot.com/members/apps/new) tab.
- Select an app you've uploaded, or the sample Android/iOS TestingBot app.
- Click the Android or iOS tab in the virtual device list
- Select an iOS simulator if you've selected an iOS app (`.ipa`), or an Android emulator if you've selected an Android app (`.apk`)
- Click the **Start** button
### Time Limits and Timeouts for Live App Testing
- Live tests will last a maximum of 5 minutes at a time for trial users.
- Live tests for paid users will timeout after 15 minutes of inactivity
## Live Test Interface
Below is some more information on the various functions that the TestingBot Live App Testing UI provides.
Icon | Name | Description || | Switch Device |
Change to a different device.
This will start a new session, you will lose the session with the current device.
|
| | Zoom |
Zoom in or out. This will make the device's screen appear larger or smaller.
This only affects the view in your browser, it does not change anything on the device itself.
|
| | Rotate |
Rotates the device. Either from PORTRAIT to LANDSCAPE or vice-versa.
|
| | Screenshot |
Takes a screenshot from the device.
A screenshot editor will appear, allowing you to annotate the image. Download the screenshot with the download button.
|
| | Copy/Paste |
Copy or paste from or to the device.
If you've selected the copy/paste permission in your browser, TestingBot will automatically keep your local and remote clipboard in sync.
|
| | DevTools |
This will open the developer tools for the device.
Retrieve realtime logs from the device. Use the **Inspector** functionality to drill down in the view hierarchy to copy element locators (such as XPath).
|
| | GPS Location |
Set a (new) mock location for the GPS of the device.
If your app uses GPS functionality, it will receive this mock location
|
| | Locale |
Set a new locale for the entire device.
Useful if your app is multilingual. Test your app in different languages.
|
| | Device Settings |
Change various device settings.
Switch between light and dark mode instantly.
|
| | Stop Session |
Stops the current session.
Logs and a video of the test will be available in the TestingBot member area.
|
## Audio
Audio is available during manual mobile app testing, for certain devices.
### Virtual Devices
Audio is available for all Android emulators and iOS Simulators. TestingBot will stream the audio generated by the virtual device to your web browser.
### Physical Devices
Android devices with Android version 12 and higher will stream the audio to your browser, you will hear all the audio generated on the device.
For iOS devices with iOS version 14 and higher, you will hear the audio from the device in realtime.
Older physical devices do not have the audio streaming capabilities. These will only stream a live video view of the device.
## Device Logs
TestingBot provides a real-time stream of the device logs during the manual live session.
You can switch between these device log levels:
- `VERBOSE` (default)
- `DEBUG`
- `INFO`
- `WARNING`
- `ERROR`
You can use the search input bar to search between the generated logs.
Icon | Functionality || | The download icon allows you to download the entire device logs generated thus far, without any filtering. |
| | The trash icon will clear the history of the logs. Only new log entries will be added to the realtime view. |
## Testing Local Websites/Apps
With our [TestingBot Tunnel](https://testingbot.com/support/tunnel) you can easily and securely connect your local computer/network with TestingBot's Real Devices.
#### Known Limitations
- **Localhost testing does not work on iOS**.
Due to an iOS Restriction, it is currently not possible to run tests against `http(s)://localhost` with TestingBot Tunnel.
A possible workaround would be to change the hosts file on the machine running TestingBot Tunnel, and add a custom hostname (for example `mylocalwebsite` and the IP address `127.0.0.1`).
Then configure your tests to use `http(s)://mylocalwebsite/...` instead of localhost.
Was this page helpful? Yes No
## Looking for More Help?
Have questions or need more information?
You can reach us via the following channels:
- [Email us](https://testingbot.com/contact/new)
- [Join our Slack Channel](https://join.slack.com/t/testingb0t/shared_invite/zt-3bcw9xch-jk19~6XPs_xBrsAgAedkCw)
---
URL: https://testingbot.com/support/app-live/apple-pay
# Testing Apple Pay
Apple Pay, developed by Apple Inc., serves as a mobile payment and digital wallet service enabling transactions through various Apple devices, such as iPhones and iPads. Testing with Apple Pay comes with challenges. This document aims to clarify some methods that are available for testing with iOS and Apple Pay.
There are important differences between Apple Pay on Real Devices and iOS Simulators. The iOS Simulator has the following limitations:
- The simulator only targets the front-end integration of Apple Pay and does not test the back-end integration.
- You can not add payment cards to the wallet on iOS simulators. So no Apple Pay sandbox testing cards, or any other real credit card.
- It is not possible to test the Apple Pay in-web flow.
- It is possible to test the Apple Pay in-app flow, but the Apple Pay in-app flow will not work the same way as with a real iOS device. It will not return a payment token and will not properly process a payment.
## Apple Pay on Real Private Devices
TestingBot provides [private iOS devices](https://testingbot.com/enterprise/private-device-cloud), which are able to use Apple Pay. To make Apple Pay work on TestingBot's real private devices, please follow the steps below:
1. Follow Apple's documentation to [enable Apple Pay](https://developer.apple.com/documentation/passkit/apple_pay/setting_up_apple_pay)
2. Set up Apple Pay integration in your iOS app, using the Apple documentation.
3. Register your Merchant ID in your Apple developer account.
4. Set up an Apple sandbox tester account. See the [Apple Sandbox documentation](https://developer.apple.com/help/app-store-connect/test-in-app-purchases/create-sandbox-apple-ids/) for more information.
5. Build your ipa file. Apple Pay will not work with enterprise certificates, which means it will not work by default on TestingBot's private devices. You will need to add the `udid` (iPhone/iPad unique id) of each private device assigned to you, to your Apple provisioning profile.
- Log in to [Apple's Developer Account](https://developer.apple.com/account/resources/identifiers/list)
- Click [Add Device](https://developer.apple.com/account/resources/devices/add)
- Type in a device name and the UDID that you received from TestingBot.
- Save the device.
- Now add the new device to your [Provisioning Profile](https://developer.apple.com/account/resources/profiles/list)
### Passcode
One of the requirements to use Apple Pay, is that a passcode needs to be set on the device. Make sure that you set a passcode on your private iOS device.
TestingBot cleans every private device after each test session. You will need to configure your Apple Pay Sandbox Testing account, including a passcode and sandbox cards, every time you want to test Apple Pay on a real iOS device.
If you want to disable this automated cleaning process, please [reach out](https://testingbot.com/contact/new).
## Apple Pay on iOS Simulators
iOS Simulators offer a feature where you can authorize Apple Pay by clicking a button in the Simulator's menu bar.
- Navigate to a point in your app where a payment sheet is visible.
- Click **Features** , then enable **Authorize Apple Pay** , or use the key combination (Command+SHIFT+A).
## Apple Sandbox Test Cards
You can find a list of Test Cards and their details on [Apple Pay's Sandbox Testing documentation page](https://developer.apple.com/apple-pay/sandbox-testing/).
These test cards include Discover, Master Card, American Express, VISA and others. There are cards available for the USA, Europe, China and even Test Cards for Point of Sale Systems.
To use these, simply open the **Wallet** application on your iOS device and add the card number and expiration date.
Was this page helpful? Yes No
## Looking for More Help?
Have questions or need more information?
You can reach us via the following channels:
- [Email us](https://testingbot.com/contact/new)
- [Join our Slack Channel](https://join.slack.com/t/testingb0t/shared_invite/zt-3bcw9xch-jk19~6XPs_xBrsAgAedkCw)
---
URL: https://testingbot.com/support/app-live/chromeos
# ChromeOS Manual App Testing
With TestingBot, you can upload your native Android app and test it on a remote ChromeOS device emulator, such as a Chromebook.
After you upload your app, simply choose one of the three ChromeOS configurations to start testing:
- ChromeOS Small: 1366x768 - 160dpi
- ChromeOS Medium: 3840x2160 - 320dpi
- ChromeOS Large: 1920x1080 - 160dpi
## Starting a live ChromeOS session
To get started, make sure you uploaded a `.apk` file on the [manual app session](https://testingbot.com/members/apps/new) page. Then, click one of the three ChromeOS configurations to start a new manual session.
A remote session will be started and you will be able to interact with the ChromeOS device emulator with your own mouse and keyboard.
An audio stream will be started, so you can hear the sounds from the ChromeOS device emulator.
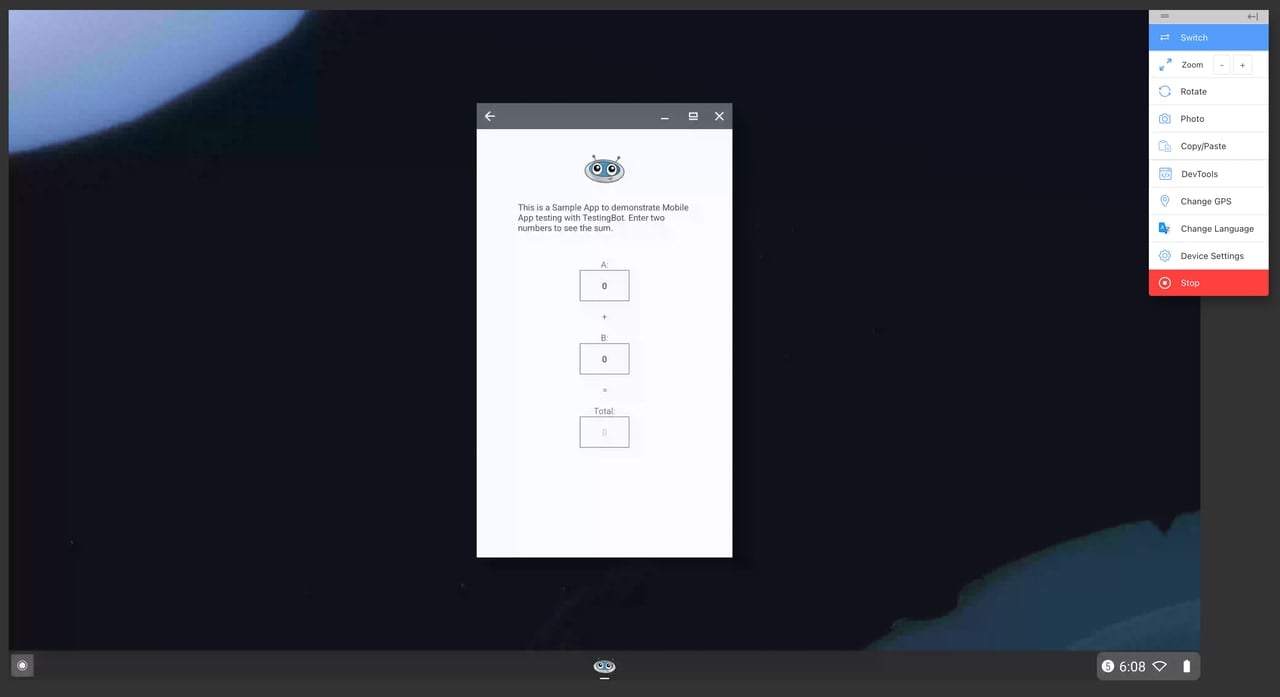
## Enabling/disabling Dark Mode
You can easily enable or disable Dark Mode in the ChromeOS emulator by clicking the "Device Settings" button in taskbar, then toggling the "Enable Dark Mode" switch.
## Taking screenshots
To take a live screenshot of the current ChromeOS session, simply click the "Photo" button in the taskbar. This will capture the current view and open the screenshot in a photo editor, which you can use to annotate or modify the screenshot, before downloading or sharing it.
## Change GPS
You can use the "GPS" button in the taskbar to change the GPS location of the ChromeOS device emulator. This is useful for testing location-based features on your website.
---
URL: https://testingbot.com/support/api
# TestingBot API Documentation
Access and modify all your TestingBot data through our comprehensive REST API. Build powerful integrations and automate your testing workflows.
All API responses are returned in JSON format.
API Endpoint: `https://api.testingbot.com`
Current Version: v1
## API Clients
There are several open source client libraries available to easily interact with the TestingBot API:
- [NodeJS](https://github.com/testingbot/testingbot-api)
- [Python](https://github.com/testingbot/testingbotclient)
- [Java](https://github.com/testingbot/testingbot-java)
- [Ruby](https://github.com/testingbot/testingbot_ruby)
- [PHP](https://github.com/testingbot/testingbot-php)
## Authentication
You can authenticate to our TestingBot API by providing your API key and API secret which you can obtain in the [member area](https://testingbot.com/members).
Authentication to the API needs to happen via [HTTP Basic Auth](http://en.wikipedia.org/wiki/Basic_access_authentication).
All requests must be made to our endpoint via HTTP. You must authenticate for all API requests, except for `List of browsers`.
## List of browsers
This call will return a list of browsers our grid currently supports.
No authentication is required for this API call.
[cURL](https://testingbot.com#)[Ruby](https://testingbot.com#)[Python](https://testingbot.com#)[PHP](https://testingbot.com#)[Java](https://testingbot.com#)[NodeJS](https://testingbot.com#)
curl "https://api.testingbot.com/v1/browsers"
require 'testingbot'
api = TestingBot::Api.new(key, secret)
api.get_browsers
TestingbotREST restApi = new TestingbotREST(key, secret);
ArrayList browsers = restApi.getBrowsers();
$api = new TestingBot\TestingBotAPI($key, $secret);
$api->getBrowsers();
import testingbotclient
tb = testingbotclient.TestingBotClient(key, secret)
tb.information.get_browsers()
const TestingBot = require('testingbot-api');
const api = new TestingBot({
api_key: "your-tb-key",
api_secret: "your-tb-secret"
});
const browsers = await api.getBrowsers();
Optional Arguments:
- (string) **type** - either "webdriver" or "rc"
Response:
[{"selenium_name":"IE8","name":"iexplore","version":8,"platform":"WINDOWS","browser_id":1,"long_version":8},
{"selenium_name":"FF7","name":"firefox","version":7,"platform":"WINDOWS","browser_id":22,"long_version":7}]
## Access your user info
This call will return the data associated to your account. You can edit this data by issueing a PUT request to our API.
[cURL](https://testingbot.com#)[Ruby](https://testingbot.com#)[Python](https://testingbot.com#)[PHP](https://testingbot.com#)[Java](https://testingbot.com#)[NodeJS](https://testingbot.com#)
$ curl "https://api.testingbot.com/v1/user" \
-u key:secret
require 'testingbot'
api = TestingBot::Api.new(key, secret)
api.get_user_info
TestingbotREST restApi = new TestingbotREST(key, secret);
TestingbotUser user = restApi.getUserInfo();
$api = new TestingBot\TestingBotAPI($key, $secret);
$api->getUserInfo();
import testingbotclient
tb = testingbotclient.TestingBotClient(key, secret)
tb.user.get_user_information()
const TestingBot = require('testingbot-api');
const api = new TestingBot({
api_key: "your-tb-key",
api_secret: "your-tb-secret"
});
const userInfo = await api.getUserInfo();
Arguments: None required
Response:
{
"first_name": "Steven",
"last_name": "King",
"seconds": 17745,
"last_login" : "2026-01-16 16:40:49 UTC",
"plan" : "small",
"max_concurrent": 10,
"max_concurrent_mobile": 2,
"company":"companyName",
"street":"companyStreet",
"city":"companyCity",
"country":"companyCountry",
"vat":"ifInEurope"
}
## Edit your user info
This call will return the data associated to your account. You can edit this data by issueing a PUT request to our API.
[cURL](https://testingbot.com#)[Ruby](https://testingbot.com#)[Python](https://testingbot.com#)[PHP](https://testingbot.com#)[Java](https://testingbot.com#)[NodeJS](https://testingbot.com#)
$ curl "https://api.testingbot.com/v1/user" \
-X PUT \
-d "user[first_name]=new" \
-u key:secret
require 'testingbot'
api = TestingBot::Api.new(key, secret)
api.update_user_info({ "first_name" => 'new' })
TestingbotREST restApi = new TestingbotREST(key, secret);
TestingbotUser user = restApi.updateUserInfo(TestingBotUser);
$api = new TestingBot\TestingBotAPI($key, $secret);
$api->updateUserInfo(array('first_name' => 'new'));
import testingbotclient
tb = testingbotclient.TestingBotClient(key, secret)
tb.user.update_user_information()
const TestingBot = require('testingbot-api');
const api = new TestingBot({
api_key: "your-tb-key",
api_secret: "your-tb-secret"
});
const newUserData = {
first_name: 'new'
}
await api.updateUserInfo(newUserData);
Arguments:
- (string) **first\_name**
- (string) **last\_name**
Response:
{
"success" : true,
"user" : {
"first_name": "new",
"last_name": "King",
"seconds": 17745,
"last_login" : "2011-08-06T16:47:04Z"
}
}
## Get Team Info
If you are part of a team, you can fetch information regarding the team with this API call. The response will include the maximum allowed concurrency for both VM based testing and physical mobile device testing. Next to that, the response will include the current usage of the entire team, for both VM based testing and physical mobile device testing.
[cURL](https://testingbot.com#)[NodeJS](https://testingbot.com#)
$ curl "https://api.testingbot.com/v1/team-management" \
-u key:secret
const TestingBot = require('testingbot-api');
const api = new TestingBot({
api_key: "your-tb-key",
api_secret: "your-tb-secret"
});
const teamInfo = await api.getTeam();
Response:
{
"concurrency":{
"allowed":{
"vms": 10,
"physical": 2
},
"current":{
"vms": 4,
"physical": 1
}
}
}
## Get users in your team
Retrieve all users that are part of your team.
[cURL](https://testingbot.com#)[NodeJS](https://testingbot.com#)
$ curl "https://api.testingbot.com/v1/team-management/users" \
-u key:secret
const TestingBot = require('testingbot-api');
const api = new TestingBot({
api_key: "your-tb-key",
api_secret: "your-tb-secret"
});
const users = await api.getUsersInTeam();
Response:
{
"data":[
{
"id":337,
"first_name":"test",
"last_name":"user",
"seconds":12000,
"last_login":"2021-05-12T19:37:35.000Z",
"plan":"Free Trial",
"max_concurrent":2,
"max_concurrent_mobile":2,
"company":"",
"street":"",
"city":"",
"country":"",
"vat":null,
"read_only":false,
"roles":[],
"current_vm_concurrency":0,
"current_physical_concurrency":0
}
],
"meta":{
"offset":0,
"count":1,
"total":1
}
}
The `roles` field indicates if you have one of the roles in the team:
- ADMIN
- USER
## Retrieve a specific user in your team
Retrieve a specific user that is part of your team.
[cURL](https://testingbot.com#)[NodeJS](https://testingbot.com#)
$ curl "https://api.testingbot.com/v1/team-management/users/:id" \
-u key:secret
const TestingBot = require('testingbot-api');
const api = new TestingBot({
api_key: "your-tb-key",
api_secret: "your-tb-secret"
});
const user = await api.getUserFromTeam(userId);
Arguments:
- (string) **:id** - a unique string identifying the user
Response:
{
"id":337,
"first_name":"test",
"last_name":"user",
"seconds":12000,
"last_login":"2021-05-12T19:37:35.000Z",
"plan":"Free Trial",
"max_concurrent":2,
"max_concurrent_mobile":2,
"company":"",
"street":"",
"city":"",
"country":"",
"vat":null,
"read_only":false,
"roles":[],
"current_vm_concurrency":0,
"current_physical_concurrency":0
}
The `roles` field indicates if you have one of the roles in the team:
- ADMIN
## Create a user in your team
Adds a new user to your team. You can use this API call to add TestingBot accounts for colleagues or people in your team.
Usage of this API call requires an upgraded account and `ADMIN` role.
[cURL](https://testingbot.com#)[NodeJS](https://testingbot.com#)
$ curl -X POST -u -u key:secret \
https://api.testingbot.com/v1/team-management/users --header 'Content-Type: application/json' --data-raw '{
"first_name": "Bruno",
"last_name": "Mars",
"email": "bmars@gmail.com",
"password": "$bmaRs*RULES"
}'
const TestingBot = require('testingbot-api');
const api = new TestingBot({
api_key: "your-tb-key",
api_secret: "your-tb-secret"
});
const userData = {
'user[first_name]': 'John',
'user[last_name]': 'Doe',
'user[email]': 'john@example.com'
};
const result = await api.createUserInTeam(userData);
Arguments:
- (string) **:first\_name**
- (string) **:last\_name**
- (string) **:email**
- (string) **:password**
Response:
{
"id":337,
"first_name":"Bruno",
"last_name":"Mars",
"seconds":12000,
"last_login":"2021-05-12T19:37:35.000Z",
"plan":"Free Trial",
"max_concurrent":2,
"max_concurrent_mobile":2,
"company":"",
"street":"",
"city":"",
"country":"",
"vat":null,
"read_only":false,
"roles":[],
"current_vm_concurrency":0,
"current_physical_concurrency":0
}
## Update a user in your team
Updates details for a user in your team.
Usage of this API call requires an upgraded account and `ADMIN` role.
[cURL](https://testingbot.com#)[NodeJS](https://testingbot.com#)
$ curl -X PUT -u -u key:secret \
https://api.testingbot.com/v1/team-management/users/:id --header 'Content-Type: application/json' --data-raw '{
"first_name": "Bruno",
"last_name": "Mars",
"email": "bmars@gmail.com",
"password": "$bmaRs*RULES"
}'
const TestingBot = require('testingbot-api');
const api = new TestingBot({
api_key: "your-tb-key",
api_secret: "your-tb-secret"
});
const userData = {
'user[first_name]': 'Jane',
'user[last_name]': 'Smith'
};
const result = await api.updateUserInTeam(userId, userData);
Arguments:
- (string) **:id**
- (string) **:first\_name**
- (string) **:last\_name**
- (string) **:email**
- (string) **:password**
- (string) **:credits** - how many credits (in seconds) this user for running tests on VMs
- (string) **:device\_credits** - how many credits (in seconds) this user for running tests on physical devices
- (string) **:concurrency** - how many tests this user is able to run in parallel on VMs
- (string) **:concurrencyPhysical** - how many tests this user is able to run in parallel on physical devices
Response:
{
"id":337,
"first_name":"Bruno",
"last_name":"Mars",
"seconds":12000,
"last_login":"2021-05-12T19:37:35.000Z",
"plan":"Free Trial",
"max_concurrent":2,
"max_concurrent_mobile":2,
"company":"",
"street":"",
"city":"",
"country":"",
"vat":null,
"read_only":false,
"roles":[],
"current_vm_concurrency":0,
"current_physical_concurrency":0
}
## Reset credentials for a specific user in your team
This API call allows you to reset the secret credentials for a user in your team, which are required to connect to the TestingBot grid.
Usage of this API call requires an `ADMIN` role.
[cURL](https://testingbot.com#)[NodeJS](https://testingbot.com#)
$ curl -X POST -u -u key:secret \
https://api.testingbot.com/v1/team-management/users/:id/reset-keys'
const TestingBot = require('testingbot-api');
const api = new TestingBot({
api_key: "your-tb-key",
api_secret: "your-tb-secret"
});
const result = await api.resetCredentials(userId);
Arguments:
- (string) **:id**
Response:
{
"success":true,
"client_key":"d69e0800xc32ed2f059b7a630ee255b"
}
Only the `client_key` will be returned. The `client_secret` will also be reset, but will only be visible to the user in the member area.
## Retrieve your tests
Will return all the tests you have created together with details for every test. You can use the offset and count parameters to paginate your tests.
[cURL](https://testingbot.com#)[Ruby](https://testingbot.com#)[Python](https://testingbot.com#)[PHP](https://testingbot.com#)[Java](https://testingbot.com#)[NodeJS](https://testingbot.com#)
$ curl "https://api.testingbot.com/v1/tests?offset=0&count=10" \
-u key:secret
require 'testingbot'
api = TestingBot::Api.new(key, secret)
api.get_tests(0, 10)
TestingbotREST restApi = new TestingbotREST(key, secret);
TestingbotTest test = restApi.getTests(0, 10);
$api = new TestingBot\TestingBotAPI($key, $secret);
$api->getJobs(0, 10);
import testingbotclient
tb = testingbotclient.TestingBotClient(key, secret)
tb.tests.get_tests(offset=0, limit=10)
const TestingBot = require('testingbot-api');
const api = new TestingBot({
api_key: "your-tb-key",
api_secret: "your-tb-secret"
});
const tests = await api.getTests({ offset, limit });
Arguments:
- (int) **offset** (optional) (default 0) - paginate tests starting from this number
- (int) **count** (optional) (default 10, max 500) - number of tests to fetch
- (string) **group** (optional) - retrieve tests that belong to this group
- (string) **build** (optional) - retrieve tests that belong to this build
- (int) **browser\_id** (optional) - retrieve tests that ran with this browser\_id
- (string) **skip\_fields** (optional) - skip these fields. For example: ?skip\_fields=logs,thumbs
Response:
{
"data":[
{
"created_at":"2011-07-30T23:21:23Z",
"completed_at":"2011-07-30T23:22:44Z",
"extra":null,
"id":3,
"name":"MyTest::testTitle",
"session_id":"f7903f9e93e74fe1b0e924bf9d2ce9fc",
"status_message":"Failed asserting that 1 equals 0.",
"device_name": null,
"platform_name": null,
"status_id": 1,
"success":false,
"test_environment_id":1,
"thumbs":[],
"video":"https://s3.amazonaws.com/rectestingbot/sample.mp4",
"groups":["testingbot.com"],
"browser":"IE8",
"browser_version":8,
"os":"WINDOWS",
"duration":13,
"build":"buildid",
"logs":{"vm":"https://s3-eu-west-1.amazonaws.com/eulogtestingbot/session.txt"}
}
],
"meta":
{
"offset":2,
"count":3,
"total":789
}
}
Possible errors:
- 404 Not found - test not found
## Specific test info
This call will return info for one of your tests. In the example below, the response will contain info for a test with Selenium sessionId 3.
You can fetch all the various test sessionIds that belong to you by [fetching your tests](https://testingbot.com#tests).
[cURL](https://testingbot.com#)[Ruby](https://testingbot.com#)[Python](https://testingbot.com#)[PHP](https://testingbot.com#)[Java](https://testingbot.com#)[NodeJS](https://testingbot.com#)
$ curl "https://api.testingbot.com/v1/tests/:webdriver_session_id" -u key:secret
require 'testingbot'
api = TestingBot::Api.new(key, secret)
api.get_test(webdriver_session_id)
TestingbotREST restApi = new TestingbotREST(key, secret);
TestingbotTest test = restApi.getTest(String webdriver_session_id);
$api = new TestingBot\TestingBotAPI($key, $secret);
$api->getJob($webdriver_session_id);
import testingbotclient
tb = testingbotclient.TestingBotClient(key, secret)
tb.tests.get_test(webdriver_session_id)
const TestingBot = require('testingbot-api');
const api = new TestingBot({
api_key: "your-tb-key",
api_secret: "your-tb-secret"
});
const test = await api.getTestDetails(webdriver_session_id);
Arguments:
- (string) **:webdriver\_session\_id** - a unique string identifying your test (= Selenium sessionId)
- (string) **skip\_fields** (optional) - skip these fields. For example: ?skip\_fields=logs,thumbs
Response:
{
"created_at":"2011-07-30T23:21:23Z",
"completed_at":"2011-07-30T23:22:23Z",
"extra":null,
"id":3,
"name":"MyTest::testTitle",
"session_id":"f7903f9e93e74fe1b0e924bf9d2ce9fc",
"status_message":"Failed asserting that 1 equals 0.",
"device_name": null,
"platform_name": null,
"success":false,
"state":"COMPLETE",
"unknown":false,
"thumbs":["https://s3.amazonaws.com/euthumbtestingbot/3_f93782fji.jpg"],
"video":"https://s3.amazonaws.com/eurectestingbot/sample.mp4",
"logs": {"selenium":"https://s3-eu-west-1.amazonaws.com/eulogtestingbot/session.txt"},
"groups":["testingbot.com"],
"build": null,
"browser":"IE8",
"browser_version": 8,
"os":"VISTA",
"duration":60,
"type":"WEBDRIVER",
"assets_available": true,
"steps": [
{
"command":"/session",
"arguments":"{\"capabilities\":{\"alwaysMatch\":{\"browserName\":\"chrome\",\"version\":\"108\"},\"firstMatch\":[{}]},\"desiredCapabilities\":{\"platform\":\"WIN8\",\"browserName\":\"chrome\",\"version\":\"108\"}}",
"response":"cb7503d4b57a-1df17d3a749a-bb324331da31-167601846491-06317943",
"time":1676018469521
}
]
}
Possible errors:
- 404 Not found - test not found
## Update a test
This call will update a test. You can use this call to update the success status, add a name or extra data, ...
To update a specific test, pass its unique test ID or its Selenium session ID.
[cURL](https://testingbot.com#)[Ruby](https://testingbot.com#)[Python](https://testingbot.com#)[PHP](https://testingbot.com#)[Java](https://testingbot.com#)[NodeJS](https://testingbot.com#)
$ curl "https://api.testingbot.com/v1/tests/:webdriver_session_id" \
-X PUT \
-d "test[success]=1" \
-u key:secret
require 'testingbot'
api = TestingBot::Api.new(key, secret)
@api.update_test(webdriver_session_id, { :name => new_name, :success => true })
TestingbotREST restApi = new TestingbotREST(key, secret);
boolean success = restApi.updateTest(String webdriver_session_id, Map details);
$api = new TestingBot\TestingBotAPI($key, $secret);
$api->updateJob($webdriver_session_id, array('name' => 'mytest', 'success' => true));
import testingbotclient
tb = testingbotclient.TestingBotClient(key, secret)
tb.tests.update_test(webdriver_session_id, status_message=.., passed=1|0, build=.., name=..)
const TestingBot = require('testingbot-api');
const api = new TestingBot({
api_key: "your-tb-key",
api_secret: "your-tb-secret"
});
const testData = { "test[success]" : "1", "test[status_message]" : "test" };
await api.updateTest(testData, webdriver_session_id);
Arguments:
- (string) **id** - a unique string identifying your test (= Selenium sessionId, a UUID)
- (boolean) **test[success]** - indicating if the test was successful
- (string) **test[status\_message]** - the status/error message of your test
- (string) **test[name]** - the name of your test
- (string) **test[extra]** - extra data for this test
- (string) **groups=...,...** - a comma-separated string of groups for this test
- (string) **build=...** - what build this test belongs to
Response:
{
"success" : true
}
Possible errors:
- 404 Not found - test not found
## Delete test
Will delete a specific test, together with possible thumbnails. In the example below, we'll delete a test with id 3.
You can fetch all the various test ids that belong to you by [fetching your tests](https://testingbot.com#tests).
[cURL](https://testingbot.com#)[Ruby](https://testingbot.com#)[Python](https://testingbot.com#)[PHP](https://testingbot.com#)[Java](https://testingbot.com#)[NodeJS](https://testingbot.com#)
$ curl "https://api.testingbot.com/v1/tests/:webdriver_session_id" \
-X DELETE \
-u key:secret
require 'testingbot'
api = TestingBot::Api.new(key, secret)
api.delete_test(webdriver_session_id)
TestingbotREST restApi = new TestingbotREST(key, secret);
boolean success = restApi.deleteTest(String webdriver_session_id);
$api = new TestingBot\TestingBotAPI($key, $secret);
$api->deleteJob($webdriver_session_id);
import testingbotclient
tb = testingbotclient.TestingBotClient(key, secret)
tb.tests.delete_test(webdriver_session_id)
const TestingBot = require('testingbot-api');
const api = new TestingBot({
api_key: "your-tb-key",
api_secret: "your-tb-secret"
});
await api.deleteTest(webdriver_session_id);
Arguments:
- (string) **id** - a unique identifier identifying your test
Response:
{
"success":true
}
Possible errors:
- 404 Not found - test not found
## Stop test
Will terminate the running test job. This will end the test and mark the test as completed. Any test assets and metadata gathered will be available for download.
[cURL](https://testingbot.com#)[Ruby](https://testingbot.com#)[Python](https://testingbot.com#)[PHP](https://testingbot.com#)[Java](https://testingbot.com#)[NodeJS](https://testingbot.com#)
$ curl "https://api.testingbot.com/v1/tests/:session_id/stop" \
-X PUT \
-u key:secret
require 'testingbot'
api = TestingBot::Api.new(key, secret)
api.stop_test(session_id)
TestingbotREST restApi = new TestingbotREST(key, secret);
boolean success = restApi.stopTest(String session_id);
$api = new TestingBot\TestingBotAPI($key, $secret);
$api->stopJob($session_id);
import testingbotclient
tb = testingbotclient.TestingBotClient(key, secret)
tb.tests.stop_test(session_id)
const TestingBot = require('testingbot-api');
const api = new TestingBot({
api_key: "your-tb-key",
api_secret: "your-tb-secret"
});
await api.stopTest(webdriver_session_id);
Arguments:
- (string) **:session\_id** - a unique number identifying your test
Response:
{
"success":true
}
Possible errors:
- 404 Not found - test not found
## Retrieve all builds
Will retrieve all builds for your account. A build is a group of tests.
[cURL](https://testingbot.com#)[Ruby](https://testingbot.com#)[Python](https://testingbot.com#)[PHP](https://testingbot.com#)[Java](https://testingbot.com#)[NodeJS](https://testingbot.com#)
$ curl "https://api.testingbot.com/v1/builds?offset=0&count=10" \
-u key:secret
require 'testingbot'
api = TestingBot::Api.new(key, secret)
api.get_builds(0, 10)
TestingbotREST restApi = new TestingbotREST(key, secret);
TestingbotBuildCollection builds = restApi.getBuilds(int offset, int count);
$api = new TestingBot\TestingBotAPI($key, $secret);
$api->getBuilds(0, 10);
import testingbotclient
tb = testingbotclient.TestingBotClient(key, secret)
tb.build.get_builds(offset=0, limit=10)
const TestingBot = require('testingbot-api');
const api = new TestingBot({
api_key: "your-tb-key",
api_secret: "your-tb-secret"
});
const builds = await api.getBuilds(offset, limit);
Arguments:
- (int) **offset** (optional) (default 0) - paginate tests starting from this number
- (int) **count** (optional) (default 10, max 500) - number of tests to fetch
Response:
{
"data":[
{
"id" : 4331,
"build_identifier" : "first-build",
"created_at" : "2016-08-01T11:09:02.000Z",
"updated_at" : "2016-08-01T11:09:02.000Z"
}
],
"meta":{
"offset" : 0,
"count" : 10,
"total" : 3
}
}
## Tests for a build
Will return all tests for a single build.
[cURL](https://testingbot.com#)[Ruby](https://testingbot.com#)[Python](https://testingbot.com#)[PHP](https://testingbot.com#)[Java](https://testingbot.com#)[NodeJS](https://testingbot.com#)
$ curl "https://api.testingbot.com/v1/builds/:buildId" \
-u key:secret
require 'testingbot'
api = TestingBot::Api.new(key, secret)
api.get_build(build_identifier)
TestingbotREST restApi = new TestingbotREST(key, secret);
TestingbotTestBuildCollection tests = restApi.getTestsForBuild(String buildId);
$api = new TestingBot\TestingBotAPI($key, $secret);
$api->getBuild($buildId);
import testingbotclient
tb = testingbotclient.TestingBotClient(key, secret)
tb.build.get_tests_for_build(buildId)
const TestingBot = require('testingbot-api');
const api = new TestingBot({
api_key: "your-tb-key",
api_secret: "your-tb-secret"
});
const tests = await api.getTestsForBuild(buildId);
Arguments:
- (string) **buildId** - a unique string describing the build
Response:
{
"data":[
{
"created_at":"2011-07-30T23:21:23Z",
"completed_at":"2011-07-30T23:22:44Z",
"extra":null,
"id":3,
"name":"MyTest::testTitle",
"session_id":"f7903f9e93e74fe1b0e924bf9d2ce9fc",
"status_message":"Failed asserting that 1 equals 0.",
"success":false,
"thumbs":[],
"video":"https://s3.amazonaws.com/rectestingbot/sample.mp4",
"groups":["testingbot.com"],
"browser":"IE8",
"browser_version":8,
"os":"WINDOWS",
"duration":13,
"build":"buildid",
"logs":{"browser":"https://s3-eu-west-1.amazonaws.com/eulogtestingbot/session.txt"},
"assets_available": true
}
]
}
## Delete a build
Will delete a build. Does not delete the tests in the build.
[cURL](https://testingbot.com#)[Ruby](https://testingbot.com#)[Python](https://testingbot.com#)[PHP](https://testingbot.com#)[Java](https://testingbot.com#)[NodeJS](https://testingbot.com#)
$ curl "https://api.testingbot.com/v1/builds/:buildId" \
-X DELETE \
-u key:secret
require 'testingbot'
api = TestingBot::Api.new(key, secret)
api.delete_build(build_identifier)
TestingbotREST restApi = new TestingbotREST(key, secret);
TestingbotUser user = restApi.deleteBuild(String buildId);
$api = new TestingBot\TestingBotAPI($key, $secret);
$api->deleteBuild($buildId);
import testingbotclient
tb = testingbotclient.TestingBotClient(key, secret)
tb.build.delete_build(buildId)
const TestingBot = require('testingbot-api');
const api = new TestingBot({
api_key: "your-tb-key",
api_secret: "your-tb-secret"
});
await api.deleteBuild(buildId);
Arguments:
- (string) **buildId** - a unique string describing the build
Response:
{
"successs": true
}
## Retrieve all Devices
Will fetch all Real Mobile devices, including devices currently in use. The response will include all public devices, and private devices associated to your subscription (if any).
[cURL](https://testingbot.com#)[Ruby](https://testingbot.com#)[Python](https://testingbot.com#)[PHP](https://testingbot.com#)[Java](https://testingbot.com#)[NodeJS](https://testingbot.com#)
$ curl -u key:secret "https://api.testingbot.com/v1/devices"
require 'testingbot'
api = TestingBot::Api.new(key, secret)
api.get_devices()
TestingbotREST restApi = new TestingbotREST(key, secret);
TestingbotUser user = restApi.getDevices(int offset, int count);
$api = new TestingBot\TestingBotAPI($key, $secret);
$api->getDevices();
import testingbotclient
tb = testingbotclient.TestingBotClient(key, secret)
tb.information.get_devices()
const TestingBot = require('testingbot-api');
const api = new TestingBot({
api_key: "your-tb-key",
api_secret: "your-tb-secret"
});
const devices = await api.getDevices();
Response:
[{
"id":1,
"available":true,
"model_number":"SM-G950U1",
"resolution":"1080x2220",
"width":1080,
"height":2220,
"cpu":"Octa-core (4x2.3 GHz Mongoose M2 & 4x1.7 GHz Cortex-A53)",
"name":"Galaxy S8",
"platform_name":"Android",
"version":"9.0",
"multiple_browsers":[
{
"id":1727,
"name":"chrome",
"version":"103.0.5060.129"
},
{
"id":2133,
"name":"firefox",
"version":"98.2"
},
{
"id":2953,
"name":"samsung",
"version":"13.2.1.70"
},
{
"id":2954,
"name":"opera",
"version":"67.1"
}
]
},
{
"id":5,
"available":false,
"model_number":"MRY42B/A",
"resolution":"828x1792",
"width":828,
"height":1792,
"cpu":"ARM - Single-core - 2390Mhz",
"name":"iPhone XR",
"version":"16.3",
"platform_name":"iOS"
}]
## Retrieve all Available Devices
Will fetch all available Real Mobile devices. The response will include all public devices, and private devices associated to your subscription (if any).
[cURL](https://testingbot.com#)[Ruby](https://testingbot.com#)[Python](https://testingbot.com#)[PHP](https://testingbot.com#)[Java](https://testingbot.com#)[NodeJS](https://testingbot.com#)
% curl -u key:secret "https://api.testingbot.com/v1/devices/available"
require 'testingbot'
api = TestingBot::Api.new(key, secret)
api.get_available_devices()
TestingbotREST restApi = new TestingbotREST(key, secret);
TestingbotUser user = restApi.getAvailableDevices(int offset, int count);
$api = new TestingBot\TestingBotAPI($key, $secret);
$api->getAvailableDevices();
import testingbotclient
tb = testingbotclient.TestingBotClient(key, secret)
tb.information.get_available_devices()
const TestingBot = require('testingbot-api');
const api = new TestingBot({
api_key: "your-tb-key",
api_secret: "your-tb-secret"
});
const devices = await api.getAvailableDevices();
Response:
[{
"id":1,
"available":true,
"model_number":"SM-G950U1",
"resolution":"1080x2220",
"width":1080,
"height":2220,
"cpu":"Octa-core (4x2.3 GHz Mongoose M2 & 4x1.7 GHz Cortex-A53)",
"name":"Galaxy S8",
"platform_name":"Android",
"version":"9.0",
"multiple_browsers":[
{
"id":1727,
"name":"chrome",
"version":"103.0.5060.129"
},
{
"id":2133,
"name":"firefox",
"version":"98.2"
},
{
"id":2953,
"name":"samsung",
"version":"13.2.1.70"
},
{
"id":2954,
"name":"opera",
"version":"67.1"
}
]
},
{
"id":5,
"available":true,
"model_number":"MRY42B/A",
"resolution":"828x1792",
"width":828,
"height":1792,
"cpu":"ARM - Single-core - 2390Mhz",
"name":"iPhone XR",
"version":"16.3",
"platform_name":"iOS"
}]
## Device Detail
Retrieves details for a single device.
[cURL](https://testingbot.com#)[Ruby](https://testingbot.com#)[Python](https://testingbot.com#)[PHP](https://testingbot.com#)[Java](https://testingbot.com#)[NodeJS](https://testingbot.com#)
$ curl "https://api.testingbot.com/v1/devices/:id" \
-u key:secret
require 'testingbot'
api = TestingBot::Api.new(key, secret)
api.get_device(device_identifier)
TestingbotREST restApi = new TestingbotREST(key, secret);
TestingbotUser user = restApi.getDevice(int deviceId);
$api = new TestingBot\TestingBotAPI($key, $secret);
$api->getDevice($deviceId);
import testingbotclient
tb = testingbotclient.TestingBotClient(key, secret)
tb.information.get_device(deviceId)
const TestingBot = require('testingbot-api');
const api = new TestingBot({
api_key: "your-tb-key",
api_secret: "your-tb-secret"
});
const device = await api.getDevice(deviceId);
Arguments:
- (number) **id** - the numeric id retrieved from the [devices list](https://testingbot.com#devices).
Response:
{
"id":12,
"available":true,
"model_number":"E",
"resolution":"1440x3200",
"width":1440,
"height":3200,
"cpu":"ARM - Quad-core - 1593Mhz",
"name":"Galaxy S20",
"platform_name":"Android",
"version": "10.0",
"multiple_browsers":[
{"id":2598,"name":"chrome","version":"101"},
{"id":2919,"name":"firefox","version":"98.2"},
{"id":2957,"name":"samsung","version":"13.2.1.70"},
{"id":2958,"name":"opera","version":"67.1"}
]
}
## Take Screenshots
With this API call you can request TestingBot to take screenshots of a specific URL with the browsers you specify.
**Important:** Please specify the `application/json` Content-Type header and specify the post body as JSON.
[cURL](https://testingbot.com#)[NodeJS](https://testingbot.com#)
$ curl -H 'Content-Type: application/json' -X POST "https://api.testingbot.com/v1/screenshots" \
-u key:secret \
-d '{"url":"https://www.google.com", "resolution" : "1280x1024", "browsers" : [{ "browserName" : "chrome", "version" : 134, "os" : "WIN10"}, { "browserName" : "safari", "version" : "17.2", "platformName": "iOS", "deviceName" : "iPhone 15"}, { "browserName" : "chrome", "version" : "15.0", "platformName": "Android", "deviceName" : "Pixel 9"}]}'
const TestingBot = require('testingbot-api');
const api = new TestingBot({
api_key: "your-tb-key",
api_secret: "your-tb-secret"
});
const screenshots = await api.takeScreenshot(
'https://example.com',
[{ browserName: 'chrome', version: 'latest', os: 'WIN11' }],
'1920x1080'
);
Arguments:
- (string) **url** - the URL of the page you'd like to take screenshots of
- (string) **resolution** - the screenresolution of the OS:
- 800x600
- 1024x768
- 1280x960
- 1280x1024
- 1600x1200
- 1920x1200
- 2560x1440
Please see [the available screen resolutions](https://testingbot.com/support/web-automate/selenium/test-options#screenresolution) per platform.
- (string) **callback\_url** (optional) - when the screenshots are taken, we can send a JSON formatted post to the callback URL you specify. The JSON body will be identical to the response of the [Retrieve Screenshots API call](https://testingbot.com#retrievescreenshots)
- (boolean) **full\_page** (optional) - by default we take a screenshot of the viewport. If you'd like a screenshot of the entire page, set this to 'true'.
- (int) **wait\_time** (optional) (default 0) - the time (in seconds) to wait between page load and taking the screenshots
- (string) **browsers** - a list of browsers with keys:
- (string) **browserName** - the name of the browser (internet explorer, chrome, safari, firefox, ...)
- (string) **version** - the version of the browser you require
- (string) **os** - the OS where the test should run
- (string) **deviceName** - the device name (only for mobile devices)
- (string) **platformName** - the platform name (only for mobile devices: iOS or Android)
- (boolean) **realDevice** - set to true if you want a screenshot from a [physical device](https://testingbot.com/support/app-automate/devices)
Response:
{ "id" : 3454, "wait_time" : 0, "resolution" : "1280x1024", "url" : "https://www.google.com" }
## Retrieve Screenshots
Specify the id of the [take screenshot](https://testingbot.com#takescreenshots) call to query the progress of the screenshots.
[cURL](https://testingbot.com#)[NodeJS](https://testingbot.com#)
$ curl "https://api.testingbot.com/v1/screenshots/:id" -u key:secret
const TestingBot = require('testingbot-api');
const api = new TestingBot({
api_key: "your-tb-key",
api_secret: "your-tb-secret"
});
const screenshotResult = await api.retrieveScreenshots(screenshotJobId);
Arguments:
- (int) **id** - the id of the screenshot group
Response:
{
"state":"done",
"screenshots":[
{
"image_url":"https://....",
"thumb_url":"https://....",
"state":"done",
"id":"9c7deea4-6f23-4041-842b-39cccee447fa",
"created_at":"2017-10-13T14:47:44.000Z",
"os":"SEQUOIA",
"browser_name":"googlechrome",
"browser_version":"138",
"browser_id":1146,
"device_name":null,
"platform_name":""
}
]
}
- (string) **state** - represents the current state for screenshot job. Values can be:
- **processing** : Not all screenshots have been taken yet.
- **done** : All screenshots are available and can be accessed.
- **error** : Something went wrong while trying to take the screenshots.
- **stopped** : The process of taking the screenshots was stopped by manually clicking the 'stop' button in our UI.
- The screenshots object itself:
- (string) **image\_url** - location to the actual screenshot (png format)
- (string) **thumb\_url** - 100x100 thumb of the actual screenshot
- (string) **state** - represents the current state for the screenshot. Values can be:
- **processing** : The screenshot has not been taking yet, the test is either queued or running.
- **done** : The screenshot has been taken and has been uploaded to our cloud - you can now view the screenshot via **image\_url** or **thumb\_url**.
- **error** : Something went wrong while trying to take the screenshot.
- **stopped** : The process of taking the screenshot was stopped before a screenshot was taken. This can only be done by manually clicking the 'stop' button in our UI.
- (string) **id** - a unique identifier for this screenshot
## Screenshot history
Retrieves a list of previous screenshot jobs.
[cURL](https://testingbot.com#)[NodeJS](https://testingbot.com#)
$ curl "https://api.testingbot.com/v1/screenshots" -u key:secret
const TestingBot = require('testingbot-api');
const api = new TestingBot({
api_key: "your-tb-key",
api_secret: "your-tb-secret"
});
const screenshots = await api.getScreenshotList();
This will return a list of screenshot jobs. You can use the `id` of every job to fetch the [screenshots for this job](https://testingbot.com#retrievescreenshots).
Arguments:
- (int) **offset** (optional) (default 0) - paginate screenshot jobs starting from this number
- (int) **count** (optional) (default 10, max 500) - number of screenshot jobs to fetch
Response:
{
"data" : [
{
"id":3454,
"url":"https://google.com",
"resolution":"1280x1024"
},
{
"id":3452,
"url":"https://testingbot.com",
"resolution":"1280x1024"
},
{
"id":3451,
"url":"https://yahoo.com",
"resolution":"1280x1024"
}
],
"meta":{
"offset" : 0,
"count" : 3,
"total" : 3
}
}
## TestingBot Tunnel List
List of currently active [TestingBot Tunnels](https://testingbot.com/support/tunnel) for your account.
You can have up to **3 simultaneous tunnels** running with your account. By issuing a `DELETE` request you can delete/stop any of your tunnels.
[cURL](https://testingbot.com#)[Ruby](https://testingbot.com#)[Python](https://testingbot.com#)[PHP](https://testingbot.com#)[Java](https://testingbot.com#)[NodeJS](https://testingbot.com#)
$ curl "https://api.testingbot.com/v1/tunnel/list" \
-u key:secret
require 'testingbot'
api = TestingBot::Api.new(key, secret)
api.get_tunnels
TestingbotREST restApi = new TestingbotREST(key, secret);
ArrayList tunnels = restApi.getTunnels();
$api = new TestingBot\TestingBotAPI($key, $secret);
$api->getTunnels();
import testingbotclient
tb = testingbotclient.TestingBotClient(key, secret)
tb.tunnel.get_tunnels()
const TestingBot = require('testingbot-api');
const api = new TestingBot({
api_key: "your-tb-key",
api_secret: "your-tb-secret"
});
const tunnels = await api.getTunnelList();
Response:
[
{
"ip":"xx",
"private_ip":"xx",
"state":"READY",
"id":1,
"requested_at"=>"2013-04-23 01:34:23"
}
]
## TestingBot Tunnel Delete
Delete an active [TestingBot Tunnel](https://testingbot.com/support/tunnel) in your account.
Usually the tunnel jar will issue this call automatically when you gracefully exit the jar. You can also use this API call, which destroys the tunnel VM.
[cURL](https://testingbot.com#)[Ruby](https://testingbot.com#)[Python](https://testingbot.com#)[PHP](https://testingbot.com#)[Java](https://testingbot.com#)[NodeJS](https://testingbot.com#)
$ curl "https://api.testingbot.com/v1/tunnel/:id" \
-X DELETE \
-u key:secret
require 'testingbot'
api = TestingBot::Api.new(key, secret)
api.delete_tunnel(tunnel_identifier)
TestingbotREST restApi = new TestingbotREST(key, secret);
boolean success = restApi.deleteTunnel(String tunnelId);
$api = new TestingBot\TestingBotAPI($key, $secret);
$api->deleteTunnel($tunnelID);
import testingbotclient
tb = testingbotclient.TestingBotClient(key, secret)
tb.tunnel.delete_tunnel(tunnelId)
const TestingBot = require('testingbot-api');
const api = new TestingBot({
api_key: "your-tb-key",
api_secret: "your-tb-secret"
});
await api.deleteTunnel(tunnelId);
Response:
{
"success":true
}
## List Codeless tests
Will return a list of all your Codeless Automation tests.
[cURL](https://testingbot.com#)[NodeJS](https://testingbot.com#)
$ curl "https://api.testingbot.com/v1/lab" \
-u key:secret
const TestingBot = require('testingbot-api');
const api = new TestingBot({
api_key: "your-tb-key",
api_secret: "your-tb-secret"
});
const codelessTests = await api.getCodelessTests();
Arguments:
- (int) **offset** (optional) (default 0) - paginate tests starting from this number
- (int) **count** (optional) (default 10, max 500) - number of tests to fetch
Response:
{
"data":[
{
"id":215,
"enabled":false,
"alerts":[],
"url":"https://testingbot.com/",
"name":"testingbot",
"created_at":"2012-03-12T20:03:45Z",
"updated_at":"2012-03-13T20:26:43Z",
"last_run":"2012-03-13T06:50:48Z",
"browsers":[
{"name":"firefox","version":10,"os":"LINUX"}
]
}],
"meta":
{
"offset":2,
"count":3,
"total":25
}
}
## Specific Codeless test info
This call will return info for a specific Codeless test. In the example below, the response will contain info for a test with id 215.
$ curl "https://api.testingbot.com/v1/lab/215" \
-u key:secret
Arguments:
- (int) **id** - a unique identifier identifying your test in the TestLab
Response:
{
"id":215,
"enabled":false,
"alerts":[],
"url":"https://testingbot.com/",
"name":"testingbot",
"created_at":"2012-03-12T20:03:45Z",
"updated_at":"2012-03-13T20:26:43Z",
"last_run":"2012-03-13T06:50:48Z",
"browsers":[
{"name":"firefox","version":10,"os":"LINUX"}
]
}
Possible errors:
- 404 Not found - codeless test not found
## Create a Codeless Test
Create a Codeless Test
[cURL](https://testingbot.com#)[NodeJS](https://testingbot.com#)
$ curl -X POST "https://api.testingbot.com/v1/lab" \
-u key:secret -d "test[name]=test" -d "test[cron]=31 * * * *"
const TestingBot = require('testingbot-api');
const api = new TestingBot({
api_key: "your-tb-key",
api_secret: "your-tb-secret"
});
const testData = {
name: 'My Codeless Test', // Required: Test name
url: 'https://example.com', // Required: URL to test
ai_prompt: 'Test the login flow', // AI test agent prompt
cron: '0 0 * * *', // Optional: Cron schedule
screenshot: true, // Optional: Take screenshots
video: false, // Optional: Record video
idletimeout: 60, // Optional: Idle timeout in seconds
screenresolution: '1920x1080', // Optional: Screen resolution
};
const result = await api.createCodelessTest(testData);
Arguments:
- (string) **test[name]** - name of the test **\* required argument**
- (string) **test[url]** - url to test **\* required argument**
- (string) **test[cron]** - cron format, when to run the test
- (boolean) **test[screenshot]** - take screenshots
- (boolean) **test[video]** - record video
- (int) **test[idletimeout]** - how long we keep a test open without receiving a request
- (string) **test[screenresolution]** - screenresolution of the OS
- (string) **test[ai\_prompt]** - the prompt to tell the [AI test agent](https://testingbot.com/support/ai/codeless) what to test. Indicate in your own language what should be tested.
### Upload .side file
You can upload a `.side` file, generated with [Selenium IDE](https://testingbot.com/support/web-automate/codeless-automation/add-test), to the TestingBot REST-API to immediately create a test and upload all steps from the file.
$ curl -X POST "https://api.testingbot.com/v1/lab" \
-u key:secret -F "test[name]=test" -F "test[cron]=31 * * * *" -F "file=@/Users/{yourName}/example.side"
Arguments:
- (string) **test[name]** - name of the test **\* required argument**
- (File) **filepath** - to the `.side` file on your machine **\* required argument**
- (string) **test[cron]** - cron format, when to run the test
Response:
[{"success":true, "lab_test_id": 59392}]
## Delete Codeless test
This call will delete a specific Codeless test.
[cURL](https://testingbot.com#)[NodeJS](https://testingbot.com#)
$ curl "https://api.testingbot.com/v1/lab/215" \
-X DELETE \
-u key:secret
const TestingBot = require('testingbot-api');
const api = new TestingBot({
api_key: "your-tb-key",
api_secret: "your-tb-secret"
});
const result = await api.deleteCodelessTest(testId);
Arguments:
- (string) **id** - a unique identifier identifying your test in the TestLab
Response:
{
"success":true
}
Possible errors:
- 404 Not found - codeless test not found
## Update Codeless test
This call will update a specific Codeless test.
[cURL](https://testingbot.com#)[NodeJS](https://testingbot.com#)
$ curl "https://api.testingbot.com/v1/lab/215" \
-X PUT \
-d "test[cron]=* * * * *" \
-u key:secret
const TestingBot = require('testingbot-api');
const api = new TestingBot({
api_key: "your-tb-key",
api_secret: "your-tb-secret"
});
const updateData = {
test: {
name: 'Updated Test Name',
cron: '0 12 * * *'
}
};
const result = await api.updateCodelessTest(updateData, testId);
Arguments:
- (string) **id** - a unique identifier identifying your test in the TestLab
- (string) **url**
- (string) **name**
- (string) **cron**
- (boolean) **enabled**
Response:
{
"success":true
}
Possible errors:
- 404 Not found - codeless test not found
## Schedule Codeless Test
Add or update the Codeless Test Schedule. You can schedule when/at which interval a test should be run.
$ curl "https://api.testingbot.com/v1/lab/215/schedule" \
-X POST \
-d "type=once" \
-d "day=2020-03-01" \
-d "hour=00:00" \
-u key:secret
Arguments:
- (string) **type** once, daily, weekly, custom (cron format)
- (string) **day** 2020-03-01 for example (to be used with 'once' or 'weekly')
- (string) **hour** 00:01 for example (to be used with 'once', 'daily' or 'weekly')
- (string) **cronFormat** \*/5 \* \* \* \* for example ([cron format](https://en.wikipedia.org/wiki/Cron))
Response:
{
"success":true
}
Possible errors:
- 404 Not found - codeless test not found
The callback URL will receive these (post data) parameters:
'success' => success (boolean),
'job_id' => job_id,
'test_ids[]' => [test_ids],
'session_ids[]' => [session_ids]
'errors[]' => json encoded errors
## Codeless Test Alert
Add or update the Codeless Test Alert. You can receive an alert via e-mail, Webhook or SMS message.
$ curl "https://api.testingbot.com/v1/lab/215/alert" \
-X POST (or PUT for update) \
-d "kind=EMAIL" \
-d "level=IMMEDIATELY" \
-d "content=my@email.com" \
-u key:secret
Arguments:
- (string) **kind** EMAIL, API or SMS
- (string) **level** IMMEDIATELY or DAILY
- (string) **content** the email address, telephone number or callback URL
Response:
{
"success":true
}
Possible errors:
- 404 Not found - codeless test not found
The callback URL will receive these (post data) parameters:
'success' => success (boolean),
'job_id' => job_id,
'test_ids[]' => test_ids
'errors[]' => json encoded errors
## Codeless Test Report
Add or update the Codeless Test Report setting. You can receive a daily report about your test success/fail rate.
$ curl "https://api.testingbot.com/v1/lab/215/report" \
-X POST (or PUT for update) \
-d "email=my@email.com" \
-d "cron=*/5 * * * *" \
-u key:secret
Arguments:
- (string) **email** the email address to contact
- (string) **cron** a [cron format](https://en.wikipedia.org/wiki/Cron)
Response:
{
"success":true
}
Possible errors:
- 404 Not found - codeless test not found
## Modify Test Steps
Update the steps for this test. Will remove all steps and add the steps you specify.
$ curl "https://api.testingbot.com/v1/lab/215/steps" \
-X POST \
-d "steps[][cmd]=open" \
-d "steps[][locator]=/" \
-d "steps[][value]=" \
-d "steps[][order]=0" \
-u key:secret
Arguments:
- (string) **step[cmd]** - Selenium RC command
- (int) **step[order]** - Define where this step should be located in the list of steps
- (string) **step[locator]** - Selenium RC locator
- (string) **step[value]** - Selenium RC value
Response:
{
"success":true
}
Possible errors:
- 404 Not found - codeless test not found
## List Test Steps
This will return all steps for a specific Codeless Test.
$ curl -u key:secret "https://api.testingbot.com/v1/lab/215/steps"
Arguments:
- (int) **offset** (optional) (default 0) - paginate steps starting from this number
- (int) **count** (optional) (default 10, max 500) - number of steps to fetch
Response:
{
"data": [{
"test_order": 0,
"cmd": "open",
"locator": "/",
"value": "",
"created_at": "2019-05-02T14:33:48.000Z",
"updated_at": "2019-05-02T14:33:48.000Z"
},
{
"test_order": 1,
"cmd": "type",
"locator": "id=username",
"value": "test",
"created_at": "2019-05-02T14:33:48.000Z",
"updated_at": "2019-05-02T14:33:48.000Z"
},
{
"test_order": 2,
"cmd": "type",
"locator": "id=password",
"value": "test",
"created_at": "2019-05-02T14:33:48.000Z",
"updated_at": "2019-05-02T14:33:48.000Z"
}
],
"meta": {
"offset": 0,
"count": 3,
"total": 3
}
}
Possible errors:
- 404 Not found - codeless test not found
## Get Browsers for Test
Retrieve what browsers this Codeless Test will run on.
$ curl "https://api.testingbot.com/v1/lab/:suiteId/browsers" \
-u key:secret
Arguments:
- (int) **suiteId** - unique Id for this suite
Response:
[{"name":"firefox","version":"41","os":"VISTA"}]
## Update Browsers for Test
Update a Codeless Test, indicate on which browsers the test should run. This call will override all existing browsers attached to this test.
$ curl -X POST "https://api.testingbot.com/v1/lab/:suiteId/browsers" \
-u key:secret -d "browser_ids=515,518
Arguments:
- (int) **suiteId** - unique Id for this suite
- (string) **browser\_ids** - (comma-separated list) - list of all browser\_ids to add to this test
You can get the browser\_ids by using the **List of browsers** call and use the browser\_ids in that response.
Response:
{"success":true}
## Run a specific Codeless test
This call will run a specific Codeless test on our grid. Upload a Selenium test in our TestLab, indicate on which browsers you want it to run and then run the test with this API call.
You could use this call to run tests when you wish, for example before/after deployment of your code. Since this call is asynchronously (test takes too long to be processed during the API call), you need to specify an API callback page in the alert section of your Codeless test.
This call will return a success state and a job\_id, which you can use to [query the progress](https://testingbot.com#testjob) of the test.
$ curl "https://api.testingbot.com/v1/lab/215/trigger" \
-X POST \
-d "" \
-u key:secret
Arguments:
- (int) **testid** - a unique number identifying your test in the TestLab
- (string) **url** (optional) - change the baseURL for this test
Response:
{
"success":true,
"job_id" : 14
}
Possible errors:
- 404 Not found - codeless test not found
## Stop a specific Codeless test
This call will stop a specific Codeless test currently running on our grid.
As soon as we receive this call, we will no longer continue running the remaining steps in the running Codeless test.
$ curl "https://api.testingbot.com/v1/lab/:testid/stop" \
-X PUT \
-u key:secret
Arguments:
- (int) **testid** - a unique number identifying your test in the TestLab
- (int) **browser\_id** (optional) - a browser\_id to only stop the test for this browser
Response:
{
"success":true
}
Possible errors:
- 404 Not found - codeless test not found
## Run all Codeless tests
This call will run all Codeless tests on our grid.
This call will return a success state and a job\_id, which you can use to [query the progress](https://testingbot.com#testjob) of the tests.
$ curl "https://api.testingbot.com/v1/lab/trigger_all" \
-X POST \
-d "" \
-u key:secret
Arguments:
- (string) **url** (optional) - change the baseURL for this test
Response:
{
"success":true,
"job_id" : 14
}
## Test Job
This call will return the status of a running test or suite, initiated by an API call.
$ curl "https://api.testingbot.com/v1/jobs/:jobId" \
-u key:secret
Arguments:
- (int) **:jobId** - a unique number identifying your job
Response:
{
"status":"FINISHED",
"created_at":"2016-04-15T13:47:39.000Z",
"updated_at":"2016-04-15T13:49:30.000Z",
"success":false,
"test_ids":[
6620446
],
"errors":[
{
"msg":"Actual value 'Google' did not match 'Goooogle'",
"step":"verifyTitle",
"browser":{
"name":"firefox",
"version":"43",
"os":"VISTA"
},
"time":"2016-04-15T13:48:25.839Z",
"test":6620446
}
]
}
The various states are: `WAITING`, `RUNNING` and `FINISHED`.
Possible errors:
- 404 Not found - job not found
## Webhook
If you initiated an API call running one or all tests, you will want to know the results of the test(s).
We post the result of the test(s) back to the location you specified in our TestLab (alerts section).
Sample post data:
{
"success":"false",
"errors":[
{
"msg" : "word Not found",
"step" : "verifyTextPresent",
"browser" : {
"name" : "iexplore",
"version" : "8",
"os" : "WINDOWS"
},
"time" : "2012-03-13 20:34:59 UTC",
"test_id" : "48586",
"job_id": 17,
"lab_id" : 133
}
],
"job_id":3,
"test_ids":[48586]
}
{
"success":"true",
"test_ids":[48586, 48587],
"job_id":3
}
## List Codeless Suites
Get a list of all Lab Suites currently available for your account in the TestLab.
$ curl "https://api.testingbot.com/v1/labsuites?offset=0&count=10" \
-u key:secret
Arguments:
- (int) **offset** (optional) (default 0) - paginate suites starting from this number
- (int) **count** (optional) (default 10, max 500) - number of suites to fetch
Response:
{
"data": [
{
"id": 1051,
"enabled": true,
"alerts": [
{
"type": "API",
"value": "https:\/\/mysite.com\/callback\/",
"level": "IMMEDIATELY"
}
],
"name": "Example",
"created_at": "2017-03-07T19:11:41.000Z",
"updated_at": "2017-03-09T12:17:22.000Z",
"last_run": "2017-03-09T12:17:22.000Z",
"cron": null,
"browsers": [
{
"name": "firefox",
"version": "41",
"os": "VISTA"
}
],
"test_count": 5
}
],
"meta": {
"offset": 0,
"count": 10,
"total": 1
}
}
## Get Codeless Suite Details
Get information about a specific Codeless Suite.
$ curl "https://api.testingbot.com/v1/labsuites/:suiteId" \
-u key:secret
Arguments:
- (int) **suiteId** - unique Id for this suite
Response:
{
"enabled": true,
"alerts": [
{
"type": "API",
"value": "https:\/\/mysite.com\/callback\/",
"level": "IMMEDIATELY"
}
],
"name": "Example",
"created_at": "2017-03-07T19:11:41.000Z",
"updated_at": "2017-03-09T12:17:22.000Z",
"last_run": "2017-03-09T12:17:22.000Z",
"cron": null,
"test_count": 5
}
## Run a specific Codeless suite
This call will run a specific TestLab suite on our grid. Upload a Selenium suite in our TestLab, indicate on which browsers you want it to run and then run the suite with this API call.
You could use this call to run suites when you wish, for example before/after deployment of your code. Since this call is asynchronously (suite takes too long to be processed during the API call), you need to specify an API callback page in the alert section of your TestLab suite.
This call will return a success state and a job\_id, which you can use to [query the progress](https://testingbot.com#testjob) of the test.
$ curl "https://api.testingbot.com/v1/labsuites/:suiteId/trigger" \
-X POST \
-d "" \
-u key:secret
Arguments:
- (int) **:suiteId** - a unique number identifying your suite in the TestLab
Response:
{
"success":true,
"job_id" : 14
}
Possible errors:
- 404 Not found - codeless test not found
## Create a Codeless Suite
Create a Codeless test suite.
$ curl -X POST "https://api.testingbot.com/v1/labsuites" \
-u key:secret -d "suite[name]=test" -d "suite[cron]=31 * * * *"
Arguments:
- (string) **suite[name]** - name of the suite.
- (string) **suite[cron]** - cron format, when to run the suite.
- (boolean) **suite[screenshot]** - take screenshots for every step.
- (boolean) **suite[video]** - record video of this test.
- (int) **suite[idletimeout]** - how long before we consider a test to be idle.
- (string) **suite[screenresolution]** - screenresolution of the OS.
Response:
[{"success":true, "suite_id": 59391}]
## Delete a Codeless Suite
Delete a Codeless suite.
$ curl -X DELETE "https://api.testingbot.com/v1/labsuites/:suiteId" \
-u key:secret
Arguments:
- (int) **suiteId** - unique Id for this suite
Response:
{"success":true}
## Get Browsers for Codeless Suite
Retrieve what browsers this Codeless Suite will run on.
$ curl "https://api.testingbot.com/v1/labsuites/:suiteId/browsers" \
-u key:secret
Arguments:
- (int) **suiteId** - unique Id for this suite
Response:
[{"name":"firefox","version":"41","os":"VISTA"}]
## Update Browsers for Codeless Suite
Update a Codeless Suite, indicate on which browsers the suite should run. This call will override all existing browsers attached to this suite.
$ curl -X POST "https://api.testingbot.com/v1/labsuites/suiteId/browsers" \
-u key:secret -d "browser_ids=515,518
Arguments:
- (int) **suiteId** - unique Id for this suite
- (string, comma-separated list) **browser\_ids** - list of all browser\_ids to add to this suite
You can get the browser\_ids by using the [List of browsers](https://testingbot.com#browsers) call and use the browser\_ids in that response.
Response:
{"success":true}
## Get Tests for a Codeless Suite
Retrieves all tests in this Suite.
$ curl "https://api.testingbot.com/v1/labsuites/:suiteId/tests" \
-u key:secret
Arguments:
- (int) **suiteId** - unique Id for this suite
- (int) **offset** (optional) (default 0) - paginate tests starting from this number
- (int) **count** (optional) (default 10, max 500) - number of tests to fetch
Response:
{
"data": [
{
"id": 18666,
"enabled": true,
"alerts": [],
"url": "https:\/\/mysite.com\/",
"name": "MyTest",
"created_at": "2017-03-09T12:14:48.000Z",
"updated_at": "2017-03-09T12:19:30.000Z",
"last_run": "2017-03-09T12:19:30.000Z",
"cron": null,
"browsers": [
{
"name": "firefox",
"version": "41",
"os": "VISTA"
}
]
}
],
"meta": {
"offset": 0,
"count": 1,
"total": 1
}
}
## Add Tests to a Codeless Suite
Add one or more tests to this suite.
$ curl -X POST "https://api.testingbot.com/v1/labsuites/:suiteId/tests" \
-u key:secret -d "test_ids=3,4"
Arguments:
- (int) **suiteId** - unique Id for this suite
- (string, comma-separated) **test\_ids** - comma-separated list of test\_ids to add to this suite.
Response:
{"success": true}
Possible errors:
- 404 Not found - suite not found
- 400 Bad request - missing test\_ids parameter
## Remove Tests from a Codeless Suite
Remove a test from a Test Suite.
$ curl -X DELETE "https://api.testingbot.com/v1/labsuites/:suiteId/tests/:testId" \
-u key:secret
Arguments:
- (int) **suiteId** - unique Id for this suite
- (int) **testsId** - unique Id for the test in the suite
Response:
{"success": true}
Possible errors:
- 404 Not found - suite not found
## TestingBot Storage - Upload File
TestingBot Storage makes it easy to upload a file you want to include during your test(s). You can use this functionality to test your Android (.apk/.aab) or iOS app (.zip/.ipa), or to [download and run before a test starts](https://testingbot.com/support/web-automate/selenium/test-options#prerun).
Files uploaded to TestingBot Storage are automatically pruned after 62 days. You can also delete the file manually be using the Delete API call.
[cURL](https://testingbot.com#)[Ruby](https://testingbot.com#)[Python](https://testingbot.com#)[PHP](https://testingbot.com#)[Java](https://testingbot.com#)[NodeJS](https://testingbot.com#)
$ curl -X POST "https://api.testingbot.com/v1/storage" \
-u key:secret -F "file=@/path/to/app/file/Application-debug.apk"
require 'testingbot'
api = TestingBot::Api.new(key, secret)
api.upload_local_file(localFilePath)
TestingbotREST restApi = new TestingbotREST(key, secret);
TestingbotStorageUploadResponse uploadResponse = restApi.uploadToStorage(File file);
$api = new TestingBot\TestingBotAPI($key, $secret);
$api->uploadLocalFileToStorage($pathToLocalFile);
import testingbotclient
tb = testingbotclient.TestingBotClient(key, secret)
tb.storage.upload_local_file(localFilePath)
const TestingBot = require('testingbot-api');
const api = new TestingBot({
api_key: "your-tb-key",
api_secret: "your-tb-secret"
});
api.uploadFile(localFilePath, function(error, response) {
// response.app_url
});
Response:
{"app_url": "tb://398eijf83i"}
The `app_url` will be a random string. If you'd like to use your own name, for example because you don't want to keep updating your test scripts each time you add a new app version, then please see below:
**Specify your own app name:**
$ curl -X POST "https://api.testingbot.com/v1/storage/your_name" \
-u key:secret -F "file=@/path/to/app/file/Application-debug.apk"
Response:
{"app_url": "tb://your_name"}
Instead of uploading a file from your computer to TestingBot storage, you can also pass an URL where we should download your app:
[cURL](https://testingbot.com#)[Ruby](https://testingbot.com#)[Python](https://testingbot.com#)[PHP](https://testingbot.com#)[Java](https://testingbot.com#)[NodeJS](https://testingbot.com#)
$ curl -X POST "https://api.testingbot.com/v1/storage" \
-u key:secret -d "url=https://...."
require 'testingbot'
api = TestingBot::Api.new(key, secret)
api.upload_remote_file(remoteFileUrl)
TestingbotREST restApi = new TestingbotREST(key, secret);
TestingbotStorageUploadResponse uploadResponse = restApi.uploadToStorage(String fileUrl);
$api = new TestingBot\TestingBotAPI($key, $secret);
$api->uploadRemoteFileToStorage($urlToRemoteFile);
import testingbotclient
tb = testingbotclient.TestingBotClient(key, secret)
tb.storage.upload_remote_file(localFilePath)
const TestingBot = require('testingbot-api');
const api = new TestingBot({
api_key: "your-tb-key",
api_secret: "your-tb-secret"
});
api.uploadFile(remoteFileUrl, function(error, response) {
// response.app_url
});
Uploads to our TestingBot Storage are automatically deleted after 62 days.
We've got an example on how to upload a file with Java at our [App Automate Java GitHub Repository](https://github.com/testingbot/app-automate-java).
## TestingBot Storage - Update File
If you want to update a file you already uploaded, please use this API call.
Use the `app_url` you received from the original file upload, without the `tb://` scheme.
[cURL](https://testingbot.com#)[NodeJS](https://testingbot.com#)
$ curl -X POST "https://api.testingbot.com/v1/storage/{app_url}" \
-u key:secret -F "file=@/path/to/app/file/Application-debug.apk"
const TestingBot = require('testingbot-api');
const api = new TestingBot({
api_key: "your-tb-key",
api_secret: "your-tb-secret"
});
const appUrl = await api.uploadFile(localFilePath);
Response:
{"app_url": "tb://398eijf83i"}
In the example above, if your `app_url` was `tb://my-file` you would use the URL `https://api.testingbot.com/v1/storage/my-file`
## TestingBot Storage - Uploaded File Data
Retrieve various meta data from a previously uploaded file.
Use the `app_url` you received from the original file upload.
[cURL](https://testingbot.com#)[Ruby](https://testingbot.com#)[Python](https://testingbot.com#)[PHP](https://testingbot.com#)[Java](https://testingbot.com#)[NodeJS](https://testingbot.com#)
$ curl "https://api.testingbot.com/v1/storage/:app_url" \
-u key:secret
require 'testingbot'
api = TestingBot::Api.new(key, secret)
api.get_uploaded_file(app_url)
TestingbotREST restApi = new TestingbotREST(key, secret);
TestingBotStorageFile storedFile = restApi.getStorageFile(String appUrl);
$api = new TestingBot\TestingBotAPI($key, $secret);
$api->getStorageFile($appUrl);
import testingbotclient
tb = testingbotclient.TestingBotClient(key, secret)
tb.storage.get_stored_file(app_url)
const TestingBot = require('testingbot-api');
const api = new TestingBot({
api_key: "your-tb-key",
api_secret: "your-tb-secret"
});
await api.getStorageFile(appUrl);
Response:
{
"app_url":"tb://0ec522702cd81ec1374e9b3c",
"url":"http://...",
"id":261,
"type":"ANDROID",
"filename":"sample.apk",
"version":"1.0.1",
"min_device_version": "12.0",
"thumb":"https://...image.png",
"created_at":"2019-03-08T08:58:32.000Z"
}
## TestingBot Storage - Upload Files List
This API call will return a list of files you or your team members have previously uploaded.
The Response will contain a `url` parameter which is a signed URL you can use for up to 4 hours.
[cURL](https://testingbot.com#)[Ruby](https://testingbot.com#)[Python](https://testingbot.com#)[PHP](https://testingbot.com#)[Java](https://testingbot.com#)[NodeJS](https://testingbot.com#)
$ curl "https://api.testingbot.com/v1/storage/"
require 'testingbot'
api = TestingBot::Api.new(key, secret)
api.get_uploaded_files(offset = 0, count = 30)
TestingbotREST restApi = new TestingbotREST(key, secret);
TestingBotStorageFileCollection fileList = restApi.getStorageFiles(int offset, int count);
$api = new TestingBot\TestingBotAPI($key, $secret);
$api->getStorageFiles();
import testingbotclient
tb = testingbotclient.TestingBotClient(key, secret)
tb.storage.get_stored_files(offset=0, limit=30)
const TestingBot = require('testingbot-api');
const api = new TestingBot({
api_key: "your-tb-key",
api_secret: "your-tb-secret"
});
const files = await api.getStorageFiles(offset, count);
Response:
[{
"app_url":"tb://....",
"url":".....",
"id":44,
"type":"ANDROID",
"filename":"sample.apk",
"version":"1.0.1",
"min_device_version": "23",
"thumb":"https://...image.png",
"created_at":"2019-01-08T13:42:42.000Z"
}]
## TestingBot Storage - Delete a file from Storage
Delete a file previously uploaded to TestingBot Storage.
Use the `app_url` parameter of the file you wish to delete, for example from `tb://398eijf83i`.
[cURL](https://testingbot.com#)[Ruby](https://testingbot.com#)[Python](https://testingbot.com#)[PHP](https://testingbot.com#)[Java](https://testingbot.com#)[NodeJS](https://testingbot.com#)
$ curl -X DELETE "https://api.testingbot.com/v1/storage/398eijf83i"
require 'testingbot'
api = TestingBot::Api.new(key, secret)
api.delete_uploaded_file(file_identifier)
TestingbotREST restApi = new TestingbotREST(key, secret);
boolean success = restApi.deleteStorageFile(String appUrl);
$api = new TestingBot\TestingBotAPI($key, $secret);
$api->deleteStorageFile($appUrl);
import testingbotclient
tb = testingbotclient.TestingBotClient(key, secret)
tb.storage.remove_file(appUrl)
const TestingBot = require('testingbot-api');
const api = new TestingBot({
api_key: "your-tb-key",
api_secret: "your-tb-secret"
});
const success = await api.deleteStorageFile(fileId);
Response:
{"success": true}
## IP Ranges for whitelisting
If you would like to whitelist the IPs that are used by the TestingBot machines, you can use the API call below to fetch an up-to-date list.
[cURL](https://testingbot.com#)
$ curl "https://api.testingbot.com/v1/configuration/ip-ranges"
Response:
["109.68.162.161","109.68.162.165","78.20.187.211","162.55.135.22","95.217.83.184","95.216.39.110","65.21.76.124","95.216.229.109","142.132.137.7"]
## Share Test Result
You can easily share a single test result with someone in a safe way, without the other person needing an account.
To share a test result, you'll need to create the following url: https://testingbot.com/tests/ **sessionId**?auth= **authentication-hash**
The sessionId is the ID assigned by the Selenium grid to identify a single test. You can find this sessionId in your logs when running a test.
The authentication hash is created with md5 in the following format:
Digest::MD5.hexdigest("#{client_key}:#{client_secret}#{session_id}")
[Ruby](https://testingbot.com#)[Python](https://testingbot.com#)[PHP](https://testingbot.com#)[Java](https://testingbot.com#)[NodeJS](https://testingbot.com#)
require 'testingbot'
api = TestingBot::Api.new(key, secret)
api.get_authentication_hash(identifier)
TestingbotREST restApi = new TestingbotREST(key, secret);
String hash = restApi.getAuthenticationHash(String identifier);
$api = new TestingBot\TestingBotAPI($key, $secret);
$api->getAuthenticationHash($identifier);
import testingbotclient
tb = testingbotclient.TestingBotClient(key, secret)
tb.get_share_link(identifier)
const TestingBot = require('testingbot-api');
const api = new TestingBot({
api_key: "your-tb-key",
api_secret: "your-tb-secret"
});
const hash = api.getAuthenticationHashForSharing(identifier);
An example link would then be: https://testingbot.com/tests/9jf392fj3j2f3ojid8?auth=230i439uf3fojf
## Share Test Build
With TestingBot, it is possible to group several tests under one build identifier. In our member area, you can then see all the tests grouped by builds.
To link directly to a build overview, please see this example: https://testingbot.com/builds/ **build-identifier**?auth= **authentication-hash** &key= **key**
To generate the authentication-hash, you must concatenate key, secret and build\_identifier and take the MD5 hash:
Digest::MD5.hexdigest("#{client_key}:#{client_secret}#{build-identifier}")
The build-identifier is the custom string you can [send as an option](https://testingbot.com/support/web-automate/selenium/test-options#build) to group several tests.
---
URL: https://testingbot.com/support/k6-browser-testing
# k6 Browser Testing
k6 is an open-source tool designed to do easy load testing against websites. With the [k6 browser module](https://grafana.com/docs/k6/latest/using-k6-browser/), you can connect to a CDP-compatible browser grid such as TestingBot. Simply configure your k6 test to use the TestingBot grid, and instantly get access to a high capacity cloud of browsers.
With this integration, you can run tests in parallel, targeting different browsers, versions and operating systems. Each test comes with logs, screenshots and a video.
## Setup
To get started, please make sure you [install k6](https://k6.io/docs/get-started/installation/).
### macOS
brew install k6
### Windows
winget install k6 --source winget
### Linux
sudo gpg -k
sudo gpg --no-default-keyring --keyring /usr/share/keyrings/k6-archive-keyring.gpg --keyserver hkp://keyserver.ubuntu.com:80 --recv-keys C5AD17C747E3415A3642D57D77C6C491D6AC1D69
echo "deb [signed-by=/usr/share/keyrings/k6-archive-keyring.gpg] https://dl.k6.io/deb stable main" | sudo tee /etc/apt/sources.list.d/k6.list
sudo apt-get update
sudo apt-get install k6
## Example
Next, let's run a sample browser test using k6 on the TestingBot browser grid. Please see the example below.
To connect to the TestingBot CDP grid, you will need to specify a `K6_BROWSER_WS_URL` environment variable. This needs to contain the URL to the TestingBot grid, together with the credentials and (url-encoded) capabilities.
K6_BROWSER_WS_URL="wss://cloud.testingbot.com/?key=...&secret=...&capabilities=%7B%22browserName%22%3A%22chrome%22%2C%22browserVersion%22%3A%22latest%22%7D"
To run the example below, you can use the following command in your terminal:
K6_BROWSER_WS_URL="wss://cloud.testingbot.com/?key=...&secret=...&capabilities=%7B%22browserName%22%3A%22chrome%22%2C%22browserVersion%22%3A%22latest%22%7D" K6_BROWSER_ENABLED=true k6 run k6_sample.js
**k6\_sample.js**
import { browser } from 'k6/browser';
import { check } from 'k6';
export const options = {
scenarios: {
ui: {
executor: 'shared-iterations',
options: {
browser: {
type: 'chromium',
},
},
},
},
thresholds: {
checks: ['rate==1.0'],
},
};
export default async function () {
const context = await browser.newContext();
const page = await context.newPage();
try {
await page.goto('https://test.k6.io/my_messages.php');
await page.locator('input[name="login"]').type('admin');
await page.locator('input[name="password"]').type('123');
const submitButton = page.locator('input[type="submit"]');
await Promise.all([page.waitForNavigation(), submitButton.click()]);
const header = await page.locator('h2').textContent();
check(page, {
header: header == 'Welcome, admin!',
});
} finally {
await page.close();
}
}
### K6\_BROWSER\_WS\_URL
To construct the `K6_BROWSER_WS_URL`, you'll need to urlencode the capabilities:
const capabilities = {
browserName: 'chrome',
browserVersion: 'latest',
platform: 'VENTURA'
}
const url = `wss://cloud.testingbot.com/?key=...&secret=...&capabilities=${encodeURIComponent(JSON.stringify(capabilities))}`
## Test Results
You can find the results of your k6 browser test in your terminal.
The TestingBot member area will contain a list of all k6 tests, together with logs, screenshots and a video of each test.
Was this page helpful? Yes No
## Looking for More Help?
Have questions or need more information?
You can reach us via the following channels:
- [Email us](https://testingbot.com/contact/new)
- [Join our Slack Channel](https://join.slack.com/t/testingb0t/shared_invite/zt-3bcw9xch-jk19~6XPs_xBrsAgAedkCw)
---
URL: https://testingbot.com/support/app-automate
# App Automation with TestingBot
TestingBot provides remote devices for testing your native mobile applications.
You can run automated tests on real devices, including iPhone and Android devices, as well as Smart TV OTT devices.
We support various testing frameworks such as Appium, Espresso, XCUITest, Maestro and more.

### [Appium](https://testingbot.com/support/app-automate/appium)
Appium is a popular test-framework, designed to automate mobile app testing.
- [C#](https://testingbot.com/support/app-automate/appium/csharp)
- [Java](https://testingbot.com/support/app-automate/appium/java)
- [NodeJS](https://testingbot.com/support/app-automate/appium/nodejs)
- [Python](https://testingbot.com/support/app-automate/appium/python)
- [Flutter](https://testingbot.com/support/app-automate/appium/flutter)
- [Ruby](https://testingbot.com/support/app-automate/appium/ruby)
- [PHP](https://testingbot.com/support/app-automate/appium/php)

### [Espresso](https://testingbot.com/support/app-automate/espresso)
Espresso is a testing framework for Android to automate UI testing.
- [Espresso Documentation](https://testingbot.com/support/app-automate/espresso)

### [XCUITest](https://testingbot.com/support/app-automate/xcuitest)
XCUITest is a testing framework for iOS to automate UI testing.
- [XCUITest Documentation](https://testingbot.com/support/app-automate/xcuitest)

### [Maestro](https://testingbot.com/support/app-automate/maestro)
Maestro is a testing framework for mobile applications to automate UI testing.
- [Maestro Documentation](https://testingbot.com/support/app-automate/maestro)

### [Electron](https://testingbot.com/support/app-automate/electron)
Electron is a framework for building cross-platform desktop applications with web technologies.
- [Electron Documentation](https://testingbot.com/support/app-automate/electron)
### [Smart TV Testing](https://testingbot.com/support/app-automate/smart-tv)
Test Smart-TV applications with TestingBot.
- [Smart TV Documentation](https://testingbot.com/support/app-automate/smart-tv)
---
URL: https://testingbot.com/support/app-automate/devices
- [Desktop Browsers & Emulators](https://testingbot.com/support/web-automate/browsers)
- [Physical Mobile Devices](https://testingbot.com#)
# Physical Mobile Devices
These are the DesiredCapabilities necessary to run an Automated Test:
#### Platform
- All Platforms
- Apple iOS
- Android
#### Android Version
- All Versions
- Android 16.0
- Android 15.0
- Android 14.0
- Android 13.0
- Android 12.0
- Android 11.0
- Android 10.0
- Android 9.0
- Android 7.1
- Android 6.0
#### iOS Version
- All Versions
- iOS 26.2
- iOS 26.0
- iOS 18.5
- iOS 18.2
- iOS 18.0
- iOS 17.6
- iOS 17.5
- iOS 16.5
- iOS 16.3
- iOS 15.0
- iOS 14.8
- iOS 14.7
- iOS 14.5
- iOS 14.0
- iOS 13.5
- iOS 13.4
- iOS 12.2
- iOS 12.1
#### Resolution
- All Resolutions
- 1440x3440
- 1440x3200
- 1260x2736
- 1179x2556
- 1170x2532
- 1080x2424
- 1080x2400
- 1080x2340
- 1080x2220
- 1200x1920
- 1080x1920
- 828x1792
- 720x1600
- 750x1334
- 810x1080
- 768x1024
- 758x1011
-

Galaxy S8
Resolution: 1080x2220
CPU: Octa-core (4x2.3 GHz Mongoose M2 & 4x1.7 GHz Cortex-A53)
Model: SM-G950U1
[Desired Capabilities](https://testingbot.com#)
DesiredCapabilities caps = new DesiredCapabilities();
caps.setCapability("version", "9.0");
caps.setCapability("app", "..URL to your app (apk or ipa)..");
caps.setCapability("deviceName", "Galaxy S8");
caps.setCapability("realDevice", true);
caps.setCapability("platformName", "Android");
-

iPhone 6s
Resolution: 750x1334
CPU: Apple A9
Model: MKQN2ZD/A
[Desired Capabilities](https://testingbot.com#)
DesiredCapabilities caps = new DesiredCapabilities();
caps.setCapability("version", "12.1");
caps.setCapability("app", "..URL to your app (apk or ipa)..");
caps.setCapability("deviceName", "iPhone 6s");
caps.setCapability("realDevice", true);
caps.setCapability("platformName", "iOS");
-

iPad (6th generation)
Resolution: 768x1024
CPU: Apple A10
Model: MR7G2NF/A
[Desired Capabilities](https://testingbot.com#)
DesiredCapabilities caps = new DesiredCapabilities();
caps.setCapability("version", "13.5");
caps.setCapability("app", "..URL to your app (apk or ipa)..");
caps.setCapability("deviceName", "iPad (6th generation)");
caps.setCapability("realDevice", true);
caps.setCapability("platformName", "iOS");
-

iPhone XR
Resolution: 828x1792
CPU: Apple A12 Bionic
Model: MRY42B/A
[Desired Capabilities](https://testingbot.com#)
DesiredCapabilities caps = new DesiredCapabilities();
caps.setCapability("version", "16.3");
caps.setCapability("app", "..URL to your app (apk or ipa)..");
caps.setCapability("deviceName", "iPhone XR");
caps.setCapability("realDevice", true);
caps.setCapability("platformName", "iOS");
-

Pixel
Resolution: 1080x1920
CPU: ARM - Quad-core - 1593Mhz
Model: PQ1A.190105.004
[Desired Capabilities](https://testingbot.com#)
DesiredCapabilities caps = new DesiredCapabilities();
caps.setCapability("version", "7.1");
caps.setCapability("app", "..URL to your app (apk or ipa)..");
caps.setCapability("deviceName", "Pixel");
caps.setCapability("realDevice", true);
caps.setCapability("platformName", "Android");
-

Galaxy S10
Resolution: 1440x3440
CPU: Octa-core
Model: SM-G973F
[Desired Capabilities](https://testingbot.com#)
DesiredCapabilities caps = new DesiredCapabilities();
caps.setCapability("version", "10.0");
caps.setCapability("app", "..URL to your app (apk or ipa)..");
caps.setCapability("deviceName", "Galaxy S10");
caps.setCapability("realDevice", true);
caps.setCapability("platformName", "Android");
-

Galaxy Tab A
Resolution: 1200x1920
CPU: ARM - Quad-core - 1200Mhz
Model: SM-T510
[Desired Capabilities](https://testingbot.com#)
DesiredCapabilities caps = new DesiredCapabilities();
caps.setCapability("version", "9.0");
caps.setCapability("app", "..URL to your app (apk or ipa)..");
caps.setCapability("deviceName", "Galaxy Tab A");
caps.setCapability("realDevice", true);
caps.setCapability("platformName", "Android");
-

iPhone 8
Resolution: 750x1334
CPU: ARM - Dual-core - 1840Mhz
Model: MQ6H2
[Desired Capabilities](https://testingbot.com#)
DesiredCapabilities caps = new DesiredCapabilities();
caps.setCapability("version", "13.4");
caps.setCapability("app", "..URL to your app (apk or ipa)..");
caps.setCapability("deviceName", "iPhone 8");
caps.setCapability("realDevice", true);
caps.setCapability("platformName", "iOS");
-

iPhone 11
Resolution: 828x1792
CPU:
Model: MWLT2
[Desired Capabilities](https://testingbot.com#)
DesiredCapabilities caps = new DesiredCapabilities();
caps.setCapability("version", "14.0");
caps.setCapability("app", "..URL to your app (apk or ipa)..");
caps.setCapability("deviceName", "iPhone 11");
caps.setCapability("realDevice", true);
caps.setCapability("platformName", "iOS");
-

Galaxy S20
Resolution: 1440x3200
CPU: ARM - Quad-core - 1593Mhz
Model: E
[Desired Capabilities](https://testingbot.com#)
DesiredCapabilities caps = new DesiredCapabilities();
caps.setCapability("version", "10.0");
caps.setCapability("app", "..URL to your app (apk or ipa)..");
caps.setCapability("deviceName", "Galaxy S20");
caps.setCapability("realDevice", true);
caps.setCapability("platformName", "Android");
-

iPhone 12
Resolution: 1170x2532
CPU: Apple A14 Bionic
Model: MWLT2
[Desired Capabilities](https://testingbot.com#)
DesiredCapabilities caps = new DesiredCapabilities();
caps.setCapability("version", "14.5");
caps.setCapability("app", "..URL to your app (apk or ipa)..");
caps.setCapability("deviceName", "iPhone 12");
caps.setCapability("realDevice", true);
caps.setCapability("platformName", "iOS");
-

Galaxy S21
Resolution: 1080x2400
CPU: ARM - Quad-core - 1593Mhz
Model: E
[Desired Capabilities](https://testingbot.com#)
DesiredCapabilities caps = new DesiredCapabilities();
caps.setCapability("version", "11.0");
caps.setCapability("app", "..URL to your app (apk or ipa)..");
caps.setCapability("deviceName", "Galaxy S21");
caps.setCapability("realDevice", true);
caps.setCapability("platformName", "Android");
-

Mi 10
Resolution: 1080x2400
CPU: ARM - Single-core - 1690Mhz
Model: M2007J3SY
[Desired Capabilities](https://testingbot.com#)
DesiredCapabilities caps = new DesiredCapabilities();
caps.setCapability("version", "12.0");
caps.setCapability("app", "..URL to your app (apk or ipa)..");
caps.setCapability("deviceName", "Mi 10");
caps.setCapability("realDevice", true);
caps.setCapability("platformName", "Android");
-

Galaxy A12
Resolution: 720x1600
CPU:
Model: SM-A125F
[Desired Capabilities](https://testingbot.com#)
DesiredCapabilities caps = new DesiredCapabilities();
caps.setCapability("version", "11.0");
caps.setCapability("app", "..URL to your app (apk or ipa)..");
caps.setCapability("deviceName", "Galaxy A12");
caps.setCapability("realDevice", true);
caps.setCapability("platformName", "Android");
-

iPad (8th generation)
Resolution: 758x1011
CPU: ARM - Quad-core - 2340MHz
Model: MR7G2NF/A
[Desired Capabilities](https://testingbot.com#)
DesiredCapabilities caps = new DesiredCapabilities();
caps.setCapability("version", "15.0");
caps.setCapability("app", "..URL to your app (apk or ipa)..");
caps.setCapability("deviceName", "iPad (8th generation)");
caps.setCapability("realDevice", true);
caps.setCapability("platformName", "iOS");
-

iPhone XR
Resolution: 828x1792
CPU: ARM - Single-core - 2390Mhz
Model: MRY42B/A
[Desired Capabilities](https://testingbot.com#)
DesiredCapabilities caps = new DesiredCapabilities();
caps.setCapability("version", "14.8");
caps.setCapability("app", "..URL to your app (apk or ipa)..");
caps.setCapability("deviceName", "iPhone XR");
caps.setCapability("realDevice", true);
caps.setCapability("platformName", "iOS");
-

OnePlus 9
Resolution: 1080x2400
CPU: ARM - Quad-core - 1593Mhz
Model: CPH2251
[Desired Capabilities](https://testingbot.com#)
DesiredCapabilities caps = new DesiredCapabilities();
caps.setCapability("version", "11.0");
caps.setCapability("app", "..URL to your app (apk or ipa)..");
caps.setCapability("deviceName", "OnePlus 9");
caps.setCapability("realDevice", true);
caps.setCapability("platformName", "Android");
-

Pixel 6
Resolution: 1080x2400
CPU: ARM - Quad-core - 1593Mhz
Model:
[Desired Capabilities](https://testingbot.com#)
DesiredCapabilities caps = new DesiredCapabilities();
caps.setCapability("version", "13.0");
caps.setCapability("app", "..URL to your app (apk or ipa)..");
caps.setCapability("deviceName", "Pixel 6");
caps.setCapability("realDevice", true);
caps.setCapability("platformName", "Android");
-

iPhone 13
Resolution: 1170x2532
CPU: ARM
Model:
[Desired Capabilities](https://testingbot.com#)
DesiredCapabilities caps = new DesiredCapabilities();
caps.setCapability("version", "18.5");
caps.setCapability("app", "..URL to your app (apk or ipa)..");
caps.setCapability("deviceName", "iPhone 13");
caps.setCapability("realDevice", true);
caps.setCapability("platformName", "iOS");
-

Galaxy S23
Resolution: 1080x2340
CPU: ARM
Model:
[Desired Capabilities](https://testingbot.com#)
DesiredCapabilities caps = new DesiredCapabilities();
caps.setCapability("version", "13.0");
caps.setCapability("app", "..URL to your app (apk or ipa)..");
caps.setCapability("deviceName", "Galaxy S23");
caps.setCapability("realDevice", true);
caps.setCapability("platformName", "Android");
-

iPhone 14
Resolution: 1170x2532
CPU: ARM
Model:
[Desired Capabilities](https://testingbot.com#)
DesiredCapabilities caps = new DesiredCapabilities();
caps.setCapability("version", "17.6");
caps.setCapability("app", "..URL to your app (apk or ipa)..");
caps.setCapability("deviceName", "iPhone 14");
caps.setCapability("realDevice", true);
caps.setCapability("platformName", "iOS");
-

iPhone 11
Resolution: 828x1792
CPU:
Model: MWLT2
[Desired Capabilities](https://testingbot.com#)
DesiredCapabilities caps = new DesiredCapabilities();
caps.setCapability("version", "14.8");
caps.setCapability("app", "..URL to your app (apk or ipa)..");
caps.setCapability("deviceName", "iPhone 11");
caps.setCapability("realDevice", true);
caps.setCapability("platformName", "iOS");
-

iPad (8th generation)
Resolution: 810x1080
CPU: ARM - Quad-core - 2340MHz
Model: MR7G2NF/A
[Desired Capabilities](https://testingbot.com#)
DesiredCapabilities caps = new DesiredCapabilities();
caps.setCapability("version", "14.7");
caps.setCapability("app", "..URL to your app (apk or ipa)..");
caps.setCapability("deviceName", "iPad (8th generation)");
caps.setCapability("realDevice", true);
caps.setCapability("platformName", "iOS");
-

iPhone 15
Resolution: 1179x2556
CPU: ARM
Model:
[Desired Capabilities](https://testingbot.com#)
DesiredCapabilities caps = new DesiredCapabilities();
caps.setCapability("version", "18.0");
caps.setCapability("app", "..URL to your app (apk or ipa)..");
caps.setCapability("deviceName", "iPhone 15");
caps.setCapability("realDevice", true);
caps.setCapability("platformName", "iOS");
-

Pixel 8
Resolution: 1080x2400
CPU: Google Tensor G3 (4 nm)
Model: GKWS6
[Desired Capabilities](https://testingbot.com#)
DesiredCapabilities caps = new DesiredCapabilities();
caps.setCapability("version", "14.0");
caps.setCapability("app", "..URL to your app (apk or ipa)..");
caps.setCapability("deviceName", "Pixel 8");
caps.setCapability("realDevice", true);
caps.setCapability("platformName", "Android");
-

Galaxy S24
Resolution: 1080x2340
CPU: ARM
Model:
[Desired Capabilities](https://testingbot.com#)
DesiredCapabilities caps = new DesiredCapabilities();
caps.setCapability("version", "14.0");
caps.setCapability("app", "..URL to your app (apk or ipa)..");
caps.setCapability("deviceName", "Galaxy S24");
caps.setCapability("realDevice", true);
caps.setCapability("platformName", "Android");
-

Galaxy A55
Resolution: 1080x2340
CPU: Exynos 1480
Model: SM-A556ELBHINS
[Desired Capabilities](https://testingbot.com#)
DesiredCapabilities caps = new DesiredCapabilities();
caps.setCapability("version", "14.0");
caps.setCapability("app", "..URL to your app (apk or ipa)..");
caps.setCapability("deviceName", "Galaxy A55");
caps.setCapability("realDevice", true);
caps.setCapability("platformName", "Android");
-

iPhone SE 2022
Resolution: 750x1334
CPU: A15 Bionic Chip
Model: A2783
[Desired Capabilities](https://testingbot.com#)
DesiredCapabilities caps = new DesiredCapabilities();
caps.setCapability("version", "17.5");
caps.setCapability("app", "..URL to your app (apk or ipa)..");
caps.setCapability("deviceName", "iPhone SE 2022");
caps.setCapability("realDevice", true);
caps.setCapability("platformName", "iOS");
-

Redmi Note 13
Resolution: 1080x2400
CPU: Octa-core (2x2.4 GHz Cortex-A76)
Model: 23124RA7EO
[Desired Capabilities](https://testingbot.com#)
DesiredCapabilities caps = new DesiredCapabilities();
caps.setCapability("version", "14.0");
caps.setCapability("app", "..URL to your app (apk or ipa)..");
caps.setCapability("deviceName", "Redmi Note 13");
caps.setCapability("realDevice", true);
caps.setCapability("platformName", "Android");
-

iPhone 16
Resolution: 1179x2556
CPU: Apple A18
Model: A3287
[Desired Capabilities](https://testingbot.com#)
DesiredCapabilities caps = new DesiredCapabilities();
caps.setCapability("version", "18.2");
caps.setCapability("app", "..URL to your app (apk or ipa)..");
caps.setCapability("deviceName", "iPhone 16");
caps.setCapability("realDevice", true);
caps.setCapability("platformName", "iOS");
-

Galaxy S25
Resolution: 1080x2340
CPU: ARM
Model:
[Desired Capabilities](https://testingbot.com#)
DesiredCapabilities caps = new DesiredCapabilities();
caps.setCapability("version", "15.0");
caps.setCapability("app", "..URL to your app (apk or ipa)..");
caps.setCapability("deviceName", "Galaxy S25");
caps.setCapability("realDevice", true);
caps.setCapability("platformName", "Android");
-

Pixel 9
Resolution: 1080x2424
CPU: Google Tensor G4
Model: GUR25
[Desired Capabilities](https://testingbot.com#)
DesiredCapabilities caps = new DesiredCapabilities();
caps.setCapability("version", "16.0");
caps.setCapability("app", "..URL to your app (apk or ipa)..");
caps.setCapability("deviceName", "Pixel 9");
caps.setCapability("realDevice", true);
caps.setCapability("platformName", "Android");
-

iPhone 17
Resolution: 1179x2556
CPU: Apple A19
Model:
[Desired Capabilities](https://testingbot.com#)
DesiredCapabilities caps = new DesiredCapabilities();
caps.setCapability("version", "26.0");
caps.setCapability("app", "..URL to your app (apk or ipa)..");
caps.setCapability("deviceName", "iPhone 17");
caps.setCapability("realDevice", true);
caps.setCapability("platformName", "iOS");
-

Pixel 10
Resolution: 1080x2424
CPU: Google Tensor G5
Model: GUR25
[Desired Capabilities](https://testingbot.com#)
DesiredCapabilities caps = new DesiredCapabilities();
caps.setCapability("version", "16.0");
caps.setCapability("app", "..URL to your app (apk or ipa)..");
caps.setCapability("deviceName", "Pixel 10");
caps.setCapability("realDevice", true);
caps.setCapability("platformName", "Android");
-

iPhone Air
Resolution: 1260x2736
CPU: Apple A19 Pro
Model:
[Desired Capabilities](https://testingbot.com#)
DesiredCapabilities caps = new DesiredCapabilities();
caps.setCapability("version", "26.2");
caps.setCapability("app", "..URL to your app (apk or ipa)..");
caps.setCapability("deviceName", "iPhone Air");
caps.setCapability("realDevice", true);
caps.setCapability("platformName", "iOS");
-

Huawei P40
Resolution: 1080x2340
CPU: Cortex-A76
Model: ANA-AN00
[Desired Capabilities](https://testingbot.com#)
DesiredCapabilities caps = new DesiredCapabilities();
caps.setCapability("version", "12.0");
caps.setCapability("app", "..URL to your app (apk or ipa)..");
caps.setCapability("deviceName", "Huawei P40");
caps.setCapability("realDevice", true);
caps.setCapability("platformName", "Android");
---
URL: https://testingbot.com/support/app-automate/electron
# Electron Testing
[Electron](https://electronjs.org/) is a framework that allows you to create cross-platform native applications by using Javascript code. Electron will embed a Chromium engine in a native app format, allowing web developers to create desktop applications by writing HTML and Javascript code.
TestingBot supports running automated WebDriver tests against Electron-based apps on these platforms:
- Windows 11
- Windows 10
- macOS Tahoe
- macOS Sequoia
- macOS Sonoma
- macOS Ventura
- macOS Monterey
All Electron versions from version 16 to the most recent version are supported.
TestingBot has created a [demo Electron app](https://github.com/testingbot/testingbot-electron-demo-app), which acts as a simple calculator, to showcase automated Electron app testing.
## Run your first Electron test
### App management
To test an Electron app, you'll first need to upload a zip file of your Electron application to a URL where TestingBot can download it from. You can choose to upload this yourself, for example to AWS S3 or use [TestingBot Storage](https://testingbot.com/support/api#upload) to upload your `.zip` file.
Note that files uploaded to TestingBot Storage are automatically pruned after 62 days.
[cURL](https://testingbot.com#)[Ruby](https://testingbot.com#)[Python](https://testingbot.com#)[PHP](https://testingbot.com#)[Java](https://testingbot.com#)[NodeJS](https://testingbot.com#)
$ curl -X POST "https://api.testingbot.com/v1/storage" \
-u key:secret -F "file=@/path/to/app/file/electron-app.zip"
require 'testingbot'
api = TestingBot::Api.new(key, secret)
api.upload_local_file('electron-app.zip')
TestingbotREST restApi = new TestingbotREST(key, secret);
TestingbotStorageUploadResponse uploadResponse = restApi.uploadToStorage(File file);
$api = new TestingBot\TestingBotAPI($key, $secret);
$api->uploadLocalFileToStorage($pathToLocalFile);
import testingbotclient
tb = testingbotclient.TestingBotClient(key, secret)
tb.storage.upload_local_file(localFilePath)
const TestingBot = require('testingbot-api');
const api = new TestingBot({
api_key: "your-tb-key",
api_secret: "your-tb-secret"
});
api.uploadFile(localFilePath, function(error, response) {
// response.app_url
});
TestingBot Storage will return a `app_url` which you can use in the `tb:app` capability of your test.
This is how the capabilities in your test should currently look like:
[Ruby](https://testingbot.com#)[Python](https://testingbot.com#)[Java](https://testingbot.com#)[NodeJS](https://testingbot.com#)[C#](https://testingbot.com#)
caps = {
"browserName" => "electron",
"browserVersion" => "33",
"tb:app" => "tb://the-app-url-you-received" # or https://s3.amazonaws.com/...
}
ChromeOptions options = new ChromeOptions();
options.setCapability("browserName", "electron");
options.setCapability("browserVersion", "33");
options.setCapability("tb:app", "tb://the-app-url-you-received");
Map tbOptions = new HashMap<>();
tbOptions.put("key", "api_key");
tbOptions.put("secret", "api_secret");
options.setCapability("tb:options", tbOptions);
capabilities = {
"browserName": "electron",
"browserVersion": "33",
"tb:app": "tb://the-app-url-you-received",
"tb:options": {
"name": "Electron Sample"
}
}
driver = webdriver.Remote("https://hub.testingbot.com/wd/hub", options=webdriver.ChromeOptions().to_capabilities() | capabilities)
driver = await new webdriver.Builder().withCapabilities({
"browserName": 'electron',
"goog:chromeOptions" : { "w3c" : true },
"tb:options": {
"key": "api_key",
"secret": "api_secret"
},
'tb:app': 'tb://the-app-url-you-received' // or https://s3.amazonaws.com/...
}).usingServer("https://hub.testingbot.com/wd/hub").build();
var chromeOptions = new ChromeOptions();
chromeOptions.BrowserVersion = "33";
chromeOptions.PlatformName = "Windows 10";
chromeOptions.AddAdditionalChromeOption("browserName", "electron");
var tbOptions = new Dictionary
{
["key"] = "api_key",
["secret"] = "api_secret",
["name"] = TestContext.CurrentContext.Test.Name
};
chromeOptions.AddAdditionalChromeOption("tb:options", tbOptions);
chromeOptions.AddAdditionalChromeOption("tb:app", "tb://the-app-url-you-received");
driver = new RemoteWebDriver(new Uri("https://hub.testingbot.com/wd/hub"),
chromeOptions, TimeSpan.FromSeconds(600));
### Binary location
Next to the required `app` capability, you will also need to specify a `tb:binary_location` capability. This is the path to the actual Electron app, so that TestingBot knows which file in the `zip` file is the Electron app.
For example, if your uploaded zip file is structured like this:
TestingBot-Electron-App.zip
[testingbot-electron-demo-app.app]
[Contents]
[MacOS]
-- testingbot-electron-demo-app
The `binary_location` capability in this case would be:
tb:binary_location = "testingbot-electron-demo-app.app/Contents/MacOS/testingbot-electron-demo-app"
Now the capabilities in your test should look like the example below.
[Ruby](https://testingbot.com#)[Python](https://testingbot.com#)[Java](https://testingbot.com#)[NodeJS](https://testingbot.com#)[C#](https://testingbot.com#)
require 'selenium-webdriver'
options = Selenium::WebDriver::Options.chrome
options.browser_name = "electron"
options.platform_name = "VENTURA"
options.browser_version = "31"
options.add_option("tb:binary_location", "testingbot-electron-demo-app.app/Contents/MacOS/testingbot-electron-demo-app")
options.add_option("tb:app", "https://github.com/testingbot/testingbot-electron-demo-app/releases/download/v1.0.0/testingbot-electron-demo-app-darwin-arm64-1.0.0.zip")
http_client = Selenium::WebDriver::Remote::Http::Default.new
http_client.open_timeout = 200
http_client.read_timeout = 200
driver = Selenium::WebDriver.for(
:remote,
url: "https://key:secret@hub.testingbot.com/wd/hub",
options: options,
http_client: http_client)
# Generate two random numbers between 0 and 9
num1 = rand(0..9)
num2 = rand(0..9)
# Find elements on the page
first_number = driver.find_element(id: "btn-#{num1}")
second_number = driver.find_element(id: "btn-#{num2}")
plus = driver.find_element(id: 'btn-plus')
equal = driver.find_element(id: 'btn-equal')
# Perform operations
first_number.click
plus.click
second_number.click
equal.click
# Get the result
result_element = driver.find_element(id: 'calc-display')
result_text = result_element.text
driver.quit
raise "Test failed" unless (num1 + num2) == result_text.to_i
import org.openqa.selenium.By;
import org.openqa.selenium.WebDriver;
import org.openqa.selenium.WebElement;
import org.openqa.selenium.chrome.ChromeOptions;
import org.openqa.selenium.remote.RemoteWebDriver;
import java.net.URL;
import java.util.Random;
public class SeleniumTest {
public static void main(String[] args) {
try {
ChromeOptions options = new ChromeOptions();
options.setCapability("browserName", "electron");
options.setCapability("platformName", "VENTURA");
options.setCapability("browserVersion", "31");
options.setCapability("tb:binary_location", "testingbot-electron-demo-app.app/Contents/MacOS/testingbot-electron-demo-app");
options.setCapability("tb:app", "https://github.com/testingbot/testingbot-electron-demo-app/releases/download/v1.0.0/testingbot-electron-demo-app-darwin-arm64-1.0.0.zip");
WebDriver driver = new RemoteWebDriver(
new URL("https://key:secret@hub.testingbot.com/wd/hub"),
options
);
// Generate two random numbers between 0 and 9
Random random = new Random();
int num1 = random.nextInt(10);
int num2 = random.nextInt(10);
WebElement firstNumber = driver.findElement(By.id("btn-" + num1));
WebElement secondNumber = driver.findElement(By.id("btn-" + num2));
WebElement plus = driver.findElement(By.id("btn-plus"));
WebElement equal = driver.findElement(By.id("btn-equal"));
firstNumber.click();
plus.click();
secondNumber.click();
equal.click();
WebElement resultElement = driver.findElement(By.id("calc-display"));
String resultText = resultElement.getText();
// Verify the result
if ((num1 + num2) != Integer.parseInt(resultText)) {
throw new AssertionError("Test failed");
}
// Quit the driver
driver.quit();
} catch (Exception e) {
e.printStackTrace();
}
}
}
from selenium import webdriver
from selenium.webdriver.common.by import By
from selenium.webdriver.chrome.options import Options
import random
# Set capabilities
options = Options()
options.set_capability("browserName", "electron")
options.set_capability("platformName", "VENTURA")
options.set_capability("browserVersion", "31")
options.set_capability("tb:binary_location", "testingbot-electron-demo-app.app/Contents/MacOS/testingbot-electron-demo-app")
options.set_capability("tb:app", "https://github.com/testingbot/testingbot-electron-demo-app/releases/download/v1.0.0/testingbot-electron-demo-app-darwin-arm64-1.0.0.zip")
# Initialize the WebDriver connection to TestingBot
driver = webdriver.Remote(
command_executor="https://key:secret@hub.testingbot.com/wd/hub",
options=options
)
try:
# Generate two random numbers between 0 and 9
num1 = random.randint(0, 9)
num2 = random.randint(0, 9)
# Find elements on the page
first_number = driver.find_element(By.ID, f"btn-{num1}")
second_number = driver.find_element(By.ID, f"btn-{num2}")
plus = driver.find_element(By.ID, "btn-plus")
equal = driver.find_element(By.ID, "btn-equal")
# Perform operations
first_number.click()
plus.click()
second_number.click()
equal.click()
# Get the result
result_element = driver.find_element(By.ID, "calc-display")
result_text = result_element.text
# Verify the result
assert (num1 + num2) == int(result_text), "Test failed"
finally:
driver.quit()
const { Builder, By } = require('selenium-webdriver');
const { Options } = require('selenium-webdriver/chrome');
(async function example() {
let driver;
try {
// Set capabilities
let caps = {
browserName: 'electron',
platformName: 'VENTURA',
browserVersion: '31',
'tb:binary_location': 'testingbot-electron-demo-app.app/Contents/MacOS/testingbot-electron-demo-app',
'tb:app': 'https://github.com/testingbot/testingbot-electron-demo-app/releases/download/v1.0.0/testingbot-electron-demo-app-darwin-arm64-1.0.0.zip'
};
driver = await new Builder()
.usingServer('https://key:secret@hub.testingbot.com/wd/hub')
.withCapabilities(caps)
.build();
// Generate two random numbers between 0 and 9
const num1 = Math.floor(Math.random() * 10);
const num2 = Math.floor(Math.random() * 10);
const firstNumber = await driver.findElement(By.id(`btn-${num1}`));
const secondNumber = await driver.findElement(By.id(`btn-${num2}`));
const plus = await driver.findElement(By.id('btn-plus'));
const equal = await driver.findElement(By.id('btn-equal'));
// Perform operations
await firstNumber.click();
await plus.click();
await secondNumber.click();
await equal.click();
// Get the result
const resultElement = await driver.findElement(By.id('calc-display'));
const resultText = await resultElement.getText();
// Verify the result
if ((num1 + num2) !== parseInt(resultText)) {
throw new Error('Test failed');
}
} catch (error) {
console.error('Error during test execution:', error);
} finally {
if (driver) {
await driver.quit();
}
}
})();
using OpenQA.Selenium;
using OpenQA.Selenium.Chrome;
using OpenQA.Selenium.Remote;
using System;
class SeleniumTest
{
static void Main(string[] args)
{
try
{
// Set capabilities
var options = new ChromeOptions();
options.AddAdditionalChromeOption("browserName", "electron");
options.PlatformName = "VENTURA";
options.BrowserVersion = "31";
options.AddAdditionalChromeOption("tb:binary_location", "testingbot-electron-demo-app.app/Contents/MacOS/testingbot-electron-demo-app");
options.AddAdditionalChromeOption("tb:app", "https://testingbot.com/electron/mac-demo.zip");
var commandTimeout = TimeSpan.FromSeconds(200);
IWebDriver driver = new RemoteWebDriver(
new Uri("https://key:secret@hub.testingbot.com/wd/hub"),
options,
commandTimeout
);
// Generate two random numbers between 0 and 9
Random random = new Random();
int num1 = random.Next(0, 10);
int num2 = random.Next(0, 10);
IWebElement firstNumber = driver.FindElement(By.Id($"btn-{num1}"));
IWebElement secondNumber = driver.FindElement(By.Id($"btn-{num2}"));
IWebElement plus = driver.FindElement(By.Id("btn-plus"));
IWebElement equal = driver.FindElement(By.Id("btn-equal"));
// Perform operations
firstNumber.Click();
plus.Click();
secondNumber.Click();
equal.Click();
// Get the result
IWebElement resultElement = driver.FindElement(By.Id("calc-display"));
string resultText = resultElement.Text;
// Verify the result
if ((num1 + num2) != int.Parse(resultText))
{
throw new Exception("Test failed");
}
// Quit the driver
driver.Quit();
}
catch (Exception ex)
{
Console.WriteLine($"Error during test execution: {ex.Message}");
}
}
}
The example above will run the TestingBot Demo Electron app on a remote macOS machine. You can also choose to run the demo app on a remote Windows machine inside TestingBot's grid, please see the capabilities below.
options = Selenium::WebDriver::Options.chrome
options.browser_name = "electron"
options.platform_name = "WIN10"
options.browser_version = "31"
options.add_option("tb:binary_location", "testingbot-electron-demo-app.exe")
options.add_option("tb:app", "https://github.com/testingbot/testingbot-electron-demo-app/releases/download/v1.0.0/testingbot-electron-demo-app-win32-x64-1.0.0.zip")
## Configuring Electron tests
To configure your Electron test with TestingBot, you need to supply 3 capabilities:
- [app capability](https://testingbot.com#capability-app)
- [binary\_location capability](https://testingbot.com#capability-binary)
- Electron version capability
Please use the `version` or `browserVersion` capability to indicate to TestingBot which version of Electron was used to create the final app that you are testing.
TestingBot needs to know which version was used, so that we can map it to the Chromium version that is being used for that particular Electron version. For example, if you created your Electron app with Electron 31, you would need to provide `browserVersion: 31` as a capability.
## Electron Test Results
Test results for each Electron test will be available in the TestingBot member dashboard. For each Electron test, you will get access to a video recording, generated log files and additional meta-data.
These results are also available through the TestingBot [REST-API](https://testingbot.com/support/api) or by using one of the [TestingBot CI/CD plugins](https://testingbot.com/support/integrations/ci-cd).
Was this page helpful? Yes No
## Looking for More Help?
Have questions or need more information?
You can reach us via the following channels:
- [Email us](https://testingbot.com/contact/new)
- [Join our Slack Channel](https://join.slack.com/t/testingb0t/shared_invite/zt-3bcw9xch-jk19~6XPs_xBrsAgAedkCw)
---
URL: https://testingbot.com/support/app-automate/earlgrey
# EarlGrey Testing
TestingBot will release testing with EarlGrey in Q4 of 2025.
Run your EarlGrey tests on physical Android devices in the cloud, on Samsung Galaxy devices, Pixels, Xiaomi and other Android devices.
If you are interested in participating in our beta program, please contact us.
Was this page helpful? Yes No
## Looking for More Help?
Have questions or need more information?
You can reach us via the following channels:
- [Email us](https://testingbot.com/contact/new)
- [Join our Slack Channel](https://join.slack.com/t/testingb0t/shared_invite/zt-3bcw9xch-jk19~6XPs_xBrsAgAedkCw)
---
URL: https://testingbot.com/support/app-automate/maestro
# Maestro Intro
TestingBot provides a grid of remote iOS and Android physical devices + emulators, ready to run your Maestro flows.
Maestro is a mobile UI testing framework, which supports testing on both iOS and Android. You write flows, which are story-like tests, where you describe a specific flow in your mobile application. For example, you could have a login flow, or a checkout flow.
Maestro is a relatively new test framework and offers several nice features, such as:
- Built-in tolerance to flakiness: various mechanisms are added to try and prevent flaky tests, for example locators that have changed or moved positions.
- Automatic waits: Maestro will automatically wait for certain conditions, which means you do not have to worry about delays, or adding sleep commands to your tests.
- Declarative syntax, which is defined in Flow (`yaml`) files.
### Why TestingBot Cloud?
TestingBot has been offering cloud-based testing since 2012 and has built a robust solution for Maestro cloud testing. Compared to other vendors and Maestro cloud, we offer the following improved features:
- Run on any iOS version, both physical iOS devices and iOS simulators.
- Test on **physical Android devices** , not just emulators (though that's also certainly possible)
- No execution limit: your tests can run as long as they need
- Apply various [options](https://testingbot.com/support/app-automate/maestro/options) such as setting orientation, geolocation options and more
## TestingBot CLI
The easiest way to run Maestro tests on TestingBot is using our CLI tool. It handles uploading your app, flows and running tests in a single command.
https://www.youtube.com/embed/MMWCkBgXFOU
### Installation
npm install -g @testingbot/cli
### Authentication
Authenticate using this command:
testingbot login
This opens your browser for authentication. After logging in, your credentials are saved to `~/.testingbot` and you can start using the CLI.
#### Other Authentication Methods
- **Command-line options** : `--api-key` and `--api-secret`
- **Environment variables** : `TB_KEY` and `TB_SECRET`
- **Config file** : Create `~/.testingbot` with content `key:secret`
### Quick Start
Run Maestro tests with a single command:
testingbot maestro app.apk flow.yml --device "Pixel 8" --deviceVersion "14"
testingbot maestro app.ipa flow.yml --device "iPhone 16" --real-device
The CLI will:
1. Upload your app to TestingBot
2. Upload and zip your flow files
3. Start the test run
4. Show real-time progress and results
## Upload Mobile App
You will need to upload a mobile app to run tests with Maestro. The format of this file depends on which device type you'd like to test:
- **iOS physical devices/simulators** :
You can upload your `.ipa` or `.zip` file (for simulators, see [here how to prepare this zip file](https://testingbot.com/support/app-automate/help/prepare#simulator)).
- **Android physical devices/emulators** :
Upload the `.apk` file, which TestingBot will automatically install on the Android device.
[CLI](https://testingbot.com#)[cURL](https://testingbot.com#)
When using the CLI, the app upload is handled automatically as part of the `testingbot maestro` command. Simply specify your app file as the first argument:
testingbot maestro /path/to/app/file/sample-debug.apk ./flows
Supported app formats:
- **Android** : `.apk`
- **iOS Physical Device** : `.ipa`
- **iOS Simulator** : `.app`, `.zip` (zipped .app bundle)
curl -u api_key:api_secret \
-X POST "https://api.testingbot.com/v1/app-automate/maestro/app" \
-F "file=@/path/to/app/file/sample-debug.zip"
The API response will include an `id` response, which you can use in the other API calls.
{
"id": 4012
}
## Upload Maestro Flows
To upload the Flows zip file, please follow the example below.
[CLI](https://testingbot.com#)[cURL](https://testingbot.com#)
When using the CLI, flow files are automatically zipped and uploaded. You can specify:
- A directory containing flow files
- Individual `.yaml` or `.yml` files
- A pre-zipped `.zip` file
- Glob patterns (e.g., `./flows/**/*.yaml`)
# Single directory
testingbot maestro app.apk ./flows
# Multiple directories
testingbot maestro app.apk ./flows/smoke ./flows/regression
# Individual flow files
testingbot maestro app.apk login.yaml checkout.yaml
# Pre-zipped flows
testingbot maestro app.apk flows.zip
Maestro Flow files are `.yaml` files which contain the actions that need to be performed. You can zip these together and upload to TestingBot by using the following command:
zip -r flows.zip *.yaml
Make sure all the necessary flows and sub flows are included in the zip file.
curl -u api_key:api_secret \
-X POST "https://api.testingbot.com/v1/app-automate/maestro/:id/tests" \
-F "file=@/path/to/app/file/flows.zip"
Replace the `:id` with the identifier you received during the app upload call. (In this example 4012)
Calling this multiple times with the same `:id` will overwrite the previously uploaded Flows zip file.
### Zip structure
Maestro needs to know which flows it should run. If there are flow files (`.yaml` files) in the top-level directory of the zip file, it will run these flow files.
You can also include a [config.yaml](https://testingbot.com/support/app-automate/maestro/options#config) file in the top-level directory of the zip file, to indicate which flows should be tested. For example, you can use the `**` annotation to indicate you want to run all flows, even if they are in separate sub-directories.
flows:
- "**"
More information is available in the [Maestro Docs](https://docs.maestro.dev/cli/test-suites-and-reports#controlling-what-tests-to-include).
## Run Maestro tests
Once you've uploaded both your app and Flows zip file, you can run the Maestro tests on the TestingBot cloud.
Specify one or more capabilities, to indicate on which iOS simulators or Android devices you want to run your tests on.
[CLI](https://testingbot.com#)[cURL](https://testingbot.com#)
Use the CLI to run tests with device selection options:
# Basic usage with device selection
testingbot maestro app.apk flow.yml --device "Pixel 8" --deviceVersion "14"
# iOS simulator
testingbot maestro app.zip ./flows --platform iOS --device "iPhone 16" --deviceVersion "26.0"
# iOS physical device
testingbot maestro app.ipa flow.yml --device "iPhone 16" --real-device
# Android real device
testingbot maestro app.apk flow.yml --device "Samsung Galaxy S24" --real-device
# With additional options
testingbot maestro app.apk ./flows \
--device "Pixel 8" \
--deviceVersion "14" \
--name "Smoke Tests" \
--build "v2.1.0"
# With CI/CD integration (Git metadata)
testingbot maestro app.apk ./flows \
--device "Pixel 8" \
--commit-sha "$COMMIT_SHA" \
--pull-request-id "$PR_NUMBER" \
--repo-owner "myorg" \
--repo-name "myapp"
#### Device Options
| Option | Description |
| --- | --- |
| `--device ` | Device name (e.g., "Pixel 9", "iPhone 16") |
| `--platform ` | Platform: Android or iOS |
| `--deviceVersion ` | OS version (e.g., "14", "18.0") |
| `--real-device` | Use a real device instead of emulator/simulator |
See the [Options page](https://testingbot.com/support/app-automate/maestro/options) for more configuration options.
Select a device configuration below, then use the generated cURL command:
iOS 18.6›iPhone 16
Loading environments...
Please wait while we load the available browsers and platforms.
Replace the `:id` with the identifier you received during the app upload call. (In this example 4012)
When running Maestro tests on physical devices, a device could be occupied at times. You might want to use regex/wildcard patterns to target a broad range of devices.
We offer special parameters which you can use to allocate a device:
Regex Input | Result || `".*Galaxy.*"` | This will allocate any of the available Galaxy devices (phone or tablet) |
| `"*"` | This will allocate a random available device, you can use this with the `deviceName` or `version`. |
## View Maestro Results
The results of your Maestro tests will be available in the [TestingBot dashboard](https://testingbot.com/members).
Each test result contains a video, test logs and other meta data generated during the test run. Maestro flows will be displayed, together with the steps that were taken during each flow.

You can also use the CLI or an API call to get back the result from the run(s):
[CLI](https://testingbot.com#)[cURL](https://testingbot.com#)
By default, the CLI waits for test completion and displays real-time progress:
testingbot maestro app.apk ./flows --device "Pixel 8"
The CLI will show:
- Upload progress for app and flows
- Device allocation status
- Live output from Maestro flows
- Final pass/fail status
#### Async Mode
Use `--async` to start tests without waiting for results:
testingbot maestro app.apk ./flows --device "Pixel 8" --async
#### Download Artifacts
Download test artifacts (logs, screenshots, video) after completion:
testingbot maestro app.apk ./flows --device "Pixel 8" \
--download-artifacts \
--artifacts-output-dir ./artifacts
curl -u api_key:api_secret \
"https://api.testingbot.com/v1/app-automate/maestro/:project_id"
Replace the `:project_id` with the identifier you received during the app upload call. (In this example 4012)
The response will contain a `success` boolean, indicating whether the test passed or failed.
**Example response:**
{"runs":[{"id":14019,"status":"DONE","capabilities":{"version":"15.0","deviceName":"Pixel 9","platformName":"Android"},"success":0,"report":"...","created_at":"2025-08-26T10:30:42.000Z","test":{"sessionId":"0255832ee646-e7620dc7d449-172937ccfc2d-175620408997-95145830","environment":{"name":"chrome","os":"Pixel 9 - 15.0","version":"15.0"}}}],"success":false,"version":"1.0","completed":true}
You can poll this request to check if the tests have finished running. The `completed` boolean will be set to true when all tests have finished.
### JUnit Report
All Maestro tests on TestingBot will by default run with a JUnit reporter. This report is accessible programmatically:
[CLI](https://testingbot.com#)[cURL](https://testingbot.com#)
Download the JUnit report automatically after test completion:
# Download JUnit XML report
testingbot maestro app.apk ./flows --device "Pixel 8" \
--report junit \
--report-output-dir ./reports
The report will be saved to the specified directory with a filename based on the test run.
curl -u api_key:api_secret \
"https://api.testingbot.com/v1/app-automate/maestro/:project_id/:run_id/junit_report"
Replace the `:project_id` with the identifier you received during the app upload call. (In this example 4012)
Replace the `:run_id` with the identifier for this run.
The response will contain a `report` string value that contains the XML formatted JUnit report.
### Webhooks
Because the Maestro tests run asynchronously, you might want to get notified when a test run has finished. You can poll the [results API](https://testingbot.com#results) or use the [Webhook integration](https://testingbot.com/support/integrations/webhooks) or [Slack integration](https://testingbot.com/support/integrations/slack) to get notified when a test run has finished.
## Example Maestro Flow
Below is a simple example Flow, where we input two values in the TestingBot example app:
- [Android Sample .apk](https://testingbot.com/appium/sample.apk)
- [iOS Simulator Sample .zip](https://testingbot.com/appium/sample.zip)
- [iOS Physical Sample .ipa](https://testingbot.com/appium/sample.ipa)
appId: org.reactjs.native.example.SampleApp
---
- launchApp
- tapOn:
id: inputA
- longPressOn:
id: inputA
- tapOn:
text: "Select All"
- eraseText
- inputText: "10"
- tapOn:
id: inputB
- longPressOn:
id: inputB
- tapOn:
text: "Select All"
- eraseText
- inputText: "5"
- tapOn:
id: sum
- assertVisible:
text: "15"
## Maestro Parallel Testing
The TestingBot physical and virtual device grid is optimised to run many tests concurrently. You can run multiple Maestro flows simultaneously (in parallel), which will drastically shorten your total test duration.
Depending on your subscription plan, you will be able to run 1 or more Maestro flows at the same time. If you exceed the threshold, additional Maestro flows will be queued until a slot becomes available.
By default, each flow runs in a separate session. Make sure each flow can run isolated. If you don't want this, you can use the [--shard-split 1](https://testingbot.com#shard-split) option to run all flows in the same session.
For example, let's assume you have an Automation Pro plan with 2 concurrent tests. And you want to run 10 Maestro tests, or run the same Maestro test on 10 different device configurations:
- 2 Maestro tests will run simultaneously
- The other 8 are waiting (queued) until one of the first two finishes
- When a slot frees up, the next Maestro test in the queue will start to run
- Finally, when all tests have run, you will see the results in the TestingBot dashboard
Currently there is no limit to the amount of Maestro tests you can add to the queue.
## Grouping Flows
When you have a large number of flows, you might want to split these flows across multiple test runs. This is also known as sharding. By default, each test runs separately in parallel on TestingBot.
You can group flows together that should run in the same session by using the `--shard-split` option.
# Shard flows across 3 parallel sessions
testingbot maestro app.apk ./flows \
--device "Pixel 8" \
--deviceVersion "14" \
--shard-split 3
You can also decide to run all flows in the same session by using the `--shard-split 1` option.
# Shard flows across 3 parallel sessions
testingbot maestro app.apk ./flows \
--device "Pixel 8" \
--deviceVersion "14" \
--shard-split 1
## Integrations
TestingBot offers various [integrations](https://testingbot.com/support/integrations) which allow for connecting your Maestro tests with external services. For example; you can receive automated Slack messages each time a Maestro test runs or fails, or you can integrate Maestro testing with any CI/CD system.
- [App Center](https://testingbot.com/support/integrations/appcenter)
- [Bitrise](https://testingbot.com/support/integrations/ci-cd/bitrise)
- [GitHub Actions](https://testingbot.com/support/integrations/ci-cd/github-actions)
- [Jenkins CI](https://testingbot.com/support/integrations/ci-cd/jenkins)
- [Jira](https://testingbot.com/support/integrations/jira)
- [Slack](https://testingbot.com/support/integrations/slack)
- [TeamCity CI](https://testingbot.com/support/integrations/ci-cd/teamcity)
- [Webhooks](https://testingbot.com/support/integrations/webhooks)
## API
TestingBot provides a [REST-API](https://testingbot.com/support/app-automate/maestro/api) to retrieve information about your Maestro projects and runs.
Was this page helpful? Yes No
## Looking for More Help?
Have questions or need more information?
You can reach us via the following channels:
- [Email us](https://testingbot.com/contact/new)
- [Join our Slack Channel](https://join.slack.com/t/testingb0t/shared_invite/zt-3bcw9xch-jk19~6XPs_xBrsAgAedkCw)
---
URL: https://testingbot.com/support/app-automate/maestro/api
# Maestro API Overview
TestingBot provides a REST API to upload apps, run Maestro flows, and retrieve information about your [Maestro projects and runs](https://testingbot.com/support/app-automate/maestro).
In the documentation below, a Maestro project using a `:project_id` consists of a mobile application that was uploaded together with a zipped set of Maestro flow files.
A Maestro project can have multiple test runs, depending on how many device configurations (capabilities) you specified when you [started the tests](https://testingbot.com/support/app-automate/maestro/api#run).
All API endpoints require authentication using your TestingBot API key and secret, which you can obtain from the Member area.
| Base URL | Authentication |
| --- | --- |
| `https://api.testingbot.com/v1/app-automate/maestro` | HTTP Basic Auth (API key:secret) |
## CLI Alternative
For most use cases, we recommend using the [TestingBot CLI](https://testingbot.com/support/app-automate/maestro#cli) instead of the REST API directly. The CLI handles uploading your app, flows and running tests in a single command:
# Install the CLI
npm install -g @testingbot/cli
# Authenticate
testingbot login
# Run Maestro tests (handles upload + run automatically)
testingbot maestro app.apk ./flows --device "Pixel 8" --deviceVersion "14"
The CLI provides:
- Automatic app and flow uploads
- Real-time progress and streaming output
- Automatic report downloads
- Simpler authentication
Use the REST API directly when you need programmatic access or custom integration workflows.
## Upload App
Upload your Android (.apk/.aab) or iOS (.ipa/.app) application to TestingBot. This creates a new Maestro project and returns a project ID.
| Method | Endpoint |
| --- | --- |
| `POST` | `/app-automate/maestro/app` |
#### Parameters
| Name | Type | Required | Description |
| --- | --- | --- | --- |
| `file` | file | Yes | The app file to upload (.apk, .aab, .ipa, .app or .zip) |
[cURL](https://testingbot.com#)
curl -u api_key:api_secret \
-X POST "https://api.testingbot.com/v1/app-automate/maestro/app" \
-F "file=@/path/to/your/app.apk"
#### Response
{
"id": 17876,
"app": {
"app_url": "https://...",
"icon_url": "https://...",
"app_version": "1.0.0",
"bundle_id": "com.example.app",
}
}
Save the returned `id` - you'll need it for uploading flows and running tests.
## Upload Maestro Flows
Upload your Maestro flow files (as a .zip archive) to an existing project. This replaces any previously uploaded flows.
| Method | Endpoint |
| --- | --- |
| `POST` | `/app-automate/maestro/:id/tests` |
#### Parameters
| Name | Type | Required | Description |
| --- | --- | --- | --- |
| `id` | integer | Yes | The project ID returned from the app upload |
| `file` | file | Yes | A .zip file containing your Maestro flow YAML files |
[cURL](https://testingbot.com#)
curl -u api_key:api_secret \
-X POST "https://api.testingbot.com/v1/app-automate/maestro/:id/tests" \
-F "file=@/path/to/flows.zip"
#### Response
{
"id": 17876,
"flows": [
{
"id": 123,
"name": "login_flow",
}
]
}
## Run Maestro Tests
Start running your Maestro flows on one or more devices. You can specify multiple device configurations to run tests in parallel.
| Method | Endpoint |
| --- | --- |
| `POST` | `/app-automate/maestro/:id/run` |
#### Parameters
| Name | Type | Required | Description |
| --- | --- | --- | --- |
| `id` | integer | Yes | The project ID |
| `capabilities` | array | Yes | Array of device configurations to run tests on |
| `maestroOptions` | object | No | Additional Maestro options (version, env, flows, tags). See [Test Options](https://testingbot.com/support/app-automate/maestro/options). |
| `shardSplit` | integer | 1 | Group flows into N chunks, each chunk running on a separate device.
By default each flow runs in its own session on a device. |
[cURL](https://testingbot.com#)
curl -u api_key:api_secret \
-X POST "https://api.testingbot.com/v1/app-automate/maestro/:id/run" \
-d '{"capabilities":[{"platformName":"Android","version":"14","deviceName":"Pixel 8"}]}' \
-H "Content-Type: application/json"
#### Response
{
"success": true,
"id": 17876,
"runs": [
{
"id": 18809,
"capabilities": {
"platformName": "Android",
"version": "14",
"deviceName": "Pixel 8"
},
"flows": [
{
"id": 123,
"name": "login_flow",
"report": "...",
"requested_at": "2025-11-28T09:15:00.000Z",
"completed_at": "2025-11-28T09:16:00.000Z",
"status": "WAITING",
"test_case_id": 456
}
]
}
]
}
#### Error Responses
| Status Code | Description |
| --- | --- |
| `429` | Insufficient minutes available. Please upgrade your account to continue running Maestro tests. |
## List Maestro Projects
Retrieve a paginated list of all your Maestro projects.
| Method | Endpoint |
| --- | --- |
| `GET` | `/app-automate/maestro` |
#### Query Parameters
| Name | Type | Default | Description |
| --- | --- | --- | --- |
| `offset` | integer | 0 | Number of records to paginate |
| `count` | integer | 10 | Number of records to return |
[cURL](https://testingbot.com#)
curl -u api_key:api_secret \
"https://api.testingbot.com/v1/app-automate/maestro"
#### Response
{
"data": [
{
"id": 17876,
"name": "Maestro Project 17876",
"created_at": "2025-11-28T08:12:31.000Z",
"updated_at": "2025-11-28T08:12:31.000Z",
"completed": false,
"app": {
"app_url": "https://...",
"icon_url": "https://...",
"app_version": "2.7.50420",
"bundle_id": "org.wikipedia"
},
"flows_url": "https://...",
"flows": [
{
"id": 123,
"name": "login_flow",
}
],
"runs": [18809, 18854, 18863, 18866]
}
],
"meta": {
"offset": 0,
"count": 10,
"total": 25
}
}
## Get Maestro Project Info
Retrieve details about a specific Maestro project, including all its runs.
| Method | Endpoint |
| --- | --- |
| `GET` | `/app-automate/maestro/:id` |
[cURL](https://testingbot.com#)
curl -u api_key:api_secret \
"https://api.testingbot.com/v1/app-automate/maestro/:id"
#### Response
{
"runs": [
{
"id": 18809,
"status": "DONE",
"capabilities": {
"version": "16",
"deviceName": "Pixel 9",
"platformName": "Android"
},
"success": 1,
"report": "",
"options": {},
"flows": [
{
"id": 123,
"name": "login_flow",
"report": "...",
"requested_at": "2025-11-28T09:15:00.000Z",
"completed_at": "2025-11-28T09:16:00.000Z",
"status": "WAITING",
"test_case_id": 456
}
]
}
],
"success": true,
"completed": true
}
#### Run Status Values
| Status | Description |
| --- | --- |
| `WAITING` | Run is queued and waiting for a device |
| `READY` | The test is running on the device |
| `DONE` | Run has completed |
| `FAILED` | Run failed to complete |
## Get Run Info
Retrieve detailed information about a specific Maestro run. Use this to poll for completion status.
| Method | Endpoint |
| --- | --- |
| `GET` | `/app-automate/maestro/:project_id/:run_id` |
[cURL](https://testingbot.com#)
curl -u api_key:api_secret \
"https://api.testingbot.com/v1/app-automate/maestro/:project_id/:run_id"
Replace `:project_id` with your project ID and `:run_id` with the run ID.
#### Response
{
"id": 18809,
"status": "DONE",
"capabilities": {
"version": "16",
"deviceName": "Pixel 9",
"platformName": "Android"
},
"flows": [
{
"id": 123,
"name": "login_flow",
"report": "...",
"requested_at": "2025-11-28T09:15:00.000Z",
"completed_at": "2025-11-28T09:16:00.000Z",
"status": "WAITING",
"test_case_id": 456
}
],
"success": 1,
"report": "",
"options": {},
"completed": true
}
Poll this endpoint to check if the test has finished. The `completed` field will be `true` when the run has completed.
## JUnit Report
Retrieve the JUnit XML report for a completed Maestro run. This is useful for CI/CD integration.
| Method | Endpoint |
| --- | --- |
| `GET` | `/app-automate/maestro/:project_id/:run_id/junit_report` |
[cURL](https://testingbot.com#)
curl -u api_key:api_secret \
"https://api.testingbot.com/v1/app-automate/maestro/:project_id/:run_id/junit_report"
#### Response
{
"junit_report": "..."
}
The `junit_report` field contains the XML-formatted JUnit report generated by Maestro.
## Stop Maestro Run
Stop a currently running Maestro test.
| Method | Endpoint |
| --- | --- |
| `POST` | `/app-automate/maestro/:project_id/:run_id/stop` |
[cURL](https://testingbot.com#)
curl -u api_key:api_secret \
-X POST "https://api.testingbot.com/v1/app-automate/maestro/:project_id/:run_id/stop"
#### Response
{
"success": true
}
Was this page helpful? Yes No
## Looking for More Help?
Have questions or need more information?
You can reach us via the following channels:
- [Email us](https://testingbot.com/contact/new)
- [Join our Slack Channel](https://join.slack.com/t/testingb0t/shared_invite/zt-3bcw9xch-jk19~6XPs_xBrsAgAedkCw)
---
URL: https://testingbot.com/support/app-automate/maestro/options
# Maestro Test Options
When running Maestro tests on TestingBot, you can customize the test execution using various options. These options are passed when [starting a test run](https://testingbot.com/support/app-automate/maestro/api#run) via the API.
Options are organized into two categories:
- **maestroOptions** : Options specific to Maestro execution (version, environment variables, flows, tags)
- **capabilities** : Device and test configuration options (device, orientation, locale, network, etc.)
## Quick Reference
All available options at a glance:
#### Maestro Options
| Option | Type | Description |
| --- | --- | --- |
| `version` | string | Maestro CLI version to use (e.g., "2.0.10") |
| `flows` | array | Specific flow files to run (e.g., ["login.yml", "checkout.yml"]) |
| `env` | object | Environment variables to pass to flows |
| `includeTags` | array | Only run flows with these tags |
| `excludeTags` | array | Skip flows with these tags |
| `shardSplit` | number | Split flows across N parallel sessions |
| `commitSha` | string | Git commit SHA for CI/CD tracking |
| `pullRequestId` | string | Pull request ID for CI/CD tracking |
| `repoName` | string | Repository name (e.g., GitHub repo slug) |
| `repoOwner` | string | Repository owner (e.g., GitHub org or username) |
#### Capability Options
| Option | Type | Description |
| --- | --- | --- |
| `platformName` | string | Platform: "Android" or "iOS" (required) |
| `version` | string | OS version (required) |
| `deviceName` | string | Device name (required) |
| `name` | string | Test name shown in dashboard |
| `build` | string | Build name for grouping tests |
| `orientation` | string | "PORTRAIT" (default) or "LANDSCAPE" |
| `locale` | string | Device locale (e.g., "en\_US", "de\_DE") |
| `timeZone` | string | Device timezone (e.g., "America/New\_York") |
| `throttle_network` | string | Network preset: "Edge", "3G", "4G", "airplane" |
| `testingbot.geoCountryCode` | string | Route traffic through specific country (ISO code) |
## Set Maestro Version
By default, TestingBot runs your Maestro flows with the latest version of the Maestro CLI.
[CLI](https://testingbot.com#)[cURL](https://testingbot.com#)
testingbot maestro app.apk ./flows \
--device "Pixel 8" \
--deviceVersion "14" \
--maestro-version "2.0.10"
If you need a specific version for compatibility, specify the `version` option in `maestroOptions`.
| Option | Type | Example |
| --- | --- | --- |
| `maestroOptions.version` | string | "2.0.10" |
curl -u api_key:api_secret \
-X POST "https://api.testingbot.com/v1/app-automate/maestro/:id/run" \
-d '{
"maestroOptions": {
"version": "2.0.10"
},
"capabilities": [{
"platformName": "Android",
"version": "14",
"deviceName": "Pixel 8"
}]
}' \
-H "Content-Type: application/json"
Replace `:id` with your project ID from the [app upload](https://testingbot.com/support/app-automate/maestro/api#uploadApp).
## Select Specific Flows
By default, TestingBot runs all flow files in your zip archive. To run only specific flows, use the option below.
#### Use Cases
- Run a subset of flows for faster feedback during development
- Execute specific test scenarios without modifying your test suite
- Re-run failed flows without running the entire suite
[CLI](https://testingbot.com#)[cURL](https://testingbot.com#)
With the CLI, you specify flows directly as arguments:
# Run specific flow files
testingbot maestro app.apk login.yml checkout.yml --device "Pixel 8"
# Run flows from a specific directory
testingbot maestro app.apk ./flows/smoke --device "Pixel 8"
# Mix directories and individual files
testingbot maestro app.apk ./flows/smoke login.yml --device "Pixel 8"
| Option | Type | Example |
| --- | --- | --- |
| `maestroOptions.flows` | array of strings | `["login.yml", "checkout.yml"]` |
curl -u api_key:api_secret \
-X POST "https://api.testingbot.com/v1/app-automate/maestro/:id/run" \
-d '{
"maestroOptions": {
"flows": ["login.yml", "checkout.yml"]
},
"capabilities": [{
"platformName": "Android",
"version": "14",
"deviceName": "Pixel 8"
}]
}' \
-H "Content-Type: application/json"
## Environment Variables
Pass environment variables to your Maestro flows using the `env` option. This is useful for configuration that varies between environments (staging, production) or for sensitive data like API keys.
#### Use Cases
- **Environment-specific URLs** : Point to staging or production backends
- **Test credentials** : Pass login credentials securely via CI/CD
- **Feature flags** : Enable or disable features during tests
- **App identifiers** : Specify package names or bundle IDs dynamically
[CLI](https://testingbot.com#)[cURL](https://testingbot.com#)
Use the `-e` or `--env` flag (can be repeated):
testingbot maestro app.apk ./flows --device "Pixel 8" \
-e API_URL=https://staging.example.com \
-e TEST_USER=testuser@example.com \
-e TEST_PASSWORD=secret123
| Option | Type | Example |
| --- | --- | --- |
| `maestroOptions.env` | object | `{"API_URL": "https://staging.example.com"}` |
curl -u api_key:api_secret \
-X POST "https://api.testingbot.com/v1/app-automate/maestro/:id/run" \
-d '{
"maestroOptions": {
"env": {
"API_URL": "https://staging.example.com",
"TEST_USER": "testuser@example.com",
"TEST_PASSWORD": "secret123"
}
},
"capabilities": [{
"platformName": "Android",
"version": "14",
"deviceName": "Pixel 8"
}]
}' \
-H "Content-Type: application/json"
#### Using Variables in Your Flows
Reference environment variables in your Maestro flow files using the `${VARIABLE_NAME}` syntax:
appId: com.example.app
---
- launchApp
- inputText:
text: "${TEST_USER}"
- tapOn: "Next"
- inputText:
text: "${TEST_PASSWORD}"
- tapOn: "Login"
**Best Practice:** Never commit sensitive values like passwords or API keys to your repository. Pass them as environment variables through your CI/CD pipeline.
## Include Tags
Run only flows that have specific tags. This is equivalent to Maestro's `--include-tags` option.
#### Adding Tags to Flows
Add tags to your flow files using the `tags` property:
appId: com.example.app
tags:
- smoke
- login
---
- launchApp
- tapOn: "Login"
[CLI](https://testingbot.com#)[cURL](https://testingbot.com#)
Use the `--include-tags` flag with comma-separated tags:
testingbot maestro app.apk ./flows --device "Pixel 8" \
--include-tags "smoke,critical"
| Option | Type | Example |
| --- | --- | --- |
| `maestroOptions.includeTags` | array of strings | `["smoke", "critical"]` |
curl -u api_key:api_secret \
-X POST "https://api.testingbot.com/v1/app-automate/maestro/:id/run" \
-d '{
"maestroOptions": {
"includeTags": ["smoke", "critical"]
},
"capabilities": [{
"platformName": "Android",
"version": "14",
"deviceName": "Pixel 8"
}]
}' \
-H "Content-Type: application/json"
## Exclude Tags
Skip flows that have specific tags. This is equivalent to Maestro's `--exclude-tags` option.
#### Use Cases
- Skip slow tests during development for faster feedback
- Exclude known flaky tests from CI pipelines
- Skip platform-specific tests (e.g., exclude "ios-only" when running on Android)
[CLI](https://testingbot.com#)[cURL](https://testingbot.com#)
Use the `--exclude-tags` flag with comma-separated tags:
testingbot maestro app.apk ./flows --device "Pixel 8" \
--exclude-tags "slow,flaky"
| Option | Type | Example |
| --- | --- | --- |
| `maestroOptions.excludeTags` | array of strings | `["slow", "flaky"]` |
curl -u api_key:api_secret \
-X POST "https://api.testingbot.com/v1/app-automate/maestro/:id/run" \
-d '{
"maestroOptions": {
"excludeTags": ["slow", "flaky"]
},
"capabilities": [{
"platformName": "Android",
"version": "14",
"deviceName": "Pixel 8"
}]
}' \
-H "Content-Type: application/json"
## IP Geolocation
Test your app from different geographic locations using TestingBot's GeoIP feature. Traffic from the device will route through an IP address in the specified country.
#### Use Cases
- Test geo-restricted content or features
- Verify location-based pricing or currency display
- Test localized content delivery
[CLI](https://testingbot.com#)[cURL](https://testingbot.com#)
testingbot maestro app.zip ./flows \
--platform iOS \
--device "iPhone 15" \
--deviceVersion "17.2" \
--geo-country-code "DE"
| Option | Type | Example |
| --- | --- | --- |
| `testingbot.geoCountryCode` | string (ISO code) | `"DE", "US", "JP"` |
curl -u api_key:api_secret \
-X POST "https://api.testingbot.com/v1/app-automate/maestro/:id/run" \
-d '{
"capabilities": [{
"platformName": "iOS",
"version": "17.2",
"deviceName": "iPhone 15",
"testingbot.geoCountryCode": "DE"
}]
}' \
-H "Content-Type: application/json"
See the full list of [available country codes](https://testingbot.com/support/web-automate/selenium/test-options#geo).
## Network Throttling
Simulate different network conditions to test how your app performs under various connectivity scenarios.
| Option | Type | Example |
| --- | --- | --- |
| `throttle_network` | string | "4G", "3G", "Edge", "airplane" |
#### Network Presets
| Preset | Download | Upload | Latency | Use Case |
| --- | --- | --- | --- | --- |
| `4G` | 18 Mbps | 9 Mbps | 100ms | Standard mobile connection |
| `3G` | 400 Kbps | 100 Kbps | 100ms | Slower mobile network |
| `Edge` | 250 Kbps | 150 Kbps | 300ms | Poor connectivity areas |
| `airplane` | 0 | 0 | - | No connectivity (offline mode) |
| `disable` | - | - | - | Restore full connectivity |
[CLI](https://testingbot.com#)[cURL](https://testingbot.com#)
testingbot maestro app.zip ./flows \
--platform iOS \
--device "iPhone 15" \
--deviceVersion "17.2" \
--throttle-network "3G"
curl -u api_key:api_secret \
-X POST "https://api.testingbot.com/v1/app-automate/maestro/:id/run" \
-d '{
"capabilities": [{
"platformName": "iOS",
"version": "17.2",
"deviceName": "iPhone 15",
"throttle_network": "3G"
}]
}' \
-H "Content-Type: application/json"
## Test Name
Set a custom name for your test that appears in the TestingBot dashboard. This makes it easier to identify specific test runs.
| Option | Type | Example |
| --- | --- | --- |
| `name` | string | "Login Flow - Smoke Test" |
[CLI](https://testingbot.com#)[cURL](https://testingbot.com#)
testingbot maestro app.zip ./flows \
--platform iOS \
--device "iPhone 15" \
--deviceVersion "17.2" \
--name "Login Flow - Smoke Test"
curl -u api_key:api_secret \
-X POST "https://api.testingbot.com/v1/app-automate/maestro/:id/run" \
-d '{
"capabilities": [{
"platformName": "iOS",
"version": "17.2",
"deviceName": "iPhone 15",
"name": "Login Flow - Smoke Test"
}]
}' \
-H "Content-Type: application/json"
## Build Grouping
Group multiple test runs under a single build name. This is useful for organizing tests that belong to the same CI/CD pipeline run or release version.
| Option | Type | Example |
| --- | --- | --- |
| `build` | string | "Release 2.5.0" |
#### Benefits
- View aggregated pass/fail statistics for all tests in a build
- Track test results across different device configurations
- Easily identify which builds introduced failures
[CLI](https://testingbot.com#)[cURL](https://testingbot.com#)
testingbot maestro app.ipa ./flows \
--platform iOS \
--device "iPhone 17" \
--real-device \
--build "Release 2.5.0"
curl -u api_key:api_secret \
-X POST "https://api.testingbot.com/v1/app-automate/maestro/:id/run" \
-d '{
"capabilities": [{
"platformName": "iOS",
"version": "26.0",
"deviceName": "iPhone 17",
"realDevice": true,
"build": "Release 2.5.0"
}]
}' \
-H "Content-Type: application/json"
## Shard Split
Group your Maestro flows into chunks, which will run across multiple parallel sessions for faster execution. For example you have 3 parallel slots and 9 tests, but you want to split this test suite into 3 chunks of tests and run them in parallel on connected devices, then you would use `shardSplit` set to 3.
| Option | Type | Example |
| --- | --- | --- |
| `shardSplit` | number | 1 |
[CLI](https://testingbot.com#)[cURL](https://testingbot.com#)
# Split flows across 3 parallel sessions - without this each flow would run in its own session
testingbot maestro app.apk ./flows \
--device "Pixel 8" \
--deviceVersion "14" \
--shard-split 3
curl -u api_key:api_secret \
-X POST "https://api.testingbot.com/v1/app-automate/maestro/:id/run" \
-d '{
"shardSplit": 3,
"capabilities": [{
"platformName": "Android",
"version": "14",
"deviceName": "Pixel 8"
}]
}' \
-H "Content-Type: application/json"
## CI/CD Integration
Pass Git and repository metadata to associate test runs with specific commits and pull requests. This information appears in the TestingBot dashboard and can be used for tracking and debugging.
| Option | Type | Description |
| --- | --- | --- |
| `commitSha` | string | Git commit SHA associated with this test run |
| `pullRequestId` | string | Pull request ID this test run originated from |
| `repoName` | string | Repository name (e.g., GitHub repo slug) |
| `repoOwner` | string | Repository owner (e.g., GitHub organization or username) |
[CLI](https://testingbot.com#)[cURL](https://testingbot.com#)
# Pass Git metadata for CI/CD tracking
testingbot maestro app.apk ./flows \
--device "Pixel 8" \
--deviceVersion "14" \
--commit-sha "abc123def456" \
--pull-request-id "42" \
--repo-owner "myorg" \
--repo-name "myapp"
#### GitHub Actions Example
testingbot maestro app.apk ./flows \
--device "Pixel 8" \
--commit-sha "${{ github.sha }}" \
--pull-request-id "${{ github.event.pull_request.number }}" \
--repo-owner "${{ github.repository_owner }}" \
--repo-name "${{ github.event.repository.name }}"
curl -u api_key:api_secret \
-X POST "https://api.testingbot.com/v1/app-automate/maestro/:id/run" \
-d '{
"meta": {
"commitSha": "abc123def456",
"pullRequestId": "42",
"repoName": "myapp",
"repoOwner": "myorg"
},
"capabilities": [{
"platformName": "Android",
"version": "14",
"deviceName": "Pixel 8"
}]
}' \
-H "Content-Type: application/json"
## Device Orientation
Set the device orientation at the start of your test.
| Option | Type | Values | Default |
| --- | --- | --- | --- |
| `orientation` | string | `"PORTRAIT", "LANDSCAPE"` | PORTRAIT |
[CLI](https://testingbot.com#)[cURL](https://testingbot.com#)
testingbot maestro app.apk ./flows \
--device "Pixel 8" \
--deviceVersion "14" \
--orientation LANDSCAPE
curl -u api_key:api_secret \
-X POST "https://api.testingbot.com/v1/app-automate/maestro/:id/run" \
-d '{
"capabilities": [{
"platformName": "Android",
"version": "14",
"deviceName": "Pixel 8",
"orientation": "LANDSCAPE"
}]
}' \
-H "Content-Type: application/json"
## Device Timezone
Set the device timezone for your test. Useful for testing time-sensitive features.
| Option | Type | Example |
| --- | --- | --- |
| `timeZone` | string (IANA) | `"America/New_York", "Europe/London", "Asia/Tokyo"` |
[CLI](https://testingbot.com#)[cURL](https://testingbot.com#)
testingbot maestro app.zip ./flows \
--platform iOS \
--device "iPhone 15" \
--deviceVersion "17.2" \
--timezone "America/New_York"
curl -u api_key:api_secret \
-X POST "https://api.testingbot.com/v1/app-automate/maestro/:id/run" \
-d '{
"capabilities": [{
"platformName": "iOS",
"version": "17.2",
"deviceName": "iPhone 15",
"timeZone": "America/New_York"
}]
}' \
-H "Content-Type: application/json"
See the [full list of timezone identifiers](https://en.wikipedia.org/wiki/List_of_tz_database_time_zones).
## Device Locale
Set the device locale to test localized content and formatting. The locale affects language, date formats, number formats, and currency display.
| Option | Type | Format | Example |
| --- | --- | --- | --- |
| `locale` | string | language\_COUNTRY | `"de_DE", "fr_CA", "ja_JP"` |
[CLI](https://testingbot.com#)[cURL](https://testingbot.com#)
testingbot maestro app.zip ./flows \
--platform iOS \
--device "iPhone 15" \
--deviceVersion "17.2" \
--device-locale "de_DE"
curl -u api_key:api_secret \
-X POST "https://api.testingbot.com/v1/app-automate/maestro/:id/run" \
-d '{
"capabilities": [{
"platformName": "iOS",
"version": "17.2",
"deviceName": "iPhone 15",
"locale": "de_DE"
}]
}' \
-H "Content-Type: application/json"
#### Common Locale Codes
| Region | Locale Code |
| --- | --- |
| English (US) | `en_US` |
| English (UK) | `en_GB` |
| German (Germany) | `de_DE` |
| French (France) | `fr_FR` |
| French (Canada) | `fr_CA` |
| Spanish (Spain) | `es_ES` |
| Spanish (Mexico) | `es_MX` |
| Japanese | `ja_JP` |
| Chinese (Simplified) | `zh_CN` |
| Chinese (Traditional) | `zh_TW` |
| Korean | `ko_KR` |
| Portuguese (Brazil) | `pt_BR` |
| Italian | `it_IT` |
| Dutch | `nl_NL` |
| Russian | `ru_RU` |
| Arabic | `ar_SA` |
| Hindi | `hi_IN` |
## Maestro config.yaml
You can include a `config.yaml` file in your [Maestro flows zip file](https://testingbot.com/support/app-automate/maestro#uploadSuite). This configuration file lets you define options that apply to all your flows.
#### Supported config.yaml Options
| Option | Description |
| --- | --- |
| `includeTags` | Only run flows with these tags |
| `excludeTags` | Skip flows with these tags |
| `env` | Environment variables available in all flows |
#### Example config.yaml
env:
API_URL: https://api.example.com
DEBUG: "true"
includeTags:
- smoke
- critical
## TestingBot Tunnel
Use [TestingBot Tunnel](https://testingbot.com/support/tunnel) to allow your app to access private or staging backend servers during tests.
#### Use Cases
- Test against staging APIs not accessible from the public internet
- Access localhost services running on your machine
- Test with private databases or internal services
When a TestingBot Tunnel is active on your account, Maestro tests automatically route traffic through it. No additional configuration is needed.
To start a tunnel, download and run the [TestingBot Tunnel](https://testingbot.com/support/tunnel) client before starting your tests.
## CLI Reference
When using the [TestingBot CLI](https://testingbot.com/support/app-automate/maestro#cli), these options are available as command-line flags:
#### Device Options
| CLI Option | Description |
| --- | --- |
| `--device ` | Device name (e.g., "Pixel 9", "iPhone 16") |
| `--platform ` | Platform: Android or iOS |
| `--deviceVersion ` | OS version (e.g., "14", "17.2") |
| `--real-device` | Use a real device instead of emulator/simulator |
| `--orientation ` | Screen orientation: PORTRAIT or LANDSCAPE |
| `--device-locale ` | Device locale (e.g., "en\_US", "de\_DE") |
| `--timezone ` | Timezone (e.g., "America/New\_York") |
#### Test Configuration
| CLI Option | Description |
| --- | --- |
| `--name ` | Test name for dashboard identification |
| `--build ` | Build identifier for grouping test runs |
| `--include-tags ` | Only run flows with these tags (comma-separated) |
| `--exclude-tags ` | Exclude flows with these tags (comma-separated) |
| `-e, --env ` | Environment variable for flows (can be repeated) |
| `--maestro-version ` | Maestro version to use (e.g., "2.0.10") |
| `--shard-split ` | Split flows into N chunks, each chunk running on a separate device |
#### CI/CD Integration
| CLI Option | Description |
| --- | --- |
| `--commit-sha ` | Git commit SHA associated with this test run |
| `--pull-request-id ` | Pull request ID this test run originated from |
| `--repo-name ` | Repository name (e.g., GitHub repo slug) |
| `--repo-owner ` | Repository owner (e.g., GitHub organization or username) |
#### Network & Location
| CLI Option | Description |
| --- | --- |
| `--throttle-network ` | Network throttling: 4G, 3G, Edge, airplane, or disable |
| `--geo-country-code
## Private Accounts
To display the matrix image, or link to builds, you need to generate an **authentication token**.
To generate the authentication token, you must concatenate your TestingBot key, TestingBot secret
and optionally an identifier. Finally, take the MD5 hash of the concatenated string:
[Ruby](https://testingbot.com#)[Python](https://testingbot.com#)[PHP](https://testingbot.com#)[Java](https://testingbot.com#)[NodeJS](https://testingbot.com#)
Digest::MD5.hexdigest("#{client_key}:#{client_secret}")
MessageDigest m=MessageDigest.getInstance("MD5");
String s = "TESTINGBOT_KEY:TESTINGBOT_SECRET";
m.update(s.getBytes(),0,s.length());
System.out.println("MD5: "+new BigInteger(1,m.digest()).toString(16));
echo md5("TESTINGBOT_KEY:TESTINGBOT_SECRET");
import hashlib
print(hashlib.md5("TESTINGBOT_KEY:TESTINGBOT_SECRET".encode('utf-8')).hexdigest())
var crypto = require('crypto');
crypto.createHash('md5').update("TESTINGBOT_KEY:TESTINGBOT_SECRET").digest("hex");
## Open Source Accounts
[Open Source](https://testingbot.com/open-source) accounts automatically have their tests and builds set to public. This means no authentication (auth parameter) is required to display matrix images or link to tests/builds.
## More
- If you like to show browser matrix images of **multiple projects** , please consider creating a new user account per project.
- We're also providing [status badges](https://testingbot.com/support/other/status-badges), displaying if your build passed/failed.
Was this page helpful? Yes No
## Looking for More Help?
Have questions or need more information?
You can reach us via the following channels:
- [Email us](https://testingbot.com/contact/new)
- [Join our Slack Channel](https://join.slack.com/t/testingb0t/shared_invite/zt-3bcw9xch-jk19~6XPs_xBrsAgAedkCw)
---
URL: https://testingbot.com/support/tunnel/commandline
# Tunnel Commandline Reference
The tunnel requires both a TestingBot Key and TestingBot Secret being passed via the commandline, except in the following cases:
- If you have a `.testingbot` file located in your `$HOME` directory, then the tunnel will fetch the key and secret from this file.
- If you pass the following environment variables with valid key/secret:
TESTINGBOT_KEY=""
and
TESTINGBOT_SECRET=""
| -a,--auth \ | Performs Basic Authentication for specific hosts, only works with HTTP. |
| -b,--nobump | Do not perform SSL bumping. |
| -d,--debug | Enables debug messages. Will output request/response headers. |
| -dns,--dns | Use a custom DNS server. For example: 8.8.8.8 |
| --doctor | Perform sanity/health checks to detect possible misconfiguration or problems. |
| --extra-headers \ | Inject extra headers in the requests the tunnel makes. |
| -f,--readyfile \ | This file will be touched when the tunnel is ready for usage |
| -F,--fast-fail-regexps \ | Specify domains you don't want to proxy, comma separated. |
| -h,--help | Displays help text |
| -i,--tunnel-identifier \ | Add an identifier to this tunnel connection.
In case of multiple tunnels, specify this identifier in your desired capabilities to use this specific tunnel. |
| -j,--localproxy \ | The port to launch the local proxy on (default 8087). |
| -l,--logfile \ | Write logging to a file. |
| --metrics-port \ | Use the specified port to access metrics. Default port 8003 |
| -P,--se-port \ | The local port your Selenium test should connect to. Default port is 4445 |
| -p,--hubport \ | Use this if you want to connect to port 80 on our hub instead of the default port 4444 |
| --pac \ | Proxy autoconfiguration. Should be a http(s) URL |
| -q,--nocache | Bypass our Caching Proxy running on our tunnel VM. |
| -v,--version | Displays the current version of the Tunnel |
| -w,--web \ | Point to a directory for testing. Creates a local webserver. |
| -x,--noproxy | Do not start a local proxy (requires user provided proxy server on port 8087) |
| -Y,--proxy \ | Specify an upstream proxy. |
| -z,--proxy-userpwd \ | Username and password required to access the proxy configured with --proxy. |
Was this page helpful? Yes No
## Looking for More Help?
Have questions or need more information?
You can reach us via the following channels:
- [Email us](https://testingbot.com/contact/new)
- [Join our Slack Channel](https://join.slack.com/t/testingb0t/shared_invite/zt-3bcw9xch-jk19~6XPs_xBrsAgAedkCw)
---
URL: https://testingbot.com/support/tunnel/multiple
# Multiple Tunnels
It is possible to run up to 3 simultaneous tunnels.
Either you run multiple tunnels with your own account, or you're a sub-account of a team where other colleagues have tunnels running as well.
To make it possible to go through a specific tunnel, you can use the `--tunnel-identifier` option with the tunnel's commandline options.
With this option you simply pass an identifier as string.
For example:
java -jar testingbot-tunnel.jar key secret --tunnel-identifier myTunnel
Now you or your team members can use this specific tunnel in your tests:
{
"browserName":"firefox",
"version":"latest",
"platform":"WIN10",
"tunnel-identifier":"myTunnel"
}
Was this page helpful? Yes No
## Looking for More Help?
Have questions or need more information?
You can reach us via the following channels:
- [Email us](https://testingbot.com/contact/new)
- [Join our Slack Channel](https://join.slack.com/t/testingb0t/shared_invite/zt-3bcw9xch-jk19~6XPs_xBrsAgAedkCw)
---
URL: https://testingbot.com/support/tunnel/changelog
# Tunnel Changelog
| Version / Release Date | Changes |
| --- | --- |
| **4.4**
Released October 2025 |
- Update dependencies
- Improve `--proxy` and `--proxy-userpwd`
|
| **4.3**
Released August 2025 |
- Update dependencies (Jetty + SSH lib)
- Improve monitoring + retry mechanisms
- Drop support for JDK 8
- Improve `--doctor` checks
|
| **4.0**
Released December 2024 |
- Update dependencies (Jetty 11)
- Websocket + Server Sent Events support
- Introduced `--nobump` argument to disable SSL bumping
|
| **3.5**
Released May 2023 |
- Updated dependencies
- Upgraded secure connection cipher
|
| **3.2**
Released February 2021 |
- Updated dependencies
|
| **3.1**
Released February 2020 |
- Updated dependencies
- Don't poll tunnel indefinitely
- Built with JDK8
- Code cleanup
|
| **3.0**
Released September 2019 |
- Various minor fixes
- Updated Jetty Dependencies
|
| **2.9**
Released January 2019 |
- Various minor fixes (timeouts, doctor checks, ..)
- Prevent duplicate ports
|
| **2.8**
Released June 2018 |
- Fix NPE in ConnectHandler
|
| **2.7**
Released June 2018 |
- Rename jettyport option to localport
- If started with --nocache, send to API for Manual Testing
- Implemented upstream proxying for HTTPs via CONNECT (--proxy)
- Updated pom.xml depndencies
- No more hardcoded ports to listen to
|
| **2.6**
Released April 2018 |
- Remove incorrect Java version check
- Remove deprecated features: --boost and --ssl
- Add option to supply extra HTTP headers during requests
- Add option to supply basic auth credentials for various hosts, which the tunnel will automatically use
- Make the --nocache option clearer: Do not cache any HTTP requests
|
| **2.5**
Released September 2017 |
- Improved --doctor checks, check if necessary ports can be opened
- Add support for --pac to set a PAC url (Proxy) for your test sessions
|
| **2.4**
Released August 2017 |
- Add --tunnel-identifier to identify different tunnels for the same account
- Improved logging (formatting, log to file, debug levels, ...)
- Improved handling of connection errors (re-establish connection to tunnel VM upon connection failures)
- Added option where you can specify a local directory to be set up as a webserver, for example to test static files
- Added an embedded statistics REST api to fetch details about the running instance, by default runs on port 8003
|
| **2.3**
Released October 2016 |
- Add --doctor to troubleshoot misconfigurations
- Debugmode will now output HTTP headers
|
Was this page helpful? Yes No
## Looking for More Help?
Have questions or need more information?
You can reach us via the following channels:
- [Email us](https://testingbot.com/contact/new)
- [Join our Slack Channel](https://join.slack.com/t/testingb0t/shared_invite/zt-3bcw9xch-jk19~6XPs_xBrsAgAedkCw)
---
URL: https://testingbot.com/support/tunnel/examples
# Examples
Below you will find some examples on how to use the Tunnel.
To start your Tunnel, [download the Java based Tunnel](https://testingbot.com/downloads/testingbot-tunnel.zip) and run from the commandline:
java -jar testingbot-tunnel.jar key secret
Below you will find an example demonstrating how to adjust your tests to use the Tunnel.
**Before:**
urlhub = "http://key:secret@hub.testingbot.com/wd/hub"
client = Selenium::WebDriver::Remote::Http::Default.new
**After:**
urlhub = "http://key:secret@localhost:4445/wd/hub"
client = Selenium::WebDriver::Remote::Http::Default.new
Notice how we now use `localhost:4445`, which will send the test commands through the Tunnel.
## Tunnel Identifiers
You can choose to use a tunnel identifier to connect to a specific tunnel.
For example, launch a tunnel:
java -jar testingbot-tunnel.jar key secret -i myTunnel
This tunnel now has an identifier "myTunnel". You can instruct your tests to go through this specific tunnel with Desired Capabilities:
{
"browserName":"firefox",
"version":"latest",
"platform":"WIN10",
"tunnel-identifier":"myTunnel"
}
## Adding Extra Headers
TestingBot tunnel allows you to add extra headers to the HTTP requests it will make during testing.
For example, to add a custom header:
java -jar testingbot-tunnel.jar key secret \
--extra-headers '{"MyOwnHeader": "HeaderValue"}'
## Upstream Proxy
You can instruct TestingBot Tunnel to use a specific upstream proxy.
For example, your company network requires all traffic to go through a specific proxy.
Or, you'd like to do geo-location testing and want to use a proxy in a different geographical location.
You can specify `-Y address:port` to indicate which proxy you'd like to use.
If your proxy requires authentication, you can pass the credentials with:
-z username:password
For example:
java -jar testingbot-tunnel.jar key secret -Y myproxy:9000 -z username:password
## Basic Authentication
If you need to test a website or pages that require Basic Authentication, then you can instruct TestingBot tunnel to automatically enter the correct credentials during testing.
You can specify `-a host:port:user:passwd` to indicate which credentials to use for which host (+port).
If your website is not running on a specific port, you can use port 80.
java -jar testingbot-tunnel.jar key secret -a mywebsite.com:80:myusername:mypassword
Was this page helpful? Yes No
## Looking for More Help?
Have questions or need more information?
You can reach us via the following channels:
- [Email us](https://testingbot.com/contact/new)
- [Join our Slack Channel](https://join.slack.com/t/testingb0t/shared_invite/zt-3bcw9xch-jk19~6XPs_xBrsAgAedkCw)
---
URL: https://testingbot.com/support/tunnel/faq
# Frequently Asked Questions
Below is a list of questions and answers that may help you with setting up or troubleshooting TestingBot Tunnel.
## How do I use the tunnel with manual (live) testing?
When you, or a team member, starts a TestingBot tunnel, all future manual tests will automatically use the latest active tunnel.
Whether you do a live test on a Desktop VM, a sim/emu device or a physical device, the tunnel will automatically be used.
## My Mobile App uses Certificate Pinning. How can I add the TestingBot Tunnel CA certificate?
All our VMs and mobile devices trust a TestingBot CA certificate that we generated. You can [download this CA certificate](https://testingbot.com/downloads/testingbot-ssl-bumping.crt) and add it to your app.
By default, TestingBot tunnel will bump all SSL traffic to use the TestingBot CA certificate. We do this to prevent issues with self-signed certificates.
If you do not wish to use this SSL bumping, you can pass `noSSLBump: true` as a capability or use the `--nocache` tunnel option.
## How many TestingBot Tunnels can I keep open simultaneously?
The maximum amount of simultaneous tunnels depends on the license your account has. By default, you can run up to 2 tunnels simultaneously.
## Can I use localhost with the tunnel?
You can use `localhost` on all our Desktop VMs while using TestingBot Tunnel.
By default we support proxying these ports for localhost testing: `[443, 80, 8080, 3030, 3000, 3001, 3400]`.
If you need additional ports, please pass an array of port numbers to either `localHttpPorts` or `localHttpsPorts`
On physical mobile devices and simulators/emulators, you cannot use `localhost`.
To test on mobile devices, please define a local domain name rather than localhost (127.0.0.1). You can define a local domain in your hosts file (`/etc/hosts`) on the machine where the TestingBot Tunnel program is running.
For example, you can add `127.0.0.1 mywebsite` to your `/etc/hosts` file, then use `http://mywebsite` in your tests.
## Can I use websockets or SSE with the tunnel?
With TestingBot Tunnel v4 and higher, it is possible to test websites or mobile apps that are using WebSockets (`ws://` and `wss://`), as well as Server-Sent Events (SSE).
To get started, please make sure to pass both the `--nobump` and `--nocache` flags when using WebSockets. This is necessary because by default, TestingBot will bump SSL to get around common SSL problems (expired certificates, self-signed certificates, etc.).
java -jar testingbot-tunnel.jar --nocache --nobump
It is currently not possible to use localhost for `ws` and `wss` requests. To get around this, you can add a custom host in your `/etc/hosts` that points to localhost and then use that custom host instead.
The Tunnel will forward the request to the machine running your tunnel endpoint and use it, as if it was localhost.
127.0.0.1 localhost
127.0.0.1 testingbot.com # add this for example, and use in ws://testingbot.com:80
## How can I improve the performance of the tunnel?
You can use the `-F,--fast-fail-regexps` option when starting the tunnel to specify a list of domains that should not be proxied at all.
You can fast-fail trackers, ads and other resources that have no impact on your test or its results. This will decrease the amount of HTTP(s) requests that need to be proxied by TestingBot Tunnel.
## Can I run tests on Virtual Devices and Real Devices using the same TestingBot Tunnel?
You can use the same instance of a tunnel for both virtual devices and real devices.
Was this page helpful? Yes No
## Looking for More Help?
Have questions or need more information?
You can reach us via the following channels:
- [Email us](https://testingbot.com/contact/new)
- [Join our Slack Channel](https://join.slack.com/t/testingb0t/shared_invite/zt-3bcw9xch-jk19~6XPs_xBrsAgAedkCw)
---
URL: https://testingbot.com/support/tunnel/upstream-proxy
# Upstream Proxy
Our tunnel has built-in support to use an upstream proxy, for example a GeoIP proxy.
You can test your website from various locations around the world, by utilizing HTTP proxies.
java -jar testingbot-tunnel.jar --proxy --proxy-userpwd :
## More Information
- TestingBot Tunnel will proxy both HTTP and HTTPs URLs to the upstream proxy (the GeoIP proxy address).
Was this page helpful? Yes No
## Looking for More Help?
Have questions or need more information?
You can reach us via the following channels:
- [Email us](https://testingbot.com/contact/new)
- [Join our Slack Channel](https://join.slack.com/t/testingb0t/shared_invite/zt-3bcw9xch-jk19~6XPs_xBrsAgAedkCw)
---
URL: https://testingbot.com/support/tunnel

# TestingBot Tunnel
Windows, Linux, BSD and macOS supported.[**Download Testingbot Tunnel v.4.4**](https://testingbot.com/downloads/testingbot-tunnel.zip)
SHA1 Checksum: 042c23c96abcb1669fc0dda336fd6a2a615412a7
v.4.4 released October 3, 2025 (Requires Java 11 or higher)
[Source code on GitHub](https://github.com/testingbot/Testingbot-Tunnel)
Maven groupId: com.testingbot | artifactId: TestingBotTunnel | version: 4.4
Docker: `docker pull testingbot/tunnel`
Whether you want to test your website on your local computer (localhost), on a **staging server inside your private network** or on a computer across VPN, the TestingBot Tunnel makes all of this possible in a secure and reliable way.
You will no longer need to open up ports on your firewall or whitelist the TestingBot IP range to run tests on your staging environment. Below are some of the key features of the TestingBot Tunnel.
- **Fast** : We cache static content on our side of the tunnel, reducing traffic and improving performance.
- **Secure** : When you initiate the Tunnel, a dedicated VM server is created just for you, remaining active only for the duration of the session.
- **Robust** : Full HTTP(s) + WebSockets support, built with Java for stability and performance.
- **Easy** : Simple to set up and use.
## Run tests in your local environment
The Tunnel makes it easy to run tests with TestingBot in your private staging environment.
Whether you're testing a new feature or a major code refactor, the Tunnel allows you to easily run regression tests and ensure everything still works as expected. Just point your tests to `http://localhost` on port `4445`, instead of connecting to our grid at `https://hub.testingbot.com`.
The Tunnel is a Java-based program (`.jar`) that includes a **secure HTTP(s) + WebSocket proxy**, which relays requests to the TestingBot browser and device grid.
## Optimized for Speed
Setting up a Tunnel means we provision a **dedicated VM server just for you** , which takes no longer than a minute to launch.
On our end, we use an accelerator that **caches static content** passing through the tunnel, speeding up the process.
The Tunnel uses compression to minimize the traffic going through the tunnel.
You can run multiple tunnels with a single account, allowing you to dedicate several machines on your private network to different tunnels. This setup ensures **High Availability** for your tests and services.
## Secure Tunnel
All requests to and from our servers are securely routed through the Tunnel, which is built on the **SSH protocol**.
A dedicated VM is provisioned just for you, and once your tests are complete, both the Tunnel and the VM server are automatically destroyed.
## Robust Tunnel
The Tunnel is designed to **handle heavy traffic, even during parallel testing** , ensuring reliable performance.
Built with Java, the Tunnel runs on any standard JVM.
It supports HTTP, HTTPS, WebSockets, SSE, HTTP/1, HTTP/2 and HTTP/3 protocols.
The standalone Tunnel application is compatible with all major operating systems: Windows, Linux, and macOS.
## Easy Setup
Setting up and using the Tunnel is easy.
Download the `.jar` file from our website and run it from your commandline, or use the provided Docker image (`testingbot/tunnel`).
Replace the `TESTINGBOT_KEY` and `TESTINGBOT_SECRET` with [your own key and secret](https://testingbot.com/members/user/edit).
Once your Tunnel is ready, you will see the message "You may start your tests."
The Tunnel creates a `~/.testingbot` file on your local system to store the `TESTINGBOT_KEY` and `TESTINGBOT_SECRET`
## System Requirements
The system requirements depend on how you are going to use the tunnel.
If you intend to do parallel testing, you will need to increase the CPU and RAM of the machine running the tunnel.
A machine with 4GB ram and 2 CPU cores should run the Tunnel just fine.
## Shutting down tunnel
For a proper shutdown, it's recommended to exit the Tunnel gracefully. If not, the Tunnel may remain active in our system because we did not receive a shutdown command.
To do a graceful exit, please use `CTRL+C` in the process window or remove the TestingBot PID file. This will trigger a graceful exit, send the shutdown command to TestingBot and clean up everything.
Alternatively, you can send a `kill -SIGUSR1` signal to the `PID` of the Tunnel process.
## Tunnel Clients
We have created a NodeJS based launcher which you can use in your NodeJS tests and projects:
[testingbot-tunnel-launcher](https://github.com/testingbot/testingbot-tunnel-launcher)
[](https://testingbot.com/assets/tunnel-diagram.png "How the TestingBot Tunnel works")
Was this page helpful? Yes No
## Looking for More Help?
Have questions or need more information?
You can reach us via the following channels:
- [Email us](https://testingbot.com/contact/new)
- [Join our Slack Channel](https://join.slack.com/t/testingb0t/shared_invite/zt-3bcw9xch-jk19~6XPs_xBrsAgAedkCw)
---
URL: https://testingbot.com/support/web-automate/mobile
# Mobile Testing
TestingBot provides iOS and Android testing on both [simulators/emulators](https://testingbot.com/support/web-automate/browsers) and [real/physical devices](https://testingbot.com/support/app-automate/devices).
## Configuring capabilities
TestingBot's mobile simulators and emulators can be accessed using Appium. You can use the device picker below to select the capabilities you want to use for your tests.
iOS 18.6›iPhone 16
Loading environments...
Please wait while we load the available devices and platforms.
W3C Protocol
W3C is the newest WebDriver protocol, TestingBot recommends using W3C.
JSONWP
JSONWP is the legacy protocol which is no longer actively maintained.
JavaPythonNodeJSC#RubyPHP
MutableCapabilities capabilities = new MutableCapabilities();
capabilities.setCapability(CapabilityType.BROWSER_NAME, "safari");
capabilities.setCapability(CapabilityType.BROWSER_VERSION, "18.6");
capabilities.setCapability("appium:deviceName", "iPhone 16");
capabilities.setCapability(CapabilityType.PLATFORM_NAME, "iOS");`
You can configure more options by using the [Appium capabilities generator](https://testingbot.com/support/app-automate/appium/capabilities).
## Portrait/Landscape
It's possible to rotate the device before and during your test. Please see these examples:
**Rotate before test (iOS only):**
desired_capabilities = { "orientation" : "LANDSCAPE " } # or PORTRAIT
**Rotate during test:**
((AppiumDriver) driver).rotate(ScreenOrientation.LANDSCAPE);
## Specifying Appium Version
TestingBot will use the most recent, compatible, Appium version according to the device, OS and version you specify.
If you'd like to specify your own Appium version, you can do this with the `appiumVersion` capability.
To learn more about the available Appium versions, please see our [Appium versions documentation](https://testingbot.com/support/app-automate/appium/appium-versions).
[Java](https://testingbot.com#)[NodeJS](https://testingbot.com#)[Python](https://testingbot.com#)[C#](https://testingbot.com#)[Ruby](https://testingbot.com#)[PHP](https://testingbot.com#)
caps = {
platformName: "iOS",
deviceName: "iPhone 15",
browserVersion: "17.4",
browserName: 'safari',
"tb:options" => {
"appiumVersion" : "2.4.1"
}
}
ChromeOptions chromeOpts = new ChromeOptions();
chromeOpts.setExperimentalOption("w3c", true);
MutableCapabilities tbOptions = new MutableCapabilities();
tbOptions.setCapability("key", "api_key");
tbOptions.setCapability("secret", "api_secret");
tbOptions.setCapability("appiumVersion", "2.4.1");
DesiredCapabilities caps = new DesiredCapabilities();
caps.setCapability(ChromeOptions.CAPABILITY, chromeOpts);
caps.setCapability("platformName", "iOS");
caps.setCapability("tb:options", tbOptions);
caps.setCapability("deviceName", "iPhone 16");
caps.setCapability("browserVersion", "18.6");
caps.setCapability("browserName", "safari");
$options = new ChromeOptions();
$capabilities = DesiredCapabilities::safari();
$capabilities->setPlatform('iOS');
$capabilities->setCapability('tb:options', array(
'appiumVersion' => "2.4.1"
));
$capabilities->setCapability(ChromeOptions::CAPABILITY, $options);
tbOptions = {
'name': 'W3C Sample',
'appiumVersion': "2.4.1"
}
chromeOpts = {
'browserName': "safari",
'platformName': "iOS",
'browserVersion': "18.6",
'deviceName': "iPhone 16",
'goog:chromeOptions': {'w3c': True},
'tb:options': tbOptions
}
self.driver = webdriver.Remote(remote_url, desired_capabilities=chromeOpts)
driver = await new webdriver.Builder().withCapabilities({
"browserName": 'safari',
"platformName": 'iOS',
"deviceName": 'iPhone 16',
"browserVersion": '18.6',
/** Google requires "w3c" to be set in "goog:chromeOptions" as true if you're using ChromeDriver version 74 or lower.
* Based on this commit: https://chromium.googlesource.com/chromium/src/+/2b49880e2481658e0702fd6fe494859bca52b39c
* ChromeDriver now uses w3c by default from version 75+ so setting this option will no longer be a requirement **/
"goog:chromeOptions" : { "w3c" : true },
"tb:options": {
"key": "api_key",
"secret": "api_secret",
"appiumVersion": "2.4.1"
}
}).usingServer("https://hub.testingbot.com/wd/hub").build();
var chromeOptions = new ChromeOptions()
{
BrowserVersion = "18.6",
PlatformName = "iOS",
DeviceName = "iPhone 16",
BrowserName = "safari",
UseSpecCompliantProtocol = true
};
var tbOptions = new Dictionary
{
["key"] = "api_key",
["secret"] = "api_secret",
["appiumVersion"] = "2.4.1"
};
chromeOptions.AddAdditionalCapability("tb:options", tbOptions, true);
driver = new RemoteWebDriver(new Uri("https://hub.testingbot.com/wd/hub"),
chromeOptions.ToCapabilities(), TimeSpan.FromSeconds(600));
## Testing Internal/Staged Websites
We've built [TestingBot Tunnel](https://testingbot.com/support/tunnel), to provide you with a secure way to run tests against your staged/internal webapps.
Please see our [TestingBot Tunnel documentation](https://testingbot.com/support/tunnel) for more information about this easy to use tunneling solution.
Was this page helpful? Yes No
## Looking for More Help?
Have questions or need more information?
You can reach us via the following channels:
- [Email us](https://testingbot.com/contact/new)
- [Join our Slack Channel](https://join.slack.com/t/testingb0t/shared_invite/zt-3bcw9xch-jk19~6XPs_xBrsAgAedkCw)
---
URL: https://testingbot.com/support/web-automate/codeless-automation
# Codeless Web Testing
Codeless Web Automated Testing allows you to run your pre-recorded Selenium tests on the TestingBot cloud grid.
- [Add a test](https://testingbot.com/support/web-automate/codeless-automation/add-test)
- [Test Suites](https://testingbot.com/support/web-automate/codeless-automation/suites)
- [Schedule a test](https://testingbot.com/support/web-automate/codeless-automation/schedule)
- [Test alerts](https://testingbot.com/support/web-automate/codeless-automation/alerts)
- [Supported commands](https://testingbot.com/support/web-automate/codeless-automation/commands)
- [Variables](https://testingbot.com/support/web-automate/codeless-automation/variables)
- [FAQ](https://testingbot.com/support/web-automate/codeless-automation/faq)
Was this page helpful? Yes No
## Looking for More Help?
Have questions or need more information?
You can reach us via the following channels:
- [Email us](https://testingbot.com/contact/new)
- [Join our Slack Channel](https://join.slack.com/t/testingb0t/shared_invite/zt-3bcw9xch-jk19~6XPs_xBrsAgAedkCw)
---
URL: https://testingbot.com/support/web-automate/codeless-automation/add-test
# Add Codeless Automation test
TestingBot can create and run automated web tests against your website on regular intervals and alert you when a test fails.
There are 2 options to create a codeless web automation test:
- You can [record your actions](https://testingbot.com#record) with Selenium IDE, [upload the steps](https://testingbot.com#upload) and replay the steps on TestingBot.
- You can choose to describe tests in natural language and have the [TestingBot AI agent](https://testingbot.com/support/ai/codeless) create and run the test for you.
## Record your actions

### Installing Selenium IDE
To get started, please make sure to [download the Selenium IDE](https://github.com/SeleniumHQ/selenium-ide/releases/). This is an Electron app that will run on Windows and macOS and will allow you to record and playback actions on a website and allow you to save these actions as Selenium scripts (`.side` files).
You can also install the package through NPM: `npm install -g selenium-ide`
### Recording a test
#### Creating a test

Once you have the Selenium IDE program running, you can create a new testcase by clicking the plus icon (+). Enter a name for your test. Next, open the URL you want to test in the right side of the Selenium IDE. Once the page is loaded, interact with the page. You will see new commands are added to the left sidebar, which means the IDE is recording all your actions.
#### Adding verifications

For example, if you tap an element on the webpage, you will see a new `Click` command appear. At any given point, you can right-click an element on the page you are testing and add a verification, for example: `Record Wait For Element Present`.
### Saving test
Once you've finished recording your test, you can choose to save it as a `.side` file, which is basically a JSON file that describes all the actions and verifications you added during the recording.
Choose `Save Project As` and save the file. You can now [upload this file](https://testingbot.com#upload) to TestingBot and instruct TestingBot to run this test on a scheduled interval, running on the browsers & operating systems you want.
## Upload a codeless test
Once you have a `.side` file, you can upload it in the [Codeless Test](https://testingbot.com/members/lab) area of TestingBot.
Click the upload button in the **Import a Selenium Test** section and upload the file.
Once uploaded, you will be redirected to a test configuration page. Here you can configure various options:

### Steps
We will display the same steps that were recorded before. You have the option to re-order the steps, edit steps or remove steps.
### Browsers
A selection of browsers & operating systems will be available to choose from. Select one or more browsers that you want to run your test on.
### Settings
You can configure various settings for your test:
- Schedule when the test should run; a specific time, interval, day. Or maybe every 15 minutes. You indicate how often the test will run.
- Manage timeouts, screen resolution, screenshots and videos.
- Daily and hourly reporting of your tests via email.
- Automatically retry a failed test and if the retry succeeds, ignore the failed test.
- Receive an alert via email or text message when a test fails.
- Test from various geographical locations
## Run Test
Now that the test has been added to TestingBot, you can choose to run it immediately.
Click the **Run test** button on the top right of the edit test page, or from within the test overview page.
TestingBot will run the test on the browser(s) you specified and alert you when a test failed.
Each test comes with screenshots, a video and generated log files.
## API Reference
You can use the [TestingBot API](https://testingbot.com/support/api) to add, edit, remove and [run Codeless Automation tests](https://testingbot.com/support/api#runlabtest).
Use our [integrations](https://testingbot.com/support/integrations) to improve your workflow. For example, configure a [Slack Bot](https://testingbot.com/support/integrations/slack) to notify you when a codeless automation test failed.
Was this page helpful? Yes No
## Looking for More Help?
Have questions or need more information?
You can reach us via the following channels:
- [Email us](https://testingbot.com/contact/new)
- [Join our Slack Channel](https://join.slack.com/t/testingb0t/shared_invite/zt-3bcw9xch-jk19~6XPs_xBrsAgAedkCw)
---
URL: https://testingbot.com/support/web-automate/codeless-automation/suites
# Add a Test Suite
In our TestLab we offer the possibility to upload test-suites (called **Projects** in Selenium IDE) generated by [Selenium IDE](https://www.selenium.dev/selenium-ide/).
A test suite is a collection of tests, generated by the Selenium IDE extension.
To upload the suite, please upload the exported (`.side`) file:

## Managing Test Suites
Once uploaded to our TestLab, you will see page detailing the Project you just uploaded.
It will include a list of the tests that this project contains.
On this page, you can change on which browser(s) the tests should run, change alert/scheduling options and more.
Changing a setting in the project affects all tests for this project.
If you like to only change a single test, click through to the test edit page and make the necessary changes there.

Was this page helpful? Yes No
## Looking for More Help?
Have questions or need more information?
You can reach us via the following channels:
- [Email us](https://testingbot.com/contact/new)
- [Join our Slack Channel](https://join.slack.com/t/testingb0t/shared_invite/zt-3bcw9xch-jk19~6XPs_xBrsAgAedkCw)
---
URL: https://testingbot.com/support/web-automate/codeless-automation/schedule
# Schedule a test
When you have [added a test](https://testingbot.com/support/web-automate/codeless-automation/add-test), you can specify when we should run the test, and how many times we should run it (interval).

You can have your test either run once, every day, every week, repeat every `..` time or use a custom CRON format.
Once scheduled, you can specify when you want to be [alerted of failed tests](https://testingbot.com/support/web-automate/codeless-automation/alerts).
Was this page helpful? Yes No
## Looking for More Help?
Have questions or need more information?
You can reach us via the following channels:
- [Email us](https://testingbot.com/contact/new)
- [Join our Slack Channel](https://join.slack.com/t/testingb0t/shared_invite/zt-3bcw9xch-jk19~6XPs_xBrsAgAedkCw)
---
URL: https://testingbot.com/support/web-automate/codeless-automation/alerts
# Alerts
When a test in Codeless Automation fails, we can notify you by sending you an email, Webhook, Push Notification or SMS/text message.
You can choose to be alerted immediately, or once a day.
## Alert Types
We offer 3 ways to alert you:
- Email
- SMS/Text message
- Webhook to a URL you specify.
The message you will receive will contain the URL, number of errors and an error message trace.
## Email Alerts
To receive an alert via email, fill in your email address.
We will send an email with the failure of the test.
You can customize the error message by filling in your own text.
We offer these variables to customize your error text: `%test_name%` and `%browser%`.

## SMS Text Message
Fill in your phone number (with country code) to receive an SMS message when a test fails.
You can customize the error message by filling in your own text.
We offer these variables to customize your error text: `%test_name%` and `%browser%`.
There's also the possibility to be alerted when the test recovers.

## Webhook
We will call a URL you specify whenever a test fails.
The URL needs to be publicly available, otherwise TestingBot cannot reach the URL.
The URL will receive a POST request from us with the following fields:
- `success` (boolean)
- `job_id` (int) - internal id
- `test_ids[]` (string[]) webdriver sessionIds
- `errors[]` (string[]) error messages
Was this page helpful? Yes No
## Looking for More Help?
Have questions or need more information?
You can reach us via the following channels:
- [Email us](https://testingbot.com/contact/new)
- [Join our Slack Channel](https://join.slack.com/t/testingb0t/shared_invite/zt-3bcw9xch-jk19~6XPs_xBrsAgAedkCw)
---
URL: https://testingbot.com/support/web-automate/codeless-automation/commands
# Supported Selenium IDE Commands
Below is a list of the commands we currently support in our Codeless Automation.
## Browsing
- **close**
Simulates the user clicking the "close" button in the titlebar of a popup window or tab.
- **closeAndWait**
Simulates the user clicking the "close" button in the titlebar of a popup window or tab.
- **goBack**
Simulates the user clicking the "back" button on their browser.
- **goBackAndWait**
Simulates the user clicking the "back" button on their browser.
- **open**
(url)
Opens an URL in the test frame. This accepts both relative and absolute URLs. The "open" command waits for the page to load before proceeding, ie. the "AndWait" suffix is implicit. Note: The URL must be on the same domain as the runner HTML due to security restrictions in the browser (Same Origin Policy). If you need to open an URL on another domain, use the Selenium Server to start a new browser session on that domain.
- **openAndWait**
(url)
Opens an URL in the test frame. This accepts both relative and absolute URLs. The "open" command waits for the page to load before proceeding, ie. the "AndWait" suffix is implicit. Note: The URL must be on the same domain as the runner HTML due to security restrictions in the browser (Same Origin Policy). If you need to open an URL on another domain, use the Selenium Server to start a new browser session on that domain.
- **openWindow**
(url - windowID)
Opens a popup window (if a window with that ID isn't already open). After opening the window, you'll need to select it using the selectWindow command. This command can also be a useful workaround for bug SEL-339. In some cases, Selenium will be unable to intercept a call to window.open (if the call occurs during or before the "onLoad" event, for example). In those cases, you can force Selenium to notice the open window's name by using the Selenium openWindow command, using an empty (blank) url, like this: openWindow("", "myFunnyWindow").
- **openWindowAndWait**
(url - windowID)
Opens a popup window (if a window with that ID isn't already open). After opening the window, you'll need to select it using the selectWindow command. This command can also be a useful workaround for bug SEL-339. In some cases, Selenium will be unable to intercept a call to window.open (if the call occurs during or before the "onLoad" event, for example). In those cases, you can force Selenium to notice the open window's name by using the Selenium openWindow command, using an empty (blank) url, like this: openWindow("", "myFunnyWindow").
- **refresh**
Simulates the user clicking the "Refresh" button on their browser.
- **refreshAndWait**
Simulates the user clicking the "Refresh" button on their browser.
- **selectFrame**
(locator)
Selects a frame within the current window. (You may invoke this command multiple times to select nested frames.) To select the parent frame, use "relative=parent" as a locator; to select the top frame, use "relative=top". You can also select a frame by its 0-based index number; select the first frame with "index=0", or the third frame with "index=2". You may also use a DOM expression to identify the frame you want directly, like this: dom=frames["main"].frames["subframe"]
- **selectFrameAndWait**
(locator)
Selects a frame within the current window. (You may invoke this command multiple times to select nested frames.) To select the parent frame, use "relative=parent" as a locator; to select the top frame, use "relative=top". You can also select a frame by its 0-based index number; select the first frame with "index=0", or the third frame with "index=2". You may also use a DOM expression to identify the frame you want directly, like this: dom=frames["main"].frames["subframe"]
- **selectWindow**
(windowID)
Selects a popup window using a window locator; once a popup window has been selected, all commands go to that window. To select the main window again, use null as the target. Window locators provide different ways of specifying the window object: by title, by internal JavaScript "name," or by JavaScript variable. title=My Special Window: Finds the window using the text that appears in the title bar. Be careful; two windows can share the same title. If that happens, this locator will just pick one. name=myWindow: Finds the window using its internal JavaScript "name" property. This is the second parameter "windowName" passed to the JavaScript method window.open(url, windowName, windowFeatures, replaceFlag) (which Selenium intercepts). var=variableName: Some pop-up windows are unnamed (anonymous), but are associated with a JavaScript variable name in the current application window, e.g. "window.foo = window.open(url);". In those cases, you can open the window using "var=foo". If no window locator prefix is provided, we'll try to guess what you mean like this: 1.) if windowID is null, (or the string "null") then it is assumed the user is referring to the original window instantiated by the browser). 2.) if the value of the "windowID" parameter is a JavaScript variable name in the current application window, then it is assumed that this variable contains the return value from a call to the JavaScript window.open() method. 3.) Otherwise, selenium looks in a hash it maintains that maps string names to window "names". 4.) If that fails, we'll try looping over all of the known windows to try to find the appropriate "title". Since "title" is not necessarily unique, this may have unexpected behavior. If you're having trouble figuring out the name of a window that you want to manipulate, look at the Selenium log messages which identify the names of windows created via window.open (and therefore intercepted by Selenium). You will see messages like the following for each window as it is opened: debug: window.open call intercepted; window ID (which you can use with selectWindow()) is "myNewWindow" In some cases, Selenium will be unable to intercept a call to window.open (if the call occurs during or before the "onLoad" event, for example). (This is bug SEL-339.) In those cases, you can force Selenium to notice the open window's name by using the Selenium openWindow command, using an empty (blank) url, like this: openWindow("", "myFunnyWindow").
- **selectWindowAndWait**
(windowID)
Selects a popup window using a window locator; once a popup window has been selected, all commands go to that window. To select the main window again, use null as the target. Window locators provide different ways of specifying the window object: by title, by internal JavaScript "name," or by JavaScript variable. title=My Special Window: Finds the window using the text that appears in the title bar. Be careful; two windows can share the same title. If that happens, this locator will just pick one. name=myWindow: Finds the window using its internal JavaScript "name" property. This is the second parameter "windowName" passed to the JavaScript method window.open(url, windowName, windowFeatures, replaceFlag) (which Selenium intercepts). var=variableName: Some pop-up windows are unnamed (anonymous), but are associated with a JavaScript variable name in the current application window, e.g. "window.foo = window.open(url);". In those cases, you can open the window using "var=foo". If no window locator prefix is provided, we'll try to guess what you mean like this: 1.) if windowID is null, (or the string "null") then it is assumed the user is referring to the original window instantiated by the browser). 2.) if the value of the "windowID" parameter is a JavaScript variable name in the current application window, then it is assumed that this variable contains the return value from a call to the JavaScript window.open() method. 3.) Otherwise, selenium looks in a hash it maintains that maps string names to window "names". 4.) If that fails, we'll try looping over all of the known windows to try to find the appropriate "title". Since "title" is not necessarily unique, this may have unexpected behavior. If you're having trouble figuring out the name of a window that you want to manipulate, look at the Selenium log messages which identify the names of windows created via window.open (and therefore intercepted by Selenium). You will see messages like the following for each window as it is opened: debug: window.open call intercepted; window ID (which you can use with selectWindow()) is "myNewWindow" In some cases, Selenium will be unable to intercept a call to window.open (if the call occurs during or before the "onLoad" event, for example). (This is bug SEL-339.) In those cases, you can force Selenium to notice the open window's name by using the Selenium openWindow command, using an empty (blank) url, like this: openWindow("", "myFunnyWindow").
- **windowFocus**
Gives focus to the currently selected window
- **windowFocusAndWait**
Gives focus to the currently selected window
- **windowMaximize**
Resize currently selected window to take up the entire screen
- **windowMaximizeAndWait**
Resize currently selected window to take up the entire screen
## Clicks
- **click**
(locator)
Clicks on a link, button, checkbox or radio button. If the click action causes a new page to load (like a link usually does), call waitForPageToLoad.
- **clickAndWait**
(locator)
Clicks on a link, button, checkbox or radio button. If the click action causes a new page to load (like a link usually does), call waitForPageToLoad.
- **clickAt**
(locator - coordString)
Clicks on a link, button, checkbox or radio button. If the click action causes a new page to load (like a link usually does), call waitForPageToLoad.
- **clickAtAndWait**
(locator - coordString)
Clicks on a link, button, checkbox or radio button. If the click action causes a new page to load (like a link usually does), call waitForPageToLoad.
- **doubleClick**
(locator)
Double clicks on a link, button, checkbox or radio button. If the double click action causes a new page to load (like a link usually does), call waitForPageToLoad.
- **doubleClickAndWait**
(locator)
Double clicks on a link, button, checkbox or radio button. If the double click action causes a new page to load (like a link usually does), call waitForPageToLoad.
- **doubleClickAt**
(locator - coordString)
Doubleclicks on a link, button, checkbox or radio button. If the action causes a new page to load (like a link usually does), call waitForPageToLoad.
- **doubleClickAtAndWait**
(locator - coordString)
Doubleclicks on a link, button, checkbox or radio button. If the action causes a new page to load (like a link usually does), call waitForPageToLoad.
- **dragAndDrop**
(locator - movementsString)
Drags an element a certain distance and then drops it
- **dragAndDropAndWait**
(locator - movementsString)
Drags an element a certain distance and then drops it
- **dragAndDropToObject**
(locatorOfObjectToBeDragged - locatorOfDragDestinationObject)
Drags an element and drops it on another element
- **dragAndDropToObjectAndWait**
(locatorOfObjectToBeDragged - locatorOfDragDestinationObject)
Drags an element and drops it on another element
## Form Fields
- **addSelection**
(locator - optionLocator)
Add a selection to the set of selected options in a multi-select element using an option locator. @see #doSelect for details of option locators
- **addSelectionAndWait**
(locator - optionLocator)
Add a selection to the set of selected options in a multi-select element using an option locator. @see #doSelect for details of option locators
- **check**
(locator)
Check a toggle-button (checkbox/radio)
- **checkAndWait**
(locator)
Check a toggle-button (checkbox/radio)
- **focus**
(locator)
Move the focus to the specified element; for example, if the element is an input field, move the cursor to that field.
- **focusAndWait**
(locator)
Move the focus to the specified element; for example, if the element is an input field, move the cursor to that field.
- **removeAllSelections**
(locator)
Unselects all of the selected options in a multi-select element.
- **removeAllSelectionsAndWait**
(locator)
Unselects all of the selected options in a multi-select element.
- **removeSelection**
(locator - optionLocator)
Remove a selection from the set of selected options in a multi-select element using an option locator. @see #doSelect for details of option locators
- **removeSelectionAndWait**
(locator - optionLocator)
Remove a selection from the set of selected options in a multi-select element using an option locator. @see #doSelect for details of option locators
- **select**
(selectLocator - optionLocator)
Select an option from a drop-down using an option locator. Option locators provide different ways of specifying options of an HTML Select element (e.g. for selecting a specific option, or for asserting that the selected option satisfies a specification). There are several forms of Select Option Locator. label=labelPattern: matches options based on their labels, i.e. the visible text. (This is the default.) label=regexp:^[Oo]ther value=valuePattern: matches options based on their values. value=other id=id: matches options based on their ids. id=option1 index=index: matches an option based on its index (offset from zero). index=2 If no option locator prefix is provided, the default behaviour is to match on label.
- **selectAndWait**
(selectLocator - optionLocator)
Select an option from a drop-down using an option locator. Option locators provide different ways of specifying options of an HTML Select element (e.g. for selecting a specific option, or for asserting that the selected option satisfies a specification). There are several forms of Select Option Locator. label=labelPattern: matches options based on their labels, i.e. the visible text. (This is the default.) label=regexp:^[Oo]ther value=valuePattern: matches options based on their values. value=other id=id: matches options based on their ids. id=option1 index=index: matches an option based on its index (offset from zero). index=2 If no option locator prefix is provided, the default behaviour is to match on label.
- **setCursorPosition**
(locator - position)
Moves the text cursor to the specified position in the given input element or textarea. This method will fail if the specified element isn't an input element or textarea.
- **setCursorPositionAndWait**
(locator - position)
Moves the text cursor to the specified position in the given input element or textarea. This method will fail if the specified element isn't an input element or textarea.
- **submit**
(formLocator)
Submit the specified form. This is particularly useful for forms without submit buttons, e.g. single-input "Search" forms.
- **submitAndWait**
(formLocator)
Submit the specified form. This is particularly useful for forms without submit buttons, e.g. single-input "Search" forms.
- **uncheck**
(locator)
Uncheck a toggle-button (checkbox/radio)
- **uncheckAndWait**
(locator)
Uncheck a toggle-button (checkbox/radio)
- **getSelectedLabels**
(selectLocator)
Gets all option labels (visible text) for selected options in the specified select or multi-select element.
- **getSelectedLabel**
(selectLocator)
Gets option label (visible text) for selected option in the specified select element.
- **getSelectedValues**
(selectLocator)
Gets all option values (value attributes) for selected options in the specified select or multi-select element.
- **getSelectedValue**
(selectLocator)
Gets option value (value attribute) for selected option in the specified select element.
- **getSelectedIndexes**
(selectLocator)
Gets all option indexes (option number, starting at 0) for selected options in the specified select or multi-select element.
- **getSelectedIndex**
(selectLocator)
Gets option index (option number, starting at 0) for selected option in the specified select element.
- **getSelectedIds**
(selectLocator)
Gets all option element IDs for selected options in the specified select or multi-select element.
- **getSelectedId**
(selectLocator)
Gets option element ID for selected option in the specified select element.
- **verifyAllButtons**
(equalTo)
- **verifyAllFields**
(equalTo)
- **verifyChecked**
(locator)
- **isChecked**
(locator)
Gets whether a toggle-button (checkbox/radio) is checked. Fails if the specified element doesn't exist or isn't a toggle-button.
- **verifyCursorPosition**
(locator - equalTo)
- **verifyEditable**
(locator)
- **waitForElementEditable**
(locator)
- **verifyNotAllButtons**
(equalTo)
- **verifyNotAllFields**
(equalTo)
- **verifyNotChecked**
(locator)
- **verifyNotCursorPosition**
(locator - equalTo)
- **verifyNotEditable**
(locator)
- **verifyNotSelectedIds**
(selectLocator - equalTo)
- **verifyNotSelectedIndexes**
(selectLocator - equalTo)
- **verifyNotSelectedLabels**
(selectLocator - equalTo)
- **verifyNotSelectedValues**
(selectLocator - equalTo)
- **verifyNotSelectedOptions**
(selectLocator - equalTo)
- **verifyNotSomethingSelected**
(selectLocator)
- **verifyNotValue**
(locator - equalTo)
- **verifySelectedIds**
(selectLocator - equalTo)
- **verifySelectedIndexes**
(selectLocator - equalTo)
- **verifySelectedLabels**
(selectLocator - equalTo)
- **verifySelectedValues**
(selectLocator - equalTo)
- **verifySelectOptions**
(selectLocator - equalTo)
- **verifySomethingSelected**
(selectLocator)
- **isSomethingSelected**
(selectLocator)
Determines whether some option in a drop-down menu is selected.
- **verifyValue**
(locator - equalTo)
- **assertAllButtons**
(equalTo)
- **assertAllFields**
(equalTo)
- **assertChecked**
(locator)
- **assertCursorPosition**
(locator - equalTo)
- **assertEditable**
(locator)
- **assertNotAllButtons**
- **assertNotAllFields**
- **assertNotChecked**
(locator)
- **assertNotCursorPosition**
(locator - equalTo)
- **assertNotEditable**
(locator)
- **assertNotSelectedIds**
(selectLocator - equalTo)
- **assertNotSelectedIndexes**
(selectLocator - equalTo)
- **assertNotSelectedLabels**
(selectLocator - equalTo)
- **assertNotSelectedValues**
(selectLocator - equalTo)
- **assertNotSelectOptions**
(selectLocator - equalTo)
- **assertNotSomethingSelected**
(selectLocator)
- **assertNotValue**
(locator - equalTo)
- **assertSelectedIds**
(selectLocator - equalTo)
- **assertSelectedIndexes**
(selectLocator - equalTo)
- **assertSelectedLabels**
(selectLocator - equalTo)
- **assertSelectedValues**
(selectLocator - equalTo)
- **assertSelectOptions**
(selectLocator - equalTo)
- **assertSomethingSelected**
(selectLocator)
- **assertValue**
(locator - equalTo)
- **waitForAllWindowIds**
(equalTo)
- **waitForAllWindowNames**
(equalTo)
- **waitForAllWindowTitles**
(equalTo)
- **waitForAttributeFromAllWindows**
(attributeName - equalTo)
- **waitForLocation**
(equalTo)
- **waitForNotAllWindowIds**
(equalTo)
- **waitForNotAllWindowNames**
(equalTo)
- **waitForNotAllWindowTitles**
(equalTo)
- **waitForNotAttributeFromAllWindows**
(attributeName - equalTo)
- **WaitForNotLocation**
(equalTo)
- **waitForNotTitle**
(equalTo)
- **waitForTitle**
(equalTo)
- **storeAllButtons**
- **storeAllFields**
- **storeChecked**
(locator - variable)
- **storeCursorPosition**
(locator - variable)
- **storeEditable**
(locator - variable)
- **storeSelectedIds**
(selectLocator - variable)
- **storeSelectedIndexes**
(selectLocator - variable)
- **storeSelectedLabels**
(selectLocator - variable)
- **storeSelectedValues**
(selectLocator - variable)
- **storeSelectOptions**
(selectLocator - variable)
- **storeSomethingSelected**
(selectLocator - variable)
- **storeValue**
(locator - variable)
## Keyboard Events
- **keyDown**
(locator - keySequence)
Simulates a user pressing a key (without releasing it yet).
- **keyDownAndWait**
(locator - keySequence)
Simulates a user pressing a key (without releasing it yet).
- **keyPress**
(locator - keySequence)
Simulates a user pressing and releasing a key.
- **keyPressAndWait**
(locator - keySequence)
Simulates a user pressing and releasing a key.
- **keyUp**
(locator - keySequence)
Simulates a user releasing a key.
- **keyUpAndWait**
(locator - keySequence)
Simulates a user releasing a key.
- **type**
(locator - value)
Sets the value of an input field, as though you typed it in. Can also be used to set the value of combo boxes, check boxes, etc. In these cases, value should be the value of the option selected, not the visible text.
- **typeAndWait**
(locator - value)
Sets the value of an input field, as though you typed it in. Can also be used to set the value of combo boxes, check boxes, etc. In these cases, value should be the value of the option selected, not the visible text.
- **typeKeys**
(locator - value)
Simulates keystroke events on the specified element, as though you typed the value key-by-key. This is a convenience method for calling keyDown, keyUp, keyPress for every character in the specified string; this is useful for dynamic UI widgets (like auto-completing combo boxes) that require explicit key events. Unlike the simple "type" command, which forces the specified value into the page directly, this command may or may not have any visible effect, even in cases where typing keys would normally have a visible effect. For example, if you use "typeKeys" on a form element, you may or may not see the results of what you typed in the field. In some cases, you may need to use the simple "type" command to set the value of the field and then the "typeKeys" command to send the keystroke events corresponding to what you just typed.
- **sendKeys**
(locator - value)
- **typeKeysAndWait**
(locator - value)
Simulates keystroke events on the specified element, as though you typed the value key-by-key. This is a convenience method for calling keyDown, keyUp, keyPress for every character in the specified string; this is useful for dynamic UI widgets (like auto-completing combo boxes) that require explicit key events. Unlike the simple "type" command, which forces the specified value into the page directly, this command may or may not have any visible effect, even in cases where typing keys would normally have a visible effect. For example, if you use "typeKeys" on a form element, you may or may not see the results of what you typed in the field. In some cases, you may need to use the simple "type" command to set the value of the field and then the "typeKeys" command to send the keystroke events corresponding to what you just typed.
## Keyboard Modifiers
- **altKeyDown**
Press the alt key and hold it down until doAltUp() is called or a new page is loaded.
- **altKeyDownAndWait**
Press the alt key and hold it down until doAltUp() is called or a new page is loaded.
- **altKeyUp**
Release the alt key.
- **altKeyUpAndWait**
Release the alt key.
- **controlKeyDown**
Press the control key and hold it down until doControlUp() is called or a new page is loaded.
- **controlKeyDownAndWait**
Press the control key and hold it down until doControlUp() is called or a new page is loaded.
- **controlKeyUp**
Release the control key.
- **controlKeyUpAndWait**
Release the control key.
- **metaKeyDown**
Press the meta key and hold it down until doMetaUp() is called or a new page is loaded.
- **metaKeyUp**
Release the meta key.
- **metaKeyUpAndWait**
Release the meta key.
- **shiftKeyDown**
Press the shift key and hold it down until doShiftUp() is called or a new page is loaded.
- **shiftKeyDownAndWait**
Press the shift key and hold it down until doShiftUp() is called or a new page is loaded.
- **shiftKeyUp**
Release the shift key.
- **shiftKeyUpAndWait**
Release the shift key.
## Mouse Events
- **mouseDown**
(locator)
Simulates a user pressing the left mouse button (without releasing it yet) on the specified element.
- **mouseDownAndWait**
(locator)
Simulates a user pressing the left mouse button (without releasing it yet) on the specified element.
- **mouseDownAt**
(locator - coordString)
Simulates a user pressing the left mouse button (without releasing it yet) at the specified location.
- **mouseDownAtAndWait**
(locator - coordString)
Simulates a user pressing the left mouse button (without releasing it yet) at the specified location.
- **mouseDownRight**
(locator)
Simulates a user pressing the right mouse button (without releasing it yet) on the specified element.
- **mouseDownRightAndWait**
(locator)
Simulates a user pressing the right mouse button (without releasing it yet) on the specified element.
- **mouseDownRightAt**
(locator - coordString)
Simulates a user pressing the right mouse button (without releasing it yet) at the specified location.
- **mouseDownRightAtAndWait**
(locator - coordString)
Simulates a user pressing the right mouse button (without releasing it yet) at the specified location.
- **mouseMove**
(locator)
Simulates a user pressing the mouse button (without releasing it yet) on the specified element.
- **mouseMoveAndWait**
(locator)
Simulates a user pressing the mouse button (without releasing it yet) on the specified element.
- **mouseMoveAt**
(locator - coordString)
Simulates a user pressing the mouse button (without releasing it yet) on the specified element.
- **mouseMoveAtAndWait**
(locator - coordString)
Simulates a user pressing the mouse button (without releasing it yet) on the specified element.
- **mouseOut**
(locator)
Simulates a user moving the mouse pointer away from the specified element.
- **mouseOutAndWait**
(locator)
Simulates a user moving the mouse pointer away from the specified element.
- **mouseOver**
(locator)
Simulates a user hovering a mouse over the specified element.
- **mouseOverAndWait**
(locator)
Simulates a user hovering a mouse over the specified element.
- **mouseUp**
(locator)
Simulates the event that occurs when the user releases the mouse button (i.e., stops holding the button down) on the specified element.
- **mouseUpAndWait**
(locator)
Simulates the event that occurs when the user releases the mouse button (i.e., stops holding the button down) on the specified element.
- **mouseUpAt**
(locator - coordString)
Simulates the event that occurs when the user releases the mouse button (i.e., stops holding the button down) at the specified location.
- **mouseUpAtAndWait**
(locator - coordString)
Simulates the event that occurs when the user releases the mouse button (i.e., stops holding the button down) at the specified location.
- **mouseUpRight**
(locator)
Simulates the event that occurs when the user releases the right mouse button (i.e., stops holding the button down) on the specified element.
- **mouseUpRightAndWait**
(locator)
Simulates the event that occurs when the user releases the right mouse button (i.e., stops holding the button down) on the specified element.
- **mouseUpRightAt**
(locator - coordString)
Simulates the event that occurs when the user releases the right mouse button (i.e., stops holding the button down) at the specified location.
- **mouseUpRightAtAndWait**
(locator - coordString)
Simulates the event that occurs when the user releases the right mouse button (i.e., stops holding the button down) at the specified location.
## Popups and Menus
- **answerOnNextPrompt**
(answer)
Instructs Selenium to return the specified answer string in response to the next JavaScript prompt [window.prompt()].
- **answerOnNextPromptAndWait**
(answer)
Instructs Selenium to return the specified answer string in response to the next JavaScript prompt [window.prompt()].
- **chooseCancelOnNextConfirmation**
By default, Selenium's overridden window.confirm() function will return true, as if the user had manually clicked OK; after running this command, the next call to confirm() will return false, as if the user had clicked Cancel. Selenium will then resume using the default behavior for future confirmations, automatically returning true (OK) unless/until you explicitly call this command for each confirmation. Take note - every time a confirmation comes up, you must consume it with a corresponding getConfirmation, or else the next selenium operation will fail.
- **chooseCancelOnNextConfirmationAndWait**
By default, Selenium's overridden window.confirm() function will return true, as if the user had manually clicked OK; after running this command, the next call to confirm() will return false, as if the user had clicked Cancel. Selenium will then resume using the default behavior for future confirmations, automatically returning true (OK) unless/until you explicitly call this command for each confirmation. Take note - every time a confirmation comes up, you must consume it with a corresponding getConfirmation, or else the next selenium operation will fail.
- **chooseOkOnNextConfirmation**
Undo the effect of calling chooseCancelOnNextConfirmation. Note that Selenium's overridden window.confirm() function will normally automatically return true, as if the user had manually clicked OK, so you shouldn't need to use this command unless for some reason you need to change your mind prior to the next confirmation. After any confirmation, Selenium will resume using the default behavior for future confirmations, automatically returning true (OK) unless/until you explicitly call chooseCancelOnNextConfirmation for each confirmation. Take note - every time a confirmation comes up, you must consume it with a corresponding getConfirmation, or else the next selenium operation will fail.
- **chooseOkOnNextConfirmationAndWait**
Undo the effect of calling chooseCancelOnNextConfirmation. Note that Selenium's overridden window.confirm() function will normally automatically return true, as if the user had manually clicked OK, so you shouldn't need to use this command unless for some reason you need to change your mind prior to the next confirmation. After any confirmation, Selenium will resume using the default behavior for future confirmations, automatically returning true (OK) unless/until you explicitly call chooseCancelOnNextConfirmation for each confirmation. Take note - every time a confirmation comes up, you must consume it with a corresponding getConfirmation, or else the next selenium operation will fail.
- **contextMenu**
(locator)
Simulates opening the context menu for the specified element (as might happen if the user "right-clicked" on the element).
- **contextMenuAndWait**
(locator)
Simulates opening the context menu for the specified element (as might happen if the user "right-clicked" on the element).
- **contextMenuAt**
(locator - coordString)
Simulates opening the context menu for the specified element (as might happen if the user "right-clicked" on the element).
- **contextMenuAtAndWait**
(locator - coordString)
Simulates opening the context menu for the specified element (as might happen if the user "right-clicked" on the element).
- **selectPopUp**
(windowID)
Simplifies the process of selecting a popup window (and does not offer functionality beyond what selectWindow() already provides). If windowID is either not specified, or specified as "null", the first non-top window is selected. The top window is the one that would be selected by selectWindow() without providing a windowID . This should not be used when more than one popup window is in play. Otherwise, the window will be looked up considering windowID as the following in order: 1) the "name" of the window, as specified to window.open(); 2) a javascript variable which is a reference to a window; and 3) the title of the window. This is the same ordered lookup performed by selectWindow .
- **deselectPopUp**
Selects the main window. Functionally equivalent to using selectWindow() and specifying no value for windowID.
- **getAlert**
Retrieves the message of a JavaScript alert generated during the previous action, or fail if there were no alerts. Getting an alert has the same effect as manually clicking OK. If an alert is generated but you do not consume it with getAlert, the next Selenium action will fail. Under Selenium, JavaScript alerts will NOT pop up a visible alert dialog. Selenium does NOT support JavaScript alerts that are generated in a page's onload() event handler. In this case a visible dialog WILL be generated and Selenium will hang until someone manually clicks OK.
- **getConfirmation**
Retrieves the message of a JavaScript confirmation dialog generated during the previous action. By default, the confirm function will return true, having the same effect as manually clicking OK. This can be changed by prior execution of the chooseCancelOnNextConfirmation command. If an confirmation is generated but you do not consume it with getConfirmation, the next Selenium action will fail. NOTE: under Selenium, JavaScript confirmations will NOT pop up a visible dialog. NOTE: Selenium does NOT support JavaScript confirmations that are generated in a page's onload() event handler. In this case a visible dialog WILL be generated and Selenium will hang until you manually click OK.
- **getPrompt**
Retrieves the message of a JavaScript question prompt dialog generated during the previous action. Successful handling of the prompt requires prior execution of the answerOnNextPrompt command. If a prompt is generated but you do not get/verify it, the next Selenium action will fail. NOTE: under Selenium, JavaScript prompts will NOT pop up a visible dialog. NOTE: Selenium does NOT support JavaScript prompts that are generated in a page's onload() event handler. In this case a visible dialog WILL be generated and Selenium will hang until someone manually clicks OK.
- **getWhetherThisFrameMatchFrameExpression**
(currentFrameString - target)
Determine whether current/locator identify the frame containing this running code. This is useful in proxy injection mode, where this code runs in every browser frame and window, and sometimes the selenium server needs to identify the "current" frame. In this case, when the test calls selectFrame, this routine is called for each frame to figure out which one has been selected. The selected frame will return true, while all others will return false.
- **getWhetherThisWindowMatchWindowExpression**
(currentWindowString - target)
Determine whether currentWindowString plus target identify the window containing this running code. This is useful in proxy injection mode, where this code runs in every browser frame and window, and sometimes the selenium server needs to identify the "current" window. In this case, when the test calls selectWindow, this routine is called for each window to figure out which one has been selected. The selected window will return true, while all others will return false.
## Browser Window
- **verifyAllWindowIds**
(equalTo)
- **verifyAllWindowNames**
(equalTo)
- **verifyAllWindowTitles**
(equalTo)
- **verifyAttributeFromAllWindows**
(attributeName - equalTo)
- **verifyLocation**
(equalTo)
- **verifyNotAllWindowIds**
(equalTo)
- **verifyNotAllWindowNames**
(equalTo)
- **verifyNotAttributeFromAllWindows**
(attributeName - equalTo)
- **verifyNotLocation**
(equalTo)
- **verifyNotTitle**
(equalTo)
- **verifyTitle**
(equalTo)
- **assertAllWindowIds**
(equalTo)
- **assertAllWindowNames**
(equalTo)
- **assertAllWindowTitles**
(equalTo)
- **assertAttributeFromAllWindows**
(attributeName - equalTo)
- **assertLocation**
(equalTo)
- **assertNotAllWindowIds**
(equalTo)
- **assertNotAllWindowNames**
(equalTo)
- **assertNotAllWindowTitles**
(equalTo)
- **assertNotAttributeFromAllWindows**
(attributeName)
- **assertNotLocation**
(equalTo)
- **assertNotTitle**
(equalTo)
- **assertTitle**
(equalTo)
- **assert**
Check that a variable is an expected value. The variable's value will be converted to a string for comparison. The test will stop if the assert fails.
- **validateXml**
Custom command by TestingBot. Validates if the document contents is valid XML.
- **waitForAlert**
(equalTo)
- **waitForAlertNotPresent**
- **waitForAlertPresent**
- **waitForConfirmation**
(equalTo)
- **waitForConfirmationNotPresent**
- **waitForConfirmationPresent**
- **waitForNotAlert**
(equalTo)
- **waitForNotConfirmation**
(equalTo)
- **waitForNotPrompt**
(equalTo)
- **waitForPrompt**
(equalTo)
- **waitForPromptNotPresent**
- **waitForPromptPresent**
- **storeAllWindowIds**
- **storeAllWindowNames**
- **storeAllWindowTitles**
- **storeAttributeFromAllWindows**
(attributeName - variable)
- **storeLocation**
- **storeTitle**
- **storeAllWindowHandles**
- **storeNewWindowHandle**
- **storeWindowHandle**
- **setWindowSize**
(size)
Sets the current window size.
## Cookies
- **verifyCookie**
(equalTo)
- **verifyCookieByName**
(name - equalTo)
- **verifyCookieNotPresent**
(name)
- **verifyCookiePresent**
(name)
- **verifyNotCookie**
(equalTo)
- **verifyNotCookieByName**
(name - equalTo)
- **assertCookie**
(equalTo)
- **assertCookieByName**
(name - equalTo)
- **assertCookieNotPresent**
(name)
- **assertCookiePresent**
(name)
- **assertNotCookie**
(equalTo)
- **assertNotCookieByName**
(name - equalTo)
- **createCookie**
(nameValuePair - optionsString)
Create a new cookie whose path and domain are same with those of current page under test, unless you specified a path for this cookie explicitly.
- **deleteAllVisibleCookies**
Calls deleteCookie with recurse=true on all cookies visible to the current page. As noted on the documentation for deleteCookie, recurse=true can be much slower than simply deleting the cookies using a known domain/path.
- **deleteCookie**
(name - optionsString)
Delete a named cookie with specified path and domain. Be careful; to delete a cookie, you need to delete it using the exact same path and domain that were used to create the cookie. If the path is wrong, or the domain is wrong, the cookie simply won't be deleted. Also note that specifying a domain that isn't a subset of the current domain will usually fail. Since there's no way to discover at runtime the original path and domain of a given cookie, we've added an option called 'recurse' to try all sub-domains of the current domain with all paths that are a subset of the current path. Beware; this option can be slow. In big-O notation, it operates in O(n\*m) time, where n is the number of dots in the domain name and m is the number of slashes in the path.
- **storeCookie**
- **storeCookieByName**
(name - variable)
- **storeCookiePresent**
(name - variable)
## Page Content
- **verifyAllLinks**
(equalTo)
- **verifyAttribute**
(attributeLocator - equalTo)
- **verifyBodyText**
(equalTo)
- **verifyElementNotPresent**
(locator)
- **verifyElementPresent**
(locator)
- **verifyHtmlSource**
(equalTo)
- **verifyNotAllLinks**
(equalTo)
- **verifyNotAttribute**
(attributeLocator)
- **verifyNotBodyText**
(equalTo)
- **verifyNotHtmlSource**
(equalTo)
- **verifyNotOrdered**
(locator1 - locator2)
- **verifyNotTable**
(tableCellAddress - equalTo)
- **verifyNotText**
(locator - equalTo)
- **verifyNotVisible**
(locator)
- **verifyOrdered**
(locator1 - locator2)
- **verifyTable**
(tableCellAddress - equalTo)
- **verifyText**
(locator - equalTo)
- **verifyTextNotPresent**
(pattern)
- **verifyTextPresent**
(pattern)
- **verifyVisible**
(locator)
- **assertAllLinks**
(equalTo)
- **assertAttribute**
(attributeLocator - equalTo)
- **assertBodyText**
(equalTo)
- **assertElementNotPresent**
(locator)
- **assertElementPresent**
(locator)
- **assertHtmlSource**
(equalTo)
- **assertNotAllLinks**
(equalTo)
- **assertNotAttribute**
(attributeLocator - equalTo)
- **assertNotBodyText**
(equalTo)
- **assertNotHtmlSource**
(equalTo)
- **assertNotOrdered**
(locator1 - locator2)
- **assertNotTable**
(tableCellAddress - equalTo)
- **assertNotText**
(locator - equalTo)
- **assertNotVisible**
(locator)
- **assertOrdered**
(locator1 - locator2)
- **assertTable**
(tableCellAddress - equalTo)
- **assertText**
(locator - equalTo)
- **assertTextNotPresent**
(pattern)
- **assertTextPresent**
(pattern)
- **assertVisible**
(locator)
- **waitForAllLinks**
(equalTo)
- **waitForAttribute**
(attributeLocator - equalTo)
- **waitForBodyText**
(equalTo)
- **waitForElementPresent**
(locator)
- **waitForHtmlSource**
(equalTo)
- **waitForNotAllLinks**
(equalTo)
- **waitForNotAttribute**
(attributeLocator - equalTo)
- **waitForNotBodyText**
(equalTo)
- **waitForElementNotPresent**
(locator)
- **waitForElementNotVisible**
(locator)
- **waitForElementVisible**
(locator)
- **waitForNotHtmlSource**
(equalTo)
- **waitForNotOrdered**
(locator1 - locator2)
- **waitForNotTable**
(tableCellAddress - equalTo)
- **waitForNotText**
(locator - equalTo)
- **waitForNotVisible**
(locator)
- **waitForOrdered**
(locator1 - locator2)
- **waitForTable**
(tableCellAddress - equalTo)
- **waitForText**
(locator - equalTo)
- **waitForTextNotPresent**
(pattern)
- **waitForTextPresent**
(pattern)
- **waitForVisible**
(locator)
- **storeAllLinks**
- **storeAttribute**
(attributeLocator - variable)
- **storeBodyText**
- **storeElementPresent**
(locator - variable)
- **storeHtmlSource**
- **storeTable**
(tableCellAddress - variable)
- **storeText**
(locator - variable)
- **storeTextPresent**
(pattern - variable)
- **storeVisible**
(locator - variable)
## Page Positioning
- **verifyElementHeight**
(locator - equalTo)
- **verifyElementIndex**
(locator - equalTo)
- **verifyElementPositionLeft**
(locator - equalTo)
- **verifyElementPositionTop**
(locator - equalTo)
- **verifyElementWidth**
(locator - equalTo)
- **verifyNotElementHeight**
(locator - equalTo)
- **verifyNotElementIndex**
(locator - equalTo)
- **verifyNotElementPositionLeft**
(locator - equalTo)
- **verifyNotElementPositionTop**
(locator - equalTo)
- **verifyNotElementWidth**
(locator - equalTo)
- **assertElementHeight**
(locator - equalTo)
- **assertElementIndex**
(locator - equalTo)
- **assertElementPositionLeft**
(locator - equalTo)
- **assertElementPositionTop**
(locator - equalTo)
- **assertElementWidth**
(locator - equalTo)
- **assertNotElementHeight**
(locator - equalTo)
- **assertNotElementIndex**
(locator - equalTo)
- **assertNotElementPositionLeft**
(locator - equalTo)
- **assertNotElementPositionTop**
(locator - equalTo)
- **assertNotElementWidth**
- **storeElementHeight**
(locator - variable)
- **storeElementIndex**
(locator - variable)
- **storeElementPositionLeft**
(locator - variable)
- **storeElementPositionTop**
(locator - variable)
- **storeElementWidth**
(locator - variable)
## Popups
- **verifyAlert**
(equalTo)
- **verifyAlertNotPresent**
- **verifyAlertPresent**
- **isAlertPresent**
Has an alert occurred? This function never throws an exception
- **verifyConfirmation**
(equalTo)
- **verifyConfirmationNotPresent**
- **verifyConfirmationPresent**
- **isConfirmationPresent**
Has confirm() been called? This function never throws an exception
- **verifyNotAlert**
(equalTo)
- **verifyNotConfirmation**
(equalTo)
- **verifyNotPrompt**
(equalTo)
- **verifyPrompt**
(equalTo)
- **verifyPromptNotPresent**
- **verifyPromptPresent**
- **isPromptPresent**
Has a prompt occurred? This function never throws an exception
- **assertAlert**
(equalTo)
- **assertAlertNotPresent**
- **assertAlertPresent**
- **assertConfirmation**
(equalTo)
- **assertConfirmationNotPresent**
- **assertConfirmationPresent**
- **assertNotAlert**
(equalTo)
- **assertNotConfirmation**
(equalTo)
- **assertNotPrompt**
(equalTo)
- **assertPrompt**
(equalTo)
- **assertPromptNotPresent**
- **assertPromptPresent**
- **waitForElementHeight**
(locator - equalTo)
- **waitForElementIndex**
(locator - equalTo)
- **waitForElementPositionLeft**
(locator - equalTo)
- **waitForElementPositionTop**
(locator - equalTo)
- **waitForElementWidth**
(locator - equalTo)
- **waitForNotElementHeight**
(locator - equalTo)
- **waitForNotElementIndex**
(locator - equalTo)
- **waitForNotElementPositionLeft**
(locator - equalTo)
- **waitForNotElementPositionTop**
(locator - equalTo)
- **waitForNotElementWidth**
(locator - equalTo)
- **waitForPopUp**
(windowID - timeout)
Waits for a popup window to appear and load up.
- **storeAlert**
- **storeAlertPresent**
- **storeConfirmation**
- **storeConfirmationPresent**
- **storePrompt**
- **storePromptPresent**
## Selenium
- **verifyEval**
(script - equalTo)
- **verifyExpression**
(expression - equalTo)
- **verifyMouseSpeed**
- **verifyNotEval**
(script - equalTo)
- **verifyNotExpression**
(expression - equalTo)
- **verifyNotMouseSpeed**
- **verifyNotSpeed**
- **verifyNotXpathCount**
(xpath - equalTo)
- **verifySpeed**
- **verifyXpathCount**
(xpath - equalTo)
- **assertEval**
(script - equalTo)
- **assertExpression**
(expression - equalTo)
- **assertMouseSpeed**
(equalTo)
- **assertNotEval**
(script - equalTo)
- **assertNotExpression**
(expression - equalTo)
- **assertNotMouseSpeed**
(equalTo)
- **assertNotSpeed**
(equalTo)
- **assertNotXpathCount**
(xpath - equalTo)
- **assertSpeed**
(equalTo)
- **assertXpathCount**
(xpath - equalTo)
- **waitForAllButtons**
(equalTo)
- **waitForAllFields**
(equalTo)
- **waitForChecked**
(locator)
- **waitForCursorPosition**
(locator - equalTo)
- **waitForCondition**
(script - timeout)
Runs the specified JavaScript snippet repeatedly until it evaluates to "true". The snippet may have multiple lines, but only the result of the last line will be considered. Note that, by default, the snippet will be run in the runner's test window, not in the window of your application. To get the window of your application, you can use the JavaScript snippet selenium.browserbot.getCurrentWindow(), and then run your JavaScript in there
- **waitForEditable**
(locator)
- **waitForEval**
(script - equalTo)
- **waitForExpression**
(expression - equalTo)
- **waitForMouseSpeed**
(equalTo)
- **waitForNotAllButtons**
(equalTo)
- **waitForNotAllFields**
(equalTo)
- **waitForNotChecked**
(locator)
- **waitForNotCursorPosition**
(locator - equalTo)
- **waitForNotEditable**
(locator)
- **waitForNotEval**
(script - equalTo)
- **waitForNotExpression**
(expression - equalTo)
- **waitForNotMouseSpeed**
(equalTo)
- **waitForNotSelectedIds**
(selectLocator - equalTo)
- **waitForNotSelectedIndexes**
(selectLocator - equalTo)
- **waitForNotSelectedLabels**
(selectLocator - equalTo)
- **waitForNotSelectedValues**
(selectLocator - equalTo)
- **waitForNotSelectOptions**
(selectLocator - equalTo)
- **waitForNotSomethingSelected**
(selectLocator)
- **waitForNotSpeed**
(equalTo)
- **waitForNotValue**
(locator - equalTo)
- **waitForNotXpathCount**
(xpath - equalTo)
- **waitForSelectedIds**
(selectLocator - equalTo)
- **waitForSelectedIndexes**
(selectLocator - equalTo)
- **waitForSelectedLabels**
(selectLocator - equalTo)
- **waitForSelectedValues**
(selectLocator - equalTo)
- **waitForSelectOptions**
(selectLocator - equalTo)
- **waitForSomethingSelected**
(selectLocator)
- **waitForSpeed**
(equalTo)
- **waitForValue**
(locator - equalTo)
- **waitForXpathCount**
(xpath - equalTo)
- **storeEval**
(script - variable)
- **storeExpression**
(expression - variable)
- **store**
(expression - variable)
This command is a synonym for storeExpression.
- **storeMouseSpeed**
- **storeSpeed**
- **storeXpathCount**
(xpath - variable)
## Screenshots
- **captureEntirePageScreenshot**
(filename - kwargs)
Saves the entire contents of the current window canvas to a PNG file. Contrast this with the captureScreenshot command, which captures the contents of the OS viewport (i.e. whatever is currently being displayed on the monitor), and is implemented in the RC only. Currently this only works in Firefox when running in chrome mode, and in IE non-HTA using the EXPERIMENTAL "Snapsie" utility. The Firefox implementation is mostly borrowed from the Screengrab! Firefox extension. Please see http://www.screengrab.org and http://snapsie.sourceforge.net/ for details.
## Selenium Settings
- **waitForCookie**
(equalTo)
- **waitForCookieByName**
(name - equalTo)
- **waitForCookieNotPresent**
(name)
- **waitForCookiePresent**
(name)
- **waitForNotCookie**
(equalTo)
- **waitForNotCookieByName**
(name - equalTo)
- **addLocationStrategy**
(strategyName - functionDefinition)
Defines a new function for Selenium to locate elements on the page. For example, if you define the strategy "foo", and someone runs click("foo=blah"), we'll run your function, passing you the string "blah", and click on the element that your function returns, or throw an "Element not found" error if your function returns null. We'll pass three arguments to your function: locator: the string the user passed in inWindow: the currently selected window inDocument: the currently selected document The function must return null if the element can't be found.
- **allowNativeXpath**
(allow)
Specifies whether Selenium should use the native in-browser implementation of XPath (if any native version is available); if you pass "false" to this function, we will always use our pure-JavaScript xpath library. Using the pure-JS xpath library can improve the consistency of xpath element locators between different browser vendors, but the pure-JS version is much slower than the native implementations.
- **ignoreAttributesWithoutValue**
(ignore)
Specifies whether Selenium will ignore xpath attributes that have no value, i.e. are the empty string, when using the non-native xpath evaluation engine. You'd want to do this for performance reasons in IE. However, this could break certain xpaths, for example an xpath that looks for an attribute whose value is NOT the empty string. The hope is that such xpaths are relatively rare, but the user should have the option of using them. Note that this only influences xpath evaluation when using the ajaxslt engine (i.e. not "javascript-xpath").
- **setBrowserLogLevel**
(logLevel)
Sets the threshold for browser-side logging messages; log messages beneath this threshold will be discarded. Valid logLevel strings are: "debug", "info", "warn", "error" or "off". To see the browser logs, you need to either show the log window in GUI mode, or enable browser-side logging in Selenium RC.
- **setMouseSpeed**
(pixels)
Configure the number of pixels between "mousemove" events during dragAndDrop commands (default=10). Setting this value to 0 means that we'll send a "mousemove" event to every single pixel in between the start location and the end location; that can be very slow, and may cause some browsers to force the JavaScript to timeout. If the mouse speed is greater than the distance between the two dragged objects, we'll just send one "mousemove" at the start location and then one final one at the end location.
- **setSpeed**
(value)
Set execution speed (i.e., set the millisecond length of a delay which will follow each selenium operation). By default, there is no such delay, i.e., the delay is 0 milliseconds.
- **getSpeed**
Get execution speed (i.e., get the millisecond length of the delay following each selenium operation). By default, there is no such delay, i.e., the delay is 0 milliseconds. See also setSpeed.
- **setTimeout**
(timeout)
Specifies the amount of time that Selenium will wait for actions to complete. Actions that require waiting include "open" and the "waitFor\*" actions. The default timeout is 30 seconds.
- **useXpathLibrary**
(libraryName)
Allows choice of one of the available libraries.
## Special
- **addScript**
(scriptContent - scriptTagId)
Loads script content into a new script tag in the Selenium document. This differs from the runScript command in that runScript adds the script tag to the document of the AUT, not the Selenium document. The following entities in the script content are replaced by the characters they represent: \< \> & The corresponding remove command is removeScript.
- **assignId**
(locator - identifier)
Temporarily sets the "id" attribute of the specified element, so you can locate it in the future using its ID rather than a slow/complicated XPath. This ID will disappear once the page is reloaded.
- **echo**
(message)
Prints the specified message into the third table cell in your Selenese tables. Useful for debugging.
- **fireEvent**
(locator - eventName)
Explicitly simulate an event, to trigger the corresponding "onevent" handler.
- **highlight**
(locator)
Briefly changes the backgroundColor of the specified element yellow. Useful for debugging.
- **rollup**
(rollupName - kwargs)
Executes a command rollup, which is a series of commands with a unique name, and optionally arguments that control the generation of the set of commands. If any one of the rolled-up commands fails, the rollup is considered to have failed. Rollups may also contain nested rollups.
- **runScript**
(script)
Creates a new "script" tag in the body of the current test window, and adds the specified text into the body of the command. Scripts run in this way can often be debugged more easily than scripts executed using Selenium's "getEval" command. Beware that JS exceptions thrown in these script tags aren't managed by Selenium, so you should probably wrap your script in try/catch blocks if there is any chance that the script will throw an exception.
- **getEval**
(command)
Gets the result of evaluating the specified JavaScript snippet. The snippet may have multiple lines, but only the result of the last line will be returned. Note that, by default, the snippet will run in the context of the "selenium" object itself, so this will refer to the Selenium object. Use window to refer to the window of your application, e.g. window.document.getElementById('foo') If you need to use a locator to refer to a single element in your application page, you can use this.browserbot.findElement("id=foo") where "id=foo" is your locator.
- **getLocation**
Gets the absolute URL of the current page.
- **getTitle**
Gets the title of the current page.
- **getBodyText**
Gets the entire text of the page.
- **getValue**
(locator)
Gets the (whitespace-trimmed) value of an input field (or anything else with a value parameter). For checkbox/radio elements, the value will be "on" or "off" depending on whether the element is checked or not.
- **getText**
(locator)
Gets the text of an element. This works for any element that contains text. This command uses either the textContent (Mozilla-like browsers) or the innerText (IE-like browsers) of the element, which is the rendered text shown to the user.
- **getTable**
(tableCellAddress)
Gets the text from a cell of a table. The cellAddress syntax tableLocator.row.column, where row and column start at 0.
- **pause**
(time)
Wait for the specified amount of time (in milliseconds)
- **comment**
(text)
Custom command by TestingBot. Add a comment between your test steps. This will show up in the test results.
- **getHtmlSource**
Returns the entire HTML source between the opening and closing "html" tags.
- **stopTest**
(condition)
Custom command by TestingBot. Will stop the test if the supplied condition is met. Other steps, which resulted in an error, after a successful stopTest, will no longer indicate a test as failed.
## Common
- **waitForPageToLoad**
(timeout)
Waits for a new page to load. You can use this command instead of the "AndWait" suffixes, "clickAndWait", "selectAndWait", "typeAndWait" etc. (which are only available in the JS API). Selenium constantly keeps track of new pages loading, and sets a "newPageLoaded" flag when it first notices a page load. Running any other Selenium command after turns the flag to false. Hence, if you want to wait for a page to load, you must wait immediately after a Selenium command that caused a page-load.
Was this page helpful? Yes No
## Looking for More Help?
Have questions or need more information?
You can reach us via the following channels:
- [Email us](https://testingbot.com/contact/new)
- [Join our Slack Channel](https://join.slack.com/t/testingb0t/shared_invite/zt-3bcw9xch-jk19~6XPs_xBrsAgAedkCw)
---
URL: https://testingbot.com/support/web-automate/codeless-automation/faq
# Selenium IDE FAQ
TestingBot supports importing and running Selenium IDE tests on all our browsers and devices.
Please find some questions and answers below.
## FAQ
- **How do I use `selenium-side-runner` with TestingBot?**
You can easily run your tests with `selenium-side-runner`, try this command for example
selenium-side-runner --server http://key:secret@hub.testingbot.com/wd/hub -c "browserName='internet explorer' version='11.0' platform='Windows 8.1'" my-test-file.side
This will run the test on our Grid on IE11 - the test results will appear in the TestingBot dashboard.
- **Do you support the old Selenium IDE format? What about the .SIDE format?**
We support both versions in our TestLab. You can upload the old format (in `HTML` format) or newly generated tests (in `SIDE` format).
- **Do you support control flow?**
We do not yet support control flow, like `if`, `else`, `while`, ...
If you need this feature, please [contact us](https://testingbot.com/contact/new).
- **Do you support mobile testing with Codeless Automation?**
We support running your tests on our iOS and Android simulators/emulators.
Please consider using `css selectors` as much as possible, as Appium (which we use to control iOS/Android) does not support XPath selectors.
Was this page helpful? Yes No
## Looking for More Help?
Have questions or need more information?
You can reach us via the following channels:
- [Email us](https://testingbot.com/contact/new)
- [Join our Slack Channel](https://join.slack.com/t/testingb0t/shared_invite/zt-3bcw9xch-jk19~6XPs_xBrsAgAedkCw)
---
URL: https://testingbot.com/support/web-automate/codeless-automation/variables
# Storing Selenium IDE Variables
With Selenium IDE it is possible to `store` variables.
These variables can then be used in later commands during the same test flow.
## How to store a variable
To store a variable during a test, please use the `store` command:
store - javascript(return "test" + Math.floor(Math.random()*11111) + "@test.com") - emailAddress
This example will store a variable called `emailAddress` and its value will be a random `"test....@test.com"` string.
Storing a variable happens in the context of the page. You can use any kind of javascript and reference DOM elements or other functions available on the page. The return value is stored.
## How to use a variable
Once you have stored a variable, you can use it in subsequent steps like this: `${emailAddress}`
## Examples
Below are some examples on how to [store and use variables](https://www.selenium.dev/selenium-ide/docs/en/api/commands#store).
storeText("css=.container:nth-child(1) > span:nth-child(3)","myVar")
This will store the text from element with CSS selector `.container:nth-child(1) > span:nth-child(3)` in a variable called `myVar`.
type('id=inputField','${myVar}')
This will type the text stored in the `myVar` variable to an element with `ID=inputField`
Was this page helpful? Yes No
## Looking for More Help?
Have questions or need more information?
You can reach us via the following channels:
- [Email us](https://testingbot.com/contact/new)
- [Join our Slack Channel](https://join.slack.com/t/testingb0t/shared_invite/zt-3bcw9xch-jk19~6XPs_xBrsAgAedkCw)
---
URL: https://testingbot.com/support/ai
# AI Testing
TestingBot provides AI solutions for QA and developers to automate their tests and other tasks. Here are some of the AI solutions we are providing:
- [TestingBot AI Chat](https://testingbot.com/support/ai/chat)
Chat with an AI operator and instruct a remote browser. Generate automated tests from your instructions.
- [Codeless Tests](https://testingbot.com/support/ai/codeless)
Instruct our AI agent what to test. The AI agent will run tests against your website on regular intervals and alert if a test fails.
- [TestingBot MCP Server](https://testingbot.com/support/ai/mcp)
Connect TestingBot with AI models, using the TestingBot MCP Server.
- [Other AI integrations such as Functions and Browser-Use](https://testingbot.com/support/ai/integrations)
Was this page helpful? Yes No
## Looking for More Help?
Have questions or need more information?
You can reach us via the following channels:
- [Email us](https://testingbot.com/contact/new)
- [Join our Slack Channel](https://join.slack.com/t/testingb0t/shared_invite/zt-3bcw9xch-jk19~6XPs_xBrsAgAedkCw)
---
URL: https://testingbot.com/support/ai/integrations
# TestingBot's Remote Browser Cloud
TestingBot offers a battle-tested remote browser cloud, available to run both automated tests and AI tasks.
When it comes to running AI-driven browser automation tasks, selecting the right remote browser grid is crucial. **TestingBot** offers a scalable, feature-rich alternative to platforms like Browserbase, Steel.dev, Browserless and Lightpanda.
At TestingBot we've been operating a browser grid since 2012, providing unmatched reliability, global coverage and enterprise-grade security.
### Comparison Table
| Feature | TestingBot | Browserbase | Steel.dev | Browserless | Lightpanda |
| --- | --- | --- | --- | --- | --- |
| Real Browsers & Devices | ✅ Yes | ❌ No | ❌ No | ❌ No | ❌ No |
| Headless Browsers | ✅ Yes | ✅ Yes | ✅ Yes | ✅ Yes | ✅ Yes |
| Global Testing Locations | ✅ Yes | ✅ Yes | ❌ No | ❌ No | ❌ No |
| Parallel Sessions | ✅ Unlimited | ❌ Limited | ✅ Yes | ❌ Limited | ❌ Limited |
| Security & Compliance | ✅ Enterprise-Grade | ❌ Basic | ❌ Basic | ❌ Basic | ❌ Basic |
## AI Integrations
TestingBot is capable of connecting remote browsers to various AI frameworks and libraries, including the following popular options:
- [AgentKit](https://testingbot.com/support/ai/integrations/agentkit) - Create AI agents that can run browser automation tasks using TestingBot's remote browser grid and AgentKit.
- [Browser-Use](https://testingbot.com/support/ai/integrations/browser-use) - A Python library for browser automation using AI agents.
- [Braintrust](https://testingbot.com/support/ai/integrations/braintrust) - Create tools to leverage AI for testing and automation.
- [Stagehand](https://testingbot.com/support/ai/integrations/stagehand) - An AI Browser Automation Framework that allows you to create and manage browser automation tasks using AI.
- [Magnitude](https://testingbot.com/support/ai/integrations/magnitude) - An AI framework using Vision to perform automated browser automation with LLMs.
- [Notte](https://testingbot.com/support/ai/integrations/notte) - A reliable and fast AI browser agent.
## Scraping data with real browsers
Looking to obtain data from the world wide web with real browsers? You can connect your [Puppeteer](https://testingbot.com/support/web-automate/puppeteer) and [Playwright](https://testingbot.com/support/web-automate/playwright) scripts to the large TestingBot browser grid, or use functions to perform tasks without writing any code:
- [Take screenshots](https://testingbot.com/support/functions/screenshot)
- [Generate PDFs](https://testingbot.com/support/functions/pdf)
- [Scrape Webpages](https://testingbot.com/support/functions/scrape)
- [Serverless Functions](https://testingbot.com/support/functions/serverless)
Was this page helpful? Yes No
## Looking for More Help?
Have questions or need more information?
You can reach us via the following channels:
- [Email us](https://testingbot.com/contact/new)
- [Join our Slack Channel](https://join.slack.com/t/testingb0t/shared_invite/zt-3bcw9xch-jk19~6XPs_xBrsAgAedkCw)
---
URL: https://testingbot.com/support/ai/integrations/agentkit
# Using AgentKit with TestingBot
Create AI agents that can run browser automation tasks using TestingBot's remote browser grid and AgentKit (by inngest).
## Dependencies
To install all dependencies, please follow these steps:
[npm](https://testingbot.com#)[pnpm](https://testingbot.com#)[yarn](https://testingbot.com#)
npm install @inngest/agent-kit playwright-core
pnpm add @inngest/agent-kit playwright-core
yarn add @inngest/agent-kit playwright-core
## Create a TestingBot service
In the example below, we'll show an example tool that will use Algolia to search Hacker News (HN) posts. The TestingBot remote browser grid will be used to perform the actions and return the results.
The example below uses the `chromium.connect` method to connect to a remote browser in the TestingBot cloud.
There are a lot of [Playwright Options](https://testingbot.com/support/web-automate/playwright/options) you can use to customize the browser session.
Make sure to replace `key` and `secret` with your TestingBot API key and secret.
import "dotenv/config";
import {
anthropic,
createAgent,
createNetwork,
createTool,
} from "@inngest/agent-kit";
import { createServer } from "@inngest/agent-kit/server";
import { z } from "zod";
import { chromium } from "playwright-core";
const searchHN = createTool({
name: "search_hn",
description: "Search HN posts and comments",
parameters: z.object({
query: z.string().describe("The search query for HN"),
}),
handler: async ({ query }, { step }) => {
return await step?.run("search-on-hn", async () => {
const browser = await chromium.connect({
wsEndpoint: `wss://cloud.testingbot.com/playwright?key=${testingBotKey}&secret=${testingBotSecret}&browserName=chrome&browserVersion=latest`,
});
try {
const page = await browser.newPage();
// Construct the search URL
const searchUrl = `https://hn.algolia.com/?dateRange=all&page=0&prefix=false&query=${query}&sort=byPopularity&type=story`;
await page.goto(searchUrl);
// Wait for results to load
await page.waitForSelector(".SearchResults", { timeout: 10000 });
// Extract search results
const results = await page.evaluate(() => {
const posts = document.querySelectorAll(".SearchResults .Story ");
return Array.from(posts).map((post) => ({
title: post.querySelector(".Story_title span")?.textContent?.trim(),
}));
});
return results.slice(0, 5); // Return top 5 results
} finally {
await browser.close();
}
});
},
});
// Create the search agent
const searchAgent = createAgent({
name: "hn_searcher",
description: "An agent that searches HN for relevant information",
system:
"You are a helpful assistant that searches HN through algolia for relevant information.",
tools: [searchHN],
});
// Create the network
const hnSearchNetwork = createNetwork({
name: "hn-search-network",
description: "A network that searches HN using TestingBot",
agents: [searchAgent],
maxIter: 2,
defaultModel: anthropic({
model: "claude-3-5-sonnet-latest",
defaultParameters: {
max_tokens: 4096,
},
}),
});
// Create and start the server
const server = createServer({
networks: [hnSearchNetwork],
});
server.listen(3010, () =>
console.log("HN Search Agent server is running on port 3010")
);
Was this page helpful? Yes No
## Looking for More Help?
Have questions or need more information?
You can reach us via the following channels:
- [Email us](https://testingbot.com/contact/new)
- [Join our Slack Channel](https://join.slack.com/t/testingb0t/shared_invite/zt-3bcw9xch-jk19~6XPs_xBrsAgAedkCw)
---
URL: https://testingbot.com/support/ai/integrations/braintrust
# Using BrainTrust with TestingBot
## Braintrust Organization
To get started, make sure you create [a new Braintrust organization](https://www.braintrust.dev/docs/guides/projects). Next, install the necessary dependencies:
## Install dependencies
To use Braintrust with TestingBot, you need to install the following dependencies:
npm install zod braintrust playwright-core
## Variables
To use TestingBot with Braintrust, you need to set the following environment variables: `TESTINGBOT_KEY` and `TESTINGBOT_SECRET`.
You will also need to set up the AI API Key that you are using. Braintrust supports various AI providers, such as OpenAI, Anthropic and others.
## Tools
Braintrust allows you to create [tools](https://www.braintrust.dev/docs/guides/functions/tools) that can be used by agents. In this example, we will create a tool that takes a URL parameter and will use Readability to convert the HTML.
import * as braintrust from "braintrust";
import { z } from "zod";
import { chromium } from "playwright-core";
async function loadPage({ url }: { url: string }) {
const { id } = await createSession();
const browser = await chromium.connectOverCDP(
wsEndpoint: `wss://cloud.testingbot.com/playwright?key=${testingBotKey}&secret=${testingBotSecret}&browserName=chrome&browserVersion=latest`,
);
const defaultContext = browser.contexts()[0];
const page = defaultContext.pages()[0];
await page.goto(url);
const readable: { title?: string; textContent?: string } =
await page.evaluate(`
import('https://cdn.skypack.dev/@mozilla/readability').then(readability => {
return new readability.Readability(document).parse()
})`);
const text = `${readable.title}\n${readable.textContent}`;
return { page: text };
}
const project = braintrust.projects.create({ name: "TestingBot API Tool" });
project.tools.create({
handler: loadPage,
parameters: z.object({
url: z.string(),
}),
returns: z.object({
page: z.string(),
}),
name: "Load page",
slug: "load-page",
description: "Load a page from the internet",
ifExists: "replace",
});
## Deploy tool
You can now deploy the tool to Braintrust. You can do this by running the following command:
npx braintrust push testingbot.ts
Once the tool is deployed, you will see the tool listed in the Library's Tools section. Now you can specify a URL and use the "Load page" tool to use the TestingBot tool.
Was this page helpful? Yes No
## Looking for More Help?
Have questions or need more information?
You can reach us via the following channels:
- [Email us](https://testingbot.com/contact/new)
- [Join our Slack Channel](https://join.slack.com/t/testingb0t/shared_invite/zt-3bcw9xch-jk19~6XPs_xBrsAgAedkCw)
---
URL: https://testingbot.com/support/ai/integrations/browser-use
# Browser Use Cloud API
Browser-Use is a Python library that allows you to create browser automation scripts using AI. You can use multiple models such as GPT-4o, DeepSeek, Gemini-2.0, Claude and more. Local models such as Qwen 2.5 are also supported. The library essentially uses a Playwright browser instance to execute tasks on a (remote) browser. You can perform tasks such as:
- Navigate to Google and search for TestingBot
- Go to Reddit and open an article
- Open a new tab and go to CNN
By using the TestingBot remote browser grid, you can run multiple AI agents in parallel without worrying about setting up and managing the browsers yourself.
Additionally, TestingBot records each session with a video, logs and generated metadata are saved as well.
You can run browsers from [various geographical locations](https://testingbot.com/support/web-automate/playwright/options#geo) and use different browser versions, on multiple operating systems.
To install browser use, please follow these steps:
- Install the Browser-Use library: `pip install browser-use`
- Install the Playwright library: `pip install playwright`
## Connecting to a remote browser
Please see the example below on how to connect your Browser-Use agent to a remote browser in the TestingBot cloud.
The `wss` URL points to the TestingBot cloud, where you can specify the browser and platform you want to use. You can also specify the name of the session.
Make sure to replace `key` and `secret` with your TestingBot API key and secret.
import json
import httpx
import os
import asyncio
import logging
from browser_use.browser import BrowserSession
from browser_use.agent.service import Agent
from browser_use.llm import ChatOpenAI
capabilities = {
"tb:options": {
"name": "Browser Use Example",
"key": os.environ["TESTINGBOT_KEY"],
"secret": os.environ["TESTINGBOT_SECRET"],
},
"browserName": "chrome",
"browserVersion": "latest",
"platform": "WIN10"
}
async def create_testingbot_session():
try:
async with httpx.AsyncClient(timeout=600.0) as client:
response = await client.post(
"https://cloud.testingbot.com/session",
json={ "capabilities": capabilities },
)
response.raise_for_status()
session_data = response.json()
logging.info(
"TestingBot session created successfully: %s",
json.dumps(session_data, indent=2)
)
return session_data
except Exception as e:
logging.error("Failed to create TestingBot session: %s", e)
async def main():
session_data = await create_testingbot_session()
cdp_url = session_data["cdp_url"]
browser_session = BrowserSession(cdp_url=cdp_url)
agent = Agent(
task="Go to the TestingBot homepage and click the pricing menu item",
llm=ChatOpenAI(model="gpt-4o"),
browser_session=browser_session,
)
try:
await agent.run()
finally:
await browser_session.close()
if __name__ == " __main__":
asyncio.run(main())
When you run this example, the Browser-Use agent will connect to a remote browser in the TestingBot cloud, and execute the task specified in the `task` variable.
Was this page helpful? Yes No
## Looking for More Help?
Have questions or need more information?
You can reach us via the following channels:
- [Email us](https://testingbot.com/contact/new)
- [Join our Slack Channel](https://join.slack.com/t/testingb0t/shared_invite/zt-3bcw9xch-jk19~6XPs_xBrsAgAedkCw)
---
URL: https://testingbot.com/support/ai/integrations/stagehand
# TestingBot & Stagehand
Stagehand is an AI Browser Automation Framework that allows you to create and manage browser automation tasks using AI. It is available in both NodeJS and Python.
By connecting Stagehand to TestingBot's remote browser grid, you can run multiple AI-driven browser automation tasks in parallel, without the need to manage the browsers yourself. Each session is video recorded and available for replay in the TestingBot dashboard. You can run browsers from [various geographical locations](https://testingbot.com/support/web-automate/playwright/options#geo) and use different browser versions, on multiple operating systems.
## Connecting to a remote browser
To get started, please install these packages:
- Install the Stagehand library: `@browserbasehq/stagehand`
- Install the TestingBot library: `npm install testingbot-api`
We can now run a simple example. This will connect Stagehand with a remote TestingBot browser session. Use the AI prompt to test a specific scenario, by describing what you want to test in your own natural language.
const { Stagehand } = require("@browserbasehq/stagehand");
const TestingBot = require("testingbot-api");
(async () => {
const tb = new TestingBot({
api_key: process.env.TESTINGBOT_KEY,
api_secret: process.env.TESTINGBOT_SECRET
});
const options = {
capabilities: {
browserName: 'chrome',
browserVersion: 'latest',
platform: 'WIN11'
}
};
const session = await tb.createSession(options);
const stagehand = new Stagehand({
env: "LOCAL",
localBrowserLaunchOptions: {
cdpUrl: session['cdp_url']
}
});
await stagehand.init();
const page = stagehand.page;
await page.goto("https://testingbot.com/pricing");
const extractResult = await page.extract("Extract the pricing plans from this page");
console.log(`Extract result:\n`, extractResult);
})();
Make sure to replace `TESTINGBOT_KEY` and `TESTINGBOT_SECRET` with your actual TestingBot API key and secret.
In the example above, we create a new TestingBot session with the desired capabilities. We then pass the `cdpUrl` to Stagehand, which allows it to connect to the remote browser session on TestingBot.
You can now use Stagehand's AI capabilities to interact with the page, extract information, or perform other actions as needed.
For more information on using Stagehand, please refer to the [Stagehand documentation](https://docs.stagehand.dev/first-steps/quickstart).
Was this page helpful? Yes No
## Looking for More Help?
Have questions or need more information?
You can reach us via the following channels:
- [Email us](https://testingbot.com/contact/new)
- [Join our Slack Channel](https://join.slack.com/t/testingb0t/shared_invite/zt-3bcw9xch-jk19~6XPs_xBrsAgAedkCw)
---
URL: https://testingbot.com/support/ai/integrations/magnitude
# Magnitude AI
[Magnitude](https://github.com/magnitudedev/magnitude) is an AI browser automation framework that allows you to run browser automation scripts using AI models. It uses Vision AI to understand the webpage and interact with it, making it possible to automate tasks that require visual understanding.
You can use the framework to automate tasks on webpages, test functionality, extract data and verify any specific behavior on the webpage, just like a normal user would do.
## Running Magnitude AI tests on TestingBot
To run Magnitude AI tests on TestingBot, you can use the following steps and example code to get started:
- `npx create-magnitude-app`
- Next, modify the `src/index.tsx` file that was generated, add a `browser` option to the `startBrowserAgent` function.
import { startBrowserAgent } from "magnitude-core";
import z from 'zod';
import dotenv from 'dotenv';
dotenv.config();
const capabilities = {
'tb:options': {
key: process.env.TESTINGBOT_KEY,
secret: process.env.TESTINGBOT_SECRET,
},
browserName: 'chrome',
browserVersion: 'latest'
}
async function main() {
const agent = await startBrowserAgent({
// Starting URL for agent
url: 'https://docs.magnitude.run/getting-started/quickstart',
// Show thoughts and actions
narrate: true,
browser: {
cdp: `wss://cloud.testingbot.com/puppeteer?capabilities=${encodeURIComponent(JSON.stringify(capabilities))}`
}
});
// Intelligently extract data based on the DOM content matching a provided zod schema
const gettingStarted = await agent.extract('Extract how to get started with Magnitude', z.object({
// Agent can extract existing data or new insights
difficulty: z.enum(['easy', 'medium', 'hard']),
steps: z.array(z.string()),
}));
// Navigate to a new URL
await agent.nav('https://magnitasks.com');
// Magnitude can handle high-level tasks
await agent.act('Create a task', {
// Optionally pass data that the agent will use where appropriate
data: {
title: 'Get started with Magnitude',
description: gettingStarted.steps.map(step => `• ${step}`).join('\n')
}
});
// It can also handle low-level actions
await agent.act('Drag "Get started with Magnitude" to the top of the in progress column');
// Stop agent and browser
await agent.stop();
}
main();
When you run this example, the Magnitude AI agent will use a remote TestingBot browser to interact with. Results will appear on your machine.
Was this page helpful? Yes No
## Looking for More Help?
Have questions or need more information?
You can reach us via the following channels:
- [Email us](https://testingbot.com/contact/new)
- [Join our Slack Channel](https://join.slack.com/t/testingb0t/shared_invite/zt-3bcw9xch-jk19~6XPs_xBrsAgAedkCw)
---
URL: https://testingbot.com/support/ai/integrations/notte
# Notte Browser Agent
[Notte](https://github.com/nottelabs/notte) is Browser AI agent that allows you to run browser automation scripts using AI models. It is a web agent framework built for speed, cost-efficiency, scale and reliability.
You can use the framework to automate tasks on webpages, test functionality, extract data and verify any specific behavior on the webpage, just like a normal user would do.
## Running Notte Browser Agent tasks with TestingBot
Notte allows you to specify a `CDP` endpoint, enabling it to connect to remote browser instances.
To run Notte Browser Agent tasks on TestingBot, you can use the following steps and example code to get started:
- `pip install notte litellm[proxy]`
- Add your OpenAI or Gemini API credentials to the `.env` file:
GEMINI_API_KEY="..."
import notte
from dotenv import load_dotenv
load_dotenv()
cdp_url = "wss://cloud.testingbot.com?key={key}&secret={secret}&browserName=chrome&browserVersion=latest"
with notte.Session(cdp_url=cdp_url) as session:
agent = notte.Agent(session=session, reasoning_model='gemini/gemini-2.5-flash', max_steps=30)
response = agent.run(task="extract pricing plans from https://testingbot.com")
Replace the `key` and `secret` with your TestingBot credentials. You can find more CDP options on [this page](https://testingbot.com/support/web-automate/puppeteer/options).
When you run this example, a remote browser session will be started on TestingBot. Notte will use the Gemini LLM to interact with the remote browser and run the task you specified.
By using TestingBot as the CDP endpoint, you can run Notte Browser Agent tasks on any of the available browsers in the TestingBot cloud, with speed, scale and reliability.
Was this page helpful? Yes No
## Looking for More Help?
Have questions or need more information?
You can reach us via the following channels:
- [Email us](https://testingbot.com/contact/new)
- [Join our Slack Channel](https://join.slack.com/t/testingb0t/shared_invite/zt-3bcw9xch-jk19~6XPs_xBrsAgAedkCw)
---
URL: https://testingbot.com/support/ai/chat
# What is TestingBot AI Chat?
TestingBot AI Chat is an innovative, codeless test automation tool that harnesses Generative AI and Large Language Models (LLMs) to let users interact with an AI agent in a chat-based interface. Instead of writing complex scripts or manually locating elements, simply type a prompt and the AI agent will operate a remote browser in real time.
Your prompts can be transformed into automated test cases, allowing you to reuse them for continuous testing of your website or web application. Additionally, the AI agent can generate Selenium WebDriver, Playwright or Puppeteer test scripts based on its recorded interactions with the remote browser.
To get started, upgrade your account and go to the [TestingBot member dashboard](https://testingbot.com/members). Click **AI Chat** in the left-hand menu to launch the AI Chat interface.
https://www.youtube.com/embed/dEu7sKL0pMo?si=vaAP1L51M37z244y&rel=0
## Example Prompts
Below are some example prompts that you can use with TestingBot AI Chat:
-
Navigate to https://cnn.com and click on the first article. Verify that it loads correctly. Generate a Playwright test for this.
-
Go to https://testingbot.com/pricing and click on the Enterprise plan. Verify that the pricing details are correct. Generate a Puppeteer test for this.
-
Open a new tab and go to https://github.com. Search for "TestingBot" and click on the first result. Verify that the page loads correctly. Generate a Selenium WebDriver test for this.
Was this page helpful? Yes No
## Looking for More Help?
Have questions or need more information?
You can reach us via the following channels:
- [Email us](https://testingbot.com/contact/new)
- [Join our Slack Channel](https://join.slack.com/t/testingb0t/shared_invite/zt-3bcw9xch-jk19~6XPs_xBrsAgAedkCw)
---
URL: https://testingbot.com/support/ai/codeless
# AI Codeless Web Testing
TestingBot provides AI solutions for QA and developers to automate their tests and other tasks. Simply instruct our AI agent what to test and the AI agent will create and run tests against your website on regular intervals, alerting you if a test fails.
Enter a URL and a prompt to instruct the AI agent what to test. The AI agent will run the test on a real browser in the TestingBot cloud.
When an error is detected, the AI agent will alert you.
Instead of generating test code from ChatGPT or Claude, you can instruct the AI agent to run tests based on natural language prompts.
Unlike traditional test scripts, which can break as soon as the website's UI changes, AI-driven tests dynamically interpret your instructions each time they run. This ensures your tests remain adaptable and up-to-date, even as the website evolves.
## Getting Started
To get started, please go to the [Codeless Testing](https://testingbot.com/members/lab) section and click the **Create a new AI test** button.
[Create a new AI test](https://testingbot.com/members/lab) 
### Create a new test
You will see the form below, where you can add a name for the test and the webpage you want to start the test with.
In the textarea you can write the test prompt in your own language. You can find example prompts in the next [prompts section](https://testingbot.com#prompts).
## Prompts
The AI agent will run tests based on the prompts you provide. A prompt is a set of instructions for the AI agent to follow.
We recommend keeping test prompts as concise as possible. For example, you can instruct the AI agent to:
- Click on a button
- Fill in a form
- Test a checkout flow
- Verify that an element is visible or not visible
- Verify that an element contains specific text
- Verify that an element does not contain specific text
- Verify that an element has or does not have a specific attribute
### Example Prompts
Below are some example prompts you could use to test a website:
#### User Authentication & Account Management
- Click on the "Sign In" button and verify that the login form appears.
- Try logging in with an incorrect password and confirm that an error message appears.
#### Forms & Input Validation
- Fill in the registration form with valid data and submit it.
- Try submitting the registration form without entering required fields and verify that validation errors appear.
- Enter an invalid email format and check that an error message is displayed.
#### Navigation & UI Elements
- Click on the "Home" link in the navigation menu and ensure it redirects correctly.
- Open the mobile menu and confirm that all expected links are visible.
- Scroll down the homepage and check that the footer loads correctly.
- Hover over the dropdown menu and verify that all submenu items appear.
#### E-Commerce & Payment Testing
- Add a product to the cart and verify that the cart updates.
- Enter invalid credit card details and ensure an error message appears.
#### Content & Accessibility
- Check that all images on the homepage load properly.
- Verify that all links on the website are clickable and lead to the correct pages.
- Use keyboard navigation to tab through elements and ensure accessibility compliance.
- Enable dark mode (if available) and confirm that the UI adjusts correctly.
- Resize the browser window and confirm that the website is responsive.
#### Performance & Security
- Try opening the website in an incognito window and verify that session-based content does not persist.
- Attempt to submit a form with script injection and confirm that it is sanitized.
- Check if the website forces HTTPS and does not allow unsecured connections.
#### Multilingual & Localization Testing
- Switch the website language to French and confirm that all text updates correctly.
- Change the currency on the pricing page and verify that the prices are updated.
## Browsers
You can select one or more browsers to run your tests on. The AI agent will run the tests on the selected browsers.
Run your tests on the latest versions of Chrome and Edge, on Windows and Linux.

## Schedule
Indicate when and at which interval, you would like to run the test.
You can choose to run the test once, on a daily basis, weekly, or repeat every xx minutes/hours.

## Alerting
When a test fails, you can choose to be alerted via e-mail, API call (webhook) or SMS text message.

## API
You can use the TestingBot REST-API to [create AI tests from prompts](https://testingbot.com/support/api#createtest). Create one or more tests with your prompt, assign browsers and set a schedule.
Use [webhooks](https://testingbot.com/support/integrations/webhooks) to get notified of the results.
Was this page helpful? Yes No
## Looking for More Help?
Have questions or need more information?
You can reach us via the following channels:
- [Email us](https://testingbot.com/contact/new)
- [Join our Slack Channel](https://join.slack.com/t/testingb0t/shared_invite/zt-3bcw9xch-jk19~6XPs_xBrsAgAedkCw)
---
URL: https://testingbot.com/support/ai/mcp
# What is TestingBot MCP?
The TestingBot MCP server (Model-Controller-Processor) is a service that allows AI agents and Large Language Models (LLMs) to interact with TestingBot’s testing infrastructure and features through natural language prompts.
You can manage your TestingBot tests, view test results, run tests, manage team members and more by simply sending natural language commands to your AI agent connected to the MCP server.
## Features
The TestingBot MCP server offers a range of features to enhance your testing experience with your favorite AI tools such as Claude, Cursor, VS Code and more. You can simply issue commands, request information, and manage your TestingBot account using natural language.
- **Natural Language** : Manage tests, team members, tunnels and more using simple natural language commands.
- **Test Result Analysis** : Retrieve test results and generated assets through conversational queries.
- **Team Collaboration** : Manage team members and permissions using AI-driven commands.
- **Storage** : Manage and upload native mobile apps for testing on physical devices.
- **CDP sessions** : Start and manage CDP sessions for browser automation through natural language.
### How does it work?
The MCP server will run as a local process on your machine. It will receive natural language commands from your AI agent or LLM and translate these into API calls to TestingBot's services. The response is then returned back to the AI client in a conversational format.
## Getting Started
To get started with the TestingBot MCP server, follow the steps below.
### 1-click installers
We provide 1-click installers for Visual Studio Code and Cursor. Click on one of the options below to automatically configure the TestingBot MCP server:
#### Visual Studio Code
Install the TestingBot MCP server for Visual Studio Code with a single click. This will automatically configure the MCP settings in your VS Code environment.
[Install for VS Code](https://testingbot.com/mcp/install?client=vscode)
#### Cursor
Install the TestingBot MCP server for Cursor with a single click. This will automatically configure the MCP settings in your Cursor editor.
[Install for Cursor](https://testingbot.com/mcp/install?client=cursor)
#### Claude
Install the `mcp-server.mcpb` file from the [MCP releases page](https://github.com/testingbot/mcp-server/releases). Claude will automatically set up the TestingBot MCP server.
You will need your TestingBot API key and secret to complete the setup. You can find these in your [account settings](https://testingbot.com/members/user/security).
### Manual Installation
If you prefer to install the MCP server manually, or if you're using a different AI client, you can follow the instructions below:
#### Prerequisites
- Node.js 18 or higher
- TestingBot API key and secret
- An MCP-compatible client (Claude Desktop, VS Code, Cursor, etc.)
[VS Code](https://testingbot.com#)[Cursor](https://testingbot.com#)[Claude](https://testingbot.com#)[GitHub (Manual)](https://testingbot.com#)
Follow these steps to install and set up the TestingBot MCP server for Visual Studio Code:
1. Open Visual Studio Code.
2. Open the command palette by pressing `Ctrl+Shift+P` (or `Cmd+Shift+P` on macOS).
3. Type in "MCP: Add Server"
4. A dropdown will appear with options. Choose the NPM Package method.
5. You can now enter the NPM package: `@testingbot/mcp-server`
6. You will see a confirmation screen requesting to install the TestingBot MCP server.
7. Click "Install". Enter your TestingBot Key and Secret which you can obtain from [the member area](https://testingbot.com/members/user/edit).
Follow these steps to install and set up the TestingBot MCP server for Cursor:
1. Create or open the file `.cursor/mcp.json`.
2. Add the configuration to the `mcp.json` file:
{
"mcpServers": {
"testingbot": {
"command": "npx",
"args": ["-y", "@testingbot/mcp-server@latest"],
"env": {
"TESTINGBOT_KEY": "",
"TESTINGBOT_SECRET": ""
}
}
}
}
3. Restart Cursor - the MCP server will now be available.
Follow these steps to install and set up the TestingBot MCP server for Claude:
1. Create or open the file `claude_desktop_config.json`.
2. Add the configuration to the `claude_desktop_config.json` file:
{
"mcpServers": {
"testingbot": {
"command": "npx",
"args": ["-y", "@testingbot/mcp-server@latest"],
"env": {
"TESTINGBOT_KEY": "",
"TESTINGBOT_SECRET": ""
}
}
}
}
3. Restart Claude (Desktop) - the MCP server will now be available.
You can install the MCP server locally from the [TestingBot MCP GitHub repository](https://github.com/testingbot/mcp-server).
## Example prompts
Here are some example prompts you can use with the TestingBot MCP server:
### Manual Testing
> "Start a live testing session on Chrome latest with Windows 11 for https://example.com"
> "Open https://myapp.com on iPhone 14 with iOS 16 for manual testing"
### Browsers & Devices
> "List all available browsers and versions"
> "Show me all available real devices for mobile testing"
### Test Management
> "Show me my last 20 tests"
> "Mark test abc123 as passed"
### Screenshots
> "Take a screenshot of https://example.com on the latest Chrome and Firefox on Windows 11"
> "Screenshot https://testingbot.com on a iOS 26 mobilesafari simulator"
### TestingBot Storage
> "Upload https://example.com/app.ipa to TestingBot"
### Team Management
> "Show me all team members"
### CDP Session
> "Create a CDP session on Chrome latest with Windows 11"
### TestingBot Tunnel
> "Show me all active tunnels"
## FAQ
##### Is this MCP server compatible with various AI models or specific to a particular provider?
MCP servers are LLM-agnostic, which means they work with any LLM model that supports the Model Context Protocol.
##### Is the information that I feed through MCP used to train?
No, the MCP server does not send any information to an LLM. It's the LLM that is requesting information from the MCP server. The MCP server will perform API calls to the TestingBot API.
##### How does authentication to TestingBot happen?
When configuring the MCP server, you will need to specify the TestingBot Key and Secret which you can obtain from the member area. These credentials are stored on your local machine, it's the credentials that the MCP Server uses to communicate with the TestingBot API.
Was this page helpful? Yes No
## Looking for More Help?
Have questions or need more information?
You can reach us via the following channels:
- [Email us](https://testingbot.com/contact/new)
- [Join our Slack Channel](https://join.slack.com/t/testingb0t/shared_invite/zt-3bcw9xch-jk19~6XPs_xBrsAgAedkCw)
---
URL: https://testingbot.com/support/web-live
# Manual Testing
- [Is usage limited in terms of minutes or users?](https://testingbot.com#usage)
- [What do I get with a Free Trial?](https://testingbot.com#trial)
- [Is manual testing on TestingBot secure?](https://testingbot.com#secure)
- [How can I test my website on my own computer or network?](https://testingbot.com#tunnel)
- [Do I need to download any software?](https://testingbot.com#software)
- [Which browsers and platforms do you provide for testing?](https://testingbot.com#browsers)
- [What kind of Developer Tools are pre-installed on the browsers?](https://testingbot.com#tools)
- [Is audio enabled during testing?](https://testingbot.com#audio)
- [Can I embed manual app/web testing in my own website or product?](https://testingbot.com#embed)
## Is usage limited in terms of minutes or users?
With an [upgraded plan](https://testingbot.com/pricing) you can use as many minutes as you like with as many friends and co-workers as you wish. There are no limits with manual browser testing.
Trial accounts can use up to 60 manual testing minutes.
## What do I get with a Free Trial?
Trial accounts can use up to 60 free minutes in manual testing.
Once you open a browser in our cloud, you'll get 5 minutes of unlimited access to the browser.
With an upgraded plan, you'll enjoy unlimited minutes of manual testing, without any restrictions.
## Is manual testing on TestingBot secure?
None of your data is stored in our cloud, for each test you receive a VM with a pristine environment.
VMs use up-to-date security patches and are located in a secure datacenter with firewalls.
## How can I test my website on my own computer or network?
You can use TestingBot to test your staging website in our cloud.
For example: you're working on a new feature and want to make sure it looks and behaves ok in all browsers, before releasing it to the public.
With our [Tunnel](https://testingbot.com/support/tunnel) you can easily and securely connect your network with our cloud.
## Do I need to download any software?
You do not need to download any software or plugins.
In our member area, you can pick on which browser you'd like to test. Once we've booted a Virtual Machine for you, you can control the machine from inside your browser.
You can for example control an IE9 browser located in our cloud from inside your own Chrome browser.
## Which browsers and platforms do you provide for testing?
We provide the latest and most used browsers, versions and platforms.
Ranging from IE6-IE11 on Windows, to Chrome on Linux, or Safari 14 on Mac to Firefox 81 on Windows 10.
See our full [list of supported browsers](https://testingbot.com/support/web-automate/browsers).
## What kind of Developer Tools are pre-installed on the browsers?
All browsers have their built-in developer tools enabled by default.
## Is audio enabled during testing?
Audio is available during all manual tests on Desktop machines and simulators/emulators.
Audio is available on manual physical Android device testing, for devices with Android 12 and higher.
On physical iOS devices, audio is available on a select number of devices, with iOS version higher than 14.
## Can I embed manual app/web testing in my own website or product?
Yes, you can embed TestingBot's manual testing interface in your own website or product using an iframe.
1. Start a manual session through an API call.
2. Fetch the `sessionId` of the session and generate an `authentication hash`.
3. Pass the `sessionId` and `authentication hash` to a liveview URL and embed it with an iframe.
const TestingBot = require('testingbot-api');
const tb = new TestingBot({
api_key: process.env.TESTINGBOT_KEY,
api_secret: process.env.TESTINGBOT_SECRET
});
const options = {
capabilities: {
browserName: 'chrome',
browserVersion: 'latest',
platform: 'WIN11',
'tb:manual': true,
}
};
const session = await tb.createSession(options);
const sessionId = session.session_id;
const authHash = tb.getAuthenticationHashForSharing(sessionId);
const liveViewUrl = `https://testingbot.com/tests/${sessionId}/live?auth=${authHash}`;
You can then embed the live view URL in an iframe as follows:
You will have a fully functional manual testing interface embedded in your own application.
---
URL: https://testingbot.com/support/web-live/extension
# Browser Extension
- [What is the TestingBot Browser Extension?](https://testingbot.com#usage)
- [Installation](https://testingbot.com#installation)
- [Using the Browser Extension](https://testingbot.com#usage)
## What is the TestingBot Browser Extension?
The TestingBot Browser Extension can be installed on your [Chrome](https://chrome.google.com/webstore/detail/testingbot/nhjmiaiamlfblfagaodhkeabfbnmdmff) or [Firefox](https://addons.mozilla.org/addon/testingbot/) browser, for free.
Once installed, you can visit any website with your own Chrome or Firefox browser, and click the TestingBot extension icon. A window will pop up, allowing you to choose on which remote browser you want to test the current page on.
Upon selecting a browser, the current page will be available for testing on a remote TestingBot browser.
For example, you are using Chrome but want to make sure that the website you are currently seeing looks and functions correctly on a macOS Safari browser. With the extension, you can simply choose the remote browser configuration. You will be redirected to a live view of the remote browser, where you can use your mouse and keyboard to interact and test the webpage.
## Installation
The TestingBot Browser Extension is currently available for [Chrome](https://chrome.google.com/webstore/detail/testingbot/nhjmiaiamlfblfagaodhkeabfbnmdmff) and [Firefox](https://addons.mozilla.org/addon/testingbot/).
Simply click the **Add Extension** button to add the extension to your browser.
A TestingBot icon will now appear in your browser's navigation bar. You can pin the extension to make sure it remains visible at all times.
## Using the Browser Extension
After installation, you can simply navigate to any website you want to test. Click the TestingBot extension icon to open a popup with browser choices.

Make sure you are logged in to TestingBot while using the extension.
---
URL: https://testingbot.com/support/web-live/chromeos
# ChromeOS Manual Testing
TestingBot gives you the ability to test your website on a remote ChromeOS device emulator, such as a Chromebook.
Simply enter the URL of the website you want to test and choose between 3 different ChromeOS configurations:
- ChromeOS Small: 1366x768 - 160dpi
- ChromeOS Medium: 3840x2160 - 320dpi
- ChromeOS Large: 1920x1080 - 160dpi
## Starting a live ChromeOS session
Simply [start a new manual session](https://testingbot.com/members/manual/new) by clicking the Android category and choosing one of the three ChromeOS configurations.
A remote session will be started and you will be able to interact with the ChromeOS device emulator with your own mouse and keyboard.
An audio stream will be started, so you can hear the sounds from the ChromeOS device emulator.

## Enabling/disabling Dark Mode
You can easily enable or disable Dark Mode in the ChromeOS emulator by clicking the "Device Settings" button in taskbar, then toggling the "Enable Dark Mode" switch.
## Taking screenshots
To take a live screenshot of the current ChromeOS session, simply click the "Photo" button in the taskbar. This will capture the current view and open the screenshot in a photo editor, which you can use to annotate or modify the screenshot, before downloading or sharing it.
## Change GPS
You can use the "GPS" button in the taskbar to change the GPS location of the ChromeOS device emulator. This is useful for testing location-based features on your website.
---
URL: https://testingbot.com/support/app-live
# Live Mobile App Testing
Take control over our real devices with your mouse and keyboard, straight from your own browser, without having to install any plugin or program.
Simply upload your iOS or Android app to TestingBot, [pick the device](https://testingbot.com/support/app-automate/devices) you want to test on, and TestingBot will give you a live session with the real device.
## Uploading a mobile App
You can upload your mobile app either through the TestingBot UI or via an [API call](https://testingbot.com/support/api#upload).
### Upload via the UI
To upload a mobile app through the TestingBot UI, simply go to the member dashboard and:
- Click **Live App Testing**
- Under **Select Source** click **Uploaded Apps**
- Either drag your mobile application on the page, or click **Upload App** to browse for the file
Currently we accept these file formats:
- `.aab`, `.apk` for Android
- `.ipa`, `.zip` for iOS

## Deleting a mobile App
To delete a mobile app, you can use the TestingBot UI or use our [REST API](https://testingbot.com/support/api#filedelete).
### Delete via the UI
To delete a mobile app through the TestingBot UI, simply go to the member dashboard and:
- Click **Live App Testing**
- Under **Select Source** click **Uploaded Apps**
- Click the trash icon in the bottom right corner of the list
- Select one or more apps you wish to delete
- Click **Delete Apps**
 
## Selecting a Mobile Device
Once you've selected a mobile app, you will need to select the device you want to run tests on. You can choose to select a Virtual Device or a Real Device by using the navigation tabs on the page.
### Real Devices
To use a Real Device, click the [Real Device Testing](https://testingbot.com/members/apps/devices/new) tab.
- Click an available device from the devices list
- Make sure to select an iOS device if you've selected an iOS app (`.ipa`), or an Android device if you've selected an Android app (`.apk`)
- Click the **Start** button
### Virtual Devices
To use a Virtual Device, click the [Emulator & Simulator Testing](https://testingbot.com/members/apps/new) tab.
- Select an app you've uploaded, or the sample Android/iOS TestingBot app.
- Click the Android or iOS tab in the virtual device list
- Select an iOS simulator if you've selected an iOS app (`.ipa`), or an Android emulator if you've selected an Android app (`.apk`)
- Click the **Start** button
### Time Limits and Timeouts for Live App Testing
- Live tests will last a maximum of 5 minutes at a time for trial users.
- Live tests for paid users will timeout after 15 minutes of inactivity
## Live Test Interface
Below is some more information on the various functions that the TestingBot Live App Testing UI provides.
Icon | Name | Description || | Switch Device |
Change to a different device.
This will start a new session, you will lose the session with the current device.
|
| | Zoom |
Zoom in or out. This will make the device's screen appear larger or smaller.
This only affects the view in your browser, it does not change anything on the device itself.
|
| | Rotate |
Rotates the device. Either from PORTRAIT to LANDSCAPE or vice-versa.
|
| | Screenshot |
Takes a screenshot from the device.
A screenshot editor will appear, allowing you to annotate the image. Download the screenshot with the download button.
|
| | Copy/Paste |
Copy or paste from or to the device.
If you've selected the copy/paste permission in your browser, TestingBot will automatically keep your local and remote clipboard in sync.
|
| | DevTools |
This will open the developer tools for the device.
Retrieve realtime logs from the device. Use the **Inspector** functionality to drill down in the view hierarchy to copy element locators (such as XPath).
|
| | GPS Location |
Set a (new) mock location for the GPS of the device.
If your app uses GPS functionality, it will receive this mock location
|
| | Locale |
Set a new locale for the entire device.
Useful if your app is multilingual. Test your app in different languages.
|
| | Device Settings |
Change various device settings.
Switch between light and dark mode instantly.
|
| | Stop Session |
Stops the current session.
Logs and a video of the test will be available in the TestingBot member area.
|
## Audio
Audio is available during manual mobile app testing, for certain devices.
### Virtual Devices
Audio is available for all Android emulators and iOS Simulators. TestingBot will stream the audio generated by the virtual device to your web browser.
### Physical Devices
Android devices with Android version 12 and higher will stream the audio to your browser, you will hear all the audio generated on the device.
For iOS devices with iOS version 14 and higher, you will hear the audio from the device in realtime.
Older physical devices do not have the audio streaming capabilities. These will only stream a live video view of the device.
## Device Logs
TestingBot provides a real-time stream of the device logs during the manual live session.
You can switch between these device log levels:
- `VERBOSE` (default)
- `DEBUG`
- `INFO`
- `WARNING`
- `ERROR`
You can use the search input bar to search between the generated logs.
Icon | Functionality || | The download icon allows you to download the entire device logs generated thus far, without any filtering. |
| | The trash icon will clear the history of the logs. Only new log entries will be added to the realtime view. |
## Testing Local Websites/Apps
With our [TestingBot Tunnel](https://testingbot.com/support/tunnel) you can easily and securely connect your local computer/network with TestingBot's Real Devices.
#### Known Limitations
- **Localhost testing does not work on iOS**.
Due to an iOS Restriction, it is currently not possible to run tests against `http(s)://localhost` with TestingBot Tunnel.
A possible workaround would be to change the hosts file on the machine running TestingBot Tunnel, and add a custom hostname (for example `mylocalwebsite` and the IP address `127.0.0.1`).
Then configure your tests to use `http(s)://mylocalwebsite/...` instead of localhost.
Was this page helpful? Yes No
## Looking for More Help?
Have questions or need more information?
You can reach us via the following channels:
- [Email us](https://testingbot.com/contact/new)
- [Join our Slack Channel](https://join.slack.com/t/testingb0t/shared_invite/zt-3bcw9xch-jk19~6XPs_xBrsAgAedkCw)
---
URL: https://testingbot.com/support/app-live/apple-pay
# Testing Apple Pay
Apple Pay, developed by Apple Inc., serves as a mobile payment and digital wallet service enabling transactions through various Apple devices, such as iPhones and iPads. Testing with Apple Pay comes with challenges. This document aims to clarify some methods that are available for testing with iOS and Apple Pay.
There are important differences between Apple Pay on Real Devices and iOS Simulators. The iOS Simulator has the following limitations:
- The simulator only targets the front-end integration of Apple Pay and does not test the back-end integration.
- You can not add payment cards to the wallet on iOS simulators. So no Apple Pay sandbox testing cards, or any other real credit card.
- It is not possible to test the Apple Pay in-web flow.
- It is possible to test the Apple Pay in-app flow, but the Apple Pay in-app flow will not work the same way as with a real iOS device. It will not return a payment token and will not properly process a payment.
## Apple Pay on Real Private Devices
TestingBot provides [private iOS devices](https://testingbot.com/enterprise/private-device-cloud), which are able to use Apple Pay. To make Apple Pay work on TestingBot's real private devices, please follow the steps below:
1. Follow Apple's documentation to [enable Apple Pay](https://developer.apple.com/documentation/passkit/apple_pay/setting_up_apple_pay)
2. Set up Apple Pay integration in your iOS app, using the Apple documentation.
3. Register your Merchant ID in your Apple developer account.
4. Set up an Apple sandbox tester account. See the [Apple Sandbox documentation](https://developer.apple.com/help/app-store-connect/test-in-app-purchases/create-sandbox-apple-ids/) for more information.
5. Build your ipa file. Apple Pay will not work with enterprise certificates, which means it will not work by default on TestingBot's private devices. You will need to add the `udid` (iPhone/iPad unique id) of each private device assigned to you, to your Apple provisioning profile.
- Log in to [Apple's Developer Account](https://developer.apple.com/account/resources/identifiers/list)
- Click [Add Device](https://developer.apple.com/account/resources/devices/add)
- Type in a device name and the UDID that you received from TestingBot.
- Save the device.
- Now add the new device to your [Provisioning Profile](https://developer.apple.com/account/resources/profiles/list)
### Passcode
One of the requirements to use Apple Pay, is that a passcode needs to be set on the device. Make sure that you set a passcode on your private iOS device.
TestingBot cleans every private device after each test session. You will need to configure your Apple Pay Sandbox Testing account, including a passcode and sandbox cards, every time you want to test Apple Pay on a real iOS device.
If you want to disable this automated cleaning process, please [reach out](https://testingbot.com/contact/new).
## Apple Pay on iOS Simulators
iOS Simulators offer a feature where you can authorize Apple Pay by clicking a button in the Simulator's menu bar.
- Navigate to a point in your app where a payment sheet is visible.
- Click **Features** , then enable **Authorize Apple Pay** , or use the key combination (Command+SHIFT+A).
## Apple Sandbox Test Cards
You can find a list of Test Cards and their details on [Apple Pay's Sandbox Testing documentation page](https://developer.apple.com/apple-pay/sandbox-testing/).
These test cards include Discover, Master Card, American Express, VISA and others. There are cards available for the USA, Europe, China and even Test Cards for Point of Sale Systems.
To use these, simply open the **Wallet** application on your iOS device and add the card number and expiration date.
Was this page helpful? Yes No
## Looking for More Help?
Have questions or need more information?
You can reach us via the following channels:
- [Email us](https://testingbot.com/contact/new)
- [Join our Slack Channel](https://join.slack.com/t/testingb0t/shared_invite/zt-3bcw9xch-jk19~6XPs_xBrsAgAedkCw)
---
URL: https://testingbot.com/support/app-live/chromeos
# ChromeOS Manual App Testing
With TestingBot, you can upload your native Android app and test it on a remote ChromeOS device emulator, such as a Chromebook.
After you upload your app, simply choose one of the three ChromeOS configurations to start testing:
- ChromeOS Small: 1366x768 - 160dpi
- ChromeOS Medium: 3840x2160 - 320dpi
- ChromeOS Large: 1920x1080 - 160dpi
## Starting a live ChromeOS session
To get started, make sure you uploaded a `.apk` file on the [manual app session](https://testingbot.com/members/apps/new) page. Then, click one of the three ChromeOS configurations to start a new manual session.
A remote session will be started and you will be able to interact with the ChromeOS device emulator with your own mouse and keyboard.
An audio stream will be started, so you can hear the sounds from the ChromeOS device emulator.

## Enabling/disabling Dark Mode
You can easily enable or disable Dark Mode in the ChromeOS emulator by clicking the "Device Settings" button in taskbar, then toggling the "Enable Dark Mode" switch.
## Taking screenshots
To take a live screenshot of the current ChromeOS session, simply click the "Photo" button in the taskbar. This will capture the current view and open the screenshot in a photo editor, which you can use to annotate or modify the screenshot, before downloading or sharing it.
## Change GPS
You can use the "GPS" button in the taskbar to change the GPS location of the ChromeOS device emulator. This is useful for testing location-based features on your website.
---
URL: https://testingbot.com/support/api
# TestingBot API Documentation
Access and modify all your TestingBot data through our comprehensive REST API. Build powerful integrations and automate your testing workflows.
All API responses are returned in JSON format.
API Endpoint: `https://api.testingbot.com`
Current Version: v1
## API Clients
There are several open source client libraries available to easily interact with the TestingBot API:
- [NodeJS](https://github.com/testingbot/testingbot-api)
- [Python](https://github.com/testingbot/testingbotclient)
- [Java](https://github.com/testingbot/testingbot-java)
- [Ruby](https://github.com/testingbot/testingbot_ruby)
- [PHP](https://github.com/testingbot/testingbot-php)
## Authentication
You can authenticate to our TestingBot API by providing your API key and API secret which you can obtain in the [member area](https://testingbot.com/members).
Authentication to the API needs to happen via [HTTP Basic Auth](http://en.wikipedia.org/wiki/Basic_access_authentication).
All requests must be made to our endpoint via HTTP. You must authenticate for all API requests, except for `List of browsers`.
## List of browsers
This call will return a list of browsers our grid currently supports.
No authentication is required for this API call.
[cURL](https://testingbot.com#)[Ruby](https://testingbot.com#)[Python](https://testingbot.com#)[PHP](https://testingbot.com#)[Java](https://testingbot.com#)[NodeJS](https://testingbot.com#)
curl "https://api.testingbot.com/v1/browsers"
require 'testingbot'
api = TestingBot::Api.new(key, secret)
api.get_browsers
TestingbotREST restApi = new TestingbotREST(key, secret);
ArrayList browsers = restApi.getBrowsers();
$api = new TestingBot\TestingBotAPI($key, $secret);
$api->getBrowsers();
import testingbotclient
tb = testingbotclient.TestingBotClient(key, secret)
tb.information.get_browsers()
const TestingBot = require('testingbot-api');
const api = new TestingBot({
api_key: "your-tb-key",
api_secret: "your-tb-secret"
});
const browsers = await api.getBrowsers();
Optional Arguments:
- (string) **type** - either "webdriver" or "rc"
Response:
[{"selenium_name":"IE8","name":"iexplore","version":8,"platform":"WINDOWS","browser_id":1,"long_version":8},
{"selenium_name":"FF7","name":"firefox","version":7,"platform":"WINDOWS","browser_id":22,"long_version":7}]
## Access your user info
This call will return the data associated to your account. You can edit this data by issueing a PUT request to our API.
[cURL](https://testingbot.com#)[Ruby](https://testingbot.com#)[Python](https://testingbot.com#)[PHP](https://testingbot.com#)[Java](https://testingbot.com#)[NodeJS](https://testingbot.com#)
$ curl "https://api.testingbot.com/v1/user" \
-u key:secret
require 'testingbot'
api = TestingBot::Api.new(key, secret)
api.get_user_info
TestingbotREST restApi = new TestingbotREST(key, secret);
TestingbotUser user = restApi.getUserInfo();
$api = new TestingBot\TestingBotAPI($key, $secret);
$api->getUserInfo();
import testingbotclient
tb = testingbotclient.TestingBotClient(key, secret)
tb.user.get_user_information()
const TestingBot = require('testingbot-api');
const api = new TestingBot({
api_key: "your-tb-key",
api_secret: "your-tb-secret"
});
const userInfo = await api.getUserInfo();
Arguments: None required
Response:
{
"first_name": "Steven",
"last_name": "King",
"seconds": 17745,
"last_login" : "2026-01-16 16:40:49 UTC",
"plan" : "small",
"max_concurrent": 10,
"max_concurrent_mobile": 2,
"company":"companyName",
"street":"companyStreet",
"city":"companyCity",
"country":"companyCountry",
"vat":"ifInEurope"
}
## Edit your user info
This call will return the data associated to your account. You can edit this data by issueing a PUT request to our API.
[cURL](https://testingbot.com#)[Ruby](https://testingbot.com#)[Python](https://testingbot.com#)[PHP](https://testingbot.com#)[Java](https://testingbot.com#)[NodeJS](https://testingbot.com#)
$ curl "https://api.testingbot.com/v1/user" \
-X PUT \
-d "user[first_name]=new" \
-u key:secret
require 'testingbot'
api = TestingBot::Api.new(key, secret)
api.update_user_info({ "first_name" => 'new' })
TestingbotREST restApi = new TestingbotREST(key, secret);
TestingbotUser user = restApi.updateUserInfo(TestingBotUser);
$api = new TestingBot\TestingBotAPI($key, $secret);
$api->updateUserInfo(array('first_name' => 'new'));
import testingbotclient
tb = testingbotclient.TestingBotClient(key, secret)
tb.user.update_user_information()
const TestingBot = require('testingbot-api');
const api = new TestingBot({
api_key: "your-tb-key",
api_secret: "your-tb-secret"
});
const newUserData = {
first_name: 'new'
}
await api.updateUserInfo(newUserData);
Arguments:
- (string) **first\_name**
- (string) **last\_name**
Response:
{
"success" : true,
"user" : {
"first_name": "new",
"last_name": "King",
"seconds": 17745,
"last_login" : "2011-08-06T16:47:04Z"
}
}
## Get Team Info
If you are part of a team, you can fetch information regarding the team with this API call. The response will include the maximum allowed concurrency for both VM based testing and physical mobile device testing. Next to that, the response will include the current usage of the entire team, for both VM based testing and physical mobile device testing.
[cURL](https://testingbot.com#)[NodeJS](https://testingbot.com#)
$ curl "https://api.testingbot.com/v1/team-management" \
-u key:secret
const TestingBot = require('testingbot-api');
const api = new TestingBot({
api_key: "your-tb-key",
api_secret: "your-tb-secret"
});
const teamInfo = await api.getTeam();
Response:
{
"concurrency":{
"allowed":{
"vms": 10,
"physical": 2
},
"current":{
"vms": 4,
"physical": 1
}
}
}
## Get users in your team
Retrieve all users that are part of your team.
[cURL](https://testingbot.com#)[NodeJS](https://testingbot.com#)
$ curl "https://api.testingbot.com/v1/team-management/users" \
-u key:secret
const TestingBot = require('testingbot-api');
const api = new TestingBot({
api_key: "your-tb-key",
api_secret: "your-tb-secret"
});
const users = await api.getUsersInTeam();
Response:
{
"data":[
{
"id":337,
"first_name":"test",
"last_name":"user",
"seconds":12000,
"last_login":"2021-05-12T19:37:35.000Z",
"plan":"Free Trial",
"max_concurrent":2,
"max_concurrent_mobile":2,
"company":"",
"street":"",
"city":"",
"country":"",
"vat":null,
"read_only":false,
"roles":[],
"current_vm_concurrency":0,
"current_physical_concurrency":0
}
],
"meta":{
"offset":0,
"count":1,
"total":1
}
}
The `roles` field indicates if you have one of the roles in the team:
- ADMIN
- USER
## Retrieve a specific user in your team
Retrieve a specific user that is part of your team.
[cURL](https://testingbot.com#)[NodeJS](https://testingbot.com#)
$ curl "https://api.testingbot.com/v1/team-management/users/:id" \
-u key:secret
const TestingBot = require('testingbot-api');
const api = new TestingBot({
api_key: "your-tb-key",
api_secret: "your-tb-secret"
});
const user = await api.getUserFromTeam(userId);
Arguments:
- (string) **:id** - a unique string identifying the user
Response:
{
"id":337,
"first_name":"test",
"last_name":"user",
"seconds":12000,
"last_login":"2021-05-12T19:37:35.000Z",
"plan":"Free Trial",
"max_concurrent":2,
"max_concurrent_mobile":2,
"company":"",
"street":"",
"city":"",
"country":"",
"vat":null,
"read_only":false,
"roles":[],
"current_vm_concurrency":0,
"current_physical_concurrency":0
}
The `roles` field indicates if you have one of the roles in the team:
- ADMIN
## Create a user in your team
Adds a new user to your team. You can use this API call to add TestingBot accounts for colleagues or people in your team.
Usage of this API call requires an upgraded account and `ADMIN` role.
[cURL](https://testingbot.com#)[NodeJS](https://testingbot.com#)
$ curl -X POST -u -u key:secret \
https://api.testingbot.com/v1/team-management/users --header 'Content-Type: application/json' --data-raw '{
"first_name": "Bruno",
"last_name": "Mars",
"email": "bmars@gmail.com",
"password": "$bmaRs*RULES"
}'
const TestingBot = require('testingbot-api');
const api = new TestingBot({
api_key: "your-tb-key",
api_secret: "your-tb-secret"
});
const userData = {
'user[first_name]': 'John',
'user[last_name]': 'Doe',
'user[email]': 'john@example.com'
};
const result = await api.createUserInTeam(userData);
Arguments:
- (string) **:first\_name**
- (string) **:last\_name**
- (string) **:email**
- (string) **:password**
Response:
{
"id":337,
"first_name":"Bruno",
"last_name":"Mars",
"seconds":12000,
"last_login":"2021-05-12T19:37:35.000Z",
"plan":"Free Trial",
"max_concurrent":2,
"max_concurrent_mobile":2,
"company":"",
"street":"",
"city":"",
"country":"",
"vat":null,
"read_only":false,
"roles":[],
"current_vm_concurrency":0,
"current_physical_concurrency":0
}
## Update a user in your team
Updates details for a user in your team.
Usage of this API call requires an upgraded account and `ADMIN` role.
[cURL](https://testingbot.com#)[NodeJS](https://testingbot.com#)
$ curl -X PUT -u -u key:secret \
https://api.testingbot.com/v1/team-management/users/:id --header 'Content-Type: application/json' --data-raw '{
"first_name": "Bruno",
"last_name": "Mars",
"email": "bmars@gmail.com",
"password": "$bmaRs*RULES"
}'
const TestingBot = require('testingbot-api');
const api = new TestingBot({
api_key: "your-tb-key",
api_secret: "your-tb-secret"
});
const userData = {
'user[first_name]': 'Jane',
'user[last_name]': 'Smith'
};
const result = await api.updateUserInTeam(userId, userData);
Arguments:
- (string) **:id**
- (string) **:first\_name**
- (string) **:last\_name**
- (string) **:email**
- (string) **:password**
- (string) **:credits** - how many credits (in seconds) this user for running tests on VMs
- (string) **:device\_credits** - how many credits (in seconds) this user for running tests on physical devices
- (string) **:concurrency** - how many tests this user is able to run in parallel on VMs
- (string) **:concurrencyPhysical** - how many tests this user is able to run in parallel on physical devices
Response:
{
"id":337,
"first_name":"Bruno",
"last_name":"Mars",
"seconds":12000,
"last_login":"2021-05-12T19:37:35.000Z",
"plan":"Free Trial",
"max_concurrent":2,
"max_concurrent_mobile":2,
"company":"",
"street":"",
"city":"",
"country":"",
"vat":null,
"read_only":false,
"roles":[],
"current_vm_concurrency":0,
"current_physical_concurrency":0
}
## Reset credentials for a specific user in your team
This API call allows you to reset the secret credentials for a user in your team, which are required to connect to the TestingBot grid.
Usage of this API call requires an `ADMIN` role.
[cURL](https://testingbot.com#)[NodeJS](https://testingbot.com#)
$ curl -X POST -u -u key:secret \
https://api.testingbot.com/v1/team-management/users/:id/reset-keys'
const TestingBot = require('testingbot-api');
const api = new TestingBot({
api_key: "your-tb-key",
api_secret: "your-tb-secret"
});
const result = await api.resetCredentials(userId);
Arguments:
- (string) **:id**
Response:
{
"success":true,
"client_key":"d69e0800xc32ed2f059b7a630ee255b"
}
Only the `client_key` will be returned. The `client_secret` will also be reset, but will only be visible to the user in the member area.
## Retrieve your tests
Will return all the tests you have created together with details for every test. You can use the offset and count parameters to paginate your tests.
[cURL](https://testingbot.com#)[Ruby](https://testingbot.com#)[Python](https://testingbot.com#)[PHP](https://testingbot.com#)[Java](https://testingbot.com#)[NodeJS](https://testingbot.com#)
$ curl "https://api.testingbot.com/v1/tests?offset=0&count=10" \
-u key:secret
require 'testingbot'
api = TestingBot::Api.new(key, secret)
api.get_tests(0, 10)
TestingbotREST restApi = new TestingbotREST(key, secret);
TestingbotTest test = restApi.getTests(0, 10);
$api = new TestingBot\TestingBotAPI($key, $secret);
$api->getJobs(0, 10);
import testingbotclient
tb = testingbotclient.TestingBotClient(key, secret)
tb.tests.get_tests(offset=0, limit=10)
const TestingBot = require('testingbot-api');
const api = new TestingBot({
api_key: "your-tb-key",
api_secret: "your-tb-secret"
});
const tests = await api.getTests({ offset, limit });
Arguments:
- (int) **offset** (optional) (default 0) - paginate tests starting from this number
- (int) **count** (optional) (default 10, max 500) - number of tests to fetch
- (string) **group** (optional) - retrieve tests that belong to this group
- (string) **build** (optional) - retrieve tests that belong to this build
- (int) **browser\_id** (optional) - retrieve tests that ran with this browser\_id
- (string) **skip\_fields** (optional) - skip these fields. For example: ?skip\_fields=logs,thumbs
Response:
{
"data":[
{
"created_at":"2011-07-30T23:21:23Z",
"completed_at":"2011-07-30T23:22:44Z",
"extra":null,
"id":3,
"name":"MyTest::testTitle",
"session_id":"f7903f9e93e74fe1b0e924bf9d2ce9fc",
"status_message":"Failed asserting that 1 equals 0.",
"device_name": null,
"platform_name": null,
"status_id": 1,
"success":false,
"test_environment_id":1,
"thumbs":[],
"video":"https://s3.amazonaws.com/rectestingbot/sample.mp4",
"groups":["testingbot.com"],
"browser":"IE8",
"browser_version":8,
"os":"WINDOWS",
"duration":13,
"build":"buildid",
"logs":{"vm":"https://s3-eu-west-1.amazonaws.com/eulogtestingbot/session.txt"}
}
],
"meta":
{
"offset":2,
"count":3,
"total":789
}
}
Possible errors:
- 404 Not found - test not found
## Specific test info
This call will return info for one of your tests. In the example below, the response will contain info for a test with Selenium sessionId 3.
You can fetch all the various test sessionIds that belong to you by [fetching your tests](https://testingbot.com#tests).
[cURL](https://testingbot.com#)[Ruby](https://testingbot.com#)[Python](https://testingbot.com#)[PHP](https://testingbot.com#)[Java](https://testingbot.com#)[NodeJS](https://testingbot.com#)
$ curl "https://api.testingbot.com/v1/tests/:webdriver_session_id" -u key:secret
require 'testingbot'
api = TestingBot::Api.new(key, secret)
api.get_test(webdriver_session_id)
TestingbotREST restApi = new TestingbotREST(key, secret);
TestingbotTest test = restApi.getTest(String webdriver_session_id);
$api = new TestingBot\TestingBotAPI($key, $secret);
$api->getJob($webdriver_session_id);
import testingbotclient
tb = testingbotclient.TestingBotClient(key, secret)
tb.tests.get_test(webdriver_session_id)
const TestingBot = require('testingbot-api');
const api = new TestingBot({
api_key: "your-tb-key",
api_secret: "your-tb-secret"
});
const test = await api.getTestDetails(webdriver_session_id);
Arguments:
- (string) **:webdriver\_session\_id** - a unique string identifying your test (= Selenium sessionId)
- (string) **skip\_fields** (optional) - skip these fields. For example: ?skip\_fields=logs,thumbs
Response:
{
"created_at":"2011-07-30T23:21:23Z",
"completed_at":"2011-07-30T23:22:23Z",
"extra":null,
"id":3,
"name":"MyTest::testTitle",
"session_id":"f7903f9e93e74fe1b0e924bf9d2ce9fc",
"status_message":"Failed asserting that 1 equals 0.",
"device_name": null,
"platform_name": null,
"success":false,
"state":"COMPLETE",
"unknown":false,
"thumbs":["https://s3.amazonaws.com/euthumbtestingbot/3_f93782fji.jpg"],
"video":"https://s3.amazonaws.com/eurectestingbot/sample.mp4",
"logs": {"selenium":"https://s3-eu-west-1.amazonaws.com/eulogtestingbot/session.txt"},
"groups":["testingbot.com"],
"build": null,
"browser":"IE8",
"browser_version": 8,
"os":"VISTA",
"duration":60,
"type":"WEBDRIVER",
"assets_available": true,
"steps": [
{
"command":"/session",
"arguments":"{\"capabilities\":{\"alwaysMatch\":{\"browserName\":\"chrome\",\"version\":\"108\"},\"firstMatch\":[{}]},\"desiredCapabilities\":{\"platform\":\"WIN8\",\"browserName\":\"chrome\",\"version\":\"108\"}}",
"response":"cb7503d4b57a-1df17d3a749a-bb324331da31-167601846491-06317943",
"time":1676018469521
}
]
}
Possible errors:
- 404 Not found - test not found
## Update a test
This call will update a test. You can use this call to update the success status, add a name or extra data, ...
To update a specific test, pass its unique test ID or its Selenium session ID.
[cURL](https://testingbot.com#)[Ruby](https://testingbot.com#)[Python](https://testingbot.com#)[PHP](https://testingbot.com#)[Java](https://testingbot.com#)[NodeJS](https://testingbot.com#)
$ curl "https://api.testingbot.com/v1/tests/:webdriver_session_id" \
-X PUT \
-d "test[success]=1" \
-u key:secret
require 'testingbot'
api = TestingBot::Api.new(key, secret)
@api.update_test(webdriver_session_id, { :name => new_name, :success => true })
TestingbotREST restApi = new TestingbotREST(key, secret);
boolean success = restApi.updateTest(String webdriver_session_id, Map details);
$api = new TestingBot\TestingBotAPI($key, $secret);
$api->updateJob($webdriver_session_id, array('name' => 'mytest', 'success' => true));
import testingbotclient
tb = testingbotclient.TestingBotClient(key, secret)
tb.tests.update_test(webdriver_session_id, status_message=.., passed=1|0, build=.., name=..)
const TestingBot = require('testingbot-api');
const api = new TestingBot({
api_key: "your-tb-key",
api_secret: "your-tb-secret"
});
const testData = { "test[success]" : "1", "test[status_message]" : "test" };
await api.updateTest(testData, webdriver_session_id);
Arguments:
- (string) **id** - a unique string identifying your test (= Selenium sessionId, a UUID)
- (boolean) **test[success]** - indicating if the test was successful
- (string) **test[status\_message]** - the status/error message of your test
- (string) **test[name]** - the name of your test
- (string) **test[extra]** - extra data for this test
- (string) **groups=...,...** - a comma-separated string of groups for this test
- (string) **build=...** - what build this test belongs to
Response:
{
"success" : true
}
Possible errors:
- 404 Not found - test not found
## Delete test
Will delete a specific test, together with possible thumbnails. In the example below, we'll delete a test with id 3.
You can fetch all the various test ids that belong to you by [fetching your tests](https://testingbot.com#tests).
[cURL](https://testingbot.com#)[Ruby](https://testingbot.com#)[Python](https://testingbot.com#)[PHP](https://testingbot.com#)[Java](https://testingbot.com#)[NodeJS](https://testingbot.com#)
$ curl "https://api.testingbot.com/v1/tests/:webdriver_session_id" \
-X DELETE \
-u key:secret
require 'testingbot'
api = TestingBot::Api.new(key, secret)
api.delete_test(webdriver_session_id)
TestingbotREST restApi = new TestingbotREST(key, secret);
boolean success = restApi.deleteTest(String webdriver_session_id);
$api = new TestingBot\TestingBotAPI($key, $secret);
$api->deleteJob($webdriver_session_id);
import testingbotclient
tb = testingbotclient.TestingBotClient(key, secret)
tb.tests.delete_test(webdriver_session_id)
const TestingBot = require('testingbot-api');
const api = new TestingBot({
api_key: "your-tb-key",
api_secret: "your-tb-secret"
});
await api.deleteTest(webdriver_session_id);
Arguments:
- (string) **id** - a unique identifier identifying your test
Response:
{
"success":true
}
Possible errors:
- 404 Not found - test not found
## Stop test
Will terminate the running test job. This will end the test and mark the test as completed. Any test assets and metadata gathered will be available for download.
[cURL](https://testingbot.com#)[Ruby](https://testingbot.com#)[Python](https://testingbot.com#)[PHP](https://testingbot.com#)[Java](https://testingbot.com#)[NodeJS](https://testingbot.com#)
$ curl "https://api.testingbot.com/v1/tests/:session_id/stop" \
-X PUT \
-u key:secret
require 'testingbot'
api = TestingBot::Api.new(key, secret)
api.stop_test(session_id)
TestingbotREST restApi = new TestingbotREST(key, secret);
boolean success = restApi.stopTest(String session_id);
$api = new TestingBot\TestingBotAPI($key, $secret);
$api->stopJob($session_id);
import testingbotclient
tb = testingbotclient.TestingBotClient(key, secret)
tb.tests.stop_test(session_id)
const TestingBot = require('testingbot-api');
const api = new TestingBot({
api_key: "your-tb-key",
api_secret: "your-tb-secret"
});
await api.stopTest(webdriver_session_id);
Arguments:
- (string) **:session\_id** - a unique number identifying your test
Response:
{
"success":true
}
Possible errors:
- 404 Not found - test not found
## Retrieve all builds
Will retrieve all builds for your account. A build is a group of tests.
[cURL](https://testingbot.com#)[Ruby](https://testingbot.com#)[Python](https://testingbot.com#)[PHP](https://testingbot.com#)[Java](https://testingbot.com#)[NodeJS](https://testingbot.com#)
$ curl "https://api.testingbot.com/v1/builds?offset=0&count=10" \
-u key:secret
require 'testingbot'
api = TestingBot::Api.new(key, secret)
api.get_builds(0, 10)
TestingbotREST restApi = new TestingbotREST(key, secret);
TestingbotBuildCollection builds = restApi.getBuilds(int offset, int count);
$api = new TestingBot\TestingBotAPI($key, $secret);
$api->getBuilds(0, 10);
import testingbotclient
tb = testingbotclient.TestingBotClient(key, secret)
tb.build.get_builds(offset=0, limit=10)
const TestingBot = require('testingbot-api');
const api = new TestingBot({
api_key: "your-tb-key",
api_secret: "your-tb-secret"
});
const builds = await api.getBuilds(offset, limit);
Arguments:
- (int) **offset** (optional) (default 0) - paginate tests starting from this number
- (int) **count** (optional) (default 10, max 500) - number of tests to fetch
Response:
{
"data":[
{
"id" : 4331,
"build_identifier" : "first-build",
"created_at" : "2016-08-01T11:09:02.000Z",
"updated_at" : "2016-08-01T11:09:02.000Z"
}
],
"meta":{
"offset" : 0,
"count" : 10,
"total" : 3
}
}
## Tests for a build
Will return all tests for a single build.
[cURL](https://testingbot.com#)[Ruby](https://testingbot.com#)[Python](https://testingbot.com#)[PHP](https://testingbot.com#)[Java](https://testingbot.com#)[NodeJS](https://testingbot.com#)
$ curl "https://api.testingbot.com/v1/builds/:buildId" \
-u key:secret
require 'testingbot'
api = TestingBot::Api.new(key, secret)
api.get_build(build_identifier)
TestingbotREST restApi = new TestingbotREST(key, secret);
TestingbotTestBuildCollection tests = restApi.getTestsForBuild(String buildId);
$api = new TestingBot\TestingBotAPI($key, $secret);
$api->getBuild($buildId);
import testingbotclient
tb = testingbotclient.TestingBotClient(key, secret)
tb.build.get_tests_for_build(buildId)
const TestingBot = require('testingbot-api');
const api = new TestingBot({
api_key: "your-tb-key",
api_secret: "your-tb-secret"
});
const tests = await api.getTestsForBuild(buildId);
Arguments:
- (string) **buildId** - a unique string describing the build
Response:
{
"data":[
{
"created_at":"2011-07-30T23:21:23Z",
"completed_at":"2011-07-30T23:22:44Z",
"extra":null,
"id":3,
"name":"MyTest::testTitle",
"session_id":"f7903f9e93e74fe1b0e924bf9d2ce9fc",
"status_message":"Failed asserting that 1 equals 0.",
"success":false,
"thumbs":[],
"video":"https://s3.amazonaws.com/rectestingbot/sample.mp4",
"groups":["testingbot.com"],
"browser":"IE8",
"browser_version":8,
"os":"WINDOWS",
"duration":13,
"build":"buildid",
"logs":{"browser":"https://s3-eu-west-1.amazonaws.com/eulogtestingbot/session.txt"},
"assets_available": true
}
]
}
## Delete a build
Will delete a build. Does not delete the tests in the build.
[cURL](https://testingbot.com#)[Ruby](https://testingbot.com#)[Python](https://testingbot.com#)[PHP](https://testingbot.com#)[Java](https://testingbot.com#)[NodeJS](https://testingbot.com#)
$ curl "https://api.testingbot.com/v1/builds/:buildId" \
-X DELETE \
-u key:secret
require 'testingbot'
api = TestingBot::Api.new(key, secret)
api.delete_build(build_identifier)
TestingbotREST restApi = new TestingbotREST(key, secret);
TestingbotUser user = restApi.deleteBuild(String buildId);
$api = new TestingBot\TestingBotAPI($key, $secret);
$api->deleteBuild($buildId);
import testingbotclient
tb = testingbotclient.TestingBotClient(key, secret)
tb.build.delete_build(buildId)
const TestingBot = require('testingbot-api');
const api = new TestingBot({
api_key: "your-tb-key",
api_secret: "your-tb-secret"
});
await api.deleteBuild(buildId);
Arguments:
- (string) **buildId** - a unique string describing the build
Response:
{
"successs": true
}
## Retrieve all Devices
Will fetch all Real Mobile devices, including devices currently in use. The response will include all public devices, and private devices associated to your subscription (if any).
[cURL](https://testingbot.com#)[Ruby](https://testingbot.com#)[Python](https://testingbot.com#)[PHP](https://testingbot.com#)[Java](https://testingbot.com#)[NodeJS](https://testingbot.com#)
$ curl -u key:secret "https://api.testingbot.com/v1/devices"
require 'testingbot'
api = TestingBot::Api.new(key, secret)
api.get_devices()
TestingbotREST restApi = new TestingbotREST(key, secret);
TestingbotUser user = restApi.getDevices(int offset, int count);
$api = new TestingBot\TestingBotAPI($key, $secret);
$api->getDevices();
import testingbotclient
tb = testingbotclient.TestingBotClient(key, secret)
tb.information.get_devices()
const TestingBot = require('testingbot-api');
const api = new TestingBot({
api_key: "your-tb-key",
api_secret: "your-tb-secret"
});
const devices = await api.getDevices();
Response:
[{
"id":1,
"available":true,
"model_number":"SM-G950U1",
"resolution":"1080x2220",
"width":1080,
"height":2220,
"cpu":"Octa-core (4x2.3 GHz Mongoose M2 & 4x1.7 GHz Cortex-A53)",
"name":"Galaxy S8",
"platform_name":"Android",
"version":"9.0",
"multiple_browsers":[
{
"id":1727,
"name":"chrome",
"version":"103.0.5060.129"
},
{
"id":2133,
"name":"firefox",
"version":"98.2"
},
{
"id":2953,
"name":"samsung",
"version":"13.2.1.70"
},
{
"id":2954,
"name":"opera",
"version":"67.1"
}
]
},
{
"id":5,
"available":false,
"model_number":"MRY42B/A",
"resolution":"828x1792",
"width":828,
"height":1792,
"cpu":"ARM - Single-core - 2390Mhz",
"name":"iPhone XR",
"version":"16.3",
"platform_name":"iOS"
}]
## Retrieve all Available Devices
Will fetch all available Real Mobile devices. The response will include all public devices, and private devices associated to your subscription (if any).
[cURL](https://testingbot.com#)[Ruby](https://testingbot.com#)[Python](https://testingbot.com#)[PHP](https://testingbot.com#)[Java](https://testingbot.com#)[NodeJS](https://testingbot.com#)
% curl -u key:secret "https://api.testingbot.com/v1/devices/available"
require 'testingbot'
api = TestingBot::Api.new(key, secret)
api.get_available_devices()
TestingbotREST restApi = new TestingbotREST(key, secret);
TestingbotUser user = restApi.getAvailableDevices(int offset, int count);
$api = new TestingBot\TestingBotAPI($key, $secret);
$api->getAvailableDevices();
import testingbotclient
tb = testingbotclient.TestingBotClient(key, secret)
tb.information.get_available_devices()
const TestingBot = require('testingbot-api');
const api = new TestingBot({
api_key: "your-tb-key",
api_secret: "your-tb-secret"
});
const devices = await api.getAvailableDevices();
Response:
[{
"id":1,
"available":true,
"model_number":"SM-G950U1",
"resolution":"1080x2220",
"width":1080,
"height":2220,
"cpu":"Octa-core (4x2.3 GHz Mongoose M2 & 4x1.7 GHz Cortex-A53)",
"name":"Galaxy S8",
"platform_name":"Android",
"version":"9.0",
"multiple_browsers":[
{
"id":1727,
"name":"chrome",
"version":"103.0.5060.129"
},
{
"id":2133,
"name":"firefox",
"version":"98.2"
},
{
"id":2953,
"name":"samsung",
"version":"13.2.1.70"
},
{
"id":2954,
"name":"opera",
"version":"67.1"
}
]
},
{
"id":5,
"available":true,
"model_number":"MRY42B/A",
"resolution":"828x1792",
"width":828,
"height":1792,
"cpu":"ARM - Single-core - 2390Mhz",
"name":"iPhone XR",
"version":"16.3",
"platform_name":"iOS"
}]
## Device Detail
Retrieves details for a single device.
[cURL](https://testingbot.com#)[Ruby](https://testingbot.com#)[Python](https://testingbot.com#)[PHP](https://testingbot.com#)[Java](https://testingbot.com#)[NodeJS](https://testingbot.com#)
$ curl "https://api.testingbot.com/v1/devices/:id" \
-u key:secret
require 'testingbot'
api = TestingBot::Api.new(key, secret)
api.get_device(device_identifier)
TestingbotREST restApi = new TestingbotREST(key, secret);
TestingbotUser user = restApi.getDevice(int deviceId);
$api = new TestingBot\TestingBotAPI($key, $secret);
$api->getDevice($deviceId);
import testingbotclient
tb = testingbotclient.TestingBotClient(key, secret)
tb.information.get_device(deviceId)
const TestingBot = require('testingbot-api');
const api = new TestingBot({
api_key: "your-tb-key",
api_secret: "your-tb-secret"
});
const device = await api.getDevice(deviceId);
Arguments:
- (number) **id** - the numeric id retrieved from the [devices list](https://testingbot.com#devices).
Response:
{
"id":12,
"available":true,
"model_number":"E",
"resolution":"1440x3200",
"width":1440,
"height":3200,
"cpu":"ARM - Quad-core - 1593Mhz",
"name":"Galaxy S20",
"platform_name":"Android",
"version": "10.0",
"multiple_browsers":[
{"id":2598,"name":"chrome","version":"101"},
{"id":2919,"name":"firefox","version":"98.2"},
{"id":2957,"name":"samsung","version":"13.2.1.70"},
{"id":2958,"name":"opera","version":"67.1"}
]
}
## Take Screenshots
With this API call you can request TestingBot to take screenshots of a specific URL with the browsers you specify.
**Important:** Please specify the `application/json` Content-Type header and specify the post body as JSON.
[cURL](https://testingbot.com#)[NodeJS](https://testingbot.com#)
$ curl -H 'Content-Type: application/json' -X POST "https://api.testingbot.com/v1/screenshots" \
-u key:secret \
-d '{"url":"https://www.google.com", "resolution" : "1280x1024", "browsers" : [{ "browserName" : "chrome", "version" : 134, "os" : "WIN10"}, { "browserName" : "safari", "version" : "17.2", "platformName": "iOS", "deviceName" : "iPhone 15"}, { "browserName" : "chrome", "version" : "15.0", "platformName": "Android", "deviceName" : "Pixel 9"}]}'
const TestingBot = require('testingbot-api');
const api = new TestingBot({
api_key: "your-tb-key",
api_secret: "your-tb-secret"
});
const screenshots = await api.takeScreenshot(
'https://example.com',
[{ browserName: 'chrome', version: 'latest', os: 'WIN11' }],
'1920x1080'
);
Arguments:
- (string) **url** - the URL of the page you'd like to take screenshots of
- (string) **resolution** - the screenresolution of the OS:
- 800x600
- 1024x768
- 1280x960
- 1280x1024
- 1600x1200
- 1920x1200
- 2560x1440
Please see [the available screen resolutions](https://testingbot.com/support/web-automate/selenium/test-options#screenresolution) per platform.
- (string) **callback\_url** (optional) - when the screenshots are taken, we can send a JSON formatted post to the callback URL you specify. The JSON body will be identical to the response of the [Retrieve Screenshots API call](https://testingbot.com#retrievescreenshots)
- (boolean) **full\_page** (optional) - by default we take a screenshot of the viewport. If you'd like a screenshot of the entire page, set this to 'true'.
- (int) **wait\_time** (optional) (default 0) - the time (in seconds) to wait between page load and taking the screenshots
- (string) **browsers** - a list of browsers with keys:
- (string) **browserName** - the name of the browser (internet explorer, chrome, safari, firefox, ...)
- (string) **version** - the version of the browser you require
- (string) **os** - the OS where the test should run
- (string) **deviceName** - the device name (only for mobile devices)
- (string) **platformName** - the platform name (only for mobile devices: iOS or Android)
- (boolean) **realDevice** - set to true if you want a screenshot from a [physical device](https://testingbot.com/support/app-automate/devices)
Response:
{ "id" : 3454, "wait_time" : 0, "resolution" : "1280x1024", "url" : "https://www.google.com" }
## Retrieve Screenshots
Specify the id of the [take screenshot](https://testingbot.com#takescreenshots) call to query the progress of the screenshots.
[cURL](https://testingbot.com#)[NodeJS](https://testingbot.com#)
$ curl "https://api.testingbot.com/v1/screenshots/:id" -u key:secret
const TestingBot = require('testingbot-api');
const api = new TestingBot({
api_key: "your-tb-key",
api_secret: "your-tb-secret"
});
const screenshotResult = await api.retrieveScreenshots(screenshotJobId);
Arguments:
- (int) **id** - the id of the screenshot group
Response:
{
"state":"done",
"screenshots":[
{
"image_url":"https://....",
"thumb_url":"https://....",
"state":"done",
"id":"9c7deea4-6f23-4041-842b-39cccee447fa",
"created_at":"2017-10-13T14:47:44.000Z",
"os":"SEQUOIA",
"browser_name":"googlechrome",
"browser_version":"138",
"browser_id":1146,
"device_name":null,
"platform_name":""
}
]
}
- (string) **state** - represents the current state for screenshot job. Values can be:
- **processing** : Not all screenshots have been taken yet.
- **done** : All screenshots are available and can be accessed.
- **error** : Something went wrong while trying to take the screenshots.
- **stopped** : The process of taking the screenshots was stopped by manually clicking the 'stop' button in our UI.
- The screenshots object itself:
- (string) **image\_url** - location to the actual screenshot (png format)
- (string) **thumb\_url** - 100x100 thumb of the actual screenshot
- (string) **state** - represents the current state for the screenshot. Values can be:
- **processing** : The screenshot has not been taking yet, the test is either queued or running.
- **done** : The screenshot has been taken and has been uploaded to our cloud - you can now view the screenshot via **image\_url** or **thumb\_url**.
- **error** : Something went wrong while trying to take the screenshot.
- **stopped** : The process of taking the screenshot was stopped before a screenshot was taken. This can only be done by manually clicking the 'stop' button in our UI.
- (string) **id** - a unique identifier for this screenshot
## Screenshot history
Retrieves a list of previous screenshot jobs.
[cURL](https://testingbot.com#)[NodeJS](https://testingbot.com#)
$ curl "https://api.testingbot.com/v1/screenshots" -u key:secret
const TestingBot = require('testingbot-api');
const api = new TestingBot({
api_key: "your-tb-key",
api_secret: "your-tb-secret"
});
const screenshots = await api.getScreenshotList();
This will return a list of screenshot jobs. You can use the `id` of every job to fetch the [screenshots for this job](https://testingbot.com#retrievescreenshots).
Arguments:
- (int) **offset** (optional) (default 0) - paginate screenshot jobs starting from this number
- (int) **count** (optional) (default 10, max 500) - number of screenshot jobs to fetch
Response:
{
"data" : [
{
"id":3454,
"url":"https://google.com",
"resolution":"1280x1024"
},
{
"id":3452,
"url":"https://testingbot.com",
"resolution":"1280x1024"
},
{
"id":3451,
"url":"https://yahoo.com",
"resolution":"1280x1024"
}
],
"meta":{
"offset" : 0,
"count" : 3,
"total" : 3
}
}
## TestingBot Tunnel List
List of currently active [TestingBot Tunnels](https://testingbot.com/support/tunnel) for your account.
You can have up to **3 simultaneous tunnels** running with your account. By issuing a `DELETE` request you can delete/stop any of your tunnels.
[cURL](https://testingbot.com#)[Ruby](https://testingbot.com#)[Python](https://testingbot.com#)[PHP](https://testingbot.com#)[Java](https://testingbot.com#)[NodeJS](https://testingbot.com#)
$ curl "https://api.testingbot.com/v1/tunnel/list" \
-u key:secret
require 'testingbot'
api = TestingBot::Api.new(key, secret)
api.get_tunnels
TestingbotREST restApi = new TestingbotREST(key, secret);
ArrayList tunnels = restApi.getTunnels();
$api = new TestingBot\TestingBotAPI($key, $secret);
$api->getTunnels();
import testingbotclient
tb = testingbotclient.TestingBotClient(key, secret)
tb.tunnel.get_tunnels()
const TestingBot = require('testingbot-api');
const api = new TestingBot({
api_key: "your-tb-key",
api_secret: "your-tb-secret"
});
const tunnels = await api.getTunnelList();
Response:
[
{
"ip":"xx",
"private_ip":"xx",
"state":"READY",
"id":1,
"requested_at"=>"2013-04-23 01:34:23"
}
]
## TestingBot Tunnel Delete
Delete an active [TestingBot Tunnel](https://testingbot.com/support/tunnel) in your account.
Usually the tunnel jar will issue this call automatically when you gracefully exit the jar. You can also use this API call, which destroys the tunnel VM.
[cURL](https://testingbot.com#)[Ruby](https://testingbot.com#)[Python](https://testingbot.com#)[PHP](https://testingbot.com#)[Java](https://testingbot.com#)[NodeJS](https://testingbot.com#)
$ curl "https://api.testingbot.com/v1/tunnel/:id" \
-X DELETE \
-u key:secret
require 'testingbot'
api = TestingBot::Api.new(key, secret)
api.delete_tunnel(tunnel_identifier)
TestingbotREST restApi = new TestingbotREST(key, secret);
boolean success = restApi.deleteTunnel(String tunnelId);
$api = new TestingBot\TestingBotAPI($key, $secret);
$api->deleteTunnel($tunnelID);
import testingbotclient
tb = testingbotclient.TestingBotClient(key, secret)
tb.tunnel.delete_tunnel(tunnelId)
const TestingBot = require('testingbot-api');
const api = new TestingBot({
api_key: "your-tb-key",
api_secret: "your-tb-secret"
});
await api.deleteTunnel(tunnelId);
Response:
{
"success":true
}
## List Codeless tests
Will return a list of all your Codeless Automation tests.
[cURL](https://testingbot.com#)[NodeJS](https://testingbot.com#)
$ curl "https://api.testingbot.com/v1/lab" \
-u key:secret
const TestingBot = require('testingbot-api');
const api = new TestingBot({
api_key: "your-tb-key",
api_secret: "your-tb-secret"
});
const codelessTests = await api.getCodelessTests();
Arguments:
- (int) **offset** (optional) (default 0) - paginate tests starting from this number
- (int) **count** (optional) (default 10, max 500) - number of tests to fetch
Response:
{
"data":[
{
"id":215,
"enabled":false,
"alerts":[],
"url":"https://testingbot.com/",
"name":"testingbot",
"created_at":"2012-03-12T20:03:45Z",
"updated_at":"2012-03-13T20:26:43Z",
"last_run":"2012-03-13T06:50:48Z",
"browsers":[
{"name":"firefox","version":10,"os":"LINUX"}
]
}],
"meta":
{
"offset":2,
"count":3,
"total":25
}
}
## Specific Codeless test info
This call will return info for a specific Codeless test. In the example below, the response will contain info for a test with id 215.
$ curl "https://api.testingbot.com/v1/lab/215" \
-u key:secret
Arguments:
- (int) **id** - a unique identifier identifying your test in the TestLab
Response:
{
"id":215,
"enabled":false,
"alerts":[],
"url":"https://testingbot.com/",
"name":"testingbot",
"created_at":"2012-03-12T20:03:45Z",
"updated_at":"2012-03-13T20:26:43Z",
"last_run":"2012-03-13T06:50:48Z",
"browsers":[
{"name":"firefox","version":10,"os":"LINUX"}
]
}
Possible errors:
- 404 Not found - codeless test not found
## Create a Codeless Test
Create a Codeless Test
[cURL](https://testingbot.com#)[NodeJS](https://testingbot.com#)
$ curl -X POST "https://api.testingbot.com/v1/lab" \
-u key:secret -d "test[name]=test" -d "test[cron]=31 * * * *"
const TestingBot = require('testingbot-api');
const api = new TestingBot({
api_key: "your-tb-key",
api_secret: "your-tb-secret"
});
const testData = {
name: 'My Codeless Test', // Required: Test name
url: 'https://example.com', // Required: URL to test
ai_prompt: 'Test the login flow', // AI test agent prompt
cron: '0 0 * * *', // Optional: Cron schedule
screenshot: true, // Optional: Take screenshots
video: false, // Optional: Record video
idletimeout: 60, // Optional: Idle timeout in seconds
screenresolution: '1920x1080', // Optional: Screen resolution
};
const result = await api.createCodelessTest(testData);
Arguments:
- (string) **test[name]** - name of the test **\* required argument**
- (string) **test[url]** - url to test **\* required argument**
- (string) **test[cron]** - cron format, when to run the test
- (boolean) **test[screenshot]** - take screenshots
- (boolean) **test[video]** - record video
- (int) **test[idletimeout]** - how long we keep a test open without receiving a request
- (string) **test[screenresolution]** - screenresolution of the OS
- (string) **test[ai\_prompt]** - the prompt to tell the [AI test agent](https://testingbot.com/support/ai/codeless) what to test. Indicate in your own language what should be tested.
### Upload .side file
You can upload a `.side` file, generated with [Selenium IDE](https://testingbot.com/support/web-automate/codeless-automation/add-test), to the TestingBot REST-API to immediately create a test and upload all steps from the file.
$ curl -X POST "https://api.testingbot.com/v1/lab" \
-u key:secret -F "test[name]=test" -F "test[cron]=31 * * * *" -F "file=@/Users/{yourName}/example.side"
Arguments:
- (string) **test[name]** - name of the test **\* required argument**
- (File) **filepath** - to the `.side` file on your machine **\* required argument**
- (string) **test[cron]** - cron format, when to run the test
Response:
[{"success":true, "lab_test_id": 59392}]
## Delete Codeless test
This call will delete a specific Codeless test.
[cURL](https://testingbot.com#)[NodeJS](https://testingbot.com#)
$ curl "https://api.testingbot.com/v1/lab/215" \
-X DELETE \
-u key:secret
const TestingBot = require('testingbot-api');
const api = new TestingBot({
api_key: "your-tb-key",
api_secret: "your-tb-secret"
});
const result = await api.deleteCodelessTest(testId);
Arguments:
- (string) **id** - a unique identifier identifying your test in the TestLab
Response:
{
"success":true
}
Possible errors:
- 404 Not found - codeless test not found
## Update Codeless test
This call will update a specific Codeless test.
[cURL](https://testingbot.com#)[NodeJS](https://testingbot.com#)
$ curl "https://api.testingbot.com/v1/lab/215" \
-X PUT \
-d "test[cron]=* * * * *" \
-u key:secret
const TestingBot = require('testingbot-api');
const api = new TestingBot({
api_key: "your-tb-key",
api_secret: "your-tb-secret"
});
const updateData = {
test: {
name: 'Updated Test Name',
cron: '0 12 * * *'
}
};
const result = await api.updateCodelessTest(updateData, testId);
Arguments:
- (string) **id** - a unique identifier identifying your test in the TestLab
- (string) **url**
- (string) **name**
- (string) **cron**
- (boolean) **enabled**
Response:
{
"success":true
}
Possible errors:
- 404 Not found - codeless test not found
## Schedule Codeless Test
Add or update the Codeless Test Schedule. You can schedule when/at which interval a test should be run.
$ curl "https://api.testingbot.com/v1/lab/215/schedule" \
-X POST \
-d "type=once" \
-d "day=2020-03-01" \
-d "hour=00:00" \
-u key:secret
Arguments:
- (string) **type** once, daily, weekly, custom (cron format)
- (string) **day** 2020-03-01 for example (to be used with 'once' or 'weekly')
- (string) **hour** 00:01 for example (to be used with 'once', 'daily' or 'weekly')
- (string) **cronFormat** \*/5 \* \* \* \* for example ([cron format](https://en.wikipedia.org/wiki/Cron))
Response:
{
"success":true
}
Possible errors:
- 404 Not found - codeless test not found
The callback URL will receive these (post data) parameters:
'success' => success (boolean),
'job_id' => job_id,
'test_ids[]' => [test_ids],
'session_ids[]' => [session_ids]
'errors[]' => json encoded errors
## Codeless Test Alert
Add or update the Codeless Test Alert. You can receive an alert via e-mail, Webhook or SMS message.
$ curl "https://api.testingbot.com/v1/lab/215/alert" \
-X POST (or PUT for update) \
-d "kind=EMAIL" \
-d "level=IMMEDIATELY" \
-d "content=my@email.com" \
-u key:secret
Arguments:
- (string) **kind** EMAIL, API or SMS
- (string) **level** IMMEDIATELY or DAILY
- (string) **content** the email address, telephone number or callback URL
Response:
{
"success":true
}
Possible errors:
- 404 Not found - codeless test not found
The callback URL will receive these (post data) parameters:
'success' => success (boolean),
'job_id' => job_id,
'test_ids[]' => test_ids
'errors[]' => json encoded errors
## Codeless Test Report
Add or update the Codeless Test Report setting. You can receive a daily report about your test success/fail rate.
$ curl "https://api.testingbot.com/v1/lab/215/report" \
-X POST (or PUT for update) \
-d "email=my@email.com" \
-d "cron=*/5 * * * *" \
-u key:secret
Arguments:
- (string) **email** the email address to contact
- (string) **cron** a [cron format](https://en.wikipedia.org/wiki/Cron)
Response:
{
"success":true
}
Possible errors:
- 404 Not found - codeless test not found
## Modify Test Steps
Update the steps for this test. Will remove all steps and add the steps you specify.
$ curl "https://api.testingbot.com/v1/lab/215/steps" \
-X POST \
-d "steps[][cmd]=open" \
-d "steps[][locator]=/" \
-d "steps[][value]=" \
-d "steps[][order]=0" \
-u key:secret
Arguments:
- (string) **step[cmd]** - Selenium RC command
- (int) **step[order]** - Define where this step should be located in the list of steps
- (string) **step[locator]** - Selenium RC locator
- (string) **step[value]** - Selenium RC value
Response:
{
"success":true
}
Possible errors:
- 404 Not found - codeless test not found
## List Test Steps
This will return all steps for a specific Codeless Test.
$ curl -u key:secret "https://api.testingbot.com/v1/lab/215/steps"
Arguments:
- (int) **offset** (optional) (default 0) - paginate steps starting from this number
- (int) **count** (optional) (default 10, max 500) - number of steps to fetch
Response:
{
"data": [{
"test_order": 0,
"cmd": "open",
"locator": "/",
"value": "",
"created_at": "2019-05-02T14:33:48.000Z",
"updated_at": "2019-05-02T14:33:48.000Z"
},
{
"test_order": 1,
"cmd": "type",
"locator": "id=username",
"value": "test",
"created_at": "2019-05-02T14:33:48.000Z",
"updated_at": "2019-05-02T14:33:48.000Z"
},
{
"test_order": 2,
"cmd": "type",
"locator": "id=password",
"value": "test",
"created_at": "2019-05-02T14:33:48.000Z",
"updated_at": "2019-05-02T14:33:48.000Z"
}
],
"meta": {
"offset": 0,
"count": 3,
"total": 3
}
}
Possible errors:
- 404 Not found - codeless test not found
## Get Browsers for Test
Retrieve what browsers this Codeless Test will run on.
$ curl "https://api.testingbot.com/v1/lab/:suiteId/browsers" \
-u key:secret
Arguments:
- (int) **suiteId** - unique Id for this suite
Response:
[{"name":"firefox","version":"41","os":"VISTA"}]
## Update Browsers for Test
Update a Codeless Test, indicate on which browsers the test should run. This call will override all existing browsers attached to this test.
$ curl -X POST "https://api.testingbot.com/v1/lab/:suiteId/browsers" \
-u key:secret -d "browser_ids=515,518
Arguments:
- (int) **suiteId** - unique Id for this suite
- (string) **browser\_ids** - (comma-separated list) - list of all browser\_ids to add to this test
You can get the browser\_ids by using the **List of browsers** call and use the browser\_ids in that response.
Response:
{"success":true}
## Run a specific Codeless test
This call will run a specific Codeless test on our grid. Upload a Selenium test in our TestLab, indicate on which browsers you want it to run and then run the test with this API call.
You could use this call to run tests when you wish, for example before/after deployment of your code. Since this call is asynchronously (test takes too long to be processed during the API call), you need to specify an API callback page in the alert section of your Codeless test.
This call will return a success state and a job\_id, which you can use to [query the progress](https://testingbot.com#testjob) of the test.
$ curl "https://api.testingbot.com/v1/lab/215/trigger" \
-X POST \
-d "" \
-u key:secret
Arguments:
- (int) **testid** - a unique number identifying your test in the TestLab
- (string) **url** (optional) - change the baseURL for this test
Response:
{
"success":true,
"job_id" : 14
}
Possible errors:
- 404 Not found - codeless test not found
## Stop a specific Codeless test
This call will stop a specific Codeless test currently running on our grid.
As soon as we receive this call, we will no longer continue running the remaining steps in the running Codeless test.
$ curl "https://api.testingbot.com/v1/lab/:testid/stop" \
-X PUT \
-u key:secret
Arguments:
- (int) **testid** - a unique number identifying your test in the TestLab
- (int) **browser\_id** (optional) - a browser\_id to only stop the test for this browser
Response:
{
"success":true
}
Possible errors:
- 404 Not found - codeless test not found
## Run all Codeless tests
This call will run all Codeless tests on our grid.
This call will return a success state and a job\_id, which you can use to [query the progress](https://testingbot.com#testjob) of the tests.
$ curl "https://api.testingbot.com/v1/lab/trigger_all" \
-X POST \
-d "" \
-u key:secret
Arguments:
- (string) **url** (optional) - change the baseURL for this test
Response:
{
"success":true,
"job_id" : 14
}
## Test Job
This call will return the status of a running test or suite, initiated by an API call.
$ curl "https://api.testingbot.com/v1/jobs/:jobId" \
-u key:secret
Arguments:
- (int) **:jobId** - a unique number identifying your job
Response:
{
"status":"FINISHED",
"created_at":"2016-04-15T13:47:39.000Z",
"updated_at":"2016-04-15T13:49:30.000Z",
"success":false,
"test_ids":[
6620446
],
"errors":[
{
"msg":"Actual value 'Google' did not match 'Goooogle'",
"step":"verifyTitle",
"browser":{
"name":"firefox",
"version":"43",
"os":"VISTA"
},
"time":"2016-04-15T13:48:25.839Z",
"test":6620446
}
]
}
The various states are: `WAITING`, `RUNNING` and `FINISHED`.
Possible errors:
- 404 Not found - job not found
## Webhook
If you initiated an API call running one or all tests, you will want to know the results of the test(s).
We post the result of the test(s) back to the location you specified in our TestLab (alerts section).
Sample post data:
{
"success":"false",
"errors":[
{
"msg" : "word Not found",
"step" : "verifyTextPresent",
"browser" : {
"name" : "iexplore",
"version" : "8",
"os" : "WINDOWS"
},
"time" : "2012-03-13 20:34:59 UTC",
"test_id" : "48586",
"job_id": 17,
"lab_id" : 133
}
],
"job_id":3,
"test_ids":[48586]
}
{
"success":"true",
"test_ids":[48586, 48587],
"job_id":3
}
## List Codeless Suites
Get a list of all Lab Suites currently available for your account in the TestLab.
$ curl "https://api.testingbot.com/v1/labsuites?offset=0&count=10" \
-u key:secret
Arguments:
- (int) **offset** (optional) (default 0) - paginate suites starting from this number
- (int) **count** (optional) (default 10, max 500) - number of suites to fetch
Response:
{
"data": [
{
"id": 1051,
"enabled": true,
"alerts": [
{
"type": "API",
"value": "https:\/\/mysite.com\/callback\/",
"level": "IMMEDIATELY"
}
],
"name": "Example",
"created_at": "2017-03-07T19:11:41.000Z",
"updated_at": "2017-03-09T12:17:22.000Z",
"last_run": "2017-03-09T12:17:22.000Z",
"cron": null,
"browsers": [
{
"name": "firefox",
"version": "41",
"os": "VISTA"
}
],
"test_count": 5
}
],
"meta": {
"offset": 0,
"count": 10,
"total": 1
}
}
## Get Codeless Suite Details
Get information about a specific Codeless Suite.
$ curl "https://api.testingbot.com/v1/labsuites/:suiteId" \
-u key:secret
Arguments:
- (int) **suiteId** - unique Id for this suite
Response:
{
"enabled": true,
"alerts": [
{
"type": "API",
"value": "https:\/\/mysite.com\/callback\/",
"level": "IMMEDIATELY"
}
],
"name": "Example",
"created_at": "2017-03-07T19:11:41.000Z",
"updated_at": "2017-03-09T12:17:22.000Z",
"last_run": "2017-03-09T12:17:22.000Z",
"cron": null,
"test_count": 5
}
## Run a specific Codeless suite
This call will run a specific TestLab suite on our grid. Upload a Selenium suite in our TestLab, indicate on which browsers you want it to run and then run the suite with this API call.
You could use this call to run suites when you wish, for example before/after deployment of your code. Since this call is asynchronously (suite takes too long to be processed during the API call), you need to specify an API callback page in the alert section of your TestLab suite.
This call will return a success state and a job\_id, which you can use to [query the progress](https://testingbot.com#testjob) of the test.
$ curl "https://api.testingbot.com/v1/labsuites/:suiteId/trigger" \
-X POST \
-d "" \
-u key:secret
Arguments:
- (int) **:suiteId** - a unique number identifying your suite in the TestLab
Response:
{
"success":true,
"job_id" : 14
}
Possible errors:
- 404 Not found - codeless test not found
## Create a Codeless Suite
Create a Codeless test suite.
$ curl -X POST "https://api.testingbot.com/v1/labsuites" \
-u key:secret -d "suite[name]=test" -d "suite[cron]=31 * * * *"
Arguments:
- (string) **suite[name]** - name of the suite.
- (string) **suite[cron]** - cron format, when to run the suite.
- (boolean) **suite[screenshot]** - take screenshots for every step.
- (boolean) **suite[video]** - record video of this test.
- (int) **suite[idletimeout]** - how long before we consider a test to be idle.
- (string) **suite[screenresolution]** - screenresolution of the OS.
Response:
[{"success":true, "suite_id": 59391}]
## Delete a Codeless Suite
Delete a Codeless suite.
$ curl -X DELETE "https://api.testingbot.com/v1/labsuites/:suiteId" \
-u key:secret
Arguments:
- (int) **suiteId** - unique Id for this suite
Response:
{"success":true}
## Get Browsers for Codeless Suite
Retrieve what browsers this Codeless Suite will run on.
$ curl "https://api.testingbot.com/v1/labsuites/:suiteId/browsers" \
-u key:secret
Arguments:
- (int) **suiteId** - unique Id for this suite
Response:
[{"name":"firefox","version":"41","os":"VISTA"}]
## Update Browsers for Codeless Suite
Update a Codeless Suite, indicate on which browsers the suite should run. This call will override all existing browsers attached to this suite.
$ curl -X POST "https://api.testingbot.com/v1/labsuites/suiteId/browsers" \
-u key:secret -d "browser_ids=515,518
Arguments:
- (int) **suiteId** - unique Id for this suite
- (string, comma-separated list) **browser\_ids** - list of all browser\_ids to add to this suite
You can get the browser\_ids by using the [List of browsers](https://testingbot.com#browsers) call and use the browser\_ids in that response.
Response:
{"success":true}
## Get Tests for a Codeless Suite
Retrieves all tests in this Suite.
$ curl "https://api.testingbot.com/v1/labsuites/:suiteId/tests" \
-u key:secret
Arguments:
- (int) **suiteId** - unique Id for this suite
- (int) **offset** (optional) (default 0) - paginate tests starting from this number
- (int) **count** (optional) (default 10, max 500) - number of tests to fetch
Response:
{
"data": [
{
"id": 18666,
"enabled": true,
"alerts": [],
"url": "https:\/\/mysite.com\/",
"name": "MyTest",
"created_at": "2017-03-09T12:14:48.000Z",
"updated_at": "2017-03-09T12:19:30.000Z",
"last_run": "2017-03-09T12:19:30.000Z",
"cron": null,
"browsers": [
{
"name": "firefox",
"version": "41",
"os": "VISTA"
}
]
}
],
"meta": {
"offset": 0,
"count": 1,
"total": 1
}
}
## Add Tests to a Codeless Suite
Add one or more tests to this suite.
$ curl -X POST "https://api.testingbot.com/v1/labsuites/:suiteId/tests" \
-u key:secret -d "test_ids=3,4"
Arguments:
- (int) **suiteId** - unique Id for this suite
- (string, comma-separated) **test\_ids** - comma-separated list of test\_ids to add to this suite.
Response:
{"success": true}
Possible errors:
- 404 Not found - suite not found
- 400 Bad request - missing test\_ids parameter
## Remove Tests from a Codeless Suite
Remove a test from a Test Suite.
$ curl -X DELETE "https://api.testingbot.com/v1/labsuites/:suiteId/tests/:testId" \
-u key:secret
Arguments:
- (int) **suiteId** - unique Id for this suite
- (int) **testsId** - unique Id for the test in the suite
Response:
{"success": true}
Possible errors:
- 404 Not found - suite not found
## TestingBot Storage - Upload File
TestingBot Storage makes it easy to upload a file you want to include during your test(s). You can use this functionality to test your Android (.apk/.aab) or iOS app (.zip/.ipa), or to [download and run before a test starts](https://testingbot.com/support/web-automate/selenium/test-options#prerun).
Files uploaded to TestingBot Storage are automatically pruned after 62 days. You can also delete the file manually be using the Delete API call.
[cURL](https://testingbot.com#)[Ruby](https://testingbot.com#)[Python](https://testingbot.com#)[PHP](https://testingbot.com#)[Java](https://testingbot.com#)[NodeJS](https://testingbot.com#)
$ curl -X POST "https://api.testingbot.com/v1/storage" \
-u key:secret -F "file=@/path/to/app/file/Application-debug.apk"
require 'testingbot'
api = TestingBot::Api.new(key, secret)
api.upload_local_file(localFilePath)
TestingbotREST restApi = new TestingbotREST(key, secret);
TestingbotStorageUploadResponse uploadResponse = restApi.uploadToStorage(File file);
$api = new TestingBot\TestingBotAPI($key, $secret);
$api->uploadLocalFileToStorage($pathToLocalFile);
import testingbotclient
tb = testingbotclient.TestingBotClient(key, secret)
tb.storage.upload_local_file(localFilePath)
const TestingBot = require('testingbot-api');
const api = new TestingBot({
api_key: "your-tb-key",
api_secret: "your-tb-secret"
});
api.uploadFile(localFilePath, function(error, response) {
// response.app_url
});
Response:
{"app_url": "tb://398eijf83i"}
The `app_url` will be a random string. If you'd like to use your own name, for example because you don't want to keep updating your test scripts each time you add a new app version, then please see below:
**Specify your own app name:**
$ curl -X POST "https://api.testingbot.com/v1/storage/your_name" \
-u key:secret -F "file=@/path/to/app/file/Application-debug.apk"
Response:
{"app_url": "tb://your_name"}
Instead of uploading a file from your computer to TestingBot storage, you can also pass an URL where we should download your app:
[cURL](https://testingbot.com#)[Ruby](https://testingbot.com#)[Python](https://testingbot.com#)[PHP](https://testingbot.com#)[Java](https://testingbot.com#)[NodeJS](https://testingbot.com#)
$ curl -X POST "https://api.testingbot.com/v1/storage" \
-u key:secret -d "url=https://...."
require 'testingbot'
api = TestingBot::Api.new(key, secret)
api.upload_remote_file(remoteFileUrl)
TestingbotREST restApi = new TestingbotREST(key, secret);
TestingbotStorageUploadResponse uploadResponse = restApi.uploadToStorage(String fileUrl);
$api = new TestingBot\TestingBotAPI($key, $secret);
$api->uploadRemoteFileToStorage($urlToRemoteFile);
import testingbotclient
tb = testingbotclient.TestingBotClient(key, secret)
tb.storage.upload_remote_file(localFilePath)
const TestingBot = require('testingbot-api');
const api = new TestingBot({
api_key: "your-tb-key",
api_secret: "your-tb-secret"
});
api.uploadFile(remoteFileUrl, function(error, response) {
// response.app_url
});
Uploads to our TestingBot Storage are automatically deleted after 62 days.
We've got an example on how to upload a file with Java at our [App Automate Java GitHub Repository](https://github.com/testingbot/app-automate-java).
## TestingBot Storage - Update File
If you want to update a file you already uploaded, please use this API call.
Use the `app_url` you received from the original file upload, without the `tb://` scheme.
[cURL](https://testingbot.com#)[NodeJS](https://testingbot.com#)
$ curl -X POST "https://api.testingbot.com/v1/storage/{app_url}" \
-u key:secret -F "file=@/path/to/app/file/Application-debug.apk"
const TestingBot = require('testingbot-api');
const api = new TestingBot({
api_key: "your-tb-key",
api_secret: "your-tb-secret"
});
const appUrl = await api.uploadFile(localFilePath);
Response:
{"app_url": "tb://398eijf83i"}
In the example above, if your `app_url` was `tb://my-file` you would use the URL `https://api.testingbot.com/v1/storage/my-file`
## TestingBot Storage - Uploaded File Data
Retrieve various meta data from a previously uploaded file.
Use the `app_url` you received from the original file upload.
[cURL](https://testingbot.com#)[Ruby](https://testingbot.com#)[Python](https://testingbot.com#)[PHP](https://testingbot.com#)[Java](https://testingbot.com#)[NodeJS](https://testingbot.com#)
$ curl "https://api.testingbot.com/v1/storage/:app_url" \
-u key:secret
require 'testingbot'
api = TestingBot::Api.new(key, secret)
api.get_uploaded_file(app_url)
TestingbotREST restApi = new TestingbotREST(key, secret);
TestingBotStorageFile storedFile = restApi.getStorageFile(String appUrl);
$api = new TestingBot\TestingBotAPI($key, $secret);
$api->getStorageFile($appUrl);
import testingbotclient
tb = testingbotclient.TestingBotClient(key, secret)
tb.storage.get_stored_file(app_url)
const TestingBot = require('testingbot-api');
const api = new TestingBot({
api_key: "your-tb-key",
api_secret: "your-tb-secret"
});
await api.getStorageFile(appUrl);
Response:
{
"app_url":"tb://0ec522702cd81ec1374e9b3c",
"url":"http://...",
"id":261,
"type":"ANDROID",
"filename":"sample.apk",
"version":"1.0.1",
"min_device_version": "12.0",
"thumb":"https://...image.png",
"created_at":"2019-03-08T08:58:32.000Z"
}
## TestingBot Storage - Upload Files List
This API call will return a list of files you or your team members have previously uploaded.
The Response will contain a `url` parameter which is a signed URL you can use for up to 4 hours.
[cURL](https://testingbot.com#)[Ruby](https://testingbot.com#)[Python](https://testingbot.com#)[PHP](https://testingbot.com#)[Java](https://testingbot.com#)[NodeJS](https://testingbot.com#)
$ curl "https://api.testingbot.com/v1/storage/"
require 'testingbot'
api = TestingBot::Api.new(key, secret)
api.get_uploaded_files(offset = 0, count = 30)
TestingbotREST restApi = new TestingbotREST(key, secret);
TestingBotStorageFileCollection fileList = restApi.getStorageFiles(int offset, int count);
$api = new TestingBot\TestingBotAPI($key, $secret);
$api->getStorageFiles();
import testingbotclient
tb = testingbotclient.TestingBotClient(key, secret)
tb.storage.get_stored_files(offset=0, limit=30)
const TestingBot = require('testingbot-api');
const api = new TestingBot({
api_key: "your-tb-key",
api_secret: "your-tb-secret"
});
const files = await api.getStorageFiles(offset, count);
Response:
[{
"app_url":"tb://....",
"url":".....",
"id":44,
"type":"ANDROID",
"filename":"sample.apk",
"version":"1.0.1",
"min_device_version": "23",
"thumb":"https://...image.png",
"created_at":"2019-01-08T13:42:42.000Z"
}]
## TestingBot Storage - Delete a file from Storage
Delete a file previously uploaded to TestingBot Storage.
Use the `app_url` parameter of the file you wish to delete, for example from `tb://398eijf83i`.
[cURL](https://testingbot.com#)[Ruby](https://testingbot.com#)[Python](https://testingbot.com#)[PHP](https://testingbot.com#)[Java](https://testingbot.com#)[NodeJS](https://testingbot.com#)
$ curl -X DELETE "https://api.testingbot.com/v1/storage/398eijf83i"
require 'testingbot'
api = TestingBot::Api.new(key, secret)
api.delete_uploaded_file(file_identifier)
TestingbotREST restApi = new TestingbotREST(key, secret);
boolean success = restApi.deleteStorageFile(String appUrl);
$api = new TestingBot\TestingBotAPI($key, $secret);
$api->deleteStorageFile($appUrl);
import testingbotclient
tb = testingbotclient.TestingBotClient(key, secret)
tb.storage.remove_file(appUrl)
const TestingBot = require('testingbot-api');
const api = new TestingBot({
api_key: "your-tb-key",
api_secret: "your-tb-secret"
});
const success = await api.deleteStorageFile(fileId);
Response:
{"success": true}
## IP Ranges for whitelisting
If you would like to whitelist the IPs that are used by the TestingBot machines, you can use the API call below to fetch an up-to-date list.
[cURL](https://testingbot.com#)
$ curl "https://api.testingbot.com/v1/configuration/ip-ranges"
Response:
["109.68.162.161","109.68.162.165","78.20.187.211","162.55.135.22","95.217.83.184","95.216.39.110","65.21.76.124","95.216.229.109","142.132.137.7"]
## Share Test Result
You can easily share a single test result with someone in a safe way, without the other person needing an account.
To share a test result, you'll need to create the following url: https://testingbot.com/tests/ **sessionId**?auth= **authentication-hash**
The sessionId is the ID assigned by the Selenium grid to identify a single test. You can find this sessionId in your logs when running a test.
The authentication hash is created with md5 in the following format:
Digest::MD5.hexdigest("#{client_key}:#{client_secret}#{session_id}")
[Ruby](https://testingbot.com#)[Python](https://testingbot.com#)[PHP](https://testingbot.com#)[Java](https://testingbot.com#)[NodeJS](https://testingbot.com#)
require 'testingbot'
api = TestingBot::Api.new(key, secret)
api.get_authentication_hash(identifier)
TestingbotREST restApi = new TestingbotREST(key, secret);
String hash = restApi.getAuthenticationHash(String identifier);
$api = new TestingBot\TestingBotAPI($key, $secret);
$api->getAuthenticationHash($identifier);
import testingbotclient
tb = testingbotclient.TestingBotClient(key, secret)
tb.get_share_link(identifier)
const TestingBot = require('testingbot-api');
const api = new TestingBot({
api_key: "your-tb-key",
api_secret: "your-tb-secret"
});
const hash = api.getAuthenticationHashForSharing(identifier);
An example link would then be: https://testingbot.com/tests/9jf392fj3j2f3ojid8?auth=230i439uf3fojf
## Share Test Build
With TestingBot, it is possible to group several tests under one build identifier. In our member area, you can then see all the tests grouped by builds.
To link directly to a build overview, please see this example: https://testingbot.com/builds/ **build-identifier**?auth= **authentication-hash** &key= **key**
To generate the authentication-hash, you must concatenate key, secret and build\_identifier and take the MD5 hash:
Digest::MD5.hexdigest("#{client_key}:#{client_secret}#{build-identifier}")
The build-identifier is the custom string you can [send as an option](https://testingbot.com/support/web-automate/selenium/test-options#build) to group several tests.
---
URL: https://testingbot.com/support/k6-browser-testing
# k6 Browser Testing
k6 is an open-source tool designed to do easy load testing against websites. With the [k6 browser module](https://grafana.com/docs/k6/latest/using-k6-browser/), you can connect to a CDP-compatible browser grid such as TestingBot. Simply configure your k6 test to use the TestingBot grid, and instantly get access to a high capacity cloud of browsers.
With this integration, you can run tests in parallel, targeting different browsers, versions and operating systems. Each test comes with logs, screenshots and a video.
## Setup
To get started, please make sure you [install k6](https://k6.io/docs/get-started/installation/).
### macOS
brew install k6
### Windows
winget install k6 --source winget
### Linux
sudo gpg -k
sudo gpg --no-default-keyring --keyring /usr/share/keyrings/k6-archive-keyring.gpg --keyserver hkp://keyserver.ubuntu.com:80 --recv-keys C5AD17C747E3415A3642D57D77C6C491D6AC1D69
echo "deb [signed-by=/usr/share/keyrings/k6-archive-keyring.gpg] https://dl.k6.io/deb stable main" | sudo tee /etc/apt/sources.list.d/k6.list
sudo apt-get update
sudo apt-get install k6
## Example
Next, let's run a sample browser test using k6 on the TestingBot browser grid. Please see the example below.
To connect to the TestingBot CDP grid, you will need to specify a `K6_BROWSER_WS_URL` environment variable. This needs to contain the URL to the TestingBot grid, together with the credentials and (url-encoded) capabilities.
K6_BROWSER_WS_URL="wss://cloud.testingbot.com/?key=...&secret=...&capabilities=%7B%22browserName%22%3A%22chrome%22%2C%22browserVersion%22%3A%22latest%22%7D"
To run the example below, you can use the following command in your terminal:
K6_BROWSER_WS_URL="wss://cloud.testingbot.com/?key=...&secret=...&capabilities=%7B%22browserName%22%3A%22chrome%22%2C%22browserVersion%22%3A%22latest%22%7D" K6_BROWSER_ENABLED=true k6 run k6_sample.js
**k6\_sample.js**
import { browser } from 'k6/browser';
import { check } from 'k6';
export const options = {
scenarios: {
ui: {
executor: 'shared-iterations',
options: {
browser: {
type: 'chromium',
},
},
},
},
thresholds: {
checks: ['rate==1.0'],
},
};
export default async function () {
const context = await browser.newContext();
const page = await context.newPage();
try {
await page.goto('https://test.k6.io/my_messages.php');
await page.locator('input[name="login"]').type('admin');
await page.locator('input[name="password"]').type('123');
const submitButton = page.locator('input[type="submit"]');
await Promise.all([page.waitForNavigation(), submitButton.click()]);
const header = await page.locator('h2').textContent();
check(page, {
header: header == 'Welcome, admin!',
});
} finally {
await page.close();
}
}
### K6\_BROWSER\_WS\_URL
To construct the `K6_BROWSER_WS_URL`, you'll need to urlencode the capabilities:
const capabilities = {
browserName: 'chrome',
browserVersion: 'latest',
platform: 'VENTURA'
}
const url = `wss://cloud.testingbot.com/?key=...&secret=...&capabilities=${encodeURIComponent(JSON.stringify(capabilities))}`
## Test Results
You can find the results of your k6 browser test in your terminal.
The TestingBot member area will contain a list of all k6 tests, together with logs, screenshots and a video of each test.
Was this page helpful? Yes No
## Looking for More Help?
Have questions or need more information?
You can reach us via the following channels:
- [Email us](https://testingbot.com/contact/new)
- [Join our Slack Channel](https://join.slack.com/t/testingb0t/shared_invite/zt-3bcw9xch-jk19~6XPs_xBrsAgAedkCw)
---
URL: https://testingbot.com/support/app-automate
# App Automation with TestingBot
TestingBot provides remote devices for testing your native mobile applications.
You can run automated tests on real devices, including iPhone and Android devices, as well as Smart TV OTT devices.
We support various testing frameworks such as Appium, Espresso, XCUITest, Maestro and more.

### [Appium](https://testingbot.com/support/app-automate/appium)
Appium is a popular test-framework, designed to automate mobile app testing.
- [C#](https://testingbot.com/support/app-automate/appium/csharp)
- [Java](https://testingbot.com/support/app-automate/appium/java)
- [NodeJS](https://testingbot.com/support/app-automate/appium/nodejs)
- [Python](https://testingbot.com/support/app-automate/appium/python)
- [Flutter](https://testingbot.com/support/app-automate/appium/flutter)
- [Ruby](https://testingbot.com/support/app-automate/appium/ruby)
- [PHP](https://testingbot.com/support/app-automate/appium/php)

### [Espresso](https://testingbot.com/support/app-automate/espresso)
Espresso is a testing framework for Android to automate UI testing.
- [Espresso Documentation](https://testingbot.com/support/app-automate/espresso)

### [XCUITest](https://testingbot.com/support/app-automate/xcuitest)
XCUITest is a testing framework for iOS to automate UI testing.
- [XCUITest Documentation](https://testingbot.com/support/app-automate/xcuitest)

### [Maestro](https://testingbot.com/support/app-automate/maestro)
Maestro is a testing framework for mobile applications to automate UI testing.
- [Maestro Documentation](https://testingbot.com/support/app-automate/maestro)

### [Electron](https://testingbot.com/support/app-automate/electron)
Electron is a framework for building cross-platform desktop applications with web technologies.
- [Electron Documentation](https://testingbot.com/support/app-automate/electron)
### [Smart TV Testing](https://testingbot.com/support/app-automate/smart-tv)
Test Smart-TV applications with TestingBot.
- [Smart TV Documentation](https://testingbot.com/support/app-automate/smart-tv)
---
URL: https://testingbot.com/support/app-automate/devices
- [Desktop Browsers & Emulators](https://testingbot.com/support/web-automate/browsers)
- [Physical Mobile Devices](https://testingbot.com#)
# Physical Mobile Devices
These are the DesiredCapabilities necessary to run an Automated Test:
#### Platform
- All Platforms
- Apple iOS
- Android
#### Android Version
- All Versions
- Android 16.0
- Android 15.0
- Android 14.0
- Android 13.0
- Android 12.0
- Android 11.0
- Android 10.0
- Android 9.0
- Android 7.1
- Android 6.0
#### iOS Version
- All Versions
- iOS 26.2
- iOS 26.0
- iOS 18.5
- iOS 18.2
- iOS 18.0
- iOS 17.6
- iOS 17.5
- iOS 16.5
- iOS 16.3
- iOS 15.0
- iOS 14.8
- iOS 14.7
- iOS 14.5
- iOS 14.0
- iOS 13.5
- iOS 13.4
- iOS 12.2
- iOS 12.1
#### Resolution
- All Resolutions
- 1440x3440
- 1440x3200
- 1260x2736
- 1179x2556
- 1170x2532
- 1080x2424
- 1080x2400
- 1080x2340
- 1080x2220
- 1200x1920
- 1080x1920
- 828x1792
- 720x1600
- 750x1334
- 810x1080
- 768x1024
- 758x1011
-

Galaxy S8
Resolution: 1080x2220
CPU: Octa-core (4x2.3 GHz Mongoose M2 & 4x1.7 GHz Cortex-A53)
Model: SM-G950U1
[Desired Capabilities](https://testingbot.com#)
DesiredCapabilities caps = new DesiredCapabilities();
caps.setCapability("version", "9.0");
caps.setCapability("app", "..URL to your app (apk or ipa)..");
caps.setCapability("deviceName", "Galaxy S8");
caps.setCapability("realDevice", true);
caps.setCapability("platformName", "Android");
-

iPhone 6s
Resolution: 750x1334
CPU: Apple A9
Model: MKQN2ZD/A
[Desired Capabilities](https://testingbot.com#)
DesiredCapabilities caps = new DesiredCapabilities();
caps.setCapability("version", "12.1");
caps.setCapability("app", "..URL to your app (apk or ipa)..");
caps.setCapability("deviceName", "iPhone 6s");
caps.setCapability("realDevice", true);
caps.setCapability("platformName", "iOS");
-

iPad (6th generation)
Resolution: 768x1024
CPU: Apple A10
Model: MR7G2NF/A
[Desired Capabilities](https://testingbot.com#)
DesiredCapabilities caps = new DesiredCapabilities();
caps.setCapability("version", "13.5");
caps.setCapability("app", "..URL to your app (apk or ipa)..");
caps.setCapability("deviceName", "iPad (6th generation)");
caps.setCapability("realDevice", true);
caps.setCapability("platformName", "iOS");
-

iPhone XR
Resolution: 828x1792
CPU: Apple A12 Bionic
Model: MRY42B/A
[Desired Capabilities](https://testingbot.com#)
DesiredCapabilities caps = new DesiredCapabilities();
caps.setCapability("version", "16.3");
caps.setCapability("app", "..URL to your app (apk or ipa)..");
caps.setCapability("deviceName", "iPhone XR");
caps.setCapability("realDevice", true);
caps.setCapability("platformName", "iOS");
-

Pixel
Resolution: 1080x1920
CPU: ARM - Quad-core - 1593Mhz
Model: PQ1A.190105.004
[Desired Capabilities](https://testingbot.com#)
DesiredCapabilities caps = new DesiredCapabilities();
caps.setCapability("version", "7.1");
caps.setCapability("app", "..URL to your app (apk or ipa)..");
caps.setCapability("deviceName", "Pixel");
caps.setCapability("realDevice", true);
caps.setCapability("platformName", "Android");
-

Galaxy S10
Resolution: 1440x3440
CPU: Octa-core
Model: SM-G973F
[Desired Capabilities](https://testingbot.com#)
DesiredCapabilities caps = new DesiredCapabilities();
caps.setCapability("version", "10.0");
caps.setCapability("app", "..URL to your app (apk or ipa)..");
caps.setCapability("deviceName", "Galaxy S10");
caps.setCapability("realDevice", true);
caps.setCapability("platformName", "Android");
-

Galaxy Tab A
Resolution: 1200x1920
CPU: ARM - Quad-core - 1200Mhz
Model: SM-T510
[Desired Capabilities](https://testingbot.com#)
DesiredCapabilities caps = new DesiredCapabilities();
caps.setCapability("version", "9.0");
caps.setCapability("app", "..URL to your app (apk or ipa)..");
caps.setCapability("deviceName", "Galaxy Tab A");
caps.setCapability("realDevice", true);
caps.setCapability("platformName", "Android");
-

iPhone 8
Resolution: 750x1334
CPU: ARM - Dual-core - 1840Mhz
Model: MQ6H2
[Desired Capabilities](https://testingbot.com#)
DesiredCapabilities caps = new DesiredCapabilities();
caps.setCapability("version", "13.4");
caps.setCapability("app", "..URL to your app (apk or ipa)..");
caps.setCapability("deviceName", "iPhone 8");
caps.setCapability("realDevice", true);
caps.setCapability("platformName", "iOS");
-

iPhone 11
Resolution: 828x1792
CPU:
Model: MWLT2
[Desired Capabilities](https://testingbot.com#)
DesiredCapabilities caps = new DesiredCapabilities();
caps.setCapability("version", "14.0");
caps.setCapability("app", "..URL to your app (apk or ipa)..");
caps.setCapability("deviceName", "iPhone 11");
caps.setCapability("realDevice", true);
caps.setCapability("platformName", "iOS");
-

Galaxy S20
Resolution: 1440x3200
CPU: ARM - Quad-core - 1593Mhz
Model: E
[Desired Capabilities](https://testingbot.com#)
DesiredCapabilities caps = new DesiredCapabilities();
caps.setCapability("version", "10.0");
caps.setCapability("app", "..URL to your app (apk or ipa)..");
caps.setCapability("deviceName", "Galaxy S20");
caps.setCapability("realDevice", true);
caps.setCapability("platformName", "Android");
-

iPhone 12
Resolution: 1170x2532
CPU: Apple A14 Bionic
Model: MWLT2
[Desired Capabilities](https://testingbot.com#)
DesiredCapabilities caps = new DesiredCapabilities();
caps.setCapability("version", "14.5");
caps.setCapability("app", "..URL to your app (apk or ipa)..");
caps.setCapability("deviceName", "iPhone 12");
caps.setCapability("realDevice", true);
caps.setCapability("platformName", "iOS");
-

Galaxy S21
Resolution: 1080x2400
CPU: ARM - Quad-core - 1593Mhz
Model: E
[Desired Capabilities](https://testingbot.com#)
DesiredCapabilities caps = new DesiredCapabilities();
caps.setCapability("version", "11.0");
caps.setCapability("app", "..URL to your app (apk or ipa)..");
caps.setCapability("deviceName", "Galaxy S21");
caps.setCapability("realDevice", true);
caps.setCapability("platformName", "Android");
-

Mi 10
Resolution: 1080x2400
CPU: ARM - Single-core - 1690Mhz
Model: M2007J3SY
[Desired Capabilities](https://testingbot.com#)
DesiredCapabilities caps = new DesiredCapabilities();
caps.setCapability("version", "12.0");
caps.setCapability("app", "..URL to your app (apk or ipa)..");
caps.setCapability("deviceName", "Mi 10");
caps.setCapability("realDevice", true);
caps.setCapability("platformName", "Android");
-

Galaxy A12
Resolution: 720x1600
CPU:
Model: SM-A125F
[Desired Capabilities](https://testingbot.com#)
DesiredCapabilities caps = new DesiredCapabilities();
caps.setCapability("version", "11.0");
caps.setCapability("app", "..URL to your app (apk or ipa)..");
caps.setCapability("deviceName", "Galaxy A12");
caps.setCapability("realDevice", true);
caps.setCapability("platformName", "Android");
-

iPad (8th generation)
Resolution: 758x1011
CPU: ARM - Quad-core - 2340MHz
Model: MR7G2NF/A
[Desired Capabilities](https://testingbot.com#)
DesiredCapabilities caps = new DesiredCapabilities();
caps.setCapability("version", "15.0");
caps.setCapability("app", "..URL to your app (apk or ipa)..");
caps.setCapability("deviceName", "iPad (8th generation)");
caps.setCapability("realDevice", true);
caps.setCapability("platformName", "iOS");
-

iPhone XR
Resolution: 828x1792
CPU: ARM - Single-core - 2390Mhz
Model: MRY42B/A
[Desired Capabilities](https://testingbot.com#)
DesiredCapabilities caps = new DesiredCapabilities();
caps.setCapability("version", "14.8");
caps.setCapability("app", "..URL to your app (apk or ipa)..");
caps.setCapability("deviceName", "iPhone XR");
caps.setCapability("realDevice", true);
caps.setCapability("platformName", "iOS");
-

OnePlus 9
Resolution: 1080x2400
CPU: ARM - Quad-core - 1593Mhz
Model: CPH2251
[Desired Capabilities](https://testingbot.com#)
DesiredCapabilities caps = new DesiredCapabilities();
caps.setCapability("version", "11.0");
caps.setCapability("app", "..URL to your app (apk or ipa)..");
caps.setCapability("deviceName", "OnePlus 9");
caps.setCapability("realDevice", true);
caps.setCapability("platformName", "Android");
-

Pixel 6
Resolution: 1080x2400
CPU: ARM - Quad-core - 1593Mhz
Model:
[Desired Capabilities](https://testingbot.com#)
DesiredCapabilities caps = new DesiredCapabilities();
caps.setCapability("version", "13.0");
caps.setCapability("app", "..URL to your app (apk or ipa)..");
caps.setCapability("deviceName", "Pixel 6");
caps.setCapability("realDevice", true);
caps.setCapability("platformName", "Android");
-

iPhone 13
Resolution: 1170x2532
CPU: ARM
Model:
[Desired Capabilities](https://testingbot.com#)
DesiredCapabilities caps = new DesiredCapabilities();
caps.setCapability("version", "18.5");
caps.setCapability("app", "..URL to your app (apk or ipa)..");
caps.setCapability("deviceName", "iPhone 13");
caps.setCapability("realDevice", true);
caps.setCapability("platformName", "iOS");
-

Galaxy S23
Resolution: 1080x2340
CPU: ARM
Model:
[Desired Capabilities](https://testingbot.com#)
DesiredCapabilities caps = new DesiredCapabilities();
caps.setCapability("version", "13.0");
caps.setCapability("app", "..URL to your app (apk or ipa)..");
caps.setCapability("deviceName", "Galaxy S23");
caps.setCapability("realDevice", true);
caps.setCapability("platformName", "Android");
-

iPhone 14
Resolution: 1170x2532
CPU: ARM
Model:
[Desired Capabilities](https://testingbot.com#)
DesiredCapabilities caps = new DesiredCapabilities();
caps.setCapability("version", "17.6");
caps.setCapability("app", "..URL to your app (apk or ipa)..");
caps.setCapability("deviceName", "iPhone 14");
caps.setCapability("realDevice", true);
caps.setCapability("platformName", "iOS");
-

iPhone 11
Resolution: 828x1792
CPU:
Model: MWLT2
[Desired Capabilities](https://testingbot.com#)
DesiredCapabilities caps = new DesiredCapabilities();
caps.setCapability("version", "14.8");
caps.setCapability("app", "..URL to your app (apk or ipa)..");
caps.setCapability("deviceName", "iPhone 11");
caps.setCapability("realDevice", true);
caps.setCapability("platformName", "iOS");
-

iPad (8th generation)
Resolution: 810x1080
CPU: ARM - Quad-core - 2340MHz
Model: MR7G2NF/A
[Desired Capabilities](https://testingbot.com#)
DesiredCapabilities caps = new DesiredCapabilities();
caps.setCapability("version", "14.7");
caps.setCapability("app", "..URL to your app (apk or ipa)..");
caps.setCapability("deviceName", "iPad (8th generation)");
caps.setCapability("realDevice", true);
caps.setCapability("platformName", "iOS");
-

iPhone 15
Resolution: 1179x2556
CPU: ARM
Model:
[Desired Capabilities](https://testingbot.com#)
DesiredCapabilities caps = new DesiredCapabilities();
caps.setCapability("version", "18.0");
caps.setCapability("app", "..URL to your app (apk or ipa)..");
caps.setCapability("deviceName", "iPhone 15");
caps.setCapability("realDevice", true);
caps.setCapability("platformName", "iOS");
-

Pixel 8
Resolution: 1080x2400
CPU: Google Tensor G3 (4 nm)
Model: GKWS6
[Desired Capabilities](https://testingbot.com#)
DesiredCapabilities caps = new DesiredCapabilities();
caps.setCapability("version", "14.0");
caps.setCapability("app", "..URL to your app (apk or ipa)..");
caps.setCapability("deviceName", "Pixel 8");
caps.setCapability("realDevice", true);
caps.setCapability("platformName", "Android");
-

Galaxy S24
Resolution: 1080x2340
CPU: ARM
Model:
[Desired Capabilities](https://testingbot.com#)
DesiredCapabilities caps = new DesiredCapabilities();
caps.setCapability("version", "14.0");
caps.setCapability("app", "..URL to your app (apk or ipa)..");
caps.setCapability("deviceName", "Galaxy S24");
caps.setCapability("realDevice", true);
caps.setCapability("platformName", "Android");
-

Galaxy A55
Resolution: 1080x2340
CPU: Exynos 1480
Model: SM-A556ELBHINS
[Desired Capabilities](https://testingbot.com#)
DesiredCapabilities caps = new DesiredCapabilities();
caps.setCapability("version", "14.0");
caps.setCapability("app", "..URL to your app (apk or ipa)..");
caps.setCapability("deviceName", "Galaxy A55");
caps.setCapability("realDevice", true);
caps.setCapability("platformName", "Android");
-

iPhone SE 2022
Resolution: 750x1334
CPU: A15 Bionic Chip
Model: A2783
[Desired Capabilities](https://testingbot.com#)
DesiredCapabilities caps = new DesiredCapabilities();
caps.setCapability("version", "17.5");
caps.setCapability("app", "..URL to your app (apk or ipa)..");
caps.setCapability("deviceName", "iPhone SE 2022");
caps.setCapability("realDevice", true);
caps.setCapability("platformName", "iOS");
-

Redmi Note 13
Resolution: 1080x2400
CPU: Octa-core (2x2.4 GHz Cortex-A76)
Model: 23124RA7EO
[Desired Capabilities](https://testingbot.com#)
DesiredCapabilities caps = new DesiredCapabilities();
caps.setCapability("version", "14.0");
caps.setCapability("app", "..URL to your app (apk or ipa)..");
caps.setCapability("deviceName", "Redmi Note 13");
caps.setCapability("realDevice", true);
caps.setCapability("platformName", "Android");
-

iPhone 16
Resolution: 1179x2556
CPU: Apple A18
Model: A3287
[Desired Capabilities](https://testingbot.com#)
DesiredCapabilities caps = new DesiredCapabilities();
caps.setCapability("version", "18.2");
caps.setCapability("app", "..URL to your app (apk or ipa)..");
caps.setCapability("deviceName", "iPhone 16");
caps.setCapability("realDevice", true);
caps.setCapability("platformName", "iOS");
-

Galaxy S25
Resolution: 1080x2340
CPU: ARM
Model:
[Desired Capabilities](https://testingbot.com#)
DesiredCapabilities caps = new DesiredCapabilities();
caps.setCapability("version", "15.0");
caps.setCapability("app", "..URL to your app (apk or ipa)..");
caps.setCapability("deviceName", "Galaxy S25");
caps.setCapability("realDevice", true);
caps.setCapability("platformName", "Android");
-

Pixel 9
Resolution: 1080x2424
CPU: Google Tensor G4
Model: GUR25
[Desired Capabilities](https://testingbot.com#)
DesiredCapabilities caps = new DesiredCapabilities();
caps.setCapability("version", "16.0");
caps.setCapability("app", "..URL to your app (apk or ipa)..");
caps.setCapability("deviceName", "Pixel 9");
caps.setCapability("realDevice", true);
caps.setCapability("platformName", "Android");
-

iPhone 17
Resolution: 1179x2556
CPU: Apple A19
Model:
[Desired Capabilities](https://testingbot.com#)
DesiredCapabilities caps = new DesiredCapabilities();
caps.setCapability("version", "26.0");
caps.setCapability("app", "..URL to your app (apk or ipa)..");
caps.setCapability("deviceName", "iPhone 17");
caps.setCapability("realDevice", true);
caps.setCapability("platformName", "iOS");
-

Pixel 10
Resolution: 1080x2424
CPU: Google Tensor G5
Model: GUR25
[Desired Capabilities](https://testingbot.com#)
DesiredCapabilities caps = new DesiredCapabilities();
caps.setCapability("version", "16.0");
caps.setCapability("app", "..URL to your app (apk or ipa)..");
caps.setCapability("deviceName", "Pixel 10");
caps.setCapability("realDevice", true);
caps.setCapability("platformName", "Android");
-

iPhone Air
Resolution: 1260x2736
CPU: Apple A19 Pro
Model:
[Desired Capabilities](https://testingbot.com#)
DesiredCapabilities caps = new DesiredCapabilities();
caps.setCapability("version", "26.2");
caps.setCapability("app", "..URL to your app (apk or ipa)..");
caps.setCapability("deviceName", "iPhone Air");
caps.setCapability("realDevice", true);
caps.setCapability("platformName", "iOS");
-

Huawei P40
Resolution: 1080x2340
CPU: Cortex-A76
Model: ANA-AN00
[Desired Capabilities](https://testingbot.com#)
DesiredCapabilities caps = new DesiredCapabilities();
caps.setCapability("version", "12.0");
caps.setCapability("app", "..URL to your app (apk or ipa)..");
caps.setCapability("deviceName", "Huawei P40");
caps.setCapability("realDevice", true);
caps.setCapability("platformName", "Android");
---
URL: https://testingbot.com/support/app-automate/electron
# Electron Testing
[Electron](https://electronjs.org/) is a framework that allows you to create cross-platform native applications by using Javascript code. Electron will embed a Chromium engine in a native app format, allowing web developers to create desktop applications by writing HTML and Javascript code.
TestingBot supports running automated WebDriver tests against Electron-based apps on these platforms:
- Windows 11
- Windows 10
- macOS Tahoe
- macOS Sequoia
- macOS Sonoma
- macOS Ventura
- macOS Monterey
All Electron versions from version 16 to the most recent version are supported.
TestingBot has created a [demo Electron app](https://github.com/testingbot/testingbot-electron-demo-app), which acts as a simple calculator, to showcase automated Electron app testing.
## Run your first Electron test
### App management
To test an Electron app, you'll first need to upload a zip file of your Electron application to a URL where TestingBot can download it from. You can choose to upload this yourself, for example to AWS S3 or use [TestingBot Storage](https://testingbot.com/support/api#upload) to upload your `.zip` file.
Note that files uploaded to TestingBot Storage are automatically pruned after 62 days.
[cURL](https://testingbot.com#)[Ruby](https://testingbot.com#)[Python](https://testingbot.com#)[PHP](https://testingbot.com#)[Java](https://testingbot.com#)[NodeJS](https://testingbot.com#)
$ curl -X POST "https://api.testingbot.com/v1/storage" \
-u key:secret -F "file=@/path/to/app/file/electron-app.zip"
require 'testingbot'
api = TestingBot::Api.new(key, secret)
api.upload_local_file('electron-app.zip')
TestingbotREST restApi = new TestingbotREST(key, secret);
TestingbotStorageUploadResponse uploadResponse = restApi.uploadToStorage(File file);
$api = new TestingBot\TestingBotAPI($key, $secret);
$api->uploadLocalFileToStorage($pathToLocalFile);
import testingbotclient
tb = testingbotclient.TestingBotClient(key, secret)
tb.storage.upload_local_file(localFilePath)
const TestingBot = require('testingbot-api');
const api = new TestingBot({
api_key: "your-tb-key",
api_secret: "your-tb-secret"
});
api.uploadFile(localFilePath, function(error, response) {
// response.app_url
});
TestingBot Storage will return a `app_url` which you can use in the `tb:app` capability of your test.
This is how the capabilities in your test should currently look like:
[Ruby](https://testingbot.com#)[Python](https://testingbot.com#)[Java](https://testingbot.com#)[NodeJS](https://testingbot.com#)[C#](https://testingbot.com#)
caps = {
"browserName" => "electron",
"browserVersion" => "33",
"tb:app" => "tb://the-app-url-you-received" # or https://s3.amazonaws.com/...
}
ChromeOptions options = new ChromeOptions();
options.setCapability("browserName", "electron");
options.setCapability("browserVersion", "33");
options.setCapability("tb:app", "tb://the-app-url-you-received");
Map tbOptions = new HashMap<>();
tbOptions.put("key", "api_key");
tbOptions.put("secret", "api_secret");
options.setCapability("tb:options", tbOptions);
capabilities = {
"browserName": "electron",
"browserVersion": "33",
"tb:app": "tb://the-app-url-you-received",
"tb:options": {
"name": "Electron Sample"
}
}
driver = webdriver.Remote("https://hub.testingbot.com/wd/hub", options=webdriver.ChromeOptions().to_capabilities() | capabilities)
driver = await new webdriver.Builder().withCapabilities({
"browserName": 'electron',
"goog:chromeOptions" : { "w3c" : true },
"tb:options": {
"key": "api_key",
"secret": "api_secret"
},
'tb:app': 'tb://the-app-url-you-received' // or https://s3.amazonaws.com/...
}).usingServer("https://hub.testingbot.com/wd/hub").build();
var chromeOptions = new ChromeOptions();
chromeOptions.BrowserVersion = "33";
chromeOptions.PlatformName = "Windows 10";
chromeOptions.AddAdditionalChromeOption("browserName", "electron");
var tbOptions = new Dictionary
{
["key"] = "api_key",
["secret"] = "api_secret",
["name"] = TestContext.CurrentContext.Test.Name
};
chromeOptions.AddAdditionalChromeOption("tb:options", tbOptions);
chromeOptions.AddAdditionalChromeOption("tb:app", "tb://the-app-url-you-received");
driver = new RemoteWebDriver(new Uri("https://hub.testingbot.com/wd/hub"),
chromeOptions, TimeSpan.FromSeconds(600));
### Binary location
Next to the required `app` capability, you will also need to specify a `tb:binary_location` capability. This is the path to the actual Electron app, so that TestingBot knows which file in the `zip` file is the Electron app.
For example, if your uploaded zip file is structured like this:
TestingBot-Electron-App.zip
[testingbot-electron-demo-app.app]
[Contents]
[MacOS]
-- testingbot-electron-demo-app
The `binary_location` capability in this case would be:
tb:binary_location = "testingbot-electron-demo-app.app/Contents/MacOS/testingbot-electron-demo-app"
Now the capabilities in your test should look like the example below.
[Ruby](https://testingbot.com#)[Python](https://testingbot.com#)[Java](https://testingbot.com#)[NodeJS](https://testingbot.com#)[C#](https://testingbot.com#)
require 'selenium-webdriver'
options = Selenium::WebDriver::Options.chrome
options.browser_name = "electron"
options.platform_name = "VENTURA"
options.browser_version = "31"
options.add_option("tb:binary_location", "testingbot-electron-demo-app.app/Contents/MacOS/testingbot-electron-demo-app")
options.add_option("tb:app", "https://github.com/testingbot/testingbot-electron-demo-app/releases/download/v1.0.0/testingbot-electron-demo-app-darwin-arm64-1.0.0.zip")
http_client = Selenium::WebDriver::Remote::Http::Default.new
http_client.open_timeout = 200
http_client.read_timeout = 200
driver = Selenium::WebDriver.for(
:remote,
url: "https://key:secret@hub.testingbot.com/wd/hub",
options: options,
http_client: http_client)
# Generate two random numbers between 0 and 9
num1 = rand(0..9)
num2 = rand(0..9)
# Find elements on the page
first_number = driver.find_element(id: "btn-#{num1}")
second_number = driver.find_element(id: "btn-#{num2}")
plus = driver.find_element(id: 'btn-plus')
equal = driver.find_element(id: 'btn-equal')
# Perform operations
first_number.click
plus.click
second_number.click
equal.click
# Get the result
result_element = driver.find_element(id: 'calc-display')
result_text = result_element.text
driver.quit
raise "Test failed" unless (num1 + num2) == result_text.to_i
import org.openqa.selenium.By;
import org.openqa.selenium.WebDriver;
import org.openqa.selenium.WebElement;
import org.openqa.selenium.chrome.ChromeOptions;
import org.openqa.selenium.remote.RemoteWebDriver;
import java.net.URL;
import java.util.Random;
public class SeleniumTest {
public static void main(String[] args) {
try {
ChromeOptions options = new ChromeOptions();
options.setCapability("browserName", "electron");
options.setCapability("platformName", "VENTURA");
options.setCapability("browserVersion", "31");
options.setCapability("tb:binary_location", "testingbot-electron-demo-app.app/Contents/MacOS/testingbot-electron-demo-app");
options.setCapability("tb:app", "https://github.com/testingbot/testingbot-electron-demo-app/releases/download/v1.0.0/testingbot-electron-demo-app-darwin-arm64-1.0.0.zip");
WebDriver driver = new RemoteWebDriver(
new URL("https://key:secret@hub.testingbot.com/wd/hub"),
options
);
// Generate two random numbers between 0 and 9
Random random = new Random();
int num1 = random.nextInt(10);
int num2 = random.nextInt(10);
WebElement firstNumber = driver.findElement(By.id("btn-" + num1));
WebElement secondNumber = driver.findElement(By.id("btn-" + num2));
WebElement plus = driver.findElement(By.id("btn-plus"));
WebElement equal = driver.findElement(By.id("btn-equal"));
firstNumber.click();
plus.click();
secondNumber.click();
equal.click();
WebElement resultElement = driver.findElement(By.id("calc-display"));
String resultText = resultElement.getText();
// Verify the result
if ((num1 + num2) != Integer.parseInt(resultText)) {
throw new AssertionError("Test failed");
}
// Quit the driver
driver.quit();
} catch (Exception e) {
e.printStackTrace();
}
}
}
from selenium import webdriver
from selenium.webdriver.common.by import By
from selenium.webdriver.chrome.options import Options
import random
# Set capabilities
options = Options()
options.set_capability("browserName", "electron")
options.set_capability("platformName", "VENTURA")
options.set_capability("browserVersion", "31")
options.set_capability("tb:binary_location", "testingbot-electron-demo-app.app/Contents/MacOS/testingbot-electron-demo-app")
options.set_capability("tb:app", "https://github.com/testingbot/testingbot-electron-demo-app/releases/download/v1.0.0/testingbot-electron-demo-app-darwin-arm64-1.0.0.zip")
# Initialize the WebDriver connection to TestingBot
driver = webdriver.Remote(
command_executor="https://key:secret@hub.testingbot.com/wd/hub",
options=options
)
try:
# Generate two random numbers between 0 and 9
num1 = random.randint(0, 9)
num2 = random.randint(0, 9)
# Find elements on the page
first_number = driver.find_element(By.ID, f"btn-{num1}")
second_number = driver.find_element(By.ID, f"btn-{num2}")
plus = driver.find_element(By.ID, "btn-plus")
equal = driver.find_element(By.ID, "btn-equal")
# Perform operations
first_number.click()
plus.click()
second_number.click()
equal.click()
# Get the result
result_element = driver.find_element(By.ID, "calc-display")
result_text = result_element.text
# Verify the result
assert (num1 + num2) == int(result_text), "Test failed"
finally:
driver.quit()
const { Builder, By } = require('selenium-webdriver');
const { Options } = require('selenium-webdriver/chrome');
(async function example() {
let driver;
try {
// Set capabilities
let caps = {
browserName: 'electron',
platformName: 'VENTURA',
browserVersion: '31',
'tb:binary_location': 'testingbot-electron-demo-app.app/Contents/MacOS/testingbot-electron-demo-app',
'tb:app': 'https://github.com/testingbot/testingbot-electron-demo-app/releases/download/v1.0.0/testingbot-electron-demo-app-darwin-arm64-1.0.0.zip'
};
driver = await new Builder()
.usingServer('https://key:secret@hub.testingbot.com/wd/hub')
.withCapabilities(caps)
.build();
// Generate two random numbers between 0 and 9
const num1 = Math.floor(Math.random() * 10);
const num2 = Math.floor(Math.random() * 10);
const firstNumber = await driver.findElement(By.id(`btn-${num1}`));
const secondNumber = await driver.findElement(By.id(`btn-${num2}`));
const plus = await driver.findElement(By.id('btn-plus'));
const equal = await driver.findElement(By.id('btn-equal'));
// Perform operations
await firstNumber.click();
await plus.click();
await secondNumber.click();
await equal.click();
// Get the result
const resultElement = await driver.findElement(By.id('calc-display'));
const resultText = await resultElement.getText();
// Verify the result
if ((num1 + num2) !== parseInt(resultText)) {
throw new Error('Test failed');
}
} catch (error) {
console.error('Error during test execution:', error);
} finally {
if (driver) {
await driver.quit();
}
}
})();
using OpenQA.Selenium;
using OpenQA.Selenium.Chrome;
using OpenQA.Selenium.Remote;
using System;
class SeleniumTest
{
static void Main(string[] args)
{
try
{
// Set capabilities
var options = new ChromeOptions();
options.AddAdditionalChromeOption("browserName", "electron");
options.PlatformName = "VENTURA";
options.BrowserVersion = "31";
options.AddAdditionalChromeOption("tb:binary_location", "testingbot-electron-demo-app.app/Contents/MacOS/testingbot-electron-demo-app");
options.AddAdditionalChromeOption("tb:app", "https://testingbot.com/electron/mac-demo.zip");
var commandTimeout = TimeSpan.FromSeconds(200);
IWebDriver driver = new RemoteWebDriver(
new Uri("https://key:secret@hub.testingbot.com/wd/hub"),
options,
commandTimeout
);
// Generate two random numbers between 0 and 9
Random random = new Random();
int num1 = random.Next(0, 10);
int num2 = random.Next(0, 10);
IWebElement firstNumber = driver.FindElement(By.Id($"btn-{num1}"));
IWebElement secondNumber = driver.FindElement(By.Id($"btn-{num2}"));
IWebElement plus = driver.FindElement(By.Id("btn-plus"));
IWebElement equal = driver.FindElement(By.Id("btn-equal"));
// Perform operations
firstNumber.Click();
plus.Click();
secondNumber.Click();
equal.Click();
// Get the result
IWebElement resultElement = driver.FindElement(By.Id("calc-display"));
string resultText = resultElement.Text;
// Verify the result
if ((num1 + num2) != int.Parse(resultText))
{
throw new Exception("Test failed");
}
// Quit the driver
driver.Quit();
}
catch (Exception ex)
{
Console.WriteLine($"Error during test execution: {ex.Message}");
}
}
}
The example above will run the TestingBot Demo Electron app on a remote macOS machine. You can also choose to run the demo app on a remote Windows machine inside TestingBot's grid, please see the capabilities below.
options = Selenium::WebDriver::Options.chrome
options.browser_name = "electron"
options.platform_name = "WIN10"
options.browser_version = "31"
options.add_option("tb:binary_location", "testingbot-electron-demo-app.exe")
options.add_option("tb:app", "https://github.com/testingbot/testingbot-electron-demo-app/releases/download/v1.0.0/testingbot-electron-demo-app-win32-x64-1.0.0.zip")
## Configuring Electron tests
To configure your Electron test with TestingBot, you need to supply 3 capabilities:
- [app capability](https://testingbot.com#capability-app)
- [binary\_location capability](https://testingbot.com#capability-binary)
- Electron version capability
Please use the `version` or `browserVersion` capability to indicate to TestingBot which version of Electron was used to create the final app that you are testing.
TestingBot needs to know which version was used, so that we can map it to the Chromium version that is being used for that particular Electron version. For example, if you created your Electron app with Electron 31, you would need to provide `browserVersion: 31` as a capability.
## Electron Test Results
Test results for each Electron test will be available in the TestingBot member dashboard. For each Electron test, you will get access to a video recording, generated log files and additional meta-data.
These results are also available through the TestingBot [REST-API](https://testingbot.com/support/api) or by using one of the [TestingBot CI/CD plugins](https://testingbot.com/support/integrations/ci-cd).
Was this page helpful? Yes No
## Looking for More Help?
Have questions or need more information?
You can reach us via the following channels:
- [Email us](https://testingbot.com/contact/new)
- [Join our Slack Channel](https://join.slack.com/t/testingb0t/shared_invite/zt-3bcw9xch-jk19~6XPs_xBrsAgAedkCw)
---
URL: https://testingbot.com/support/app-automate/earlgrey
# EarlGrey Testing
TestingBot will release testing with EarlGrey in Q4 of 2025.
Run your EarlGrey tests on physical Android devices in the cloud, on Samsung Galaxy devices, Pixels, Xiaomi and other Android devices.
If you are interested in participating in our beta program, please contact us.
Was this page helpful? Yes No
## Looking for More Help?
Have questions or need more information?
You can reach us via the following channels:
- [Email us](https://testingbot.com/contact/new)
- [Join our Slack Channel](https://join.slack.com/t/testingb0t/shared_invite/zt-3bcw9xch-jk19~6XPs_xBrsAgAedkCw)
---
URL: https://testingbot.com/support/app-automate/maestro
# Maestro Intro
TestingBot provides a grid of remote iOS and Android physical devices + emulators, ready to run your Maestro flows.
Maestro is a mobile UI testing framework, which supports testing on both iOS and Android. You write flows, which are story-like tests, where you describe a specific flow in your mobile application. For example, you could have a login flow, or a checkout flow.
Maestro is a relatively new test framework and offers several nice features, such as:
- Built-in tolerance to flakiness: various mechanisms are added to try and prevent flaky tests, for example locators that have changed or moved positions.
- Automatic waits: Maestro will automatically wait for certain conditions, which means you do not have to worry about delays, or adding sleep commands to your tests.
- Declarative syntax, which is defined in Flow (`yaml`) files.
### Why TestingBot Cloud?
TestingBot has been offering cloud-based testing since 2012 and has built a robust solution for Maestro cloud testing. Compared to other vendors and Maestro cloud, we offer the following improved features:
- Run on any iOS version, both physical iOS devices and iOS simulators.
- Test on **physical Android devices** , not just emulators (though that's also certainly possible)
- No execution limit: your tests can run as long as they need
- Apply various [options](https://testingbot.com/support/app-automate/maestro/options) such as setting orientation, geolocation options and more
## TestingBot CLI
The easiest way to run Maestro tests on TestingBot is using our CLI tool. It handles uploading your app, flows and running tests in a single command.
https://www.youtube.com/embed/MMWCkBgXFOU
### Installation
npm install -g @testingbot/cli
### Authentication
Authenticate using this command:
testingbot login
This opens your browser for authentication. After logging in, your credentials are saved to `~/.testingbot` and you can start using the CLI.
#### Other Authentication Methods
- **Command-line options** : `--api-key` and `--api-secret`
- **Environment variables** : `TB_KEY` and `TB_SECRET`
- **Config file** : Create `~/.testingbot` with content `key:secret`
### Quick Start
Run Maestro tests with a single command:
testingbot maestro app.apk flow.yml --device "Pixel 8" --deviceVersion "14"
testingbot maestro app.ipa flow.yml --device "iPhone 16" --real-device
The CLI will:
1. Upload your app to TestingBot
2. Upload and zip your flow files
3. Start the test run
4. Show real-time progress and results
## Upload Mobile App
You will need to upload a mobile app to run tests with Maestro. The format of this file depends on which device type you'd like to test:
- **iOS physical devices/simulators** :
You can upload your `.ipa` or `.zip` file (for simulators, see [here how to prepare this zip file](https://testingbot.com/support/app-automate/help/prepare#simulator)).
- **Android physical devices/emulators** :
Upload the `.apk` file, which TestingBot will automatically install on the Android device.
[CLI](https://testingbot.com#)[cURL](https://testingbot.com#)
When using the CLI, the app upload is handled automatically as part of the `testingbot maestro` command. Simply specify your app file as the first argument:
testingbot maestro /path/to/app/file/sample-debug.apk ./flows
Supported app formats:
- **Android** : `.apk`
- **iOS Physical Device** : `.ipa`
- **iOS Simulator** : `.app`, `.zip` (zipped .app bundle)
curl -u api_key:api_secret \
-X POST "https://api.testingbot.com/v1/app-automate/maestro/app" \
-F "file=@/path/to/app/file/sample-debug.zip"
The API response will include an `id` response, which you can use in the other API calls.
{
"id": 4012
}
## Upload Maestro Flows
To upload the Flows zip file, please follow the example below.
[CLI](https://testingbot.com#)[cURL](https://testingbot.com#)
When using the CLI, flow files are automatically zipped and uploaded. You can specify:
- A directory containing flow files
- Individual `.yaml` or `.yml` files
- A pre-zipped `.zip` file
- Glob patterns (e.g., `./flows/**/*.yaml`)
# Single directory
testingbot maestro app.apk ./flows
# Multiple directories
testingbot maestro app.apk ./flows/smoke ./flows/regression
# Individual flow files
testingbot maestro app.apk login.yaml checkout.yaml
# Pre-zipped flows
testingbot maestro app.apk flows.zip
Maestro Flow files are `.yaml` files which contain the actions that need to be performed. You can zip these together and upload to TestingBot by using the following command:
zip -r flows.zip *.yaml
Make sure all the necessary flows and sub flows are included in the zip file.
curl -u api_key:api_secret \
-X POST "https://api.testingbot.com/v1/app-automate/maestro/:id/tests" \
-F "file=@/path/to/app/file/flows.zip"
Replace the `:id` with the identifier you received during the app upload call. (In this example 4012)
Calling this multiple times with the same `:id` will overwrite the previously uploaded Flows zip file.
### Zip structure
Maestro needs to know which flows it should run. If there are flow files (`.yaml` files) in the top-level directory of the zip file, it will run these flow files.
You can also include a [config.yaml](https://testingbot.com/support/app-automate/maestro/options#config) file in the top-level directory of the zip file, to indicate which flows should be tested. For example, you can use the `**` annotation to indicate you want to run all flows, even if they are in separate sub-directories.
flows:
- "**"
More information is available in the [Maestro Docs](https://docs.maestro.dev/cli/test-suites-and-reports#controlling-what-tests-to-include).
## Run Maestro tests
Once you've uploaded both your app and Flows zip file, you can run the Maestro tests on the TestingBot cloud.
Specify one or more capabilities, to indicate on which iOS simulators or Android devices you want to run your tests on.
[CLI](https://testingbot.com#)[cURL](https://testingbot.com#)
Use the CLI to run tests with device selection options:
# Basic usage with device selection
testingbot maestro app.apk flow.yml --device "Pixel 8" --deviceVersion "14"
# iOS simulator
testingbot maestro app.zip ./flows --platform iOS --device "iPhone 16" --deviceVersion "26.0"
# iOS physical device
testingbot maestro app.ipa flow.yml --device "iPhone 16" --real-device
# Android real device
testingbot maestro app.apk flow.yml --device "Samsung Galaxy S24" --real-device
# With additional options
testingbot maestro app.apk ./flows \
--device "Pixel 8" \
--deviceVersion "14" \
--name "Smoke Tests" \
--build "v2.1.0"
# With CI/CD integration (Git metadata)
testingbot maestro app.apk ./flows \
--device "Pixel 8" \
--commit-sha "$COMMIT_SHA" \
--pull-request-id "$PR_NUMBER" \
--repo-owner "myorg" \
--repo-name "myapp"
#### Device Options
| Option | Description |
| --- | --- |
| `--device ` | Device name (e.g., "Pixel 9", "iPhone 16") |
| `--platform ` | Platform: Android or iOS |
| `--deviceVersion ` | OS version (e.g., "14", "18.0") |
| `--real-device` | Use a real device instead of emulator/simulator |
See the [Options page](https://testingbot.com/support/app-automate/maestro/options) for more configuration options.
Select a device configuration below, then use the generated cURL command:
iOS 18.6›iPhone 16
Loading environments...
Please wait while we load the available browsers and platforms.
Replace the `:id` with the identifier you received during the app upload call. (In this example 4012)
When running Maestro tests on physical devices, a device could be occupied at times. You might want to use regex/wildcard patterns to target a broad range of devices.
We offer special parameters which you can use to allocate a device:
Regex Input | Result || `".*Galaxy.*"` | This will allocate any of the available Galaxy devices (phone or tablet) |
| `"*"` | This will allocate a random available device, you can use this with the `deviceName` or `version`. |
## View Maestro Results
The results of your Maestro tests will be available in the [TestingBot dashboard](https://testingbot.com/members).
Each test result contains a video, test logs and other meta data generated during the test run. Maestro flows will be displayed, together with the steps that were taken during each flow.

You can also use the CLI or an API call to get back the result from the run(s):
[CLI](https://testingbot.com#)[cURL](https://testingbot.com#)
By default, the CLI waits for test completion and displays real-time progress:
testingbot maestro app.apk ./flows --device "Pixel 8"
The CLI will show:
- Upload progress for app and flows
- Device allocation status
- Live output from Maestro flows
- Final pass/fail status
#### Async Mode
Use `--async` to start tests without waiting for results:
testingbot maestro app.apk ./flows --device "Pixel 8" --async
#### Download Artifacts
Download test artifacts (logs, screenshots, video) after completion:
testingbot maestro app.apk ./flows --device "Pixel 8" \
--download-artifacts \
--artifacts-output-dir ./artifacts
curl -u api_key:api_secret \
"https://api.testingbot.com/v1/app-automate/maestro/:project_id"
Replace the `:project_id` with the identifier you received during the app upload call. (In this example 4012)
The response will contain a `success` boolean, indicating whether the test passed or failed.
**Example response:**
{"runs":[{"id":14019,"status":"DONE","capabilities":{"version":"15.0","deviceName":"Pixel 9","platformName":"Android"},"success":0,"report":"...","created_at":"2025-08-26T10:30:42.000Z","test":{"sessionId":"0255832ee646-e7620dc7d449-172937ccfc2d-175620408997-95145830","environment":{"name":"chrome","os":"Pixel 9 - 15.0","version":"15.0"}}}],"success":false,"version":"1.0","completed":true}
You can poll this request to check if the tests have finished running. The `completed` boolean will be set to true when all tests have finished.
### JUnit Report
All Maestro tests on TestingBot will by default run with a JUnit reporter. This report is accessible programmatically:
[CLI](https://testingbot.com#)[cURL](https://testingbot.com#)
Download the JUnit report automatically after test completion:
# Download JUnit XML report
testingbot maestro app.apk ./flows --device "Pixel 8" \
--report junit \
--report-output-dir ./reports
The report will be saved to the specified directory with a filename based on the test run.
curl -u api_key:api_secret \
"https://api.testingbot.com/v1/app-automate/maestro/:project_id/:run_id/junit_report"
Replace the `:project_id` with the identifier you received during the app upload call. (In this example 4012)
Replace the `:run_id` with the identifier for this run.
The response will contain a `report` string value that contains the XML formatted JUnit report.
### Webhooks
Because the Maestro tests run asynchronously, you might want to get notified when a test run has finished. You can poll the [results API](https://testingbot.com#results) or use the [Webhook integration](https://testingbot.com/support/integrations/webhooks) or [Slack integration](https://testingbot.com/support/integrations/slack) to get notified when a test run has finished.
## Example Maestro Flow
Below is a simple example Flow, where we input two values in the TestingBot example app:
- [Android Sample .apk](https://testingbot.com/appium/sample.apk)
- [iOS Simulator Sample .zip](https://testingbot.com/appium/sample.zip)
- [iOS Physical Sample .ipa](https://testingbot.com/appium/sample.ipa)
appId: org.reactjs.native.example.SampleApp
---
- launchApp
- tapOn:
id: inputA
- longPressOn:
id: inputA
- tapOn:
text: "Select All"
- eraseText
- inputText: "10"
- tapOn:
id: inputB
- longPressOn:
id: inputB
- tapOn:
text: "Select All"
- eraseText
- inputText: "5"
- tapOn:
id: sum
- assertVisible:
text: "15"
## Maestro Parallel Testing
The TestingBot physical and virtual device grid is optimised to run many tests concurrently. You can run multiple Maestro flows simultaneously (in parallel), which will drastically shorten your total test duration.
Depending on your subscription plan, you will be able to run 1 or more Maestro flows at the same time. If you exceed the threshold, additional Maestro flows will be queued until a slot becomes available.
By default, each flow runs in a separate session. Make sure each flow can run isolated. If you don't want this, you can use the [--shard-split 1](https://testingbot.com#shard-split) option to run all flows in the same session.
For example, let's assume you have an Automation Pro plan with 2 concurrent tests. And you want to run 10 Maestro tests, or run the same Maestro test on 10 different device configurations:
- 2 Maestro tests will run simultaneously
- The other 8 are waiting (queued) until one of the first two finishes
- When a slot frees up, the next Maestro test in the queue will start to run
- Finally, when all tests have run, you will see the results in the TestingBot dashboard
Currently there is no limit to the amount of Maestro tests you can add to the queue.
## Grouping Flows
When you have a large number of flows, you might want to split these flows across multiple test runs. This is also known as sharding. By default, each test runs separately in parallel on TestingBot.
You can group flows together that should run in the same session by using the `--shard-split` option.
# Shard flows across 3 parallel sessions
testingbot maestro app.apk ./flows \
--device "Pixel 8" \
--deviceVersion "14" \
--shard-split 3
You can also decide to run all flows in the same session by using the `--shard-split 1` option.
# Shard flows across 3 parallel sessions
testingbot maestro app.apk ./flows \
--device "Pixel 8" \
--deviceVersion "14" \
--shard-split 1
## Integrations
TestingBot offers various [integrations](https://testingbot.com/support/integrations) which allow for connecting your Maestro tests with external services. For example; you can receive automated Slack messages each time a Maestro test runs or fails, or you can integrate Maestro testing with any CI/CD system.
- [App Center](https://testingbot.com/support/integrations/appcenter)
- [Bitrise](https://testingbot.com/support/integrations/ci-cd/bitrise)
- [GitHub Actions](https://testingbot.com/support/integrations/ci-cd/github-actions)
- [Jenkins CI](https://testingbot.com/support/integrations/ci-cd/jenkins)
- [Jira](https://testingbot.com/support/integrations/jira)
- [Slack](https://testingbot.com/support/integrations/slack)
- [TeamCity CI](https://testingbot.com/support/integrations/ci-cd/teamcity)
- [Webhooks](https://testingbot.com/support/integrations/webhooks)
## API
TestingBot provides a [REST-API](https://testingbot.com/support/app-automate/maestro/api) to retrieve information about your Maestro projects and runs.
Was this page helpful? Yes No
## Looking for More Help?
Have questions or need more information?
You can reach us via the following channels:
- [Email us](https://testingbot.com/contact/new)
- [Join our Slack Channel](https://join.slack.com/t/testingb0t/shared_invite/zt-3bcw9xch-jk19~6XPs_xBrsAgAedkCw)
---
URL: https://testingbot.com/support/app-automate/maestro/api
# Maestro API Overview
TestingBot provides a REST API to upload apps, run Maestro flows, and retrieve information about your [Maestro projects and runs](https://testingbot.com/support/app-automate/maestro).
In the documentation below, a Maestro project using a `:project_id` consists of a mobile application that was uploaded together with a zipped set of Maestro flow files.
A Maestro project can have multiple test runs, depending on how many device configurations (capabilities) you specified when you [started the tests](https://testingbot.com/support/app-automate/maestro/api#run).
All API endpoints require authentication using your TestingBot API key and secret, which you can obtain from the Member area.
| Base URL | Authentication |
| --- | --- |
| `https://api.testingbot.com/v1/app-automate/maestro` | HTTP Basic Auth (API key:secret) |
## CLI Alternative
For most use cases, we recommend using the [TestingBot CLI](https://testingbot.com/support/app-automate/maestro#cli) instead of the REST API directly. The CLI handles uploading your app, flows and running tests in a single command:
# Install the CLI
npm install -g @testingbot/cli
# Authenticate
testingbot login
# Run Maestro tests (handles upload + run automatically)
testingbot maestro app.apk ./flows --device "Pixel 8" --deviceVersion "14"
The CLI provides:
- Automatic app and flow uploads
- Real-time progress and streaming output
- Automatic report downloads
- Simpler authentication
Use the REST API directly when you need programmatic access or custom integration workflows.
## Upload App
Upload your Android (.apk/.aab) or iOS (.ipa/.app) application to TestingBot. This creates a new Maestro project and returns a project ID.
| Method | Endpoint |
| --- | --- |
| `POST` | `/app-automate/maestro/app` |
#### Parameters
| Name | Type | Required | Description |
| --- | --- | --- | --- |
| `file` | file | Yes | The app file to upload (.apk, .aab, .ipa, .app or .zip) |
[cURL](https://testingbot.com#)
curl -u api_key:api_secret \
-X POST "https://api.testingbot.com/v1/app-automate/maestro/app" \
-F "file=@/path/to/your/app.apk"
#### Response
{
"id": 17876,
"app": {
"app_url": "https://...",
"icon_url": "https://...",
"app_version": "1.0.0",
"bundle_id": "com.example.app",
}
}
Save the returned `id` - you'll need it for uploading flows and running tests.
## Upload Maestro Flows
Upload your Maestro flow files (as a .zip archive) to an existing project. This replaces any previously uploaded flows.
| Method | Endpoint |
| --- | --- |
| `POST` | `/app-automate/maestro/:id/tests` |
#### Parameters
| Name | Type | Required | Description |
| --- | --- | --- | --- |
| `id` | integer | Yes | The project ID returned from the app upload |
| `file` | file | Yes | A .zip file containing your Maestro flow YAML files |
[cURL](https://testingbot.com#)
curl -u api_key:api_secret \
-X POST "https://api.testingbot.com/v1/app-automate/maestro/:id/tests" \
-F "file=@/path/to/flows.zip"
#### Response
{
"id": 17876,
"flows": [
{
"id": 123,
"name": "login_flow",
}
]
}
## Run Maestro Tests
Start running your Maestro flows on one or more devices. You can specify multiple device configurations to run tests in parallel.
| Method | Endpoint |
| --- | --- |
| `POST` | `/app-automate/maestro/:id/run` |
#### Parameters
| Name | Type | Required | Description |
| --- | --- | --- | --- |
| `id` | integer | Yes | The project ID |
| `capabilities` | array | Yes | Array of device configurations to run tests on |
| `maestroOptions` | object | No | Additional Maestro options (version, env, flows, tags). See [Test Options](https://testingbot.com/support/app-automate/maestro/options). |
| `shardSplit` | integer | 1 | Group flows into N chunks, each chunk running on a separate device.
By default each flow runs in its own session on a device. |
[cURL](https://testingbot.com#)
curl -u api_key:api_secret \
-X POST "https://api.testingbot.com/v1/app-automate/maestro/:id/run" \
-d '{"capabilities":[{"platformName":"Android","version":"14","deviceName":"Pixel 8"}]}' \
-H "Content-Type: application/json"
#### Response
{
"success": true,
"id": 17876,
"runs": [
{
"id": 18809,
"capabilities": {
"platformName": "Android",
"version": "14",
"deviceName": "Pixel 8"
},
"flows": [
{
"id": 123,
"name": "login_flow",
"report": "...",
"requested_at": "2025-11-28T09:15:00.000Z",
"completed_at": "2025-11-28T09:16:00.000Z",
"status": "WAITING",
"test_case_id": 456
}
]
}
]
}
#### Error Responses
| Status Code | Description |
| --- | --- |
| `429` | Insufficient minutes available. Please upgrade your account to continue running Maestro tests. |
## List Maestro Projects
Retrieve a paginated list of all your Maestro projects.
| Method | Endpoint |
| --- | --- |
| `GET` | `/app-automate/maestro` |
#### Query Parameters
| Name | Type | Default | Description |
| --- | --- | --- | --- |
| `offset` | integer | 0 | Number of records to paginate |
| `count` | integer | 10 | Number of records to return |
[cURL](https://testingbot.com#)
curl -u api_key:api_secret \
"https://api.testingbot.com/v1/app-automate/maestro"
#### Response
{
"data": [
{
"id": 17876,
"name": "Maestro Project 17876",
"created_at": "2025-11-28T08:12:31.000Z",
"updated_at": "2025-11-28T08:12:31.000Z",
"completed": false,
"app": {
"app_url": "https://...",
"icon_url": "https://...",
"app_version": "2.7.50420",
"bundle_id": "org.wikipedia"
},
"flows_url": "https://...",
"flows": [
{
"id": 123,
"name": "login_flow",
}
],
"runs": [18809, 18854, 18863, 18866]
}
],
"meta": {
"offset": 0,
"count": 10,
"total": 25
}
}
## Get Maestro Project Info
Retrieve details about a specific Maestro project, including all its runs.
| Method | Endpoint |
| --- | --- |
| `GET` | `/app-automate/maestro/:id` |
[cURL](https://testingbot.com#)
curl -u api_key:api_secret \
"https://api.testingbot.com/v1/app-automate/maestro/:id"
#### Response
{
"runs": [
{
"id": 18809,
"status": "DONE",
"capabilities": {
"version": "16",
"deviceName": "Pixel 9",
"platformName": "Android"
},
"success": 1,
"report": "",
"options": {},
"flows": [
{
"id": 123,
"name": "login_flow",
"report": "...",
"requested_at": "2025-11-28T09:15:00.000Z",
"completed_at": "2025-11-28T09:16:00.000Z",
"status": "WAITING",
"test_case_id": 456
}
]
}
],
"success": true,
"completed": true
}
#### Run Status Values
| Status | Description |
| --- | --- |
| `WAITING` | Run is queued and waiting for a device |
| `READY` | The test is running on the device |
| `DONE` | Run has completed |
| `FAILED` | Run failed to complete |
## Get Run Info
Retrieve detailed information about a specific Maestro run. Use this to poll for completion status.
| Method | Endpoint |
| --- | --- |
| `GET` | `/app-automate/maestro/:project_id/:run_id` |
[cURL](https://testingbot.com#)
curl -u api_key:api_secret \
"https://api.testingbot.com/v1/app-automate/maestro/:project_id/:run_id"
Replace `:project_id` with your project ID and `:run_id` with the run ID.
#### Response
{
"id": 18809,
"status": "DONE",
"capabilities": {
"version": "16",
"deviceName": "Pixel 9",
"platformName": "Android"
},
"flows": [
{
"id": 123,
"name": "login_flow",
"report": "...",
"requested_at": "2025-11-28T09:15:00.000Z",
"completed_at": "2025-11-28T09:16:00.000Z",
"status": "WAITING",
"test_case_id": 456
}
],
"success": 1,
"report": "",
"options": {},
"completed": true
}
Poll this endpoint to check if the test has finished. The `completed` field will be `true` when the run has completed.
## JUnit Report
Retrieve the JUnit XML report for a completed Maestro run. This is useful for CI/CD integration.
| Method | Endpoint |
| --- | --- |
| `GET` | `/app-automate/maestro/:project_id/:run_id/junit_report` |
[cURL](https://testingbot.com#)
curl -u api_key:api_secret \
"https://api.testingbot.com/v1/app-automate/maestro/:project_id/:run_id/junit_report"
#### Response
{
"junit_report": "..."
}
The `junit_report` field contains the XML-formatted JUnit report generated by Maestro.
## Stop Maestro Run
Stop a currently running Maestro test.
| Method | Endpoint |
| --- | --- |
| `POST` | `/app-automate/maestro/:project_id/:run_id/stop` |
[cURL](https://testingbot.com#)
curl -u api_key:api_secret \
-X POST "https://api.testingbot.com/v1/app-automate/maestro/:project_id/:run_id/stop"
#### Response
{
"success": true
}
Was this page helpful? Yes No
## Looking for More Help?
Have questions or need more information?
You can reach us via the following channels:
- [Email us](https://testingbot.com/contact/new)
- [Join our Slack Channel](https://join.slack.com/t/testingb0t/shared_invite/zt-3bcw9xch-jk19~6XPs_xBrsAgAedkCw)
---
URL: https://testingbot.com/support/app-automate/maestro/options
# Maestro Test Options
When running Maestro tests on TestingBot, you can customize the test execution using various options. These options are passed when [starting a test run](https://testingbot.com/support/app-automate/maestro/api#run) via the API.
Options are organized into two categories:
- **maestroOptions** : Options specific to Maestro execution (version, environment variables, flows, tags)
- **capabilities** : Device and test configuration options (device, orientation, locale, network, etc.)
## Quick Reference
All available options at a glance:
#### Maestro Options
| Option | Type | Description |
| --- | --- | --- |
| `version` | string | Maestro CLI version to use (e.g., "2.0.10") |
| `flows` | array | Specific flow files to run (e.g., ["login.yml", "checkout.yml"]) |
| `env` | object | Environment variables to pass to flows |
| `includeTags` | array | Only run flows with these tags |
| `excludeTags` | array | Skip flows with these tags |
| `shardSplit` | number | Split flows across N parallel sessions |
| `commitSha` | string | Git commit SHA for CI/CD tracking |
| `pullRequestId` | string | Pull request ID for CI/CD tracking |
| `repoName` | string | Repository name (e.g., GitHub repo slug) |
| `repoOwner` | string | Repository owner (e.g., GitHub org or username) |
#### Capability Options
| Option | Type | Description |
| --- | --- | --- |
| `platformName` | string | Platform: "Android" or "iOS" (required) |
| `version` | string | OS version (required) |
| `deviceName` | string | Device name (required) |
| `name` | string | Test name shown in dashboard |
| `build` | string | Build name for grouping tests |
| `orientation` | string | "PORTRAIT" (default) or "LANDSCAPE" |
| `locale` | string | Device locale (e.g., "en\_US", "de\_DE") |
| `timeZone` | string | Device timezone (e.g., "America/New\_York") |
| `throttle_network` | string | Network preset: "Edge", "3G", "4G", "airplane" |
| `testingbot.geoCountryCode` | string | Route traffic through specific country (ISO code) |
## Set Maestro Version
By default, TestingBot runs your Maestro flows with the latest version of the Maestro CLI.
[CLI](https://testingbot.com#)[cURL](https://testingbot.com#)
testingbot maestro app.apk ./flows \
--device "Pixel 8" \
--deviceVersion "14" \
--maestro-version "2.0.10"
If you need a specific version for compatibility, specify the `version` option in `maestroOptions`.
| Option | Type | Example |
| --- | --- | --- |
| `maestroOptions.version` | string | "2.0.10" |
curl -u api_key:api_secret \
-X POST "https://api.testingbot.com/v1/app-automate/maestro/:id/run" \
-d '{
"maestroOptions": {
"version": "2.0.10"
},
"capabilities": [{
"platformName": "Android",
"version": "14",
"deviceName": "Pixel 8"
}]
}' \
-H "Content-Type: application/json"
Replace `:id` with your project ID from the [app upload](https://testingbot.com/support/app-automate/maestro/api#uploadApp).
## Select Specific Flows
By default, TestingBot runs all flow files in your zip archive. To run only specific flows, use the option below.
#### Use Cases
- Run a subset of flows for faster feedback during development
- Execute specific test scenarios without modifying your test suite
- Re-run failed flows without running the entire suite
[CLI](https://testingbot.com#)[cURL](https://testingbot.com#)
With the CLI, you specify flows directly as arguments:
# Run specific flow files
testingbot maestro app.apk login.yml checkout.yml --device "Pixel 8"
# Run flows from a specific directory
testingbot maestro app.apk ./flows/smoke --device "Pixel 8"
# Mix directories and individual files
testingbot maestro app.apk ./flows/smoke login.yml --device "Pixel 8"
| Option | Type | Example |
| --- | --- | --- |
| `maestroOptions.flows` | array of strings | `["login.yml", "checkout.yml"]` |
curl -u api_key:api_secret \
-X POST "https://api.testingbot.com/v1/app-automate/maestro/:id/run" \
-d '{
"maestroOptions": {
"flows": ["login.yml", "checkout.yml"]
},
"capabilities": [{
"platformName": "Android",
"version": "14",
"deviceName": "Pixel 8"
}]
}' \
-H "Content-Type: application/json"
## Environment Variables
Pass environment variables to your Maestro flows using the `env` option. This is useful for configuration that varies between environments (staging, production) or for sensitive data like API keys.
#### Use Cases
- **Environment-specific URLs** : Point to staging or production backends
- **Test credentials** : Pass login credentials securely via CI/CD
- **Feature flags** : Enable or disable features during tests
- **App identifiers** : Specify package names or bundle IDs dynamically
[CLI](https://testingbot.com#)[cURL](https://testingbot.com#)
Use the `-e` or `--env` flag (can be repeated):
testingbot maestro app.apk ./flows --device "Pixel 8" \
-e API_URL=https://staging.example.com \
-e TEST_USER=testuser@example.com \
-e TEST_PASSWORD=secret123
| Option | Type | Example |
| --- | --- | --- |
| `maestroOptions.env` | object | `{"API_URL": "https://staging.example.com"}` |
curl -u api_key:api_secret \
-X POST "https://api.testingbot.com/v1/app-automate/maestro/:id/run" \
-d '{
"maestroOptions": {
"env": {
"API_URL": "https://staging.example.com",
"TEST_USER": "testuser@example.com",
"TEST_PASSWORD": "secret123"
}
},
"capabilities": [{
"platformName": "Android",
"version": "14",
"deviceName": "Pixel 8"
}]
}' \
-H "Content-Type: application/json"
#### Using Variables in Your Flows
Reference environment variables in your Maestro flow files using the `${VARIABLE_NAME}` syntax:
appId: com.example.app
---
- launchApp
- inputText:
text: "${TEST_USER}"
- tapOn: "Next"
- inputText:
text: "${TEST_PASSWORD}"
- tapOn: "Login"
**Best Practice:** Never commit sensitive values like passwords or API keys to your repository. Pass them as environment variables through your CI/CD pipeline.
## Include Tags
Run only flows that have specific tags. This is equivalent to Maestro's `--include-tags` option.
#### Adding Tags to Flows
Add tags to your flow files using the `tags` property:
appId: com.example.app
tags:
- smoke
- login
---
- launchApp
- tapOn: "Login"
[CLI](https://testingbot.com#)[cURL](https://testingbot.com#)
Use the `--include-tags` flag with comma-separated tags:
testingbot maestro app.apk ./flows --device "Pixel 8" \
--include-tags "smoke,critical"
| Option | Type | Example |
| --- | --- | --- |
| `maestroOptions.includeTags` | array of strings | `["smoke", "critical"]` |
curl -u api_key:api_secret \
-X POST "https://api.testingbot.com/v1/app-automate/maestro/:id/run" \
-d '{
"maestroOptions": {
"includeTags": ["smoke", "critical"]
},
"capabilities": [{
"platformName": "Android",
"version": "14",
"deviceName": "Pixel 8"
}]
}' \
-H "Content-Type: application/json"
## Exclude Tags
Skip flows that have specific tags. This is equivalent to Maestro's `--exclude-tags` option.
#### Use Cases
- Skip slow tests during development for faster feedback
- Exclude known flaky tests from CI pipelines
- Skip platform-specific tests (e.g., exclude "ios-only" when running on Android)
[CLI](https://testingbot.com#)[cURL](https://testingbot.com#)
Use the `--exclude-tags` flag with comma-separated tags:
testingbot maestro app.apk ./flows --device "Pixel 8" \
--exclude-tags "slow,flaky"
| Option | Type | Example |
| --- | --- | --- |
| `maestroOptions.excludeTags` | array of strings | `["slow", "flaky"]` |
curl -u api_key:api_secret \
-X POST "https://api.testingbot.com/v1/app-automate/maestro/:id/run" \
-d '{
"maestroOptions": {
"excludeTags": ["slow", "flaky"]
},
"capabilities": [{
"platformName": "Android",
"version": "14",
"deviceName": "Pixel 8"
}]
}' \
-H "Content-Type: application/json"
## IP Geolocation
Test your app from different geographic locations using TestingBot's GeoIP feature. Traffic from the device will route through an IP address in the specified country.
#### Use Cases
- Test geo-restricted content or features
- Verify location-based pricing or currency display
- Test localized content delivery
[CLI](https://testingbot.com#)[cURL](https://testingbot.com#)
testingbot maestro app.zip ./flows \
--platform iOS \
--device "iPhone 15" \
--deviceVersion "17.2" \
--geo-country-code "DE"
| Option | Type | Example |
| --- | --- | --- |
| `testingbot.geoCountryCode` | string (ISO code) | `"DE", "US", "JP"` |
curl -u api_key:api_secret \
-X POST "https://api.testingbot.com/v1/app-automate/maestro/:id/run" \
-d '{
"capabilities": [{
"platformName": "iOS",
"version": "17.2",
"deviceName": "iPhone 15",
"testingbot.geoCountryCode": "DE"
}]
}' \
-H "Content-Type: application/json"
See the full list of [available country codes](https://testingbot.com/support/web-automate/selenium/test-options#geo).
## Network Throttling
Simulate different network conditions to test how your app performs under various connectivity scenarios.
| Option | Type | Example |
| --- | --- | --- |
| `throttle_network` | string | "4G", "3G", "Edge", "airplane" |
#### Network Presets
| Preset | Download | Upload | Latency | Use Case |
| --- | --- | --- | --- | --- |
| `4G` | 18 Mbps | 9 Mbps | 100ms | Standard mobile connection |
| `3G` | 400 Kbps | 100 Kbps | 100ms | Slower mobile network |
| `Edge` | 250 Kbps | 150 Kbps | 300ms | Poor connectivity areas |
| `airplane` | 0 | 0 | - | No connectivity (offline mode) |
| `disable` | - | - | - | Restore full connectivity |
[CLI](https://testingbot.com#)[cURL](https://testingbot.com#)
testingbot maestro app.zip ./flows \
--platform iOS \
--device "iPhone 15" \
--deviceVersion "17.2" \
--throttle-network "3G"
curl -u api_key:api_secret \
-X POST "https://api.testingbot.com/v1/app-automate/maestro/:id/run" \
-d '{
"capabilities": [{
"platformName": "iOS",
"version": "17.2",
"deviceName": "iPhone 15",
"throttle_network": "3G"
}]
}' \
-H "Content-Type: application/json"
## Test Name
Set a custom name for your test that appears in the TestingBot dashboard. This makes it easier to identify specific test runs.
| Option | Type | Example |
| --- | --- | --- |
| `name` | string | "Login Flow - Smoke Test" |
[CLI](https://testingbot.com#)[cURL](https://testingbot.com#)
testingbot maestro app.zip ./flows \
--platform iOS \
--device "iPhone 15" \
--deviceVersion "17.2" \
--name "Login Flow - Smoke Test"
curl -u api_key:api_secret \
-X POST "https://api.testingbot.com/v1/app-automate/maestro/:id/run" \
-d '{
"capabilities": [{
"platformName": "iOS",
"version": "17.2",
"deviceName": "iPhone 15",
"name": "Login Flow - Smoke Test"
}]
}' \
-H "Content-Type: application/json"
## Build Grouping
Group multiple test runs under a single build name. This is useful for organizing tests that belong to the same CI/CD pipeline run or release version.
| Option | Type | Example |
| --- | --- | --- |
| `build` | string | "Release 2.5.0" |
#### Benefits
- View aggregated pass/fail statistics for all tests in a build
- Track test results across different device configurations
- Easily identify which builds introduced failures
[CLI](https://testingbot.com#)[cURL](https://testingbot.com#)
testingbot maestro app.ipa ./flows \
--platform iOS \
--device "iPhone 17" \
--real-device \
--build "Release 2.5.0"
curl -u api_key:api_secret \
-X POST "https://api.testingbot.com/v1/app-automate/maestro/:id/run" \
-d '{
"capabilities": [{
"platformName": "iOS",
"version": "26.0",
"deviceName": "iPhone 17",
"realDevice": true,
"build": "Release 2.5.0"
}]
}' \
-H "Content-Type: application/json"
## Shard Split
Group your Maestro flows into chunks, which will run across multiple parallel sessions for faster execution. For example you have 3 parallel slots and 9 tests, but you want to split this test suite into 3 chunks of tests and run them in parallel on connected devices, then you would use `shardSplit` set to 3.
| Option | Type | Example |
| --- | --- | --- |
| `shardSplit` | number | 1 |
[CLI](https://testingbot.com#)[cURL](https://testingbot.com#)
# Split flows across 3 parallel sessions - without this each flow would run in its own session
testingbot maestro app.apk ./flows \
--device "Pixel 8" \
--deviceVersion "14" \
--shard-split 3
curl -u api_key:api_secret \
-X POST "https://api.testingbot.com/v1/app-automate/maestro/:id/run" \
-d '{
"shardSplit": 3,
"capabilities": [{
"platformName": "Android",
"version": "14",
"deviceName": "Pixel 8"
}]
}' \
-H "Content-Type: application/json"
## CI/CD Integration
Pass Git and repository metadata to associate test runs with specific commits and pull requests. This information appears in the TestingBot dashboard and can be used for tracking and debugging.
| Option | Type | Description |
| --- | --- | --- |
| `commitSha` | string | Git commit SHA associated with this test run |
| `pullRequestId` | string | Pull request ID this test run originated from |
| `repoName` | string | Repository name (e.g., GitHub repo slug) |
| `repoOwner` | string | Repository owner (e.g., GitHub organization or username) |
[CLI](https://testingbot.com#)[cURL](https://testingbot.com#)
# Pass Git metadata for CI/CD tracking
testingbot maestro app.apk ./flows \
--device "Pixel 8" \
--deviceVersion "14" \
--commit-sha "abc123def456" \
--pull-request-id "42" \
--repo-owner "myorg" \
--repo-name "myapp"
#### GitHub Actions Example
testingbot maestro app.apk ./flows \
--device "Pixel 8" \
--commit-sha "${{ github.sha }}" \
--pull-request-id "${{ github.event.pull_request.number }}" \
--repo-owner "${{ github.repository_owner }}" \
--repo-name "${{ github.event.repository.name }}"
curl -u api_key:api_secret \
-X POST "https://api.testingbot.com/v1/app-automate/maestro/:id/run" \
-d '{
"meta": {
"commitSha": "abc123def456",
"pullRequestId": "42",
"repoName": "myapp",
"repoOwner": "myorg"
},
"capabilities": [{
"platformName": "Android",
"version": "14",
"deviceName": "Pixel 8"
}]
}' \
-H "Content-Type: application/json"
## Device Orientation
Set the device orientation at the start of your test.
| Option | Type | Values | Default |
| --- | --- | --- | --- |
| `orientation` | string | `"PORTRAIT", "LANDSCAPE"` | PORTRAIT |
[CLI](https://testingbot.com#)[cURL](https://testingbot.com#)
testingbot maestro app.apk ./flows \
--device "Pixel 8" \
--deviceVersion "14" \
--orientation LANDSCAPE
curl -u api_key:api_secret \
-X POST "https://api.testingbot.com/v1/app-automate/maestro/:id/run" \
-d '{
"capabilities": [{
"platformName": "Android",
"version": "14",
"deviceName": "Pixel 8",
"orientation": "LANDSCAPE"
}]
}' \
-H "Content-Type: application/json"
## Device Timezone
Set the device timezone for your test. Useful for testing time-sensitive features.
| Option | Type | Example |
| --- | --- | --- |
| `timeZone` | string (IANA) | `"America/New_York", "Europe/London", "Asia/Tokyo"` |
[CLI](https://testingbot.com#)[cURL](https://testingbot.com#)
testingbot maestro app.zip ./flows \
--platform iOS \
--device "iPhone 15" \
--deviceVersion "17.2" \
--timezone "America/New_York"
curl -u api_key:api_secret \
-X POST "https://api.testingbot.com/v1/app-automate/maestro/:id/run" \
-d '{
"capabilities": [{
"platformName": "iOS",
"version": "17.2",
"deviceName": "iPhone 15",
"timeZone": "America/New_York"
}]
}' \
-H "Content-Type: application/json"
See the [full list of timezone identifiers](https://en.wikipedia.org/wiki/List_of_tz_database_time_zones).
## Device Locale
Set the device locale to test localized content and formatting. The locale affects language, date formats, number formats, and currency display.
| Option | Type | Format | Example |
| --- | --- | --- | --- |
| `locale` | string | language\_COUNTRY | `"de_DE", "fr_CA", "ja_JP"` |
[CLI](https://testingbot.com#)[cURL](https://testingbot.com#)
testingbot maestro app.zip ./flows \
--platform iOS \
--device "iPhone 15" \
--deviceVersion "17.2" \
--device-locale "de_DE"
curl -u api_key:api_secret \
-X POST "https://api.testingbot.com/v1/app-automate/maestro/:id/run" \
-d '{
"capabilities": [{
"platformName": "iOS",
"version": "17.2",
"deviceName": "iPhone 15",
"locale": "de_DE"
}]
}' \
-H "Content-Type: application/json"
#### Common Locale Codes
| Region | Locale Code |
| --- | --- |
| English (US) | `en_US` |
| English (UK) | `en_GB` |
| German (Germany) | `de_DE` |
| French (France) | `fr_FR` |
| French (Canada) | `fr_CA` |
| Spanish (Spain) | `es_ES` |
| Spanish (Mexico) | `es_MX` |
| Japanese | `ja_JP` |
| Chinese (Simplified) | `zh_CN` |
| Chinese (Traditional) | `zh_TW` |
| Korean | `ko_KR` |
| Portuguese (Brazil) | `pt_BR` |
| Italian | `it_IT` |
| Dutch | `nl_NL` |
| Russian | `ru_RU` |
| Arabic | `ar_SA` |
| Hindi | `hi_IN` |
## Maestro config.yaml
You can include a `config.yaml` file in your [Maestro flows zip file](https://testingbot.com/support/app-automate/maestro#uploadSuite). This configuration file lets you define options that apply to all your flows.
#### Supported config.yaml Options
| Option | Description |
| --- | --- |
| `includeTags` | Only run flows with these tags |
| `excludeTags` | Skip flows with these tags |
| `env` | Environment variables available in all flows |
#### Example config.yaml
env:
API_URL: https://api.example.com
DEBUG: "true"
includeTags:
- smoke
- critical
## TestingBot Tunnel
Use [TestingBot Tunnel](https://testingbot.com/support/tunnel) to allow your app to access private or staging backend servers during tests.
#### Use Cases
- Test against staging APIs not accessible from the public internet
- Access localhost services running on your machine
- Test with private databases or internal services
When a TestingBot Tunnel is active on your account, Maestro tests automatically route traffic through it. No additional configuration is needed.
To start a tunnel, download and run the [TestingBot Tunnel](https://testingbot.com/support/tunnel) client before starting your tests.
## CLI Reference
When using the [TestingBot CLI](https://testingbot.com/support/app-automate/maestro#cli), these options are available as command-line flags:
#### Device Options
| CLI Option | Description |
| --- | --- |
| `--device ` | Device name (e.g., "Pixel 9", "iPhone 16") |
| `--platform ` | Platform: Android or iOS |
| `--deviceVersion ` | OS version (e.g., "14", "17.2") |
| `--real-device` | Use a real device instead of emulator/simulator |
| `--orientation ` | Screen orientation: PORTRAIT or LANDSCAPE |
| `--device-locale ` | Device locale (e.g., "en\_US", "de\_DE") |
| `--timezone ` | Timezone (e.g., "America/New\_York") |
#### Test Configuration
| CLI Option | Description |
| --- | --- |
| `--name ` | Test name for dashboard identification |
| `--build ` | Build identifier for grouping test runs |
| `--include-tags ` | Only run flows with these tags (comma-separated) |
| `--exclude-tags ` | Exclude flows with these tags (comma-separated) |
| `-e, --env ` | Environment variable for flows (can be repeated) |
| `--maestro-version ` | Maestro version to use (e.g., "2.0.10") |
| `--shard-split ` | Split flows into N chunks, each chunk running on a separate device |
#### CI/CD Integration
| CLI Option | Description |
| --- | --- |
| `--commit-sha ` | Git commit SHA associated with this test run |
| `--pull-request-id ` | Pull request ID this test run originated from |
| `--repo-name ` | Repository name (e.g., GitHub repo slug) |
| `--repo-owner ` | Repository owner (e.g., GitHub organization or username) |
#### Network & Location
| CLI Option | Description |
| --- | --- |
| `--throttle-network ` | Network throttling: 4G, 3G, Edge, airplane, or disable |
| `--geo-country-code ` | Geographic IP location (ISO country code, e.g., "US", "DE") |
#### Output Options
| CLI Option | Description |
| --- | --- |
| `--async` | Start tests and exit without waiting for results |
| `-q, --quiet` | Suppress progress output |
| `--report ` | Download report after completion: html or junit |
| `--report-output-dir ` | Directory to save reports |
| `--download-artifacts` | Download test artifacts (logs, screenshots, video) |
| `--artifacts-output-dir ` | Directory to save artifacts zip |
#### Advanced Options
| CLI Option | Description |
| --- | --- |
| `--ignore-checksum-check` | Skip checksum verification and always upload the app |
Was this page helpful? Yes No
## Looking for More Help?
Have questions or need more information?
You can reach us via the following channels:
- [Email us](https://testingbot.com/contact/new)
- [Join our Slack Channel](https://join.slack.com/t/testingb0t/shared_invite/zt-3bcw9xch-jk19~6XPs_xBrsAgAedkCw)
---
URL: https://testingbot.com/support/app-automate/espresso
# Espresso Testing
TestingBot provides access to Android physical devices and Android emulators, capable of running your Android Espresso tests.
[Espresso](https://developer.android.com/training/testing/espresso) is a mobile automation framework from Google, designed to run UI tests for Android applications.
Using Espresso in combination with TestingBot's Android cloud service is very straightforward:
- Upload your native mobile Android app, together with the Espresso test apk file. These are created with either Java or Kotlin.
- Specify on which devices you want to run the Espresso tests.
- Retrieve the results of the Espresso tests.
## Getting Started
To get started, please follow the steps below:
1. You will need a `key` and `secret` to connect to the TestingBot grid.
These credentials are available in the [TestingBot member area](https://testingbot.com/members).
2. Espresso tests require a separate `apk` file for testing. So you will need to upload both the app (`.apk` or `.aab` file) and the test file (`.apk`).
You can also use the [TestingBot Espresso Demo App](https://github.com/testingbot/android-espresso-demo-app) to give the Espresso Cloud Testing functionality a try.
## TestingBot CLI
The easiest way to run Espresso tests on TestingBot is using our CLI tool. It handles uploading your app, test APK, and running tests in a single command.
### Installation
npm install -g @testingbot/cli
### Authentication
Authenticate using this command:
testingbot login
This opens your browser for authentication. After logging in, your credentials are saved to `~/.testingbot` and you can start using the CLI.
#### Other Authentication Methods
- **Command-line options** : `--api-key` and `--api-secret`
- **Environment variables** : `TB_KEY` and `TB_SECRET`
- **Config file** : Create `~/.testingbot` with content `key:secret`
### Quick Start
Run Espresso tests with a single command:
testingbot espresso app.apk app-test.apk --device "Pixel 8" --platform-version "14"
testingbot espresso app.apk app-test.apk --device "Samsung Galaxy S24" --real-device
The CLI will:
1. Upload your app APK to TestingBot
2. Upload your test APK
3. Start the test run
4. Show real-time progress and results
## Upload Android App
To run Android Espresso tests on TestingBot, you will first have to upload your `.apk` or `.aab` file to TestingBot Storage.
[CLI](https://testingbot.com#)[cURL](https://testingbot.com#)
When using the CLI, the app upload is handled automatically as part of the `testingbot espresso` command. Simply specify your app APK file as the first argument:
testingbot espresso /path/to/app/Application-debug.apk /path/to/test/Application-debug-test.apk --device "Pixel 8"
Alternatively, you can use the `--app` option:
testingbot espresso --app /path/to/app/Application-debug.apk --test-app /path/to/test/Application-debug-test.apk --device "Pixel 8"
curl -u api_key:api_secret \
-X POST "https://api.testingbot.com/v1/app-automate/espresso/app" \
-F "file=@/path/to/app/file/Application-debug.apk"
The API response will include an `id` response, which you can use in the other API calls.
{
"id": 4012
}
## Upload Espresso Test Suite
You can now upload the `.apk` file containing the Espresso tests.
The upload process is similar to the [app upload](https://testingbot.com#upload) process.
[CLI](https://testingbot.com#)[cURL](https://testingbot.com#)
When using the CLI, the test APK upload is handled automatically. Specify your test APK as the second argument:
testingbot espresso app.apk app-test.apk --device "Pixel 8"
Or use the `--test-app` option:
testingbot espresso --app app.apk --test-app app-test.apk --device "Pixel 8"
curl -u api_key:api_secret \
-X POST "https://api.testingbot.com/v1/app-automate/espresso/:id/tests" \
-F "file=@/path/to/app/file/Application-debug-test.apk"
Replace the `:id` with the identifier you received during the app upload call.
## Specify devices
You can specify one or more Android device capabilities with your API call.
These capabilities can target either Android emulators, or physical Android devices.
Android 16.0›Pixel 9
Loading environments...
Please wait while we load the available browsers and platforms.
We offer special parameters which you can use to allocate a device:
Regex Input | Result || `"Pixel.*"` | This will allocate any available Pixel device (phone) |
| `"*"` | This will allocate a random available Android device |
| `"Samsung [20-21]"` | This will allocate either an Samsung 20 or 21 |
Some Examples:
// find any Samsung Galaxy, except 23
-d '{"capabilities":[{"deviceName":"^(Galaxy.*)(?!23)$", "platformName":"Android", "realDevice": true}]}'
// find any device which name starts with Pixel
-d '{"capabilities":[{"deviceName":"Pixel.*", "platformName":"Android", "realDevice": true}]}'
### Tablet Only
You can specify the `tabletOnly` capability when you only want to allocate a tablet device.
### Phone Only
You can specify the `phoneOnly` capability when you only want to allocate a phone device.
-d '{"capabilities":[{"deviceName":"*", "tabletOnly": true, "platformName":"Android", "realDevice": true}]}'
-d '{"capabilities":[{"deviceName":"*", "phoneOnly": true, "platformName":"Android", "realDevice": true}]}'
## Run Espresso Tests
Now that you have uploaded both your Android application and the Espresso test suite, you can run your first Espresso test on the TestingBot cloud.
[CLI](https://testingbot.com#)[cURL](https://testingbot.com#)
Use the CLI to run tests with device selection options:
# Basic usage with device selection
testingbot espresso app.apk app-test.apk --device "Pixel 8" --platform-version "14"
# Real device
testingbot espresso app.apk app-test.apk --device "Samsung Galaxy S24" --real-device
# With test name and build identifier
testingbot espresso app.apk app-test.apk \
--device "Pixel 8" \
--platform-version "14" \
--name "Smoke Tests" \
--build "v2.1.0"
#### Device Options
| Option | Description |
| --- | --- |
| `--device ` | Device name (e.g., "Pixel 8", "Samsung.\*") |
| `--platform-version ` | Android version (e.g., "12", "13", "14") |
| `--real-device` | Use a real device instead of emulator |
| `--tablet-only` | Only allocate tablet devices |
| `--phone-only` | Only allocate phone devices |
#### Test Filtering
# Run specific test classes
testingbot espresso app.apk app-test.apk \
--device "Pixel 8" \
--class "com.example.LoginTest,com.example.HomeTest"
# Run tests with specific annotations
testingbot espresso app.apk app-test.apk \
--device "Pixel 8" \
--annotation "com.example.SmokeTest" \
--size "small,medium"
# Exclude specific test classes
testingbot espresso app.apk app-test.apk \
--device "Pixel 8" \
--not-class "com.example.SlowTest"
#### Test Filtering Options
| Option | Description |
| --- | --- |
| `--class ` | Run tests in specific classes (comma-separated fully qualified names) |
| `--not-class ` | Exclude tests in specific classes |
| `--package ` | Run tests in specific packages (comma-separated) |
| `--not-package ` | Exclude tests in specific packages |
| `--annotation ` | Run tests with specific annotations (comma-separated) |
| `--not-annotation ` | Exclude tests with specific annotations |
| `--size ` | Run tests by size: small, medium, large (comma-separated) |
#### Network & Location
# With network throttling and geolocation
testingbot espresso app.apk app-test.apk \
--device "Pixel 8" \
--throttle-network "3G" \
--geo-location "DE" \
--language "de"
curl -u api_key:api_secret \
-X POST "https://api.testingbot.com/v1/app-automate/espresso/:id/run" \
-d '{"capabilities":[{"platform":"ANDROID", "version":12, "deviceName":"Pixel 6", "platformName":"Android"}]}' \
-H "Content-Type: application/json"
Replace the `:id` with the identifier you received during the app upload call.
The API response will include a `success` response, indicating if the tests will start or if an error occurred.
{
"success": true
}
## View Espresso Test Results
You will now see a test appear in the [TestingBot dashboard](https://testingbot.com/members), together with a video, test logs and other metadata.
You can also use the CLI or an API call to get the results from the run(s):
[CLI](https://testingbot.com#)[cURL](https://testingbot.com#)
By default, the CLI waits for test completion and displays real-time progress:
testingbot espresso app.apk app-test.apk --device "Pixel 8"
The CLI will show:
- Upload progress for app and test APK
- Device allocation status
- Live output from Espresso tests
- Final pass/fail status
#### Async Mode
Use `--async` to start tests without waiting for results:
testingbot espresso app.apk app-test.apk --device "Pixel 8" --async
#### Download JUnit Report
Download the JUnit report after test completion:
testingbot espresso app.apk app-test.apk --device "Pixel 8" \
--report junit \
--report-output-dir ./reports
curl -u api_key:api_secret \
"https://api.testingbot.com/v1/app-automate/espresso/:id"
Replace the `:id` with the identifier you received during the app upload call.
The API response will include a response indicating the current state of the Espresso test results.
{
"runs": [
{
"status": "DONE",
"capabilities": {
"version": "12",
"deviceName": "Pixel 6",
"platformName": "Android"
},
"success": false,
"test": {
"sessionId": "30f6eild082c3-804f3c0ec2df-a18b2d431ffb-169920992163-48455547",
"environment": {
"name": "chrome",
"os": "Pixel 6 - 12.0",
"version": "12.0"
}
}
}
],
"version": "1.0"
}
Was this page helpful? Yes No
## Looking for More Help?
Have questions or need more information?
You can reach us via the following channels:
- [Email us](https://testingbot.com/contact/new)
- [Join our Slack Channel](https://join.slack.com/t/testingb0t/shared_invite/zt-3bcw9xch-jk19~6XPs_xBrsAgAedkCw)
---
URL: https://testingbot.com/support/app-automate/espresso/instrumentation
# Espresso Instrumentation Logs
Instrumentation logs are logs generated by Android Espresso. These logs list all the steps that were performed during the test, with any errors or meta data available from the Android Espresso test runner (usually `AndroidJUnitRunner`).
These logs are available in the [TestingBot dashboard](https://testingbot.com/members) as well as through the [REST API](https://testingbot.com/support/api).
Was this page helpful? Yes No
## Looking for More Help?
Have questions or need more information?
You can reach us via the following channels:
- [Email us](https://testingbot.com/contact/new)
- [Join our Slack Channel](https://join.slack.com/t/testingb0t/shared_invite/zt-3bcw9xch-jk19~6XPs_xBrsAgAedkCw)
---
URL: https://testingbot.com/support/app-automate/espresso/filter
# Filter Espresso Test Cases
By default, TestingBot will execute all tests present in the Espresso `.apk`.
The Espresso test runner (which is usually **AndroidJUnitRunner** ) provides multiple options to filter test cases for execution.
You might want to use these filter options for specific use cases, such as:
- Run only specific tests for a bugfix.
- Only run a subset of tests, for quick smoke testing. Instead of waiting on all your Espresso tests.
- Run specific tests for specific environments (production, staging, ...)
Below you'll find the different filter options that TestingBot and Espresso provide.
- [class](https://testingbot.com#class): will run all tests in a specific class
- [notClass](https://testingbot.com#notClass): will run all tests except the tests in a particular class
- [size](https://testingbot.com#size): will run a specific test size annotated with `SmallTest`, `MediumTest` or `LargeTest`
- [package](https://testingbot.com#package): will run all tests in a specific Java package
- [notPackage](https://testingbot.com#notPackage): will run all tests except the tests in a specific package
- [annotation](https://testingbot.com#annotation): will run all tests with a specific annotation
- [notAnnotation](https://testingbot.com#notAnnotation): will run all tests except the tests with a specific annotation
- [numShards](https://testingbot.com#shards): filter test run to a shard of all tests, where numShards is an integer greater than 0 and shardIndex is an integer between 0 (inclusive) and numShards
## class Filter
To only run Espresso tests for a specific `class`, you can use the class option.
You can pass a list of fully qualified Java class names. See the example below.
[CLI](https://testingbot.com#)[cURL](https://testingbot.com#)
testingbot espresso app.apk app-test.apk \
--device "Pixel 6" \
--platform-version "12" \
--class "com.android.app.one,com.android.app.two"
This will start an Espresso test session on the specified device and only run tests for the classes specified.
curl -u api_key:api_secret \
-X POST "https://api.testingbot.com/v1/app-automate/espresso/:id/run" \
-d '{ "espressoOptions": { "class": ["com.android.app.one", "com.android.app.two"] }, "capabilities":[{"platform":"ANDROID", "version":12, "deviceName":"Pixel 6", "platformName":"Android"}]}' \
-H "Content-Type: application/json"
This call with start an Espresso test Session on the specific device and only run the Espresso tests for the classNames specified.
## notClass Filter
Use the `notClass` option to run all Espresso tests except for the tests in the classes specified with this option.
You can pass a list of fully qualified Java class names. See the example below.
[CLI](https://testingbot.com#)[cURL](https://testingbot.com#)
testingbot espresso app.apk app-test.apk \
--device "Pixel 6" \
--platform-version "12" \
--not-class "com.android.app.one,com.android.app.two"
curl -u api_key:api_secret \
-X POST "https://api.testingbot.com/v1/app-automate/espresso/:id/run" \
-d '{ "espressoOptions": { "notClass": ["com.android.app.one", "com.android.app.two"] }, "capabilities":[{"platform":"ANDROID", "version":12, "deviceName":"Pixel 6", "platformName":"Android"}]}' \
-H "Content-Type: application/json"
## size Filter
The `size` option allows you to specify which tests you want to run, depending on the annotated size: `SmallTest`, `MediumTest` or `LargeTest`
You can pass an array of sizes, see below for an example.
[CLI](https://testingbot.com#)[cURL](https://testingbot.com#)
testingbot espresso app.apk app-test.apk \
--device "Pixel 6" \
--platform-version "12" \
--size "small,medium"
curl -u api_key:api_secret \
-X POST "https://api.testingbot.com/v1/app-automate/espresso/:id/run" \
-d '{ "espressoOptions": { "size": ["small", "medium"] }, "capabilities":[{"platform":"ANDROID", "version":12, "deviceName":"Pixel 6", "platformName":"Android"}]}' \
-H "Content-Type: application/json"
## package Filter
The `package` filter allows you to specify for which package the Espresso tests should run.
You can pass an array of packages, see below for an example.
[CLI](https://testingbot.com#)[cURL](https://testingbot.com#)
testingbot espresso app.apk app-test.apk \
--device "Pixel 6" \
--platform-version "12" \
--package "com.android.one,com.android.two"
curl -u api_key:api_secret \
-X POST "https://api.testingbot.com/v1/app-automate/espresso/:id/run" \
-d '{ "espressoOptions": { "package": ["com.android.one", "com.android.two"] }, "capabilities":[{"platform":"ANDROID", "version":12, "deviceName":"Pixel 6", "platformName":"Android"}]}' \
-H "Content-Type: application/json"
## notPackage Filter
The `notPackage` filter allows you to indicate that Espresso tests should run for everything except for the packages defined.
You can pass an array of packages, see below for an example.
[CLI](https://testingbot.com#)[cURL](https://testingbot.com#)
testingbot espresso app.apk app-test.apk \
--device "Pixel 6" \
--platform-version "12" \
--not-package "com.android.one,com.android.two"
curl -u api_key:api_secret \
-X POST "https://api.testingbot.com/v1/app-automate/espresso/:id/run" \
-d '{ "espressoOptions": { "notPackage": ["com.android.one", "com.android.two"] }, "capabilities":[{"platform":"ANDROID", "version":12, "deviceName":"Pixel 6", "platformName":"Android"}]}' \
-H "Content-Type: application/json"
## annotation Filter
The `annotation` filter will run tests annotated with the field (or fields) you specified.
You can pass an array of annotations, see below for an example.
[CLI](https://testingbot.com#)[cURL](https://testingbot.com#)
testingbot espresso app.apk app-test.apk \
--device "Pixel 6" \
--platform-version "12" \
--annotation "com.android.foo.MyAnnotation,com.android.foo.MyAnnotationTwo"
curl -u api_key:api_secret \
-X POST "https://api.testingbot.com/v1/app-automate/espresso/:id/run" \
-d '{ "espressoOptions": { "annotation": ["com.android.foo.MyAnnotation", "com.android.foo.MyAnnotationTwo"] }, "capabilities":[{"platform":"ANDROID", "version":12, "deviceName":"Pixel 6", "platformName":"Android"}]}' \
-H "Content-Type: application/json"
## notAnnotation Filter
The `notAnnotation` filter will run all tests except those annotated with the field (or fields) you specified.
You can pass an array of notAnnotations, see below for an example.
[CLI](https://testingbot.com#)[cURL](https://testingbot.com#)
testingbot espresso app.apk app-test.apk \
--device "Pixel 6" \
--platform-version "12" \
--not-annotation "com.android.foo.MyAnnotation,com.android.foo.MyAnnotationTwo"
curl -u api_key:api_secret \
-X POST "https://api.testingbot.com/v1/app-automate/espresso/:id/run" \
-d '{ "espressoOptions": { "notAnnotation": ["com.android.foo.MyAnnotation", "com.android.foo.MyAnnotationTwo"] }, "capabilities":[{"platform":"ANDROID", "version":12, "deviceName":"Pixel 6", "platformName":"Android"}]}' \
-H "Content-Type: application/json"
Was this page helpful? Yes No
## Looking for More Help?
Have questions or need more information?
You can reach us via the following channels:
- [Email us](https://testingbot.com/contact/new)
- [Join our Slack Channel](https://join.slack.com/t/testingb0t/shared_invite/zt-3bcw9xch-jk19~6XPs_xBrsAgAedkCw)
---
URL: https://testingbot.com/support/app-automate/espresso/options
# Set Espresso Test Runner
By default, TestingBot will run your Espresso tests with `${packageName}/androidx.test.runner.AndroidJUnitRunner`.
If you have defined your own `testInstrumentationRunner`, you can pass this custom runner during the start Espresso call:
[CLI](https://testingbot.com#)[cURL](https://testingbot.com#)
testingbot espresso app.apk app-test.apk \
--device "Pixel 6" \
--platform-version "12" \
--test-runner "${packageName}/customTestRunner"
curl -u api_key:api_secret \
-X POST "https://api.testingbot.com/v1/app-automate/espresso/:id/run" \
-d '{ "espressoOptions": { "testRunner": "${packageName}/customTestRunner" }, "capabilities":[{"platform":"ANDROID", "version":12, "deviceName":"Pixel 6", "platformName":"Android"}]}' \
-H "Content-Type: application/json"
Replace the `:id` with the identifier you received during the app upload call.
Was this page helpful? Yes No
## Looking for More Help?
Have questions or need more information?
You can reach us via the following channels:
- [Email us](https://testingbot.com/contact/new)
- [Join our Slack Channel](https://join.slack.com/t/testingb0t/shared_invite/zt-3bcw9xch-jk19~6XPs_xBrsAgAedkCw)
---
URL: https://testingbot.com/support/app-automate/espresso/screenshots
# Capturing Espresso Screenshots
Espresso does not have a built-in way to capture screenshots during test automation. You can however achieve this by using two options:
- **Native Screenshot grabbing**
Use native Java or Kotlin code to take a screenshot of the device, and save it on the device.
Once the test is completed, you can fetch the image through `ADB`, or if you run it via TestingBot, the screenshot will appear on the [test result page](https://testingbot.com#view).
- **Using the Spoon library**
The [Square Screenshots feature](https://square.github.io/spoon/#screenshots) is part of the Spoon Library.
It will take screenshots during your Espresso tests, but only for Android devices with a version of Android 10 or lower.
[Using Native Screenshot](https://testingbot.com#)[Using Spoon Library](https://testingbot.com#)
1. **Add the native screenshots file to your project**
You can see the implementation of Native Screenshots in the [TestingBot Espresso Demo App](https://github.com/testingbot/android-espresso-demo-app/blob/main/app/src/androidTest/java/com/testingbot/calculator/NativeScreenshot.java).
package com.testingbot.calculator;
import android.graphics.Bitmap;
import android.os.Build;
import android.os.Environment;
import androidx.test.runner.screenshot.BasicScreenCaptureProcessor;
import androidx.test.runner.screenshot.ScreenCapture;
import androidx.test.runner.screenshot.Screenshot;
import java.io.File;
import java.io.IOException;
import java.util.regex.Pattern;
public final class NativeScreenshot {
private static String methodName;
private static String className;
private static final Pattern SCREENSHOT_NAME_VALIDATION = Pattern.compile("[a-zA-Z0-9_-]+");
private NativeScreenshot() {}
/**
* Captures screenshot using Androidx Screenshot library and stores in the filesystem.
* If there is any runtime exception while capturing screenshot, the method throws
* Exception and the test might fail if exception is not handled properly.
* @param screenshotName a screenshot identifier
* @return path to the screenshot file
*/
public static String capture(String screenshotName) {
StackTraceElement testClass = findTestClassTraceElement(Thread.currentThread().getStackTrace());
className = testClass.getClassName().replaceAll("[^A-Za-z0-9._-]", "_");
methodName = testClass.getMethodName();
EspressoScreenCaptureProcessor screenCaptureProcessor = new EspressoScreenCaptureProcessor();
if (!SCREENSHOT_NAME_VALIDATION.matcher(screenshotName).matches()) {
throw new IllegalArgumentException("ScreenshotName must match " + SCREENSHOT_NAME_VALIDATION.pattern() + ".");
} else {
ScreenCapture capture = Screenshot.capture();
capture.setFormat(Bitmap.CompressFormat.PNG);
capture.setName(screenshotName);
try {
return screenCaptureProcessor.process(capture);
} catch (IOException e) {
throw new RuntimeException("Unable to capture screenshot.", e);
}
}
}
/**
* Extracts the currently executing test's trace element based on the test runner
* or any framework being used.
* @param trace stacktrace of the currently running test
* @return StackTrace Element corresponding to the current test being executed.
*/
private static StackTraceElement findTestClassTraceElement(StackTraceElement[] trace) {
for(int i = trace.length - 1; i >= 0; --i) {
StackTraceElement element = trace[i];
if ("android.test.InstrumentationTestCase".equals(element.getClassName()) && "runMethod".equals(element.getMethodName())) {
return extractStackElement(trace, i);
}
if ("org.junit.runners.model.FrameworkMethod$1".equals(element.getClassName()) && "runReflectiveCall".equals(element.getMethodName())) {
return extractStackElement(trace, i);
}
if ("cucumber.runtime.model.CucumberFeature".equals(element.getClassName()) && "run".equals(element.getMethodName())) {
return extractStackElement(trace, i);
}
}
throw new IllegalArgumentException("Could not find test class!");
}
/**
* Based on the test runner or framework being used, extracts the exact traceElement.
* @param trace stacktrace of the currently running test
* @param i a reference index
* @return trace element based on the index passed
*/
private static StackTraceElement extractStackElement(StackTraceElement[] trace, int i) {
int testClassTraceIndex = Build.VERSION.SDK_INT >= 23 ? i - 2 : i - 3;
return trace[testClassTraceIndex];
}
private static class EspressoScreenCaptureProcessor extends BasicScreenCaptureProcessor {
private static final String SCREENSHOT = "screenshots";
EspressoScreenCaptureProcessor() {
File screenshotDir = new File(String.valueOf(Environment.getExternalStoragePublicDirectory(Environment.DIRECTORY_DOWNLOADS)), SCREENSHOT);
File classDir = new File(screenshotDir, className);
mDefaultScreenshotPath = new File(classDir, methodName);
}
/**
* Converts the filename to a standard path to be stored on device.
* Example: "post_addition" converts to "1648038895211_post_addition"
* which is later suffixed by the file extension i.e. png.
* @param filename a screenshot identifier
* @return custom filename format
*/
@Override
protected String getFilename(String filename) {
return System.currentTimeMillis() + "_" + filename;
}
}
}
2. **Modify your Espresso test scripts to take screenshots**
You can call the `NativeScreenshot.capture("tag")` method to capture screenshots in your Espresso tests.
The `tag` can be used to provide a name to the screenshot (usually you would use the testname for this).
@Test
public void ensureCalculatorWorks() {
onView(withId(R.id.buttonOne)).perform(click());
onView(withId(R.id.buttonAdd)).perform(click());
onView(withId(R.id.buttonTwo)).perform(click());
onView(withId(R.id.editText)).check(matches(withText("3")));
NativeScreenshot.capture(mainActivity, "ensureCalculatorWorks");
}
3. **Android 11 and higher**
For Android 11 and higher, make sure to add the following `RuleChain` to your Espresso test:
@Rule
public RuleChain screenshotRule = RuleChain
.outerRule(GrantPermissionRule.grant(Manifest.permission.WRITE_EXTERNAL_STORAGE, Manifest.permission.READ_EXTERNAL_STORAGE))
.around(activityScenarioRule);
1. **Add the required dependencies to your project**
See the [Spoon Documentation](https://github.com/square/spoon#download) on how to add Spoon to your project.
You can either use a `JAR` or use `Maven`.
2. **Change storage permissions**
If you do not yet have the `WRITE_EXTERNAL_STORAGE` permission in your `AndroidManifest.xml`, please add it.
It will allow Spoon to save the screenshots on your device.
...
If the targetSdk for your app is using Android 10 (level 29), please make sure to add `android:requestLegacyExternalStorage="true"` in the Application tag of your `AndroidManifest.xml` file.
3. **Modify your Espresso test scripts to take screenshots**
You can call the `Spoon.screenshot(activityName, tag)` method to capture screenshots in your Espresso tests.
The `tag` can be used to provide a name to the screenshot (usually you would use the testname for this).
@Test
public void ensureCalculatorWorks() {
onView(withId(R.id.buttonOne)).perform(click());
onView(withId(R.id.buttonAdd)).perform(click());
onView(withId(R.id.buttonTwo)).perform(click());
onView(withId(R.id.editText)).check(matches(withText("3")));
Spoon.screenshot(mainActivity, "ensureCalculatorWorks");
}
## Viewing Espresso Screenshots
The Espresso tests that you run on TestingBot will appear automatically in the TestingBot dashboard.
If screenshots were generated during the test, they will be added on the Espresso test result page.
Additionally, these screenshots will also be available for download through our [REST API](https://testingbot.com/support/api).
Was this page helpful? Yes No
## Looking for More Help?
Have questions or need more information?
You can reach us via the following channels:
- [Email us](https://testingbot.com/contact/new)
- [Join our Slack Channel](https://join.slack.com/t/testingb0t/shared_invite/zt-3bcw9xch-jk19~6XPs_xBrsAgAedkCw)
---
URL: https://testingbot.com/support/app-automate/espresso/set-ip-geolocation
# Use IP geolocation
TestingBot's GeoIP feature allows you to test your app from various parts of the world, by using IP addresses in [over 20 different countries](https://testingbot.com/support/web-automate/selenium/test-options#geo).
When you enable GeoIP, all traffic from your mobile Android app will originate from a specific IP address hosted in the country that you choose.
## GeoIP example
To use GeoIP, you can specify the geoIP option when starting an Espresso test.
Please see the example below where we specify that the app should connect via Germany.
[CLI](https://testingbot.com#)[cURL](https://testingbot.com#)
testingbot espresso app.apk app-test.apk \
--device "Pixel 6" \
--platform-version "12" \
--geo-location "DE"
The `DE` abbreviation is the ISO code of Germany. You can find other [GeoIP country codes](https://testingbot.com/support/web-automate/selenium/test-options#geo) to use.
curl -u api_key:api_secret \
-X POST "https://api.testingbot.com/v1/app-automate/espresso/:id/run" \
-d '{ "espressoOptions": { "geoLocation": "DE" }, "capabilities":[{"platform":"ANDROID", "version":12, "deviceName":"Pixel 6", "platformName":"Android"}]}' \
-H "Content-Type: application/json"
The `DE` abbreviation is the ISO code of Germany. You can find other [GeoIP country codes](https://testingbot.com/support/web-automate/selenium/test-options#geo) to use.
Was this page helpful? Yes No
## Looking for More Help?
Have questions or need more information?
You can reach us via the following channels:
- [Email us](https://testingbot.com/contact/new)
- [Join our Slack Channel](https://join.slack.com/t/testingb0t/shared_invite/zt-3bcw9xch-jk19~6XPs_xBrsAgAedkCw)
---
URL: https://testingbot.com/support/app-automate/espresso/set-localization-options
# Set localization options
With TestingBot you can run Android Espresso tests on a localized version of your Android app.
You can configure the language, locale and timezone of the remote device before running an Android Espresso test.
## Setting Language for Android Espresso Tests
You can test a localized version of your app with Android Espresso, by changing the language of the application under test.
You will need to specify a `language` option with the ISO code of the language you want to use.
[CLI](https://testingbot.com#)[cURL](https://testingbot.com#)
testingbot espresso app.apk app-test.apk \
--device "Pixel 6" \
--platform-version "12" \
--language "fr"
Use an [ISO 639-1 language code](https://en.wikipedia.org/wiki/List_of_ISO_639-1_codes) to set the language of your app.
Your app needs to be compiled with support for this language to notice a change.
curl -u api_key:api_secret \
-X POST "https://api.testingbot.com/v1/app-automate/espresso/:id/run" \
-d '{ "espressoOptions": { "language": "fr" }, "capabilities":[{"platform":"ANDROID", "version":12, "deviceName":"Pixel 6", "platformName":"Android"}]}' \
-H "Content-Type: application/json"
Use an [ISO 639-1 language code](https://en.wikipedia.org/wiki/List_of_ISO_639-1_codes) to set the language of your app.
Your app needs to be compiled with support for this language to notice a change.
## Set a locale for Android Espresso Testing
It is possible to set a locale, different than the default device's locale, with the `locale` parameter.
Please use the CA format (country name abbreviation). For example: `DE` for Germany.
[CLI](https://testingbot.com#)[cURL](https://testingbot.com#)
testingbot espresso app.apk app-test.apk \
--device "Pixel 6" \
--platform-version "12" \
--locale "DE"
curl -u api_key:api_secret \
-X POST "https://api.testingbot.com/v1/app-automate/espresso/:id/run" \
-d '{ "espressoOptions": { "locale": "DE" }, "capabilities":[{"platform":"ANDROID", "version":12, "deviceName":"Pixel 6", "platformName":"Android"}]}' \
-H "Content-Type: application/json"
## Change timezone for Android Espresso
It might be necessary during your tests to change the timezone to a different timezone than the default one on the device (UTC).
Please use a timezone format from the [list of timezones](https://en.wikipedia.org/wiki/List_of_tz_database_time_zones).
[CLI](https://testingbot.com#)[cURL](https://testingbot.com#)
testingbot espresso app.apk app-test.apk \
--device "Pixel 6" \
--platform-version "12" \
--timezone "America/New_York"
curl -u api_key:api_secret \
-X POST "https://api.testingbot.com/v1/app-automate/espresso/:id/run" \
-d '{ "espressoOptions": { "timeZone": "New_York" }, "capabilities":[{"platform":"ANDROID", "version":12, "deviceName":"Pixel 6", "platformName":"Android"}]}' \
-H "Content-Type: application/json"
Was this page helpful? Yes No
## Looking for More Help?
Have questions or need more information?
You can reach us via the following channels:
- [Email us](https://testingbot.com/contact/new)
- [Join our Slack Channel](https://join.slack.com/t/testingb0t/shared_invite/zt-3bcw9xch-jk19~6XPs_xBrsAgAedkCw)
---
URL: https://testingbot.com/support/app-automate/espresso/simulate-network-conditions
# Simulate Network Conditions
TestingBot allows you to test your mobile apps under various network conditions, including download speed, upload speed, packet loss and latency.
## Simulate network conditions using a predefined network profile
TestingBot provides a set of predefined network profiles which you can choose from.
Profile Name | Bandwidth down/up (kbps) | Packet Loss (%) | Latency (ms) || Edge | 250/150 | 0 | 300 |
| 3G | 400/100 | 0 | 100 |
| 4G | 18000/9000 | 0 | 100 |
| airplane | 0 | 100 | 0 |
[CLI](https://testingbot.com#)[cURL](https://testingbot.com#)
testingbot espresso app.apk app-test.apk \
--device "Pixel 6" \
--platform-version "12" \
--throttle-network "3G"
curl -u api_key:api_secret \
-X POST "https://api.testingbot.com/v1/app-automate/espresso/:id/run" \
-d '{ "espressoOptions": { "throttle_network": "3G" }, "capabilities":[{"platform":"ANDROID", "version":12, "deviceName":"Pixel 6", "platformName":"Android"}]}' \
-H "Content-Type: application/json"
## Simulate network conditions using a custom network profile
You can specify a custom set of parameters, including:
- Download rate (kbps)
- Upload rate (kbps)
- Packet loss (%)
- Latency (ms)
[CLI](https://testingbot.com#)[cURL](https://testingbot.com#)
The CLI supports predefined network profiles. For custom network profiles, use the cURL API directly.
# Predefined profiles: 4G, 3G, Edge, airplane
testingbot espresso app.apk app-test.apk \
--device "Pixel 6" \
--platform-version "12" \
--throttle-network "Edge"
curl -u api_key:api_secret \
-X POST "https://api.testingbot.com/v1/app-automate/espresso/:id/run" \
-d '{ "espressoOptions": { "throttle_network": { "uploadSpeed": 10240, "downloadSpeed": 10240, "latency": 0, "loss": 0 } }, "capabilities":[{"platform":"ANDROID", "version":12, "deviceName":"Pixel 6", "platformName":"Android"}]}' \
-H "Content-Type: application/json"
Was this page helpful? Yes No
## Looking for More Help?
Have questions or need more information?
You can reach us via the following channels:
- [Email us](https://testingbot.com/contact/new)
- [Join our Slack Channel](https://join.slack.com/t/testingb0t/shared_invite/zt-3bcw9xch-jk19~6XPs_xBrsAgAedkCw)
---
URL: https://testingbot.com/support/app-automate/espresso/test-reports
# Espresso Test Reports
TestingBot currently offers both test reports from inside the TestingBot member dashboard, or through REST-API where you can use a [JUnit formatted XML report](https://testingbot.com#junit).
## Dashboard Report
When you run Espresso Tests with TestingBot, you will find the test results, together with a video of the test, in the [TestingBot member dashboard](https://testingbot.com/members).
## API report
You can query the TestingBot API to fetch the result of the Espresso test run(s).
[CLI](https://testingbot.com#)[cURL](https://testingbot.com#)
By default, the CLI waits for test completion and displays results in real-time:
testingbot espresso app.apk app-test.apk --device "Pixel 6"
The CLI will show:
- Upload progress for app and test APK
- Device allocation status
- Live output from Espresso tests
- Final pass/fail status
Use `--async` to start tests without waiting for results:
testingbot espresso app.apk app-test.apk --device "Pixel 6" --async
curl -u api_key:api_secret \
"https://api.testingbot.com/v1/app-automate/espresso/:id/:run_id"
Replace the `:id` and `:run_id` with the identifiers you received during the app upload call and the run call.
You will get back a response similar to this one:
{"id":86,"created_at":"2023-11-05T18:45:51.000Z","status":"DONE","capabilities":{"version":"12","deviceName":"Pixel 6","platformName":"Android"},"success":false,"test":{"sessionId":"30f642d082c3-804f3c0ec2df-a18b2d431ffb-169920992163-48455547","environment":{"name":"chrome","os":"Pixel 6 - 12.0","version":"12.0"}},"version":"1.0"}
## JUnit XML report
You can query our API to fetch a JUnit XML report which you can use a post-build step in your CI/CD environment.
**Report Structure**
In the XML report, each session maps to a `testsuite` tag. Inside that tag, multiple `testcase` items are available, each mapping to a single Espresso test.
If a test failed, a `failure` or `error` tag will be available.
[CLI](https://testingbot.com#)[cURL](https://testingbot.com#)
Download the JUnit XML report after test completion:
testingbot espresso app.apk app-test.apk \
--device "Pixel 6" \
--report junit \
--report-output-dir ./reports
The schema corresponds to the Android Studio's Gradle schema used when running JUnit tests.
curl -u api_key:api_secret \
"https://api.testingbot.com/v1/app-automate/espresso/:id/report"
The schema corresponds to the Android Studio's Gradle schema used when running JUnit tests.
Was this page helpful? Yes No
## Looking for More Help?
Have questions or need more information?
You can reach us via the following channels:
- [Email us](https://testingbot.com/contact/new)
- [Join our Slack Channel](https://join.slack.com/t/testingb0t/shared_invite/zt-3bcw9xch-jk19~6XPs_xBrsAgAedkCw)
---
URL: https://testingbot.com/support/app-automate/help
# Mobile App Help
Please see the topic below for help with Automated App testing:
## Help Topics
- [Prepare your App](https://testingbot.com/support/app-automate/help/prepare)
- [Upload your App](https://testingbot.com/support/app-automate/help/upload)
- [Tunnel + Real Devices](https://testingbot.com/support/app-automate/help/tunnel)
- [FAQ](https://testingbot.com/support/app-automate/help/faq)
Was this page helpful? Yes No
## Looking for More Help?
Have questions or need more information?
You can reach us via the following channels:
- [Email us](https://testingbot.com/contact/new)
- [Join our Slack Channel](https://join.slack.com/t/testingb0t/shared_invite/zt-3bcw9xch-jk19~6XPs_xBrsAgAedkCw)
---
URL: https://testingbot.com/support/app-automate/help/prepare
# Prepare your Mobile App for Automated Testing
TestingBot provides Android Emulators and iOS Simulators as well as [Real Devices](https://testingbot.com/support/app-automate/devices) to run tests against your mobile app.
Below are the steps necessary to prepare your mobile app for Automated Testing.
## Building your app
You do not need to install any code or plugin to run a test.
Below are some things that are necessary to successfully run a mobile test:
### For Android:
- Please supply the URL to your `.apk` or `.aab` file.
**Important:** the .apk file needs to be compiled for the emulator/device you are running your test on (x86 or arm).
- Your app needs to have internet permissions
- The URL to the `.apk` file must be publicly available, or you can use our [TestingBot Storage](https://testingbot.com/support/app-automate/help/upload) to temporarily host your mobile app.
### For iOS (Real Device):
- Please supply the URL to an [.ipa file](https://testingbot.com#ipa). The URL must be publicly available, or you can use our [TestingBot Storage](https://testingbot.com/support/app-automate/help/upload) to temporarily host your mobile app.
- By default, we [automatically resign](https://testingbot.com/support/app-automate/help/app-resigning) your [.ipa file](https://testingbot.com#ipa) so that your development builds can run on our devices.
If you don't want this, specify `resigningEnabled: false` in your `tb:options` capabilities.
- Please make sure your target version matches the version of the simulator you want to test on.
### For iOS (Simulator):
- Please supply the URL to a .zip file that contains your .app
- The .app needs to be an iOS Simulator build:
- Create a Simulator build:
xcodebuild -sdk iphonesimulator -configuration Debug
- Zip the .app bundle:
zip -r MyApp.zip MyApp.app
- Please make sure your target version matches the version of the simulator you want to test on.
## Building IPA file
To build an IPA file, please follow these steps:
- Open your project in XCode.
- Select **Generic iOS Device** as a project device target.
- In the **Product** menu, select **Archive**.
- Once archived, click **Export**.
- You will be asked what kind of export mode you want, you can pick any of these methods: **Ad Hoc** , **Enterprise** or **Development mode**.
- When asked for **Distribution options** , please set these options:
- App Thinning: disabled
- Uncheck **Rebuild from Bitcode**
- Uncheck **Strip Swift Symbols**
- Uncheck **Include manifest for over-the-air installation**
- Select your **Distribution Certificate** and **Provisioning Profile (either Automatic or Manual)**.
- Now your `IPA` file should be generated, export it to a folder on your hard disk.
- You can now upload the `IPA` file to a public URL or use our [TestingBot Storage](https://testingbot.com/support/app-automate/help/upload) to temporarily host your app.
Was this page helpful? Yes No
## Looking for More Help?
Have questions or need more information?
You can reach us via the following channels:
- [Email us](https://testingbot.com/contact/new)
- [Join our Slack Channel](https://join.slack.com/t/testingb0t/shared_invite/zt-3bcw9xch-jk19~6XPs_xBrsAgAedkCw)
---
URL: https://testingbot.com/support/app-automate/help/upload
# Upload your App
In order to run tests against your mobile app, our devices need to be able to download your app.
There are two ways to configure your tests to do this:
- Upload your app to TestingBot Storage: our private upload servers.
- Specify an HTTP or HTTPS url to the app you uploaded on a public internet website.
## TestingBot Storage
With TestingBot Storage, you can upload your app to our servers.
The advantage of this is that your tests will start faster, as the device can download the app from our internal network, instead of the public internet.
To get started, simply submit your app to our API:
$ curl -X POST "https://api.testingbot.com/v1/storage" \
-u key:secret -F "file=@/path/to/app/file/Application-debug.apk"
This call will return a unique identifier for your app (`{"app_url": "tb://..."}`), which you can use in the desired capabilities (see example below).
More information regarding this API call and other similar calls (update uploaded file, delete uploaded file, list uploaded files) are available in [our API documentation](https://testingbot.com/support/api#upload).
Note: uploads to TestingBot Storage are automatically deleted after 62 days.
require 'appium_lib'
caps = {
"platformName" => "iOS",
"appium:deviceName" => "iPhone 15",
"appium:platformVersion" => "18.0",
"appium:app" => "tb://...", # specify the link to your app here
"tb:options" => {
"name" => "single_test",
"build" => "Ruby Appium Sample"
}
}
appium_driver = Appium::Driver.new({
caps: caps,
appium_lib: {
server_url: "https://API_KEY:API_SECRET@hub.testingbot.com/wd/hub"
}}, true)
driver = appium_driver.start_driver
driver.find_element(:name, "inputA").send_keys 5
driver.find_element(:name, "inputB").send_keys 10
driver.quit
## Public Internet
If you have your app available on a public website, you can specify this in the desired capabilities:
require 'appium_lib'
caps = {
"platformName" => "iOS",
"appium:deviceName" => "iPhone 15",
"appium:platformVersion" => "18.0",
"appium:app" => "https://...", # specify the link to your app here
"tb:options" => {
"name" => "single_test",
"build" => "Ruby Appium Sample"
}
}
appium_driver = Appium::Driver.new({
caps: caps,
appium_lib: {
server_url: "https://API_KEY:API_SECRET@hub.testingbot.com/wd/hub"
}}, true)
driver = appium_driver.start_driver
driver.find_element(:name, "inputA").send_keys 5
driver.find_element(:name, "inputB").send_keys 10
driver.quit
Was this page helpful? Yes No
## Looking for More Help?
Have questions or need more information?
You can reach us via the following channels:
- [Email us](https://testingbot.com/contact/new)
- [Join our Slack Channel](https://join.slack.com/t/testingb0t/shared_invite/zt-3bcw9xch-jk19~6XPs_xBrsAgAedkCw)
---
URL: https://testingbot.com/support/app-automate/help/tunnel
# Using TestingBot Tunnel with Real Devices
With TestingBot tunnel, we create a secure connection between a real device running in our datacenter, and your computer and internal network.
This way, you can run tests against apps using internal (staging) APIs, from our real mobile devices. Or test websites running on your local network through Safari/Chrome running on a real device.
TestingBot Tunnel in combination with Real Devices is available for both **public devices** and **private devices**.
More information regarding our TestingBot Tunnel is available on our [TestingBot Tunnel documentation page](https://testingbot.com/support/tunnel).
## Known Limitations
- **Localhost testing does not work on iOS**.
Due to an iOS Restriction, it is currently not possible to run tests against `http(s)://localhost` with TestingBot Tunnel.
A possible workaround would be to change the hosts file on the machine running TestingBot Tunnel, and add a custom hostname (for example `mylocalwebsite` and the IP address `127.0.0.1`).
Then configure your tests to use `http(s)://mylocalwebsite/...` instead of localhost.
## Security and Privacy (Advisory)
At TestingBot, we clean each device after every test. We take the utmost care to clean as much from the device as we can, to make sure your test runs without any leftover artifacts from previous tests.
However, due to the complexity of automatically cleaning different mobile device models, we cannot 100% guarantee that all data generated from a previous session is removed from our **public devices**.
Using our TestingBot tunnel in combination with a public device might have potential security risks.
We recommend to [opt for private, dedicated devices](https://testingbot.com/enterprise/private-device-cloud) for maximum security.
With **private devices** , your company will be the only one running tests on the device.
Was this page helpful? Yes No
## Looking for More Help?
Have questions or need more information?
You can reach us via the following channels:
- [Email us](https://testingbot.com/contact/new)
- [Join our Slack Channel](https://join.slack.com/t/testingb0t/shared_invite/zt-3bcw9xch-jk19~6XPs_xBrsAgAedkCw)
---
URL: https://testingbot.com/support/app-automate/help/faq
# Mobile App Testing FAQ
TestingBot provides mobile application testing on both **virtual devices** as well as **physical devices**.
Virtual devices are Android emulators and iOS simulators.
TestingBot provides a large collection of these, available for mobile app testing, both automated and manual testing.
This FAQ document will list questions and answers regarding the mobile native app testing service.
## Can I run Android emulator tests using Espresso instead of Appium?
TestingBot allows you to upload native mobile Android apps and use [Espresso testing](https://testingbot.com/support/app-automate/espresso) on both Android emulators and physical devices.
Of course, you can do [Appium automated app testing](https://testingbot.com/support/app-automate/appium) as well on TestingBot.
## Which apps are available on the devices?
TestingBot uses stock images for Android emulators, which come equipped with the PlayStore and Chrome.
Similarly, we use stock iOS simulators which come with Safari by default.
TestingBot does not use jailbroken or rooted physical devices.
All Android devices come with factory settings, with PlayStore enabled (if available) and Chrome.
The iOS devices come with Safari, the Safari version depends on the iOS version installed on the device.
## How does manual testing work?
We provide access to a realtime view of an Android emulator, iOS simulator, Android physical device and iOS device.
You can interact with the device, from your own mouse and keyboard, without installing any plugins or software.
The screens are streamed either through WebRTC or VNC, depending on your network connectivity settings.
## When are new devices added?
Our public device pool contains a collection of the most popular devices used, backed by public statistics of mobile device usage.
When new devices are released to the public, we aim to procure, setup and make these available to our customers in less than 2 weeks.
The criteria we use for selecting which devices to add depends on the popularity of the device and the demand for testing on such a device.
If you are looking to test on a specific device, please do not hesitate to [reach out to us](https://testingbot.com/contact/new).
## Is it possible to test push notifications?
It is possible to test push notifications in the following scenarios:
- **Android Physical Devices**
It will work automatically. Simply install the app and allow push notifications.
- **iOS Physical Devices**
This is only possible for private devices, which require an [Enterprise plan](https://testingbot.com/enterprise). [Reach out to us](https://testingbot.com/contact/new) for more information.
- **Android Emulators**
Unfortunately this is not supported yet.
If you'd like to be a part of the beta program, please let us know.
- **iOS Simulators**
This is possible since Appium 1.21.0.
## Can I upload or download files from a device or sim/emu?
Yes, you can upload files to devices using Appium's `pushFile` command and download files using the `pullFile` command.
Please see our [Upload Files documentation](https://testingbot.com/support/app-automate/appium/upload-files) for more information.
## How is my app protected during mobile app testing?
Our Real Device Cloud is located in a secure datacenter in Europe. We make sure that every device is fully protected, both physically and digitally.
All traffic happens through SSL and each device is cleaned after usage:
- All user apps are removed
- Generated data, such as browser data, is wiped
- SD card, accounts, and other data that was altered is removed
TestingBot's [automated cleaning process](https://testingbot.com/support/app-automate/help/cleaning) makes sure that no data is available from an earlier test.
If you think this did happen, please reach out to us so we can reset the device and check why this happened.
## Is audio supported, or microphone access?
Audio is available for Android devices running Android 12 and higher.
Older physical devices do not have the capability to stream audio, these will only stream a realtime video of the screen.
## My app needs to make requests to internal services. Can I use a VPN for this?
We suggest using the [TestingBot Tunnel](https://testingbot.com/support/tunnel). It will set up the device or sim/emu to proxy all requests through the tunnel to your internal services.
An alternative solution is to [whitelist our IP addresses](https://testingbot.com/support/other/configuration#ip-range), which would allow our devices to reach your protected services.
## Can I use Bluetooth on the physical devices?
Yes you can, please [reach out](https://testingbot.com/contact/new) to discuss your specific use case.
## Can I trigger a disconnect or reconnect from a charging cable?
This is currently not supported.
## Can I change the orientation of the device?
Yes, both on simulators/emulators as well as on physical devices. You can change the orientation to either `PORTRAIT` or `LANDSCAPE`.
You can do this via our manual testing feature, or [change the screen orientation during an automated test](https://testingbot.com/support/app-automate/appium/screen-orientation).
## Are code coverage reports by JaCoCo supported?
We currently do not support this.
## Can I change the geolocation during my test?
Yes, you can [change the geolocation](https://testingbot.com/support/web-automate/selenium/test-options#geo) either during manual testing or via automated tests.
## Why do I sometimes see a lock/PIN screen?
On trial devices, in our public device pool, we need to make some areas password protected to prevent users from changing certain settings.
The password protection is not in place on non-trial devices.
## Can I test payments on the physical devices?
Payments can be tested on private devices only. Please [reach out to us](https://testingbot.com/contact/new) for more information.
## Can I inspect the mobile app in your manual testing feature?
Yes, you can inspect the mobile app from the manual testing feature. Simply open the **DevTools** option and click the **Inspector** tab.
Was this page helpful? Yes No
## Looking for More Help?
Have questions or need more information?
You can reach us via the following channels:
- [Email us](https://testingbot.com/contact/new)
- [Join our Slack Channel](https://join.slack.com/t/testingb0t/shared_invite/zt-3bcw9xch-jk19~6XPs_xBrsAgAedkCw)
---
URL: https://testingbot.com/support/app-automate/help/cleaning
# Real Device Cleaning Process
TestingBot automatically cleans each physical mobile device after every test session. We do this to ensure each new test starts with a clean state, without any leftover data from previous sessions.
The cleaning process we use is automated for both iOS and Android. For devices in the public device pool, each test session automatically ends with a thorough cleaning process where we delete any apps installed by the user, together with various other files and data that were generated.
If you are using a private device, there's the possibility to alter or completely disable the cleaning process. You would for example use this when you want to make sure that a specific state is kept between various test sessions.
## Cleaning Process
TestingBot uses a proprietary process to clean its devices. Below are the various processes that happen when a device is being cleaned.
- All apps that have been installed by the customer are deleted. Some applications, which are used by TestingBot to operate the device, are kept.
- The browser history, together with any cached website data and cookies are removed.
- AppleID sessions are removed.
- Network settings such as WiFi and DNS configurations are reset to their default state.
- The system locale, language and time zone are reset to their default. (English, UTC+2).
- Any mock GPS location is reset to Brussels, Belgium.
- Media files such as Photos, Videos and other Files are removed from the device.
TestingBot's cleaning process aims to clean as much as possible from the device. If you prefer the guarantee of a pristine device, please consider using a [private mobile device](https://testingbot.com/enterprise/private-device-cloud).
Was this page helpful? Yes No
## Looking for More Help?
Have questions or need more information?
You can reach us via the following channels:
- [Email us](https://testingbot.com/contact/new)
- [Join our Slack Channel](https://join.slack.com/t/testingb0t/shared_invite/zt-3bcw9xch-jk19~6XPs_xBrsAgAedkCw)
---
URL: https://testingbot.com/support/app-automate/help/app-resigning
# iOS App Resigning
When you [upload an iOS app](https://testingbot.com/support/app-automate/help/upload) to TestingBot, we will automatically re-sign the `.ipa` file with our own provisioning profile, to be able to install and run your app on our mobile devices.
Because of this procedure, the [entitlements](https://developer.apple.com/documentation/bundleresources/entitlements) of your iOS app will be removed.
You can choose to disable this re-signing, if your app is signed using the [Apple Developer Enterprise Program](https://developer.apple.com/programs/enterprise/). This way you can test **push notifications** or [universal links](https://developer.apple.com/ios/universal-links/) on our physical devices.
## Disable iOS Resigning
[Ruby](https://testingbot.com#)[Python](https://testingbot.com#)[PHP](https://testingbot.com#)[Java](https://testingbot.com#)[NodeJS](https://testingbot.com#)[C#](https://testingbot.com#)
capabilities = {
"tb:options" => {
"resigningEnabled" => false
}
}
Map tbOptions = new HashMap<>();
tbOptions.put("resigningEnabled", false);
options.setCapability("tb:options", tbOptions);
$capabilities = [
"tb:options" => [
"resigningEnabled" => false
]
];
capabilities = {
"tb:options": {
"resigningEnabled": False
}
}
const capabilities = {
"tb:options": {
"resigningEnabled": false
}
};
var tbOptions = new Dictionary
{
["resigningEnabled"] = false
};
options.AddAdditionalAppiumOption("tb:options", tbOptions);
Was this page helpful? Yes No
## Looking for More Help?
Have questions or need more information?
You can reach us via the following channels:
- [Email us](https://testingbot.com/contact/new)
- [Join our Slack Channel](https://join.slack.com/t/testingb0t/shared_invite/zt-3bcw9xch-jk19~6XPs_xBrsAgAedkCw)
---
URL: https://testingbot.com/support/app-automate/smart-tv
# Smart TV Testing
Run tests on physical Smart TV devices with TestingBot, using the open-source test framework Appium.
Currently TestingBot supports running automated tests on physical AppleTV 4k devices.
To get started with testing your Smart TV app in the cloud, you will need to follow these steps:
- Upload your native Smart TV app, either to a public URL or using TestingBot Storage.
- Create an Appium test script that will connect to TestingBot.
- The results will be available in the TestingBot dashboard, together with a video of the test and logs.
## Upload Smart TV App
To run Smart TV tests on TestingBot, you will first have to upload your `.ipa` file to TestingBot Storage.
[cURL](https://testingbot.com#)
$ curl -X POST "https://api.testingbot.com/v1/storage" \
-u key:secret -F "file=@/path/to/app/file/tvos.ipa"
This call will return a unique identifier for your SmartTV app (`{"app_url": "tb://..."}`), which you can use in the capabilities in your test (see example below).
More information regarding this API call and other similar calls (update uploaded file, delete uploaded file, list uploaded files) are available in [the TestingBot API documentation](https://testingbot.com/support/api#upload).
Note: uploads to TestingBot Storage are automatically deleted after 62 days.
## Run your first SmartTV test
Once you've [uploaded your Smart TV app](https://testingbot.com#upload), you can start with running your first test on the TestingBot SmartTV cloud.
TestingBot currently only supports running tests on physical AppleTV 4k devices. Please see the example tests below, where we use the [TestingBot tvOS example app](https://github.com/testingbot/tvos-example) to input two numbers in the calculator and verify its sum.
[Ruby](https://testingbot.com#)[Python](https://testingbot.com#)[Java](https://testingbot.com#)[NodeJS](https://testingbot.com#)[C#](https://testingbot.com#)
require 'rubygems'
require 'appium_lib'
caps = {}
caps['name'] = 'Ruby tvOS Example'
caps['deviceName'] = 'Apple TV 4K'
caps['platformName'] = 'tvOS'
caps['version'] = '17.4'
caps['app'] = 'https://github.com/testingbot/tvos-example/releases/download/1.0.0/tvos-example.ipa'
caps['realDevice'] = true
appium_driver = Appium::Driver.new({
caps: caps,
appium_lib: {
server_url: "https://key:secret@hub.testingbot.com/wd/hub"
}}, true)
driver = appium_driver.start_driver
wait = Selenium::WebDriver::Wait.new(:timeout => 30)
wait.until { driver.find_element(:accessibility_id, "inputField1").displayed? }
inputField1 = driver.find_element(:accessibility_id, "inputField1")
inputField1.click
inputField1.send_keys 5
driver.execute_script('mobile: pressButton', { name: 'down' })
driver.execute_script('mobile: pressButton', { name: 'select' })
driver.switch_to.active_element.send_keys 10
driver.execute_script('mobile: pressButton', { name: 'down' })
driver.execute_script('mobile: pressButton', { name: 'select' })
result = driver.find_element(:accessibility_id, "resultField")
if (!result.nil?) && (result.text.to_i == 15)
puts "Test Passed"
else
puts "Test Failed"
end
driver.quit
const wdio = require('webdriverio');
const caps = {
name: 'Node.js tvOS Example',
deviceName: 'Apple TV 4K',
platformName: 'tvOS',
platformVersion: '17.4',
app: 'https://github.com/testingbot/tvos-example/releases/download/1.0.0/tvos-example.ipa',
realDevice: true
};
const options = {
protocol: 'https',
hostname: 'hub.testingbot.com',
port: 443,
path: '/wd/hub',
user: 'key', // Replace 'key' with your TestingBot key
key: 'secret', // Replace 'secret' with your TestingBot secret
capabilities: caps
};
(async () => {
// Start the Appium driver
const driver = await wdio.remote(options);
try {
// Wait for the first input field to be displayed
const inputField1 = await driver.$('~inputField1');
await inputField1.waitForDisplayed({ timeout: 30000 });
// Interact with the first input field
await inputField1.click();
await inputField1.setValue(5);
// Navigate down and select
await driver.execute('mobile: pressButton', { name: 'down' });
await driver.execute('mobile: pressButton', { name: 'select' });
// Send keys to the active element
await driver.switchToParentFrame(); // Ensure focus is on the active frame
await driver.activeElement().setValue(10);
// Navigate down and select the result
await driver.execute('mobile: pressButton', { name: 'down' });
await driver.execute('mobile: pressButton', { name: 'select' });
// Verify the result
const result = await driver.$('~resultField');
const resultText = await result.getText();
if (resultText && parseInt(resultText, 10) === 15) {
console.log('Test Passed');
} else {
console.log('Test Failed');
}
} catch (err) {
console.error('Error occurred:', err);
} finally {
// Quit the driver
await driver.deleteSession();
}
})();
from appium import webdriver
from selenium.webdriver.common.by import By
from selenium.webdriver.support.ui import WebDriverWait
from selenium.webdriver.support import expected_conditions as EC
# Define capabilities
caps = {
"name": "Python tvOS Example",
"deviceName": "Apple TV 4K",
"platformName": "tvOS",
"platformVersion": "17.4",
"app": "https://github.com/testingbot/tvos-example/releases/download/1.0.0/tvos-example.ipa",
"realDevice": True
}
# Appium server URL
server_url = "https://key:secret@hub.testingbot.com/wd/hub"
# Initialize the driver
driver = webdriver.Remote(server_url, caps)
try:
# Wait for the first input field to be displayed
wait = WebDriverWait(driver, 30)
input_field1 = wait.until(EC.presence_of_element_located((By.ACCESSIBILITY_ID, "inputField1")))
# Interact with the first input field
input_field1.click()
input_field1.send_keys("5")
# Navigate down and select the second input field
driver.execute_script('mobile: pressButton', {'name': 'down'})
driver.execute_script('mobile: pressButton', {'name': 'select'})
# Send keys to the active element (second input field)
driver.switch_to.active_element.send_keys("10")
# Navigate down and select the result field
driver.execute_script('mobile: pressButton', {'name': 'down'})
driver.execute_script('mobile: pressButton', {'name': 'select'})
# Verify the result
result_field = driver.find_element(By.ACCESSIBILITY_ID, "resultField")
result_text = result_field.text
if result_text and int(result_text) == 15:
print("Test Passed")
else:
print("Test Failed")
except Exception as e:
print(f"An error occurred: {e}")
finally:
# Quit the driver
driver.quit()
import io.appium.java_client.AppiumDriver;
import io.appium.java_client.MobileBy;
import io.appium.java_client.remote.MobileCapabilityType;
import org.openqa.selenium.By;
import org.openqa.selenium.WebElement;
import org.openqa.selenium.remote.DesiredCapabilities;
import java.net.URL;
import java.time.Duration;
import org.openqa.selenium.support.ui.ExpectedConditions;
import org.openqa.selenium.support.ui.WebDriverWait;
public class TvOSTest {
public static void main(String[] args) {
AppiumDriver driver = null;
try {
// Set capabilities
DesiredCapabilities caps = new DesiredCapabilities();
caps.setCapability("name", "Java tvOS Example");
caps.setCapability("deviceName", "Apple TV 4K");
caps.setCapability("platformName", "tvOS");
caps.setCapability("platformVersion", "17.4");
caps.setCapability("app", "https://github.com/testingbot/tvos-example/releases/download/1.0.0/tvos-example.ipa");
caps.setCapability("realDevice", true);
URL serverUrl = new URL("https://key:secret@hub.testingbot.com/wd/hub");
driver = new AppiumDriver<>(serverUrl, caps);
// Wait for the first input field to be displayed
WebDriverWait wait = new WebDriverWait(driver, Duration.ofSeconds(30));
WebElement inputField1 = wait.until(ExpectedConditions.presenceOfElementLocated(MobileBy.AccessibilityId("inputField1")));
inputField1.click();
inputField1.sendKeys("5");
// Navigate down and select the second input field
driver.executeScript("mobile: pressButton", Map.of("name", "down"));
driver.executeScript("mobile: pressButton", Map.of("name", "select"));
// Send keys to the active element (second input field)
WebElement activeElement = driver.switchTo().activeElement();
activeElement.sendKeys("10");
// Navigate down and select the result field
driver.executeScript("mobile: pressButton", Map.of("name", "down"));
driver.executeScript("mobile: pressButton", Map.of("name", "select"));
WebElement resultField = driver.findElement(MobileBy.AccessibilityId("resultField"));
String resultText = resultField.getText();
if (resultText != null && Integer.parseInt(resultText) == 15) {
System.out.println("Test Passed");
} else {
System.out.println("Test Failed");
}
} catch (Exception e) {
e.printStackTrace();
} finally {
// Quit the driver
if (driver != null) {
driver.quit();
}
}
}
}
using OpenQA.Selenium;
using OpenQA.Selenium.Appium;
using OpenQA.Selenium.Appium.Enums;
using OpenQA.Selenium.Appium.iOS;
using OpenQA.Selenium.Support.UI;
using System;
using System.Collections.Generic;
class TvOSTest
{
static void Main(string[] args)
{
AppiumDriver driver = null;
try
{
// Set capabilities
var caps = new AppiumOptions();
caps.AddAdditionalCapability(MobileCapabilityType.PlatformName, "tvOS");
caps.AddAdditionalCapability(MobileCapabilityType.DeviceName, "Apple TV 4K");
caps.AddAdditionalCapability(MobileCapabilityType.PlatformVersion, "17.4");
caps.AddAdditionalCapability(MobileCapabilityType.App, "https://github.com/testingbot/tvos-example/releases/download/1.0.0/tvos-example.ipa");
caps.AddAdditionalCapability("realDevice", true);
caps.AddAdditionalCapability("name", "C# tvOS Example");
// Initialize driver
var serverUri = new Uri("https://key:secret@hub.testingbot.com/wd/hub");
driver = new IOSDriver(serverUri, caps);
// Wait for the first input field to be displayed
var wait = new WebDriverWait(driver, TimeSpan.FromSeconds(30));
var inputField1 = wait.Until(d => d.FindElement(MobileBy.AccessibilityId("inputField1")));
// Interact with the first input field
inputField1.Click();
inputField1.SendKeys("5");
// Navigate down and select the second input field
driver.ExecuteScript("mobile: pressButton", new Dictionary { { "name", "down" } });
driver.ExecuteScript("mobile: pressButton", new Dictionary { { "name", "select" } });
// Send keys to the active element (second input field)
var activeElement = driver.SwitchTo().ActiveElement();
activeElement.SendKeys("10");
// Navigate down and select the result field
driver.ExecuteScript("mobile: pressButton", new Dictionary { { "name", "down" } });
driver.ExecuteScript("mobile: pressButton", new Dictionary { { "name", "select" } });
// Verify the result
var resultField = driver.FindElement(MobileBy.AccessibilityId("resultField"));
var resultText = resultField.Text;
if (!string.IsNullOrEmpty(resultText) && int.Parse(resultText) == 15)
{
Console.WriteLine("Test Passed");
}
else
{
Console.WriteLine("Test Failed");
}
}
catch (Exception ex)
{
Console.WriteLine($"An error occurred: {ex.Message}");
}
finally
{
// Quit the driver
driver?.Quit();
}
}
}
## View SmartTV Test Results
Once your test has finished running, you will see a new test entry in the [TestingBot dashboard.](https://testingbot.com/members). If you click the test, you will see detailed information about the test, including a video recording of the test, logs and screenshots.
You can also use the [TestingBot API](https://testingbot.com/support/api) to programmatically fetch the test results.
Was this page helpful? Yes No
## Looking for More Help?
Have questions or need more information?
You can reach us via the following channels:
- [Email us](https://testingbot.com/contact/new)
- [Join our Slack Channel](https://join.slack.com/t/testingb0t/shared_invite/zt-3bcw9xch-jk19~6XPs_xBrsAgAedkCw)
---
URL: https://testingbot.com/support/app-automate/smart-tv/options
# Smart TV Test Options
Please see the examples below on how to customize your test run on the available Smart TV devices.
## Specifying Appium Version
TestingBot will use the most recent, compatible, Appium version according to the device, OS and version you specify.
If you'd like to specify your own Appium version, you can do this with the `appiumVersion` capability.
[Ruby](https://testingbot.com#)[Python](https://testingbot.com#)[Java](https://testingbot.com#)[NodeJS](https://testingbot.com#)[C#](https://testingbot.com#)
caps = {
platformName: "tvOS",
deviceName: "Apple TV 4K",
browserVersion: "17.4",
app: 'https://github.com/testingbot/tvos-example/releases/download/1.0.0/tvos-example.ipa',
"tb:options" => {
"appiumVersion" : "2.0"
}
}
ChromeOptions chromeOpts = new ChromeOptions();
chromeOpts.setExperimentalOption("w3c", true);
MutableCapabilities tbOptions = new MutableCapabilities();
tbOptions.setCapability("key", "api_key");
tbOptions.setCapability("secret", "api_secret");
tbOptions.setCapability("appiumVersion", "2.0");
DesiredCapabilities caps = new DesiredCapabilities();
caps.setCapability(ChromeOptions.CAPABILITY, chromeOpts);
caps.setCapability("platformName", "tvOS");
caps.setCapability("tb:options", tbOptions);
caps.setCapability("deviceName", "Apple TV 4K");
caps.setCapability("browserVersion", "17.4");
caps.setCapability("app", "https://github.com/testingbot/tvos-example/releases/download/1.0.0/tvos-example.ipa");
tbOptions = {
'name': 'W3C Sample',
'appiumVersion': "2.0"
}
chromeOpts = {
'app': "https://github.com/testingbot/tvos-example/releases/download/1.0.0/tvos-example.ipa",
'platformName': "tvOS",
'browserVersion': "17.4",
'deviceName': "Apple TV 4K",
'goog:chromeOptions': {'w3c': True},
'tb:options': tbOptions
}
self.driver = webdriver.Remote(remote_url, desired_capabilities=chromeOpts)
driver = await new webdriver.Builder().withCapabilities({
"app": 'https://github.com/testingbot/tvos-example/releases/download/1.0.0/tvos-example.ipa',
"platformName": 'tvOS',
"deviceName": 'Apple TV 4K',
"version": '17.4',
/** Google requires "w3c" to be set in "goog:chromeOptions" as true if you're using ChromeDriver version 74 or lower.
* Based on this commit: https://chromium.googlesource.com/chromium/src/+/2b49880e2481658e0702fd6fe494859bca52b39c
* ChromeDriver now uses w3c by default from version 75+ so setting this option will no longer be a requirement **/
"goog:chromeOptions" : { "w3c" : true },
"tb:options": {
"key": "api_key",
"secret": "api_secret",
"appiumVersion": "2.0"
}
}).usingServer("https://hub.testingbot.com/wd/hub").build();
var chromeOptions = new ChromeOptions()
{
BrowserVersion = "17.4",
PlatformName = "tvOS",
DeviceName = "Apple TV 4K",
App = "https://github.com/testingbot/tvos-example/releases/download/1.0.0/tvos-example.ipa",
UseSpecCompliantProtocol = true
};
var tbOptions = new Dictionary
{
["key"] = "api_key",
["secret"] = "api_secret",
["appiumVersion"] = "2.0"
};
chromeOptions.AddAdditionalCapability("tb:options", tbOptions, true);
driver = new RemoteWebDriver(new Uri("https://hub.testingbot.com/wd/hub"),
chromeOptions.ToCapabilities(), TimeSpan.FromSeconds(600));
### Appium 2 Versions
We currently support these Appium 2 versions:
- 2.11.3
- 2.10.3
- 2.9.0
- 2.5.1
- 2.4.1
- 2.3.0
- 2.2.1
If you specify `"appiumVersion": "latest"`, TestingBot will automatically use the latest Appium version. You can also use `latest-1`, `latest-2`, ... to test on the next most recent versions of Appium.
### Geolocation Testing
TestingBot provides an option where you can specify from which country you'd like to run the test from.
We will configure the Smart TV device to use a proxy that will route all traffic through the specified country.
[Ruby](https://testingbot.com#)[Python](https://testingbot.com#)[Java](https://testingbot.com#)[NodeJS](https://testingbot.com#)[C#](https://testingbot.com#)
caps = {
platformName: "tvOS",
app: "https://github.com/testingbot/tvos-example/releases/download/1.0.0/tvos-example.ipa",
deviceName: "Apple TV 4K",
version: "17.4",
"tb:options" => {
"testingbot.geoCountryCode" : "DE"
}
}
ChromeOptions chromeOpts = new ChromeOptions();
chromeOpts.setExperimentalOption("w3c", true);
MutableCapabilities tbOptions = new MutableCapabilities();
tbOptions.setCapability("key", "api_key");
tbOptions.setCapability("secret", "api_secret");
tbOptions.setCapability("testingbot.geoCountryCode", "DE");
DesiredCapabilities caps = new DesiredCapabilities();
caps.setCapability(ChromeOptions.CAPABILITY, chromeOpts);
caps.setCapability("platformName", "tvOS");
caps.setCapability("tb:options", tbOptions);
caps.setCapability("app", "https://github.com/testingbot/tvos-example/releases/download/1.0.0/tvos-example.ipa");
tbOptions = {
'testingbot.geoCountryCode': "DE"
}
chromeOpts = {
'app': "https://github.com/testingbot/tvos-example/releases/download/1.0.0/tvos-example.ipa",
'platformName': "tvOS",
'goog:chromeOptions': {'w3c': True},
'tb:options': tbOptions
}
self.driver = webdriver.Remote(remote_url, desired_capabilities=chromeOpts)
driver = await new webdriver.Builder().withCapabilities({
"app": 'https://github.com/testingbot/tvos-example/releases/download/1.0.0/tvos-example.ipa',
"platformName": 'tvOS',
"goog:chromeOptions" : { "w3c" : true },
"tb:options": {
"key": "api_key",
"secret": "api_secret",
"testingbot.geoCountryCode": "DE"
}
}).usingServer("https://hub.testingbot.com/wd/hub").build();
var chromeOptions = new ChromeOptions()
{
Version = "17.4",
PlatformName = "tvOS",
UseSpecCompliantProtocol = true
};
var tbOptions = new Dictionary
{
["key"] = "api_key",
["secret"] = "api_secret",
["testingbot.geoCountryCode"] = "DE"
};
chromeOptions.AddAdditionalCapability("tb:options", tbOptions, true);
driver = new RemoteWebDriver(new Uri("https://hub.testingbot.com/wd/hub"),
chromeOptions.ToCapabilities(), TimeSpan.FromSeconds(600));
Specify `testingbot.geoCountryCode` with one of the following country codes:
- **'\*'** : this will take a random country from the list below
- **'AU'** : Australia
- **'BH'** : Bahrain
- **'BE'** : Belgium
- **'BR'** : Brazil
- **'CA'** : Canada
- **'CL'** : Chile
- **'FR'** : France
- **'DE'** : Germany
- **'IN'** : India
- **'IT'** : Italy
- **'JP'** : Japan
- **'NO'** : Norway
- **'SG'** : Singapore
- **'ZA'** : South Africa
- **'SE'** : Sweden
- **'CH'** : Switzerland
- **'AE'** : United Arab Emirates
- **'GB'** : United Kingdom
- **'US'** : United States
**Important:** this does not work on tvOS 4.4
### Change Test Name
Add a name to this test, which will show up in the TestingBot member area and API.
[Ruby](https://testingbot.com#)[Python](https://testingbot.com#)[PHP](https://testingbot.com#)[Java](https://testingbot.com#)[NodeJS](https://testingbot.com#)[C#](https://testingbot.com#)
caps = {
platformName: "tvOS",
app: "https://github.com/testingbot/tvos-example/releases/download/1.0.0/tvos-example.ipa",
version: "17.4",
deviceName: "Apple TV 4K",
"tb:options" => {
"name" : "My Test Name"
}
}
ChromeOptions chromeOpts = new ChromeOptions();
chromeOpts.setExperimentalOption("w3c", true);
MutableCapabilities tbOptions = new MutableCapabilities();
tbOptions.setCapability("key", "api_key");
tbOptions.setCapability("secret", "api_secret");
tbOptions.setCapability("name", "My Test Name");
DesiredCapabilities caps = new DesiredCapabilities();
caps.setCapability(ChromeOptions.CAPABILITY, chromeOpts);
caps.setCapability("platformName", "tvOS");
caps.setCapability("tb:options", tbOptions);
caps.setCapability("app", "https://github.com/testingbot/tvos-example/releases/download/1.0.0/tvos-example.ipa");
$options = new ChromeOptions();
$capabilities = DesiredCapabilities::chrome();
$capabilities->setPlatform('tvOS');
$capabilities->setCapability('tb:options', array(
'name' => "My Test Name"
));
$capabilities->setCapability(ChromeOptions::CAPABILITY, $options);
tbOptions = {
'name': "My Test Name"
}
chromeOpts = {
'app': "https://github.com/testingbot/tvos-example/releases/download/1.0.0/tvos-example.ipa",
'platformName': "tvOS",
'deviceName': "Apple TV 4K",
'goog:chromeOptions': {'w3c': True},
'tb:options': tbOptions
}
self.driver = webdriver.Remote(remote_url, desired_capabilities=chromeOpts)
driver = await new webdriver.Builder().withCapabilities({
"app": 'https://github.com/testingbot/tvos-example/releases/download/1.0.0/tvos-example.ipa',
"platformName": 'tvOS',
"goog:chromeOptions" : { "w3c" : true },
"tb:options": {
"key": "api_key",
"secret": "api_secret",
"name": "My Test Name"
}
}).usingServer("https://hub.testingbot.com/wd/hub").build();
var chromeOptions = new ChromeOptions()
{
Version = "17.4",
PlatformName = "tvOS",
UseSpecCompliantProtocol = true
};
var tbOptions = new Dictionary
{
["key"] = "api_key",
["secret"] = "api_secret",
["name"] = "My Test Name"
};
chromeOptions.AddAdditionalCapability("tb:options", tbOptions, true);
driver = new RemoteWebDriver(new Uri("https://hub.testingbot.com/wd/hub"),
chromeOptions.ToCapabilities(), TimeSpan.FromSeconds(600));
Value Type | Default Value || string | unnamed test |
### Group Tests
A key you can use to group certain tests in the same build (for example in Jenkins).
The builds will appear in our member area.
[Ruby](https://testingbot.com#)[Python](https://testingbot.com#)[PHP](https://testingbot.com#)[Java](https://testingbot.com#)[NodeJS](https://testingbot.com#)[C#](https://testingbot.com#)
caps = {
platformName: "tvOS",
app: "https://github.com/testingbot/tvos-example/releases/download/1.0.0/tvos-example.ipa",
version: "17.4",
deviceName: "Apple TV 4K",
"tb:options" => {
"build" : "My First Build"
}
}
ChromeOptions chromeOpts = new ChromeOptions();
chromeOpts.setExperimentalOption("w3c", true);
MutableCapabilities tbOptions = new MutableCapabilities();
tbOptions.setCapability("key", "api_key");
tbOptions.setCapability("secret", "api_secret");
tbOptions.setCapability("build", "My First Build");
DesiredCapabilities caps = new DesiredCapabilities();
caps.setCapability(ChromeOptions.CAPABILITY, chromeOpts);
caps.setCapability("platformName", "tvOS");
caps.setCapability("tb:options", tbOptions);
caps.setCapability("app", "https://github.com/testingbot/tvos-example/releases/download/1.0.0/tvos-example.ipa");
$options = new ChromeOptions();
$capabilities = DesiredCapabilities::chrome();
$capabilities->setPlatform('tvOS');
$capabilities->setCapability('tb:options', array(
'build' => "My First Build"
));
$capabilities->setCapability(ChromeOptions::CAPABILITY, $options);
tbOptions = {
'build': "My First Build"
}
chromeOpts = {
'app': "https://github.com/testingbot/tvos-example/releases/download/1.0.0/tvos-example.ipa",
'platformName': "tvOS",
'deviceName': "Apple TV 4K",
'version': '17.4',
'goog:chromeOptions': {'w3c': True},
'tb:options': tbOptions
}
self.driver = webdriver.Remote(remote_url, desired_capabilities=chromeOpts)
driver = await new webdriver.Builder().withCapabilities({
"app": 'https://github.com/testingbot/tvos-example/releases/download/1.0.0/tvos-example.ipa',
"platformName": 'tvOS',
"goog:chromeOptions" : { "w3c" : true },
"tb:options": {
"key": "api_key",
"secret": "api_secret",
"build": "My First Build"
}
}).usingServer("https://hub.testingbot.com/wd/hub").build();
var chromeOptions = new ChromeOptions()
{
Version = "17.4",
PlatformName = "tvOS",
UseSpecCompliantProtocol = true
};
var tbOptions = new Dictionary
{
["key"] = "api_key",
["secret"] = "api_secret",
["build"] = "My First Build"
};
chromeOptions.AddAdditionalCapability("tb:options", tbOptions, true);
driver = new RemoteWebDriver(new Uri("https://hub.testingbot.com/wd/hub"),
chromeOptions.ToCapabilities(), TimeSpan.FromSeconds(600));
Value Type || string |
### Idle Timeout
The maximum amount of time a device will wait before proceeding to the next step in your test.
[Ruby](https://testingbot.com#)[Python](https://testingbot.com#)[PHP](https://testingbot.com#)[Java](https://testingbot.com#)[NodeJS](https://testingbot.com#)[C#](https://testingbot.com#)
caps = {
platformName: "tvOS",
app: "https://github.com/testingbot/tvos-example/releases/download/1.0.0/tvos-example.ipa",
version: "17.4",
deviceName: "Apple TV 4K",
"tb:options" => {
"idletimeout" : 130
}
}
ChromeOptions chromeOpts = new ChromeOptions();
chromeOpts.setExperimentalOption("w3c", true);
MutableCapabilities tbOptions = new MutableCapabilities();
tbOptions.setCapability("key", "api_key");
tbOptions.setCapability("secret", "api_secret");
tbOptions.setCapability("idletimeout", 130);
DesiredCapabilities caps = new DesiredCapabilities();
caps.setCapability(ChromeOptions.CAPABILITY, chromeOpts);
caps.setCapability("platformName", "tvOS");
caps.setCapability("tb:options", tbOptions);
caps.setCapability("app", "https://github.com/testingbot/tvos-example/releases/download/1.0.0/tvos-example.ipa");
$options = new ChromeOptions();
$capabilities = DesiredCapabilities::chrome();
$capabilities->setPlatform('tvOS');
$capabilities->setCapability('tb:options', array(
'idletimeout' => 130
));
$capabilities->setCapability(ChromeOptions::CAPABILITY, $options);
tbOptions = {
'idletimeout': 130
}
chromeOpts = {
'app': "https://github.com/testingbot/tvos-example/releases/download/1.0.0/tvos-example.ipa",
'platformName': "tvOS",
'goog:chromeOptions': {'w3c': True},
'tb:options': tbOptions
}
self.driver = webdriver.Remote(remote_url, desired_capabilities=chromeOpts)
driver = await new webdriver.Builder().withCapabilities({
"app": 'https://github.com/testingbot/tvos-example/releases/download/1.0.0/tvos-example.ipa',
"platformName": 'tvOS',
"goog:chromeOptions" : { "w3c" : true },
"tb:options": {
"key": "api_key",
"secret": "api_secret",
"idletimeout": 130
}
}).usingServer("https://hub.testingbot.com/wd/hub").build();
var chromeOptions = new ChromeOptions()
{
Version = "17.4",
PlatformName = "tvOS",
UseSpecCompliantProtocol = true
};
var tbOptions = new Dictionary
{
["key"] = "api_key",
["secret"] = "api_secret",
["idletimeout"] = 130
};
chromeOptions.AddAdditionalCapability("tb:options", tbOptions, true);
driver = new RemoteWebDriver(new Uri("https://hub.testingbot.com/wd/hub"),
chromeOptions.ToCapabilities(), TimeSpan.FromSeconds(600));
Value Type | Default Value || int (specify number of seconds) | 130 seconds |
### Maximum Test Duration
The maximum duration for a single test. This is a safeguard to prevent bad tests from using up your credits.
We generally recommend to keep tests short (less than 10 minutes). It's better to split up large tests in smaller individual tests.
This keeps your tests fast and allows for more parallelization of your tests.
[Ruby](https://testingbot.com#)[Python](https://testingbot.com#)[PHP](https://testingbot.com#)[Java](https://testingbot.com#)[NodeJS](https://testingbot.com#)[C#](https://testingbot.com#)
caps = {
platformName: "tvOS",
app: "https://github.com/testingbot/tvos-example/releases/download/1.0.0/tvos-example.ipa",
version: "17.4",
deviceName: "Apple TV 4K",
"tb:options" => {
"maxduration" : 1800
}
}
ChromeOptions chromeOpts = new ChromeOptions();
chromeOpts.setExperimentalOption("w3c", true);
MutableCapabilities tbOptions = new MutableCapabilities();
tbOptions.setCapability("key", "api_key");
tbOptions.setCapability("secret", "api_secret");
tbOptions.setCapability("maxduration", 1800);
DesiredCapabilities caps = new DesiredCapabilities();
caps.setCapability(ChromeOptions.CAPABILITY, chromeOpts);
caps.setCapability("platformName", "tvOS");
caps.setCapability("tb:options", tbOptions);
caps.setCapability("app", "https://github.com/testingbot/tvos-example/releases/download/1.0.0/tvos-example.ipa");
$options = new ChromeOptions();
$capabilities = DesiredCapabilities::chrome();
$capabilities->setPlatform('tvOS');
$capabilities->setCapability('tb:options', array(
'maxduration' => 1800
));
$capabilities->setCapability(ChromeOptions::CAPABILITY, $options);
tbOptions = {
'maxduration': 1800
}
chromeOpts = {
'app': "https://github.com/testingbot/tvos-example/releases/download/1.0.0/tvos-example.ipa",
'platformName': "tvOS",
'goog:chromeOptions': {'w3c': True},
'tb:options': tbOptions
}
self.driver = webdriver.Remote(remote_url, desired_capabilities=chromeOpts)
driver = await new webdriver.Builder().withCapabilities({
"app": 'https://github.com/testingbot/tvos-example/releases/download/1.0.0/tvos-example.ipa',
"platformName": 'tvOS',
"goog:chromeOptions" : { "w3c" : true },
"tb:options": {
"key": "api_key",
"secret": "api_secret",
"maxduration": 1800
}
}).usingServer("https://hub.testingbot.com/wd/hub").build();
var chromeOptions = new ChromeOptions()
{
Version = "17.4",
PlatformName = "tvOS",
UseSpecCompliantProtocol = true
};
var tbOptions = new Dictionary
{
["key"] = "api_key",
["secret"] = "api_secret",
["maxduration"] = 1800
};
chromeOptions.AddAdditionalCapability("tb:options", tbOptions, true);
driver = new RemoteWebDriver(new Uri("https://hub.testingbot.com/wd/hub"),
chromeOptions.ToCapabilities(), TimeSpan.FromSeconds(600));
Value Type | Default Value || int (specify number of seconds) | 1800 seconds (30 minutes) |
### Custom Metadata
Send along custom data, for example your release, server, commit hash, ...
This will show up on the test detail page in the TestingBot member area.
[Ruby](https://testingbot.com#)[Python](https://testingbot.com#)[PHP](https://testingbot.com#)[Java](https://testingbot.com#)[NodeJS](https://testingbot.com#)[C#](https://testingbot.com#)
caps = {
platformName: "tvOS",
app: "https://github.com/testingbot/tvos-example/releases/download/1.0.0/tvos-example.ipa",
version: "17.4",
deviceName: "Apple TV 4K",
"tb:options" => {
"extra" : "Extra Information"
}
}
ChromeOptions chromeOpts = new ChromeOptions();
chromeOpts.setExperimentalOption("w3c", true);
MutableCapabilities tbOptions = new MutableCapabilities();
tbOptions.setCapability("key", "api_key");
tbOptions.setCapability("secret", "api_secret");
tbOptions.setCapability("extra", "Extra Information");
DesiredCapabilities caps = new DesiredCapabilities();
caps.setCapability(ChromeOptions.CAPABILITY, chromeOpts);
caps.setCapability("platformName", "tvOS");
caps.setCapability("tb:options", tbOptions);
caps.setCapability("browserName", "chrome");
$options = new ChromeOptions();
$capabilities = DesiredCapabilities::chrome();
$capabilities->setPlatform('tvOS');
$capabilities->setCapability('tb:options', array(
'extra' => "Extra Information"
));
$capabilities->setCapability(ChromeOptions::CAPABILITY, $options);
tbOptions = {
'extra': "Extra Information"
}
chromeOpts = {
'app': "https://github.com/testingbot/tvos-example/releases/download/1.0.0/tvos-example.ipa",
'platformName': "tvOS",
'goog:chromeOptions': {'w3c': True},
'tb:options': tbOptions
}
self.driver = webdriver.Remote(remote_url, desired_capabilities=chromeOpts)
driver = await new webdriver.Builder().withCapabilities({
"app": 'https://github.com/testingbot/tvos-example/releases/download/1.0.0/tvos-example.ipa',
"platformName": 'tvOS',
"goog:chromeOptions" : { "w3c" : true },
"tb:options": {
"key": "api_key",
"secret": "api_secret",
"extra": "Extra Information"
}
}).usingServer("https://hub.testingbot.com/wd/hub").build();
var chromeOptions = new ChromeOptions()
{
Version = "17.4",
PlatformName = "tvOS",
UseSpecCompliantProtocol = true
};
var tbOptions = new Dictionary
{
["key"] = "api_key",
["secret"] = "api_secret",
["extra"] = "Extra Information"
};
chromeOptions.AddAdditionalCapability("tb:options", tbOptions, true);
driver = new RemoteWebDriver(new Uri("https://hub.testingbot.com/wd/hub"),
chromeOptions.ToCapabilities(), TimeSpan.FromSeconds(600));
Value Type || string |
### Taking screenshots during your tests
By default, TestingBot does not capture screenshots at every step of your mobile test. If you wish to take a screenshot for every step, please add this capability (set to `true`) to your request.
[Ruby](https://testingbot.com#)[Python](https://testingbot.com#)[PHP](https://testingbot.com#)[Java](https://testingbot.com#)[NodeJS](https://testingbot.com#)[C#](https://testingbot.com#)
caps = {
platformName: "tvOS",
app: "https://github.com/testingbot/tvos-example/releases/download/1.0.0/tvos-example.ipa",
version: "17.4",
deviceName: "Apple TV 4K",
"tb:options" => {
screenshot: true
}
}
ChromeOptions chromeOpts = new ChromeOptions();
chromeOpts.setExperimentalOption("w3c", true);
MutableCapabilities tbOptions = new MutableCapabilities();
tbOptions.setCapability("key", "api_key");
tbOptions.setCapability("secret", "api_secret");
tbOptions.setCapability("screenshot", true);
DesiredCapabilities caps = new DesiredCapabilities();
caps.setCapability(ChromeOptions.CAPABILITY, chromeOpts);
caps.setCapability("platformName", "tvOS");
caps.setCapability("tb:options", tbOptions);
caps.setCapability("app", "https://github.com/testingbot/tvos-example/releases/download/1.0.0/tvos-example.ipa);
$options = new ChromeOptions();
$capabilities = DesiredCapabilities::chrome();
$capabilities->setPlatform('tvOS');
$capabilities->setCapability('tb:options', array(
'screenshot' => true
));
$capabilities->setCapability(ChromeOptions::CAPABILITY, $options);
tbOptions = {
'name': 'W3C Sample',
'screenshot': True
}
chromeOpts = {
'app': "https://github.com/testingbot/tvos-example/releases/download/1.0.0/tvos-example.ipa,
'platformName': "tvOS",
'goog:chromeOptions': {'w3c': True},
'tb:options': tbOptions
}
self.driver = webdriver.Remote(remote_url, desired_capabilities=chromeOpts)
driver = await new webdriver.Builder().withCapabilities({
"app": 'https://github.com/testingbot/tvos-example/releases/download/1.0.0/tvos-example.ipa',
"platformName": 'tvOS',
"goog:chromeOptions" : { "w3c" : true },
"tb:options": {
"key": "api_key",
"secret": "api_secret",
"screenshot": true
}
}).usingServer("https://hub.testingbot.com/wd/hub").build();
var chromeOptions = new ChromeOptions()
{
Version = "23",
PlatformName = "tvOS",
UseSpecCompliantProtocol = true
};
var tbOptions = new Dictionary
{
["key"] = "api_key",
["secret"] = "api_secret",
["screenshot"] = true
};
chromeOptions.AddAdditionalCapability("tb:options", tbOptions, true);
driver = new RemoteWebDriver(new Uri("https://hub.testingbot.com/wd/hub"),
chromeOptions.ToCapabilities(), TimeSpan.FromSeconds(600));
Value Type | Default Value || boolean | false |
### Make a video of your tests
By default we record a video of your test, which is accessible in the member area. If you do not wish to have this, you can disable it with this option.
Video should not slow down your test considerably.
[Ruby](https://testingbot.com#)[Python](https://testingbot.com#)[PHP](https://testingbot.com#)[Java](https://testingbot.com#)[NodeJS](https://testingbot.com#)[C#](https://testingbot.com#)
caps = {
platformName: "tvOS",
app: "https://github.com/testingbot/tvos-example/releases/download/1.0.0/tvos-example.ipa",
version: "17.4",
"tb:options" => {
screenrecorder: true
}
}
ChromeOptions chromeOpts = new ChromeOptions();
chromeOpts.setExperimentalOption("w3c", true);
MutableCapabilities tbOptions = new MutableCapabilities();
tbOptions.setCapability("key", "api_key");
tbOptions.setCapability("secret", "api_secret");
tbOptions.setCapability("screenrecorder", true);
DesiredCapabilities caps = new DesiredCapabilities();
caps.setCapability(ChromeOptions.CAPABILITY, chromeOpts);
caps.setCapability("platformName", "tvOS");
caps.setCapability("tb:options", tbOptions);
caps.setCapability("app", "https://github.com/testingbot/tvos-example/releases/download/1.0.0/tvos-example.ipa");
$options = new ChromeOptions();
$capabilities = DesiredCapabilities::chrome();
$capabilities->setPlatform('tvOS');
$capabilities->setCapability('tb:options', array(
'screenrecorder' => true
));
$capabilities->setCapability(ChromeOptions::CAPABILITY, $options);
tbOptions = {
'name': 'W3C Sample',
'screenrecorder': True
}
chromeOpts = {
'app': "https://github.com/testingbot/tvos-example/releases/download/1.0.0/tvos-example.ipa",
'platformName': "tvOS",
'goog:chromeOptions': {'w3c': True},
'tb:options': tbOptions
}
self.driver = webdriver.Remote(remote_url, desired_capabilities=chromeOpts)
driver = await new webdriver.Builder().withCapabilities({
"app": 'https://github.com/testingbot/tvos-example/releases/download/1.0.0/tvos-example.ipa',
"platformName": 'tvOS',
"goog:chromeOptions" : { "w3c" : true },
"tb:options": {
"key": "api_key",
"secret": "api_secret",
"screenrecorder": true
}
}).usingServer("https://hub.testingbot.com/wd/hub").build();
var chromeOptions = new ChromeOptions()
{
Version = "17.4",
PlatformName = "tvOS",
UseSpecCompliantProtocol = true
};
var tbOptions = new Dictionary
{
["key"] = "api_key",
["secret"] = "api_secret",
["screenrecorder"] = true
};
chromeOptions.AddAdditionalCapability("tb:options", tbOptions, true);
driver = new RemoteWebDriver(new Uri("https://hub.testingbot.com/wd/hub"),
chromeOptions.ToCapabilities(), TimeSpan.FromSeconds(600));
Value Type | Default Value || boolean | true |
### Test Privacy
Make the test results for this test public so that everyone can access the results.
[Ruby](https://testingbot.com#)[Python](https://testingbot.com#)[PHP](https://testingbot.com#)[Java](https://testingbot.com#)[NodeJS](https://testingbot.com#)[C#](https://testingbot.com#)
caps = {
platformName: "tvOS",
app: "https://github.com/testingbot/tvos-example/releases/download/1.0.0/tvos-example.ipa",
version: "17.4",
"tb:options" => {
"public" : false
}
}
ChromeOptions chromeOpts = new ChromeOptions();
chromeOpts.setExperimentalOption("w3c", true);
MutableCapabilities tbOptions = new MutableCapabilities();
tbOptions.setCapability("key", "api_key");
tbOptions.setCapability("secret", "api_secret");
tbOptions.setCapability("public", false);
DesiredCapabilities caps = new DesiredCapabilities();
caps.setCapability(ChromeOptions.CAPABILITY, chromeOpts);
caps.setCapability("platformName", "tvOS");
caps.setCapability("tb:options", tbOptions);
caps.setCapability("app", "https://github.com/testingbot/tvos-example/releases/download/1.0.0/tvos-example.ipa");
$options = new ChromeOptions();
$capabilities = DesiredCapabilities::chrome();
$capabilities->setPlatform('tvOS');
$capabilities->setCapability('tb:options', array(
'public' => 130
));
$capabilities->setCapability(ChromeOptions::CAPABILITY, $options);
tbOptions = {
'public': False
}
chromeOpts = {
'app': "https://github.com/testingbot/tvos-example/releases/download/1.0.0/tvos-example.ipa",
'platformName': "tvOS",
'goog:chromeOptions': {'w3c': True},
'tb:options': tbOptions
}
self.driver = webdriver.Remote(remote_url, desired_capabilities=chromeOpts)
driver = await new webdriver.Builder().withCapabilities({
"app": 'https://github.com/testingbot/tvos-example/releases/download/1.0.0/tvos-example.ipa',
"platformName": 'tvOS',
"goog:chromeOptions" : { "w3c" : true },
"tb:options": {
"key": "api_key",
"secret": "api_secret",
"public": false
}
}).usingServer("https://hub.testingbot.com/wd/hub").build();
var chromeOptions = new ChromeOptions()
{
Version = "17.4",
PlatformName = "tvOS",
UseSpecCompliantProtocol = true
};
var tbOptions = new Dictionary
{
["key"] = "api_key",
["secret"] = "api_secret",
["public"] = false
};
chromeOptions.AddAdditionalCapability("tb:options", tbOptions, true);
driver = new RemoteWebDriver(new Uri("https://hub.testingbot.com/wd/hub"),
chromeOptions.ToCapabilities(), TimeSpan.FromSeconds(600));
Value Type | Default Value || boolean | false |
### Customize Logging
By default, TestingBot records logs of all test actions and its drivers.
Set this option to `false` if you don't want TestingBot to record anything (for example, if you have sensitive data).
You will not see any test logs in our member dashboard.
Set to `strip-parameters` to prevent the POST/GET parameters from being logged on the TestingBot test detail page (does not affect other logs like Appium logs, Chromedriver logs, ...).
[Ruby](https://testingbot.com#)[Python](https://testingbot.com#)[PHP](https://testingbot.com#)[Java](https://testingbot.com#)[NodeJS](https://testingbot.com#)[C#](https://testingbot.com#)
caps = {
platformName: "tvOS",
app: "https://github.com/testingbot/tvos-example/releases/download/1.0.0/tvos-example.ipa",
version: "17.4",
deviceName: "Apple TV 4K",
"tb:options" => {
"recordLogs" : true
}
}
ChromeOptions chromeOpts = new ChromeOptions();
chromeOpts.setExperimentalOption("w3c", true);
MutableCapabilities tbOptions = new MutableCapabilities();
tbOptions.setCapability("key", "api_key");
tbOptions.setCapability("secret", "api_secret");
tbOptions.setCapability("recordLogs", true);
DesiredCapabilities caps = new DesiredCapabilities();
caps.setCapability(ChromeOptions.CAPABILITY, chromeOpts);
caps.setCapability("platformName", "tvOS");
caps.setCapability("tb:options", tbOptions);
caps.setCapability("app", "https://github.com/testingbot/tvos-example/releases/download/1.0.0/tvos-example.ipa");
$options = new ChromeOptions();
$capabilities = DesiredCapabilities::chrome();
$capabilities->setPlatform('tvOS');
$capabilities->setCapability('tb:options', array(
'recordLogs' => true
));
$capabilities->setCapability(ChromeOptions::CAPABILITY, $options);
tbOptions = {
'recordLogs': True
}
chromeOpts = {
'app': "https://github.com/testingbot/tvos-example/releases/download/1.0.0/tvos-example.ipa",
'platformName': "tvOS",
'goog:chromeOptions': {'w3c': True},
'tb:options': tbOptions
}
self.driver = webdriver.Remote(remote_url, desired_capabilities=chromeOpts)
driver = await new webdriver.Builder().withCapabilities({
"app": 'https://github.com/testingbot/tvos-example/releases/download/1.0.0/tvos-example.ipa',
"platformName": 'tvOS',
"goog:chromeOptions" : { "w3c" : true },
"tb:options": {
"key": "api_key",
"secret": "api_secret",
"recordLogs": true
}
}).usingServer("https://hub.testingbot.com/wd/hub").build();
var chromeOptions = new ChromeOptions()
{
Version = "17.4",
PlatformName = "tvOS",
UseSpecCompliantProtocol = true
};
var tbOptions = new Dictionary
{
["key"] = "api_key",
["secret"] = "api_secret",
["recordLogs"] = true
};
chromeOptions.AddAdditionalCapability("tb:options", tbOptions, true);
driver = new RemoteWebDriver(new Uri("https://hub.testingbot.com/wd/hub"),
chromeOptions.ToCapabilities(), TimeSpan.FromSeconds(600));
Value Type | Default Value | Possible Values: || string | "true" | `true`, `false`, or `strip-parameters` |
Was this page helpful? Yes No
## Looking for More Help?
Have questions or need more information?
You can reach us via the following channels:
- [Email us](https://testingbot.com/contact/new)
- [Join our Slack Channel](https://join.slack.com/t/testingb0t/shared_invite/zt-3bcw9xch-jk19~6XPs_xBrsAgAedkCw)
---
URL: https://testingbot.com/support/app-automate/smart-tv/remote-control-navigation
# TvOS (Apple TV 4K)
During an Appium test you can use the buttons actions to simulate remote control navigation on the Apple TV.
[Ruby](https://testingbot.com#)[Python](https://testingbot.com#)[Java](https://testingbot.com#)[NodeJS](https://testingbot.com#)[C#](https://testingbot.com#)
driver.execute_script('mobile: pressButton', { name: 'down' })
driver.execute_script('mobile: pressButton', { name: 'select' })
await driver.execute('mobile: pressButton', { name: 'down' });
await driver.execute('mobile: pressButton', { name: 'select' });
driver.execute_script('mobile: pressButton', {'name': 'down'})
driver.execute_script('mobile: pressButton', {'name': 'select'})
driver.executeScript("mobile: pressButton", Map.of("name", "down"));
driver.executeScript("mobile: pressButton", Map.of("name", "select"));
driver.ExecuteScript("mobile: pressButton", new Dictionary { { "name", "down" } });
driver.ExecuteScript("mobile: pressButton", new Dictionary { { "name", "select" } });
The following buttons are available:
| Button Name | Behaviour |
| --- | --- |
| Home | Return to the home screen. |
| Menu | Return to the previous operation or screen. In the context of tvOS, it works as a traditional back button. |
| Select | Select the item with the current focus. |
| Up | Move the focus upward in the UI. |
| Down | Move the focus downward in the UI. |
| Left | Move the focus left in the UI. |
| Right | Move the focus right in the UI. |
| Play/Pause | Control media playback. Play/Pause is a toggle. |
Was this page helpful? Yes No
## Looking for More Help?
Have questions or need more information?
You can reach us via the following channels:
- [Email us](https://testingbot.com/contact/new)
- [Join our Slack Channel](https://join.slack.com/t/testingb0t/shared_invite/zt-3bcw9xch-jk19~6XPs_xBrsAgAedkCw)
---
URL: https://testingbot.com/support/app-automate/appium
# Your first test with Appium
Appium allows you to run Automated tests against hybrid and native mobile apps, on iOS and Android devices.
Simply upload your mobile app and run it on iOS and Android devices in the TestingBot cloud.
## Automated Mobile App Testing
To get started, please choose a programming language/framework:
### [Java](https://testingbot.com/support/app-automate/appium/java)
Get started with Java mobile app testing using Appium.
- [Java](https://testingbot.com/support/app-automate/appium/java)
- [TestNG](https://testingbot.com/support/app-automate/appium/java/testng)
### [NodeJS](https://testingbot.com/support/app-automate/appium/nodejs)
Get started with NodeJS mobile app testing using Appium.
- [NodeJS](https://testingbot.com/support/app-automate/appium/nodejs)
- [CodeceptJS](https://testingbot.com/support/app-automate/appium/nodejs/codeceptjs)
- [WebDriverIO](https://testingbot.com/support/app-automate/appium/nodejs/webdriverio)
### [C#](https://testingbot.com/support/app-automate/appium/csharp)
Get started with C# mobile app testing using Appium.
- [C#](https://testingbot.com/support/app-automate/appium/csharp)
- [NUnit](https://testingbot.com/support/app-automate/appium/csharp/nunit)
- [SpecFlow](https://testingbot.com/support/app-automate/appium/csharp/specflow)
### [Python](https://testingbot.com/support/app-automate/appium/python)
Get started with Python mobile app testing using Appium.
- [Python](https://testingbot.com/support/app-automate/appium/python)
### [PHP](https://testingbot.com/support/app-automate/appium/php)
Get started with PHP mobile app testing using Appium.
- [PHP](https://testingbot.com/support/app-automate/appium/php)
### [Ruby](https://testingbot.com/support/app-automate/appium/ruby)
Get started with Ruby mobile app testing using Appium.
- [Ruby](https://testingbot.com/support/app-automate/appium/ruby)
## Preparing your App
Please see our [Prepare Mobile App](https://testingbot.com/support/app-automate/help/prepare) documentation to make sure your app will work on our emulators/devices.
## Additional Options
Appium provides [a lot of options](https://appium.io/docs/en/2.0/guides/caps/) to configure your test.
Some important options that might help:
**For Android:**
- **appium:appActivity** and **appium:appPackage** : by default, Appium will try to extract the main Activity from your apk. If this fails, you can supply your own with these options.
- **appium:chromeOptions** : additional chromedriver options you can supply.
- **appium:otherApps** : a JSON array of other apps that need to be installed, in URL format.
**For Android & iOS:**
- **appium:locale** : the language of the simulator/device (ex: `fr_CA`)
This sets the locale on the entire device/simulator, except on physical iOS devices. For real iOS devices, we will pass `-AppleLocale` as argument to the app.
- **appium:newCommandTimeout** : How long (in seconds) Appium will wait for a new command from the client before assuming the client quit and ending the session
Was this page helpful? Yes No
## Looking for More Help?
Have questions or need more information?
You can reach us via the following channels:
- [Email us](https://testingbot.com/contact/new)
- [Join our Slack Channel](https://join.slack.com/t/testingb0t/shared_invite/zt-3bcw9xch-jk19~6XPs_xBrsAgAedkCw)
---
URL: https://testingbot.com/support/app-automate/appium/capabilities
# Appium Capabilities Generator
Generate Appium capabilities for your mobile automated tests. Choose your device, OS version and configuration options to get the exact code you need for Java, Python, NodeJS, C#, Ruby or PHP.
[Selenium](https://testingbot.com/support/web-automate/selenium/capabilities)[Appium](https://testingbot.com/support/app-automate/appium/capabilities)[Puppeteer](https://testingbot.com/support/web-automate/puppeteer/capabilities)[Playwright](https://testingbot.com/support/web-automate/playwright/capabilities)
Mobile Environment
iOS 18.6›iPhone 16
Loading environments...
Please wait while we load the available devices and platforms.
App URL or ID
Appium Version3.0.12.11.52.10.32.9.02.8.12.7.02.6.02.5.42.4.12.3.02.2.32.1.32.0.11.22.31.22.21.22.11.22.01.21.01.20.21.19.11.18.31.17.11.16.01.15.1
## Project Capabilities
Test NameAllows you to customize the name of the test, as it will appear in the dashboard.
Build NameGroup tests under the same build identifier for easy retrieval.
## Debugging
Record Video
YesNo
Take Screenshot After Each Step
YesNo
Collect Logs
YesNo
## Customization
Locale
Geolocation TestingRun the test from a different geographical location.NoneRandom CountryAustraliaBahrainBelgiumBrazilCanadaChileFranceGermanyIndiaItalyJapanNorwaySingaporeSouth AfricaSwedenSwitzerlandUnited Arab EmiratesUnited KingdomUnited States
Screen OrientationPortraitLandscape
Looking for more options? See [all Appium capabilities](https://testingbot.com/support/app-automate/appium/options).
W3C Protocol
W3C is the newest WebDriver protocol, TestingBot recommends using W3C.
JSONWP
JSONWP is the legacy protocol which is no longer actively maintained.
JavaPythonNodeJSC#RubyPHP
MutableCapabilities capabilities = new MutableCapabilities();
capabilities.setCapability(CapabilityType.BROWSER_NAME, "safari");
capabilities.setCapability(CapabilityType.BROWSER_VERSION, "18.6");
capabilities.setCapability("appium:deviceName", "iPhone 16");
capabilities.setCapability(CapabilityType.PLATFORM_NAME, "iOS");`
---
URL: https://testingbot.com/support/app-automate/appium/appium-versions
# Appium 3
TestingBot supports Appium 3. See [Specify Appium version](https://testingbot.com#versions) to use Appium 3 with your tests.
Appium 3 introduces a couple of breaking changes compared to Appium 2. The main changes are removal of legacy code and protocols, which were already marked as deprecated in [Appium 2](https://testingbot.com#appium2).
Below is a list of breaking changes in Appium 3:
- Node.js / NPM minimum version bump (to 20.19 / 10) - which is handled by TestingBot.
- Removal of certain deprecated endpoints
- Security feature flag prefix requirements (for example replacing `adb_shell` with `uiautomator2:adb_shell`).
Please see the [Appium 3 migration guide](https://appium.io/docs/en/latest/guides/migrating-2-to-3/) for more details.
## Appium 2
Appium 2 is the new version of Appium, the mobile automation framework to run tests against websites and mobile apps on phones and tablets (both simulators/emulators and physical devices).
The main difference between Appium 2 and Appium 1 is that Appium 2 uses the concept of plugins and drivers.
This makes for a better ecosystem, with cleaner code and improved flexibility and performance.
The drivers will add support for any given platform, for example an xcuitest driver will provide support for iOS XCUITest automation, an espresso driver for Android Espresso.
Plugins allow for adding and customizing existing behavior of Appium. Drivers and plugins can be easily shared, installed or removed from Appium 2.
Appium 2 supports iOS 14 and above and Android 6 and above.
## Appium Versions
TestingBot currently supports these Appium versions:
Appium Version | EOL Date | Description || 3.0.1 | active | These drivers are installed:
- `appium-xcuitest-driver`: 10.0.2
- `appium-safari-driver`: 4.0.1
- `appium-uiautomator2-driver`: 5.0.0
- `appium-flutter-driver`: 2.14.2
|
| 2.17.0 or `latest` | active | These drivers are installed:
- `appium-xcuitest-driver`: 8.4.3
- `appium-safari-driver`: 3.5.23
- `appium-uiautomator2-driver`: 4.1.2
- `appium-flutter-driver`: 2.14.2
- `appium-flutter-integration-driver`: 1.1.3
|
| 2.11.3 | active | These drivers are installed:
- `appium-xcuitest-driver`: 7.24.16
- `appium-safari-driver`: 3.5.17
- `appium-uiautomator2-driver`: 3.7.7
- `appium-flutter-driver`: 2.9.2
- `appium-flutter-integration-driver`: 1.1.3
|
| 2.10.3 or `latest-1` | December 1, 2025 | These drivers are installed:
- `appium-xcuitest-driver`: 7.17.5
- `appium-uiautomator2-driver`: 3.5.4
- `appium-flutter-driver`: 2.6.0
|
| 2.9.0 | November 1, 2025 | These drivers are installed:
- `appium-xcuitest-driver`: 7.17.5
- `appium-uiautomator2-driver`: 3.5.4
- `appium-flutter-driver`: 2.6.0
|
| 2.5.1 | October 1, 2025 | These drivers are installed:
- `appium-xcuitest-driver`: 7.9.1
- `appium-uiautomator2-driver`: 3.0.4
- `appium-flutter-driver`: 2.5.1
|
| 2.4.1 | September 1, 2025 | These drivers are installed:
- `appium-xcuitest-driver`: 5.15.1
- `appium-uiautomator2-driver`: 2.43.4
- `appium-flutter-driver`: 2.4.1
|
If you specify `"appiumVersion": "latest"`, TestingBot will automatically use the latest Appium version. You can also use `latest-1`, `latest-2`, ... to test on the next most recent versions of Appium.
## Appium 1 Legacy version
TestingBot currently supports Appium 1 with its latest version: `1.22.3`.
## Appium 2 example on TestingBot
Appium 1 and 2 are both supported on TestingBot, on all our physical devices and virtual devices: iOS simulators and Android emulators.
These Appium 2 drivers are installed on TestingBot:
- [appium-uiautomator2-driver](https://github.com/appium/appium-uiautomator2-driver)
- [appium-xcuitest-driver](https://github.com/appium/appium-xcuitest-driver)
- [appium-geckodriver](https://github.com/appium/appium-geckodriver)
- [appium-safari-driver](https://github.com/appium/appium-safari-driver)
- [Flutter](https://testingbot.com/support/app-automate/appium/flutter)
These Appium 2 plugins are pre-installed and can be activated by specifying a `tb:appiumPlugins` capability (by default empty):
{
'tb:appiumPlugins': ['images', 'execute-driver', 'universal-xml']
}
- [Images Plugin](https://github.com/appium/appium/tree/master/packages/images-plugin)
- [Execute Driver Plugin](https://github.com/appium/appium/tree/master/packages/execute-driver-plugin)
- [Universal XML Plugin](https://github.com/appium/appium/tree/master/packages/universal-xml-plugin)
By default, TestingBot will use Appium 1 for all mobile tests. You can change this by [specifying an Appium Version](https://testingbot.com/support/app-automate/appium/options#appiumVersion).
The example below will connect to the TestingBot device grid and will use Appium 2 to run a mobile automation test.
[Java](https://testingbot.com#)[NodeJS](https://testingbot.com#)[Python](https://testingbot.com#)[Ruby](https://testingbot.com#)[C#](https://testingbot.com#)
XCUITestOptions options = new XCUITestOptions();
options.setPlatformName("iOS");
options.setCapability("appium:platformVersion", "18.0");
options.setCapability("appium:deviceName", "iPhone 16");
HashMap tbOptions = new HashMap<>();
tbOptions.put("appiumVersion", "2.5.1");
options.setCapability("tb:options", tbOptions);
const capabilities = {
platformName: 'iOS',
'appium:platformVersion': '18.0',
'appium:deviceName': 'iPhone 16',
'appium:automationName': 'XCUITest',
'tb:options': {
appiumVersion: '2.5.1'
}
}
capabilities = {
"platformName" : "iOS",
"appium:platformVersion" : "18.0",
"appium:deviceName" : "iPhone 16",
"appium:automationName": "XCUITest",
"tb:options" : {
"appiumVersion" : "2.5.1"
}
}
capabilities = {
"platformName" => "iOS",
"appium:platformVersion" => "18.0",
"appium:deviceName" => "iPhone 16",
"appium:automationName" => "XCUITest",
"tb:options" => {
"appiumVersion" => "2.5.1"
}
}
AppiumOptions options = new AppiumOptions();
options.PlatformName = "iOS";
options.AddAdditionalAppiumOption("appium:platformVersion", "18.0");
options.AddAdditionalAppiumOption("appium:deviceName", "iPhone 16");
options.AddAdditionalAppiumOption("appium:automationName", "XCUITest");
var tbOptions = new Dictionary();
tbOptions.Add("appiumVersion", "2.5.1");
options.AddAdditionalAppiumOption("tb:options", tbOptions);
## Appium 2 Changes
If you've been using Appium 1 and want to try out Appium 2, then please be aware of the possible breaking changes listed below.
### Protocol Changes
Appium 2 only allows the [W3C WebDriver Protocol](https://www.w3.org/TR/webdriver/). Even though Appium 1 has supported this protocol since recent years, it also supported JSONWP (JSON Wire Protocol) and MJSONWP (Mobile Json Wire Protocol).
This means that if you are using an older Appium client or binding, you might have trouble communicating with Appium 2.
Instead of using `desiredCapabilities`, you now need to use `capabilities` with either `alwaysMatch` or `firstMatch` properties.
### Capabilities
Appium only accepts a couple of [standard W3C capabilities](https://www.w3.org/TR/webdriver/#capabilities), including:
- `browserName`
- `browserVersion`
- `platformName`
All other capabilities, such as `app` or `deviceName` need to be vendor-prefixed. A vendor prefix means you prefix each key with a string followed by a colon. In Appium's case, this would be `appium:`
An example of some of the capabilities you can use with Appium 2:
- `appium:app`
- `appium:deviceName`
- `appium:noReset`
### automationName is required
With Appium 2, you now need to specify an automationName. Before, with Appium 1 this was filled in automatically if you did not specify it.
For iOS testing, you should use `appium:automationName` with `XCUITest`. For Android, you should set the `appium:automationName` capability to `UiAutomator2`.
### TestingBot specific capabilities
You can specify [TestingBot specific capabilities](https://testingbot.com/support/app-automate/appium/options) with the `tb:options` capability.
See below for an example where we will be using both Appium 2 and custom TestingBot capabilities.
XCUITestOptions options = new XCUITestOptions();
options.setPlatformName("iOS");
options.setCapability("appium:platformVersion", "18.0");
options.setCapability("appium:deviceName", "iPhone 16");
HashMap tbOptions = new HashMap<>();
tbOptions.put("appiumVersion", "2.5.1");
options.setCapability("tb:options", tbOptions);
Was this page helpful? Yes No
## Looking for More Help?
Have questions or need more information?
You can reach us via the following channels:
- [Email us](https://testingbot.com/contact/new)
- [Join our Slack Channel](https://join.slack.com/t/testingb0t/shared_invite/zt-3bcw9xch-jk19~6XPs_xBrsAgAedkCw)
---
URL: https://testingbot.com/support/app-automate/appium/csharp
### C# Examples:
- [NUnit](https://testingbot.com/support/app-automate/appium/csharp/nunit)
- [SpecFlow](https://testingbot.com/support/app-automate/appium/csharp/specflow)
# C# Automated App Testing
This guide will help you run mobile automated tests with Appium and C# on the TestingBot device cloud.
[Command Line](https://testingbot.com#)[Visual Studio](https://testingbot.com#)
TestingBot has created a sample Visual Studio project to help you get started with C# and Appium testing.
[Download ZIP](https://github.com/testingbot/csharp-app-example/archive/refs/heads/main.zip)
You can import this project into Visual Studio and run the tests directly.
To run your tests with C# and .NET, you need to have the [.NET SDK](https://dotnet.microsoft.com/download) installed on your machine.
- **On Windows:**
- Download the [.NET SDK](https://dotnet.microsoft.com/en-us/download) installer and run it.
- Or use the `winget` command: `winget install Microsoft.DotNet.SDK.9`
- **On MacOS:** `brew install dotnet`
- **On Linux:** `sudo apt-get install dotnet-sdk-9.0`
After installing the .NET SDK, you can create a new NUnit test project using the command line:
dotnet new nunit -n AppiumTest
cd AppiumTest
Next, add the Appium and Selenium WebDriver packages to your project:
dotnet add package Appium.WebDriver
dotnet add package Selenium.WebDriver
dotnet add package Selenium.Support
Replace the contents of `UnitTest1.cs` with the example code below, then run your tests with:
TB_KEY=... TB_SECRET=... dotnet test
## Installation
See our [C# App example repository](https://github.com/testingbot/csharp-app-example) for a simple example on how to run C# tests on Mobile Devices with TestingBot.
Please download the [appium-dotnet-driver](https://github.com/appium/appium-dotnet-driver) and add it to your project.
You can use NuGet packages as well, in which case you'll need to install these packages:
- Appium.WebDriver
- DotNetSeleniumExtras.WaitHelpers
- Selenium.WebDriver
## Real Device Testing
[Android](https://testingbot.com#)[iOS](https://testingbot.com#)
This will download and install a sample Android app we built. It will add two numbers to a textinput and display the sum of the two numbers.
using NUnit.Framework;
using NUnit.Framework.Interfaces;
using OpenQA.Selenium;
using OpenQA.Selenium.Appium;
using OpenQA.Selenium.Appium.Android;
using OpenQA.Selenium.Support.UI;
using System;
using System.Collections.Generic;
namespace AppiumNunit
{
[TestFixture]
public class AndroidRealDeviceTest
{
private AndroidDriver? Driver;
[Test]
public void SampleTest()
{
var options = new AppiumOptions
{
PlatformName = "Android",
DeviceName = "Galaxy S10",
PlatformVersion = "10.0",
App = "https://testingbot.com/appium/sample.apk"
};
options.AddAdditionalAppiumOption("tb:options", new Dictionary
{
["key"] = Environment.GetEnvironmentVariable("TB_KEY") ?? "",
["secret"] = Environment.GetEnvironmentVariable("TB_SECRET") ?? "",
["name"] = TestContext.CurrentContext.Test.Name,
["realDevice"] = true
});
Driver = new AndroidDriver(new Uri("https://hub.testingbot.com/wd/hub"), options, TimeSpan.FromSeconds(120));
var wait = new WebDriverWait(Driver, TimeSpan.FromSeconds(30));
var inputA = wait.Until(d => d.FindElement(MobileBy.AccessibilityId("inputA")));
inputA.SendKeys("10");
var inputB = wait.Until(d => d.FindElement(MobileBy.AccessibilityId("inputB")));
inputB.SendKeys("5");
Assert.Pass();
}
[TearDown]
public void CleanUpAfterEveryTestMethod()
{
if (Driver != null)
{
var passed = TestContext.CurrentContext.Result.Outcome.Status == TestStatus.Passed;
((IJavaScriptExecutor)Driver).ExecuteScript("tb:test-result=" + (passed ? "passed" : "failed"));
Driver.Dispose();
}
}
}
}
This will download and install a sample iOS app we built. It will add two numbers to a textinput and display the sum of the two numbers.
using NUnit.Framework;
using NUnit.Framework.Interfaces;
using OpenQA.Selenium;
using OpenQA.Selenium.Appium;
using OpenQA.Selenium.Appium.iOS;
using OpenQA.Selenium.Support.UI;
using System;
using System.Collections.Generic;
namespace AppiumNunit
{
[TestFixture]
public class iOSRealDeviceTest
{
private IOSDriver? Driver;
[Test]
public void SampleTest()
{
var options = new AppiumOptions
{
PlatformName = "iOS",
DeviceName = "iPhone 15",
PlatformVersion = "17.4",
App = "https://testingbot.com/appium/sample.ipa"
};
options.AddAdditionalAppiumOption("tb:options", new Dictionary
{
["key"] = Environment.GetEnvironmentVariable("TB_KEY") ?? "",
["secret"] = Environment.GetEnvironmentVariable("TB_SECRET") ?? "",
["name"] = TestContext.CurrentContext.Test.Name,
["realDevice"] = true
});
Driver = new IOSDriver(new Uri("https://hub.testingbot.com/wd/hub"), options, TimeSpan.FromSeconds(300));
var wait = new WebDriverWait(Driver, TimeSpan.FromSeconds(30));
var inputA = wait.Until(d => d.FindElement(MobileBy.AccessibilityId("inputA")));
inputA.SendKeys("10");
var inputB = wait.Until(d => d.FindElement(MobileBy.AccessibilityId("inputB")));
inputB.SendKeys("5");
var sum = wait.Until(d => d.FindElement(MobileBy.AccessibilityId("sum")));
Console.WriteLine(sum.Text);
Assert.Pass();
}
[TearDown]
public void CleanUpAfterEveryTestMethod()
{
if (Driver != null)
{
var passed = TestContext.CurrentContext.Result.Outcome.Status == TestStatus.Passed;
((IJavaScriptExecutor)Driver).ExecuteScript("tb:test-result=" + (passed ? "passed" : "failed"));
Driver.Dispose();
}
}
}
}
## Simulator/Emulator Testing
[Android](https://testingbot.com#)[iOS](https://testingbot.com#)
This will download and install a sample Android app we built. It will add two numbers to a textinput and display the sum of the two numbers.
using NUnit.Framework;
using NUnit.Framework.Interfaces;
using OpenQA.Selenium;
using OpenQA.Selenium.Appium;
using OpenQA.Selenium.Appium.Android;
using OpenQA.Selenium.Support.UI;
using System;
using System.Collections.Generic;
namespace AppiumNunit
{
[TestFixture]
public class AndroidEmulatorTest
{
private AndroidDriver? Driver;
[Test]
public void SampleTest()
{
var options = new AppiumOptions
{
PlatformName = "Android",
DeviceName = "Galaxy S9",
PlatformVersion = "9.0",
App = "https://testingbot.com/appium/sample.apk"
};
options.AddAdditionalAppiumOption("tb:options", new Dictionary
{
["key"] = Environment.GetEnvironmentVariable("TB_KEY") ?? "",
["secret"] = Environment.GetEnvironmentVariable("TB_SECRET") ?? "",
["name"] = TestContext.CurrentContext.Test.Name
});
Driver = new AndroidDriver(new Uri("https://hub.testingbot.com/wd/hub"), options, TimeSpan.FromSeconds(240));
var wait = new WebDriverWait(Driver, TimeSpan.FromSeconds(30));
var inputA = wait.Until(d => d.FindElement(MobileBy.AccessibilityId("inputA")));
inputA.SendKeys("10");
var inputB = wait.Until(d => d.FindElement(MobileBy.AccessibilityId("inputB")));
inputB.SendKeys("5");
Assert.Pass();
}
[TearDown]
public void CleanUpAfterEveryTestMethod()
{
if (Driver != null)
{
var passed = TestContext.CurrentContext.Result.Outcome.Status == TestStatus.Passed;
((IJavaScriptExecutor)Driver).ExecuteScript("tb:test-result=" + (passed ? "passed" : "failed"));
Driver.Dispose();
}
}
}
}
This will download and install a sample iOS app we built. It will add two numbers to a textinput and display the sum of the two numbers.
using NUnit.Framework;
using NUnit.Framework.Interfaces;
using OpenQA.Selenium;
using OpenQA.Selenium.Appium;
using OpenQA.Selenium.Appium.iOS;
using OpenQA.Selenium.Support.UI;
using System;
using System.Collections.Generic;
namespace AppiumNunit
{
[TestFixture]
public class iOSSimulatorTest
{
private IOSDriver? Driver;
[Test]
public void SampleTest()
{
var options = new AppiumOptions
{
PlatformName = "iOS",
DeviceName = "iPhone 15",
PlatformVersion = "17.4",
App = "https://testingbot.com/appium/sample.zip"
};
options.AddAdditionalAppiumOption("tb:options", new Dictionary
{
["key"] = Environment.GetEnvironmentVariable("TB_KEY") ?? "",
["secret"] = Environment.GetEnvironmentVariable("TB_SECRET") ?? "",
["name"] = TestContext.CurrentContext.Test.Name
});
Driver = new IOSDriver(new Uri("https://hub.testingbot.com/wd/hub"), options, TimeSpan.FromSeconds(300));
var wait = new WebDriverWait(Driver, TimeSpan.FromSeconds(30));
var inputA = wait.Until(d => d.FindElement(MobileBy.AccessibilityId("inputA")));
inputA.SendKeys("10");
var inputB = wait.Until(d => d.FindElement(MobileBy.AccessibilityId("inputB")));
inputB.SendKeys("5");
var sum = wait.Until(d => d.FindElement(MobileBy.AccessibilityId("sum")));
Console.WriteLine(sum.Text);
Assert.Pass();
}
[TearDown]
public void CleanUpAfterEveryTestMethod()
{
if (Driver != null)
{
var passed = TestContext.CurrentContext.Result.Outcome.Status == TestStatus.Passed;
((IJavaScriptExecutor)Driver).ExecuteScript("tb:test-result=" + (passed ? "passed" : "failed"));
Driver.Dispose();
}
}
}
}
## Uploading Your App
Please see our [Upload Mobile App](https://testingbot.com/support/app-automate/help/upload) documentation to find out how to upload your app to TestingBot for testing.
## Specify Browsers & Devices
To run your existing tests on TestingBot, your tests will need to be configured to use the TestingBot remote machines. If the test was running on your local machine or network, you can simply change your existing test like this:
**Before:**
Driver = new IOSDriver(new Uri("http://localhost:4444/wd/hub"), options, TimeSpan.FromSeconds(300));
**After:**
Driver = new IOSDriver(new Uri("https://hub.testingbot.com/wd/hub"), options, TimeSpan.FromSeconds(300));
To let TestingBot know on which device you want to run your test on, you need to specify the `appium:deviceName`, `appium:platformVersion`, `platformName` and other optional options in the capabilities field.
To see how to do this, please select a combination of device type and device name in the drop-down menus below.
iOS 18.6›iPhone 16
Loading environments...
Please wait while we load the available browsers and platforms.
## Testing Internal Websites
We've built [TestingBot Tunnel](https://testingbot.com/support/tunnel), to provide you with a secure way to run tests against your staged/internal webapps.
Please see our [TestingBot Tunnel documentation](https://testingbot.com/support/tunnel) for more information about this easy to use tunneling solution.
The example below shows how to easily run a C# test with our Tunnel:
1. [Download our tunnel](https://testingbot.com/support/tunnel) and start the tunnel:
java -jar testingbot-tunnel.jar key secret
2. Adjust your test: instead of pointing to `'hub.testingbot.com/wd/hub'` like the example above - change it to point to your tunnel's IP address.
Assuming you run the tunnel on the same machine you run your tests, change to `'localhost:4445/wd/hub'`. localhost is the machine running the tunnel, 4445 is the default port of the tunnel.
This way your test will go securely through the tunnel to TestingBot and back:
using NUnit.Framework;
using NUnit.Framework.Interfaces;
using OpenQA.Selenium;
using OpenQA.Selenium.Appium;
using OpenQA.Selenium.Appium.iOS;
using OpenQA.Selenium.Support.UI;
using System;
using System.Collections.Generic;
namespace AppiumNunit
{
[TestFixture]
public class iOSTunnelTest
{
private IOSDriver? Driver;
[Test]
public void SampleTest()
{
var options = new AppiumOptions
{
PlatformName = "iOS",
DeviceName = "iPhone 15",
PlatformVersion = "17.4",
App = "https://testingbot.com/appium/sample.zip"
};
options.AddAdditionalAppiumOption("tb:options", new Dictionary
{
["key"] = Environment.GetEnvironmentVariable("TB_KEY") ?? "",
["secret"] = Environment.GetEnvironmentVariable("TB_SECRET") ?? "",
["name"] = TestContext.CurrentContext.Test.Name
});
Driver = new IOSDriver(new Uri("http://localhost:4445/wd/hub"), options, TimeSpan.FromSeconds(300));
var wait = new WebDriverWait(Driver, TimeSpan.FromSeconds(30));
var inputA = wait.Until(d => d.FindElement(MobileBy.AccessibilityId("inputA")));
inputA.SendKeys("10");
var inputB = wait.Until(d => d.FindElement(MobileBy.AccessibilityId("inputB")));
inputB.SendKeys("5");
var sum = wait.Until(d => d.FindElement(MobileBy.AccessibilityId("sum")));
Console.WriteLine(sum.Text);
Assert.Pass();
}
[TearDown]
public void CleanUpAfterEveryTestMethod()
{
if (Driver != null)
{
var passed = TestContext.CurrentContext.Result.Outcome.Status == TestStatus.Passed;
((IJavaScriptExecutor)Driver).ExecuteScript("tb:test-result=" + (passed ? "passed" : "failed"));
Driver.Dispose();
}
}
}
}
## Run tests in Parallel
Parallel Testing means running the same test, or multiple tests, simultaneously. This greatly reduces your total testing time.
You can run the same tests on all different browser configurations or run different tests all on the same browser configuration.
TestingBot has a large grid of machines and browsers, which means you can use our service to do efficient parallel testing. It is one of the key features we provide to greatly cut down on your total testing time.
### Queuing
Every plan we provide comes with a limit of parallel tests.
If you exceed the number of parallel tests assigned to your account, TestingBot will queue the additional tests (for up to 6 minutes) and run the tests as soon as slots become available.
## Mark tests as passed/failed
To see if a test passed or not in our member area, or to send additional meta-data to TestingBot, you can use our API.
Please see the example below on how to notify TestingBot about the test success state:
[TearDown]
public void CleanUp()
{
if (Driver != null)
{
bool passed = TestContext.CurrentContext.Result.Outcome.Status == TestStatus.Passed;
// Logs the result to TestingBot
((IJavaScriptExecutor)Driver).ExecuteScript("tb:test-result=" + (passed ? "passed" : "failed"));
// Terminates the remote webdriver session
Driver.Dispose();
}
}
## Preparing your App
You do not need to install any code or plugin to run a test.
Below are some things that are necessary to successfully run a mobile test:
**For Android:**
- Please supply the URL to your `.apk` or `.aab` file.
**Important:** the `.apk` file needs to be a x86 build (x86 ABI) for Android emulators.
**For iOS Real Device:**
- Please supply the URL to an `.ipa` file.
**For iOS Simulator:**
- Please supply the URL to a `.zip` file that contains your `.app`
- The `.app` needs to be an iOS Simulator build:
- Create a Simulator build:
xcodebuild -sdk iphonesimulator -configuration Debug
- Zip the `.app` bundle:
zip -r MyApp.zip MyApp.app
## Additional Options
Appium provides [a lot of options](https://appium.io/docs/en/2.0/guides/caps/) to configure your test.
Some important options that might help:
**For Android:**
- **appActivity** and **appPackage** : by default, Appium will try to extract the main Activity from your apk. If this fails, you can supply your own with these options.
- **chromeOptions** : additional chromedriver options you can supply.
- **otherApps** : a JSON array of other apps that need to be installed, in URL format.
**For Android & iOS:**
- **locale** : the language of the simulator/device (ex: `fr_CA`)
This sets the locale on the entire device/simulator, except on physical iOS devices. For real iOS devices, we will pass `-AppleLocale` as argument to the app.
- **newCommandTimeout** : How long (in seconds) Appium will wait for a new command from the client before assuming the client quit and ending the session
Was this page helpful? Yes No
## Looking for More Help?
Have questions or need more information?
You can reach us via the following channels:
- [Email us](https://testingbot.com/contact/new)
- [Join our Slack Channel](https://join.slack.com/t/testingb0t/shared_invite/zt-3bcw9xch-jk19~6XPs_xBrsAgAedkCw)
---
URL: https://testingbot.com/support/app-automate/appium/csharp/specflow
# SpecFlow Automated App Testing
See our [SpecFlow App example repository](https://github.com/testingbot/specflow-app-example) for a simple example on how to run SpecFlow tests on Mobile Devices with TestingBot.
This example project can be used with Visual Studio, or via terminal: `dotnet test`.
SpecFlow is an open-source .NET utility which allows you to write tests using Cucumber-compatible Gherkin syntax.
## Installation
We'll assume you are using Visual Studio to run your tests.
Here are the steps to set up the required environment for your SpecFlow tests:
- Add NuGet Packages: `Appium.WebDriver, NUnit, SpecFlow`
- For more information, please see the [SpecFlow documentation](https://specflow.org/getting-started/#InstallSetup).
In the example below, we'll create a calculator test that enters 2 numbers in 2 input fields and validates the sum.
The app used in the example is a demo app we created at TestingBot and runs on both iOS and Android.
## SpecFlow Example
First, we'll create the feature file **feature.feature** :
Feature: Calculator
Scenario Outline: Can do simple math
Given I am using the calculator
When I add inputA for "5"
When I add inputB for "10"
Then I should see the sum "15"
Now we need to define the logic behind these steps:
**SingleStep.cs**
using NUnit.Framework;
using OpenQA.Selenium.Appium;
using OpenQA.Selenium.Appium.Android;
using TechTalk.SpecFlow;
namespace testingbot_specflow
{
[Binding]
public class SingleStep
{
private AppiumDriver _driver;
readonly TestingBotDriver _tbDriver;
public SingleStep()
{
_tbDriver = (TestingBotDriver) ScenarioContext.Current["tbDriver"];
}
[Given(@"I am using the calculator")]
public void GivenIAmOnTheGooglePage()
{
_driver = _tbDriver.Init();
_driver.LaunchApp();
}
[When(@"I add inputA for ""(.*)""")]
public void WhenIAddA(string amount)
{
AndroidElement inputA = _driver.FindElementById("inputA");
inputA.SendKeys(amount);
}
[When(@"I add inputB for ""(.*)""")]
public void WhenIAddB(string amount)
{
AndroidElement inputB = _driver.FindElementById("inputB");
inputB.SendKeys(amount);
}
[Then(@"I should see the sum ""(.*)""")]
public void ThenIShouldSeeTitle(string sum)
{
Assert.That(_driver.FindElementByXPath("//android.widget.EditText[@content-desc=\"sum\"]").Text, Is.EqualTo(sum));
}
}
}
Finally, we'll need to create the `TestingBotDriver`:
using System;
using OpenQA.Selenium;
using OpenQA.Selenium.Appium;
using OpenQA.Selenium.Appium.Android;
using OpenQA.Selenium.Appium.Enums;
using TechTalk.SpecFlow;
namespace testingbot_specflow
{
[Binding]
public sealed class testingbot_specflow
{
private TestingBotDriver tbDriver;
[BeforeScenario]
public void BeforeScenario()
{
tbDriver = new TestingBotDriver(ScenarioContext.Current);
ScenarioContext.Current["tbDriver"] = tbDriver;
}
[AfterScenario]
public void AfterScenario()
{
tbDriver.Cleanup();
}
}
public class TestingBotDriver
{
private AppiumDriver driver;
private ScenarioContext current;
public TestingBotDriver(ScenarioContext current)
{
this.current = current;
}
public AppiumDriver Init()
{
AppiumOptions appiumOptions = new AppiumOptions();
appiumOptions.AddAdditionalCapability(MobileCapabilityType.DeviceName, "Galaxy S9");
appiumOptions.AddAdditionalCapability(MobileCapabilityType.PlatformName, "Android");
appiumOptions.AddAdditionalCapability(MobileCapabilityType.PlatformVersion, "9.0");
appiumOptions.AddAdditionalCapability(MobileCapabilityType.App, "tb://...");
String key = "TB_KEY";
String secret = "TB_SECRET";
appiumOptions.AddAdditionalCapability("key", key);
appiumOptions.AddAdditionalCapability("secret", secret);
AppiumDriver driver = new AndroidDriver(
new Uri("https://hub.testingbot.com/wd/hub"),
appiumOptions
);
return driver;
}
public void Cleanup()
{
if (driver != null)
{
driver.Quit();
}
}
}
}
## Real Device Testing
[Android](https://testingbot.com#)[iOS](https://testingbot.com#)
This will download and install a sample Android app we built. It will add two numbers to a textinput and display the sum of the two numbers.
using System;
using OpenQA.Selenium;
using OpenQA.Selenium.Appium;
using OpenQA.Selenium.Appium.Android;
using OpenQA.Selenium.Appium.Enums;
using TechTalk.SpecFlow;
namespace testingbot_specflow
{
[Binding]
public sealed class testingbot_specflow
{
private TestingBotDriver tbDriver;
[BeforeScenario]
public void BeforeScenario()
{
tbDriver = new TestingBotDriver(ScenarioContext.Current);
ScenarioContext.Current["tbDriver"] = tbDriver;
}
[AfterScenario]
public void AfterScenario()
{
tbDriver.Cleanup();
}
}
public class TestingBotDriver
{
private AppiumDriver driver;
private ScenarioContext current;
public TestingBotDriver(ScenarioContext current)
{
this.current = current;
}
public AppiumDriver Init()
{
AppiumOptions appiumOptions = new AppiumOptions();
appiumOptions.AddAdditionalCapability(MobileCapabilityType.DeviceName, "Galaxy S10");
appiumOptions.AddAdditionalCapability(MobileCapabilityType.PlatformName, "Android");
appiumOptions.AddAdditionalCapability(MobileCapabilityType.PlatformVersion, "10.0");
appiumOptions.AddAdditionalCapability(MobileCapabilityType.App, "tb://...");
appiumOptions.AddAdditionalCapability("realDevice", true);
appiumOptions.AddAdditionalCapability("key", Environment.GetEnvironmentVariable("TB_KEY"));
appiumOptions.AddAdditionalCapability("secret", Environment.GetEnvironmentVariable("TB_SECRET"));
AppiumDriver driver = new AndroidDriver(
new Uri("https://hub.testingbot.com/wd/hub"),
appiumOptions
);
return driver;
}
public void Cleanup()
{
if (driver != null)
{
driver.Quit();
}
}
}
}
This will download and install a sample iOS app we built. It will add two numbers to a textinput and display the sum of the two numbers.
using System;
using OpenQA.Selenium.Appium;
using OpenQA.Selenium.Appium.Enums;
using OpenQA.Selenium.Appium.iOS;
using TechTalk.SpecFlow;
namespace testingbot_specflow
{
[Binding]
public sealed class testingbot_specflow
{
private TestingBotDriver tbDriver;
[BeforeScenario]
public void BeforeScenario()
{
tbDriver = new TestingBotDriver(ScenarioContext.Current);
ScenarioContext.Current["tbDriver"] = tbDriver;
}
[AfterScenario]
public void AfterScenario()
{
tbDriver.Cleanup();
}
}
public class TestingBotDriver
{
private IOSDriver driver;
private ScenarioContext current;
public TestingBotDriver(ScenarioContext current)
{
this.current = current;
}
public IOSDriver Init()
{
AppiumOptions appiumOptions = new AppiumOptions();
appiumOptions.AddAdditionalCapability(MobileCapabilityType.DeviceName, "iPhone 15");
appiumOptions.AddAdditionalCapability(MobileCapabilityType.PlatformName, "iOS");
appiumOptions.AddAdditionalCapability(MobileCapabilityType.PlatformVersion, "18.0");
appiumOptions.AddAdditionalCapability(MobileCapabilityType.App, "tb://...");
appiumOptions.AddAdditionalCapability("realDevice", true);
appiumOptions.AddAdditionalCapability("key", Environment.GetEnvironmentVariable("TB_KEY"));
appiumOptions.AddAdditionalCapability("secret", Environment.GetEnvironmentVariable("TB_SECRET"));
IOSDriver driver = new IOSDriver(
new Uri("https://hub.testingbot.com/wd/hub"),
appiumOptions
);
return driver;
}
public void Cleanup()
{
if (driver != null)
{
driver.Quit();
}
}
}
}
## Simulator/Emulator Testing
[Android](https://testingbot.com#)[iOS](https://testingbot.com#)
This will download and install a sample Android app we built. It will add two numbers to a textinput and display the sum of the two numbers.
using System;
using OpenQA.Selenium;
using OpenQA.Selenium.Appium;
using OpenQA.Selenium.Appium.Android;
using OpenQA.Selenium.Appium.Enums;
using TechTalk.SpecFlow;
namespace testingbot_specflow
{
[Binding]
public sealed class testingbot_specflow
{
private TestingBotDriver tbDriver;
[BeforeScenario]
public void BeforeScenario()
{
tbDriver = new TestingBotDriver(ScenarioContext.Current);
ScenarioContext.Current["tbDriver"] = tbDriver;
}
[AfterScenario]
public void AfterScenario()
{
tbDriver.Cleanup();
}
}
public class TestingBotDriver
{
private AppiumDriver driver;
private ScenarioContext current;
public TestingBotDriver(ScenarioContext current)
{
this.current = current;
}
public AppiumDriver Init()
{
AppiumOptions appiumOptions = new AppiumOptions();
appiumOptions.AddAdditionalCapability(MobileCapabilityType.DeviceName, "Galaxy S9");
appiumOptions.AddAdditionalCapability(MobileCapabilityType.PlatformName, "Android");
appiumOptions.AddAdditionalCapability(MobileCapabilityType.PlatformVersion, "9.0");
appiumOptions.AddAdditionalCapability(MobileCapabilityType.App, "tb://...");
appiumOptions.AddAdditionalCapability("key", Environment.GetEnvironmentVariable("TB_KEY"));
appiumOptions.AddAdditionalCapability("secret", Environment.GetEnvironmentVariable("TB_SECRET"));
AppiumDriver driver = new AndroidDriver(
new Uri("https://hub.testingbot.com/wd/hub"),
appiumOptions
);
return driver;
}
public void Cleanup()
{
if (driver != null)
{
driver.Quit();
}
}
}
}
This will download and install a sample iOS app we built. It will add two numbers to a textinput and display the sum of the two numbers.
using System;
using OpenQA.Selenium.Appium;
using OpenQA.Selenium.Appium.Enums;
using OpenQA.Selenium.Appium.iOS;
using TechTalk.SpecFlow;
namespace testingbot_specflow
{
[Binding]
public sealed class testingbot_specflow
{
private TestingBotDriver tbDriver;
[BeforeScenario]
public void BeforeScenario()
{
tbDriver = new TestingBotDriver(ScenarioContext.Current);
ScenarioContext.Current["tbDriver"] = tbDriver;
}
[AfterScenario]
public void AfterScenario()
{
tbDriver.Cleanup();
}
}
public class TestingBotDriver
{
private IOSDriver driver;
private ScenarioContext current;
public TestingBotDriver(ScenarioContext current)
{
this.current = current;
}
public IOSDriver Init()
{
AppiumOptions appiumOptions = new AppiumOptions();
appiumOptions.AddAdditionalCapability(MobileCapabilityType.DeviceName, "iPhone 16");
appiumOptions.AddAdditionalCapability(MobileCapabilityType.PlatformName, "iOS");
appiumOptions.AddAdditionalCapability(MobileCapabilityType.PlatformVersion, "18.0");
appiumOptions.AddAdditionalCapability(MobileCapabilityType.App, "tb://...");
appiumOptions.AddAdditionalCapability("key", Environment.GetEnvironmentVariable("TB_KEY"));
appiumOptions.AddAdditionalCapability("secret", Environment.GetEnvironmentVariable("TB_SECRET"));
IOSDriver driver = new IOSDriver(
new Uri("https://hub.testingbot.com/wd/hub"),
appiumOptions
);
return driver;
}
public void Cleanup()
{
if (driver != null)
{
driver.Quit();
}
}
}
}
## Uploading Your App
Please see our [Upload Mobile App](https://testingbot.com/support/app-automate/help/upload) documentation to find out how to upload your app to TestingBot for testing.
## Specify Browsers & Devices
To run your existing tests on TestingBot, your tests will need to be configured to use the TestingBot remote machines. If the test was running on your local machine or network, you can simply change your existing test like this:
**Before:**
IOSDriver driver = new IOSDriver(
new Uri("http://localhost:4444/wd/hub"),
appiumOptions
);
**After:**
IOSDriver driver = new IOSDriver(
new Uri("https://hub.testingbot.com/wd/hub"),
appiumOptions
);
### Configuring Capabilities
Capabilities are key-value pairs that allows you to customize your tests on TestingBot.
Appium provides its [own set of capabilities](https://appium.io/docs/en/2.0/guides/caps/) which you can specify.
TestingBot also provide its own [Custom Capabilities](https://testingbot.com/support/app-automate/appium/options), to customize tests ran on the TestingBot platform.
You can use the drop-down menus below to see how to configure your tests to run on a specific mobile device:
iOS 18.6›iPhone 16
Loading environments...
Please wait while we load the available browsers and platforms.
## Testing Internal Websites
We've built [TestingBot Tunnel](https://testingbot.com/support/tunnel), to provide you with a secure way to run tests against your staged/internal webapps.
Please see our [TestingBot Tunnel documentation](https://testingbot.com/support/tunnel) for more information about this easy to use tunneling solution.
The example below shows how to easily run a C# test with our Tunnel:
1. [Download our tunnel](https://testingbot.com/support/tunnel) and start the tunnel:
java -jar testingbot-tunnel.jar key secret
2. Adjust your test: instead of pointing to `'hub.testingbot.com/wd/hub'` like the example above - change it to point to your tunnel's IP address.
Assuming you run the tunnel on the same machine you run your tests, change to `'localhost:4445/wd/hub'`. localhost is the machine running the tunnel, 4445 is the default port of the tunnel.
This way your test will go securely through the tunnel to TestingBot and back:
using System;
using OpenQA.Selenium;
using OpenQA.Selenium.Remote;
namespace SeleniumTest {
class Program {
static void Main(string[] args) {
IWebDriver driver;
DesiredCapabilities capability = DesiredCapabilities.Firefox();
capability.SetCapability("key", "key");
capability.SetCapability("secret", "secret");
capability.SetCapability("version", "latest-1");
driver = new RemoteWebDriver(
new Uri("http://localhost:4445/wd/hub/"), capability
);
driver.Navigate().GoToUrl("https://www.google.com/ncr");
Console.WriteLine(driver.Title);
IWebElement query = driver.FindElement(By.Name("q"));
query.SendKeys("TestingBot");
query.Submit();
Console.WriteLine(driver.Title);
driver.Quit();
}
}
}
## Run tests in Parallel
Parallel Testing means running the same test, or multiple tests, simultaneously. This greatly reduces your total testing time.
You can run the same tests on all different browser configurations or run different tests all on the same browser configuration.
TestingBot has a large grid of machines and browsers, which means you can use our service to do efficient parallel testing. It is one of the key features we provide to greatly cut down on your total testing time.
### Queuing
Every plan we provide comes with a limit of parallel tests.
If you exceed the number of parallel tests assigned to your account, TestingBot will queue the additional tests (for up to 6 minutes) and run the tests as soon as slots become available.
## Mark tests as passed/failed
To see if a test passed or not in our member area, or to send additional meta-data to TestingBot, you can use our API.
Please see the example below on how to notify TestingBot about the test success state:
[TearDown]
public void CleanUp()
{
bool passed = TestContext.CurrentContext.Result.Status == TestStatus.Passed;
try
{
// Logs the result to TestingBot
((IJavaScriptExecutor)driver).ExecuteScript("tb:test-result=" + (passed ? "passed" : "failed"));
}
finally
{
// Terminates the remote webdriver session
driver.Quit();
}
}
## Preparing your App
You do not need to install any code or plugin to run a test.
Below are some things that are necessary to successfully run a mobile test:
**For Android:**
- Please supply the URL to your `.apk` or `.aab` file.
**Important:** the `.apk` file needs to be a x86 build (x86 ABI) for Android emulators.
**For iOS Real Device:**
- Please supply the URL to an `.ipa` file.
**For iOS Simulator:**
- Please supply the URL to a `.zip` file that contains your `.app`
- The `.app` needs to be an iOS Simulator build:
- Create a Simulator build:
xcodebuild -sdk iphonesimulator -configuration Debug
- Zip the `.app` bundle:
zip -r MyApp.zip MyApp.app
## Additional Options
Appium provides [a lot of options](https://appium.io/docs/en/2.0/guides/caps/) to configure your test.
Some important options that might help:
**For Android:**
- **appActivity** and **appPackage** : by default, Appium will try to extract the main Activity from your apk. If this fails, you can supply your own with these options.
- **chromeOptions** : additional chromedriver options you can supply.
- **otherApps** : a JSON array of other apps that need to be installed, in URL format.
**For Android & iOS:**
- **locale** : the language of the simulator/device (ex: `fr_CA`)
This sets the locale on the entire device/simulator, except on physical iOS devices. For real iOS devices, we will pass `-AppleLocale` as argument to the app.
- **newCommandTimeout** : How long (in seconds) Appium will wait for a new command from the client before assuming the client quit and ending the session
Was this page helpful? Yes No
## Looking for More Help?
Have questions or need more information?
You can reach us via the following channels:
- [Email us](https://testingbot.com/contact/new)
- [Join our Slack Channel](https://join.slack.com/t/testingb0t/shared_invite/zt-3bcw9xch-jk19~6XPs_xBrsAgAedkCw)
---
URL: https://testingbot.com/support/app-automate/appium/csharp/nunit
# NUnit Automated App Testing
NUnit is a unit-testing framework for all .NET languages. You can use NUnit to run tests on mobile devices, together with Appium.
This documentation page will show you how to set up and run Appium tests with NUnit on TestingBot's remote physical device grid. Once you've finished integrating, you will be able to run tests on iOS and Android devices, in parallel, on the remote TestingBot device grid.
## Installation
We'll assume you are using Visual Studio to run your tests.
Make sure to add these NuGet packages:
- `Appium.WebDriver`
- `NUnit`
## Initialize remote Appium Webdriver
To be able to connect to TestingBot's device grid, we'll need to set up a remote Appium WebDriver. Please see the example file (`TestingBotDriver`) below on how to do this.
[Android](https://testingbot.com#)[iOS](https://testingbot.com#)
using System;
using System.Collections.Generic;
using OpenQA.Selenium.Appium;
using OpenQA.Selenium.Appium.Android;
namespace testingbot
{
[Binding]
public sealed class TestingBot
{
private TestingBotDriver tbDriver;
[BeforeScenario]
public void BeforeScenario()
{
tbDriver = new TestingBotDriver(ScenarioContext.Current);
ScenarioContext.Current["tbDriver"] = tbDriver;
}
[AfterScenario]
public void AfterScenario()
{
tbDriver.Cleanup();
}
}
public class TestingBotDriver
{
private AndroidDriver driver;
private ScenarioContext current;
public TestingBotDriver(ScenarioContext current)
{
this.current = current;
}
public AndroidDriver Init()
{
AppiumOptions appiumOptions = new AppiumOptions();
appiumOptions.PlatformName = "Android";
appiumOptions.AddAdditionalAppiumOption("appium:deviceName", "Galaxy S23");
appiumOptions.AddAdditionalAppiumOption("appium:platformVersion", "13.0");
appiumOptions.AddAdditionalAppiumOption("appium:app", "tb://...");
String key = "TB_KEY";
String secret = "TB_SECRET";
var tbOptions = new Dictionary();
tbOptions.Add("key", key);
tbOptions.Add("secret", secret);
tbOptions.Add("realDevice", true);
appiumOptions.AddAdditionalAppiumOption("tb:options", tbOptions);
AndroidDriver driver = new AndroidDriver(
new Uri("https://hub.testingbot.com/wd/hub"),
appiumOptions
);
return driver;
}
public void Cleanup()
{
if (driver != null)
{
driver.Quit();
}
}
}
}
using System;
using System.Collections.Generic;
using OpenQA.Selenium.Appium;
using OpenQA.Selenium.Appium.iOS;
namespace testingbot
{
[Binding]
public sealed class TestingBot
{
private TestingBotDriver tbDriver;
[BeforeScenario]
public void BeforeScenario()
{
tbDriver = new TestingBotDriver(ScenarioContext.Current);
ScenarioContext.Current["tbDriver"] = tbDriver;
}
[AfterScenario]
public void AfterScenario()
{
tbDriver.Cleanup();
}
}
public class TestingBotDriver
{
private IOSDriver driver;
private ScenarioContext current;
public TestingBotDriver(ScenarioContext current)
{
this.current = current;
}
public IOSDriver Init()
{
AppiumOptions appiumOptions = new AppiumOptions();
appiumOptions.PlatformName = "iOS";
appiumOptions.AddAdditionalAppiumOption("appium:deviceName", "iPhone 15");
appiumOptions.AddAdditionalAppiumOption("appium:platformVersion", "18.0");
appiumOptions.AddAdditionalAppiumOption("appium:app", "tb://...");
String key = "TB_KEY";
String secret = "TB_SECRET";
var tbOptions = new Dictionary();
tbOptions.Add("key", key);
tbOptions.Add("secret", secret);
tbOptions.Add("realDevice", true);
appiumOptions.AddAdditionalAppiumOption("tb:options", tbOptions);
IOSDriver driver = new IOSDriver(
new Uri("https://hub.testingbot.com/wd/hub"),
appiumOptions
);
return driver;
}
public void Cleanup()
{
if (driver != null)
{
driver.Quit();
}
}
}
}
## Uploading Your App
Please see our [Upload Mobile App](https://testingbot.com/support/app-automate/help/upload) documentation to find out how to upload your app to TestingBot for testing.
## Specify Devices
To run your existing tests on TestingBot, your tests will need to be configured to use the TestingBot remote machines. If the test was running on your local machine or network, you can simply change your existing test like this:
**Before:**
IOSDriver driver = new IOSDriver(
new Uri("http://localhost:4444/wd/hub"),
appiumOptions
);
**After:**
IOSDriver driver = new IOSDriver(
new Uri("https://hub.testingbot.com/wd/hub"),
appiumOptions
);
### Configuring Capabilities
Capabilities are key-value pairs that allows you to customize your tests on TestingBot.
Appium provides its [own set of capabilities](https://appium.io/docs/en/2.0/guides/caps/) which you can specify.
TestingBot also provide its own [Custom Capabilities](https://testingbot.com/support/app-automate/appium/options), to customize tests ran on the TestingBot platform.
You can use the drop-down menus below to see how to configure your tests to run on a specific mobile device:
iOS 18.6›iPhone 16
Loading environments...
Please wait while we load the available browsers and platforms.
## Testing Internal Websites
We've built [TestingBot Tunnel](https://testingbot.com/support/tunnel), to provide you with a secure way to run tests against your staged/internal webapps.
Please see our [TestingBot Tunnel documentation](https://testingbot.com/support/tunnel) for more information about this easy to use tunneling solution.
The example below shows how to easily run a NUnit C# test with our Tunnel:
1. [Download our tunnel](https://testingbot.com/support/tunnel) and start the tunnel:
java -jar testingbot-tunnel.jar key secret
2. Adjust your test: instead of pointing to `'hub.testingbot.com/wd/hub'` like the example above - change it to point to your tunnel's IP address.
Assuming you run the tunnel on the same machine you run your tests, change to `'localhost:4445/wd/hub'`. localhost is the machine running the tunnel, 4445 is the default port of the tunnel.
This way your test will go securely through the tunnel to TestingBot and back:
using System;
using System.Collections.Generic;
using OpenQA.Selenium.Appium;
using OpenQA.Selenium.Appium.Android;
namespace AppiumTest {
class Program {
[Test]
public void testLocal()
{
AppiumOptions appiumOptions = new AppiumOptions();
appiumOptions.PlatformName = "Android";
appiumOptions.AddAdditionalAppiumOption("appium:deviceName", "Galaxy S23");
appiumOptions.AddAdditionalAppiumOption("appium:platformVersion", "13.0");
appiumOptions.AddAdditionalAppiumOption("appium:app", "tb://...");
var tbOptions = new Dictionary();
tbOptions.Add("key", "TB_KEY");
tbOptions.Add("secret", "TB_SECRET");
tbOptions.Add("realDevice", true);
appiumOptions.AddAdditionalAppiumOption("tb:options", tbOptions);
// Point to local tunnel instead of hub.testingbot.com
AndroidDriver driver = new AndroidDriver(
new Uri("http://localhost:4445/wd/hub"),
appiumOptions
);
// Perform your app test actions here
driver.Quit();
}
}
}
## Run tests in Parallel
Parallel Testing means running the same test, or multiple tests, simultaneously. This greatly reduces your total testing time.
You can run the same tests on all different device configurations or run different tests all on the same device configuration.
TestingBot has a large grid of machines and browsers, which means you can use our service to do efficient parallel testing. It is one of the key features we provide to greatly cut down on your total testing time.
### Queuing
Every plan we provide comes with a limit of parallel tests.
If you exceed the number of parallel tests assigned to your account, TestingBot will queue the additional tests (for up to 6 minutes) and run the tests as soon as slots become available.
## Mark tests as passed/failed
To see if a test passed or not in our member area, or to send additional meta-data to TestingBot, you can use our API.
Please see the example below on how to notify TestingBot about the test success state:
[TearDown]
public void CleanUp()
{
bool passed = TestContext.CurrentContext.Result.Status == TestStatus.Passed;
try
{
// Logs the result to TestingBot
((IJavaScriptExecutor)driver).ExecuteScript("tb:test-result=" + (passed ? "passed" : "failed"));
}
finally
{
// Terminates the remote webdriver session
driver.Quit();
}
}
## Preparing your App
You do not need to install any code or plugin to run a test.
Below are some things that are necessary to successfully run a mobile test:
**For Android:**
- Please supply the URL to your `.apk` or `.aab` file.
**Important:** the `.apk` file needs to be a x86 build (x86 ABI) for Android emulators.
**For iOS Real Device:**
- Please supply the URL to an `.ipa` file.
**For iOS Simulator:**
- Please supply the URL to a `.zip` file that contains your `.app`
- The `.app` needs to be an iOS Simulator build:
- Create a Simulator build:
xcodebuild -sdk iphonesimulator -configuration Debug
- Zip the `.app` bundle:
zip -r MyApp.zip MyApp.app
## Additional Options
Appium provides [a lot of options](https://appium.io/docs/en/2.0/guides/caps/) to configure your test.
Some important options that might help:
**For Android:**
- **appActivity** and **appPackage** : by default, Appium will try to extract the main Activity from your apk. If this fails, you can supply your own with these options.
- **chromeOptions** : additional chromedriver options you can supply.
- **otherApps** : a JSON array of other apps that need to be installed, in URL format.
**For Android & iOS:**
- **locale** : the language of the simulator/device (ex: `fr_CA`)
This sets the locale on the entire device/simulator, except on physical iOS devices. For real iOS devices, we will pass `-AppleLocale` as argument to the app.
- **newCommandTimeout** : How long (in seconds) Appium will wait for a new command from the client before assuming the client quit and ending the session
Was this page helpful? Yes No
## Looking for More Help?
Have questions or need more information?
You can reach us via the following channels:
- [Email us](https://testingbot.com/contact/new)
- [Join our Slack Channel](https://join.slack.com/t/testingb0t/shared_invite/zt-3bcw9xch-jk19~6XPs_xBrsAgAedkCw)
---
URL: https://testingbot.com/support/app-automate/appium/flutter
# Automated Flutter App Testing
TestingBot supports automated testing of Flutter apps via [Appium's Flutter Driver](https://github.com/appium-userland/appium-flutter-driver).
To get started, please make sure to follow these steps:
1. Compile your Flutter app in `debug` or `profile` mode.
Appium's Flutter driver does not currently support apps built in `release` mode.
2. Make sure your app's `pubspec.yaml` file contains:
3. Import the new `dev_dependencies` that you have added in the previous step:
4. Next, import the `flutter_driver_extension` library in your `main.dart` file:
5. Your `main.dart` file should contain `enableFlutterDriverExtension()` before `runApp`.
6. The `automationName` in your desired capabilities should be set to `Flutter`.
## Preparing your App
You can build an `.apk` file for Android, `.ipa` file for iOS physical devices or `.app` bundle for iOS Simulator testing.
This file needs to be [uploaded](https://testingbot.com#upload) to TestingBot for automated or manual testing.
Please see the table below on how to build your app:
OS | Build Mode | Command || Android | debug |
flutter build apk --debug
|
| | profile |
flutter build apk --profile
|
| iOS | debug |
flutter build ios --debug
|
| | simulator |
flutter build ios --simulator
|
| | profile |
flutter build ios --profile
|
- For iOS 14 and higher, please build the app in `profile` mode only.
- Release mode is not supported by Appium's Flutter Driver.
- For iOS real device testing, please use `flutter build ipa`, then do:
mkdir Payload
mv Runner.app Payload/
zip --symlinks -qr test-app.ipa Payload
## Uploading Your App
Please see our [Upload Mobile App](https://testingbot.com/support/app-automate/help/upload) documentation to find out how to upload your app to TestingBot for testing.
## Example
TestingBot has created a [flutter-demo-app](https://github.com/testingbot/flutter-demo-app) which you can use to run your first Flutter Automated test with TestingBot.
Please see the example below where we run an automated Flutter test on TestingBot.
const { remote } = require('webdriverio');
const assert = require('assert');
const { byValueKey } = require('appium-flutter-finder');
const capabilities = {
'platformName': 'Android',
'appium:deviceName': 'Pixel 8',
'appium:platformVersion': '14.0',
'appium:automationName': 'Flutter',
'appium:app': 'https://github.com/testingbot/flutter-demo-app/releases/download/v1.0.0/demo.apk',
'tb:options': {
'realDevice': true
}
};
(async () => {
const driver = await remote({
hostname: 'hub.testingbot.com',
port: 443,
protocol: 'https',
path: '/wd/hub',
user: 'api_key',
key: 'api_secret',
capabilities
});
const counterTextFinder = byValueKey('counter');
const buttonFinder = byValueKey('incrementButton');
assert.strictEqual(await driver.getElementText(counterTextFinder), '0');
await driver.elementClick(buttonFinder);
await driver.elementClick(buttonFinder);
assert.strictEqual(await driver.getElementText(counterTextFinder), '2');
await driver.deleteSession();
})();
This example test will open the [flutter-demo-app](https://github.com/testingbot/flutter-demo-app), find both the counter number and increment button by `valueKey`.
It will then verify the initial number, click the button twice and verify if the number is correct.
You can use the following demo applications to try out automated Flutter testing:
- For iOS simulator testing:
https://github.com/testingbot/flutter-demo-app/releases/download/v1.0.0/demo-ios-simulator.zip
- For iOS physical device testing:
https://github.com/testingbot/flutter-demo-app/releases/download/v1.0.0/demo.ipa
- For Android testing:
https://github.com/testingbot/flutter-demo-app/releases/download/v1.0.0/demo.apk
## Specify Devices
To run your existing tests on TestingBot, your tests will need to be configured to use the TestingBot remote devices. If the test was running on your local machine or network, you can simply change your existing test like this:
To let TestingBot know on which device you want to run your test on, you need to specify the `appium:deviceName`, `appium:platformVersion`, `platformName` and other optional options in the capabilities field.
iOS 18.6›iPhone 16
Loading environments...
Please wait while we load the available browsers and platforms.
## Additional Options
Appium provides [multiple Flutter capabilities](https://github.com/appium/appium-flutter-driver#capabilities) to configure your test.
Additionally, you can use [Flutter Finders](https://github.com/appium/appium-flutter-driver#Finders) and [Flutter Commands](https://github.com/appium/appium-flutter-driver#commands).
Was this page helpful? Yes No
## Looking for More Help?
Have questions or need more information?
You can reach us via the following channels:
- [Email us](https://testingbot.com/contact/new)
- [Join our Slack Channel](https://join.slack.com/t/testingb0t/shared_invite/zt-3bcw9xch-jk19~6XPs_xBrsAgAedkCw)
---
URL: https://testingbot.com/support/app-automate/appium/java
### Java Examples:
- [TestNG](https://testingbot.com/support/app-automate/appium/java/testng)
# JUnit Automated App Testing
See our [JUnit example repository](https://github.com/testingbot/java-junit-app-example) for a simple example on how to run JUnit mobile app tests.
## Installation
First, make sure you install the necessary dependencies to run a test. For this example, we'll be using [JUnit 5](https://junit.org/junit5/) and the [Appium Java Client](https://github.com/appium/java-client).
Add the following dependencies to your `pom.xml`:
org.junit.jupiter
junit-jupiter
5.10.2
test
io.appium
java-client
10.0.0
test
**Note:** Appium Java Client 10.x requires Java 11 or higher.
## JUnit Example
The example below shows a complete JUnit 5 test that connects to the TestingBot hub and runs a test on a real device. In this test, we'll test a sample calculator app by entering values into two input fields and verifying the sum.
[Android](https://testingbot.com#)[iOS](https://testingbot.com#)
import io.appium.java_client.AppiumBy;
import io.appium.java_client.android.AndroidDriver;
import io.appium.java_client.android.options.UiAutomator2Options;
import org.junit.jupiter.api.*;
import org.openqa.selenium.WebElement;
import org.openqa.selenium.support.ui.ExpectedConditions;
import org.openqa.selenium.support.ui.WebDriverWait;
import java.net.MalformedURLException;
import java.net.URL;
import java.time.Duration;
import static org.junit.jupiter.api.Assertions.assertEquals;
public class AndroidAppTest {
private AndroidDriver driver;
@BeforeEach
public void setUp() throws MalformedURLException {
// Configure capabilities using UiAutomator2Options
UiAutomator2Options options = new UiAutomator2Options()
.setPlatformName("Android")
.setPlatformVersion("16.0")
.setDeviceName("Pixel 9")
.setApp("tb://")
.setAutomationName("UiAutomator2");
// Add TestingBot-specific options
options.setCapability("tb:options", java.util.Map.of(
"key", "YOUR_TB_KEY",
"secret", "YOUR_TB_SECRET",
"name", "Android Calculator Test",
"build", "JUnit Build 1"
));
// Connect to TestingBot hub
driver = new AndroidDriver(
new URL("https://hub.testingbot.com/wd/hub"),
options
);
}
@Test
public void testCalculatorSum() {
WebDriverWait wait = new WebDriverWait(driver, Duration.ofSeconds(30));
// Enter first number
WebElement inputA = wait.until(
ExpectedConditions.elementToBeClickable(AppiumBy.accessibilityId("inputA"))
);
inputA.sendKeys("10");
// Enter second number
WebElement inputB = wait.until(
ExpectedConditions.elementToBeClickable(AppiumBy.accessibilityId("inputB"))
);
inputB.sendKeys("5");
// Verify the sum
WebElement sum = wait.until(
ExpectedConditions.elementToBeClickable(AppiumBy.accessibilityId("sum"))
);
assertEquals("15", sum.getText());
}
@AfterEach
public void tearDown() {
if (driver != null) {
driver.quit();
}
}
}
import io.appium.java_client.AppiumBy;
import io.appium.java_client.ios.IOSDriver;
import io.appium.java_client.ios.options.XCUITestOptions;
import org.junit.jupiter.api.*;
import org.openqa.selenium.WebElement;
import org.openqa.selenium.support.ui.ExpectedConditions;
import org.openqa.selenium.support.ui.WebDriverWait;
import java.net.MalformedURLException;
import java.net.URL;
import java.time.Duration;
import static org.junit.jupiter.api.Assertions.assertEquals;
public class IOSAppTest {
private IOSDriver driver;
@BeforeEach
public void setUp() throws MalformedURLException {
// Configure capabilities using XCUITestOptions
XCUITestOptions options = new XCUITestOptions()
.setPlatformName("iOS")
.setPlatformVersion("26.0")
.setDeviceName("iPhone 17")
.setApp("tb://")
.setAutomationName("XCUITest");
// Add TestingBot-specific options
options.setCapability("tb:options", java.util.Map.of(
"key", "YOUR_TB_KEY",
"secret", "YOUR_TB_SECRET",
"name", "iOS Calculator Test",
"build", "JUnit Build 1"
));
// Connect to TestingBot hub
driver = new IOSDriver(
new URL("https://hub.testingbot.com/wd/hub"),
options
);
}
@Test
public void testCalculatorSum() {
WebDriverWait wait = new WebDriverWait(driver, Duration.ofSeconds(30));
// Enter first number
WebElement inputA = wait.until(
ExpectedConditions.elementToBeClickable(AppiumBy.accessibilityId("inputA"))
);
inputA.sendKeys("10");
// Enter second number
WebElement inputB = wait.until(
ExpectedConditions.elementToBeClickable(AppiumBy.accessibilityId("inputB"))
);
inputB.sendKeys("5");
// Verify the sum
WebElement sum = wait.until(
ExpectedConditions.elementToBeClickable(AppiumBy.accessibilityId("sum"))
);
assertEquals("15", sum.getText());
}
@AfterEach
public void tearDown() {
if (driver != null) {
driver.quit();
}
}
}
Always call `driver.quit()` in your teardown method to properly end the session. Otherwise, the test will continue running until it times out.
## Uploading Your App
Please see our [Upload Mobile App](https://testingbot.com/support/app-automate/help/upload) documentation to find out how to upload your app to TestingBot for testing.
## Specify Browsers & Devices
To run your tests on TestingBot, you need to configure the device and platform you want to test on. The Appium Java client provides type-safe Options classes for this purpose.
### Using Options Classes (Recommended)
For Android testing, use `UiAutomator2Options`. For iOS testing, use `XCUITestOptions`:
[Android](https://testingbot.com#)[iOS](https://testingbot.com#)
UiAutomator2Options options = new UiAutomator2Options()
.setPlatformName("Android")
.setPlatformVersion("16.0")
.setDeviceName("Pixel 9")
.setApp("tb://")
.setAutomationName("UiAutomator2");
// Add TestingBot credentials
options.setCapability("tb:options", Map.of(
"key", "YOUR_TB_KEY",
"secret", "YOUR_TB_SECRET",
"name", "My Test",
"build", "Build 1"
));
AndroidDriver driver = new AndroidDriver(
new URL("https://hub.testingbot.com/wd/hub"),
options
);
XCUITestOptions options = new XCUITestOptions()
.setPlatformName("iOS")
.setPlatformVersion("26.0")
.setDeviceName("iPhone 17")
.setApp("tb://")
.setAutomationName("XCUITest");
// Add TestingBot credentials
options.setCapability("tb:options", Map.of(
"key", "YOUR_TB_KEY",
"secret", "YOUR_TB_SECRET",
"name", "My Test",
"build", "Build 1"
));
IOSDriver driver = new IOSDriver(
new URL("https://hub.testingbot.com/wd/hub"),
options
);
### Using BaseOptions (Generic)
For more flexibility or when working with multiple platforms, you can use `BaseOptions`:
import io.appium.java_client.remote.options.BaseOptions;
BaseOptions options = new BaseOptions()
.setPlatformName("Android")
.setAutomationName("UiAutomator2")
.amend("appium:deviceName", "Pixel 9")
.amend("appium:platformVersion", "16.0")
.amend("appium:app", "tb://");
options.setCapability("tb:options", Map.of(
"key", "YOUR_TB_KEY",
"secret", "YOUR_TB_SECRET"
));
AppiumDriver driver = new AppiumDriver(
new URL("https://hub.testingbot.com/wd/hub"),
options
);
### Required Capabilities
To specify which device you want to test on, you need to provide:
- `platformName` - The mobile OS (Android or iOS)
- `appium:platformVersion` - The OS version (e.g., "17.0", "26.0")
- `appium:deviceName` - The device name (e.g., "Pixel 9", "iPhone 17")
- `appium:app` - The app to test (URL or tb:// reference)
- `appium:automationName` - The automation driver ("UiAutomator2" for Android, "XCUITest" for iOS)
Use the device picker below to generate the configuration for your target device:
iOS 18.6›iPhone 16
Loading environments...
Please wait while we load the available browsers and platforms.
## Testing Internal Websites
We've built [TestingBot Tunnel](https://testingbot.com/support/tunnel), to provide you with a secure way to run tests against your staged/internal webapps.
Please see our [TestingBot Tunnel documentation](https://testingbot.com/support/tunnel) for more information about this easy to use tunneling solution.
The example below shows how to easily run a JUnit test with our Tunnel:
**1.** [Download our tunnel](https://testingbot.com/support/tunnel) and start the tunnel:
java -jar testingbot-tunnel.jar key secret
**2.** Update your test to connect through the tunnel instead of directly to the TestingBot hub. Change the URL from `hub.testingbot.com` to `localhost:4445`:
// Connect through the tunnel instead of directly to TestingBot
AndroidDriver driver = new AndroidDriver(
new URL("http://localhost:4445/wd/hub"),
options
);
Your test traffic will now go securely through the tunnel, allowing you to test apps that access internal resources.
## Run tests in Parallel
Parallel Testing means running the same test, or multiple tests, simultaneously. This greatly reduces your total testing time.
You can run the same tests on all different browser configurations or run different tests all on the same browser configuration.
TestingBot has a large grid of machines and browsers, which means you can use our service to do efficient parallel testing. It is one of the key features we provide to greatly cut down on your total testing time.
Please see our [Parallel JUnit documentation](https://testingbot.com/support/web-automate/selenium/java/parallel-junit) for parallel testing.
### Queuing
Every plan we provide comes with a limit of parallel tests.
If you exceed the number of parallel tests assigned to your account, TestingBot will queue the additional tests (for up to 6 minutes) and run the tests as soon as slots become available.
## Mark tests as passed/failed
TestingBot cannot automatically determine if your test passed or failed - that depends on your test assertions. To report test results to TestingBot, use our [REST API](https://testingbot.com/support/api).
First, add the [TestingBot Java client](https://github.com/testingbot/testingbot-java) to your dependencies:
com.testingbot
testingbotrest
1.0.10
Then use it in your test to report the result:
import com.testingbot.comingbotrest.TestingbotREST;
import java.util.Map;
@AfterEach
public void tearDown() {
if (driver != null) {
// Report test result to TestingBot
TestingbotREST api = new TestingbotREST(
"YOUR_TB_KEY",
"YOUR_TB_SECRET"
);
api.updateTest(
driver.getSessionId().toString(),
Map.of(
"success", "1", // "1" for passed, "0" for failed
"name", "Calculator Test"
)
);
driver.quit();
}
}
For JUnit 5, you can use a `TestWatcher` extension to automatically report results:
import org.junit.jupiter.api.extension.*;
public class TestingBotWatcher implements TestWatcher {
private final AndroidDriver driver;
private final TestingbotREST api;
public TestingBotWatcher(AndroidDriver driver, String key, String secret) {
this.driver = driver;
this.api = new TestingbotREST(key, secret);
}
@Override
public void testSuccessful(ExtensionContext context) {
updateTest("1", context.getDisplayName());
}
@Override
public void testFailed(ExtensionContext context, Throwable cause) {
updateTest("0", context.getDisplayName());
}
private void updateTest(String success, String name) {
api.updateTest(driver.getSessionId().toString(), Map.of(
"success", success,
"name", name
));
}
}
## Preparing your App
You do not need to install any code or plugin to run a test.
Below are some things that are necessary to successfully run a mobile test:
**For Android:**
- Please supply the URL to your `.apk` or `.aab` file.
**Important:** the `.apk` file needs to be a x86 build (x86 ABI) for Android emulators.
**For iOS Real Device:**
- Please supply the URL to an `.ipa` file.
**For iOS Simulator:**
- Please supply the URL to a `.zip` file that contains your `.app`
- The `.app` needs to be an iOS Simulator build:
- Create a Simulator build:
xcodebuild -sdk iphonesimulator -configuration Debug
- Zip the `.app` bundle:
zip -r MyApp.zip MyApp.app
## Additional Options
Appium provides [a lot of options](https://appium.io/docs/en/2.0/guides/caps/) to configure your test.
Some important options that might help:
**For Android:**
- **appActivity** and **appPackage** : by default, Appium will try to extract the main Activity from your apk. If this fails, you can supply your own with these options.
- **chromeOptions** : additional chromedriver options you can supply.
- **otherApps** : a JSON array of other apps that need to be installed, in URL format.
**For Android & iOS:**
- **locale** : the language of the simulator/device (ex: `fr_CA`)
This sets the locale on the entire device/simulator, except on physical iOS devices. For real iOS devices, we will pass `-AppleLocale` as argument to the app.
- **newCommandTimeout** : How long (in seconds) Appium will wait for a new command from the client before assuming the client quit and ending the session
Was this page helpful? Yes No
## Looking for More Help?
Have questions or need more information?
You can reach us via the following channels:
- [Email us](https://testingbot.com/contact/new)
- [Join our Slack Channel](https://join.slack.com/t/testingb0t/shared_invite/zt-3bcw9xch-jk19~6XPs_xBrsAgAedkCw)
---
URL: https://testingbot.com/support/app-automate/appium/java/testng
# TestNG Automated App Testing
See our [TestNG example repository](https://github.com/testingbot/java-testng-app-example) for a simple example on how to run TestNG mobile app tests.
## Installation
First, make sure you install the necessary dependencies to run a test. For this example, we'll be using [TestNG](https://testng.org/) and the [Appium Java Client](https://github.com/appium/java-client).
Add the following dependencies to your `pom.xml`:
org.testng
testng
7.11.0
test
io.appium
java-client
10.0.0
test
**Note:** Appium Java Client 10.x requires Java 11 or higher.
## TestNG Example
The example below shows a complete TestNG test that connects to the TestingBot hub and runs a test on a real device. In this test, we'll test a sample calculator app by entering values into two input fields and verifying the sum.
[Android](https://testingbot.com#)[iOS](https://testingbot.com#)
import io.appium.java_client.AppiumBy;
import io.appium.java_client.android.AndroidDriver;
import io.appium.java_client.android.options.UiAutomator2Options;
import org.openqa.selenium.WebElement;
import org.openqa.selenium.support.ui.ExpectedConditions;
import org.openqa.selenium.support.ui.WebDriverWait;
import org.testng.Assert;
import org.testng.annotations.*;
import java.net.MalformedURLException;
import java.net.URL;
import java.time.Duration;
import java.util.Map;
public class AndroidAppTest {
private AndroidDriver driver;
@BeforeMethod
public void setUp() throws MalformedURLException {
// Configure capabilities using UiAutomator2Options
UiAutomator2Options options = new UiAutomator2Options()
.setPlatformName("Android")
.setPlatformVersion("16.0")
.setDeviceName("Pixel 9")
.setApp("tb://")
.setAutomationName("UiAutomator2");
// Add TestingBot-specific options
options.setCapability("tb:options", Map.of(
"key", "YOUR_TB_KEY",
"secret", "YOUR_TB_SECRET",
"name", "Android Calculator Test",
"build", "TestNG Build 1"
));
// Connect to TestingBot hub
driver = new AndroidDriver(
new URL("https://hub.testingbot.com/wd/hub"),
options
);
}
@Test
public void testCalculatorSum() {
WebDriverWait wait = new WebDriverWait(driver, Duration.ofSeconds(30));
// Enter first number
WebElement inputA = wait.until(
ExpectedConditions.elementToBeClickable(AppiumBy.accessibilityId("inputA"))
);
inputA.sendKeys("10");
// Enter second number
WebElement inputB = wait.until(
ExpectedConditions.elementToBeClickable(AppiumBy.accessibilityId("inputB"))
);
inputB.sendKeys("5");
// Verify the sum
WebElement sum = wait.until(
ExpectedConditions.elementToBeClickable(AppiumBy.accessibilityId("sum"))
);
Assert.assertEquals(sum.getText(), "15");
}
@AfterMethod
public void tearDown() {
if (driver != null) {
driver.quit();
}
}
}
import io.appium.java_client.AppiumBy;
import io.appium.java_client.ios.IOSDriver;
import io.appium.java_client.ios.options.XCUITestOptions;
import org.openqa.selenium.WebElement;
import org.openqa.selenium.support.ui.ExpectedConditions;
import org.openqa.selenium.support.ui.WebDriverWait;
import org.testng.Assert;
import org.testng.annotations.*;
import java.net.MalformedURLException;
import java.net.URL;
import java.time.Duration;
import java.util.Map;
public class IOSAppTest {
private IOSDriver driver;
@BeforeMethod
public void setUp() throws MalformedURLException {
// Configure capabilities using XCUITestOptions
XCUITestOptions options = new XCUITestOptions()
.setPlatformName("iOS")
.setPlatformVersion("26.0")
.setDeviceName("iPhone 17")
.setApp("tb://")
.setAutomationName("XCUITest");
// Add TestingBot-specific options
options.setCapability("tb:options", Map.of(
"key", "YOUR_TB_KEY",
"secret", "YOUR_TB_SECRET",
"name", "iOS Calculator Test",
"build", "TestNG Build 1"
));
// Connect to TestingBot hub
driver = new IOSDriver(
new URL("https://hub.testingbot.com/wd/hub"),
options
);
}
@Test
public void testCalculatorSum() {
WebDriverWait wait = new WebDriverWait(driver, Duration.ofSeconds(30));
// Enter first number
WebElement inputA = wait.until(
ExpectedConditions.elementToBeClickable(AppiumBy.accessibilityId("inputA"))
);
inputA.sendKeys("10");
// Enter second number
WebElement inputB = wait.until(
ExpectedConditions.elementToBeClickable(AppiumBy.accessibilityId("inputB"))
);
inputB.sendKeys("5");
// Verify the sum
WebElement sum = wait.until(
ExpectedConditions.elementToBeClickable(AppiumBy.accessibilityId("sum"))
);
Assert.assertEquals(sum.getText(), "15");
}
@AfterMethod
public void tearDown() {
if (driver != null) {
driver.quit();
}
}
}
Always call `driver.quit()` in your `@AfterMethod` to properly end the session. Otherwise, the test will continue running until it times out.
## Reusable Base Test Class
For cleaner test organization, you can create a reusable base class that handles driver setup and teardown. Tests can then extend this base class and focus only on test logic.
### Base Class
import io.appium.java_client.android.AndroidDriver;
import io.appium.java_client.android.options.UiAutomator2Options;
import org.testng.annotations.*;
import java.net.MalformedURLException;
import java.net.URL;
import java.util.Map;
public class TestingBotBaseTest {
protected AndroidDriver driver;
@BeforeMethod(alwaysRun = true)
@Parameters({"platformVersion", "deviceName", "app"})
public void setUp(
@Optional("16.0") String platformVersion,
@Optional("Pixel 9") String deviceName,
@Optional("tb://") String app
) throws MalformedURLException {
// Get credentials from environment or use defaults
String key = System.getenv("TB_KEY");
String secret = System.getenv("TB_SECRET");
if (key == null || secret == null) {
throw new RuntimeException("TB_KEY and TB_SECRET environment variables must be set");
}
// Configure capabilities
UiAutomator2Options options = new UiAutomator2Options()
.setPlatformName("Android")
.setPlatformVersion(platformVersion)
.setDeviceName(deviceName)
.setApp(app)
.setAutomationName("UiAutomator2");
options.setCapability("tb:options", Map.of(
"key", key,
"secret", secret,
"name", this.getClass().getSimpleName()
));
driver = new AndroidDriver(
new URL("https://hub.testingbot.com/wd/hub"),
options
);
}
@AfterMethod(alwaysRun = true)
public void tearDown() {
if (driver != null) {
driver.quit();
}
}
}
### Test Class Using the Base
import io.appium.java_client.AppiumBy;
import org.openqa.selenium.WebElement;
import org.openqa.selenium.support.ui.ExpectedConditions;
import org.openqa.selenium.support.ui.WebDriverWait;
import org.testng.Assert;
import org.testng.annotations.Test;
import java.time.Duration;
public class CalculatorTest extends TestingBotBaseTest {
@Test
public void testAddition() {
WebDriverWait wait = new WebDriverWait(driver, Duration.ofSeconds(30));
WebElement inputA = wait.until(
ExpectedConditions.elementToBeClickable(AppiumBy.accessibilityId("inputA"))
);
inputA.sendKeys("10");
WebElement inputB = wait.until(
ExpectedConditions.elementToBeClickable(AppiumBy.accessibilityId("inputB"))
);
inputB.sendKeys("5");
WebElement sum = wait.until(
ExpectedConditions.elementToBeClickable(AppiumBy.accessibilityId("sum"))
);
Assert.assertEquals(sum.getText(), "15");
}
}
### TestNG XML Configuration
Use a `testng.xml` file to pass parameters and run tests on multiple devices:
## Uploading Your App
Please see our [Upload Mobile App](https://testingbot.com/support/app-automate/help/upload) documentation to find out how to upload your app to TestingBot for testing.
## Specify Browsers & Devices
To run your tests on TestingBot, you need to configure the device and platform you want to test on. The Appium Java client provides type-safe Options classes for this purpose.
### Using Options Classes (Recommended)
For Android testing, use `UiAutomator2Options`. For iOS testing, use `XCUITestOptions`:
[Android](https://testingbot.com#)[iOS](https://testingbot.com#)
UiAutomator2Options options = new UiAutomator2Options()
.setPlatformName("Android")
.setPlatformVersion("16.0")
.setDeviceName("Pixel 9")
.setApp("tb://")
.setAutomationName("UiAutomator2");
// Add TestingBot credentials
options.setCapability("tb:options", Map.of(
"key", "YOUR_TB_KEY",
"secret", "YOUR_TB_SECRET",
"name", "My Test",
"build", "Build 1"
));
AndroidDriver driver = new AndroidDriver(
new URL("https://hub.testingbot.com/wd/hub"),
options
);
XCUITestOptions options = new XCUITestOptions()
.setPlatformName("iOS")
.setPlatformVersion("26.0")
.setDeviceName("iPhone 17")
.setApp("tb://")
.setAutomationName("XCUITest");
// Add TestingBot credentials
options.setCapability("tb:options", Map.of(
"key", "YOUR_TB_KEY",
"secret", "YOUR_TB_SECRET",
"name", "My Test",
"build", "Build 1"
));
IOSDriver driver = new IOSDriver(
new URL("https://hub.testingbot.com/wd/hub"),
options
);
### Using BaseOptions (Generic)
For more flexibility or when working with multiple platforms, you can use `BaseOptions`:
import io.appium.java_client.remote.options.BaseOptions;
BaseOptions options = new BaseOptions()
.setPlatformName("Android")
.setAutomationName("UiAutomator2")
.amend("appium:deviceName", "Pixel 9")
.amend("appium:platformVersion", "16.0")
.amend("appium:app", "tb://");
options.setCapability("tb:options", Map.of(
"key", "YOUR_TB_KEY",
"secret", "YOUR_TB_SECRET"
));
AppiumDriver driver = new AppiumDriver(
new URL("https://hub.testingbot.com/wd/hub"),
options
);
### Required Capabilities
To specify which device you want to test on, you need to provide:
- `platformName` - The mobile OS (Android or iOS)
- `appium:platformVersion` - The OS version (e.g., "16.0", "26.0")
- `appium:deviceName` - The device name (e.g., "Pixel 9", "iPhone 17")
- `appium:app` - The app to test (URL or tb:// reference)
- `appium:automationName` - The automation driver ("UiAutomator2" for Android, "XCUITest" for iOS)
Use the device picker below to generate the configuration for your target device:
iOS 18.6›iPhone 16
Loading environments...
Please wait while we load the available browsers and platforms.
## Testing Internal Websites
We've built [TestingBot Tunnel](https://testingbot.com/support/tunnel), to provide you with a secure way to run tests against your staged/internal webapps.
Please see our [TestingBot Tunnel documentation](https://testingbot.com/support/tunnel) for more information about this easy to use tunneling solution.
The example below shows how to easily run a TestNG test with our Tunnel:
**1.** [Download our tunnel](https://testingbot.com/support/tunnel) and start the tunnel:
java -jar testingbot-tunnel.jar key secret
**2.** Update your test to connect through the tunnel instead of directly to the TestingBot hub. Change the URL from `hub.testingbot.com` to `localhost:4445`:
// Connect through the tunnel instead of directly to TestingBot
AndroidDriver driver = new AndroidDriver(
new URL("http://localhost:4445/wd/hub"),
options
);
Your test traffic will now go securely through the tunnel, allowing you to test apps that access internal resources.
## Mark tests as passed/failed
TestingBot cannot automatically determine if your test passed or failed - that depends on your test assertions. To report test results to TestingBot, use our [REST API](https://testingbot.com/support/api).
First, add the [TestingBot Java client](https://github.com/testingbot/testingbot-java) to your dependencies:
com.testingbot
testingbotrest
1.0.10
Then use it in your test to report the result:
import com.testingbot.comingbotrest.TestingbotREST;
import java.util.Map;
@AfterMethod
public void tearDown() {
if (driver != null) {
// Report test result to TestingBot
TestingbotREST api = new TestingbotREST(
"YOUR_TB_KEY",
"YOUR_TB_SECRET"
);
api.updateTest(
driver.getSessionId().toString(),
Map.of(
"success", "1", // "1" for passed, "0" for failed
"name", "Calculator Test"
)
);
driver.quit();
}
}
For automatic result reporting, you can use a TestNG listener:
import org.testng.ITestListener;
import org.testng.ITestResult;
import com.testingbot.comingbotrest.TestingbotREST;
import java.util.Map;
public class TestingBotListener implements ITestListener {
private TestingbotREST api;
public TestingBotListener() {
this.api = new TestingbotREST(
System.getenv("TB_KEY"),
System.getenv("TB_SECRET")
);
}
@Override
public void onTestSuccess(ITestResult result) {
updateTestStatus(result, "1");
}
@Override
public void onTestFailure(ITestResult result) {
updateTestStatus(result, "0");
}
private void updateTestStatus(ITestResult result, String success) {
Object testInstance = result.getInstance();
if (testInstance instanceof TestingBotBaseTest) {
AndroidDriver driver = ((TestingBotBaseTest) testInstance).driver;
if (driver != null) {
api.updateTest(
driver.getSessionId().toString(),
Map.of(
"success", success,
"name", result.getMethod().getMethodName()
)
);
}
}
}
}
Register the listener in your `testng.xml`:
## Preparing your App
You do not need to install any code or plugin to run a test.
Below are some things that are necessary to successfully run a mobile test:
**For Android:**
- Please supply the URL to your `.apk` or `.aab` file.
**Important:** the `.apk` file needs to be a x86 build (x86 ABI) for Android emulators.
**For iOS Real Device:**
- Please supply the URL to an `.ipa` file.
**For iOS Simulator:**
- Please supply the URL to a `.zip` file that contains your `.app`
- The `.app` needs to be an iOS Simulator build:
- Create a Simulator build:
xcodebuild -sdk iphonesimulator -configuration Debug
- Zip the `.app` bundle:
zip -r MyApp.zip MyApp.app
## Additional Options
Appium provides [a lot of options](https://appium.io/docs/en/2.0/guides/caps/) to configure your test.
Some important options that might help:
**For Android:**
- **appActivity** and **appPackage** : by default, Appium will try to extract the main Activity from your apk. If this fails, you can supply your own with these options.
- **chromeOptions** : additional chromedriver options you can supply.
- **otherApps** : a JSON array of other apps that need to be installed, in URL format.
**For Android & iOS:**
- **locale** : the language of the simulator/device (ex: `fr_CA`)
This sets the locale on the entire device/simulator, except on physical iOS devices. For real iOS devices, we will pass `-AppleLocale` as argument to the app.
- **newCommandTimeout** : How long (in seconds) Appium will wait for a new command from the client before assuming the client quit and ending the session
Was this page helpful? Yes No
## Looking for More Help?
Have questions or need more information?
You can reach us via the following channels:
- [Email us](https://testingbot.com/contact/new)
- [Join our Slack Channel](https://join.slack.com/t/testingb0t/shared_invite/zt-3bcw9xch-jk19~6XPs_xBrsAgAedkCw)
---
URL: https://testingbot.com/support/app-automate/appium/nodejs
### NodeJS Examples:
- [WebDriverIO](https://testingbot.com/support/app-automate/appium/nodejs/webdriverio)
- [CodeceptJS](https://testingbot.com/support/app-automate/appium/nodejs/codeceptjs)
# NodeJS Automated App Testing
First, make sure you have installed NodeJS. If you haven't, you can easily install it by downloading NodeJS from the [NodeJS website](https://nodejs.org/en/download/)
## Installation
With TestingBot you can easily run your automated tests with any NodeJS test framework, here's a simple example with **WebdriverIO** :
npm install webdriverio
## Real Device Testing
[Android](https://testingbot.com#)[iOS](https://testingbot.com#)
This will download and install a sample Android app we built. It will add two numbers to a textinput and display the sum of the two numbers.
const { remote } = require('webdriverio');
const capabilities = {
hostname: 'hub.testingbot.com',
port: 443,
protocol: 'https',
path: '/wd/hub',
user: "api_key",
key: "api_secret",
capabilities: {
'appium:name': 'My First App Test',
'appium:deviceName': 'Pixel 9',
'platformName': 'Android',
'appium:platformVersion': '16.0',
'appium:app': 'https://testingbot.com/appium/sample.apk',
'tb:options': {
'realDevice': true
}
}
};
(async () => {
const driver = await remote(capabilities);
const inputA = await driver.$('~inputA');
await inputA.waitForDisplayed({ timeout: 30000 });
await inputA.setValue('10');
const inputB = await driver.$('~inputB');
await inputB.waitForDisplayed({ timeout: 30000 });
await inputB.setValue('5');
const sum = await driver.$('~sum');
await sum.waitForDisplayed({ timeout: 30000 });
const value = await sum.getText();
console.log(value === '15' ? 'Test passed!' : 'Test failed!');
await driver.deleteSession();
})();
Make sure to always end your session (`await driver.deleteSession()`), otherwise it will continue running, leading to a timeout.
This will download and install a sample iOS app we built. It will add two numbers to a textinput and display the sum of the two numbers.
const { remote } = require('webdriverio');
const capabilities = {
hostname: 'hub.testingbot.com',
port: 443,
protocol: 'https',
path: '/wd/hub',
user: "api_key",
key: "api_secret",
capabilities: {
'appium:name': 'My First App Test',
'appium:deviceName': 'iPhone 17',
'platformName': 'iOS',
'appium:platformVersion': '26.0',
'appium:app': 'https://testingbot.com/appium/sample.ipa',
'tb:options': {
'realDevice': true
}
}
};
(async () => {
const driver = await remote(capabilities);
const inputA = await driver.$('~inputA');
await inputA.waitForDisplayed({ timeout: 30000 });
await inputA.setValue('10');
const inputB = await driver.$('~inputB');
await inputB.waitForDisplayed({ timeout: 30000 });
await inputB.setValue('5');
await driver.deleteSession();
})();
Make sure to always end your session (`await driver.deleteSession()`), otherwise it will continue running, leading to a timeout.
## Simulator/Emulator Testing
[Android](https://testingbot.com#)[iOS](https://testingbot.com#)
This will download and install a sample Android app we built. It will add two numbers to a textinput and display the sum of the two numbers.
const { remote } = require('webdriverio');
const capabilities = {
hostname: 'hub.testingbot.com',
port: 443,
protocol: 'https',
path: '/wd/hub',
user: "api_key",
key: "api_secret",
capabilities: {
'appium:name': 'My First App Test',
'appium:deviceName': 'Pixel 9',
'platformName': 'Android',
'appium:platformVersion': '16.0',
'appium:app': 'https://testingbot.com/appium/sample.apk'
}
};
(async () => {
const driver = await remote(capabilities);
const inputA = await driver.$('~inputA');
await inputA.waitForDisplayed({ timeout: 30000 });
await inputA.setValue('10');
const inputB = await driver.$('~inputB');
await inputB.waitForDisplayed({ timeout: 30000 });
await inputB.setValue('5');
const sum = await driver.$('~sum');
await sum.waitForDisplayed({ timeout: 30000 });
const value = await sum.getText();
console.log(value === '15' ? 'Test passed!' : 'Test failed!');
await driver.deleteSession();
})();
Make sure to always end your session (`await driver.deleteSession()`), otherwise it will continue running, leading to a timeout.
This will download and install a sample iOS app we built. It will add two numbers to a textinput and display the sum of the two numbers.
const { remote } = require('webdriverio');
const capabilities = {
hostname: 'hub.testingbot.com',
port: 443,
protocol: 'https',
path: '/wd/hub',
user: "api_key",
key: "api_secret",
capabilities: {
'appium:name': 'My First App Test',
'appium:deviceName': 'iPhone 17',
'platformName': 'iOS',
'appium:platformVersion': '26.0',
'appium:app': 'https://testingbot.com/appium/sample.zip'
}
};
(async () => {
const driver = await remote(capabilities);
const inputA = await driver.$('~inputA');
await inputA.waitForDisplayed({ timeout: 30000 });
await inputA.setValue('10');
const inputB = await driver.$('~inputB');
await inputB.waitForDisplayed({ timeout: 30000 });
await inputB.setValue('5');
await driver.deleteSession();
})();
Make sure to always end your session (`await driver.deleteSession()`), otherwise it will continue running, leading to a timeout.
## Uploading Your App
Please see our [Upload Mobile App](https://testingbot.com/support/app-automate/help/upload) documentation to find out how to upload your app to TestingBot for testing.
## Specify Devices
To run your existing tests on TestingBot, your tests will need to be configured to use the TestingBot remote machines. If the test was running on your local machine or network, you can simply change your existing test like this:
**Before:**
const capabilities = {
hostname: 'localhost',
port: 4444,
...
};
**After:**
const capabilities = {
hostname: 'hub.testingbot.com',
port: 443,
protocol: 'https',
path: '/wd/hub',
user: 'api_key',
key: 'api_secret',
capabilities: {
'appium:app': 'tb://...'
}
};
To let TestingBot know on which device you want to run your test on, you need to specify the `appium:deviceName`, `appium:platformVersion`, `platformName` and other optional options in the capabilities field.
To see how to do this, please select a combination of device type and device name in the drop-down menus below.
iOS 18.6›iPhone 16
Loading environments...
Please wait while we load the available browsers and platforms.
## Testing Internal Websites
We've built [TestingBot Tunnel](https://testingbot.com/support/tunnel), to provide you with a secure way to run tests against your staged/internal webapps.
Please see our [TestingBot Tunnel documentation](https://testingbot.com/support/tunnel) for more information about this easy to use tunneling solution.
The example below shows how to easily run a NodeJS test with our Tunnel:
1. [Download our tunnel](https://testingbot.com/support/tunnel) and start the tunnel:
java -jar testingbot-tunnel.jar key secret
2. Adjust your test: instead of pointing to `'hub.testingbot.com/wd/hub'` like the example above - change it to point to your tunnel's IP address.
Assuming you run the tunnel on the same machine you run your tests, change to `'localhost:4445/wd/hub'`. localhost is the machine running the tunnel, 4445 is the default port of the tunnel.
This way your test will go securely through the tunnel to TestingBot and back:
const { remote } = require('webdriverio');
const capabilities = {
hostname: 'localhost',
port: 4445,
protocol: 'http',
path: '/wd/hub',
user: "api_key",
key: "api_secret",
capabilities: {
'appium:name': 'My First App Test',
'appium:deviceName': 'iPhone 17',
'platformName': 'iOS',
'appium:platformVersion': '26.0',
'appium:app': 'https://testingbot.com/appium/sample.zip'
}
};
(async () => {
const driver = await remote(capabilities);
const inputA = await driver.$('~inputA');
await inputA.waitForDisplayed({ timeout: 30000 });
await inputA.setValue('10');
const inputB = await driver.$('~inputB');
await inputB.waitForDisplayed({ timeout: 30000 });
await inputB.setValue('5');
await driver.deleteSession();
})();
## Run tests in Parallel
Parallel Testing means running the same test, or multiple tests, simultaneously. This greatly reduces your total testing time.
You can run the same tests on all different browser configurations or run different tests all on the same browser configuration.
TestingBot has a large grid of machines and browsers, which means you can use our service to do efficient parallel testing. It is one of the key features we provide to greatly cut down on your total testing time.
To run tests in parallel, we recommend using a test runner like [WebDriverIO](https://testingbot.com/support/app-automate/appium/nodejs/webdriverio) to run your tests simultaneously.
### Queuing
Every plan we provide comes with a limit of parallel tests.
If you exceed the number of parallel tests assigned to your account, TestingBot will queue the additional tests (for up to 6 minutes) and run the tests as soon as slots become available.
## Mark tests as passed/failed
As TestingBot has no way to determine whether your test passed or failed (it is determined by your business logic), we offer a way to send the test status back to TestingBot. This is useful if you want to see if a test succeeded or failed from the TestingBot member area.
Install our NPM package to interact with the TestingBot API:
npm install testingbot-api
After your test completed, you can send back the test success state and other meta-data:
const TestingBot = require('testingbot-api');
const tb = new TestingBot({
api_key: "api_key",
api_secret: "api_secret"
});
tb.updateTest({
'test[name]' : 'Example Test',
'test[success]' : true
}, browser.sessionId, done);
## Preparing your App
You do not need to install any code or plugin to run a test.
Below are some things that are necessary to successfully run a mobile test:
**For Android:**
- Please supply the URL to your `.apk` or `.aab` file.
**Important:** the `.apk` file needs to be a x86 build (x86 ABI) for Android emulators.
**For iOS Real Device:**
- Please supply the URL to an `.ipa` file.
**For iOS Simulator:**
- Please supply the URL to a `.zip` file that contains your `.app`
- The `.app` needs to be an iOS Simulator build:
- Create a Simulator build:
xcodebuild -sdk iphonesimulator -configuration Debug
- Zip the `.app` bundle:
zip -r MyApp.zip MyApp.app
## Additional Options
Appium provides [a lot of options](https://appium.io/docs/en/2.0/guides/caps/) to configure your test.
Some important options that might help:
**For Android:**
- **appActivity** and **appPackage** : by default, Appium will try to extract the main Activity from your apk. If this fails, you can supply your own with these options.
- **chromeOptions** : additional chromedriver options you can supply.
- **otherApps** : a JSON array of other apps that need to be installed, in URL format.
**For Android & iOS:**
- **locale** : the language of the simulator/device (ex: `fr_CA`)
This sets the locale on the entire device/simulator, except on physical iOS devices. For real iOS devices, we will pass `-AppleLocale` as argument to the app.
- **newCommandTimeout** : How long (in seconds) Appium will wait for a new command from the client before assuming the client quit and ending the session
Was this page helpful? Yes No
## Looking for More Help?
Have questions or need more information?
You can reach us via the following channels:
- [Email us](https://testingbot.com/contact/new)
- [Join our Slack Channel](https://join.slack.com/t/testingb0t/shared_invite/zt-3bcw9xch-jk19~6XPs_xBrsAgAedkCw)
---
URL: https://testingbot.com/support/app-automate/appium/nodejs/codeceptjs
# Getting started with CodeceptJS
[CodeceptJS](https://codecept.io/) is an end-to-end testing framework which supports Appium for automated mobile testing.
It offers scenario driven testing, PageObjects support, beautiful reports and much more.
Let's start with installing everything we need:
npm i --save-dev codeceptjs
Now we need to set up CodeceptJS. Please use the command below to initialize a new project:
npx codeceptjs init
This will ask a bunch of questions, and will create a sample test at the end of the process.
## Example test
Now that you have everything set up, you can create a very simple test:
Feature('My First Mobile App Test');
Scenario('test sample calculator', (I) => {
I.seeAppIsInstalled("com.testingbot.sample");
I.click('~inputA');
I.fillField('~inputA', '10');
I.click('~inputB');
I.fillField('~inputB', '5');
I.see('15', '~sum');
});
This simple test will test a calculator mobile app, it will fill in two numbers in two input fields and check the sum.
Before we can run this test, we need to configure CodeceptJS to connect to TestingBot.
## Configuration
You can configure CodeceptJS with a `codecept.conf.js` file:
exports.config = {
tests: './*_test.js',
output: './output',
helpers: {
Appium: {
host: "hub.testingbot.com",
port: 443,
user: "api_key",
key: "api_secret",
capabilities: {
platformName: "Android",
"appium:app": "tb://...",
"appium:deviceName": "Pixel 8",
"appium:platformVersion": "14.0",
"appium:automationName": "UiAutomator2"
},
},
},
include: {
I: './steps_file.js'
},
bootstrap: null,
mocha: {},
name: 'codeceptjs-example',
plugins: {
retryFailedStep: {
enabled: true
},
screenshotOnFail: {
enabled: true
},
}
}
To run the test, you can do:
npx codeceptjs run --steps
This will start a Pixel 8 Emulator and run the test on our grid.
You will see a test appear in your member dashboard on TestingBot, together with a video, log files and other assets generated by the test.
## Configuring capabilities
To run your existing tests on TestingBot, your tests will need to be configured to use the TestingBot remote machines. If the test was running on your local machine or network, you can simply change your existing test like this:
**Before**
// codecept.conf.js
exports.config = {
tests: './*_test.js',
output: './output',
helpers: {
Appium : {}
}
};
**After**
// codecept.conf.js
helpers: {
Appium: {
host: "hub.testingbot.com",
port: 443,
user: "api_key",
key: "api_secret",
capabilities: {
platformName: "Android",
"appium:app": "tb://...",
"appium:deviceName": "Pixel 8",
"appium:platformVersion": "14.0",
"appium:automationName": "UiAutomator2"
},
},
},
### Specifying the device
To let TestingBot know on which device you want to run your test on, you need to specify the deviceName and platformName.
To see how to do this, please select a combination of deviceName and platformName in the drop-down menus below.
iOS 18.6›iPhone 16
Loading environments...
Please wait while we load the available browsers and platforms.
## Mark tests as passed/failed
CodeceptJS allows you to mark tests as passed or failed, which is useful for debugging and reporting purposes. You can use the `I.see()` and `I.dontSee()` methods to check for specific elements or text on the page. If the element is not found, the test will fail.
This is useful for checking if a specific element is present on the page, or if a specific text is visible. If the element or text is not found, the test will fail and you will see an error message in the report.
## Parallel Testing
Please see [CodeceptJS parallel testing](https://codecept.io/parallel/#parallel-execution-by-workers) on how to run your tests in parallel.
You can specify the concurrency by specifying a number of workers:
npx codeceptjs run-workers 2
or run multiple different devices with:
npx codeceptjs run-multiple --all
### Queuing
Every plan we provide comes with a limit of parallel tests.
If you exceed the number of parallel tests assigned to your account, TestingBot will queue the additional tests (for up to 6 minutes) and run the tests as soon as slots become available.
## Preparing your App
You do not need to install any code or plugin to run a test.
Below are some things that are necessary to successfully run a mobile test:
**For Android:**
- Please supply the URL to your `.apk` or `.aab` file.
**Important:** the `.apk` file needs to be a x86 build (x86 ABI) for Android emulators.
**For iOS Real Device:**
- Please supply the URL to an `.ipa` file.
**For iOS Simulator:**
- Please supply the URL to a `.zip` file that contains your `.app`
- The `.app` needs to be an iOS Simulator build:
- Create a Simulator build:
xcodebuild -sdk iphonesimulator -configuration Debug
- Zip the `.app` bundle:
zip -r MyApp.zip MyApp.app
## Additional Options
Appium provides [a lot of options](https://appium.io/docs/en/2.0/guides/caps/) to configure your test.
Some important options that might help:
**For Android:**
- **appActivity** and **appPackage** : by default, Appium will try to extract the main Activity from your apk. If this fails, you can supply your own with these options.
- **chromeOptions** : additional chromedriver options you can supply.
- **otherApps** : a JSON array of other apps that need to be installed, in URL format.
**For Android & iOS:**
- **locale** : the language of the simulator/device (ex: `fr_CA`)
This sets the locale on the entire device/simulator, except on physical iOS devices. For real iOS devices, we will pass `-AppleLocale` as argument to the app.
- **newCommandTimeout** : How long (in seconds) Appium will wait for a new command from the client before assuming the client quit and ending the session
Was this page helpful? Yes No
## Looking for More Help?
Have questions or need more information?
You can reach us via the following channels:
- [Email us](https://testingbot.com/contact/new)
- [Join our Slack Channel](https://join.slack.com/t/testingb0t/shared_invite/zt-3bcw9xch-jk19~6XPs_xBrsAgAedkCw)
---
URL: https://testingbot.com/support/app-automate/appium/nodejs/webdriverio
# WebDriverIO Automated App Testing
First, make sure you have installed NodeJS. If you haven't, you can easily install it by [downloading NodeJS](https://nodejs.org/en/download/).
See our [WebdriverIO examples repository](https://github.com/testingbot/webdriverio-examples) for some examples on how to use WebdriverIO with TestingBot.
## Installation
TestingBot has its own [WebDriverIO service](https://webdriver.io/docs/testingbot-service.html) plugin which makes configuring your tests easier and which sends test meta-data back to TestingBot.
Let's start with making sure `webdriverio` is installed:
npm i --save-dev @wdio/cli @wdio/local-runner
You are now ready to run a WebDriver test with NodeJS on our grid.
## WebDriverIO TestingBot Service
WebDriverIO contains a [TestingBot service](https://webdriver.io/docs/testingbot-service.html) which makes it easy to run tests with WebDriverIO on TestingBot. With this service, WebDriverIO will start a [TestingBot Tunnel](https://testingbot.com/support/tunnel) if required, and send back test meta-data (passed state, name, build-id, ...)
In order to use the service you need to download it from NPM:
npm install @wdio/testingbot-service --save-dev
## Mocha Example
To run Mocha tests on TestingBot, please follow these steps:
npm install @wdio/testingbot-service --save-dev
npm install @wdio/dot-reporter --save-dev
npm install @wdio/mocha-framework --save-dev
Now we'll make a simple Mocha test which uses Firefox on TestingBot to go to Google.com and verify the page's title.
Please create the following files:
**wdio.conf.js**
exports.config = {
/**
* specify test files
*/
specs: [
'./runner-specs/mocha.test.js'
],
/**
* capabilities
*/
capabilities: [{
platformName: 'Android',
'appium:deviceName': 'Pixel 8',
'appium:platformVersion': '14.0',
'appium:app': 'https://testingbot.com/appium/sample.apk',
'tb:options': {
name: 'My First App Test'
}
}],
/**
* test configurations
*/
logLevel: 'silent',
coloredLogs: true,
screenshotPath: 'screenshots',
waitforTimeout: 10000,
connectionRetryTimeout: 480000,
framework: 'mocha',
services: [
['testingbot']
],
user: 'api_key',
key: 'api_secret',
reporters: ['dot'],
reporterOptions: {
outputDir: './'
},
mochaOpts: {
ui: 'bdd'
}
};
**runner-specs/mocha.test.js**
const assert = require('assert')
describe('calculator', function() {
it('should calculate a sum', async () => {
const inputA = await $('~inputA')
await inputA.waitForDisplayed(5000)
await inputA.click()
try {
await inputA.addValue('10')
} catch (e) {}
const inputB = await $('~inputB')
await inputB.waitForDisplayed(5000)
await inputB.click()
try {
await inputB.addValue('5')
} catch (e) {}
const sumElement = await $('~sum')
const sum = await sumElement.getText()
assert.equal(sum, '15') // 10 + 5
})
})
Now we can run this mobile app test on TestingBot. The test will do a simple sum calculation and verify if the calculation was correct.
To start the test, please run this command:
~/node_modules/.bin/wdio run wdio.conf.js
The test will now run on TestingBot. At the end of the test, the testname and success state will be available on TestingBot, together with a video and other meta-data.
## Uploading Your App
Please see our [Upload Mobile App](https://testingbot.com/support/app-automate/help/upload) documentation to find out how to upload your app to TestingBot for testing.
## Specify Devices
To run your existing tests on TestingBot, your tests will need to be configured to use the TestingBot remote machines. If the test was running on your local machine or network, you can simply change your existing test like this:
**Before:**
exports.config = {
// ...
services: ['selenium-standalone'],
// ...
};
**After:**
exports.config = {
// ...
services: [
['testingbot']
],
user: process.env.TB_KEY,
key: process.env.TB_SECRET,
// ...
};
To let TestingBot know on which device you want to run your test on, you need to specify the `appium:deviceName`, `appium:platformVersion`, `platformName` and other optional options in the capabilities field.
To see how to do this, please select a combination of device type and device name in the drop-down menus below.
iOS 18.6›iPhone 16
Loading environments...
Please wait while we load the available browsers and platforms.
## Testing Internal Websites
We've built [TestingBot Tunnel](https://testingbot.com/support/tunnel), to provide you with a secure way to run tests against your staged/internal webapps.
Please see our [TestingBot Tunnel documentation](https://testingbot.com/support/tunnel) for more information about this easy to use tunneling solution.
The example below shows how to easily run a WebdriverIO test with our Tunnel:
1. Adjust your `wdio.conf.js` configuration to use `tbTunnel: true`.
The [wdio-testingbot-service](https://webdriver.io/docs/testingbot-service/) will automatically download and use the tunnel for your tests.
**wdio.conf.js**
exports.config = {
services: [
['testingbot', {
tbTunnel: true
}]
],
user: 'api_key',
key: 'api_secret'
};
## Run Tests in Parallel
Parallel testing allows you to run multiple tests at the same time, significantly reducing your total test execution time.
You can run the same test across different device configurations, or run different tests on the same configuration — all simultaneously.
TestingBot provides a large grid of browsers and devices, enabling you to run tests in parallel efficiently. This is one of our core features designed to help you test faster and ship more reliably.
With WebDriverIO, you can enable parallel test execution by setting the `maxInstances` property in your `wdio.conf.js` file and specifying multiple `capabilities`. This defines how many instances of the same browser can run in parallel. We recommend setting this value to match the number of parallel sessions allowed by your TestingBot plan.
exports.config = {
maxInstances: 5, // Adjust this based on your TestingBot plan
capabilities: [{
platformName: 'Android',
'appium:deviceName': 'Pixel 8',
'appium:platformVersion': '14.0',
'appium:app': 'https://testingbot.com/appium/sample.apk',
'tb:options': {
name: 'My First App Test'
}
},
{
platformName: 'Android',
'appium:deviceName': 'Pixel 9',
'appium:platformVersion': '15.0',
'appium:app': 'https://testingbot.com/appium/sample.apk',
'tb:options': {
name: 'My Second App Test'
}
}]
};
### Queuing
Every TestingBot plan includes a fixed number of parallel test slots.
If you exceed this limit, additional tests will be automatically queued and executed as soon as slots become available, no tests will be dropped or skipped.
## Mark tests as passed/failed
As TestingBot has no way to determine whether your test passed or failed (it is determined by your business logic), we offer a way to send the test status back to TestingBot. This is useful if you want to see if a test succeeded or failed from the TestingBot member area.
If you are using the [wdio-testingbot-service](https://webdriver.io/docs/testingbot-service/) then your tests will automatically report back meta-data to TestingBot (like test success, name, stacktrace, ...)
## Common errors
Below are some common errors you might encounter when running WebDriverIO tests on TestingBot:
- `UND_ERR_HEADERS_TIMEOUT`
**Problem:** This error indicates that WebdriverIO did not receive a response in time. This might happen when requesting a device that is currently in use, or in case you are trying to run more tests in parallel than your plan allows and the tests have been [queued](https://testingbot.com#queuing) for a long time.
**Solution:** You can try adding the `connectionRetryTimeout` in your WebDriverIO configuration with a high enough value:
connectionRetryTimeout: 480000
## Preparing your App
You do not need to install any code or plugin to run a test.
Below are some things that are necessary to successfully run a mobile test:
**For Android:**
- Please supply the URL to your `.apk` or `.aab` file.
**Important:** the `.apk` file needs to be a x86 build (x86 ABI) for Android emulators.
**For iOS Real Device:**
- Please supply the URL to an `.ipa` file.
**For iOS Simulator:**
- Please supply the URL to a `.zip` file that contains your `.app`
- The `.app` needs to be an iOS Simulator build:
- Create a Simulator build:
xcodebuild -sdk iphonesimulator -configuration Debug
- Zip the `.app` bundle:
zip -r MyApp.zip MyApp.app
## Additional Options
Appium provides [a lot of options](https://appium.io/docs/en/2.0/guides/caps/) to configure your test.
Some important options that might help:
**For Android:**
- **appActivity** and **appPackage** : by default, Appium will try to extract the main Activity from your apk. If this fails, you can supply your own with these options.
- **chromeOptions** : additional chromedriver options you can supply.
- **otherApps** : a JSON array of other apps that need to be installed, in URL format.
**For Android & iOS:**
- **locale** : the language of the simulator/device (ex: `fr_CA`)
This sets the locale on the entire device/simulator, except on physical iOS devices. For real iOS devices, we will pass `-AppleLocale` as argument to the app.
- **newCommandTimeout** : How long (in seconds) Appium will wait for a new command from the client before assuming the client quit and ending the session
Was this page helpful? Yes No
## Looking for More Help?
Have questions or need more information?
You can reach us via the following channels:
- [Email us](https://testingbot.com/contact/new)
- [Join our Slack Channel](https://join.slack.com/t/testingb0t/shared_invite/zt-3bcw9xch-jk19~6XPs_xBrsAgAedkCw)
---
URL: https://testingbot.com/support/app-automate/appium/php
# PHPUnit Automated App Testing
See our [PHPUnit Mobile example repository](https://github.com/testingbot/php-phpunit-mobile-example) for a simple example on how to run PHPUnit tests for Mobile Apps on TestingBot.
Let's start with making sure PHP is available on your system.
**For Windows:**
- You can download PHP for Windows from [PHP For Windows](https://windows.php.net/download/).
- Run the installer and follow the setup wizard to install PHP.
**For Linux:**
sudo apt-get install curl libcurl3 libcurl3-dev php
**For macOS:**
PHP should already be present on macOS by default.
## Install PHPUnit
- Make sure you have [Composer installed](https://getcomposer.org/).
- Install PHPUnit by running this command in your terminal:
- Install Appium PHP Client by running this command in your terminal:
## PHPUnit Example Real Devices
Please see the example below. We're going to test our sample app on a Real Device.
In this test we'll add values to two input fields and see if the calculator works.
[Android](https://testingbot.com#)[iOS](https://testingbot.com#)
'', 'desiredCapabilities' => array(
'app' => 'https://testingbot.com/appium/sample.apk',
'deviceName' => 'Galaxy S8',
'version' => '9.0',
'platformName' => 'Android',
'realDevice': true
)));
public function setupSpecificBrowser($params) {
$caps = $this->getDesiredCapabilities();
$this->setHost('api_key:api_secret@hub.testingbot.com');
$caps = isset($params['desiredCapabilities']) ? $params['desiredCapabilities'] : array();
$this->setDesiredCapabilities($caps);
$this->setUpSessionStrategy($params);
$this->setSeleniumServerRequestsTimeout(180);
}
public function testNativeApplication() {
$el = $this->byAccessibilityId('inputA');
$el->click();
$this->keys("10");
$el = $this->byAccessibilityId('inputB');
$el->click();
$this->keys("5");
}
}
'', 'desiredCapabilities' => array(
'app' => 'https://testingbot.com/appium/sample.ipa',
'deviceName' => 'iPhone XR',
'version' => '16.3',
'platformName' => 'iOS',
'realDevice': true
)));
public function setupSpecificBrowser($params) {
$caps = $this->getDesiredCapabilities();
$this->setHost('api_key:api_secret@hub.testingbot.com');
$caps = isset($params['desiredCapabilities']) ? $params['desiredCapabilities'] : array();
$this->setDesiredCapabilities($caps);
$this->setUpSessionStrategy($params);
$this->setSeleniumServerRequestsTimeout(180);
}
public function testNativeApplication() {
$el = $this->byAccessibilityId('inputA');
$el->click();
$this->keys("10");
$el = $this->byAccessibilityId('inputB');
$el->click();
$this->keys("5");
}
}
## PHPUnit Example Simulator/Emulator
Please see the example below. We're going to test our sample app on an iOS Simulator or Android Emulator.
In this test we'll add values to two input fields and see if the calculator works.
[Android](https://testingbot.com#)[iOS](https://testingbot.com#)
'', 'desiredCapabilities' => array(
'app' => 'https://testingbot.com/appium/sample.apk',
'deviceName' => 'Pixel 8',
'version' => '14.0',
'platformName' => 'Android'
)));
public function setupSpecificBrowser($params) {
$caps = $this->getDesiredCapabilities();
$this->setHost('api_key:api_secret@hub.testingbot.com');
$caps = isset($params['desiredCapabilities']) ? $params['desiredCapabilities'] : array();
$this->setDesiredCapabilities($caps);
$this->setUpSessionStrategy($params);
$this->setSeleniumServerRequestsTimeout(180);
}
public function testNativeApplication() {
$el = $this->byAccessibilityId('inputA');
$el->click();
$this->keys("10");
$el = $this->byAccessibilityId('inputB');
$el->click();
$this->keys("5");
}
}
'', 'desiredCapabilities' => array(
'app' => 'https://testingbot.com/appium/sample.zip',
'deviceName' => 'iPhone 15',
'version' => '17.4',
'platformName' => 'iOS'
)));
public function setupSpecificBrowser($params) {
$caps = $this->getDesiredCapabilities();
$this->setHost('api_key:api_secret@hub.testingbot.com');
$caps = isset($params['desiredCapabilities']) ? $params['desiredCapabilities'] : array();
$this->setDesiredCapabilities($caps);
$this->setUpSessionStrategy($params);
$this->setSeleniumServerRequestsTimeout(180);
}
public function testNativeApplication() {
$el = $this->byAccessibilityId('inputA');
$el->click();
$this->keys("10");
$el = $this->byAccessibilityId('inputB');
$el->click();
$this->keys("5");
}
}
## Uploading Your App
Please see our [Upload Mobile App](https://testingbot.com/support/app-automate/help/upload) documentation to find out how to upload your app to TestingBot for testing.
## Specify Browsers & Devices
To run your existing tests on TestingBot, your tests will need to be configured to use the TestingBot remote machines. If the test was running on your local machine or network, you can simply change your existing test like this:
$this->setHost('api_key:api_secret@hub.testingbot.com');
To let TestingBot know on which device you want to run your test on, you need to specify the `deviceName`, `version`, `platformName` and other optional options in the capabilities field.
public static $browsers = array(array( 'browserName' => '', 'desiredCapabilities' => array(
'app' => 'tb://...',
'deviceName' => 'iPhone 15',
'version' => '17.4',
'platformName' => 'iOS'
)));
To see how to do this, please select a combination of device type and device name in the drop-down menus below.
iOS 18.6›iPhone 16
Loading environments...
Please wait while we load the available browsers and platforms.
## Testing Internal Websites
We've built [TestingBot Tunnel](https://testingbot.com/support/tunnel), to provide you with a secure way to run tests against your staged/internal webapps.
Please see our [TestingBot Tunnel documentation](https://testingbot.com/support/tunnel) for more information about this easy to use tunneling solution.
The example below shows how to easily run a PHP WebDriver test with our Tunnel:
1. [Download our tunnel](https://testingbot.com/support/tunnel) and start the tunnel:
java -jar testingbot-tunnel.jar key secret
2. Adjust your test: instead of pointing to `'hub.testingbot.com/wd/hub'` like the example above - change it to point to your tunnel's IP address.
Assuming you run the tunnel on the same machine you run your tests, change to `'localhost:4445/wd/hub'`. localhost is the machine running the tunnel, 4445 is the default port of the tunnel.
This way your test will go securely through the tunnel to TestingBot and back:
'', 'desiredCapabilities' => array(
'app' => 'https://testingbot.com/appium/sample.zip',
'deviceName' => 'iPhone 15',
'version' => '17.4',
'platformName' => 'iOS'
)));
public function setupSpecificBrowser($params) {
$caps = $this->getDesiredCapabilities();
$this->setHost('api_key:api_secret@localhost');
$this->setPort(4445);
$caps = isset($params['desiredCapabilities']) ? $params['desiredCapabilities'] : array();
$this->setDesiredCapabilities($caps);
$this->setUpSessionStrategy($params);
$this->setSeleniumServerRequestsTimeout(180);
}
public function testNativeApplication() {
$el = $this->byAccessibilityId('inputA');
$el->click();
$this->keys("10");
$el = $this->byAccessibilityId('inputB');
$el->click();
$this->keys("5");
}
}
## Run tests in Parallel
Parallel Testing means running the same test, or multiple tests, simultaneously. This greatly reduces your total testing time.
You can run the same tests on all different browser configurations or run different tests all on the same browser configuration.
TestingBot has a large grid of machines and browsers, which means you can use our service to do efficient parallel testing. It is one of the key features we provide to greatly cut down on your total testing time.
To run tests in parallel, we recommend using [Paratest](https://github.com/brianium/paratest), which makes it very easy to run multiple PHPUnit tests simultaneously.
vendor/bin/paratest -p 8 -f --phpunit=vendor/bin/phpunit WebdriverTest.php
The command above will run your tests in 8 separate processes (8 tests at once).
### Queuing
Every plan we provide comes with a limit of parallel tests.
If you exceed the number of parallel tests assigned to your account, TestingBot will queue the additional tests (for up to 6 minutes) and run the tests as soon as slots become available.
## Mark tests as passed/failed
As TestingBot has no way to determine whether your test passed or failed (it is determined by your business logic), we offer a way to send the test status back to TestingBot. This is useful if you want to see if a test succeeded or failed from the TestingBot member area.
You can use our [PHP API client](https://github.com/testingbot/testingbot-php) to report back test results.
$api = new TestingBot\TestingBotAPI($apiKey, $apiSecret);
$api->updateJob($web_driver->getSessionID(), array('name' => 'mytest', 'success' => true));
## Preparing your App
You do not need to install any code or plugin to run a test.
Below are some things that are necessary to successfully run a mobile test:
**For Android:**
- Please supply the URL to your `.apk` or `.aab` file.
**Important:** the `.apk` file needs to be a x86 build (x86 ABI) for Android emulators.
**For iOS Real Device:**
- Please supply the URL to an `.ipa` file.
**For iOS Simulator:**
- Please supply the URL to a `.zip` file that contains your `.app`
- The `.app` needs to be an iOS Simulator build:
- Create a Simulator build:
xcodebuild -sdk iphonesimulator -configuration Debug
- Zip the `.app` bundle:
zip -r MyApp.zip MyApp.app
## Additional Options
Appium provides [a lot of options](https://appium.io/docs/en/2.0/guides/caps/) to configure your test.
Some important options that might help:
**For Android:**
- **appActivity** and **appPackage** : by default, Appium will try to extract the main Activity from your apk. If this fails, you can supply your own with these options.
- **chromeOptions** : additional chromedriver options you can supply.
- **otherApps** : a JSON array of other apps that need to be installed, in URL format.
**For Android & iOS:**
- **locale** : the language of the simulator/device (ex: `fr_CA`)
This sets the locale on the entire device/simulator, except on physical iOS devices. For real iOS devices, we will pass `-AppleLocale` as argument to the app.
- **newCommandTimeout** : How long (in seconds) Appium will wait for a new command from the client before assuming the client quit and ending the session
Was this page helpful? Yes No
## Looking for More Help?
Have questions or need more information?
You can reach us via the following channels:
- [Email us](https://testingbot.com/contact/new)
- [Join our Slack Channel](https://join.slack.com/t/testingb0t/shared_invite/zt-3bcw9xch-jk19~6XPs_xBrsAgAedkCw)
---
URL: https://testingbot.com/support/app-automate/appium/proxy
# Configure a device with a proxy
You can use Appium or Selenium WebDriver to configure a proxy on the remote Android or iOS device, at the start of your test.
This makes sure that all traffic on the device will go through the external proxy, which can be useful to do [geolocation testing](https://testingbot.com/support/app-automate/appium/options#geo) or latency testing.
[Ruby](https://testingbot.com#)[Python](https://testingbot.com#)[PHP](https://testingbot.com#)[Java](https://testingbot.com#)[NodeJS](https://testingbot.com#)[C#](https://testingbot.com#)
desired_caps = {
'platformName' => 'Android',
'appium:deviceName' => 'Pixel 9',
'appium:platformVersion' => '16.0',
'appium:app' => 'https://testingbot.com/appium/sample.apk',
'tb:options' => {
'realDevice' => true
}
}
# Set up the proxy settings
proxy = {
'proxyType' => 'manual', # Proxy type (manual or system)
'httpProxy' => 'http://your-proxy-server:8080', # Replace with your HTTP proxy URL
'sslProxy' => 'http://your-proxy-server:8080', # Replace with your SSL proxy URL
'noProxy' => 'localhost,127.0.0.1' # Optional: bypass proxy for specific hosts
}
# Add proxy to desired capabilities
desired_caps['proxy'] = proxy
# Initialize the Appium driver
driver = Appium::Driver.new({caps: desired_caps}, true)
UiAutomator2Options options = new UiAutomator2Options();
// Set basic capabilities
options.setPlatformName("Android");
options.setCapability("appium:deviceName", "Pixel 9");
options.setCapability("appium:platformVersion", "16.0");
options.setCapability("appium:app", "https://testingbot.com/appium/sample.apk");
// Set TestingBot-specific options
Map tbOptions = new HashMap<>();
tbOptions.put("realDevice", true);
options.setCapability("tb:options", tbOptions);
// Set up proxy settings
Proxy proxy = new Proxy();
proxy.setHttpProxy("http://your-proxy-server:8080"); // Replace with your HTTP proxy URL
proxy.setSslProxy("http://your-proxy-server:8080"); // Replace with your SSL proxy URL
// Apply the proxy settings to the capabilities
options.setProxy(proxy);
// Initialize the driver with TestingBot Appium server URL
URL appiumServerUrl = new URL("https://hub.testingbot.com/wd/hub");
AndroidDriver driver = new AndroidDriver(appiumServerUrl, options);
$capabilities = array(
'platformName' => 'Android',
'appium:app' => 'https://testingbot.com/appium/sample.apk',
'appium:deviceName' => 'Pixel 9',
'appium:platformVersion' => '16.0',
'tb:options' => array(
'realDevice' => true
),
'proxy' => array(
'proxyType' => 'manual', // Proxy type, "manual" for custom proxy settings
'httpProxy' => 'http://your-proxy-server:8080', // Replace with your HTTP proxy
'sslProxy' => 'http://your-proxy-server:8080', // Replace with your SSL proxy (HTTPS traffic)
'noProxy' => 'localhost,127.0.0.1' // Optional: addresses that should bypass the proxy
)
);
$web_driver = RemoteWebDriver::create('https://hub.testingbot.com/wd/hub', $capabilities, null, null, PROXY_URL, PROXY_PORT);
capabilities = {
"platformName": "Android",
"appium:deviceName": "Pixel 9",
"appium:platformVersion": "16.0",
"appium:app": "https://testingbot.com/appium/sample.apk",
"tb:options": {
"realDevice": True
},
"proxy": {
"proxyType": "manual", # Or "system" if you want to use system proxy
"httpProxy": "http://your-proxy-server:8080", # Replace with your proxy server
"sslProxy": "http://your-proxy-server:8080", # Replace with your proxy server for SSL
"noProxy": "localhost,127.0.0.1" # Optional: specify addresses to bypass the proxy
}
}
driver = webdriver.Remote(
command_executor="https://hub.testingbot.com/wd/hub",
options=capabilities
)
const { remote } = require('webdriverio');
const capabilities = {
hostname: 'hub.testingbot.com',
port: 443,
protocol: 'https',
path: '/wd/hub',
user: 'api_key',
key: 'api_secret',
capabilities: {
'platformName': 'Android',
'appium:deviceName': 'Pixel 9',
'appium:platformVersion': '16.0',
'appium:app': 'https://testingbot.com/appium/sample.apk',
'tb:options': {
'name': 'My First App Test',
'realDevice': true
},
'proxy': {
proxyType: 'manual',
httpProxy: 'http://proxy-server:8080', // Replace with your proxy server URL
sslProxy: 'http://proxy-server:8080', // If needed for SSL connections
noProxy: '' // You can define URLs to bypass the proxy
}
}
};
const driver = await remote(capabilities);
AppiumOptions options = new AppiumOptions();
options.PlatformName = "Android";
options.AddAdditionalAppiumOption("appium:deviceName", "Pixel 9");
options.AddAdditionalAppiumOption("appium:platformVersion", "16.0");
options.AddAdditionalAppiumOption("appium:app", "https://testingbot.com/appium/sample.apk");
// Set TestingBot-specific options
var tbOptions = new Dictionary
{
["realDevice"] = true
};
options.AddAdditionalAppiumOption("tb:options", tbOptions);
// Set up proxy using the Proxy class
Proxy proxy = new Proxy();
proxy.HttpProxy = "http://your-proxy-server:8080"; // Replace with your proxy URL
proxy.SslProxy = "http://your-proxy-server:8080"; // Replace with your proxy URL
proxy.NoProxy = "localhost,127.0.0.1"; // Optional: bypass proxy for specific addresses
// Apply the proxy to the Appium options
options.Proxy = proxy;
// Initialize the driver
AndroidDriver driver = new AndroidDriver(new Uri("https://hub.testingbot.com/wd/hub"), options);
Was this page helpful? Yes No
## Looking for More Help?
Have questions or need more information?
You can reach us via the following channels:
- [Email us](https://testingbot.com/contact/new)
- [Join our Slack Channel](https://join.slack.com/t/testingb0t/shared_invite/zt-3bcw9xch-jk19~6XPs_xBrsAgAedkCw)
---
URL: https://testingbot.com/support/app-automate/appium/python
# Python Automated App Testing
Before you can start testing apps with Python, let's start with making sure Python is available on your system.
**For Windows:**
- Download the latest python installer for Windows: [Python Releases for Windows](https://www.python.org/downloads/windows/)
- Run the installer and follow the setup wizard to install Python.
**For Linux/macOS:**
- macOS, Ubuntu and most other Linux distros come with Python pre-installed.
## Installation
With TestingBot you can easily run automated tests with Python against your mobile app.
To get started, please install the following libraries:
easy_install pip
pip install Appium-Python-Client
pip install selenium
### Real Device Example
[Android](https://testingbot.com#)[iOS](https://testingbot.com#)
Below is a Python Example, this will download and install our sample app (a calculator), add numbers to two input fields and show the sum of the two numbers:
from appium import webdriver
from appium.webdriver.common.appiumby import AppiumBy
from selenium.webdriver.support.ui import WebDriverWait
from selenium.webdriver.support import expected_conditions as EC
capabilities = {
"platformName": "Android",
"appium:deviceName": "Galaxy S24",
"appium:platformVersion": "14.0",
"appium:app": "https://testingbot.com/appium/sample.apk",
"tb:options": {
"key": "api_key",
"secret": "api_secret",
"realDevice": True
}
}
driver = webdriver.Remote("https://hub.testingbot.com/wd/hub", capabilities)
inputA = WebDriverWait(driver, 30).until(
EC.element_to_be_clickable((AppiumBy.ACCESSIBILITY_ID, "inputA"))
)
inputA.send_keys("10")
inputB = WebDriverWait(driver, 30).until(
EC.element_to_be_clickable((AppiumBy.ACCESSIBILITY_ID, "inputB"))
)
inputB.send_keys("5")
sum_element = WebDriverWait(driver, 30).until(
EC.element_to_be_clickable((AppiumBy.ACCESSIBILITY_ID, "sum"))
)
assert sum_element.text == "15", "Sum should be 15"
driver.quit()
from appium import webdriver
from appium.webdriver.common.appiumby import AppiumBy
from selenium.webdriver.support.ui import WebDriverWait
from selenium.webdriver.support import expected_conditions as EC
capabilities = {
"platformName": "iOS",
"appium:deviceName": "iPhone 15",
"appium:platformVersion": "18.0",
"appium:app": "https://testingbot.com/appium/sample.ipa",
"tb:options": {
"key": "api_key",
"secret": "api_secret",
"realDevice": True
}
}
driver = webdriver.Remote("https://hub.testingbot.com/wd/hub", capabilities)
inputA = WebDriverWait(driver, 30).until(
EC.element_to_be_clickable((AppiumBy.ACCESSIBILITY_ID, "inputA"))
)
inputA.send_keys("10")
inputB = WebDriverWait(driver, 30).until(
EC.element_to_be_clickable((AppiumBy.ACCESSIBILITY_ID, "inputB"))
)
inputB.send_keys("5")
driver.quit()
### Simulator/Emulator Example
[Android](https://testingbot.com#)[iOS](https://testingbot.com#)
Below is a Python Example, this will download and install our sample app (a calculator), add numbers to two input fields and show the sum of the two numbers:
from appium import webdriver
from appium.webdriver.common.appiumby import AppiumBy
from selenium.webdriver.support.ui import WebDriverWait
from selenium.webdriver.support import expected_conditions as EC
capabilities = {
"platformName": "Android",
"appium:deviceName": "Pixel 8",
"appium:platformVersion": "14.0",
"appium:app": "https://testingbot.com/appium/sample.apk",
"tb:options": {
"key": "api_key",
"secret": "api_secret"
}
}
driver = webdriver.Remote("https://hub.testingbot.com/wd/hub", capabilities)
inputA = WebDriverWait(driver, 30).until(
EC.element_to_be_clickable((AppiumBy.ACCESSIBILITY_ID, "inputA"))
)
inputA.send_keys("10")
inputB = WebDriverWait(driver, 30).until(
EC.element_to_be_clickable((AppiumBy.ACCESSIBILITY_ID, "inputB"))
)
inputB.send_keys("5")
sum_element = WebDriverWait(driver, 30).until(
EC.element_to_be_clickable((AppiumBy.ACCESSIBILITY_ID, "sum"))
)
assert sum_element.text == "15", "Sum should be 15"
driver.quit()
from appium import webdriver
from appium.webdriver.common.appiumby import AppiumBy
from selenium.webdriver.support.ui import WebDriverWait
from selenium.webdriver.support import expected_conditions as EC
capabilities = {
"platformName": "iOS",
"appium:deviceName": "iPhone 15",
"appium:platformVersion": "17.4",
"appium:app": "https://testingbot.com/appium/sample.zip",
"tb:options": {
"key": "api_key",
"secret": "api_secret"
}
}
driver = webdriver.Remote("https://hub.testingbot.com/wd/hub", capabilities)
inputA = WebDriverWait(driver, 30).until(
EC.element_to_be_clickable((AppiumBy.ACCESSIBILITY_ID, "inputA"))
)
inputA.send_keys("10")
inputB = WebDriverWait(driver, 30).until(
EC.element_to_be_clickable((AppiumBy.ACCESSIBILITY_ID, "inputB"))
)
inputB.send_keys("5")
driver.quit()
Make sure to always stop your test (`driver.quit()`), otherwise it will continue running, leading to a timeout.
## Uploading Your App
Please see our [Upload Mobile App](https://testingbot.com/support/app-automate/help/upload) documentation to find out how to upload your app to TestingBot for testing.
## Specify Devices
To run your existing tests on TestingBot, your tests will need to be configured to use the TestingBot remote machines. If the test was running on your local machine or network, you can simply change your existing test like this:
**Before:**
driver = webdriver.Remote("http://localhost:4723/wd/hub", capabilities)
**After:**
driver = webdriver.Remote("https://hub.testingbot.com/wd/hub", capabilities)
To let TestingBot know on which device you want to run your test on, you need to specify the `appium:deviceName`, `appium:platformVersion`, `platformName` and other optional options in the capabilities field.
iOS 18.6›iPhone 16
Loading environments...
Please wait while we load the available browsers and platforms.
## Testing Internal Websites
We've built [TestingBot Tunnel](https://testingbot.com/support/tunnel), to provide you with a secure way to run tests against your staged/internal webapps.
Please see our [TestingBot Tunnel documentation](https://testingbot.com/support/tunnel) for more information about this easy to use tunneling solution.
The example below shows how to easily run a Python test with our Tunnel:
1. [Download our tunnel](https://testingbot.com/support/tunnel) and start the tunnel:
java -jar testingbot-tunnel.jar key secret
2. Adjust your test: instead of pointing to `'hub.testingbot.com/wd/hub'` like the example above - change it to point to your tunnel's IP address.
Assuming you run the tunnel on the same machine you run your tests, change to `'localhost:4445/wd/hub'`. localhost is the machine running the tunnel, 4445 is the default port of the tunnel.
This way your test will go securely through the tunnel to TestingBot and back:
from appium import webdriver
from appium.webdriver.common.appiumby import AppiumBy
from selenium.webdriver.support.ui import WebDriverWait
from selenium.webdriver.support import expected_conditions as EC
capabilities = {
"platformName": "iOS",
"appium:deviceName": "iPhone 15",
"appium:platformVersion": "17.4",
"appium:app": "https://testingbot.com/appium/sample.zip",
"tb:options": {
"key": "api_key",
"secret": "api_secret"
}
}
# Point to local tunnel instead of hub.testingbot.com
driver = webdriver.Remote("http://localhost:4445/wd/hub", capabilities)
inputA = WebDriverWait(driver, 30).until(
EC.element_to_be_clickable((AppiumBy.ACCESSIBILITY_ID, "inputA"))
)
inputA.send_keys("10")
inputB = WebDriverWait(driver, 30).until(
EC.element_to_be_clickable((AppiumBy.ACCESSIBILITY_ID, "inputB"))
)
inputB.send_keys("5")
driver.quit()
## Run tests in Parallel
Parallel Testing means running the same test, or multiple tests, simultaneously. This greatly reduces your total testing time.
You can run the same tests on all different device configurations or run different tests all on the same device configuration.
TestingBot has a large grid of devices, which means you can use our service to do efficient parallel testing. It is one of the key features we provide to greatly cut down on your total testing time.
To run tests in parallel, we recommend using pytest with pytest-xdist, which makes it very easy to run multiple Python tests simultaneously:
pip install pytest pytest-xdist
pytest -n
### Queuing
Every plan we provide comes with a limit of parallel tests.
If you exceed the number of parallel tests assigned to your account, TestingBot will queue the additional tests (for up to 6 minutes) and run the tests as soon as slots become available.
## Mark tests as passed/failed
As TestingBot has no way to determine whether your test passed or failed (it is determined by your business logic), we offer a way to send the test status back to TestingBot. This is useful if you want to see if a test succeeded or failed from the TestingBot member area.
You can use our [Python API client](https://github.com/testingbot/testingbotclient) to report back test results.
tb = testingbotclient.TestingBotClient(key, secret)
tb.tests.update_test(self.driver.session_id, status_message=.., passed=1|0, build=.., name=..)
## Preparing your App
You do not need to install any code or plugin to run a test.
Below are some things that are necessary to successfully run a mobile test:
**For Android:**
- Please supply the URL to your `.apk` or `.aab` file.
**Important:** the `.apk` file needs to be a x86 build (x86 ABI) for Android emulators.
**For iOS Real Device:**
- Please supply the URL to an `.ipa` file.
**For iOS Simulator:**
- Please supply the URL to a `.zip` file that contains your `.app`
- The `.app` needs to be an iOS Simulator build:
- Create a Simulator build:
xcodebuild -sdk iphonesimulator -configuration Debug
- Zip the `.app` bundle:
zip -r MyApp.zip MyApp.app
## Additional Options
Appium provides [a lot of options](https://appium.io/docs/en/2.0/guides/caps/) to configure your test.
Some important options that might help:
**For Android:**
- **appActivity** and **appPackage** : by default, Appium will try to extract the main Activity from your apk. If this fails, you can supply your own with these options.
- **chromeOptions** : additional chromedriver options you can supply.
- **otherApps** : a JSON array of other apps that need to be installed, in URL format.
**For Android & iOS:**
- **locale** : the language of the simulator/device (ex: `fr_CA`)
This sets the locale on the entire device/simulator, except on physical iOS devices. For real iOS devices, we will pass `-AppleLocale` as argument to the app.
- **newCommandTimeout** : How long (in seconds) Appium will wait for a new command from the client before assuming the client quit and ending the session
Was this page helpful? Yes No
## Looking for More Help?
Have questions or need more information?
You can reach us via the following channels:
- [Email us](https://testingbot.com/contact/new)
- [Join our Slack Channel](https://join.slack.com/t/testingb0t/shared_invite/zt-3bcw9xch-jk19~6XPs_xBrsAgAedkCw)
---
URL: https://testingbot.com/support/app-automate/appium/ruby
# Ruby Automated App Testing
Let's start with making sure Ruby is available on your system.
**For Windows:**
- You can download Ruby for Windows from [RubyInstaller](https://rubyinstaller.org/)
- Run the installer and follow the setup wizard to install Ruby.
**For Linux/macOS:**
Download [RVM](https://rvm.io/) and install Ruby:
curl -L https://get.rvm.io | bash -s stable --ruby
## Installation
With TestingBot you can easily run your automated app tests with Ruby.
Please install the following gems:
gem install appium_lib
gem install selenium-webdriver
Please see the example below. We're going to run a test on our sample app (calculator) where we'll add values to two input fields.
### Real Device Testing
[Android](https://testingbot.com#)[iOS](https://testingbot.com#)
require 'appium_lib'
caps = {
"platformName" => "Android",
"appium:deviceName" => "Galaxy S24",
"appium:platformVersion" => "14.0",
"appium:app" => "https://testingbot.com/appium/sample.apk",
"tb:options" => {
"name" => "Ruby Appium Example",
"realDevice" => true
}
}
appium_driver = Appium::Driver.new({
caps: caps,
appium_lib: {
server_url: "https://hub.testingbot.com/wd/hub"
}}, true)
driver = appium_driver.start_driver
wait = Selenium::WebDriver::Wait.new(:timeout => 30)
wait.until { driver.find_element(:accessibility_id, "inputA").displayed? }
driver.find_element(:accessibility_id, "inputA").send_keys 5
driver.find_element(:accessibility_id, "inputB").send_keys 10
result = driver.find_element(:accessibility_id, "sum")
if (!result.nil?) && (result.text.eql? "15")
puts "Test Passed"
else
puts "Test Failed"
end
driver.quit
require 'appium_lib'
caps = {
"platformName" => "iOS",
"appium:deviceName" => "iPhone 15",
"appium:platformVersion" => "18.0",
"appium:app" => "https://testingbot.com/appium/sample.ipa",
"tb:options" => {
"name" => "Ruby Appium Example",
"realDevice" => true
}
}
appium_driver = Appium::Driver.new({
caps: caps,
appium_lib: {
server_url: "https://hub.testingbot.com/wd/hub"
}}, true)
driver = appium_driver.start_driver
wait = Selenium::WebDriver::Wait.new(:timeout => 30)
driver.find_element(:accessibility_id, "inputA").send_keys 5
driver.find_element(:accessibility_id, "inputB").send_keys 10
driver.quit
### Simulator/Emulator Testing
[Android](https://testingbot.com#)[iOS](https://testingbot.com#)
require 'appium_lib'
caps = {
"platformName" => "Android",
"appium:deviceName" => "Pixel 8",
"appium:platformVersion" => "14.0",
"appium:app" => "https://testingbot.com/appium/sample.apk",
"tb:options" => {
"name" => "Ruby Appium Example"
}
}
appium_driver = Appium::Driver.new({
caps: caps,
appium_lib: {
server_url: "https://hub.testingbot.com/wd/hub"
}}, true)
driver = appium_driver.start_driver
wait = Selenium::WebDriver::Wait.new(:timeout => 30)
wait.until { driver.find_element(:accessibility_id, "inputA").displayed? }
driver.find_element(:accessibility_id, "inputA").send_keys 5
driver.find_element(:accessibility_id, "inputB").send_keys 10
result = driver.find_element(:accessibility_id, "sum")
if (!result.nil?) && (result.text.eql? "15")
puts "Test Passed"
else
puts "Test Failed"
end
driver.quit
require 'appium_lib'
caps = {
"platformName" => "iOS",
"appium:deviceName" => "iPhone 15",
"appium:platformVersion" => "17.4",
"appium:app" => "https://testingbot.com/appium/sample.zip",
"tb:options" => {
"name" => "Ruby Appium Example"
}
}
appium_driver = Appium::Driver.new({
caps: caps,
appium_lib: {
server_url: "https://hub.testingbot.com/wd/hub"
}}, true)
driver = appium_driver.start_driver
wait = Selenium::WebDriver::Wait.new(:timeout => 30)
driver.find_element(:accessibility_id, "inputA").send_keys 5
driver.find_element(:accessibility_id, "inputB").send_keys 10
driver.quit
Make sure to always stop your test (`driver.quit`), otherwise it will continue running, leading to a timeout.
## Uploading Your App
Please see our [Upload Mobile App](https://testingbot.com/support/app-automate/help/upload) documentation to find out how to upload your app to TestingBot for testing.
## Specify Devices
To run your existing tests on TestingBot, your tests will need to be configured to use the TestingBot remote devices. If the test was running on your local machine or network, you can simply change your existing test like this:
**Before:**
appium_driver = Appium::Driver.new({
caps: caps,
appium_lib: {
server_url: "http://localhost:4723/wd/hub"
}}, true)
**After:**
appium_driver = Appium::Driver.new({
caps: caps,
appium_lib: {
server_url: "https://hub.testingbot.com/wd/hub"
}}, true)
To let TestingBot know on which device you want to run your test on, you need to specify the `appium:deviceName`, `appium:platformVersion`, `platformName` and other optional options in the capabilities field.
To see how to do this, please select a combination of device type and device name in the drop-down menus below.
iOS 18.6›iPhone 16
Loading environments...
Please wait while we load the available browsers and platforms.
## Testing Internal Websites
We've built [TestingBot Tunnel](https://testingbot.com/support/tunnel), to provide you with a secure way to run tests against your staged/internal webapps.
Please see our [TestingBot Tunnel documentation](https://testingbot.com/support/tunnel) for more information about this easy to use tunneling solution.
The example below shows how to easily run a Ruby WebDriver test with our Tunnel:
1. [Download our tunnel](https://testingbot.com/support/tunnel) and start the tunnel:
java -jar testingbot-tunnel.jar key secret
2. Adjust your test: instead of pointing to `'hub.testingbot.com/wd/hub'` like the example above - change it to point to your tunnel's IP address.
Assuming you run the tunnel on the same machine you run your tests, change to `'localhost:4445/wd/hub'`. localhost is the machine running the tunnel, 4445 is the default port of the tunnel.
This way your test will go securely through the tunnel to TestingBot and back:
require 'appium_lib'
caps = {
"platformName" => "iOS",
"appium:deviceName" => "iPhone 15",
"appium:platformVersion" => "17.4",
"appium:app" => "https://testingbot.com/appium/sample.zip",
"tb:options" => {
"name" => "single_test",
"build" => "Ruby Appium Sample"
}
}
appium_driver = Appium::Driver.new({
caps: caps,
appium_lib: {
# Point to local tunnel instead of hub.testingbot.com
server_url: "http://localhost:4445/wd/hub"
}}, true)
driver = appium_driver.start_driver
wait = Selenium::WebDriver::Wait.new(:timeout => 30)
driver.find_element(:accessibility_id, "inputA").send_keys 5
driver.find_element(:accessibility_id, "inputB").send_keys 10
driver.quit
## Run tests in Parallel
Parallel Testing means running the same test, or multiple tests, simultaneously. This greatly reduces your total testing time.
You can run the same tests on all different device configurations or run different tests all on the same device configuration.
TestingBot has a large grid of devices, which means you can use our service to do efficient parallel testing. It is one of the key features we provide to greatly cut down on your total testing time.
To get started, please see the examples on [https://github.com/grosser/parallel\_tests](https://github.com/grosser/parallel_tests)
### Queuing
Every plan we provide comes with a limit of parallel tests.
If you exceed the number of parallel tests assigned to your account, TestingBot will queue the additional tests (for up to 6 minutes) and run the tests as soon as slots become available.
## Mark tests as passed/failed
As TestingBot has no way to determine whether your test passed or failed (it is determined by your business logic), we offer a way to send the test status back to TestingBot. This is useful if you want to see if a test succeeded or failed from the TestingBot member area.
You can use our [Ruby API client](https://github.com/testingbot/testingbot_ruby) to report back test results.
api = TestingBot::Api.new(key, secret)
api.update_test(driver.session_id, { :name => new_name, :success => true })
## Preparing your App
You do not need to install any code or plugin to run a test.
Below are some things that are necessary to successfully run a mobile test:
**For Android:**
- Please supply the URL to your `.apk` or `.aab` file.
**Important:** the `.apk` file needs to be a x86 build (x86 ABI) for Android emulators.
**For iOS Real Device:**
- Please supply the URL to an `.ipa` file.
**For iOS Simulator:**
- Please supply the URL to a `.zip` file that contains your `.app`
- The `.app` needs to be an iOS Simulator build:
- Create a Simulator build:
xcodebuild -sdk iphonesimulator -configuration Debug
- Zip the `.app` bundle:
zip -r MyApp.zip MyApp.app
## Additional Options
Appium provides [a lot of options](https://appium.io/docs/en/2.0/guides/caps/) to configure your test.
Some important options that might help:
**For Android:**
- **appActivity** and **appPackage** : by default, Appium will try to extract the main Activity from your apk. If this fails, you can supply your own with these options.
- **chromeOptions** : additional chromedriver options you can supply.
- **otherApps** : a JSON array of other apps that need to be installed, in URL format.
**For Android & iOS:**
- **locale** : the language of the simulator/device (ex: `fr_CA`)
This sets the locale on the entire device/simulator, except on physical iOS devices. For real iOS devices, we will pass `-AppleLocale` as argument to the app.
- **newCommandTimeout** : How long (in seconds) Appium will wait for a new command from the client before assuming the client quit and ending the session
Was this page helpful? Yes No
## Looking for More Help?
Have questions or need more information?
You can reach us via the following channels:
- [Email us](https://testingbot.com/contact/new)
- [Join our Slack Channel](https://join.slack.com/t/testingb0t/shared_invite/zt-3bcw9xch-jk19~6XPs_xBrsAgAedkCw)
---
URL: https://testingbot.com/support/app-automate/appium/test-app-upgrades
# Test App Upgrades/Mid-Session App Installations
As app developers, we frequently release new versions of our applications. In most cases, users upgrade from an older version rather than installing the app from scratch. This transition often requires migrating existing user data to ensure the app functions correctly, making upgrade testing a crucial step in development. By thoroughly testing upgrades, we can confirm that the app continues to work as expected post-update.
App upgrades aren't the only scenario where installing apps during a running session is necessary. Some applications may depend on other apps to function properly. If your app interacts with another application—such as pulling data or integrating with its features — it's essential to verify that these dependencies remain intact after an upgrade.
Additionally, there are cases where you might need to delete and reinstall an app during a session. For example, if you want to test how the app behaves when a user uninstalls and reinstalls it, the mid-session install feature can facilitate this process.
## (Re-)Installing apps during a test
Before you can install a new app, or a new version of the app, we encourage you to first upload your `.apk/.ipa/.zip` file to [TestingBot Storage](https://testingbot.com/support/app-automate/help/upload).
Alternatively, you can also specify a URL to an `.apk/.ipa/.zip` file that is publicly accessible.
During your test, you can use the `mobile:installApp` command to install the app on the device.
[Java](https://testingbot.com#)[NodeJS](https://testingbot.com#)[Python](https://testingbot.com#)[Ruby](https://testingbot.com#)[C#](https://testingbot.com#)
driver.executeScript("mobile: installApp", ImmutableMap.of("appPath", "tb://.apk|ipa|zip"));
await driver.execute('mobile: installApp', {"appPath": "tb://.apk|ipa|zip"});
driver.execute_script('mobile: installApp', {"appPath": "tb://.apk|ipa|zip"})
driver.execute_script('mobile: installApp', {"appPath" => "tb://.apk|ipa|zip"})
driver.ExecuteScript("mobile: installApp", new Dictionary { { "appPath", "tb://.apk|ipa|zip" } });
A successful installation will return the following response, which can be used to validate if the right version of the app was installed:
{
"packageName": "com.testingbot.com",
"version": "2.3.1",
"buildNumber": "116"
}
Appium will not automatically launch the app after you installed it during the test. You can launch the app manually using the following commands after installation:
- **Android:** `mobile: startActivity`
- **iOS:** `mobile: launchApp`
[Java](https://testingbot.com#)[NodeJS](https://testingbot.com#)[Python](https://testingbot.com#)[Ruby](https://testingbot.com#)[C#](https://testingbot.com#)
// Android
driver.executeScript("mobile: startActivity", ImmutableMap.of("intent", "com.testingbot.demo/.MainActivity"));
// iOS
driver.executeScript("mobile: launchApp", ImmutableMap.of("bundleId", "com.testingbot.demo"));
// Android
await driver.execute('mobile: startActivity', {intent: 'com.testingbot.demo/.MainActivity'});
// iOS
await driver.execute('mobile: launchApp', {bundleId: 'com.testingbot.demo'});
# Android
driver.execute_script("mobile: startActivity", {"intent": "com.testingbot.demo/.MainActivity"})
# iOS
driver.execute_script("mobile: launchApp", {"bundleId": "com.testingbot.demo"})
# Android
@driver.execute_script("mobile: startActivity", {"intent" => "com.testingbot.demo/.MainActivity"})
# iOS
@driver.execute_script("mobile: launchApp", {"bundleId" => "com.testingbot.demo"})
// Android
driver.ExecuteScript("mobile: startActivity", new Dictionary { { "intent", "com.testingbot.demo/.MainActivity" } });
// iOS
driver.ExecuteScript("mobile: launchApp", new Dictionary { { "bundleId", "com.testingbot.demo" } });
## Removing your app during a test
To remove your app during a test, you can use the [`mobile: removeApp`](https://github.com/appium/appium-uiautomator2-driver?tab=readme-ov-file#mobile-removeapp) command.
[Java](https://testingbot.com#)[NodeJS](https://testingbot.com#)[Python](https://testingbot.com#)[Ruby](https://testingbot.com#)[C#](https://testingbot.com#)
// Android
driver.executeScript("mobile: removeApp", ImmutableMap.of("appId", "com.testingbot.demo"));
// iOS
driver.executeScript("mobile: removeApp", ImmutableMap.of("bundleId", "com.testingbot.demo"));
// Android
await driver.execute('mobile: removeApp', {appId: 'com.testingbot.demo'});
// iOS
await driver.execute('mobile: removeApp', {bundleId: 'com.testingbot.demo'});
# Android
driver.execute_script("mobile: removeApp", {"appId": "com.testingbot.demo"})
# iOS
driver.execute_script("mobile: removeApp", {"bundleId": "com.testingbot.demo"})
# Android
@driver.execute_script("mobile: removeApp", {"appId" => "com.testingbot.demo"})
# iOS
@driver.execute_script("mobile: removeApp", {"bundleId" => "com.testingbot.demo"})
// Android
driver.ExecuteScript("mobile: removeApp", new Dictionary { { "appId", "com.testingbot.demo" } });
// iOS
driver.ExecuteScript("mobile: removeApp", new Dictionary { { "bundleId", "com.testingbot.demo" } });
## Other app commands
Appium supports more commands to handle apps during a test, such as:
### mobile: terminateApp
This will forcefully stop the app (specified by bundleId or appId) on the device.
### mobile: isAppInstalled
Verifies if the app (specified by bundleId or appId) is on the device. Returns a boolean true or false.
Was this page helpful? Yes No
## Looking for More Help?
Have questions or need more information?
You can reach us via the following channels:
- [Email us](https://testingbot.com/contact/new)
- [Join our Slack Channel](https://join.slack.com/t/testingb0t/shared_invite/zt-3bcw9xch-jk19~6XPs_xBrsAgAedkCw)
---
URL: https://testingbot.com/support/app-automate/appium/upload-files
# Upload files to physical devices
TestingBot provides a feature that allows you to specify one or more media files that need to be uploaded to a physical iOS or Android device, prior to running your Appium test. This functionality allows you to run tests that require media files (photos and videos) from the iOS or Android photo gallery.
There are two options to use this feature, depending on your usecase. We suggest using the first option, which will use TestingBot's custom `uploadMedia` capability.
- [TestingBot Upload Capability](https://testingbot.com#testingbot)
- [Appium Push and Pull](https://testingbot.com#appium)
## TestingBot Upload Capability
To use this functionality, you can use the `uploadMedia` capability, specifying an array of URLs to image files or video files. You can specify URLs to publicly downloadable media files, or you can use TestingBot Storage to upload the files to TestingBot and use the `tb://` URLs.
### Upload files to TestingBot
[cURL](https://testingbot.com#)
curl -u api_key:api_secret \
-X POST "https://api.testingbot.com/v1/storage" \
-F "file=@/path/to/app/file/media.png"
The API response will include a `tb://` URL, which you can use in the `uploadMedia` capability.
{
"app_url": "tb://edb4f4f3ed95a4f46714f3df"
}
Uploads to our TestingBot Storage are automatically deleted after 62 days.
### Add the capability to your Appium script
[Java](https://testingbot.com#)[NodeJS](https://testingbot.com#)[Python](https://testingbot.com#)[Ruby](https://testingbot.com#)[C#](https://testingbot.com#)
Map tbOptions = new HashMap<>();
tbOptions.put("uploadMedia", new String[]{"tb://edb4f4f3ed95a4f46714f3df"});
options.setCapability("tb:options", tbOptions);
const capabilities = {
'tb:options': {
'uploadMedia': ['tb://edb4f4f3ed95a4f46714f3df']
}
}
capabilities = {
"tb:options" : {
"uploadMedia" : ["tb://edb4f4f3ed95a4f46714f3df"]
}
}
capabilities = {
"tb:options" => {
"uploadMedia" => ["tb://edb4f4f3ed95a4f46714f3df"]
}
}
AppiumOptions options = new AppiumOptions();
var tbOptions = new Dictionary();
tbOptions.Add("uploadMedia", new string[] { "tb://edb4f4f3ed95a4f46714f3df" });
options.AddAdditionalAppiumOption("tb:options", tbOptions);
TestingBot will add these files to the Android or iOS device. The metadata of the gallery on the device will be updated automatically, which means the media file will immediately appear in the device's gallery.
- **Android:** the media files will be added to the Default Gallery app. `/sdcard/Pictures` for images and `/sdcard/Movies` for videos.
- **iOS:** the media files will be added to the iOS Camera Roll: `com.apple.mobileslideshow`
## Appium Push and Pull
Appium provides both [pushFile](https://appium.io/docs/en/2.0/reference/interfaces/appium_types.ExternalDriver/#pushfile) and [pullFile](https://appium.io/docs/en/2.0/reference/interfaces/appium_types.ExternalDriver/#pullfile) functionality. This is supported since [Appium Version](https://testingbot.com/support/app-automate/appium/options#appiumVersion) 1.15.0.
With this approach, the file is pushed when the test has already started. Pushing media files to the iOS or Android device does not guarantee the updating of the metadata in the iOS or Android gallery, which means your media file might not appear (immediately).
### Android Example
Push a file to the SD Card of the Android device:
[Java](https://testingbot.com#)[NodeJS](https://testingbot.com#)[Python](https://testingbot.com#)[Ruby](https://testingbot.com#)[C#](https://testingbot.com#)
// Push a file to the sdcard
driver.pushFile("/sdcard/Download/sample.png", new File("~/sample.png"));
// Pull file from sdcard
byte[] fileBase64 = driver.pullFile("/sdcard/Download/sample.png");
// Push file - WebdriverIO syntax
const data = Buffer.from("TestingBot").toString('base64');
await driver.pushFile('/sdcard/Download/sample.txt', data);
// Pull file WebdriverIO example
const fileData = await driver.pullFile('/sdcard/Download/sample.txt');
# Push a file
dest_path = '/sdcard/Download/sample.txt'
driver.push_file(dest_path, 'TestingBot'.encode("utf-8"))
# Pull file
file_base64 = driver.pull_file(dest_path)
# Push a file
driver.push_file('/sdcard/Download/sample.png', File.read('/Users/testingbot/Desktop/sample.png'))
# Pull file
driver.pull_file('/sdcard/Download/sample.png')
// Push a file
driver.PushFile("/sdcard/Download/sample.png", new FileInfo("/Users/testingbot/Desktop/sample.png"));
// Pull file
byte[] fileBase64 = driver.PullFile("/sdcard/Download/sample.png");
### iOS Example
Before using the pull and push functionality, you'll need to ensure that:
- Your iOS app must have set the `UIFileSharingEnabled` key to `true` in the `Info.plist` file, which enables file sharing.
- Alternatively, you can set the `LSSupportsOpeningDocumentsInPlace` key to `true` in the `Info.plist` to expose your app's folder in the **Files** app on the iOS device.
The destination path to push a file is in the following format: `@:documents/.`
[Java](https://testingbot.com#)[NodeJS](https://testingbot.com#)[Python](https://testingbot.com#)[Ruby](https://testingbot.com#)[C#](https://testingbot.com#)
// Push an image file
driver.pushFile("@com.testingbot.Sample-App:documents/sample.png", new File("/Users/testingbot/Desktop/sample.png"));
// Pull file
byte[] fileBase64 = driver.pullFile("@com.testingbot.Sample-App:documents/sample.png");
// Push file WebdriverIO example
const data = Buffer.from("TestingBot").toString('base64');
await driver.pushFile('@com.testingbot.Sample-App:documents/sample.txt', data);
// Pull file WebdriverIO example
const fileData = await driver.pullFile('@com.testingbot.Sample-App:documents/sample.txt');
# Push an image file
driver.push_file('@com.testingbot.Sample-App:documents/sample.png', source_path='/Users/testingbot/Desktop/sample.png')
# Push a text file
dest_path = '@com.testingbot.Sample-App:documents/sample.txt'
driver.push_file(dest_path, 'TestingBot'.encode("utf-8"))
# Pull file
file_base64 = driver.pull_file(dest_path)
# Push an image file
driver.push_file('@com.testingbot.Sample-App:documents/sample.png', File.read('/Users/testingbot/Desktop/sample.png'))
# Pull file
driver.pull_file('@com.testingbot.Sample-App:documents/image.png')
// Push an image file
driver.PushFile("@com.testingbot.Sample-App:documents/image.jpg", new FileInfo("/Users/testingbot/Desktop/sample.png"))
// Pull file
byte[] fileBase64 = driver.PullFile("@com.testingbot.Sample-App:documents/sample.png");
Was this page helpful? Yes No
## Looking for More Help?
Have questions or need more information?
You can reach us via the following channels:
- [Email us](https://testingbot.com/contact/new)
- [Join our Slack Channel](https://join.slack.com/t/testingb0t/shared_invite/zt-3bcw9xch-jk19~6XPs_xBrsAgAedkCw)
---
URL: https://testingbot.com/support/app-automate/appium/permission-popups
# Handling permission pop-ups
While testing your mobile app, it may ask for specific permissions during the test. Various system dialogs or popups may appear, asking the user to grant access.
The mobile app might ask the user permission to access the contacts, notifications, media, ... on the device.
Below we'll go over the various techniques to handle these events during your mobile testing:
- [Allow or Deny all permissions](https://testingbot.com#allPermissions)
- [Allow or Deny specific permissions](https://testingbot.com#specificPermissions)
## Allow or Deny all permissions
Appium allows you to automatically accept all permission and alert requests.
### Allow or Deny all permissions on Android
You can use the `autoGrantPermissions` capability.
Appium will inspect the [Android Manifest](https://developer.android.com/guide/topics/manifest/manifest-intro) of the app, extract the required permissions and grant these.
[Ruby](https://testingbot.com#)[Python](https://testingbot.com#)[Java](https://testingbot.com#)[NodeJS](https://testingbot.com#)[C#](https://testingbot.com#)
caps["appium:autoGrantPermissions"] = true
options.setCapability("appium:autoGrantPermissions", true);
capabilities = {
"appium:autoGrantPermissions": True
}
const capabilities = {
"appium:autoGrantPermissions": true
}
options.AddAdditionalAppiumOption("appium:autoGrantPermissions", true);
### Allow or Deny all permissions on iOS
On iOS, Appium offers two capabilities which you can use: `autoAcceptAlerts` and `autoDismissAlerts`.
`autoAcceptAlerts` will automatically accept (grant) any alerts (including permission popups) that might appear during your test.
`autoDismissAlerts` will automatically dismiss (deny) any alerts (including permission popups) that might appear during your test.
[Ruby](https://testingbot.com#)[Python](https://testingbot.com#)[Java](https://testingbot.com#)[NodeJS](https://testingbot.com#)[C#](https://testingbot.com#)
caps["appium:autoAcceptAlerts"] = true # to accept all alerts
caps["appium:autoDismissAlerts"] = true # to dismiss all alerts
options.setCapability("appium:autoAcceptAlerts", true); // to accept all alerts
options.setCapability("appium:autoDismissAlerts", true); // to dismiss all alerts
capabilities = {
"appium:autoAcceptAlerts": True # to accept all alerts
}
capabilities = {
"appium:autoDismissAlerts": True # to dismiss all alerts
}
const capabilities = {
"appium:autoAcceptAlerts": true // to accept all alerts
}
const capabilities = {
"appium:autoDismissAlerts": true // to dismiss all alerts
}
options.AddAdditionalAppiumOption("appium:autoAcceptAlerts", true); // to accept all alerts
options.AddAdditionalAppiumOption("appium:autoDismissAlerts", true); // to dismiss all alerts
### Customizing the alert button selector
There may be dialogs that appear during your automated tests which have 3 buttons instead of 2, or there's a specific button you want to press instead of the default (allow) button.
In this case, you might want to consider using the `acceptAlertButtonSelector` Appium setting, which allows you to pass a selector (a [class-chain expression](https://github.com/facebookarchive/WebDriverAgent/wiki/Class-Chain-Queries-Construction-Rules)) to tell Appium which button to click.
For example, you might want to click the 'Allow Once' button in a location permission dialog. To instruct Appium to do this, you can change the `acceptAlertButtonSelector` setting during your test:
driver.updateSettings({
acceptAlertButtonSelector: "**/XCUIElementTypeButton[`label CONTAINS[c] 'Allow Once'`]"
});
Alternatively, you can set this setting at the beginning of your test with a capability:
const capabilities = {
"appium:settings[acceptAlertButtonSelector]": "**/XCUIElementTypeButton[`label CONTAINS[c] 'Allow Once'`]"
}
## Allow or Deny specific permissions
You can also choose to accept or deny alerts and popups during your test.
Your test will need to find the element of the alert or popup and perform a `click` action on that element.
[Ruby](https://testingbot.com#)[Python](https://testingbot.com#)[Java](https://testingbot.com#)[NodeJS](https://testingbot.com#)[C#](https://testingbot.com#)
# For Android
driver.find_element(:xpath, ".//android.widget.Button[@text='Allow']").click
# For iOS
driver.find_element(:id, "Allow").click
// For Android
driver.findElement(By.xpath(".//android.widget.Button[@text='Allow']")).click();
// For iOS
driver.findElement(By.id("Allow")).click();
from selenium.webdriver.common.by import By
# For Android
driver.find_element(By.XPATH, ".//android.widget.Button[@text='Allow']").click()
# For iOS
driver.find_element(By.ID, "Allow").click()
// For Android
const element = await driver.$(".//android.widget.Button[@text='Allow']");
await element.click();
// For iOS
const allowBtn = await driver.$("#Allow");
await allowBtn.click();
// For Android
IWebElement ll = driver.FindElement(By.XPath(".//android.widget.Button[@text='Allow']"));
ll.Click();
// For iOS
IWebElement ll = driver.FindElement(By.Id("Allow"));
ll.Click();
Was this page helpful? Yes No
## Looking for More Help?
Have questions or need more information?
You can reach us via the following channels:
- [Email us](https://testingbot.com/contact/new)
- [Join our Slack Channel](https://join.slack.com/t/testingb0t/shared_invite/zt-3bcw9xch-jk19~6XPs_xBrsAgAedkCw)
---
URL: https://testingbot.com/support/app-automate/appium/screen-orientation
# Change screen orientation
Appium allows you to change the screen orientation of your iOS and Android devices.
You can choose to either change the orientation [at the start of the test](https://testingbot.com#caps) or [during a test](https://testingbot.com#during).
## Set screen orientation at the start of your test
[Ruby](https://testingbot.com#)[Python](https://testingbot.com#)[PHP](https://testingbot.com#)[Java](https://testingbot.com#)[Node](https://testingbot.com#)[C#](https://testingbot.com#)
capabilities = {
"appium:orientation" => "LANDSCAPE"
}
options.setCapability("appium:orientation", "LANDSCAPE");
$capabilities = [
"appium:orientation" => "LANDSCAPE"
];
capabilities = {
"appium:orientation": "LANDSCAPE"
}
const capabilities = {
"appium:orientation": "LANDSCAPE"
};
options.AddAdditionalAppiumOption("appium:orientation", "LANDSCAPE");
## Set screen orientation during a test
[Ruby](https://testingbot.com#)[Python](https://testingbot.com#)[PHP](https://testingbot.com#)[Java](https://testingbot.com#)[Node](https://testingbot.com#)[C#](https://testingbot.com#)
@driver.rotation = :landscape
((AppiumDriver) driver).rotate(ScreenOrientation.LANDSCAPE);
$driver->rotate("LANDSCAPE");
driver.orientation = "LANDSCAPE"
await driver.setOrientation('landscape');
driver.Orientation = ScreenOrientation.Landscape;
Was this page helpful? Yes No
## Looking for More Help?
Have questions or need more information?
You can reach us via the following channels:
- [Email us](https://testingbot.com/contact/new)
- [Join our Slack Channel](https://join.slack.com/t/testingb0t/shared_invite/zt-3bcw9xch-jk19~6XPs_xBrsAgAedkCw)
---
URL: https://testingbot.com/support/app-automate/appium/localization-options
# Localization testing on iOS and Android
When running tests with Appium, you can choose to set a specific locale for the device or emulator, by using the `appium:locale` capability.
Specifying this capability will make sure the device/emulator and app will display or format data such as dates, time, decimal separators and calendars according to the specified country's regional conventions.
On iOS, you can use a locale format such as `fr_CA` to indicate you want the french region in Canada. More information is available in the [Locale IDs documentation](https://developer.apple.com/library/archive/documentation/MacOSX/Conceptual/BPInternational/LanguageandLocaleIDs/LanguageandLocaleIDs.html#//apple_ref/doc/uid/10000171i-CH15-SW9).
You can also change the Simulator UI locale at runtime using the following script command: `mobile: configureLocalization`.
[Ruby](https://testingbot.com#)[Python](https://testingbot.com#)[PHP](https://testingbot.com#)[Java](https://testingbot.com#)[NodeJS](https://testingbot.com#)[C#](https://testingbot.com#)
capabilities = {
"appium:locale" => "ES"
}
options.setCapability("appium:locale", "ES");
$capabilities = [
"appium:locale" => "ES"
];
capabilities = {
"appium:locale": "ES"
}
const capabilities = {
"appium:locale": "ES"
};
options.AddAdditionalAppiumOption("appium:locale", "ES");
### Android locale codes
| Locale | Locale Code |
| --- | --- |
| Australia | AU |
| Austria | AT |
| Belgium | BE |
| Brazil | BR |
| Britain | GB |
| Bulgaria | BG |
| Canada | CA |
| Croatia | HR |
| Czech Republic | CZ |
| Denmark | DK |
| Egypt | EG |
| Finland | FI |
| France | FR |
| Germany | DE |
| Greece | GR |
| Hong-Kong | HK |
| Hungary | HU |
| India | IN |
| Indonesia | ID |
| Ireland | IE |
| Israel | IL |
| Italy | IT |
| Japan | JP |
| Korea | KR |
| Latvia | LV |
| Liechtenstein | LI |
| Lithuania | LT |
| Mexico | MX |
| Netherlands | NL |
| New Zealand | NZ |
| Norway | NO |
| Philippines | PH |
| Poland | PL |
| Portugal | PT |
| PRC | CN |
| Romania | RO |
| Russia | RU |
| Serbia | RS |
| Singapore | SG |
| Slovakia | SK |
| Slovenia | SI |
| Spain | ES |
| Sweden | SE |
| Switzerland | CH |
| Taiwan | TW |
| Thailand | TH |
| Turkey | TR |
| Ukraine | UA |
| US | US |
| USA | US |
| Vietnam | VN |
| Zimbabwe | ZW |
### iOS locale codes
| Locale | Locale Code |
| --- | --- |
| Australia | en\_AU |
| Belgium | nl\_BE |
| Belgium | fr\_BE |
| Brunei Darussalam | ms\_BN |
| Canada | en\_CA |
| Canada | fr\_CA |
| Czech Republic | cs\_CZ |
| Finland | fi\_FI |
| Germany | de\_DE |
| Greece | el\_GR |
| Hungary | hu\_HU |
| India | hi\_IN |
| Indonesia | id\_ID |
| Israel | he\_IL |
| Italy | it\_IT |
| Japan | ja\_JP |
| Malaysia | ms\_MY |
| Netherlands | nl\_NL |
| New Zealand | en\_NZ |
| Norway | nb\_NO |
| Philippines | tl\_PH |
| Poland | pl\_PL |
| PRC | zh\_CN |
| Romania | ro\_RO |
| Russia | ru\_RU |
| Singapore | en\_SG |
| Slovakia | sk\_SK |
| Korea | ko\_KR |
| Sweden | sv\_SE |
| Taiwan | zh\_TW |
| Thailand | th\_TH |
| Turkey | tr\_TR |
| UK | en\_GB |
| Ukraine | uk\_UA |
| US | es\_US |
| USA | en\_US |
| Vietnam | vi\_VN |
| Brazil | pt-BR |
| China (Simplified) | zh-Hans |
| China (Traditional) | zh-Hant |
| Hong Kong | zh-HK |
| India | en-IN |
| Ireland | en-IE |
| Latin America | es-419 |
| Mexico | es-MX |
| South Africa | en-ZA |
## Change Language
Specify the `appium:language` capability to set the language of the app under test, and the device/emulator.
On iOS, you can set the language to for example French: `fr`. More information is available in the [Language IDs documentation](https://developer.apple.com/library/archive/documentation/MacOSX/Conceptual/BPInternational/LanguageandLocaleIDs/LanguageandLocaleIDs.html).
You can also change the Simulator UI language at runtime using the following script command: `mobile: configureLocalization`.
[Ruby](https://testingbot.com#)[Python](https://testingbot.com#)[PHP](https://testingbot.com#)[Java](https://testingbot.com#)[NodeJS](https://testingbot.com#)[C#](https://testingbot.com#)
capabilities = {
"appium:language" => "es"
}
options.setCapability("appium:language", "es");
$capabilities = [
"appium:language" => "es"
];
capabilities = {
"appium:language": "es"
}
const capabilities = {
"appium:language": "es"
};
options.AddAdditionalAppiumOption("appium:language", "es");
### Android language codes
| Language | Language Code |
| --- | --- |
| Arabic | ar |
| Bulgarian | bg |
| Catalan | ca |
| Chinese | zh |
| Croatian | hr |
| Czech | cs |
| Danish | da |
| Dutch | nl |
| English | en |
| Finnish | fi |
| French | fr |
| German | de |
| Greek | el |
| Hebrew | he |
| Hindi | hi |
| Hungarian | hu |
| Indonesian | id |
| Italian | it |
| Japanese | ja |
| Korean | ko |
| Latvian | lv |
| Lithuanian | lt |
| Norwegian-Bokmol | nb |
| Polish | pl |
| Portuguese | pt |
| Romanian | ro |
| Russian | ru |
| Serbian | sr |
| Slovak | sk |
| Slovenian | sl |
| Spanish | es |
| Swedish | sv |
| Tagalog | tl |
| Thai | th |
| Turkish | tr |
| Ukrainian | uk |
| Vietnamese | vi |
### iOS language codes
| Language | Language Code |
| --- | --- |
| Chinese | zh |
| Czech | cs |
| Dutch | nl |
| English | en |
| Finnish | fi |
| French | fr |
| German | de |
| Greek | el |
| Hebrew | he |
| Hindi | hi |
| Hungarian | hu |
| Indonesian | id |
| Italian | it |
| Japanese | ja |
| Korean | ko |
| Malay | ms |
| Norwegian (Bokmal) | nb |
| Polish | pl |
| Portuguese (Brazil) | pt |
| Romanian | ro |
| Russian | ru |
| Slovak | sk |
| Spanish | es |
| Swedish | sv |
| Tagalog | tl |
| Thai | th |
| Turkish | tr |
| Ukrainian | uk |
| Vietnamese | vi |
Was this page helpful? Yes No
## Looking for More Help?
Have questions or need more information?
You can reach us via the following channels:
- [Email us](https://testingbot.com/contact/new)
- [Join our Slack Channel](https://join.slack.com/t/testingb0t/shared_invite/zt-3bcw9xch-jk19~6XPs_xBrsAgAedkCw)
---
URL: https://testingbot.com/support/app-automate/appium/dark-mode
# Dark Mode testing with Appium
Dark mode is a setting, available on both Android and iOS, which toggles the interface appearance of the phone to use either the standard light mode setting or a dark mode.
When dark mode is enabled, the phone will switch to a dark background with lighter foreground colors, which enables better viewing in low-light conditions.
## Changing Dark Mode
This example will use `mobile: setAppearance` to set the appearance to dark (dark mode).
[Android](https://testingbot.com#)[iOS](https://testingbot.com#)
const { remote } = require('webdriverio');
const capabilities = {
'platformName': 'Android',
'appium:app': 'https://testingbot.com/appium/sample.apk',
'appium:deviceName': 'Pixel 8',
'appium:platformVersion': '14.0',
'appium:automationName': 'UiAutomator2',
'tb:options': {
'name': 'Dark Mode Test',
'realDevice': true
}
};
const driver = await remote({
hostname: 'hub.testingbot.com',
port: 443,
protocol: 'https',
path: '/wd/hub',
user: 'api_key',
key: 'api_secret',
capabilities
});
// Enable dark mode
await driver.execute('mobile: setAppearance', { style: 'dark' });
const inputA = await driver.$('~inputA');
await inputA.setValue('10');
const inputB = await driver.$('~inputB');
await inputB.setValue('5');
const sum = await driver.$('~sum');
const value = await sum.getText();
console.assert(value === '15', 'Sum should be 15');
await driver.deleteSession();
Make sure to always stop your test (`driver.deleteSession()`), otherwise it will continue running, leading to a timeout.
const { remote } = require('webdriverio');
const capabilities = {
'platformName': 'iOS',
'appium:app': 'https://testingbot.com/appium/sample.ipa',
'appium:deviceName': 'iPhone 15',
'appium:platformVersion': '17.0',
'appium:automationName': 'XCUITest',
'tb:options': {
'name': 'Dark Mode Test',
'realDevice': true
}
};
const driver = await remote({
hostname: 'hub.testingbot.com',
port: 443,
protocol: 'https',
path: '/wd/hub',
user: 'api_key',
key: 'api_secret',
capabilities
});
// Enable dark mode
await driver.execute('mobile: setAppearance', { style: 'dark' });
const inputA = await driver.$('~inputA');
await inputA.setValue('10');
const inputB = await driver.$('~inputB');
await inputB.setValue('5');
await driver.deleteSession();
Make sure to always stop your test (`driver.deleteSession()`), otherwise it will continue running, leading to a timeout.
Was this page helpful? Yes No
## Looking for More Help?
Have questions or need more information?
You can reach us via the following channels:
- [Email us](https://testingbot.com/contact/new)
- [Join our Slack Channel](https://join.slack.com/t/testingb0t/shared_invite/zt-3bcw9xch-jk19~6XPs_xBrsAgAedkCw)
---
URL: https://testingbot.com/support/app-automate/appium/options
# Mobile App Options
Please see the examples below on how to customize your test run on our mobile emulators and devices.
The [Appium Capabilities generator](https://testingbot.com/support/app-automate/appium/capabilities) allows you to easily generate the necessary capabilities for your mobile tests.
## Appium Options
Appium provides [a lot of options](https://appium.io/docs/en/2.0/guides/caps/) to configure your test.
Some important options that might help:
**For Android:**
- **appActivity** and **appPackage** : by default, Appium will try to extract the main Activity from your apk. If this fails, you can supply your own with these options.
- **chromeOptions** : additional chromedriver options you can supply.
- **otherApps** : a JSON array of other apps that need to be installed, in URL format.
**For Android & iOS:**
- **locale** : the language of the simulator/device (ex: fr\_CA)
- **newCommandTimeout** : How long (in seconds) Appium will wait for a new command from the client before assuming the client quit and ending the session
## Specifying Appium Version
TestingBot will use the most recent, compatible, Appium version according to the device, OS and version you specify.
If you'd like to specify your own Appium version, you can do this with the `appiumVersion` capability.
[Ruby](https://testingbot.com#)[Python](https://testingbot.com#)[PHP](https://testingbot.com#)[Java](https://testingbot.com#)[NodeJS](https://testingbot.com#)[C#](https://testingbot.com#)
caps = Selenium::WebDriver::Remote::Capabilities.new
caps["appiumVersion"] = "2.0"
DesiredCapabilities caps = new DesiredCapabilities();
caps.setCapability("appiumVersion", "2.0");
$caps = array(
"appiumVersion" => "2.0"
);
capabilities = {
"appiumVersion" : "2.0"
}
const capabilities = {
"appiumVersion" : "2.0"
}
DesiredCapabilities caps = new DesiredCapabilities();
caps.SetCapability("appiumVersion", "2.0");
**Selenium W3C Example:**
[Ruby](https://testingbot.com#)[Python](https://testingbot.com#)[PHP](https://testingbot.com#)[Java](https://testingbot.com#)[NodeJS](https://testingbot.com#)[C#](https://testingbot.com#)
caps = {
platformName: "iOS",
deviceName: "iPhone 13",
browserVersion: "16.0",
app: 'https://testingbot.com/appium/sample.ipa',
"tb:options" => {
"appiumVersion" : "2.0"
}
}
ChromeOptions chromeOpts = new ChromeOptions();
chromeOpts.setExperimentalOption("w3c", true);
MutableCapabilities tbOptions = new MutableCapabilities();
tbOptions.setCapability("key", "api_key");
tbOptions.setCapability("secret", "api_secret");
tbOptions.setCapability("appiumVersion", "2.0");
DesiredCapabilities caps = new DesiredCapabilities();
caps.setCapability(ChromeOptions.CAPABILITY, chromeOpts);
caps.setCapability("platformName", "iOS");
caps.setCapability("tb:options", tbOptions);
caps.setCapability("deviceName", "iPhone 13");
caps.setCapability("browserVersion", "16.0");
caps.setCapability("app", "https://testingbot.com/appium/sample.ipa");
$options = new ChromeOptions();
$capabilities = DesiredCapabilities::safari();
$capabilities->setPlatform('iOS');
$capabilities->setCapability('tb:options', array(
'appiumVersion' => "2.0"
));
$capabilities->setCapability(ChromeOptions::CAPABILITY, $options);
tbOptions = {
'name': 'W3C Sample',
'appiumVersion': "2.0"
}
chromeOpts = {
'app': "https://testingbot.com/appium/sample.ipa",
'platformName': "iOS",
'browserVersion': "16.0",
'deviceName': "iPhone 13",
'goog:chromeOptions': {'w3c': True},
'tb:options': tbOptions
}
self.driver = webdriver.Remote(remote_url, desired_capabilities=chromeOpts)
driver = await new webdriver.Builder().withCapabilities({
"app": 'https://testingbot.com/appium/sample.ipa',
"platformName": 'iOS',
"deviceName": 'iPhone 13',
"version": '16.0',
/** Google requires "w3c" to be set in "goog:chromeOptions" as true if you're using ChromeDriver version 74 or lower.
* Based on this commit: https://chromium.googlesource.com/chromium/src/+/2b49880e2481658e0702fd6fe494859bca52b39c
* ChromeDriver now uses w3c by default from version 75+ so setting this option will no longer be a requirement **/
"goog:chromeOptions" : { "w3c" : true },
"tb:options": {
"key": "api_key",
"secret": "api_secret",
"appiumVersion": "2.0"
}
}).usingServer("https://hub.testingbot.com/wd/hub").build();
var chromeOptions = new ChromeOptions()
{
BrowserVersion = "16.0",
PlatformName = "iOS",
DeviceName = "iPhone 13",
App = "https://testingbot.com/appium/sample.ipa",
UseSpecCompliantProtocol = true
};
var tbOptions = new Dictionary
{
["key"] = "api_key",
["secret"] = "api_secret",
["appiumVersion"] = "2.0"
};
chromeOptions.AddAdditionalCapability("tb:options", tbOptions, true);
driver = new RemoteWebDriver(new Uri("https://hub.testingbot.com/wd/hub"),
chromeOptions.ToCapabilities(), TimeSpan.FromSeconds(600));
### Appium 2 Versions
We currently support these Appium 2 versions:
- 2.11.3
- 2.10.3
- 2.9.0
- 2.5.1
- 2.4.1
- 2.3.0
- 2.2.1
If you specify `"appiumVersion": "latest"`, TestingBot will automatically use the latest Appium version. You can also use `latest-1`, `latest-2`, ... to test on the next most recent versions of Appium.
## Change Device Timezone
TestingBot allows you to change the timezone of the mobile device (physical or emu/sim) to a timezone that you specify. Simply pass in a `timeZone` capability specifying a timezone from the list. You can find a [list of timezones on Wikipedia](https://en.wikipedia.org/wiki/List_of_tz_database_time_zones).
[Ruby](https://testingbot.com#)[Python](https://testingbot.com#)[PHP](https://testingbot.com#)[Java](https://testingbot.com#)[NodeJS](https://testingbot.com#)[C#](https://testingbot.com#)
caps = Selenium::WebDriver::Remote::Capabilities.new
caps["timeZone"] = "Etc/UTC"
DesiredCapabilities caps = new DesiredCapabilities();
caps.setCapability("timeZone", "Etc/UTC");
$caps = array(
"timeZone" => "Etc/UTC"
);
capabilities = {
"timeZone" : "Etc/UTC"
}
const capabilities = {
"timeZone" : "Etc/UTC"
}
DesiredCapabilities caps = new DesiredCapabilities();
caps.SetCapability("timeZone", "Etc/UTC");
**Selenium W3C Example:**
[Ruby](https://testingbot.com#)[Python](https://testingbot.com#)[PHP](https://testingbot.com#)[Java](https://testingbot.com#)[NodeJS](https://testingbot.com#)[C#](https://testingbot.com#)
caps = {
platformName: "Android",
app: "https://testingbot.com/appium/sample.apk",
version: "13.0",
deviceName: 'Galaxy S23',
"tb:options" => {
"timeZone" : "Etc/UTC"
}
}
ChromeOptions chromeOpts = new ChromeOptions();
chromeOpts.setExperimentalOption("w3c", true);
MutableCapabilities tbOptions = new MutableCapabilities();
tbOptions.setCapability("key", "api_key");
tbOptions.setCapability("secret", "api_secret");
tbOptions.setCapability("timeZone", "Etc/UTC");
DesiredCapabilities caps = new DesiredCapabilities();
caps.setCapability(ChromeOptions.CAPABILITY, chromeOpts);
caps.setCapability("platformName", "Android");
caps.setCapability("tb:options", tbOptions);
caps.setCapability("app", "https://testingbot.com/appium/sample.apk");
$options = new ChromeOptions();
$capabilities = DesiredCapabilities::chrome();
$capabilities->setPlatform('Android');
$capabilities->setCapability('tb:options', array(
'timeZone' => "Etc/UTC"
));
$capabilities->setCapability(ChromeOptions::CAPABILITY, $options);
tbOptions = {
'timeZone': "Etc/UTC"
}
chromeOpts = {
'app': "https://testingbot.com/appium/sample.apk",
'platformName': "Android",
'goog:chromeOptions': {'w3c': True},
'tb:options': tbOptions
}
self.driver = webdriver.Remote(remote_url, desired_capabilities=chromeOpts)
driver = await new webdriver.Builder().withCapabilities({
"app": 'https://testingbot.com/appium/sample.apk',
"platformName": 'Android',
"goog:chromeOptions" : { "w3c" : true },
"tb:options": {
"key": "api_key",
"secret": "api_secret",
"timeZone": "Etc/UTC"
}
}).usingServer("https://hub.testingbot.com/wd/hub").build();
var appiumOptions = new AppiumOptions();
appiumOptions.PlatformName = "Android";
appiumOptions.AddAdditionalAppiumOption("appium:app", "https://testingbot.com/appium/sample.apk");
var tbOptions = new Dictionary
{
["key"] = "api_key",
["secret"] = "api_secret",
["timeZone"] = "Etc/UTC"
};
appiumOptions.AddAdditionalAppiumOption("tb:options", tbOptions);
chromeOptions.AddAdditionalCapability("tb:options", tbOptions, true);
driver = new RemoteWebDriver(new Uri("https://hub.testingbot.com/wd/hub"),
chromeOptions.ToCapabilities(), TimeSpan.FromSeconds(600));
Value Type | Default Value | Possible Values: || string | "Etc/UTC" | [List of timezones](https://en.wikipedia.org/wiki/List_of_tz_database_time_zones) |
### Localization Options
Please see the [Localization Options documentation](https://testingbot.com/support/app-automate/appium/localization-options) to learn how to set the locale and language of the device during your automated tests.
### Geolocation Testing
TestingBot provides an option where you can specify from which country you'd like to run the test from.
Once you specify this option, the device we provision for your test will be configured to use a proxy in the country you specified.
[Ruby](https://testingbot.com#)[Python](https://testingbot.com#)[PHP](https://testingbot.com#)[Java](https://testingbot.com#)[NodeJS](https://testingbot.com#)[C#](https://testingbot.com#)
caps = Selenium::WebDriver::Remote::Capabilities.new
caps["testingbot.geoCountryCode"] = "DE"
DesiredCapabilities caps = new DesiredCapabilities();
caps.setCapability("testingbot.geoCountryCode", "DE");
$caps = array(
"testingbot.geoCountryCode" => "DE"
);
capabilities = {
"testingbot.geoCountryCode" : "DE"
}
const capabilities = {
"testingbot.geoCountryCode" : "DE"
}
DesiredCapabilities caps = new DesiredCapabilities();
caps.SetCapability("testingbot.geoCountryCode", "DE");
**Selenium W3C Example:**
[Ruby](https://testingbot.com#)[Python](https://testingbot.com#)[PHP](https://testingbot.com#)[Java](https://testingbot.com#)[NodeJS](https://testingbot.com#)[C#](https://testingbot.com#)
caps = {
platformName: "Android",
app: "https://testingbot.com/appium/sample.apk",
deviceName: "Galaxy S23",
version: "13.0",
"tb:options" => {
"testingbot.geoCountryCode" : "DE"
}
}
ChromeOptions chromeOpts = new ChromeOptions();
chromeOpts.setExperimentalOption("w3c", true);
MutableCapabilities tbOptions = new MutableCapabilities();
tbOptions.setCapability("key", "api_key");
tbOptions.setCapability("secret", "api_secret");
tbOptions.setCapability("testingbot.geoCountryCode", "DE");
DesiredCapabilities caps = new DesiredCapabilities();
caps.setCapability(ChromeOptions.CAPABILITY, chromeOpts);
caps.setCapability("platformName", "Android");
caps.setCapability("tb:options", tbOptions);
caps.setCapability("app", "https://testingbot.com/appium/sample.apk");
$options = new ChromeOptions();
$capabilities = DesiredCapabilities::chrome();
$capabilities->setPlatform('Android');
$capabilities->setCapability('tb:options', array(
'testingbot.geoCountryCode' => "DE"
));
$capabilities->setCapability(ChromeOptions::CAPABILITY, $options);
tbOptions = {
'testingbot.geoCountryCode': "DE"
}
chromeOpts = {
'app': "https://testingbot.com/appium/sample.apk",
'platformName': "Android",
'goog:chromeOptions': {'w3c': True},
'tb:options': tbOptions
}
self.driver = webdriver.Remote(remote_url, desired_capabilities=chromeOpts)
driver = await new webdriver.Builder().withCapabilities({
"app": 'https://testingbot.com/appium/sample.apk',
"platformName": 'Android',
"goog:chromeOptions" : { "w3c" : true },
"tb:options": {
"key": "api_key",
"secret": "api_secret",
"testingbot.geoCountryCode": "DE"
}
}).usingServer("https://hub.testingbot.com/wd/hub").build();
var chromeOptions = new ChromeOptions()
{
Version = "13.0",
PlatformName = "Android",
UseSpecCompliantProtocol = true
};
var tbOptions = new Dictionary
{
["key"] = "api_key",
["secret"] = "api_secret",
["testingbot.geoCountryCode"] = "DE"
};
chromeOptions.AddAdditionalCapability("tb:options", tbOptions, true);
driver = new RemoteWebDriver(new Uri("https://hub.testingbot.com/wd/hub"),
chromeOptions.ToCapabilities(), TimeSpan.FromSeconds(600));
Specify `testingbot.geoCountryCode` with one of the following country codes:
- **'\*'** : this will take a random country from the list below
- **'AU'** : Australia
- **'BH'** : Bahrain
- **'BE'** : Belgium
- **'BR'** : Brazil
- **'CA'** : Canada
- **'CL'** : Chile
- **'FR'** : France
- **'DE'** : Germany
- **'IN'** : India
- **'IT'** : Italy
- **'JP'** : Japan
- **'NO'** : Norway
- **'SG'** : Singapore
- **'ZA'** : South Africa
- **'SE'** : Sweden
- **'CH'** : Switzerland
- **'AE'** : United Arab Emirates
- **'GB'** : United Kingdom
- **'US'** : United States
**Important:** this does not work on Android 4.4
## Upload files to device
You can upload files to the remote iOS or Android device, prior to starting a test. More information is available on this page: [upload files to device](https://testingbot.com/support/app-automate/appium/upload-files).
## Throttle Network
TestingBot provides a throttle network feature, which will simulate specific network conditions during a test.
We offer various presets:
- **Edge** :
- 250kbps download
- 150kbps upload
- 0% Loss
- 300ms Latency
- **3G** :
- 400kbps download
- 100kbps upload
- 0% Loss
- 100ms Latency
- **4G** :
- 18000kbps download
- 9000kbps upload
- 0% Loss
- 100ms Latency
- **airplane** :
Simulates Airplane Mode (no network connectivity)
- **disable** :
Revert the throttling to no throttling.
We also offer the possibility to specify your own `download`, `upload`, `loss` and `latency` values.
You can pass a preset or specific options at the start of your test (through the `capabilities`), or during the test (with `execute_script`).
**At the start of a test:**
[Ruby](https://testingbot.com#)[Python](https://testingbot.com#)[PHP](https://testingbot.com#)[Java](https://testingbot.com#)[NodeJS](https://testingbot.com#)[C#](https://testingbot.com#)
caps = {
throttle_network: "3G",
throttle_network: {
uploadSpeed: 10 * 1024,
downloadSpeed: 10 * 1024,
latency: 0,
loss: 0
}
}
ChromeOptions chromeOpts = new ChromeOptions();
chromeOpts.setExperimentalOption("w3c", true);
MutableCapabilities tbOptions = new MutableCapabilities();
tbOptions.setCapability("key", "api_key");
tbOptions.setCapability("secret", "api_secret");
tbOptions.setCapability("throttle_network", "3G");
MutableCapabilities throttleOptions = new MutableCapabilities();
throttleOptions.setCapability("uploadSpeed", 10 * 1024);
throttleOptions.setCapability("downloadSpeed", 10 * 1024);
throttleOptions.setCapability("latency", 0);
throttleOptions.setCapability("loss", 0);
tbOptions.setCapability("throttle_network", throttleOptions);
DesiredCapabilities caps = new DesiredCapabilities();
caps.setCapability(ChromeOptions.CAPABILITY, chromeOpts);
caps.setCapability("tb:options", tbOptions);
caps.setCapability("browserName", "chrome");
$options = new ChromeOptions();
$capabilities = DesiredCapabilities::chrome();
$capabilities->setPlatform('Android');
$capabilities->setCapability('tb:options', array(
'throttle_network' => '3G',
'throttle_network' => array(
'uploadSpeed' => 10 * 1024,
'downloadSpeed' => 10 * 1024,
'latency' => 0,
'loss' => 0
)
));
$capabilities->setCapability(ChromeOptions::CAPABILITY, $options);
tbOptions = {
'name': 'W3C Sample',
'throttle_network': '3G',
'throttle_network': {
'uploadSpeed': 10 * 1024,
'downloadSpeed': 10 * 1024,
'latency': 0,
'loss': 0
}
}
chromeOpts = {
'browserName': "chrome",
'goog:chromeOptions': {'w3c': True},
'tb:options': tbOptions
}
self.driver = webdriver.Remote(remote_url, desired_capabilities=chromeOpts)
driver = await new webdriver.Builder().withCapabilities({
"app": 'https://testingbot.com/appium/sample.apk',
"goog:chromeOptions" : { "w3c" : true },
"tb:options": {
"key": "api_key",
"secret": "api_secret",
"throttle_network": "3G",
"throttle_network": {
"uploadSpeed": 10 * 1024,
"downloadSpeed": 10 * 1024,
"latency": 0,
"loss": 0
}
}
}).usingServer("https://hub.testingbot.com/wd/hub").build();
var appiumOptions = new AppiumOptions();
appiumOptions.PlatformName = "Android";
appiumOptions.AddAdditionalAppiumOption("appium:app", "https://testingbot.com/appium/sample.apk");
var tbOptions = new Dictionary
{
["key"] = "api_key",
["secret"] = "api_secret",
["name"] = TestContext.CurrentContext.Test.Name,
["throttle_network"] = "3G"
};
appiumOptions.AddAdditionalAppiumOption("tb:options", tbOptions);
var driver = new AndroidDriver(new Uri("https://hub.testingbot.com/wd/hub"),
appiumOptions, TimeSpan.FromSeconds(600));
**During a test:**
[Ruby](https://testingbot.com#)[Python](https://testingbot.com#)[PHP](https://testingbot.com#)[Java](https://testingbot.com#)[NodeJS](https://testingbot.com#)[C#](https://testingbot.com#)
driver.execute_script("tb:throttle", "3G")
# or
driver.execute_script("tb:throttle", {
"downloadSpeed": 10 * 1024,
"uploadSpeed": 10 * 1024,
"latency": 0,
"loss": 0
})
((JavascriptExecutor) driver).executeScript("tb:throttle", "3G");
// or
Map throttleMap = new HashMap<>();
throttleMap.put("downloadSpeed", 10 * 1024);
throttleMap.put("uploadSpeed", 10 * 1024);
throttleMap.put("latency", 0);
throttleMap.put("loss", 0);
((JavascriptExecutor) driver).executeScript("tb:throttle", throttleMap);
$driver->executeScript("tb:throttle", ["3G"]);
// or
$driver->executeScript("tb:throttle", [
"downloadSpeed" => 10 * 1024,
"uploadSpeed" => 10 * 1024,
"latency" => 0,
"loss" => 0
]);
driver.execute_script("tb:throttle", "3G")
# or
driver.execute_script("tb:throttle", {
"downloadSpeed": 10 * 1024,
"uploadSpeed": 10 * 1024,
"latency": 0,
"loss": 0
})
browser.execute('tb:throttle', '3G')
// or
browser.execute('tb:throttle', {
"downloadSpeed": 10 * 1024,
"uploadSpeed": 10 * 1024,
"latency": 0,
"loss": 0
})
((IJavaScriptExecutor)driver).ExecuteScript("tb:throttle", "3G");
// or
((IJavaScriptExecutor)driver).ExecuteScript("tb:throttle", "{\"downloadSpeed\":10*1024, \"uploadSpeed\": 10*1024, \"latency\": 0, \"loss\": 0}");
To stop network throttling during your test, pass `disable: true` in the `tb:throttle` options via the `execute_script`.
## mobile: shell
You can execute ADB shell commands during your automated test, with Appium's `mobile: shell` functionality.
This allows you to fetch or set various settings for the device or emulator, during your automated test. For example, send a custom `input` event, or use `dumpsys`, `pm clear` or others.
When running a test on an emulator, all ADB shell commands are allowed.
For tests running on physical devices, we maintain a whitelist of allowed commands
**Whitelisted ADB commands for physical devices** :
- am start
- am force-stop
- pm clear
- input
- (ls|cp|mkdir|echo|grep|cut|pwd|dumpsys)
- getprop
- am compat enable
- cmd connectivity airplane-mode (enable|disable)
- settings put global (animator\_duration\_scale|transition\_animation\_scale|window\_animation\_scale) \
- setprop debug.firebase.analytics.app \
- setprop (log.tag.FA|log.tag.FA-SVC) (ERROR|WARN|INFO|DEBUG|VERBOSE)
- setprop (log.tag.FA|log.tag.FA-SVC|log.tag.GAv4|log.tag.GAv4-SVC) (ERROR|WARN|INFO|DEBUG|VERBOSE)
- appops set \ REQUEST\_INSTALL\_PACKAGES allow
[Ruby](https://testingbot.com#)[Python](https://testingbot.com#)[PHP](https://testingbot.com#)[Java](https://testingbot.com#)[NodeJS](https://testingbot.com#)[C#](https://testingbot.com#)
driver.execute_script('mobile: shell', { command: 'input', args: ['keyevent', 3] })
driver.executeScript("mobile: shell", ImmutableMap.of(
"command", "input",
"args", ImmutableList.of("keyevent", "3")
));
$args = [
"command" => "input",
"args" => ["keyevent", "3"]
];
$driver->executeScript("mobile: shell", $args);
args = {
"command": "input",
"args": ["keyevent", "3"]
}
driver.execute_script("mobile: shell", args)
await driver.executeScript("mobile: shell", {
command: "input",
args: ["keyevent", "3"]
});
var args = new Dictionary
{
{ "command", "input" },
{ "args", new List { "keyevent", "3" } }
};
((IJavaScriptExecutor)driver).ExecuteScript("mobile: shell", args);
### Device Name
When running a mobile automated test, you'll need to specify on which [mobile device](https://testingbot.com/support/app-automate/devices) (or [simulator/emulator](https://testingbot.com/support/web-automate/browsers)) you want to test.
[Ruby](https://testingbot.com#)[Python](https://testingbot.com#)[Java](https://testingbot.com#)[NodeJS](https://testingbot.com#)[C#](https://testingbot.com#)
caps = {
deviceName: "Samsung S21"
}
ChromeOptions chromeOpts = new ChromeOptions();
chromeOpts.setExperimentalOption("w3c", true);
MutableCapabilities tbOptions = new MutableCapabilities();
tbOptions.setCapability("key", "api_key");
tbOptions.setCapability("secret", "api_secret");
DesiredCapabilities caps = new DesiredCapabilities();
caps.setCapability(ChromeOptions.CAPABILITY, chromeOpts);
caps.setCapability("platformName", "Android");
caps.setCapability("tb:options", tbOptions);
caps.setCapability("deviceName", "Samsung S21");
tbOptions = {
'name': 'W3C Sample'
}
chromeOpts = {
'deviceName': "Samsung S21",
'platformName': "Android",
'goog:chromeOptions': {'w3c': True},
'tb:options': tbOptions
}
self.driver = webdriver.Remote(remote_url, desired_capabilities=chromeOpts)
driver = await new webdriver.Builder().withCapabilities({
"browserName": 'chrome',
"deviceName": 'Samsung S21',
"platformName": 'Android',
"goog:chromeOptions" : { "w3c" : true },
"tb:options": {
"key": "api_key",
"secret": "api_secret"
}
}).usingServer("https://hub.testingbot.com/wd/hub").build();
var chromeOptions = new ChromeOptions()
{
PlatformName = "Android",
UseSpecCompliantProtocol = true
};
var tbOptions = new Dictionary
{
["key"] = "api_key",
["secret"] = "api_secret",
["name"] = TestContext.CurrentContext.Test.Name,
["deviceName"] = "Samsung S21"
};
chromeOptions.AddAdditionalCapability("tb:options", tbOptions, true);
driver = new RemoteWebDriver(new Uri("https://hub.testingbot.com/wd/hub"),
chromeOptions.ToCapabilities(), TimeSpan.FromSeconds(600));
Physical Devices Only
We offer special parameters which you can use to allocate a device:
Regex Input | Result || `"iPhone.*"` | This will allocate any available iPhone device (phone) |
| `".*Galaxy.*"` | This will allocate any of the available Galaxy devices (phone or tablet) |
| `"*"` | This will allocate a random available device, either iOS or Android device |
| `"iPhone [8-11]"` | This will allocate either an iPhone 8 or 11 |
| `"iPhone 6.*"` | This will allocate either an iPhone 6 or 6S |
Some Examples:
// find any iPhone, except 6 or 6s
capabilities.setCapability("deviceName", "^(iPhone.*)(?!6|6S)$");
// find any device which name starts with Samsung
capabilities.setCapability("deviceName", "Samsung.*");
### Device Version
You can specify the version of the device you want to target. In case of physical devices, you might want to use regex/wildcard patterns to target a broad range of devices. This way your chance of hitting an occupied device during your automated test decreases significantly.
Instead of only targetting a specific iOS or Android device, you can target a wider range of devices.
[Ruby](https://testingbot.com#)[Python](https://testingbot.com#)[Java](https://testingbot.com#)[NodeJS](https://testingbot.com#)[C#](https://testingbot.com#)
caps = {
version: "(16|17).*"
}
ChromeOptions chromeOpts = new ChromeOptions();
chromeOpts.setExperimentalOption("w3c", true);
MutableCapabilities tbOptions = new MutableCapabilities();
tbOptions.setCapability("key", "api_key");
tbOptions.setCapability("secret", "api_secret");
DesiredCapabilities caps = new DesiredCapabilities();
caps.setCapability(ChromeOptions.CAPABILITY, chromeOpts);
caps.setCapability("appium:platformName", "Android");
caps.setCapability("appium:deviceName", "*");
caps.setCapability("tb:options", tbOptions);
caps.setCapability("appium:version", "(13|14).*");
tbOptions = {
'name': 'W3C Sample'
}
chromeOpts = {
'appium:deviceName': "*",
'appium:version': '(13|14).*',
'platformName': "Android",
'goog:chromeOptions': {'w3c': True}
}
self.driver = webdriver.Remote(remote_url, desired_capabilities=chromeOpts)
driver = await new webdriver.Builder().withCapabilities({
"browserName": 'chrome',
"appium:deviceName": '*',
"appium:version": '(13|14).*',
"platformName": 'Android',
"goog:chromeOptions" : { "w3c" : true },
"tb:options": {
"key": "api_key",
"secret": "api_secret"
}
}).usingServer("https://hub.testingbot.com/wd/hub").build();
var chromeOptions = new ChromeOptions()
{
PlatformName = "Android"
};
var tbOptions = new Dictionary
{
["key"] = "api_key",
["secret"] = "api_secret",
["name"] = TestContext.CurrentContext.Test.Name,
["deviceName"] = "*",
["version"] = "(13|14).*"
};
chromeOptions.AddAdditionalCapability("tb:options", tbOptions, true);
driver = new RemoteWebDriver(new Uri("https://hub.testingbot.com/wd/hub"),
chromeOptions.ToCapabilities(), TimeSpan.FromSeconds(600));
Some Examples:
// target multiple specific versions of an iPhone device
capabilities.setCapability("appium:deviceName", "iPhone.*");
capabilities.setCapability("appium:version", "18.0|15.0|14.2|14");
// find any Samsung device with Android version 13 or 14
capabilities.setCapability("appium:deviceName", "Samsung.*");
capabilities.setCapability("appium:version", "(13|14).*");
### Tablet Only
You can specify this capability when you only want to allocate a tablet device.
[Ruby](https://testingbot.com#)[Python](https://testingbot.com#)[Java](https://testingbot.com#)[NodeJS](https://testingbot.com#)[C#](https://testingbot.com#)
caps = {
deviceName: "*",
tabletOnly: true
}
ChromeOptions chromeOpts = new ChromeOptions();
chromeOpts.setExperimentalOption("w3c", true);
MutableCapabilities tbOptions = new MutableCapabilities();
tbOptions.setCapability("key", "api_key");
tbOptions.setCapability("secret", "api_secret");
tbOptions.setCapability("tabletOnly", true);
tbOptions.setCapability("deviceName", "*");
DesiredCapabilities caps = new DesiredCapabilities();
caps.setCapability(ChromeOptions.CAPABILITY, chromeOpts);
caps.setCapability("platformName", "Android");
caps.setCapability("tb:options", tbOptions);
tbOptions = {
'name': 'W3C Sample'
}
chromeOpts = {
'deviceName': "*",
'tabletOnly': true,
'platformName': "Android",
'goog:chromeOptions': {'w3c': True},
'tb:options': tbOptions
}
self.driver = webdriver.Remote(remote_url, desired_capabilities=chromeOpts)
driver = await new webdriver.Builder().withCapabilities({
"browserName": 'chrome',
"deviceName": '*',
"platformName": 'Android',
"goog:chromeOptions" : { "w3c" : true },
"tb:options": {
"key": "api_key",
"secret": "api_secret",
"tabletOnly": true
}
}).usingServer("https://hub.testingbot.com/wd/hub").build();
var chromeOptions = new ChromeOptions()
{
PlatformName = "Android",
UseSpecCompliantProtocol = true
};
var tbOptions = new Dictionary
{
["key"] = "api_key",
["secret"] = "api_secret",
["name"] = TestContext.CurrentContext.Test.Name,
["deviceName"] = "*",
["tabletOnly"] = true
};
chromeOptions.AddAdditionalCapability("tb:options", tbOptions, true);
driver = new RemoteWebDriver(new Uri("https://hub.testingbot.com/wd/hub"),
chromeOptions.ToCapabilities(), TimeSpan.FromSeconds(600));
### Phone Only
You can specify this capability when you only want to allocate a phone device.
[Ruby](https://testingbot.com#)[Python](https://testingbot.com#)[Java](https://testingbot.com#)[NodeJS](https://testingbot.com#)[C#](https://testingbot.com#)
caps = {
deviceName: "*",
phoneOnly: true
}
ChromeOptions chromeOpts = new ChromeOptions();
chromeOpts.setExperimentalOption("w3c", true);
MutableCapabilities tbOptions = new MutableCapabilities();
tbOptions.setCapability("key", "api_key");
tbOptions.setCapability("secret", "api_secret");
tbOptions.setCapability("phoneOnly", true);
tbOptions.setCapability("deviceName", "*");
DesiredCapabilities caps = new DesiredCapabilities();
caps.setCapability(ChromeOptions.CAPABILITY, chromeOpts);
caps.setCapability("platformName", "Android");
caps.setCapability("tb:options", tbOptions);
tbOptions = {
'name': 'W3C Sample'
}
chromeOpts = {
'deviceName': "*",
'phoneOnly': true,
'platformName': "Android",
'goog:chromeOptions': {'w3c': True},
'tb:options': tbOptions
}
self.driver = webdriver.Remote(remote_url, desired_capabilities=chromeOpts)
driver = await new webdriver.Builder().withCapabilities({
"browserName": 'chrome',
"deviceName": '*',
"platformName": 'Android',
"goog:chromeOptions" : { "w3c" : true },
"tb:options": {
"key": "api_key",
"secret": "api_secret",
"phoneOnly": true
}
}).usingServer("https://hub.testingbot.com/wd/hub").build();
var chromeOptions = new ChromeOptions()
{
PlatformName = "Android",
UseSpecCompliantProtocol = true
};
var tbOptions = new Dictionary
{
["key"] = "api_key",
["secret"] = "api_secret",
["name"] = TestContext.CurrentContext.Test.Name,
["deviceName"] = "*",
["phoneOnly"] = true
};
chromeOptions.AddAdditionalCapability("tb:options", tbOptions, true);
driver = new RemoteWebDriver(new Uri("https://hub.testingbot.com/wd/hub"),
chromeOptions.ToCapabilities(), TimeSpan.FromSeconds(600));
### Change Test Name
Add a name to this test, which will show up in the TestingBot member area and API.
[Ruby](https://testingbot.com#)[Python](https://testingbot.com#)[PHP](https://testingbot.com#)[Java](https://testingbot.com#)[NodeJS](https://testingbot.com#)[C#](https://testingbot.com#)
caps = Selenium::WebDriver::Remote::Capabilities.new
caps["name"] = "My Test Name"
DesiredCapabilities caps = new DesiredCapabilities();
caps.setCapability("name", "My Test Name");
$caps = array(
"name" => "My Test Name"
);
capabilities = {
"name" : "My Test Name"
}
const capabilities = {
"name" : "My Test Name"
}
DesiredCapabilities caps = new DesiredCapabilities();
caps.SetCapability("name", "My Test Name");
**Selenium W3C Example:**
[Ruby](https://testingbot.com#)[Python](https://testingbot.com#)[PHP](https://testingbot.com#)[Java](https://testingbot.com#)[NodeJS](https://testingbot.com#)[C#](https://testingbot.com#)
caps = {
platformName: "Android",
app: "https://testingbot.com/appium/sample.apk",
version: "13.0",
deviceName: "Galaxy S23",
"tb:options" => {
"name" : "My Test Name"
}
}
ChromeOptions chromeOpts = new ChromeOptions();
chromeOpts.setExperimentalOption("w3c", true);
MutableCapabilities tbOptions = new MutableCapabilities();
tbOptions.setCapability("key", "api_key");
tbOptions.setCapability("secret", "api_secret");
tbOptions.setCapability("name", "My Test Name");
DesiredCapabilities caps = new DesiredCapabilities();
caps.setCapability(ChromeOptions.CAPABILITY, chromeOpts);
caps.setCapability("platformName", "Android");
caps.setCapability("tb:options", tbOptions);
caps.setCapability("app", "https://testingbot.com/appium/sample.apk");
$options = new ChromeOptions();
$capabilities = DesiredCapabilities::chrome();
$capabilities->setPlatform('Android');
$capabilities->setCapability('tb:options', array(
'name' => "My Test Name"
));
$capabilities->setCapability(ChromeOptions::CAPABILITY, $options);
tbOptions = {
'name': "My Test Name"
}
chromeOpts = {
'app': "https://testingbot.com/appium/sample.apk",
'platformName': "Android",
'deviceName': "Galaxy S23",
'goog:chromeOptions': {'w3c': True},
'tb:options': tbOptions
}
self.driver = webdriver.Remote(remote_url, desired_capabilities=chromeOpts)
driver = await new webdriver.Builder().withCapabilities({
"app": 'https://testingbot.com/appium/sample.apk',
"platformName": 'Android',
"goog:chromeOptions" : { "w3c" : true },
"tb:options": {
"key": "api_key",
"secret": "api_secret",
"name": "My Test Name"
}
}).usingServer("https://hub.testingbot.com/wd/hub").build();
var chromeOptions = new ChromeOptions()
{
Version = "13.0",
PlatformName = "Android",
UseSpecCompliantProtocol = true
};
var tbOptions = new Dictionary
{
["key"] = "api_key",
["secret"] = "api_secret",
["name"] = "My Test Name"
};
chromeOptions.AddAdditionalCapability("tb:options", tbOptions, true);
driver = new RemoteWebDriver(new Uri("https://hub.testingbot.com/wd/hub"),
chromeOptions.ToCapabilities(), TimeSpan.FromSeconds(600));
Value Type | Default Value || string | unnamed test |
### Group Tests
A key you can use to group certain tests in the same build (for example in Jenkins).
The builds will appear in our member area.
[Ruby](https://testingbot.com#)[Python](https://testingbot.com#)[PHP](https://testingbot.com#)[Java](https://testingbot.com#)[NodeJS](https://testingbot.com#)[C#](https://testingbot.com#)
caps = Selenium::WebDriver::Remote::Capabilities.new
caps["build"] = "My First Build"
DesiredCapabilities caps = new DesiredCapabilities();
caps.setCapability("build", "My First Build");
$caps = array(
"build" => "My First Build"
);
capabilities = {
"build" : "My First Build"
}
const capabilities = {
"build" : "My First Build"
}
DesiredCapabilities caps = new DesiredCapabilities();
caps.SetCapability("build", "My First Build");
**Selenium W3C Example:**
[Ruby](https://testingbot.com#)[Python](https://testingbot.com#)[PHP](https://testingbot.com#)[Java](https://testingbot.com#)[NodeJS](https://testingbot.com#)[C#](https://testingbot.com#)
caps = {
platformName: "Android",
app: "https://testingbot.com/appium/sample.apk",
version: "13.0",
deviceName: "Galaxy S23",
"tb:options" => {
"build" : "My First Build"
}
}
ChromeOptions chromeOpts = new ChromeOptions();
chromeOpts.setExperimentalOption("w3c", true);
MutableCapabilities tbOptions = new MutableCapabilities();
tbOptions.setCapability("key", "api_key");
tbOptions.setCapability("secret", "api_secret");
tbOptions.setCapability("build", "My First Build");
DesiredCapabilities caps = new DesiredCapabilities();
caps.setCapability(ChromeOptions.CAPABILITY, chromeOpts);
caps.setCapability("platformName", "Android");
caps.setCapability("tb:options", tbOptions);
caps.setCapability("app", "https://testingbot.com/appium/sample.apk");
$options = new ChromeOptions();
$capabilities = DesiredCapabilities::chrome();
$capabilities->setPlatform('Android');
$capabilities->setCapability('tb:options', array(
'build' => "My First Build"
));
$capabilities->setCapability(ChromeOptions::CAPABILITY, $options);
tbOptions = {
'build': "My First Build"
}
chromeOpts = {
'app': "https://testingbot.com/appium/sample.apk",
'platformName': "Android",
'deviceName': "Galaxy S23",
'version': '13.0',
'goog:chromeOptions': {'w3c': True},
'tb:options': tbOptions
}
self.driver = webdriver.Remote(remote_url, desired_capabilities=chromeOpts)
driver = await new webdriver.Builder().withCapabilities({
"app": 'https://testingbot.com/appium/sample.apk',
"platformName": 'Android',
"goog:chromeOptions" : { "w3c" : true },
"tb:options": {
"key": "api_key",
"secret": "api_secret",
"build": "My First Build"
}
}).usingServer("https://hub.testingbot.com/wd/hub").build();
var chromeOptions = new ChromeOptions()
{
Version = "13.0",
PlatformName = "Android",
UseSpecCompliantProtocol = true
};
var tbOptions = new Dictionary
{
["key"] = "api_key",
["secret"] = "api_secret",
["build"] = "My First Build"
};
chromeOptions.AddAdditionalCapability("tb:options", tbOptions, true);
driver = new RemoteWebDriver(new Uri("https://hub.testingbot.com/wd/hub"),
chromeOptions.ToCapabilities(), TimeSpan.FromSeconds(600));
Value Type || string |
### Idle Timeout
The maximum amount of time a device will wait before proceeding to the next step in your test.
[Ruby](https://testingbot.com#)[Python](https://testingbot.com#)[PHP](https://testingbot.com#)[Java](https://testingbot.com#)[NodeJS](https://testingbot.com#)[C#](https://testingbot.com#)
caps = Selenium::WebDriver::Remote::Capabilities.new
caps["idletimeout"] = 130
DesiredCapabilities caps = new DesiredCapabilities();
caps.setCapability("idletimeout", 130);
$caps = array(
"idletimeout" => 130
);
capabilities = {
"idletimeout" : 130
}
const capabilities = {
"idletimeout" : 130
}
DesiredCapabilities caps = new DesiredCapabilities();
caps.SetCapability("idletimeout", 130);
**Selenium W3C Example:**
[Ruby](https://testingbot.com#)[Python](https://testingbot.com#)[PHP](https://testingbot.com#)[Java](https://testingbot.com#)[NodeJS](https://testingbot.com#)[C#](https://testingbot.com#)
caps = {
platformName: "Android",
app: "https://testingbot.com/appium/sample.apk",
version: "13.0",
deviceName: "Galaxy S23",
"tb:options" => {
"idletimeout" : 130
}
}
ChromeOptions chromeOpts = new ChromeOptions();
chromeOpts.setExperimentalOption("w3c", true);
MutableCapabilities tbOptions = new MutableCapabilities();
tbOptions.setCapability("key", "api_key");
tbOptions.setCapability("secret", "api_secret");
tbOptions.setCapability("idletimeout", 130);
DesiredCapabilities caps = new DesiredCapabilities();
caps.setCapability(ChromeOptions.CAPABILITY, chromeOpts);
caps.setCapability("platformName", "Android");
caps.setCapability("tb:options", tbOptions);
caps.setCapability("app", "https://testingbot.com/appium/sample.apk");
$options = new ChromeOptions();
$capabilities = DesiredCapabilities::chrome();
$capabilities->setPlatform('Android');
$capabilities->setCapability('tb:options', array(
'idletimeout' => 130
));
$capabilities->setCapability(ChromeOptions::CAPABILITY, $options);
tbOptions = {
'idletimeout': 130
}
chromeOpts = {
'app': "https://testingbot.com/appium/sample.apk",
'platformName': "Android",
'goog:chromeOptions': {'w3c': True},
'tb:options': tbOptions
}
self.driver = webdriver.Remote(remote_url, desired_capabilities=chromeOpts)
driver = await new webdriver.Builder().withCapabilities({
"app": 'https://testingbot.com/appium/sample.apk',
"platformName": 'Android',
"goog:chromeOptions" : { "w3c" : true },
"tb:options": {
"key": "api_key",
"secret": "api_secret",
"idletimeout": 130
}
}).usingServer("https://hub.testingbot.com/wd/hub").build();
var chromeOptions = new ChromeOptions()
{
Version = "13.0",
PlatformName = "Android",
UseSpecCompliantProtocol = true
};
var tbOptions = new Dictionary
{
["key"] = "api_key",
["secret"] = "api_secret",
["idletimeout"] = 130
};
chromeOptions.AddAdditionalCapability("tb:options", tbOptions, true);
driver = new RemoteWebDriver(new Uri("https://hub.testingbot.com/wd/hub"),
chromeOptions.ToCapabilities(), TimeSpan.FromSeconds(600));
Value Type | Default Value || int (specify number of seconds) | 130 seconds |
### Maximum Test Duration
The maximum duration for a single test. This is a safeguard to prevent bad tests from using up your credits.
We generally recommend to keep tests short (less than 10 minutes). It's better to split up large tests in smaller individual tests.
This keeps your tests fast and allows for more parallelization of your tests.
[Ruby](https://testingbot.com#)[Python](https://testingbot.com#)[PHP](https://testingbot.com#)[Java](https://testingbot.com#)[NodeJS](https://testingbot.com#)[C#](https://testingbot.com#)
caps = Selenium::WebDriver::Remote::Capabilities.new
caps["maxduration"] = 1800
DesiredCapabilities caps = new DesiredCapabilities();
caps.setCapability("maxduration", 1800);
$caps = array(
"maxduration" => 1800
);
capabilities = {
"maxduration" : 1800
}
const capabilities = {
"maxduration" : 1800
}
DesiredCapabilities caps = new DesiredCapabilities();
caps.SetCapability("maxduration", 1800);
**Selenium W3C Example:**
[Ruby](https://testingbot.com#)[Python](https://testingbot.com#)[PHP](https://testingbot.com#)[Java](https://testingbot.com#)[NodeJS](https://testingbot.com#)[C#](https://testingbot.com#)
caps = {
platformName: "Android",
app: "https://testingbot.com/appium/sample.apk",
version: "13.0",
deviceName: "Galaxy S23",
"tb:options" => {
"maxduration" : 1800
}
}
ChromeOptions chromeOpts = new ChromeOptions();
chromeOpts.setExperimentalOption("w3c", true);
MutableCapabilities tbOptions = new MutableCapabilities();
tbOptions.setCapability("key", "api_key");
tbOptions.setCapability("secret", "api_secret");
tbOptions.setCapability("maxduration", 1800);
DesiredCapabilities caps = new DesiredCapabilities();
caps.setCapability(ChromeOptions.CAPABILITY, chromeOpts);
caps.setCapability("platformName", "Android");
caps.setCapability("tb:options", tbOptions);
caps.setCapability("app", "https://testingbot.com/appium/sample.apk");
$options = new ChromeOptions();
$capabilities = DesiredCapabilities::chrome();
$capabilities->setPlatform('Android');
$capabilities->setCapability('tb:options', array(
'maxduration' => 1800
));
$capabilities->setCapability(ChromeOptions::CAPABILITY, $options);
tbOptions = {
'maxduration': 1800
}
chromeOpts = {
'app': "https://testingbot.com/appium/sample.apk",
'platformName': "Android",
'goog:chromeOptions': {'w3c': True},
'tb:options': tbOptions
}
self.driver = webdriver.Remote(remote_url, desired_capabilities=chromeOpts)
driver = await new webdriver.Builder().withCapabilities({
"app": 'https://testingbot.com/appium/sample.apk',
"platformName": 'Android',
"goog:chromeOptions" : { "w3c" : true },
"tb:options": {
"key": "api_key",
"secret": "api_secret",
"maxduration": 1800
}
}).usingServer("https://hub.testingbot.com/wd/hub").build();
var chromeOptions = new ChromeOptions()
{
Version = "13.0",
PlatformName = "Android",
UseSpecCompliantProtocol = true
};
var tbOptions = new Dictionary
{
["key"] = "api_key",
["secret"] = "api_secret",
["maxduration"] = 1800
};
chromeOptions.AddAdditionalCapability("tb:options", tbOptions, true);
driver = new RemoteWebDriver(new Uri("https://hub.testingbot.com/wd/hub"),
chromeOptions.ToCapabilities(), TimeSpan.FromSeconds(600));
Value Type | Default Value || int (specify number of seconds) | 1800 seconds (30 minutes) |
### Custom Metadata
Send along custom data, for example your release, server, commit hash, ...
This will show up on the test detail page in the TestingBot member area.
[Ruby](https://testingbot.com#)[Python](https://testingbot.com#)[PHP](https://testingbot.com#)[Java](https://testingbot.com#)[NodeJS](https://testingbot.com#)[C#](https://testingbot.com#)
caps = Selenium::WebDriver::Remote::Capabilities.new
caps["extra"] = "Extra Information"
DesiredCapabilities caps = new DesiredCapabilities();
caps.setCapability("extra", "Extra Information");
$caps = array(
"extra" => "Extra Information"
);
capabilities = {
"extra" : "Extra Information"
}
const capabilities = {
"extra" : "Extra Information"
}
DesiredCapabilities caps = new DesiredCapabilities();
caps.SetCapability("extra", "Extra Information");
**Selenium W3C Example:**
[Ruby](https://testingbot.com#)[Python](https://testingbot.com#)[PHP](https://testingbot.com#)[Java](https://testingbot.com#)[NodeJS](https://testingbot.com#)[C#](https://testingbot.com#)
caps = {
platformName: "Android",
app: "https://testingbot.com/appium/sample.apk",
version: "13.0",
deviceName: "Galaxy S23",
"tb:options" => {
"extra" : "Extra Information"
}
}
ChromeOptions chromeOpts = new ChromeOptions();
chromeOpts.setExperimentalOption("w3c", true);
MutableCapabilities tbOptions = new MutableCapabilities();
tbOptions.setCapability("key", "api_key");
tbOptions.setCapability("secret", "api_secret");
tbOptions.setCapability("extra", "Extra Information");
DesiredCapabilities caps = new DesiredCapabilities();
caps.setCapability(ChromeOptions.CAPABILITY, chromeOpts);
caps.setCapability("platformName", "Android");
caps.setCapability("tb:options", tbOptions);
caps.setCapability("browserName", "chrome");
$options = new ChromeOptions();
$capabilities = DesiredCapabilities::chrome();
$capabilities->setPlatform('Android');
$capabilities->setCapability('tb:options', array(
'extra' => "Extra Information"
));
$capabilities->setCapability(ChromeOptions::CAPABILITY, $options);
tbOptions = {
'extra': "Extra Information"
}
chromeOpts = {
'app': "https://testingbot.com/appium/sample.apk",
'platformName': "Android",
'goog:chromeOptions': {'w3c': True},
'tb:options': tbOptions
}
self.driver = webdriver.Remote(remote_url, desired_capabilities=chromeOpts)
driver = await new webdriver.Builder().withCapabilities({
"app": 'https://testingbot.com/appium/sample.apk',
"platformName": 'Android',
"goog:chromeOptions" : { "w3c" : true },
"tb:options": {
"key": "api_key",
"secret": "api_secret",
"extra": "Extra Information"
}
}).usingServer("https://hub.testingbot.com/wd/hub").build();
var chromeOptions = new ChromeOptions()
{
Version = "13.0",
PlatformName = "Android",
UseSpecCompliantProtocol = true
};
var tbOptions = new Dictionary
{
["key"] = "api_key",
["secret"] = "api_secret",
["extra"] = "Extra Information"
};
chromeOptions.AddAdditionalCapability("tb:options", tbOptions, true);
driver = new RemoteWebDriver(new Uri("https://hub.testingbot.com/wd/hub"),
chromeOptions.ToCapabilities(), TimeSpan.FromSeconds(600));
Value Type || string |
### Taking screenshots during your tests
By default, TestingBot does not capture screenshots at every step of your mobile test. If you wish to take a screenshot for every step, please add this capability (set to `true`) to your request.
[Ruby](https://testingbot.com#)[Python](https://testingbot.com#)[PHP](https://testingbot.com#)[Java](https://testingbot.com#)[NodeJS](https://testingbot.com#)[C#](https://testingbot.com#)
caps = Selenium::WebDriver::Remote::Capabilities.new
caps["screenshot"] = true
DesiredCapabilities caps = new DesiredCapabilities();
caps.setCapability("screenshot", true);
$caps = array(
"screenshot" => true
);
capabilities = {
"screenshot" : True
}
const capabilities = {
"screenshot" : true
}
DesiredCapabilities caps = new DesiredCapabilities();
caps.SetCapability("screenshot", true);
**Selenium W3C Example:**
[Ruby](https://testingbot.com#)[Python](https://testingbot.com#)[PHP](https://testingbot.com#)[Java](https://testingbot.com#)[NodeJS](https://testingbot.com#)[C#](https://testingbot.com#)
caps = {
platformName: "Android",
app: "https://testingbot.com/appium/sample.apk",
version: "13.0",
deviceName: "Galaxy S23",
"tb:options" => {
screenshot: true
}
}
ChromeOptions chromeOpts = new ChromeOptions();
chromeOpts.setExperimentalOption("w3c", true);
MutableCapabilities tbOptions = new MutableCapabilities();
tbOptions.setCapability("key", "api_key");
tbOptions.setCapability("secret", "api_secret");
tbOptions.setCapability("screenshot", true);
DesiredCapabilities caps = new DesiredCapabilities();
caps.setCapability(ChromeOptions.CAPABILITY, chromeOpts);
caps.setCapability("platformName", "Android");
caps.setCapability("tb:options", tbOptions);
caps.setCapability("app", "https://testingbot.com/appium/sample.apk);
$options = new ChromeOptions();
$capabilities = DesiredCapabilities::chrome();
$capabilities->setPlatform('Android');
$capabilities->setCapability('tb:options', array(
'screenshot' => true
));
$capabilities->setCapability(ChromeOptions::CAPABILITY, $options);
tbOptions = {
'name': 'W3C Sample',
'screenshot': True
}
chromeOpts = {
'app': "https://testingbot.com/appium/sample.apk,
'platformName': "Android",
'goog:chromeOptions': {'w3c': True},
'tb:options': tbOptions
}
self.driver = webdriver.Remote(remote_url, desired_capabilities=chromeOpts)
driver = await new webdriver.Builder().withCapabilities({
"app": 'https://testingbot.com/appium/sample.apk',
"platformName": 'Android',
"goog:chromeOptions" : { "w3c" : true },
"tb:options": {
"key": "api_key",
"secret": "api_secret",
"screenshot": true
}
}).usingServer("https://hub.testingbot.com/wd/hub").build();
var chromeOptions = new ChromeOptions()
{
Version = "23",
PlatformName = "Android",
UseSpecCompliantProtocol = true
};
var tbOptions = new Dictionary
{
["key"] = "api_key",
["secret"] = "api_secret",
["screenshot"] = true
};
chromeOptions.AddAdditionalCapability("tb:options", tbOptions, true);
driver = new RemoteWebDriver(new Uri("https://hub.testingbot.com/wd/hub"),
chromeOptions.ToCapabilities(), TimeSpan.FromSeconds(600));
Value Type | Default Value || boolean | false |
### Make a video of your tests
By default we record a video of your test, which is accessible in the member area. If you do not wish to have this, you can disable it with this option.
Video should not slow down your test considerably.
[Ruby](https://testingbot.com#)[Python](https://testingbot.com#)[PHP](https://testingbot.com#)[Java](https://testingbot.com#)[NodeJS](https://testingbot.com#)[C#](https://testingbot.com#)
caps = Selenium::WebDriver::Remote::Capabilities.new
caps["screenrecorder"] = true
DesiredCapabilities caps = new DesiredCapabilities();
caps.setCapability("screenrecorder", true);
$caps = array(
"screenrecorder" => true
);
capabilities = {
"screenrecorder" : True
}
const capabilities = {
"screenrecorder" : true
}
DesiredCapabilities caps = new DesiredCapabilities();
caps.SetCapability("screenrecorder", true);
**Selenium W3C Example:**
[Ruby](https://testingbot.com#)[Python](https://testingbot.com#)[PHP](https://testingbot.com#)[Java](https://testingbot.com#)[NodeJS](https://testingbot.com#)[C#](https://testingbot.com#)
caps = {
platformName: "Android",
app: "https://testingbot.com/appium/sample.apk",
version: "13.0",
"tb:options" => {
screenrecorder: true
}
}
ChromeOptions chromeOpts = new ChromeOptions();
chromeOpts.setExperimentalOption("w3c", true);
MutableCapabilities tbOptions = new MutableCapabilities();
tbOptions.setCapability("key", "api_key");
tbOptions.setCapability("secret", "api_secret");
tbOptions.setCapability("screenrecorder", true);
DesiredCapabilities caps = new DesiredCapabilities();
caps.setCapability(ChromeOptions.CAPABILITY, chromeOpts);
caps.setCapability("platformName", "Android");
caps.setCapability("tb:options", tbOptions);
caps.setCapability("app", "https://testingbot.com/appium/sample.apk");
$options = new ChromeOptions();
$capabilities = DesiredCapabilities::chrome();
$capabilities->setPlatform('Android');
$capabilities->setCapability('tb:options', array(
'screenrecorder' => true
));
$capabilities->setCapability(ChromeOptions::CAPABILITY, $options);
tbOptions = {
'name': 'W3C Sample',
'screenrecorder': True
}
chromeOpts = {
'app': "https://testingbot.com/appium/sample.apk",
'platformName': "Android",
'goog:chromeOptions': {'w3c': True},
'tb:options': tbOptions
}
self.driver = webdriver.Remote(remote_url, desired_capabilities=chromeOpts)
driver = await new webdriver.Builder().withCapabilities({
"app": 'https://testingbot.com/appium/sample.apk',
"platformName": 'Android',
"goog:chromeOptions" : { "w3c" : true },
"tb:options": {
"key": "api_key",
"secret": "api_secret",
"screenrecorder": true
}
}).usingServer("https://hub.testingbot.com/wd/hub").build();
var chromeOptions = new ChromeOptions()
{
Version = "13.0",
PlatformName = "Android",
UseSpecCompliantProtocol = true
};
var tbOptions = new Dictionary
{
["key"] = "api_key",
["secret"] = "api_secret",
["screenrecorder"] = true
};
chromeOptions.AddAdditionalCapability("tb:options", tbOptions, true);
driver = new RemoteWebDriver(new Uri("https://hub.testingbot.com/wd/hub"),
chromeOptions.ToCapabilities(), TimeSpan.FromSeconds(600));
Value Type | Default Value || boolean | true |
### Test Privacy
Make the test results for this test public so that everyone can access the results.
[Ruby](https://testingbot.com#)[Python](https://testingbot.com#)[PHP](https://testingbot.com#)[Java](https://testingbot.com#)[NodeJS](https://testingbot.com#)[C#](https://testingbot.com#)
caps = Selenium::WebDriver::Remote::Capabilities.new
caps["public"] = false
DesiredCapabilities caps = new DesiredCapabilities();
caps.setCapability("public", false);
$caps = array(
"public" => false
);
capabilities = {
"public" : False
}
const capabilities = {
"public" : false
}
DesiredCapabilities caps = new DesiredCapabilities();
caps.SetCapability("public", false);
**Selenium W3C Example:**
[Ruby](https://testingbot.com#)[Python](https://testingbot.com#)[PHP](https://testingbot.com#)[Java](https://testingbot.com#)[NodeJS](https://testingbot.com#)[C#](https://testingbot.com#)
caps = {
platformName: "Android",
app: "https://testingbot.com/appium/sample.apk",
version: "13.0",
"tb:options" => {
"public" : false
}
}
ChromeOptions chromeOpts = new ChromeOptions();
chromeOpts.setExperimentalOption("w3c", true);
MutableCapabilities tbOptions = new MutableCapabilities();
tbOptions.setCapability("key", "api_key");
tbOptions.setCapability("secret", "api_secret");
tbOptions.setCapability("public", false);
DesiredCapabilities caps = new DesiredCapabilities();
caps.setCapability(ChromeOptions.CAPABILITY, chromeOpts);
caps.setCapability("platformName", "Android");
caps.setCapability("tb:options", tbOptions);
caps.setCapability("app", "https://testingbot.com/appium/sample.apk");
$options = new ChromeOptions();
$capabilities = DesiredCapabilities::chrome();
$capabilities->setPlatform('Android');
$capabilities->setCapability('tb:options', array(
'public' => 130
));
$capabilities->setCapability(ChromeOptions::CAPABILITY, $options);
tbOptions = {
'public': False
}
chromeOpts = {
'app': "https://testingbot.com/appium/sample.apk",
'platformName': "Android",
'goog:chromeOptions': {'w3c': True},
'tb:options': tbOptions
}
self.driver = webdriver.Remote(remote_url, desired_capabilities=chromeOpts)
driver = await new webdriver.Builder().withCapabilities({
"app": 'https://testingbot.com/appium/sample.apk',
"platformName": 'Android',
"goog:chromeOptions" : { "w3c" : true },
"tb:options": {
"key": "api_key",
"secret": "api_secret",
"public": false
}
}).usingServer("https://hub.testingbot.com/wd/hub").build();
var chromeOptions = new ChromeOptions()
{
Version = "13.0",
PlatformName = "Android",
UseSpecCompliantProtocol = true
};
var tbOptions = new Dictionary
{
["key"] = "api_key",
["secret"] = "api_secret",
["public"] = false
};
chromeOptions.AddAdditionalCapability("tb:options", tbOptions, true);
driver = new RemoteWebDriver(new Uri("https://hub.testingbot.com/wd/hub"),
chromeOptions.ToCapabilities(), TimeSpan.FromSeconds(600));
Value Type | Default Value || boolean | false |
### Customize Logging
By default, TestingBot records logs of all test actions and its drivers.
Set this option to `false` if you don't want TestingBot to record anything (for example, if you have sensitive data).
You will not see any test logs in our member dashboard.
Set to `strip-parameters` to prevent the POST/GET parameters from being logged on the TestingBot test detail page (does not affect other logs like Appium logs, Chromedriver logs, ...).
[Ruby](https://testingbot.com#)[Python](https://testingbot.com#)[PHP](https://testingbot.com#)[Java](https://testingbot.com#)[NodeJS](https://testingbot.com#)[C#](https://testingbot.com#)
caps = Selenium::WebDriver::Remote::Capabilities.new
caps["recordLogs"] = true
DesiredCapabilities caps = new DesiredCapabilities();
caps.setCapability("recordLogs", true);
$caps = array(
"recordLogs" => true
);
capabilities = {
"recordLogs" : True
}
const capabilities = {
"recordLogs" : true
}
DesiredCapabilities caps = new DesiredCapabilities();
caps.SetCapability("recordLogs", true);
**Selenium W3C Example:**
[Ruby](https://testingbot.com#)[Python](https://testingbot.com#)[PHP](https://testingbot.com#)[Java](https://testingbot.com#)[NodeJS](https://testingbot.com#)[C#](https://testingbot.com#)
caps = {
platformName: "Android",
app: "https://testingbot.com/appium/sample.apk",
version: "13.0",
deviceName: "Galaxy S23",
"tb:options" => {
"recordLogs" : true
}
}
ChromeOptions chromeOpts = new ChromeOptions();
chromeOpts.setExperimentalOption("w3c", true);
MutableCapabilities tbOptions = new MutableCapabilities();
tbOptions.setCapability("key", "api_key");
tbOptions.setCapability("secret", "api_secret");
tbOptions.setCapability("recordLogs", true);
DesiredCapabilities caps = new DesiredCapabilities();
caps.setCapability(ChromeOptions.CAPABILITY, chromeOpts);
caps.setCapability("platformName", "Android");
caps.setCapability("tb:options", tbOptions);
caps.setCapability("app", "https://testingbot.com/appium/sample.apk");
$options = new ChromeOptions();
$capabilities = DesiredCapabilities::chrome();
$capabilities->setPlatform('Android');
$capabilities->setCapability('tb:options', array(
'recordLogs' => true
));
$capabilities->setCapability(ChromeOptions::CAPABILITY, $options);
tbOptions = {
'recordLogs': True
}
chromeOpts = {
'app': "https://testingbot.com/appium/sample.apk",
'platformName': "Android",
'goog:chromeOptions': {'w3c': True},
'tb:options': tbOptions
}
self.driver = webdriver.Remote(remote_url, desired_capabilities=chromeOpts)
driver = await new webdriver.Builder().withCapabilities({
"app": 'https://testingbot.com/appium/sample.apk',
"platformName": 'Android',
"goog:chromeOptions" : { "w3c" : true },
"tb:options": {
"key": "api_key",
"secret": "api_secret",
"recordLogs": true
}
}).usingServer("https://hub.testingbot.com/wd/hub").build();
var chromeOptions = new ChromeOptions()
{
Version = "13.0",
PlatformName = "Android",
UseSpecCompliantProtocol = true
};
var tbOptions = new Dictionary
{
["key"] = "api_key",
["secret"] = "api_secret",
["recordLogs"] = true
};
chromeOptions.AddAdditionalCapability("tb:options", tbOptions, true);
driver = new RemoteWebDriver(new Uri("https://hub.testingbot.com/wd/hub"),
chromeOptions.ToCapabilities(), TimeSpan.FromSeconds(600));
Value Type | Default Value | Possible Values: || string | "true" | `true`, `false`, or `strip-parameters` |
Was this page helpful? Yes No
## Looking for More Help?
Have questions or need more information?
You can reach us via the following channels:
- [Email us](https://testingbot.com/contact/new)
- [Join our Slack Channel](https://join.slack.com/t/testingb0t/shared_invite/zt-3bcw9xch-jk19~6XPs_xBrsAgAedkCw)
---
URL: https://testingbot.com/support/app-automate/appium/instrumentation
# App Instrumentation with Appium
App instrumentation means adding extra hooks to your app while it runs on TestingBot's devices. It lets your automated tests interact with things that normally require human interaction, such as authentication, taking a specific photo or making a call.
With app instrumentation, you can perform the following tasks in an automated Appium test script:
- [Inject images into the camera](https://testingbot.com#image-injection): feed a test image to the virtual camera instead of using a real one.
- [Biometric authentication](https://testingbot.com#biometric): simulate fingerprint or Touch ID prompts in your tests.
- [Receive calls and SMS messages](https://testingbot.com#calls-sms): emulate incoming phone calls or text messages to see how your app responds.
## Injecting images into camera
Android Emulators Only
Image injection allows you to specify a base64 encoded image to the virtual camera of the Android emulator.
The test script will fetch the content of the image, convert it to base64 and send it to the TestingBot grid. The image will be used by the remote device to inject into the camera.
Make sure to include the `images` Appium plugin, as it is required for this to function correctly.
[Java](https://testingbot.com#)[NodeJS](https://testingbot.com#)[Python](https://testingbot.com#)[Ruby](https://testingbot.com#)[C#](https://testingbot.com#)
import io.appium.java_client.AppiumDriver;
import org.openqa.selenium.remote.DesiredCapabilities;
import java.net.URL;
import java.util.Base64;
import java.nio.file.Files;
import java.nio.file.Paths;
import java.util.HashMap;
public class ImageInjectionExample {
public static String imageToBase64(String url) throws Exception {
byte[] data = java.net.URI.create(url).toURL().openStream().readAllBytes();
return Base64.getEncoder().encodeToString(data);
}
public static void main(String[] args) throws Exception {
DesiredCapabilities caps = new DesiredCapabilities();
caps.setCapability("platformName", "Android");
caps.setCapability("browserName", "chrome");
caps.setCapability("browserVersion", "15");
caps.setCapability("appium:deviceName", "Pixel 9");
caps.setCapability("tb:appiumPlugins", new String[]{"images"});
caps.setCapability("tb:appiumVersion", "2.11.3");
caps.setCapability("appium:injectedImageProperties", new HashMap<>());
AppiumDriver driver = new AppiumDriver(new URL("https://key:secret@hub.testingbot.com/wd/hub"), caps);
String base64Image = imageToBase64("https://upload.wikimedia.org/wikipedia/commons/5/5e/QR_Code_example.png");
driver.executeScript("mobile: injectEmulatorCameraImage", new HashMap() {{
put("payload", base64Image);
}});
Thread.sleep(30000);
base64Image = imageToBase64("https://testingbot.com/assets/about.png");
driver.executeScript("mobile: injectEmulatorCameraImage", new HashMap() {{
put("payload", base64Image);
}});
Thread.sleep(30000);
driver.quit();
}
}
const { remote } = require('webdriverio');
const fs = require('fs');
const fetch = require('node-fetch');
async function imageToBase64(url) {
const res = await fetch(url);
const buffer = await res.buffer();
return buffer.toString('base64');
}
(async () => {
const caps = {
platformName: 'Android',
'appium:deviceName': 'Pixel 9',
browserName: 'chrome',
browserVersion: '15',
'tb:appiumPlugins': ['images'],
'tb:appiumVersion': '2.11.3',
'appium:injectedImageProperties': {}
};
const driver = await remote({
protocol: 'https',
hostname: 'hub.testingbot.com',
port: 443,
path: '/wd/hub',
user: 'key',
key: 'secret',
capabilities: caps
});
let base64Image = await imageToBase64('https://upload.wikimedia.org/wikipedia/commons/5/5e/QR_Code_example.png');
await driver.executeScript('mobile: injectEmulatorCameraImage', [{ payload: base64Image }]);
console.log("Injected first image");
await driver.pause(30000);
base64Image = await imageToBase64('https://testingbot.com/assets/about.png');
await driver.executeScript('mobile: injectEmulatorCameraImage', [{ payload: base64Image }]);
console.log("Injected second image");
await driver.pause(30000);
await driver.deleteSession();
})();
from appium import webdriver
import base64
import requests
import time
def image_to_base64(url):
response = requests.get(url)
return base64.b64encode(response.content).decode('utf-8')
caps = {
"platformName": "Android",
"browserName": "chrome",
"browserVersion": "15",
"appium:deviceName": "Pixel 9",
"tb:appiumPlugins": ["images"],
"tb:appiumVersion": "2.11.3",
"appium:injectedImageProperties": {}
}
driver = webdriver.Remote("https://key:secret@hub.testingbot.com/wd/hub", caps)
base64_image = image_to_base64("https://upload.wikimedia.org/wikipedia/commons/5/5e/QR_Code_example.png")
driver.execute_script("mobile: injectEmulatorCameraImage", { "payload": base64_image })
time.sleep(30)
print("Changing image")
base64_image = image_to_base64("https://testingbot.com/assets/about.png")
driver.execute_script("mobile: injectEmulatorCameraImage", { "payload": base64_image })
time.sleep(30)
driver.quit()
#!/usr/bin/env ruby
require 'rubygems'
require 'appium_lib'
require 'base64'
require 'open-uri'
def image_to_base64(image_url)
image_data = URI.parse(image_url).open.read
Base64.strict_encode64(image_data)
end
caps = {
"browserName" => "chrome",
"browserVersion" => "15",
"appium:deviceName" => "Pixel 9",
"platformName" => "Android",
"tb:appiumPlugins" => ["images"],
"tb:appiumVersion" => "2.11.3",
"appium:injectedImageProperties" => {}
}
appium_driver = Appium::Driver.new({
caps: caps,
appium_lib: {
server_url: "https://key:secret@hub.testingbot.com/wd/hub"
}
}, true)
driver = appium_driver.start_driver
base64_image = image_to_base64("https://upload.wikimedia.org/wikipedia/commons/5/5e/QR_Code_example.png")
driver.execute_script('mobile: injectEmulatorCameraImage', { payload: base64_image })
sleep 30
puts "Changing image"
base64_image = image_to_base64("https://testingbot.com/assets/about.png")
driver.execute_script('mobile: injectEmulatorCameraImage', { payload: base64_image })
sleep 30
driver.quit
using OpenQA.Selenium;
using OpenQA.Selenium.Appium;
using OpenQA.Selenium.Remote;
using System;
using System.Net.Http;
using System.Threading.Tasks;
class ImageInjectionExample
{
static async Task ImageToBase64(string url)
{
using (HttpClient client = new HttpClient())
{
var data = await client.GetByteArrayAsync(url);
return Convert.ToBase64String(data);
}
}
static async Task Main(string[] args)
{
var options = new AppiumOptions();
options.PlatformName = "Android";
options.AddAdditionalAppiumOption("browserName", "chrome");
options.AddAdditionalAppiumOption("browserVersion", "15");
options.AddAdditionalAppiumOption("appium:deviceName", "Pixel 9");
options.AddAdditionalAppiumOption("tb:appiumPlugins", new string[] { "images" });
options.AddAdditionalAppiumOption("tb:appiumVersion", "2.11.3");
options.AddAdditionalAppiumOption("appium:injectedImageProperties", new { });
var driver = new RemoteWebDriver(
new Uri("https://key:secret@hub.testingbot.com/wd/hub"),
options
);
var base64Image = await ImageToBase64("https://upload.wikimedia.org/wikipedia/commons/5/5e/QR_Code_example.png");
driver.ExecuteScript("mobile: injectEmulatorCameraImage", new Dictionary { { "payload", base64Image } });
Console.WriteLine("Injected first image");
System.Threading.Thread.Sleep(30000);
base64Image = await ImageToBase64("https://testingbot.com/assets/about.png");
driver.ExecuteScript("mobile: injectEmulatorCameraImage", new Dictionary { { "payload", base64Image } });
Console.WriteLine("Injected second image");
System.Threading.Thread.Sleep(30000);
driver.Quit();
}
}
## Biometric authentication (Finger Print, Touch Id)
### Android fingerprint authentication
Emulate fingerprints on Android Emulator, with the [mobile:fingerprint](https://github.com/appium/appium-uiautomator2-driver?tab=readme-ov-file#mobile-fingerprint) command. Only works on API 23+ with [Appium version 2 or higher](https://testingbot.com/support/app-automate/appium/appium-versions).
[Java](https://testingbot.com#)[NodeJS](https://testingbot.com#)[Python](https://testingbot.com#)[Ruby](https://testingbot.com#)[C#](https://testingbot.com#)
import io.appium.java_client.AppiumDriver;
import org.openqa.selenium.remote.DesiredCapabilities;
import java.net.URL;
import java.util.HashMap;
public class FingerprintExample {
public static void main(String[] args) throws Exception {
DesiredCapabilities caps = new DesiredCapabilities();
caps.setCapability("platformName", "Android");
caps.setCapability("appium:deviceName", "Pixel 9");
caps.setCapability("browserName", "chrome");
caps.setCapability("browserVersion", "15");
caps.setCapability("tb:appiumVersion", "2.11.3");
AppiumDriver driver = new AppiumDriver(new URL("https://key:secret@hub.testingbot.com/wd/hub"), caps);
HashMap args1 = new HashMap<>();
args1.put("fingerprintId", 1);
driver.executeScript("mobile: fingerprint", args1);
Thread.sleep(5000);
driver.quit();
}
}
const { remote } = require('webdriverio');
(async () => {
const caps = {
platformName: 'Android',
'appium:deviceName': 'Pixel 9',
browserName: 'chrome',
browserVersion: '15',
'tb:appiumVersion': '2.11.3'
};
const driver = await remote({
protocol: 'https',
hostname: 'hub.testingbot.com',
port: 443,
path: '/wd/hub',
user: 'key',
key: 'secret',
capabilities: caps
});
await driver.executeScript('mobile: fingerprint', [{ fingerprintId: 1 }]);
await driver.pause(5000);
await driver.deleteSession();
})();
from appium import webdriver
import time
caps = {
"platformName": "Android",
"appium:deviceName": "Pixel 9",
"browserName": "chrome",
"browserVersion": "15",
"tb:appiumVersion": "2.11.3"
}
driver = webdriver.Remote("https://key:secret@hub.testingbot.com/wd/hub", caps)
# Simulate fingerprint auth with ID 1
driver.execute_script("mobile: fingerprint", { "fingerprintId": 1 })
time.sleep(5)
driver.quit()
require 'appium_lib'
caps = {
"platformName" => "Android",
"appium:deviceName" => "Pixel 9",
"browserName" => "chrome",
"browserVersion" => "15",
"tb:appiumVersion" => "2.11.3"
}
driver = Appium::Driver.new({
caps: caps,
appium_lib: {
server_url: "https://key:secret@hub.testingbot.com/wd/hub"
}
}, true).start_driver
driver.execute_script("mobile: fingerprint", { fingerprintId: 1 })
sleep 5
driver.quit
using OpenQA.Selenium.Remote;
using System;
using System.Collections.Generic;
using OpenQA.Selenium.Appium;
class FingerprintExample {
static void Main(string[] args) {
var options = new AppiumOptions();
options.PlatformName = "Android";
options.AddAdditionalAppiumOption("appium:deviceName", "Pixel 9");
options.AddAdditionalAppiumOption("browserName", "chrome");
options.AddAdditionalAppiumOption("browserVersion", "15");
options.AddAdditionalAppiumOption("tb:appiumVersion", "2.11.3");
var driver = new RemoteWebDriver(
new Uri("https://key:secret@hub.testingbot.com/wd/hub"), options);
driver.ExecuteScript("mobile: fingerprint", new Dictionary {
{ "fingerprintId", 1 }
});
System.Threading.Thread.Sleep(5000);
driver.Quit();
}
}
### iOS TouchID/FaceID authentication
You can simulate a biometric match/non-match event with TouchID and FaceID, with the [mobile: sendBiometricMatch](https://appium.github.io/appium-xcuitest-driver/latest/reference/execute-methods/#mobile-sendbiometricmatch) command.
[Java](https://testingbot.com#)[NodeJS](https://testingbot.com#)[Python](https://testingbot.com#)[Ruby](https://testingbot.com#)[C#](https://testingbot.com#)
import io.appium.java_client.AppiumDriver;
import org.openqa.selenium.remote.DesiredCapabilities;
import java.net.URL;
import java.util.HashMap;
public class TouchIDExample {
public static void main(String[] args) throws Exception {
DesiredCapabilities caps = new DesiredCapabilities();
caps.setCapability("platformName", "iOS");
caps.setCapability("appium:deviceName", "iPhone 15");
caps.setCapability("appium:platformVersion", "18.0");
caps.setCapability("browserName", "safari");
caps.setCapability("tb:appiumVersion", "2.11.3");
AppiumDriver driver = new AppiumDriver(new URL("https://key:secret@hub.testingbot.com/wd/hub"), caps);
HashMap args1 = new HashMap<>();
args1.put("type", "touchId");
args1.put("match", true);
driver.executeScript("mobile: sendBiometricMatch", args1);
Thread.sleep(5000);
HashMap args2 = new HashMap<>();
args2.put("type", "touchId");
args2.put("match", false);
driver.executeScript("mobile: sendBiometricMatch", args2);
Thread.sleep(5000);
driver.quit();
}
}
const { remote } = require('webdriverio');
(async () => {
const caps = {
platformName: 'iOS',
'appium:deviceName': 'iPhone 15',
'appium:platformVersion': '18.0',
browserName: 'safari',
'tb:appiumVersion': '2.11.3'
};
const driver = await remote({
protocol: 'https',
hostname: 'hub.testingbot.com',
port: 443,
path: '/wd/hub',
user: 'key',
key: 'secret',
capabilities: caps
});
// Successful Touch ID
await driver.executeScript('mobile: sendBiometricMatch', [{ type: 'touchId', match: true }]);
await driver.pause(5000);
// Failed Touch ID
await driver.executeScript('mobile: sendBiometricMatch', [{ type: 'touchId', match: false }]);
await driver.pause(5000);
await driver.deleteSession();
})();
from appium import webdriver
import time
caps = {
"platformName": "iOS",
"appium:deviceName": "iPhone 15",
"appium:platformVersion": "18.0",
"browserName": "safari",
"tb:appiumVersion": "2.11.3"
}
driver = webdriver.Remote("https://key:secret@hub.testingbot.com/wd/hub", caps)
# Successful Touch ID
driver.execute_script("mobile: sendBiometricMatch", { "type": "touchId", "match": True })
time.sleep(5)
# Failed Touch ID
driver.execute_script("mobile: sendBiometricMatch", { "type": "touchId", "match": False })
time.sleep(5)
driver.quit()
require 'appium_lib'
caps = {
"platformName" => "iOS",
"appium:deviceName" => "iPhone 15",
"appium:platformVersion" => "18.0",
"browserName" => "safari",
"tb:appiumVersion" => "2.11.3"
}
driver = Appium::Driver.new({
caps: caps,
appium_lib: {
server_url: "https://key:secret@hub.testingbot.com/wd/hub"
}
}, true).start_driver
# Success
driver.execute_script("mobile: sendBiometricMatch", { type: "touchId", match: true })
sleep 5
# Failure
driver.execute_script("mobile: sendBiometricMatch", { type: "touchId", match: false })
sleep 5
driver.quit
using OpenQA.Selenium.Remote;
using System;
using System.Collections.Generic;
using OpenQA.Selenium.Appium;
class TouchIDExample {
static void Main(string[] args) {
var options = new AppiumOptions();
options.PlatformName = "iOS";
options.AddAdditionalAppiumOption("appium:deviceName", "iPhone 15");
options.AddAdditionalAppiumOption("appium:platformVersion", "18.0");
options.AddAdditionalAppiumOption("browserName", "safari");
options.AddAdditionalAppiumOption("tb:appiumVersion", "2.11.3");
var driver = new RemoteWebDriver(
new Uri("https://key:secret@hub.testingbot.com/wd/hub"), options);
driver.ExecuteScript("mobile: sendBiometricMatch", new Dictionary {
{ "type", "touchId" },
{ "match", true }
});
System.Threading.Thread.Sleep(5000);
driver.ExecuteScript("mobile: sendBiometricMatch", new Dictionary {
{ "type", "touchId" },
{ "match", false }
});
System.Threading.Thread.Sleep(5000);
driver.Quit();
}
}
## Receiving calls and text messages (SMS)
You can simulate an incoming call or text message with Appium. Please see the examples below.
[Java](https://testingbot.com#)[NodeJS](https://testingbot.com#)[Python](https://testingbot.com#)[Ruby](https://testingbot.com#)[C#](https://testingbot.com#)
import io.appium.java_client.AppiumDriver;
import io.appium.java_client.android.AndroidDriver;
import io.appium.java_client.android.connection.GsmCallActions;
import org.openqa.selenium.remote.DesiredCapabilities;
import java.net.URL;
public class AndroidGsmExample {
public static void main(String[] args) throws Exception {
DesiredCapabilities caps = new DesiredCapabilities();
caps.setCapability("platformName", "Android");
caps.setCapability("appium:deviceName", "Pixel 9");
caps.setCapability("browserName", "chrome");
caps.setCapability("browserVersion", "15");
caps.setCapability("tb:appiumVersion", "2.11.3");
AndroidDriver driver = new AndroidDriver(new URL("https://key:secret@hub.testingbot.com/wd/hub"), caps);
// Send SMS
driver.sendSMS("5555555555", "Your message here!");
// Make and handle a phone call
driver.makeGsmCall("5555555555", GsmCallActions.CALL);
Thread.sleep(2000);
driver.makeGsmCall("5555555555", GsmCallActions.ACCEPT);
Thread.sleep(2000);
driver.makeGsmCall("5555555555", GsmCallActions.CANCEL);
driver.quit();
}
}
const { remote } = require('webdriverio');
(async () => {
const caps = {
platformName: 'Android',
'appium:deviceName': 'Pixel 9',
browserName: 'chrome',
browserVersion: '15',
'tb:appiumVersion': '2.11.3'
};
const driver = await remote({
protocol: 'https',
hostname: 'hub.testingbot.com',
port: 443,
path: '/wd/hub',
user: 'key',
key: 'secret',
capabilities: caps
});
// Send SMS
await driver.sendSms('5555555555', 'Your message here!');
// Phone call
await driver.makeGsmCall('5555555555', 'call');
await driver.pause(2000);
await driver.makeGsmCall('5555555555', 'accept');
await driver.pause(2000);
await driver.makeGsmCall('5555555555', 'cancel');
await driver.deleteSession();
})();
from appium import webdriver
import time
caps = {
"platformName": "Android",
"appium:deviceName": "Pixel 9",
"browserName": "chrome",
"browserVersion": "15",
"tb:appiumVersion": "2.11.3"
}
driver = webdriver.Remote("https://key:secret@hub.testingbot.com/wd/hub", caps)
# Send SMS
driver.send_sms("5555555555", "Your message here!")
# Phone call
driver.make_gsm_call("5555555555", "call")
time.sleep(2)
driver.make_gsm_call("5555555555", "accept")
time.sleep(2)
driver.make_gsm_call("5555555555", "cancel")
driver.quit()
require 'appium_lib'
caps = {
"platformName" => "Android",
"appium:deviceName" => "Pixel 9",
"browserName" => "chrome",
"browserVersion" => "15",
"tb:appiumVersion" => "2.11.3"
}
driver = Appium::Driver.new({
caps: caps,
appium_lib: {
server_url: "https://key:secret@hub.testingbot.com/wd/hub"
}
}, true).start_driver
# Send SMS
driver.send_sms("5555555555", "Your message here!")
# Phone call
driver.make_gsm_call("5555555555", "call")
sleep 2
driver.make_gsm_call("5555555555", "accept")
sleep 2
driver.make_gsm_call("5555555555", "cancel")
driver.quit
using OpenQA.Selenium.Remote;
using OpenQA.Selenium.Appium;
using OpenQA.Selenium.Appium.Android;
using System;
class AndroidGsmExample {
static void Main(string[] args) {
var options = new AppiumOptions();
options.PlatformName = "Android";
options.AddAdditionalAppiumOption("appium:deviceName", "Pixel 9");
options.AddAdditionalAppiumOption("browserName", "chrome");
options.AddAdditionalAppiumOption("browserVersion", "15");
options.AddAdditionalAppiumOption("tb:appiumVersion", "2.11.3");
var driver = new AndroidDriver(new Uri("https://key:secret@hub.testingbot.com/wd/hub"), options);
// Send SMS
driver.SendSMS("5555555555", "Your message here!");
// Phone call
driver.MakeGsmCall("5555555555", "call");
System.Threading.Thread.Sleep(2000);
driver.MakeGsmCall("5555555555", "accept");
System.Threading.Thread.Sleep(2000);
driver.MakeGsmCall("5555555555", "cancel");
driver.Quit();
}
}
Was this page helpful? Yes No
## Looking for More Help?
Have questions or need more information?
You can reach us via the following channels:
- [Email us](https://testingbot.com/contact/new)
- [Join our Slack Channel](https://join.slack.com/t/testingb0t/shared_invite/zt-3bcw9xch-jk19~6XPs_xBrsAgAedkCw)
---
URL: https://testingbot.com/support/app-automate/xcuitest
# XCUITest Intro
TestingBot provides a grid of physical iOS devices in the cloud, ready to run your XCUITests.
XCUITest (a framework within the larger XCTest Testing framework) is Apple's automation framework, which comes with Apple's XCode IDE, capable of running automated UI tests on iPhone and iPad devices.
## Setup
XCUITest is packaged in a `zip` file. You will need two files to perform XCUITesting on our cloud:
- An `.ipa` file of the actual mobile application that you want to test.
- Another `.zip` file of the XCUITests.
If you just want to give this a try, we have a [TestingBot XCUITest Demo App](https://github.com/testingbot/xcuitest-example-app) which you can use with the following steps.
## TestingBot CLI
The easiest way to run XCUITests on TestingBot is using our CLI tool. It handles uploading your app, test ZIP, and running tests in a single command.
### Installation
npm install -g @testingbot/cli
### Authentication
Authenticate using this command:
testingbot login
This opens your browser for authentication. After logging in, your credentials are saved to `~/.testingbot` and you can start using the CLI.
#### Other Authentication Methods
- **Command-line options** : `--api-key` and `--api-secret`
- **Environment variables** : `TB_KEY` and `TB_SECRET`
- **Config file** : Create `~/.testingbot` with content `key:secret`
### Quick Start
Run XCUITests with a single command:
testingbot xcuitest app.ipa app-test.zip --device "iPhone 16" --real-device
The CLI will:
1. Upload your app IPA to TestingBot
2. Upload your test ZIP
3. Start the test run
4. Show real-time progress and results
## Upload iOS App
You can upload your `.ipa` file to TestingBot storage with our [REST-API](https://testingbot.com/support/api).
[CLI](https://testingbot.com#)[cURL](https://testingbot.com#)
When using the CLI, the app upload is handled automatically as part of the `testingbot xcuitest` command. Simply specify your app IPA file as the first argument:
testingbot xcuitest /path/to/app/sample-debug.ipa /path/to/test/app-test.zip --device "iPhone 16" --real-device
Alternatively, you can use the `--app` option:
testingbot xcuitest --app /path/to/app/sample-debug.ipa --test-app /path/to/test/app-test.zip --device "iPhone 16" --real-device
curl -u api_key:api_secret \
-X POST "https://api.testingbot.com/v1/app-automate/xcuitest/app" \
-F "file=@/path/to/app/file/sample-debug.ipa"
The API response will include an `id` response, which you can use in the other API calls.
{
"id": 4012
}
## Upload XCUITest Suite
If you do not have a `.zip` file yet, please see our [Build Testsuite](https://testingbot.com/support/app-automate/xcuitest/build-testsuite) documentation.
[CLI](https://testingbot.com#)[cURL](https://testingbot.com#)
When using the CLI, the test ZIP upload is handled automatically. Specify your test ZIP as the second argument:
testingbot xcuitest app.ipa app-test.zip --device "iPhone 16" --real-device
Or use the `--test-app` option:
testingbot xcuitest --app app.ipa --test-app app-test.zip --device "iPhone 16" --real-device
To upload the XCUITest suite, in `.zip` file, please use our [REST-API](https://testingbot.com/support/api).
curl -u api_key:api_secret \
-X POST "https://api.testingbot.com/v1/app-automate/xcuitest/:id/tests" \
-F "file=@/path/to/app/file/application-debug-test.zip"
Replace the `:id` with the identifier you received during the app upload call. (In this example 4012)
## Run XCUI tests
Once you've uploaded both your app and test suite, you can start a XCUITest on the TestingBot cloud.
[CLI](https://testingbot.com#)[cURL](https://testingbot.com#)
Use the CLI to run tests with device selection options:
# Basic usage with device selection
testingbot xcuitest app.ipa app-test.zip --device "iPhone 16" --real-device
# With test name and build identifier
testingbot xcuitest app.ipa app-test.zip \
--device "iPhone 16" \
--real-device \
--name "Smoke Tests" \
--build "v2.1.0"
#### Device Options
| Option | Description |
| --- | --- |
| `--device ` | Device name (e.g., "iPhone 16", "iPad.\*") |
| `--platform-version ` | iOS version (e.g., "17.0", "18.2") |
| `--real-device` | Use a real device instead of simulator |
| `--tablet-only` | Only allocate tablet devices (iPads) |
| `--phone-only` | Only allocate phone devices (iPhones) |
| `--orientation ` | Screen orientation: PORTRAIT or LANDSCAPE |
#### Localization & Network
# With localization settings
testingbot xcuitest app.ipa app-test.zip \
--device "iPhone 16" \
--real-device \
--locale "DE" \
--language "de" \
--timezone "Europe/Berlin"
# With network throttling and geolocation
testingbot xcuitest app.ipa app-test.zip \
--device "iPhone 16" \
--real-device \
--throttle-network "3G" \
--geo-location "DE"
Specify one or more capabilities, to indicate on which iOS devices you want to run your tests on.
iOS 18.2›iPhone 16
Loading environments...
Please wait while we load the available browsers and platforms.
Replace the `:id` with the identifier you received during the app upload call. (In this example 4012)
We offer special parameters which you can use to allocate a device:
Regex Input | Result || `"iPhone.*"` | This will allocate any available iPhone device (phone) |
| `"*"` | This will allocate a random available device |
| `"iPhone [8-11]"` | This will allocate either an iPhone 8 or 11 |
| `"iPhone 6.*"` | This will allocate either an iPhone 6 or 6S |
Some Examples:
// find any iPhone, except 6 or 6s
-d '{"capabilities":[{"deviceName":"^(iPhone.*)(?!6|6S)$", "platformName":"iOS", "realDevice": true}]}'
// find any device which name starts with iPad
-d '{"capabilities":[{"deviceName":"iPad.*", "platformName":"iOS", "realDevice": true}]}'
### Tablet Only
You can specify the `tabletOnly` capability when you only want to allocate a tablet device.
### Phone Only
You can specify the `phoneOnly` capability when you only want to allocate a phone device.
-d '{"capabilities":[{"deviceName":"*", "tabletOnly": true, "platformName":"iOS", "realDevice": true}]}'
-d '{"capabilities":[{"deviceName":"*", "phoneOnly": true, "platformName":"iOS", "realDevice": true}]}'
## View XCUITest Results
The XCUITest results will be available in the [TestingBot dashboard](https://testingbot.com/members).
Each test result contains a video, test logs and other meta data generated during the test run.
[CLI](https://testingbot.com#)[cURL](https://testingbot.com#)
By default, the CLI waits for test completion and displays real-time progress:
testingbot xcuitest app.ipa app-test.zip --device "iPhone 16" --real-device
The CLI will show:
- Upload progress for app and test ZIP
- Device allocation status
- Live output from XCUITests
- Final pass/fail status
#### Async Mode
Use `--async` to start tests without waiting for results:
testingbot xcuitest app.ipa app-test.zip --device "iPhone 16" --real-device --async
#### Download Reports
Download a JUnit or HTML report after test completion:
testingbot xcuitest app.ipa app-test.zip --device "iPhone 16" --real-device \
--report junit \
--report-output-dir ./reports
You can also use an API call to get the results from the run(s):
curl -u api_key:api_secret \
"https://api.testingbot.com/v1/app-automate/xcuitest/:id"
Replace the `:id` with the identifier you received during the app upload call.
Was this page helpful? Yes No
## Looking for More Help?
Have questions or need more information?
You can reach us via the following channels:
- [Email us](https://testingbot.com/contact/new)
- [Join our Slack Channel](https://join.slack.com/t/testingb0t/shared_invite/zt-3bcw9xch-jk19~6XPs_xBrsAgAedkCw)
---
URL: https://testingbot.com/support/app-automate/xcuitest/build-testsuite
# Building XCUITest
To test with XCUITest on TestingBot, you will need to build and export the XCUITests you have created.
If you do not have a `zip` file of the XCUITest suite, you can follow the examples below.
The `zip` file should contain a folder similar to this:
xcuitest-sampleUITests-Runner.app
## Using XCode (13 and higher)
1. From the XCode schemes dropdown menu, select your app scheme and **Any iOS Device** as device
2. Click **Product -\> Clean** (`Cmd+Shift+K`)
3. Click **Product -\> Build For -\> Testing** (`Cmd+Shift+U`)
4. Go to **Product -\> Show Build Folder in Finder**
5. In Finder, navigate to **Products -\> Debug-iphoneos**. The directory should contain a file that ends with `-Runner.app`.
Right click and choose the compress option to generate a `zip` file.
## Using XCode (Lower than 13.0)
1. From the XCode schemes dropdown menu, select your app scheme and **Generic iOS device** as device
2. Click **Product -\> Clean** (`Cmd+Shift+K`)
3. Click **Product -\> Build For -\> Testing** (`Cmd+Shift+U`)
4. Right click the `.app` file using the Project Navigator, and select **Show in Finder**
5. In Finder, the directory should contain a file called `-Runner.app`.
Right click and choose the compress option to generate a `zip` file.
## Using Command Line
To build the `.zip` file from the command line, please follow these steps:
1. Change to the project directory and build for testing:
xcodebuild -scheme build-for-testing
2. Go to the **DerivedData** directory. To know the location of this directory, open Xcode and go to **Preferences -\> Locations**.
3. Now you can create the zip file. In the **DerivedData** directory, go to the directory containing the name of your app and some random characters.
cd appname-random_characters
cd Build/Products
cd Debug-iphoneos
zip --symlinks -r .zip -Runner.app
Was this page helpful? Yes No
## Looking for More Help?
Have questions or need more information?
You can reach us via the following channels:
- [Email us](https://testingbot.com/contact/new)
- [Join our Slack Channel](https://join.slack.com/t/testingb0t/shared_invite/zt-3bcw9xch-jk19~6XPs_xBrsAgAedkCw)
---
URL: https://testingbot.com/support/app-automate/xcuitest/change-screen-orientation
# Change Device Orientation
You can change the iOS device's screen orientation before an XCUITest session starts by passing in a `orientation` option.
## Device Orientation Example
See the example below on how to change the orientation. You can choose between `PORTRAIT` (default) and `LANDSCAPE`.
[CLI](https://testingbot.com#)[cURL](https://testingbot.com#)
testingbot xcuitest app.ipa app-test.zip \
--device "iPhone 13" \
--real-device \
--orientation LANDSCAPE
The default orientation is set to `PORTRAIT` for all XCUITests.
curl -u api_key:api_secret \
-X POST "https://api.testingbot.com/v1/app-automate/xcuitest/:id/run" \
-d '{ "options": { "orientation": "LANDSCAPE" }, "capabilities":[{"version":"15.5", "deviceName":"iPhone 13", "platformName":"iOS"}]}' \
-H "Content-Type: application/json"
The default orientation is set to `PORTRAIT` for all XCUITests.
Was this page helpful? Yes No
## Looking for More Help?
Have questions or need more information?
You can reach us via the following channels:
- [Email us](https://testingbot.com/contact/new)
- [Join our Slack Channel](https://join.slack.com/t/testingb0t/shared_invite/zt-3bcw9xch-jk19~6XPs_xBrsAgAedkCw)
---
URL: https://testingbot.com/support/app-automate/xcuitest/instrumentation
# XCUITest Instrumentation Logs
Instrumentation logs are logs generated by XCUITest. These logs list all the steps that were performed during the test, with any errors or meta data available from the XCUITest runner.
These logs are available in the [TestingBot dashboard](https://testingbot.com/members) as well as through the [REST API](https://testingbot.com/support/api).
Was this page helpful? Yes No
## Looking for More Help?
Have questions or need more information?
You can reach us via the following channels:
- [Email us](https://testingbot.com/contact/new)
- [Join our Slack Channel](https://join.slack.com/t/testingb0t/shared_invite/zt-3bcw9xch-jk19~6XPs_xBrsAgAedkCw)
---
URL: https://testingbot.com/support/app-automate/xcuitest/simulate-network-conditions
# Simulate Network Conditions
TestingBot allows you to test your mobile apps under various network conditions, including download speed, upload speed, packet loss and latency.
## Simulate network conditions using a predefined network profile
TestingBot provides a set of predefined network profiles which you can choose from.
Profile Name | Bandwidth down/up (kbps) | Packet Loss (%) | Latency (ms) || Edge | 250/150 | 0 | 300 |
| 3G | 400/100 | 0 | 100 |
| 4G | 18000/9000 | 0 | 100 |
| airplane | 0 | 100 | 0 |
[CLI](https://testingbot.com#)[cURL](https://testingbot.com#)
testingbot xcuitest app.ipa app-test.zip \
--device "iPhone 13" \
--real-device \
--throttle-network "3G"
curl -u api_key:api_secret \
-X POST "https://api.testingbot.com/v1/app-automate/xcuitest/:id/run" \
-d '{ "options": { "throttle_network": "3G" }, "capabilities":[{"version":"15.5", "deviceName":"iPhone 13", "platformName":"iOS"}]}' \
-H "Content-Type: application/json"
## Simulate network conditions using a custom network profile
You can specify a custom set of parameters, including:
- Download rate (kbps)
- Upload rate (kbps)
- Packet loss (%)
- Latency (ms)
[CLI](https://testingbot.com#)[cURL](https://testingbot.com#)
The CLI supports predefined network profiles. For custom network profiles, use the cURL API directly.
# Predefined profiles: 4G, 3G, Edge, airplane
testingbot xcuitest app.ipa app-test.zip \
--device "iPhone 13" \
--real-device \
--throttle-network "Edge"
curl -u api_key:api_secret \
-X POST "https://api.testingbot.com/v1/app-automate/xcuitest/:id/run" \
-d '{ "options": { "throttle_network": { "uploadSpeed": 10240, "downloadSpeed": 10240, "latency": 0, "loss": 0 } }, "capabilities":[{"version":"15.5", "deviceName":"iPhone 13", "platformName":"iOS"}]}' \
-H "Content-Type: application/json"
Was this page helpful? Yes No
## Looking for More Help?
Have questions or need more information?
You can reach us via the following channels:
- [Email us](https://testingbot.com/contact/new)
- [Join our Slack Channel](https://join.slack.com/t/testingb0t/shared_invite/zt-3bcw9xch-jk19~6XPs_xBrsAgAedkCw)
---
URL: https://testingbot.com/support/app-automate/xcuitest/set-localization-options
# Set localization options
TestingBot provides an option to run XCUITests on a localized version of your iOS mobile application.
Configure the language, locale and timezone of the remote iOS device before running your XCUITest suite.
## Setting Language for iOS XCUI Tests
Test a localized version of your mobile app with iOS XCUITest, by changing the language of the application under test.
You will need to specify a `language` option with the ISO code of the language you want to use.
[CLI](https://testingbot.com#)[cURL](https://testingbot.com#)
testingbot xcuitest app.ipa app-test.zip \
--device "iPhone 13" \
--real-device \
--language "fr"
Use an [ISO 639-1 language code](https://en.wikipedia.org/wiki/List_of_ISO_639-1_codes) to set the language of your app.
Your app needs to be compiled with support for this language to notice a change.
curl -u api_key:api_secret \
-X POST "https://api.testingbot.com/v1/app-automate/xcuitest/:id/run" \
-d '{ "options": { "language": "fr" }, "capabilities":[{"version":"15.5", "deviceName":"iPhone 13", "platformName":"iOS"}]}' \
-H "Content-Type: application/json"
Use an [ISO 639-1 language code](https://en.wikipedia.org/wiki/List_of_ISO_639-1_codes) to set the language of your app.
Your app needs to be compiled with support for this language to notice a change.
## Set a locale for XCUI Testing
You can change the locale before running your XCUITest with the `locale` parameter.
Please use the CA format (country name abbreviation). For example: `DE` for Germany.
[CLI](https://testingbot.com#)[cURL](https://testingbot.com#)
testingbot xcuitest app.ipa app-test.zip \
--device "iPhone 13" \
--real-device \
--locale "DE"
curl -u api_key:api_secret \
-X POST "https://api.testingbot.com/v1/app-automate/xcuitest/:id/run" \
-d '{ "options": { "locale": "DE" }, "capabilities":[{"version":"15.5", "deviceName":"iPhone 13", "platformName":"iOS"}]}' \
-H "Content-Type: application/json"
## Change timezone for XCUITests
If you'd like to change the timezone before starting your XCUITests, you can use the `timeZone` option.
Please use a timezone format from the [list of timezones](https://en.wikipedia.org/wiki/List_of_tz_database_time_zones).
[CLI](https://testingbot.com#)[cURL](https://testingbot.com#)
testingbot xcuitest app.ipa app-test.zip \
--device "iPhone 13" \
--real-device \
--timezone "America/New_York"
curl -u api_key:api_secret \
-X POST "https://api.testingbot.com/v1/app-automate/xcuitest/:id/run" \
-d '{ "options": { "timeZone": "New_York" }, "capabilities":[{"version":"15.5", "deviceName":"iPhone 13", "platformName":"iOS"}]}' \
-H "Content-Type: application/json"
Was this page helpful? Yes No
## Looking for More Help?
Have questions or need more information?
You can reach us via the following channels:
- [Email us](https://testingbot.com/contact/new)
- [Join our Slack Channel](https://join.slack.com/t/testingb0t/shared_invite/zt-3bcw9xch-jk19~6XPs_xBrsAgAedkCw)
---
URL: https://testingbot.com/support/app-automate/xcuitest/set-ip-geolocation
# Use IP geolocation
TestingBot's GeoIP feature allows you to test your app from various parts of the world, by using IP addresses in [over 20 different countries](https://testingbot.com/support/web-automate/selenium/test-options#geo).
When you enable GeoIP, traffic originating from the iOS device which is running your XCUITest will come from an IP address in the country you specified.
## GeoIP example
To get started with location testing, you can specify the geoLocation option when starting a XCUITest.
Please see the example below where we specify that the app should connect through Germany.
[CLI](https://testingbot.com#)[cURL](https://testingbot.com#)
testingbot xcuitest app.ipa app-test.zip \
--device "iPhone 13" \
--real-device \
--geo-location "DE"
The `DE` abbreviation is the ISO code of Germany. You can find other [GeoIP country codes](https://testingbot.com/support/web-automate/selenium/test-options#geo) to use.
curl -u api_key:api_secret \
-X POST "https://api.testingbot.com/v1/app-automate/xcuitest/:id/run" \
-d '{ "options": { "geoLocation": "DE" }, "capabilities":[{"version":"15.5", "deviceName":"iPhone 13", "platformName":"iOS"}]}' \
-H "Content-Type: application/json"
The `DE` abbreviation is the ISO code of Germany. You can find other [GeoIP country codes](https://testingbot.com/support/web-automate/selenium/test-options#geo) to use.
Was this page helpful? Yes No
## Looking for More Help?
Have questions or need more information?
You can reach us via the following channels:
- [Email us](https://testingbot.com/contact/new)
- [Join our Slack Channel](https://join.slack.com/t/testingb0t/shared_invite/zt-3bcw9xch-jk19~6XPs_xBrsAgAedkCw)
---
URL: https://testingbot.com/support/app-automate/xcuitest/test-reports
# XCUITest Reports
TestingBot currently offers both test reports from inside the TestingBot member dashboard, or through REST-API where you can use a [JUnit formatted XML report](https://testingbot.com#junit).
## Dashboard Report
When you run XCUITests with TestingBot, you will find the test results, together with a video of the test and various other logs, in the [TestingBot member dashboard](https://testingbot.com/members).
## API report
You can query the TestingBot API to fetch the result of the XCUITest run(s).
[CLI](https://testingbot.com#)[cURL](https://testingbot.com#)
By default, the CLI waits for test completion and displays results in real-time:
testingbot xcuitest app.ipa app-test.zip --device "iPhone 16" --real-device
The CLI will show:
- Upload progress for app and test ZIP
- Device allocation status
- Live output from XCUITests
- Final pass/fail status
Use `--async` to start tests without waiting for results:
testingbot xcuitest app.ipa app-test.zip --device "iPhone 16" --real-device --async
curl -u api_key:api_secret \
"https://api.testingbot.com/v1/app-automate/xcuitest/:id/:run_id"
Replace the `:id` and `:run_id` with the identifiers you received during the app upload call and the run call.
You will get back a response similar to this one:
{"id":216,"created_at":"2024-04-04T15:49:47.000Z","status":"DONE","capabilities":{"deviceName":"iPhone .*","platformName":"iOS"},"success":false,"test":{"sessionId":"ffe-4b453ea45667-61a0a28dbf36-171224576223-3e","environment":{"name":"Safari","os":"iPhone 15 - 17.0","version":"17.0"}},"version":"1.0"}
## JUnit XML report
You can query our API to fetch a JUnit XML report which you can use a post-build step in your CI/CD environment.
**Report Structure**
In the XML report, each session maps to a `testsuite` tag. Inside that tag, multiple `testcase` items are available, each mapping to a single XCUITest.
If a test failed, a `failure` or `error` tag will be available.
[CLI](https://testingbot.com#)[cURL](https://testingbot.com#)
Download the JUnit XML report after test completion:
testingbot xcuitest app.ipa app-test.zip \
--device "iPhone 16" \
--real-device \
--report junit \
--report-output-dir ./reports
You can also download an HTML report:
testingbot xcuitest app.ipa app-test.zip \
--device "iPhone 16" \
--real-device \
--report html \
--report-output-dir ./reports
curl -u api_key:api_secret \
"https://api.testingbot.com/v1/app-automate/xcuitest/:id/report"
Was this page helpful? Yes No
## Looking for More Help?
Have questions or need more information?
You can reach us via the following channels:
- [Email us](https://testingbot.com/contact/new)
- [Join our Slack Channel](https://join.slack.com/t/testingb0t/shared_invite/zt-3bcw9xch-jk19~6XPs_xBrsAgAedkCw)
---
URL: https://testingbot.com/support/web-automate
# Web Automation with TestingBot
TestingBot provides a cloud-based platform for running automated tests on web applications, using various popular testing frameworks and tools.

### [Selenium](https://testingbot.com/support/web-automate/selenium)
Selenium is a popular test-framework, designed to automate website testing.
- [Java](https://testingbot.com/support/web-automate/selenium/java)
- [C#/.NET](https://testingbot.com/support/web-automate/selenium/csharp)
- [NodeJS](https://testingbot.com/support/web-automate/selenium/nodejs)
- [Python](https://testingbot.com/support/web-automate/selenium/python)
- [PHP](https://testingbot.com/support/web-automate/selenium/php)
- [Ruby](https://testingbot.com/support/web-automate/selenium/ruby)

### [Playwright](https://testingbot.com/support/web-automate/playwright)
Playwright is a NodeJS library to automate Chromium, Firefox and WebKit.
- [Java](https://testingbot.com/support/web-automate/playwright/java)
- [C#/.NET](https://testingbot.com/support/web-automate/playwright/dotnet)
- [Python](https://testingbot.com/support/web-automate/playwright/pytest)
- [Jest](https://testingbot.com/support/web-automate/playwright/jest)

### [Puppeteer](https://testingbot.com/support/web-automate/puppeteer)
Puppeteer is a NodeJS library to automate Chrome and Firefox browsers.
- [Jest](https://testingbot.com/support/web-automate/puppeteer/jest)
- [WebdriverIO](https://testingbot.com/support/web-automate/puppeteer/webdriverio)
- [CodeceptJS](https://testingbot.com/support/web-automate/puppeteer/codeceptjs)
- [Scraping](https://testingbot.com/support/web-automate/puppeteer/scraping)

### [Cypress](https://testingbot.com/support/web-automate/cypress)
Cypress is a JavaScript-based end-to-end testing framework.
- [Tutorial](https://testingbot.com/support/web-automate/cypress/tutorial)
---
URL: https://testingbot.com/support/web-automate/headless
# Headless Testing Documentation
Headless testing **significantly minimizes the time it takes to run a test**. Because the browser runs in headless mode, it is not necessary to render the graphical user interface.
This means the browser starts faster and uses less resources, resulting in quicker test execution.
You can still take screenshots during headless mode. Video recording of the test however is not available in headless mode.
## Chrome Headless Testing
To run headless tests on Chrome, simply set `headless: true` in `tb:options`. This tells TestingBot to launch the browser in headless mode and automatically disables video recording.
We recommend using the `LINUX` platform for the fastest headless testing experience.
[Java](https://testingbot.com#)[Python](https://testingbot.com#)[NodeJS](https://testingbot.com#)[WebdriverIO](https://testingbot.com#)[Ruby](https://testingbot.com#)[C#](https://testingbot.com#)[PHP](https://testingbot.com#)[Robot Framework](https://testingbot.com#)
import org.openqa.selenium.WebDriver;
import org.openqa.selenium.chrome.ChromeOptions;
import org.openqa.selenium.remote.RemoteWebDriver;
import java.net.URL;
import java.util.HashMap;
import java.util.Map;
public class HeadlessChromeTest {
public static void main(String[] args) throws Exception {
ChromeOptions chromeOptions = new ChromeOptions();
chromeOptions.setPlatformName("LINUX");
chromeOptions.setBrowserVersion("latest");
Map tbOptions = new HashMap<>();
tbOptions.put("key", "api_key");
tbOptions.put("secret", "api_secret");
tbOptions.put("name", "Chrome Headless Test");
tbOptions.put("headless", true);
chromeOptions.setCapability("tb:options", tbOptions);
WebDriver driver = new RemoteWebDriver(
new URL("https://hub.testingbot.com/wd/hub"),
chromeOptions
);
driver.get("https://www.google.com");
System.out.println("Title: " + driver.getTitle());
driver.quit();
}
}
from selenium import webdriver
from selenium.webdriver.chrome.options import Options
chrome_options = Options()
chrome_options.set_capability("platformName", "LINUX")
chrome_options.set_capability("browserVersion", "latest")
chrome_options.set_capability("tb:options", {
"key": "api_key",
"secret": "api_secret",
"name": "Chrome Headless Test",
"headless": True
})
driver = webdriver.Remote(
command_executor="https://hub.testingbot.com/wd/hub",
options=chrome_options
)
driver.get("https://www.google.com")
print("Title:", driver.title)
driver.quit()
const { Builder } = require('selenium-webdriver');
async function runHeadlessTest() {
const driver = await new Builder()
.forBrowser('chrome')
.withCapabilities({
'browserName': 'chrome',
'browserVersion': 'latest',
'platformName': 'LINUX',
'tb:options': {
'key': 'api_key',
'secret': 'api_secret',
'name': 'Chrome Headless Test',
'headless': true
}
})
.usingServer('https://hub.testingbot.com/wd/hub')
.build();
try {
await driver.get('https://www.google.com');
const title = await driver.getTitle();
console.log('Title:', title);
} finally {
await driver.quit();
}
}
runHeadlessTest();
// wdio.conf.js
exports.config = {
user: 'api_key',
key: 'api_secret',
capabilities: [{
browserName: 'chrome',
browserVersion: 'latest',
platformName: 'LINUX',
'tb:options': {
name: 'Chrome Headless Test',
headless: true
}
}],
services: [['testingbot']],
// Your test configuration
specs: ['./test/specs/**/*.js'],
framework: 'mocha',
reporters: ['spec']
};
// test/specs/example.js
describe('Headless Chrome Test', () => {
it('should load Google', async () => {
await browser.url('https://www.google.com');
const title = await browser.getTitle();
console.log('Title:', title);
});
});
require 'selenium-webdriver'
options = Selenium::WebDriver::Chrome::Options.new
options.platform_name = 'LINUX'
options.browser_version = 'latest'
caps = Selenium::WebDriver::Remote::Capabilities.new(
'tb:options': {
key: 'api_key',
secret: 'api_secret',
name: 'Chrome Headless Test',
headless: true
}
)
driver = Selenium::WebDriver.for(
:remote,
url: 'https://hub.testingbot.com/wd/hub',
capabilities: [options, caps]
)
driver.get('https://www.google.com')
puts "Title: #{driver.title}"
driver.quit
using OpenQA.Selenium;
using OpenQA.Selenium.Chrome;
using OpenQA.Selenium.Remote;
var chromeOptions = new ChromeOptions();
chromeOptions.PlatformName = "LINUX";
chromeOptions.BrowserVersion = "latest";
var tbOptions = new Dictionary
{
["key"] = "api_key",
["secret"] = "api_secret",
["name"] = "Chrome Headless Test",
["headless"] = true
};
chromeOptions.AddAdditionalOption("tb:options", tbOptions);
IWebDriver driver = new RemoteWebDriver(
new Uri("https://hub.testingbot.com/wd/hub"),
chromeOptions.ToCapabilities(),
TimeSpan.FromSeconds(600)
);
driver.Navigate().GoToUrl("https://www.google.com");
Console.WriteLine("Title: " + driver.Title);
driver.Quit();
setCapability('browserVersion', 'latest');
$capabilities->setCapability('platformName', 'LINUX');
$capabilities->setCapability('tb:options', [
'key' => 'api_key',
'secret' => 'api_secret',
'name' => 'Chrome Headless Test',
'headless' => true
]);
$driver = RemoteWebDriver::create(
'https://hub.testingbot.com/wd/hub',
$capabilities,
60000,
60000
);
$driver->get('https://www.google.com');
echo "Title: " . $driver->getTitle() . "\n";
$driver->quit();
?>
Save the example below in a `headless_chrome.robot` file:
***Settings***
Library SeleniumLibrary
Library TestingBot
Library Collections
Test Setup Open Headless Chrome Browser
Test Teardown Close Test Browser
***Variables***
${TB_KEY} api_key
${TB_SECRET} api_secret
***Test Cases***
Chrome Headless Test
Go To https://www.google.com
Title Should Be Google
***Keywords***
Open Headless Chrome Browser
${chrome_options}= Evaluate selenium.webdriver.ChromeOptions() modules=selenium.webdriver
# Set W3C capabilities
Call Method ${chrome_options} set_capability platformName LINUX
Call Method ${chrome_options} set_capability browserVersion latest
# Set TestingBot options with headless enabled
${tb_options}= Create Dictionary name=Chrome Headless Test headless=${True}
Call Method ${chrome_options} set_capability tb:options ${tb_options}
Open Browser about:blank
... remote_url=https://${TB_KEY}:${TB_SECRET}@hub.testingbot.com/wd/hub
... options=${chrome_options}
Close Test Browser
Report TestingBot Status
... ${SUITE_NAME} | ${TEST_NAME}
... ${TEST_STATUS}
... ${TB_KEY}:${TB_SECRET}
Close All Browsers
Save the code below in a `TestingBot.py` file:
import requests
from robot.libraries.BuiltIn import BuiltIn
def report_testingbot_status(name, status, credentials):
selenium = BuiltIn().get_library_instance('SeleniumLibrary')
session_id = selenium.driver.session_id
payload = {'test[name]': name, 'test[success]': int(status == 'PASS')}
key, secret = credentials.split(':')
url = 'https://api.testingbot.com/v1/tests/{0}'.format(session_id)
response = requests.put(url, data=payload, auth=(key, secret))
assert response.status_code == 200, response.text
To run the test:
pip install robotframework-seleniumlibrary requests
PYTHONPATH=$PYTHONPATH:. robot headless_chrome.robot
## Firefox Headless Testing
To run headless tests on Firefox, simply set `headless: true` in `tb:options`. This tells TestingBot to launch the browser in headless mode and automatically disables video recording.
[Java](https://testingbot.com#)[Python](https://testingbot.com#)[NodeJS](https://testingbot.com#)[WebdriverIO](https://testingbot.com#)[Ruby](https://testingbot.com#)[C#](https://testingbot.com#)[PHP](https://testingbot.com#)[Robot Framework](https://testingbot.com#)
import org.openqa.selenium.WebDriver;
import org.openqa.selenium.firefox.FirefoxOptions;
import org.openqa.selenium.remote.RemoteWebDriver;
import java.net.URL;
import java.util.HashMap;
import java.util.Map;
public class HeadlessFirefoxTest {
public static void main(String[] args) throws Exception {
FirefoxOptions firefoxOptions = new FirefoxOptions();
firefoxOptions.setPlatformName("LINUX");
firefoxOptions.setBrowserVersion("latest");
Map tbOptions = new HashMap<>();
tbOptions.put("key", "api_key");
tbOptions.put("secret", "api_secret");
tbOptions.put("name", "Firefox Headless Test");
tbOptions.put("headless", true);
firefoxOptions.setCapability("tb:options", tbOptions);
WebDriver driver = new RemoteWebDriver(
new URL("https://hub.testingbot.com/wd/hub"),
firefoxOptions
);
driver.get("https://www.google.com");
System.out.println("Title: " + driver.getTitle());
driver.quit();
}
}
from selenium import webdriver
from selenium.webdriver.firefox.options import Options
firefox_options = Options()
firefox_options.set_capability("platformName", "LINUX")
firefox_options.set_capability("browserVersion", "latest")
firefox_options.set_capability("tb:options", {
"key": "api_key",
"secret": "api_secret",
"name": "Firefox Headless Test",
"headless": True
})
driver = webdriver.Remote(
command_executor="https://hub.testingbot.com/wd/hub",
options=firefox_options
)
driver.get("https://www.google.com")
print("Title:", driver.title)
driver.quit()
const { Builder } = require('selenium-webdriver');
async function runHeadlessTest() {
const driver = await new Builder()
.forBrowser('firefox')
.withCapabilities({
'browserName': 'firefox',
'browserVersion': 'latest',
'platformName': 'LINUX',
'tb:options': {
'key': 'api_key',
'secret': 'api_secret',
'name': 'Firefox Headless Test',
'headless': true
}
})
.usingServer('https://hub.testingbot.com/wd/hub')
.build();
try {
await driver.get('https://www.google.com');
const title = await driver.getTitle();
console.log('Title:', title);
} finally {
await driver.quit();
}
}
runHeadlessTest();
// wdio.conf.js
exports.config = {
user: 'api_key',
key: 'api_secret',
capabilities: [{
browserName: 'firefox',
browserVersion: 'latest',
platformName: 'LINUX',
'tb:options': {
name: 'Firefox Headless Test',
headless: true
}
}],
services: [['testingbot']],
// Your test configuration
specs: ['./test/specs/**/*.js'],
framework: 'mocha',
reporters: ['spec']
};
// test/specs/example.js
describe('Headless Firefox Test', () => {
it('should load Google', async () => {
await browser.url('https://www.google.com');
const title = await browser.getTitle();
console.log('Title:', title);
});
});
require 'selenium-webdriver'
options = Selenium::WebDriver::Firefox::Options.new
options.platform_name = 'LINUX'
options.browser_version = 'latest'
caps = Selenium::WebDriver::Remote::Capabilities.new(
'tb:options': {
key: 'api_key',
secret: 'api_secret',
name: 'Firefox Headless Test',
headless: true
}
)
driver = Selenium::WebDriver.for(
:remote,
url: 'https://hub.testingbot.com/wd/hub',
capabilities: [options, caps]
)
driver.get('https://www.google.com')
puts "Title: #{driver.title}"
driver.quit
using OpenQA.Selenium;
using OpenQA.Selenium.Firefox;
using OpenQA.Selenium.Remote;
var firefoxOptions = new FirefoxOptions();
firefoxOptions.PlatformName = "LINUX";
firefoxOptions.BrowserVersion = "latest";
var tbOptions = new Dictionary
{
["key"] = "api_key",
["secret"] = "api_secret",
["name"] = "Firefox Headless Test",
["headless"] = true
};
firefoxOptions.AddAdditionalOption("tb:options", tbOptions);
IWebDriver driver = new RemoteWebDriver(
new Uri("https://hub.testingbot.com/wd/hub"),
firefoxOptions.ToCapabilities(),
TimeSpan.FromSeconds(600)
);
driver.Navigate().GoToUrl("https://www.google.com");
Console.WriteLine("Title: " + driver.Title);
driver.Quit();
setCapability('browserVersion', 'latest');
$capabilities->setCapability('platformName', 'LINUX');
$capabilities->setCapability('tb:options', [
'key' => 'api_key',
'secret' => 'api_secret',
'name' => 'Firefox Headless Test',
'headless' => true
]);
$driver = RemoteWebDriver::create(
'https://hub.testingbot.com/wd/hub',
$capabilities,
60000,
60000
);
$driver->get('https://www.google.com');
echo "Title: " . $driver->getTitle() . "\n";
$driver->quit();
?>
Save the example below in a `headless_firefox.robot` file:
***Settings***
Library SeleniumLibrary
Library TestingBot
Library Collections
Test Setup Open Headless Firefox Browser
Test Teardown Close Test Browser
***Variables***
${TB_KEY} api_key
${TB_SECRET} api_secret
***Test Cases***
Firefox Headless Test
Go To https://www.google.com
Title Should Be Google
***Keywords***
Open Headless Firefox Browser
${firefox_options}= Evaluate selenium.webdriver.FirefoxOptions() modules=selenium.webdriver
# Set W3C capabilities
Call Method ${firefox_options} set_capability platformName LINUX
Call Method ${firefox_options} set_capability browserVersion latest
# Set TestingBot options with headless enabled
${tb_options}= Create Dictionary name=Firefox Headless Test headless=${True}
Call Method ${firefox_options} set_capability tb:options ${tb_options}
Open Browser about:blank
... remote_url=https://${TB_KEY}:${TB_SECRET}@hub.testingbot.com/wd/hub
... options=${firefox_options}
Close Test Browser
Report TestingBot Status
... ${SUITE_NAME} | ${TEST_NAME}
... ${TEST_STATUS}
... ${TB_KEY}:${TB_SECRET}
Close All Browsers
Save the code below in a `TestingBot.py` file:
import requests
from robot.libraries.BuiltIn import BuiltIn
def report_testingbot_status(name, status, credentials):
selenium = BuiltIn().get_library_instance('SeleniumLibrary')
session_id = selenium.driver.session_id
payload = {'test[name]': name, 'test[success]': int(status == 'PASS')}
key, secret = credentials.split(':')
url = 'https://api.testingbot.com/v1/tests/{0}'.format(session_id)
response = requests.put(url, data=payload, auth=(key, secret))
assert response.status_code == 200, response.text
To run the test:
pip install robotframework-seleniumlibrary requests
PYTHONPATH=$PYTHONPATH:. robot headless_firefox.robot
## Microsoft Edge Headless Testing
To run headless tests on Microsoft Edge, simply set `headless: true` in `tb:options`. This tells TestingBot to launch the browser in headless mode and automatically disables video recording.
We recommend using the `WIN11` or `WIN10` platform for Edge headless testing.
[Java](https://testingbot.com#)[Python](https://testingbot.com#)[NodeJS](https://testingbot.com#)[WebdriverIO](https://testingbot.com#)[Ruby](https://testingbot.com#)[C#](https://testingbot.com#)[PHP](https://testingbot.com#)[Robot Framework](https://testingbot.com#)
import org.openqa.selenium.WebDriver;
import org.openqa.selenium.edge.EdgeOptions;
import org.openqa.selenium.remote.RemoteWebDriver;
import java.net.URL;
import java.util.HashMap;
import java.util.Map;
public class HeadlessEdgeTest {
public static void main(String[] args) throws Exception {
EdgeOptions edgeOptions = new EdgeOptions();
edgeOptions.setPlatformName("WIN11");
edgeOptions.setBrowserVersion("latest");
Map tbOptions = new HashMap<>();
tbOptions.put("key", "api_key");
tbOptions.put("secret", "api_secret");
tbOptions.put("name", "Edge Headless Test");
tbOptions.put("headless", true);
edgeOptions.setCapability("tb:options", tbOptions);
WebDriver driver = new RemoteWebDriver(
new URL("https://hub.testingbot.com/wd/hub"),
edgeOptions
);
driver.get("https://www.google.com");
System.out.println("Title: " + driver.getTitle());
driver.quit();
}
}
from selenium import webdriver
from selenium.webdriver.edge.options import Options
edge_options = Options()
edge_options.set_capability("platformName", "WIN11")
edge_options.set_capability("browserVersion", "latest")
edge_options.set_capability("tb:options", {
"key": "api_key",
"secret": "api_secret",
"name": "Edge Headless Test",
"headless": True
})
driver = webdriver.Remote(
command_executor="https://hub.testingbot.com/wd/hub",
options=edge_options
)
driver.get("https://www.google.com")
print("Title:", driver.title)
driver.quit()
const { Builder } = require('selenium-webdriver');
async function runHeadlessTest() {
const driver = await new Builder()
.forBrowser('MicrosoftEdge')
.withCapabilities({
'browserName': 'MicrosoftEdge',
'browserVersion': 'latest',
'platformName': 'WIN11',
'tb:options': {
'key': 'api_key',
'secret': 'api_secret',
'name': 'Edge Headless Test',
'headless': true
}
})
.usingServer('https://hub.testingbot.com/wd/hub')
.build();
try {
await driver.get('https://www.google.com');
const title = await driver.getTitle();
console.log('Title:', title);
} finally {
await driver.quit();
}
}
runHeadlessTest();
// wdio.conf.js
exports.config = {
user: 'api_key',
key: 'api_secret',
capabilities: [{
browserName: 'MicrosoftEdge',
browserVersion: 'latest',
platformName: 'WIN11',
'tb:options': {
name: 'Edge Headless Test',
headless: true
}
}],
services: [['testingbot']],
// Your test configuration
specs: ['./test/specs/**/*.js'],
framework: 'mocha',
reporters: ['spec']
};
// test/specs/example.js
describe('Headless Edge Test', () => {
it('should load Google', async () => {
await browser.url('https://www.google.com');
const title = await browser.getTitle();
console.log('Title:', title);
});
});
require 'selenium-webdriver'
options = Selenium::WebDriver::Edge::Options.new
options.platform_name = 'WIN11'
options.browser_version = 'latest'
caps = Selenium::WebDriver::Remote::Capabilities.new(
'tb:options': {
key: 'api_key',
secret: 'api_secret',
name: 'Edge Headless Test',
headless: true
}
)
driver = Selenium::WebDriver.for(
:remote,
url: 'https://hub.testingbot.com/wd/hub',
capabilities: [options, caps]
)
driver.get('https://www.google.com')
puts "Title: #{driver.title}"
driver.quit
using OpenQA.Selenium;
using OpenQA.Selenium.Edge;
using OpenQA.Selenium.Remote;
var edgeOptions = new EdgeOptions();
edgeOptions.PlatformName = "WIN11";
edgeOptions.BrowserVersion = "latest";
var tbOptions = new Dictionary
{
["key"] = "api_key",
["secret"] = "api_secret",
["name"] = "Edge Headless Test",
["headless"] = true
};
edgeOptions.AddAdditionalOption("tb:options", tbOptions);
IWebDriver driver = new RemoteWebDriver(
new Uri("https://hub.testingbot.com/wd/hub"),
edgeOptions.ToCapabilities(),
TimeSpan.FromSeconds(600)
);
driver.Navigate().GoToUrl("https://www.google.com");
Console.WriteLine("Title: " + driver.Title);
driver.Quit();
setCapability('browserVersion', 'latest');
$capabilities->setCapability('platformName', 'WIN11');
$capabilities->setCapability('tb:options', [
'key' => 'api_key',
'secret' => 'api_secret',
'name' => 'Edge Headless Test',
'headless' => true
]);
$driver = RemoteWebDriver::create(
'https://hub.testingbot.com/wd/hub',
$capabilities,
60000,
60000
);
$driver->get('https://www.google.com');
echo "Title: " . $driver->getTitle() . "\n";
$driver->quit();
?>
Save the example below in a `headless_edge.robot` file:
***Settings***
Library SeleniumLibrary
Library TestingBot
Library Collections
Test Setup Open Headless Edge Browser
Test Teardown Close Test Browser
***Variables***
${TB_KEY} api_key
${TB_SECRET} api_secret
***Test Cases***
Edge Headless Test
Go To https://www.google.com
Title Should Be Google
***Keywords***
Open Headless Edge Browser
${edge_options}= Evaluate selenium.webdriver.EdgeOptions() modules=selenium.webdriver
# Set W3C capabilities
Call Method ${edge_options} set_capability platformName WIN11
Call Method ${edge_options} set_capability browserVersion latest
# Set TestingBot options with headless enabled
${tb_options}= Create Dictionary name=Edge Headless Test headless=${True}
Call Method ${edge_options} set_capability tb:options ${tb_options}
Open Browser about:blank
... remote_url=https://${TB_KEY}:${TB_SECRET}@hub.testingbot.com/wd/hub
... options=${edge_options}
Close Test Browser
Report TestingBot Status
... ${SUITE_NAME} | ${TEST_NAME}
... ${TEST_STATUS}
... ${TB_KEY}:${TB_SECRET}
Close All Browsers
Save the code below in a `TestingBot.py` file:
import requests
from robot.libraries.BuiltIn import BuiltIn
def report_testingbot_status(name, status, credentials):
selenium = BuiltIn().get_library_instance('SeleniumLibrary')
session_id = selenium.driver.session_id
payload = {'test[name]': name, 'test[success]': int(status == 'PASS')}
key, secret = credentials.split(':')
url = 'https://api.testingbot.com/v1/tests/{0}'.format(session_id)
response = requests.put(url, data=payload, auth=(key, secret))
assert response.status_code == 200, response.text
To run the test:
pip install robotframework-seleniumlibrary requests
PYTHONPATH=$PYTHONPATH:. robot headless_edge.robot
## Safari Headless Testing
**Safari does not support headless mode.** Apple has not implemented headless functionality in Safari or the SafariDriver.
If you need to run Safari tests, they will always run in headed (visible) mode. For headless testing requirements, consider using Chrome, Firefox or Edge as alternatives.
At TestingBot we run all Safari 17 and higher versions on Apple Silicon for maximum performance.
## Mobile Headless Testing
TestingBot uses Appium to run mobile tests. Appium supports running your iOS and Android tests in headless mode (no screen rendering).
To enable headless mode for mobile testing, specify the `isHeadless` capability in your test configuration.
### iOS Headless Testing
[Java](https://testingbot.com#)[Python](https://testingbot.com#)[NodeJS](https://testingbot.com#)[Ruby](https://testingbot.com#)[C#](https://testingbot.com#)
import io.appium.java_client.ios.IOSDriver;
import io.appium.java_client.ios.options.XCUITestOptions;
import java.net.URL;
import java.util.HashMap;
import java.util.Map;
public class HeadlessIOSTest {
public static void main(String[] args) throws Exception {
XCUITestOptions options = new XCUITestOptions();
options.setPlatformName("iOS");
options.setPlatformVersion("18.0");
options.setDeviceName("iPhone 16");
options.setBrowserName("safari");
options.setCapability("appium:isHeadless", true);
Map tbOptions = new HashMap<>();
tbOptions.put("key", "api_key");
tbOptions.put("secret", "api_secret");
tbOptions.put("name", "iOS Headless Test");
options.setCapability("tb:options", tbOptions);
IOSDriver driver = new IOSDriver(
new URL("https://hub.testingbot.com/wd/hub"),
options
);
driver.get("https://www.google.com");
System.out.println("Title: " + driver.getTitle());
driver.quit();
}
}
from appium import webdriver
from appium.options.ios import XCUITestOptions
options = XCUITestOptions()
options.platform_name = "iOS"
options.platform_version = "18.0"
options.device_name = "iPhone 16"
options.browser_name = "safari"
options.set_capability("appium:isHeadless", True)
options.set_capability("tb:options", {
"key": "api_key",
"secret": "api_secret",
"name": "iOS Headless Test"
})
driver = webdriver.Remote(
command_executor="https://hub.testingbot.com/wd/hub",
options=options
)
driver.get("https://www.google.com")
print("Title:", driver.title)
driver.quit()
const { remote } = require('webdriverio');
async function runHeadlessIOSTest() {
const driver = await remote({
hostname: 'hub.testingbot.com',
port: 443,
path: '/wd/hub',
protocol: 'https',
capabilities: {
'platformName': 'iOS',
'appium:platformVersion': '18.0',
'appium:deviceName': 'iPhone 16',
'browserName': 'safari',
'appium:isHeadless': true,
'tb:options': {
'key': 'api_key',
'secret': 'api_secret',
'name': 'iOS Headless Test'
}
}
});
await driver.url('https://www.google.com');
const title = await driver.getTitle();
console.log('Title:', title);
await driver.deleteSession();
}
runHeadlessIOSTest();
require 'appium_lib'
caps = {
platformName: 'iOS',
'appium:platformVersion': '18.0',
'appium:deviceName': 'iPhone 16',
browserName: 'safari',
'appium:isHeadless': true,
'tb:options': {
key: 'api_key',
secret: 'api_secret',
name: 'iOS Headless Test'
}
}
opts = {
caps: caps,
appium_lib: {
server_url: 'https://hub.testingbot.com/wd/hub'
}
}
driver = Appium::Driver.new(opts, true)
driver.start_driver
driver.get('https://www.google.com')
puts "Title: #{driver.title}"
driver.quit
using OpenQA.Selenium.Appium;
using OpenQA.Selenium.Appium.iOS;
var options = new AppiumOptions();
options.PlatformName = "iOS";
options.AddAdditionalAppiumOption("appium:platformVersion", "18.0");
options.AddAdditionalAppiumOption("appium:deviceName", "iPhone 16");
options.AddAdditionalAppiumOption("browserName", "safari");
options.AddAdditionalAppiumOption("appium:isHeadless", true);
var tbOptions = new Dictionary
{
["key"] = "api_key",
["secret"] = "api_secret",
["name"] = "iOS Headless Test"
};
options.AddAdditionalAppiumOption("tb:options", tbOptions);
var driver = new IOSDriver(
new Uri("https://hub.testingbot.com/wd/hub"),
options,
TimeSpan.FromSeconds(600)
);
driver.Navigate().GoToUrl("https://www.google.com");
Console.WriteLine("Title: " + driver.Title);
driver.Quit();
### Android Headless Testing
[Java](https://testingbot.com#)[Python](https://testingbot.com#)[NodeJS](https://testingbot.com#)[Ruby](https://testingbot.com#)[C#](https://testingbot.com#)
import io.appium.java_client.android.AndroidDriver;
import io.appium.java_client.android.options.UiAutomator2Options;
import java.net.URL;
import java.util.HashMap;
import java.util.Map;
public class HeadlessAndroidTest {
public static void main(String[] args) throws Exception {
UiAutomator2Options options = new UiAutomator2Options();
options.setPlatformName("Android");
options.setPlatformVersion("14.0");
options.setDeviceName("Pixel 8");
options.setBrowserName("chrome");
options.setCapability("appium:isHeadless", true);
Map tbOptions = new HashMap<>();
tbOptions.put("key", "api_key");
tbOptions.put("secret", "api_secret");
tbOptions.put("name", "Android Headless Test");
options.setCapability("tb:options", tbOptions);
AndroidDriver driver = new AndroidDriver(
new URL("https://hub.testingbot.com/wd/hub"),
options
);
driver.get("https://www.google.com");
System.out.println("Title: " + driver.getTitle());
driver.quit();
}
}
from appium import webdriver
from appium.options.android import UiAutomator2Options
options = UiAutomator2Options()
options.platform_name = "Android"
options.platform_version = "14.0"
options.device_name = "Pixel 8"
options.browser_name = "chrome"
options.set_capability("appium:isHeadless", True)
options.set_capability("tb:options", {
"key": "api_key",
"secret": "api_secret",
"name": "Android Headless Test"
})
driver = webdriver.Remote(
command_executor="https://hub.testingbot.com/wd/hub",
options=options
)
driver.get("https://www.google.com")
print("Title:", driver.title)
driver.quit()
const { remote } = require('webdriverio');
async function runHeadlessAndroidTest() {
const driver = await remote({
hostname: 'hub.testingbot.com',
port: 443,
path: '/wd/hub',
protocol: 'https',
capabilities: {
'platformName': 'Android',
'appium:platformVersion': '14.0',
'appium:deviceName': 'Pixel 8',
'browserName': 'chrome',
'appium:isHeadless': true,
'tb:options': {
'key': 'api_key',
'secret': 'api_secret',
'name': 'Android Headless Test'
}
}
});
await driver.url('https://www.google.com');
const title = await driver.getTitle();
console.log('Title:', title);
await driver.deleteSession();
}
runHeadlessAndroidTest();
require 'appium_lib'
caps = {
platformName: 'Android',
'appium:platformVersion': '14.0',
'appium:deviceName': 'Pixel 8',
browserName: 'chrome',
'appium:isHeadless': true,
'tb:options': {
key: 'api_key',
secret: 'api_secret',
name: 'Android Headless Test'
}
}
opts = {
caps: caps,
appium_lib: {
server_url: 'https://hub.testingbot.com/wd/hub'
}
}
driver = Appium::Driver.new(opts, true)
driver.start_driver
driver.get('https://www.google.com')
puts "Title: #{driver.title}"
driver.quit
using OpenQA.Selenium.Appium;
using OpenQA.Selenium.Appium.Android;
var options = new AppiumOptions();
options.PlatformName = "Android";
options.AddAdditionalAppiumOption("appium:platformVersion", "14.0");
options.AddAdditionalAppiumOption("appium:deviceName", "Pixel 8");
options.AddAdditionalAppiumOption("browserName", "chrome");
options.AddAdditionalAppiumOption("appium:isHeadless", true);
var tbOptions = new Dictionary
{
["key"] = "api_key",
["secret"] = "api_secret",
["name"] = "Android Headless Test"
};
options.AddAdditionalAppiumOption("tb:options", tbOptions);
var driver = new AndroidDriver(
new Uri("https://hub.testingbot.com/wd/hub"),
options,
TimeSpan.FromSeconds(600)
);
driver.Navigate().GoToUrl("https://www.google.com");
Console.WriteLine("Title: " + driver.Title);
driver.Quit();
## Benefits of Headless Testing
- **Faster Test Execution:** Without rendering the UI, tests start and complete more quickly.
- **Lower Resource Usage:** Headless browsers consume less memory and CPU.
- **Ideal for CI/CD:** Perfect for automated pipelines where visual output is not needed.
- **Screenshots Supported:** You can still capture screenshots during headless tests.
## Limitations
- **No Video Recording:** Video recording is not available during headless tests.
- **Debugging:** Debugging can be more challenging without seeing the browser UI.
For debugging purposes, we recommend switching to headed mode temporarily to visually inspect the browser during test execution.
Was this page helpful? Yes No
## Looking for More Help?
Have questions or need more information?
You can reach us via the following channels:
- [Email us](https://testingbot.com/contact/new)
- [Join our Slack Channel](https://join.slack.com/t/testingb0t/shared_invite/zt-3bcw9xch-jk19~6XPs_xBrsAgAedkCw)
---
URL: https://testingbot.com/support/web-automate/browsers
- [Desktop Browsers & Emulators](https://testingbot.com#)
- [Physical Mobile Devices](https://testingbot.com/support/app-automate/devices)
# List of available browsers
Below is a list of **6031 combinations** available for testing. Click a combination to see how to run an automated or manual test.
DesiredCapabilities caps = new DesiredCapabilities();
caps.setCapability("platform", "%platform%");
caps.setCapability("version", "%version%");
caps.setCapability("browserName", "%browser%");
DesiredCapabilities caps = new DesiredCapabilities();
caps.setCapability("platform", "%platform%");
caps.setCapability("version", "%version%");
caps.setCapability("browserName", "%browser%");
caps.setCapability("deviceName", "%deviceName%");
caps.setCapability("platformName", "%platformName%");
### Test Configuration
These are the DesiredCapabilities necessary to run an Automated Test:
[Run Manual Test](https://testingbot.com/members/manual/new)

### Windows 11
(64-bit)

#### Chrome
[beta](https://testingbot.com# "Chrome")[dev](https://testingbot.com# "Chrome")[143](https://testingbot.com# "Chrome 143")[142](https://testingbot.com# "Chrome 142")[141](https://testingbot.com# "Chrome 141")[140](https://testingbot.com# "Chrome 140")[139](https://testingbot.com# "Chrome 139")[138](https://testingbot.com# "Chrome 138")[137](https://testingbot.com# "Chrome 137")[136](https://testingbot.com# "Chrome 136")[135](https://testingbot.com# "Chrome 135")[134](https://testingbot.com# "Chrome 134")[133](https://testingbot.com# "Chrome 133")[132](https://testingbot.com# "Chrome 132")[131](https://testingbot.com# "Chrome 131")[130](https://testingbot.com# "Chrome 130")[129](https://testingbot.com# "Chrome 129")[128](https://testingbot.com# "Chrome 128")[127](https://testingbot.com# "Chrome 127")[126](https://testingbot.com# "Chrome 126")[125](https://testingbot.com# "Chrome 125")[124](https://testingbot.com# "Chrome 124")[123](https://testingbot.com# "Chrome 123")[122](https://testingbot.com# "Chrome 122")[121](https://testingbot.com# "Chrome 121")[120](https://testingbot.com# "Chrome 120")[119](https://testingbot.com# "Chrome 119")[118](https://testingbot.com# "Chrome 118")[117](https://testingbot.com# "Chrome 117")[116](https://testingbot.com# "Chrome 116")[115](https://testingbot.com# "Chrome 115")[114](https://testingbot.com# "Chrome 114")[113](https://testingbot.com# "Chrome 113")[112](https://testingbot.com# "Chrome 112")[111](https://testingbot.com# "Chrome 111")[110](https://testingbot.com# "Chrome 110")[109](https://testingbot.com# "Chrome 109")[108](https://testingbot.com# "Chrome 108")[107](https://testingbot.com# "Chrome 107")[106](https://testingbot.com# "Chrome 106")[105](https://testingbot.com# "Chrome 105")[104](https://testingbot.com# "Chrome 104")[103](https://testingbot.com# "Chrome 103")[102](https://testingbot.com# "Chrome 102")[101](https://testingbot.com# "Chrome 101")[100](https://testingbot.com# "Chrome 100")[99](https://testingbot.com# "Chrome 99")[98](https://testingbot.com# "Chrome 98")[97](https://testingbot.com# "Chrome 97")[96](https://testingbot.com# "Chrome 96")[95](https://testingbot.com# "Chrome 95")[94](https://testingbot.com# "Chrome 94")[93](https://testingbot.com# "Chrome 93")[92](https://testingbot.com# "Chrome 92")[91](https://testingbot.com# "Chrome 91")[90](https://testingbot.com# "Chrome 90")[89](https://testingbot.com# "Chrome 89")[88](https://testingbot.com# "Chrome 88")[87](https://testingbot.com# "Chrome 87")[86](https://testingbot.com# "Chrome 86")[85](https://testingbot.com# "Chrome 85")[84](https://testingbot.com# "Chrome 84")[83](https://testingbot.com# "Chrome 83")[81](https://testingbot.com# "Chrome 81")[80](https://testingbot.com# "Chrome 80")[79](https://testingbot.com# "Chrome 79")[78](https://testingbot.com# "Chrome 78")[77](https://testingbot.com# "Chrome 77")[76](https://testingbot.com# "Chrome 76")[75](https://testingbot.com# "Chrome 75")[74](https://testingbot.com# "Chrome 74")[73](https://testingbot.com# "Chrome 73")[72](https://testingbot.com# "Chrome 72")[71](https://testingbot.com# "Chrome 71")[70](https://testingbot.com# "Chrome 70")[69](https://testingbot.com# "Chrome 69")[68](https://testingbot.com# "Chrome 68")[67](https://testingbot.com# "Chrome 67")[66](https://testingbot.com# "Chrome 66")[65](https://testingbot.com# "Chrome 65")[64](https://testingbot.com# "Chrome 64")[63](https://testingbot.com# "Chrome 63")[62](https://testingbot.com# "Chrome 62")[61](https://testingbot.com# "Chrome 61")[60](https://testingbot.com# "Chrome 60")[59](https://testingbot.com# "Chrome 59")[58](https://testingbot.com# "Chrome 58")[57](https://testingbot.com# "Chrome 57")[56](https://testingbot.com# "Chrome 56")[55](https://testingbot.com# "Chrome 55")[54](https://testingbot.com# "Chrome 54")[53](https://testingbot.com# "Chrome 53")[52](https://testingbot.com# "Chrome 52")[51](https://testingbot.com# "Chrome 51")[50](https://testingbot.com# "Chrome 50")[49](https://testingbot.com# "Chrome 49")[48](https://testingbot.com# "Chrome 48")[47](https://testingbot.com# "Chrome 47")[46](https://testingbot.com# "Chrome 46")[45](https://testingbot.com# "Chrome 45")[44](https://testingbot.com# "Chrome 44")[43](https://testingbot.com# "Chrome 43")[42](https://testingbot.com# "Chrome 42")[41](https://testingbot.com# "Chrome 41")[40](https://testingbot.com# "Chrome 40")[39](https://testingbot.com# "Chrome 39")[38](https://testingbot.com# "Chrome 38")[37](https://testingbot.com# "Chrome 37")[36](https://testingbot.com# "Chrome 36")

#### Firefox
[dev](https://testingbot.com# "FF dev")[beta](https://testingbot.com# "FF beta")[146](https://testingbot.com# "FF 146")[145](https://testingbot.com# "FF 145")[144](https://testingbot.com# "FF 144")[143](https://testingbot.com# "FF 143")[142](https://testingbot.com# "FF 142")[141](https://testingbot.com# "FF 141")[140](https://testingbot.com# "FF 140")[139](https://testingbot.com# "FF 139")[138](https://testingbot.com# "FF 138")[137](https://testingbot.com# "FF 137")[136](https://testingbot.com# "FF 136")[135](https://testingbot.com# "FF 135")[134](https://testingbot.com# "FF 134")[133](https://testingbot.com# "FF 133")[132](https://testingbot.com# "FF 132")[131](https://testingbot.com# "FF 131")[130](https://testingbot.com# "FF 130")[129](https://testingbot.com# "FF 129")[128](https://testingbot.com# "FF 128")[127](https://testingbot.com# "FF 127")[126](https://testingbot.com# "FF 126")[125](https://testingbot.com# "FF 125")[124](https://testingbot.com# "FF 124")[123](https://testingbot.com# "FF 123")[122](https://testingbot.com# "FF 122")[121](https://testingbot.com# "FF 121")[120](https://testingbot.com# "FF 120")[119](https://testingbot.com# "FF 119")[118](https://testingbot.com# "FF 118")[117](https://testingbot.com# "FF 117")[116](https://testingbot.com# "FF 116")[115](https://testingbot.com# "FF 115")[114](https://testingbot.com# "FF 114")[113](https://testingbot.com# "FF 113")[112](https://testingbot.com# "FF 112")[111](https://testingbot.com# "FF 111")[110](https://testingbot.com# "FF 110")[109](https://testingbot.com# "FF 109")[108](https://testingbot.com# "FF 108")[107](https://testingbot.com# "FF 107")[106](https://testingbot.com# "FF 106")[105](https://testingbot.com# "FF 105")[104](https://testingbot.com# "FF 104")[103](https://testingbot.com# "FF 103")[102](https://testingbot.com# "FF 102")[101](https://testingbot.com# "FF 101")[100](https://testingbot.com# "FF 100")[99](https://testingbot.com# "FF 99")[98](https://testingbot.com# "FF 98")[97](https://testingbot.com# "FF 97")[96](https://testingbot.com# "FF 96")[95](https://testingbot.com# "FF 95")[94](https://testingbot.com# "FF 94")[93](https://testingbot.com# "FF 93")[92](https://testingbot.com# "FF 92")[91](https://testingbot.com# "FF 91")[90](https://testingbot.com# "FF 90")[89](https://testingbot.com# "FF 89")[88](https://testingbot.com# "FF 88")[87](https://testingbot.com# "FF 87")[86](https://testingbot.com# "FF 86")[85](https://testingbot.com# "FF 85")[84](https://testingbot.com# "FF 84")[83](https://testingbot.com# "FF 83")[82](https://testingbot.com# "FF 82")[81](https://testingbot.com# "FF 81")[80](https://testingbot.com# "FF 80")[79](https://testingbot.com# "FF 79")[78](https://testingbot.com# "FF 78")[77](https://testingbot.com# "FF 77")[76](https://testingbot.com# "FF 76")[75](https://testingbot.com# "FF 75")[74](https://testingbot.com# "FF 74")[73](https://testingbot.com# "FF 73")[72](https://testingbot.com# "FF 72")[71](https://testingbot.com# "FF 71")[70](https://testingbot.com# "FF 70")[69](https://testingbot.com# "FF 69")[68](https://testingbot.com# "FF 68")[67](https://testingbot.com# "FF 67")[66](https://testingbot.com# "FF 66")[65](https://testingbot.com# "FF 65")[64](https://testingbot.com# "FF 64")[63](https://testingbot.com# "FF 63")[62](https://testingbot.com# "FF 62")[61](https://testingbot.com# "FF 61")[60](https://testingbot.com# "FF 60")[59](https://testingbot.com# "FF 59")[58](https://testingbot.com# "FF 58")[57](https://testingbot.com# "FF 57")[56](https://testingbot.com# "FF 56")[55](https://testingbot.com# "FF 55")[54](https://testingbot.com# "FF 54")[53](https://testingbot.com# "FF 53")[52](https://testingbot.com# "FF 52")[51](https://testingbot.com# "FF 51")[50](https://testingbot.com# "FF 50")[49](https://testingbot.com# "FF 49")[48](https://testingbot.com# "FF 48")[47](https://testingbot.com# "FF 47")[46](https://testingbot.com# "FF 46")[45](https://testingbot.com# "FF 45")[44](https://testingbot.com# "FF 44")[43](https://testingbot.com# "FF 43")[42](https://testingbot.com# "FF 42")[41](https://testingbot.com# "FF 41")[40](https://testingbot.com# "FF 40")[39](https://testingbot.com# "FF 39")[38](https://testingbot.com# "FF 38")[37](https://testingbot.com# "FF 37")[36](https://testingbot.com# "FF 36")[35](https://testingbot.com# "FF 35")[34](https://testingbot.com# "FF 34")[33](https://testingbot.com# "FF 33")[32](https://testingbot.com# "FF 32")[31](https://testingbot.com# "FF 31")[30](https://testingbot.com# "FF 30")[29](https://testingbot.com# "FF 29")[28](https://testingbot.com# "FF 28")[27](https://testingbot.com# "FF 27")[26](https://testingbot.com# "FF 26")[25](https://testingbot.com# "FF 25")[24](https://testingbot.com# "FF 24")[23](https://testingbot.com# "FF 23")[22](https://testingbot.com# "FF 22")[21](https://testingbot.com# "FF 21")[20](https://testingbot.com# "FF 20")[19](https://testingbot.com# "FF 19")[18](https://testingbot.com# "FF 18")[17](https://testingbot.com# "FF 17")[16](https://testingbot.com# "FF 16")[15](https://testingbot.com# "FF 15")[14](https://testingbot.com# "FF 14")[13](https://testingbot.com# "FF 13")[12](https://testingbot.com# "FF 12")[11](https://testingbot.com# "FF 11")[10](https://testingbot.com# "FF 10")[9](https://testingbot.com# "FF 9")[8](https://testingbot.com# "FF 8")[7](https://testingbot.com# "FF 7")[6](https://testingbot.com# "FF 6")[5](https://testingbot.com# "FF 5")[4](https://testingbot.com# "FF 4")

#### Edge
[dev](https://testingbot.com# "Edge")[beta](https://testingbot.com# "Edge")[143](https://testingbot.com# "Edge 143")[142](https://testingbot.com# "Edge 142")[141](https://testingbot.com# "Edge 141")[140](https://testingbot.com# "Edge 140")[139](https://testingbot.com# "Edge 139")[138](https://testingbot.com# "Edge 138")[137](https://testingbot.com# "Edge 137")[136](https://testingbot.com# "Edge 136")[135](https://testingbot.com# "Edge 135")[134](https://testingbot.com# "Edge 134")[133](https://testingbot.com# "Edge 133")[132](https://testingbot.com# "Edge 132")[131](https://testingbot.com# "Edge 131")[130](https://testingbot.com# "Edge 130")[129](https://testingbot.com# "Edge 129")[128](https://testingbot.com# "Edge 128")[127](https://testingbot.com# "Edge 127")[126](https://testingbot.com# "Edge 126")[125](https://testingbot.com# "Edge 125")[124](https://testingbot.com# "Edge 124")[123](https://testingbot.com# "Edge 123")[122](https://testingbot.com# "Edge 122")[121](https://testingbot.com# "Edge 121")[120](https://testingbot.com# "Edge 120")[119](https://testingbot.com# "Edge 119")[118](https://testingbot.com# "Edge 118")[117](https://testingbot.com# "Edge 117")[116](https://testingbot.com# "Edge 116")[115](https://testingbot.com# "Edge 115")[114](https://testingbot.com# "Edge 114")[113](https://testingbot.com# "Edge 113")[112](https://testingbot.com# "Edge 112")[111](https://testingbot.com# "Edge 111")[110](https://testingbot.com# "Edge 110")[109](https://testingbot.com# "Edge 109")[108](https://testingbot.com# "Edge 108")[107](https://testingbot.com# "Edge 107")[106](https://testingbot.com# "Edge 106")[105](https://testingbot.com# "Edge 105")[104](https://testingbot.com# "Edge 104")[103](https://testingbot.com# "Edge 103")[102](https://testingbot.com# "Edge 102")[101](https://testingbot.com# "Edge 101")[100](https://testingbot.com# "Edge 100")[99](https://testingbot.com# "Edge 99")[98](https://testingbot.com# "Edge 98")[97](https://testingbot.com# "Edge 97")[96](https://testingbot.com# "Edge 96")[95](https://testingbot.com# "Edge 95")[94](https://testingbot.com# "Edge 94")[93](https://testingbot.com# "Edge 93")[92](https://testingbot.com# "Edge 92")[91](https://testingbot.com# "Edge 91")[90](https://testingbot.com# "Edge 90")[89](https://testingbot.com# "Edge 89")[88](https://testingbot.com# "Edge 88")[87](https://testingbot.com# "Edge 87")[86](https://testingbot.com# "Edge 86")[85](https://testingbot.com# "Edge 85")[84](https://testingbot.com# "Edge 84")[83](https://testingbot.com# "Edge 83")[81](https://testingbot.com# "Edge 81")[80](https://testingbot.com# "Edge 80")[79](https://testingbot.com# "Edge 79")

#### Opera
[125](https://testingbot.com# "Opera 125")[124](https://testingbot.com# "Opera 124")[123](https://testingbot.com# "Opera 123")[122](https://testingbot.com# "Opera 122")[121](https://testingbot.com# "Opera 121")[120](https://testingbot.com# "Opera 120")[119](https://testingbot.com# "Opera 119")[118](https://testingbot.com# "Opera 118")[117](https://testingbot.com# "Opera 117")[116](https://testingbot.com# "Opera 116")[115](https://testingbot.com# "Opera 115")[114](https://testingbot.com# "Opera 114")[113](https://testingbot.com# "Opera 113")[112](https://testingbot.com# "Opera 112")[111](https://testingbot.com# "Opera 111")[110](https://testingbot.com# "Opera 110")[109](https://testingbot.com# "Opera 109")[108](https://testingbot.com# "Opera 108")[107](https://testingbot.com# "Opera 107")[106](https://testingbot.com# "Opera 106")[105](https://testingbot.com# "Opera 105")[104](https://testingbot.com# "Opera 104")[103](https://testingbot.com# "Opera 103")[102](https://testingbot.com# "Opera 102")[101](https://testingbot.com# "Opera 101")[100](https://testingbot.com# "Opera 100")[99](https://testingbot.com# "Opera 99")[98](https://testingbot.com# "Opera 98")[97](https://testingbot.com# "Opera 97")[96](https://testingbot.com# "Opera 96")[95](https://testingbot.com# "Opera 95")[94](https://testingbot.com# "Opera 94")[93](https://testingbot.com# "Opera 93")[92](https://testingbot.com# "Opera 92")[91](https://testingbot.com# "Opera 91")[90](https://testingbot.com# "Opera 90")[89](https://testingbot.com# "Opera 89")[88](https://testingbot.com# "Opera 88")[87](https://testingbot.com# "Opera 87")[86](https://testingbot.com# "Opera 86")[85](https://testingbot.com# "Opera 85")[84](https://testingbot.com# "Opera 84")[83](https://testingbot.com# "Opera 83")[82](https://testingbot.com# "Opera 82")[81](https://testingbot.com# "Opera 81")[80](https://testingbot.com# "Opera 80")[79](https://testingbot.com# "Opera 79")[78](https://testingbot.com# "Opera 78")[77](https://testingbot.com# "Opera 77")[76](https://testingbot.com# "Opera 76")[75](https://testingbot.com# "Opera 75")[74](https://testingbot.com# "Opera 74")[73](https://testingbot.com# "Opera 73")[72](https://testingbot.com# "Opera 72")[71](https://testingbot.com# "Opera 71")[70](https://testingbot.com# "Opera 70")[69](https://testingbot.com# "Opera 69")[68](https://testingbot.com# "Opera 68")[67](https://testingbot.com# "Opera 67")[66](https://testingbot.com# "Opera 66")[65](https://testingbot.com# "Opera 65")[64](https://testingbot.com# "Opera 64")[63](https://testingbot.com# "Opera 63")[62](https://testingbot.com# "Opera 62")[60](https://testingbot.com# "Opera 60")[59](https://testingbot.com# "Opera 59")[58](https://testingbot.com# "Opera 58")[57](https://testingbot.com# "Opera 57")[56](https://testingbot.com# "Opera 56")[55](https://testingbot.com# "Opera 55")[54](https://testingbot.com# "Opera 54")[53](https://testingbot.com# "Opera 53")[52](https://testingbot.com# "Opera 52")[51](https://testingbot.com# "Opera 51")[50](https://testingbot.com# "Opera 50")

### Windows 10
(64-bit)

#### Chrome
[beta](https://testingbot.com# "Chrome")[dev](https://testingbot.com# "Chrome")[143](https://testingbot.com# "Chrome 143")[142](https://testingbot.com# "Chrome 142")[141](https://testingbot.com# "Chrome 141")[140](https://testingbot.com# "Chrome 140")[139](https://testingbot.com# "Chrome 139")[138](https://testingbot.com# "Chrome 138")[137](https://testingbot.com# "Chrome 137")[136](https://testingbot.com# "Chrome 136")[135](https://testingbot.com# "Chrome 135")[134](https://testingbot.com# "Chrome 134")[133](https://testingbot.com# "Chrome 133")[132](https://testingbot.com# "Chrome 132")[131](https://testingbot.com# "Chrome 131")[130](https://testingbot.com# "Chrome 130")[129](https://testingbot.com# "Chrome 129")[128](https://testingbot.com# "Chrome 128")[127](https://testingbot.com# "Chrome 127")[126](https://testingbot.com# "Chrome 126")[125](https://testingbot.com# "Chrome 125")[124](https://testingbot.com# "Chrome 124")[123](https://testingbot.com# "Chrome 123")[122](https://testingbot.com# "Chrome 122")[121](https://testingbot.com# "Chrome 121")[120](https://testingbot.com# "Chrome 120")[119](https://testingbot.com# "Chrome 119")[118](https://testingbot.com# "Chrome 118")[117](https://testingbot.com# "Chrome 117")[116](https://testingbot.com# "Chrome 116")[115](https://testingbot.com# "Chrome 115")[114](https://testingbot.com# "Chrome 114")[113](https://testingbot.com# "Chrome 113")[112](https://testingbot.com# "Chrome 112")[111](https://testingbot.com# "Chrome 111")[110](https://testingbot.com# "Chrome 110")[109](https://testingbot.com# "Chrome 109")[108](https://testingbot.com# "Chrome 108")[107](https://testingbot.com# "Chrome 107")[106](https://testingbot.com# "Chrome 106")[105](https://testingbot.com# "Chrome 105")[104](https://testingbot.com# "Chrome 104")[103](https://testingbot.com# "Chrome 103")[102](https://testingbot.com# "Chrome 102")[101](https://testingbot.com# "Chrome 101")[100](https://testingbot.com# "Chrome 100")[99](https://testingbot.com# "Chrome 99")[98](https://testingbot.com# "Chrome 98")[97](https://testingbot.com# "Chrome 97")[96](https://testingbot.com# "Chrome 96")[95](https://testingbot.com# "Chrome 95")[94](https://testingbot.com# "Chrome 94")[93](https://testingbot.com# "Chrome 93")[92](https://testingbot.com# "Chrome 92")[91](https://testingbot.com# "Chrome 91")[90](https://testingbot.com# "Chrome 90")[89](https://testingbot.com# "Chrome 89")[88](https://testingbot.com# "Chrome 88")[87](https://testingbot.com# "Chrome 87")[86](https://testingbot.com# "Chrome 86")[85](https://testingbot.com# "Chrome 85")[84](https://testingbot.com# "Chrome 84")[83](https://testingbot.com# "Chrome 83")[81](https://testingbot.com# "Chrome 81")[80](https://testingbot.com# "Chrome 80")[79](https://testingbot.com# "Chrome 79")[78](https://testingbot.com# "Chrome 78")[77](https://testingbot.com# "Chrome 77")[76](https://testingbot.com# "Chrome 76")[75](https://testingbot.com# "Chrome 75")[74](https://testingbot.com# "Chrome 74")[73](https://testingbot.com# "Chrome 73")[72](https://testingbot.com# "Chrome 72")[71](https://testingbot.com# "Chrome 71")[70](https://testingbot.com# "Chrome 70")[69](https://testingbot.com# "Chrome 69")[68](https://testingbot.com# "Chrome 68")[67](https://testingbot.com# "Chrome 67")[66](https://testingbot.com# "Chrome 66")[65](https://testingbot.com# "Chrome 65")[64](https://testingbot.com# "Chrome 64")[63](https://testingbot.com# "Chrome 63")[62](https://testingbot.com# "Chrome 62")[61](https://testingbot.com# "Chrome 61")[60](https://testingbot.com# "Chrome 60")[59](https://testingbot.com# "Chrome 59")[58](https://testingbot.com# "Chrome 58")[57](https://testingbot.com# "Chrome 57")[56](https://testingbot.com# "Chrome 56")[55](https://testingbot.com# "Chrome 55")[54](https://testingbot.com# "Chrome 54")[53](https://testingbot.com# "Chrome 53")[52](https://testingbot.com# "Chrome 52")[51](https://testingbot.com# "Chrome 51")[50](https://testingbot.com# "Chrome 50")[49](https://testingbot.com# "Chrome 49")[48](https://testingbot.com# "Chrome 48")[47](https://testingbot.com# "Chrome 47")[46](https://testingbot.com# "Chrome 46")[45](https://testingbot.com# "Chrome 45")[44](https://testingbot.com# "Chrome 44")[43](https://testingbot.com# "Chrome 43")[42](https://testingbot.com# "Chrome 42")[41](https://testingbot.com# "Chrome 41")[40](https://testingbot.com# "Chrome 40")[39](https://testingbot.com# "Chrome 39")[38](https://testingbot.com# "Chrome 38")[37](https://testingbot.com# "Chrome 37")[36](https://testingbot.com# "Chrome 36")

#### Firefox
[dev](https://testingbot.com# "FF dev")[beta](https://testingbot.com# "FF beta")[146](https://testingbot.com# "FF 146")[145](https://testingbot.com# "FF 145")[144](https://testingbot.com# "FF 144")[143](https://testingbot.com# "FF 143")[142](https://testingbot.com# "FF 142")[141](https://testingbot.com# "FF 141")[140](https://testingbot.com# "FF 140")[139](https://testingbot.com# "FF 139")[138](https://testingbot.com# "FF 138")[137](https://testingbot.com# "FF 137")[136](https://testingbot.com# "FF 136")[135](https://testingbot.com# "FF 135")[134](https://testingbot.com# "FF 134")[133](https://testingbot.com# "FF 133")[132](https://testingbot.com# "FF 132")[131](https://testingbot.com# "FF 131")[130](https://testingbot.com# "FF 130")[129](https://testingbot.com# "FF 129")[128](https://testingbot.com# "FF 128")[127](https://testingbot.com# "FF 127")[126](https://testingbot.com# "FF 126")[125](https://testingbot.com# "FF 125")[124](https://testingbot.com# "FF 124")[123](https://testingbot.com# "FF 123")[122](https://testingbot.com# "FF 122")[121](https://testingbot.com# "FF 121")[120](https://testingbot.com# "FF 120")[119](https://testingbot.com# "FF 119")[118](https://testingbot.com# "FF 118")[117](https://testingbot.com# "FF 117")[116](https://testingbot.com# "FF 116")[115](https://testingbot.com# "FF 115")[114](https://testingbot.com# "FF 114")[113](https://testingbot.com# "FF 113")[112](https://testingbot.com# "FF 112")[111](https://testingbot.com# "FF 111")[110](https://testingbot.com# "FF 110")[109](https://testingbot.com# "FF 109")[108](https://testingbot.com# "FF 108")[107](https://testingbot.com# "FF 107")[106](https://testingbot.com# "FF 106")[105](https://testingbot.com# "FF 105")[104](https://testingbot.com# "FF 104")[103](https://testingbot.com# "FF 103")[102](https://testingbot.com# "FF 102")[101](https://testingbot.com# "FF 101")[100](https://testingbot.com# "FF 100")[99](https://testingbot.com# "FF 99")[98](https://testingbot.com# "FF 98")[97](https://testingbot.com# "FF 97")[96](https://testingbot.com# "FF 96")[95](https://testingbot.com# "FF 95")[94](https://testingbot.com# "FF 94")[93](https://testingbot.com# "FF 93")[92](https://testingbot.com# "FF 92")[91](https://testingbot.com# "FF 91")[90](https://testingbot.com# "FF 90")[89](https://testingbot.com# "FF 89")[88](https://testingbot.com# "FF 88")[87](https://testingbot.com# "FF 87")[86](https://testingbot.com# "FF 86")[85](https://testingbot.com# "FF 85")[84](https://testingbot.com# "FF 84")[83](https://testingbot.com# "FF 83")[82](https://testingbot.com# "FF 82")[81](https://testingbot.com# "FF 81")[80](https://testingbot.com# "FF 80")[79](https://testingbot.com# "FF 79")[78](https://testingbot.com# "FF 78")[77](https://testingbot.com# "FF 77")[76](https://testingbot.com# "FF 76")[75](https://testingbot.com# "FF 75")[74](https://testingbot.com# "FF 74")[73](https://testingbot.com# "FF 73")[72](https://testingbot.com# "FF 72")[71](https://testingbot.com# "FF 71")[70](https://testingbot.com# "FF 70")[69](https://testingbot.com# "FF 69")[68](https://testingbot.com# "FF 68")[67](https://testingbot.com# "FF 67")[66](https://testingbot.com# "FF 66")[65](https://testingbot.com# "FF 65")[64](https://testingbot.com# "FF 64")[63](https://testingbot.com# "FF 63")[62](https://testingbot.com# "FF 62")[61](https://testingbot.com# "FF 61")[60](https://testingbot.com# "FF 60")[59](https://testingbot.com# "FF 59")[58](https://testingbot.com# "FF 58")[57](https://testingbot.com# "FF 57")[56](https://testingbot.com# "FF 56")[55](https://testingbot.com# "FF 55")[54](https://testingbot.com# "FF 54")[53](https://testingbot.com# "FF 53")[52](https://testingbot.com# "FF 52")[51](https://testingbot.com# "FF 51")[50](https://testingbot.com# "FF 50")[49](https://testingbot.com# "FF 49")[48](https://testingbot.com# "FF 48")[47](https://testingbot.com# "FF 47")[46](https://testingbot.com# "FF 46")[45](https://testingbot.com# "FF 45")[44](https://testingbot.com# "FF 44")[43](https://testingbot.com# "FF 43")[42](https://testingbot.com# "FF 42")[41](https://testingbot.com# "FF 41")[40](https://testingbot.com# "FF 40")[39](https://testingbot.com# "FF 39")[38](https://testingbot.com# "FF 38")[37](https://testingbot.com# "FF 37")[36](https://testingbot.com# "FF 36")[35](https://testingbot.com# "FF 35")[34](https://testingbot.com# "FF 34")[33](https://testingbot.com# "FF 33")[32](https://testingbot.com# "FF 32")[31](https://testingbot.com# "FF 31")[30](https://testingbot.com# "FF 30")[29](https://testingbot.com# "FF 29")[28](https://testingbot.com# "FF 28")[27](https://testingbot.com# "FF 27")[26](https://testingbot.com# "FF 26")[25](https://testingbot.com# "FF 25")[24](https://testingbot.com# "FF 24")[23](https://testingbot.com# "FF 23")[22](https://testingbot.com# "FF 22")[21](https://testingbot.com# "FF 21")[20](https://testingbot.com# "FF 20")[19](https://testingbot.com# "FF 19")[18](https://testingbot.com# "FF 18")[17](https://testingbot.com# "FF 17")[16](https://testingbot.com# "FF 16")[15](https://testingbot.com# "FF 15")[14](https://testingbot.com# "FF 14")[13](https://testingbot.com# "FF 13")[12](https://testingbot.com# "FF 12")[11](https://testingbot.com# "FF 11")[10](https://testingbot.com# "FF 10")[9](https://testingbot.com# "FF 9")[8](https://testingbot.com# "FF 8")[7](https://testingbot.com# "FF 7")[6](https://testingbot.com# "FF 6")[5](https://testingbot.com# "FF 5")[4](https://testingbot.com# "FF 4")

#### IE
[11](https://testingbot.com# "IE11")

#### Edge
[dev](https://testingbot.com# "Edge")[beta](https://testingbot.com# "Edge")[143](https://testingbot.com# "Edge 143")[142](https://testingbot.com# "Edge 142")[141](https://testingbot.com# "Edge 141")[140](https://testingbot.com# "Edge 140")[139](https://testingbot.com# "Edge 139")[138](https://testingbot.com# "Edge 138")[137](https://testingbot.com# "Edge 137")[136](https://testingbot.com# "Edge 136")[135](https://testingbot.com# "Edge 135")[134](https://testingbot.com# "Edge 134")[133](https://testingbot.com# "Edge 133")[132](https://testingbot.com# "Edge 132")[131](https://testingbot.com# "Edge 131")[130](https://testingbot.com# "Edge 130")[129](https://testingbot.com# "Edge 129")[128](https://testingbot.com# "Edge 128")[127](https://testingbot.com# "Edge 127")[126](https://testingbot.com# "Edge 126")[125](https://testingbot.com# "Edge 125")[124](https://testingbot.com# "Edge 124")[123](https://testingbot.com# "Edge 123")[122](https://testingbot.com# "Edge 122")[121](https://testingbot.com# "Edge 121")[120](https://testingbot.com# "Edge 120")[119](https://testingbot.com# "Edge 119")[118](https://testingbot.com# "Edge 118")[117](https://testingbot.com# "Edge 117")[116](https://testingbot.com# "Edge 116")[115](https://testingbot.com# "Edge 115")[114](https://testingbot.com# "Edge 114")[113](https://testingbot.com# "Edge 113")[112](https://testingbot.com# "Edge 112")[111](https://testingbot.com# "Edge 111")[110](https://testingbot.com# "Edge 110")[109](https://testingbot.com# "Edge 109")[108](https://testingbot.com# "Edge 108")[107](https://testingbot.com# "Edge 107")[106](https://testingbot.com# "Edge 106")[105](https://testingbot.com# "Edge 105")[104](https://testingbot.com# "Edge 104")[103](https://testingbot.com# "Edge 103")[102](https://testingbot.com# "Edge 102")[101](https://testingbot.com# "Edge 101")[100](https://testingbot.com# "Edge 100")[99](https://testingbot.com# "Edge 99")[98](https://testingbot.com# "Edge 98")[97](https://testingbot.com# "Edge 97")[96](https://testingbot.com# "Edge 96")[95](https://testingbot.com# "Edge 95")[94](https://testingbot.com# "Edge 94")[93](https://testingbot.com# "Edge 93")[92](https://testingbot.com# "Edge 92")[91](https://testingbot.com# "Edge 91")[90](https://testingbot.com# "Edge 90")[89](https://testingbot.com# "Edge 89")[88](https://testingbot.com# "Edge 88")[87](https://testingbot.com# "Edge 87")[86](https://testingbot.com# "Edge 86")[85](https://testingbot.com# "Edge 85")[84](https://testingbot.com# "Edge 84")[83](https://testingbot.com# "Edge 83")[81](https://testingbot.com# "Edge 81")[80](https://testingbot.com# "Edge 80")[79](https://testingbot.com# "Edge 79")

#### Opera
[125](https://testingbot.com# "Opera 125")[124](https://testingbot.com# "Opera 124")[123](https://testingbot.com# "Opera 123")[122](https://testingbot.com# "Opera 122")[121](https://testingbot.com# "Opera 121")[120](https://testingbot.com# "Opera 120")[119](https://testingbot.com# "Opera 119")[118](https://testingbot.com# "Opera 118")[117](https://testingbot.com# "Opera 117")[116](https://testingbot.com# "Opera 116")[115](https://testingbot.com# "Opera 115")[114](https://testingbot.com# "Opera 114")[113](https://testingbot.com# "Opera 113")[112](https://testingbot.com# "Opera 112")[111](https://testingbot.com# "Opera 111")[110](https://testingbot.com# "Opera 110")[109](https://testingbot.com# "Opera 109")[108](https://testingbot.com# "Opera 108")[107](https://testingbot.com# "Opera 107")[106](https://testingbot.com# "Opera 106")[105](https://testingbot.com# "Opera 105")[104](https://testingbot.com# "Opera 104")[103](https://testingbot.com# "Opera 103")[102](https://testingbot.com# "Opera 102")[101](https://testingbot.com# "Opera 101")[100](https://testingbot.com# "Opera 100")[99](https://testingbot.com# "Opera 99")[98](https://testingbot.com# "Opera 98")[97](https://testingbot.com# "Opera 97")[96](https://testingbot.com# "Opera 96")[95](https://testingbot.com# "Opera 95")[94](https://testingbot.com# "Opera 94")[93](https://testingbot.com# "Opera 93")[92](https://testingbot.com# "Opera 92")[91](https://testingbot.com# "Opera 91")[90](https://testingbot.com# "Opera 90")[89](https://testingbot.com# "Opera 89")[88](https://testingbot.com# "Opera 88")[87](https://testingbot.com# "Opera 87")[86](https://testingbot.com# "Opera 86")[85](https://testingbot.com# "Opera 85")[84](https://testingbot.com# "Opera 84")[83](https://testingbot.com# "Opera 83")[82](https://testingbot.com# "Opera 82")[81](https://testingbot.com# "Opera 81")[80](https://testingbot.com# "Opera 80")[79](https://testingbot.com# "Opera 79")[78](https://testingbot.com# "Opera 78")[77](https://testingbot.com# "Opera 77")[76](https://testingbot.com# "Opera 76")[75](https://testingbot.com# "Opera 75")[74](https://testingbot.com# "Opera 74")[73](https://testingbot.com# "Opera 73")[72](https://testingbot.com# "Opera 72")[71](https://testingbot.com# "Opera 71")[70](https://testingbot.com# "Opera 70")[69](https://testingbot.com# "Opera 69")[68](https://testingbot.com# "Opera 68")[67](https://testingbot.com# "Opera 67")[66](https://testingbot.com# "Opera 66")[65](https://testingbot.com# "Opera 65")[64](https://testingbot.com# "Opera 64")[63](https://testingbot.com# "Opera 63")[62](https://testingbot.com# "Opera 62")[60](https://testingbot.com# "Opera 60")[59](https://testingbot.com# "Opera 59")[58](https://testingbot.com# "Opera 58")[57](https://testingbot.com# "Opera 57")[56](https://testingbot.com# "Opera 56")[55](https://testingbot.com# "Opera 55")[54](https://testingbot.com# "Opera 54")[53](https://testingbot.com# "Opera 53")[52](https://testingbot.com# "Opera 52")[51](https://testingbot.com# "Opera 51")[50](https://testingbot.com# "Opera 50")

### Windows 8.1
(64-bit)

#### Chrome
[109](https://testingbot.com# "Chrome 109")[108](https://testingbot.com# "Chrome 108")[107](https://testingbot.com# "Chrome 107")[106](https://testingbot.com# "Chrome 106")[105](https://testingbot.com# "Chrome 105")[104](https://testingbot.com# "Chrome 104")[103](https://testingbot.com# "Chrome 103")[102](https://testingbot.com# "Chrome 102")[101](https://testingbot.com# "Chrome 101")[100](https://testingbot.com# "Chrome 100")[99](https://testingbot.com# "Chrome 99")[98](https://testingbot.com# "Chrome 98")[97](https://testingbot.com# "Chrome 97")[96](https://testingbot.com# "Chrome 96")[95](https://testingbot.com# "Chrome 95")[94](https://testingbot.com# "Chrome 94")[93](https://testingbot.com# "Chrome 93")[92](https://testingbot.com# "Chrome 92")[91](https://testingbot.com# "Chrome 91")[90](https://testingbot.com# "Chrome 90")[89](https://testingbot.com# "Chrome 89")[88](https://testingbot.com# "Chrome 88")[87](https://testingbot.com# "Chrome 87")[86](https://testingbot.com# "Chrome 86")[85](https://testingbot.com# "Chrome 85")[84](https://testingbot.com# "Chrome 84")[83](https://testingbot.com# "Chrome 83")[81](https://testingbot.com# "Chrome 81")[80](https://testingbot.com# "Chrome 80")[79](https://testingbot.com# "Chrome 79")[78](https://testingbot.com# "Chrome 78")[77](https://testingbot.com# "Chrome 77")[76](https://testingbot.com# "Chrome 76")[75](https://testingbot.com# "Chrome 75")[74](https://testingbot.com# "Chrome 74")[73](https://testingbot.com# "Chrome 73")[72](https://testingbot.com# "Chrome 72")[71](https://testingbot.com# "Chrome 71")[70](https://testingbot.com# "Chrome 70")[69](https://testingbot.com# "Chrome 69")[68](https://testingbot.com# "Chrome 68")[67](https://testingbot.com# "Chrome 67")[66](https://testingbot.com# "Chrome 66")[65](https://testingbot.com# "Chrome 65")[64](https://testingbot.com# "Chrome 64")[63](https://testingbot.com# "Chrome 63")[62](https://testingbot.com# "Chrome 62")[61](https://testingbot.com# "Chrome 61")[60](https://testingbot.com# "Chrome 60")[59](https://testingbot.com# "Chrome 59")[58](https://testingbot.com# "Chrome 58")[57](https://testingbot.com# "Chrome 57")[56](https://testingbot.com# "Chrome 56")[55](https://testingbot.com# "Chrome 55")[54](https://testingbot.com# "Chrome 54")[53](https://testingbot.com# "Chrome 53")[52](https://testingbot.com# "Chrome 52")[51](https://testingbot.com# "Chrome 51")[50](https://testingbot.com# "Chrome 50")[49](https://testingbot.com# "Chrome 49")[48](https://testingbot.com# "Chrome 48")[47](https://testingbot.com# "Chrome 47")[46](https://testingbot.com# "Chrome 46")[45](https://testingbot.com# "Chrome 45")[44](https://testingbot.com# "Chrome 44")[43](https://testingbot.com# "Chrome 43")[42](https://testingbot.com# "Chrome 42")[41](https://testingbot.com# "Chrome 41")[40](https://testingbot.com# "Chrome 40")[39](https://testingbot.com# "Chrome 39")[38](https://testingbot.com# "Chrome 38")[37](https://testingbot.com# "Chrome 37")[36](https://testingbot.com# "Chrome 36")

#### Firefox
[115](https://testingbot.com# "FF 115")[114](https://testingbot.com# "FF 114")[113](https://testingbot.com# "FF 113")[112](https://testingbot.com# "FF 112")[111](https://testingbot.com# "FF 111")[110](https://testingbot.com# "FF 110")[109](https://testingbot.com# "FF 109")[108](https://testingbot.com# "FF 108")[107](https://testingbot.com# "FF 107")[106](https://testingbot.com# "FF 106")[105](https://testingbot.com# "FF 105")[104](https://testingbot.com# "FF 104")[103](https://testingbot.com# "FF 103")[102](https://testingbot.com# "FF 102")[101](https://testingbot.com# "FF 101")[100](https://testingbot.com# "FF 100")[99](https://testingbot.com# "FF 99")[98](https://testingbot.com# "FF 98")[97](https://testingbot.com# "FF 97")[96](https://testingbot.com# "FF 96")[95](https://testingbot.com# "FF 95")[94](https://testingbot.com# "FF 94")[93](https://testingbot.com# "FF 93")[92](https://testingbot.com# "FF 92")[91](https://testingbot.com# "FF 91")[90](https://testingbot.com# "FF 90")[89](https://testingbot.com# "FF 89")[88](https://testingbot.com# "FF 88")[87](https://testingbot.com# "FF 87")[86](https://testingbot.com# "FF 86")[85](https://testingbot.com# "FF 85")[84](https://testingbot.com# "FF 84")[83](https://testingbot.com# "FF 83")[82](https://testingbot.com# "FF 82")[81](https://testingbot.com# "FF 81")[80](https://testingbot.com# "FF 80")[79](https://testingbot.com# "FF 79")[78](https://testingbot.com# "FF 78")[77](https://testingbot.com# "FF 77")[76](https://testingbot.com# "FF 76")[75](https://testingbot.com# "FF 75")[74](https://testingbot.com# "FF 74")[73](https://testingbot.com# "FF 73")[72](https://testingbot.com# "FF 72")[71](https://testingbot.com# "FF 71")[70](https://testingbot.com# "FF 70")[69](https://testingbot.com# "FF 69")[68](https://testingbot.com# "FF 68")[67](https://testingbot.com# "FF 67")[66](https://testingbot.com# "FF 66")[65](https://testingbot.com# "FF 65")[64](https://testingbot.com# "FF 64")[63](https://testingbot.com# "FF 63")[62](https://testingbot.com# "FF 62")[61](https://testingbot.com# "FF 61")[60](https://testingbot.com# "FF 60")[59](https://testingbot.com# "FF 59")[58](https://testingbot.com# "FF 58")[57](https://testingbot.com# "FF 57")[56](https://testingbot.com# "FF 56")[55](https://testingbot.com# "FF 55")[54](https://testingbot.com# "FF 54")[53](https://testingbot.com# "FF 53")[52](https://testingbot.com# "FF 52")[51](https://testingbot.com# "FF 51")[50](https://testingbot.com# "FF 50")[49](https://testingbot.com# "FF 49")[48](https://testingbot.com# "FF 48")[47](https://testingbot.com# "FF 47")[46](https://testingbot.com# "FF 46")[45](https://testingbot.com# "FF 45")[44](https://testingbot.com# "FF 44")[43](https://testingbot.com# "FF 43")[42](https://testingbot.com# "FF 42")[41](https://testingbot.com# "FF 41")[40](https://testingbot.com# "FF 40")[39](https://testingbot.com# "FF 39")[38](https://testingbot.com# "FF 38")[37](https://testingbot.com# "FF 37")[36](https://testingbot.com# "FF 36")[35](https://testingbot.com# "FF 35")[34](https://testingbot.com# "FF 34")[33](https://testingbot.com# "FF 33")[32](https://testingbot.com# "FF 32")[31](https://testingbot.com# "FF 31")[30](https://testingbot.com# "FF 30")[29](https://testingbot.com# "FF 29")[28](https://testingbot.com# "FF 28")[27](https://testingbot.com# "FF 27")[26](https://testingbot.com# "FF 26")[25](https://testingbot.com# "FF 25")[24](https://testingbot.com# "FF 24")[23](https://testingbot.com# "FF 23")[22](https://testingbot.com# "FF 22")[21](https://testingbot.com# "FF 21")[20](https://testingbot.com# "FF 20")[19](https://testingbot.com# "FF 19")[18](https://testingbot.com# "FF 18")[17](https://testingbot.com# "FF 17")[16](https://testingbot.com# "FF 16")[15](https://testingbot.com# "FF 15")[14](https://testingbot.com# "FF 14")[13](https://testingbot.com# "FF 13")[12](https://testingbot.com# "FF 12")[11](https://testingbot.com# "FF 11")[10](https://testingbot.com# "FF 10")[9](https://testingbot.com# "FF 9")[8](https://testingbot.com# "FF 8")[7](https://testingbot.com# "FF 7")[6](https://testingbot.com# "FF 6")[5](https://testingbot.com# "FF 5")[4](https://testingbot.com# "FF 4")

#### IE
[11](https://testingbot.com# "IE11")

### Windows 8
(64-bit)

#### Chrome
[109](https://testingbot.com# "Chrome 109")[108](https://testingbot.com# "Chrome 108")[107](https://testingbot.com# "Chrome 107")[106](https://testingbot.com# "Chrome 106")[105](https://testingbot.com# "Chrome 105")[104](https://testingbot.com# "Chrome 104")[103](https://testingbot.com# "Chrome 103")[102](https://testingbot.com# "Chrome 102")[101](https://testingbot.com# "Chrome 101")[100](https://testingbot.com# "Chrome 100")[99](https://testingbot.com# "Chrome 99")[98](https://testingbot.com# "Chrome 98")[97](https://testingbot.com# "Chrome 97")[96](https://testingbot.com# "Chrome 96")[95](https://testingbot.com# "Chrome 95")[94](https://testingbot.com# "Chrome 94")[93](https://testingbot.com# "Chrome 93")[92](https://testingbot.com# "Chrome 92")[91](https://testingbot.com# "Chrome 91")[90](https://testingbot.com# "Chrome 90")[89](https://testingbot.com# "Chrome 89")[88](https://testingbot.com# "Chrome 88")[87](https://testingbot.com# "Chrome 87")[86](https://testingbot.com# "Chrome 86")[85](https://testingbot.com# "Chrome 85")[84](https://testingbot.com# "Chrome 84")[83](https://testingbot.com# "Chrome 83")[81](https://testingbot.com# "Chrome 81")[80](https://testingbot.com# "Chrome 80")[79](https://testingbot.com# "Chrome 79")[78](https://testingbot.com# "Chrome 78")[77](https://testingbot.com# "Chrome 77")[76](https://testingbot.com# "Chrome 76")[75](https://testingbot.com# "Chrome 75")[74](https://testingbot.com# "Chrome 74")[73](https://testingbot.com# "Chrome 73")[72](https://testingbot.com# "Chrome 72")[71](https://testingbot.com# "Chrome 71")[70](https://testingbot.com# "Chrome 70")[69](https://testingbot.com# "Chrome 69")[68](https://testingbot.com# "Chrome 68")[67](https://testingbot.com# "Chrome 67")[66](https://testingbot.com# "Chrome 66")[65](https://testingbot.com# "Chrome 65")[64](https://testingbot.com# "Chrome 64")[63](https://testingbot.com# "Chrome 63")[62](https://testingbot.com# "Chrome 62")[61](https://testingbot.com# "Chrome 61")[60](https://testingbot.com# "Chrome 60")[59](https://testingbot.com# "Chrome 59")[58](https://testingbot.com# "Chrome 58")[57](https://testingbot.com# "Chrome 57")[56](https://testingbot.com# "Chrome 56")[55](https://testingbot.com# "Chrome 55")[54](https://testingbot.com# "Chrome 54")[53](https://testingbot.com# "Chrome 53")[52](https://testingbot.com# "Chrome 52")[51](https://testingbot.com# "Chrome 51")[50](https://testingbot.com# "Chrome 50")[49](https://testingbot.com# "Chrome 49")[48](https://testingbot.com# "Chrome 48")[47](https://testingbot.com# "Chrome 47")[46](https://testingbot.com# "Chrome 46")[45](https://testingbot.com# "Chrome 45")[44](https://testingbot.com# "Chrome 44")[43](https://testingbot.com# "Chrome 43")[42](https://testingbot.com# "Chrome 42")[41](https://testingbot.com# "Chrome 41")[40](https://testingbot.com# "Chrome 40")[39](https://testingbot.com# "Chrome 39")[38](https://testingbot.com# "Chrome 38")[37](https://testingbot.com# "Chrome 37")[36](https://testingbot.com# "Chrome 36")

#### Firefox
[115](https://testingbot.com# "FF 115")[114](https://testingbot.com# "FF 114")[113](https://testingbot.com# "FF 113")[112](https://testingbot.com# "FF 112")[111](https://testingbot.com# "FF 111")[110](https://testingbot.com# "FF 110")[109](https://testingbot.com# "FF 109")[108](https://testingbot.com# "FF 108")[107](https://testingbot.com# "FF 107")[106](https://testingbot.com# "FF 106")[105](https://testingbot.com# "FF 105")[104](https://testingbot.com# "FF 104")[103](https://testingbot.com# "FF 103")[102](https://testingbot.com# "FF 102")[101](https://testingbot.com# "FF 101")[100](https://testingbot.com# "FF 100")[99](https://testingbot.com# "FF 99")[98](https://testingbot.com# "FF 98")[97](https://testingbot.com# "FF 97")[96](https://testingbot.com# "FF 96")[95](https://testingbot.com# "FF 95")[94](https://testingbot.com# "FF 94")[93](https://testingbot.com# "FF 93")[92](https://testingbot.com# "FF 92")[91](https://testingbot.com# "FF 91")[90](https://testingbot.com# "FF 90")[89](https://testingbot.com# "FF 89")[88](https://testingbot.com# "FF 88")[87](https://testingbot.com# "FF 87")[86](https://testingbot.com# "FF 86")[85](https://testingbot.com# "FF 85")[84](https://testingbot.com# "FF 84")[83](https://testingbot.com# "FF 83")[82](https://testingbot.com# "FF 82")[81](https://testingbot.com# "FF 81")[80](https://testingbot.com# "FF 80")[79](https://testingbot.com# "FF 79")[78](https://testingbot.com# "FF 78")[77](https://testingbot.com# "FF 77")[76](https://testingbot.com# "FF 76")[75](https://testingbot.com# "FF 75")[74](https://testingbot.com# "FF 74")[73](https://testingbot.com# "FF 73")[72](https://testingbot.com# "FF 72")[71](https://testingbot.com# "FF 71")[70](https://testingbot.com# "FF 70")[69](https://testingbot.com# "FF 69")[68](https://testingbot.com# "FF 68")[67](https://testingbot.com# "FF 67")[66](https://testingbot.com# "FF 66")[65](https://testingbot.com# "FF 65")[64](https://testingbot.com# "FF 64")[63](https://testingbot.com# "FF 63")[62](https://testingbot.com# "FF 62")[61](https://testingbot.com# "FF 61")[60](https://testingbot.com# "FF 60")[59](https://testingbot.com# "FF 59")[58](https://testingbot.com# "FF 58")[57](https://testingbot.com# "FF 57")[56](https://testingbot.com# "FF 56")[55](https://testingbot.com# "FF 55")[54](https://testingbot.com# "FF 54")[53](https://testingbot.com# "FF 53")[52](https://testingbot.com# "FF 52")[51](https://testingbot.com# "FF 51")[50](https://testingbot.com# "FF 50")[49](https://testingbot.com# "FF 49")[48](https://testingbot.com# "FF 48")[47](https://testingbot.com# "FF 47")[46](https://testingbot.com# "FF 46")[45](https://testingbot.com# "FF 45")[44](https://testingbot.com# "FF 44")[43](https://testingbot.com# "FF 43")[42](https://testingbot.com# "FF 42")[41](https://testingbot.com# "FF 41")[40](https://testingbot.com# "FF 40")[39](https://testingbot.com# "FF 39")[38](https://testingbot.com# "FF 38")[37](https://testingbot.com# "FF 37")[36](https://testingbot.com# "FF 36")[35](https://testingbot.com# "FF 35")[34](https://testingbot.com# "FF 34")[33](https://testingbot.com# "FF 33")[32](https://testingbot.com# "FF 32")[31](https://testingbot.com# "FF 31")[30](https://testingbot.com# "FF 30")[29](https://testingbot.com# "FF 29")[28](https://testingbot.com# "FF 28")[27](https://testingbot.com# "FF 27")[26](https://testingbot.com# "FF 26")[25](https://testingbot.com# "FF 25")[24](https://testingbot.com# "FF 24")[23](https://testingbot.com# "FF 23")[22](https://testingbot.com# "FF 22")[21](https://testingbot.com# "FF 21")[20](https://testingbot.com# "FF 20")[19](https://testingbot.com# "FF 19")[18](https://testingbot.com# "FF 18")[17](https://testingbot.com# "FF 17")[16](https://testingbot.com# "FF 16")[15](https://testingbot.com# "FF 15")[14](https://testingbot.com# "FF 14")[13](https://testingbot.com# "FF 13")[12](https://testingbot.com# "FF 12")[11](https://testingbot.com# "FF 11")[10](https://testingbot.com# "FF 10")[9](https://testingbot.com# "FF 9")[8](https://testingbot.com# "FF 8")[7](https://testingbot.com# "FF 7")[6](https://testingbot.com# "FF 6")[5](https://testingbot.com# "FF 5")[4](https://testingbot.com# "FF 4")

#### IE
[10](https://testingbot.com# "IE10")

### Windows 7
(64-bit)

#### Chrome
[109](https://testingbot.com# "Chrome 109")[108](https://testingbot.com# "Chrome 108")[107](https://testingbot.com# "Chrome 107")[106](https://testingbot.com# "Chrome 106")[105](https://testingbot.com# "Chrome 105")[104](https://testingbot.com# "Chrome 104")[103](https://testingbot.com# "Chrome 103")[102](https://testingbot.com# "Chrome 102")[101](https://testingbot.com# "Chrome 101")[100](https://testingbot.com# "Chrome 100")[99](https://testingbot.com# "Chrome 99")[98](https://testingbot.com# "Chrome 98")[97](https://testingbot.com# "Chrome 97")[96](https://testingbot.com# "Chrome 96")[95](https://testingbot.com# "Chrome 95")[94](https://testingbot.com# "Chrome 94")[93](https://testingbot.com# "Chrome 93")[92](https://testingbot.com# "Chrome 92")[91](https://testingbot.com# "Chrome 91")[90](https://testingbot.com# "Chrome 90")[89](https://testingbot.com# "Chrome 89")[88](https://testingbot.com# "Chrome 88")[87](https://testingbot.com# "Chrome 87")[86](https://testingbot.com# "Chrome 86")[85](https://testingbot.com# "Chrome 85")[84](https://testingbot.com# "Chrome 84")[83](https://testingbot.com# "Chrome 83")[81](https://testingbot.com# "Chrome 81")[80](https://testingbot.com# "Chrome 80")[79](https://testingbot.com# "Chrome 79")[78](https://testingbot.com# "Chrome 78")[77](https://testingbot.com# "Chrome 77")[76](https://testingbot.com# "Chrome 76")[75](https://testingbot.com# "Chrome 75")[74](https://testingbot.com# "Chrome 74")[73](https://testingbot.com# "Chrome 73")[72](https://testingbot.com# "Chrome 72")[71](https://testingbot.com# "Chrome 71")[70](https://testingbot.com# "Chrome 70")[69](https://testingbot.com# "Chrome 69")[68](https://testingbot.com# "Chrome 68")[67](https://testingbot.com# "Chrome 67")[66](https://testingbot.com# "Chrome 66")[65](https://testingbot.com# "Chrome 65")[64](https://testingbot.com# "Chrome 64")[63](https://testingbot.com# "Chrome 63")[62](https://testingbot.com# "Chrome 62")[61](https://testingbot.com# "Chrome 61")[60](https://testingbot.com# "Chrome 60")[59](https://testingbot.com# "Chrome 59")[58](https://testingbot.com# "Chrome 58")[57](https://testingbot.com# "Chrome 57")[56](https://testingbot.com# "Chrome 56")[55](https://testingbot.com# "Chrome 55")[54](https://testingbot.com# "Chrome 54")[53](https://testingbot.com# "Chrome 53")[52](https://testingbot.com# "Chrome 52")[51](https://testingbot.com# "Chrome 51")[50](https://testingbot.com# "Chrome 50")[49](https://testingbot.com# "Chrome 49")[48](https://testingbot.com# "Chrome 48")[47](https://testingbot.com# "Chrome 47")[46](https://testingbot.com# "Chrome 46")[45](https://testingbot.com# "Chrome 45")[44](https://testingbot.com# "Chrome 44")[43](https://testingbot.com# "Chrome 43")[42](https://testingbot.com# "Chrome 42")[41](https://testingbot.com# "Chrome 41")[40](https://testingbot.com# "Chrome 40")[39](https://testingbot.com# "Chrome 39")[38](https://testingbot.com# "Chrome 38")[37](https://testingbot.com# "Chrome 37")[36](https://testingbot.com# "Chrome 36")

#### Firefox
[115](https://testingbot.com# "FF 115")[114](https://testingbot.com# "FF 114")[113](https://testingbot.com# "FF 113")[112](https://testingbot.com# "FF 112")[111](https://testingbot.com# "FF 111")[110](https://testingbot.com# "FF 110")[109](https://testingbot.com# "FF 109")[108](https://testingbot.com# "FF 108")[107](https://testingbot.com# "FF 107")[106](https://testingbot.com# "FF 106")[105](https://testingbot.com# "FF 105")[104](https://testingbot.com# "FF 104")[103](https://testingbot.com# "FF 103")[102](https://testingbot.com# "FF 102")[101](https://testingbot.com# "FF 101")[100](https://testingbot.com# "FF 100")[99](https://testingbot.com# "FF 99")[98](https://testingbot.com# "FF 98")[97](https://testingbot.com# "FF 97")[96](https://testingbot.com# "FF 96")[95](https://testingbot.com# "FF 95")[94](https://testingbot.com# "FF 94")[93](https://testingbot.com# "FF 93")[92](https://testingbot.com# "FF 92")[91](https://testingbot.com# "FF 91")[90](https://testingbot.com# "FF 90")[89](https://testingbot.com# "FF 89")[88](https://testingbot.com# "FF 88")[87](https://testingbot.com# "FF 87")[86](https://testingbot.com# "FF 86")[85](https://testingbot.com# "FF 85")[84](https://testingbot.com# "FF 84")[83](https://testingbot.com# "FF 83")[82](https://testingbot.com# "FF 82")[81](https://testingbot.com# "FF 81")[80](https://testingbot.com# "FF 80")[79](https://testingbot.com# "FF 79")[78](https://testingbot.com# "FF 78")[77](https://testingbot.com# "FF 77")[76](https://testingbot.com# "FF 76")[75](https://testingbot.com# "FF 75")[74](https://testingbot.com# "FF 74")[73](https://testingbot.com# "FF 73")[72](https://testingbot.com# "FF 72")[71](https://testingbot.com# "FF 71")[70](https://testingbot.com# "FF 70")[69](https://testingbot.com# "FF 69")[68](https://testingbot.com# "FF 68")[67](https://testingbot.com# "FF 67")[66](https://testingbot.com# "FF 66")[65](https://testingbot.com# "FF 65")[64](https://testingbot.com# "FF 64")[63](https://testingbot.com# "FF 63")[62](https://testingbot.com# "FF 62")[61](https://testingbot.com# "FF 61")[60](https://testingbot.com# "FF 60")[59](https://testingbot.com# "FF 59")[58](https://testingbot.com# "FF 58")[57](https://testingbot.com# "FF 57")[56](https://testingbot.com# "FF 56")[55](https://testingbot.com# "FF 55")[54](https://testingbot.com# "FF 54")[53](https://testingbot.com# "FF 53")[52](https://testingbot.com# "FF 52")[51](https://testingbot.com# "FF 51")[50](https://testingbot.com# "FF 50")[49](https://testingbot.com# "FF 49")[48](https://testingbot.com# "FF 48")[47](https://testingbot.com# "FF 47")[46](https://testingbot.com# "FF 46")[45](https://testingbot.com# "FF 45")[44](https://testingbot.com# "FF 44")[43](https://testingbot.com# "FF 43")[42](https://testingbot.com# "FF 42")[41](https://testingbot.com# "FF 41")[40](https://testingbot.com# "FF 40")[39](https://testingbot.com# "FF 39")[38](https://testingbot.com# "FF 38")[37](https://testingbot.com# "FF 37")[36](https://testingbot.com# "FF 36")[35](https://testingbot.com# "FF 35")[34](https://testingbot.com# "FF 34")[33](https://testingbot.com# "FF 33")[32](https://testingbot.com# "FF 32")[31](https://testingbot.com# "FF 31")[30](https://testingbot.com# "FF 30")[29](https://testingbot.com# "FF 29")[28](https://testingbot.com# "FF 28")[27](https://testingbot.com# "FF 27")[26](https://testingbot.com# "FF 26")[25](https://testingbot.com# "FF 25")[24](https://testingbot.com# "FF 24")[23](https://testingbot.com# "FF 23")[22](https://testingbot.com# "FF 22")[21](https://testingbot.com# "FF 21")[20](https://testingbot.com# "FF 20")[19](https://testingbot.com# "FF 19")[18](https://testingbot.com# "FF 18")[17](https://testingbot.com# "FF 17")[16](https://testingbot.com# "FF 16")[15](https://testingbot.com# "FF 15")[14](https://testingbot.com# "FF 14")[13](https://testingbot.com# "FF 13")[12](https://testingbot.com# "FF 12")[11](https://testingbot.com# "FF 11")[10](https://testingbot.com# "FF 10")[9](https://testingbot.com# "FF 9")[8](https://testingbot.com# "FF 8")[7](https://testingbot.com# "FF 7")[6](https://testingbot.com# "FF 6")[5](https://testingbot.com# "FF 5")[4](https://testingbot.com# "FF 4")

#### IE
[11](https://testingbot.com# "IE11")[10](https://testingbot.com# "IE10")[9](https://testingbot.com# "IE9")[8](https://testingbot.com# "IE8")

#### Opera
[95](https://testingbot.com# "Opera 95")[94](https://testingbot.com# "Opera 94")[93](https://testingbot.com# "Opera 93")[92](https://testingbot.com# "Opera 92")[91](https://testingbot.com# "Opera 91")[90](https://testingbot.com# "Opera 90")[89](https://testingbot.com# "Opera 89")[88](https://testingbot.com# "Opera 88")[87](https://testingbot.com# "Opera 87")[86](https://testingbot.com# "Opera 86")[85](https://testingbot.com# "Opera 85")[84](https://testingbot.com# "Opera 84")[83](https://testingbot.com# "Opera 83")[82](https://testingbot.com# "Opera 82")[81](https://testingbot.com# "Opera 81")[80](https://testingbot.com# "Opera 80")[79](https://testingbot.com# "Opera 79")[78](https://testingbot.com# "Opera 78")[77](https://testingbot.com# "Opera 77")[76](https://testingbot.com# "Opera 76")[75](https://testingbot.com# "Opera 75")[74](https://testingbot.com# "Opera 74")[73](https://testingbot.com# "Opera 73")[72](https://testingbot.com# "Opera 72")[71](https://testingbot.com# "Opera 71")[70](https://testingbot.com# "Opera 70")[69](https://testingbot.com# "Opera 69")[68](https://testingbot.com# "Opera 68")[67](https://testingbot.com# "Opera 67")[66](https://testingbot.com# "Opera 66")[65](https://testingbot.com# "Opera 65")[64](https://testingbot.com# "Opera 64")[63](https://testingbot.com# "Opera 63")[62](https://testingbot.com# "Opera 62")[60](https://testingbot.com# "Opera 60")[59](https://testingbot.com# "Opera 59")[58](https://testingbot.com# "Opera 58")[57](https://testingbot.com# "Opera 57")[56](https://testingbot.com# "Opera 56")[55](https://testingbot.com# "Opera 55")[54](https://testingbot.com# "Opera 54")[53](https://testingbot.com# "Opera 53")[52](https://testingbot.com# "Opera 52")[51](https://testingbot.com# "Opera 51")[50](https://testingbot.com# "Opera 50")

### macOS Tahoe
(26.0) (ARM64)

#### Chrome
[143](https://testingbot.com# "Chrome 143")[142](https://testingbot.com# "Chrome 142")[141](https://testingbot.com# "Chrome 141")[140](https://testingbot.com# "Chrome 140")[139](https://testingbot.com# "Chrome 139")[138](https://testingbot.com# "Chrome 138")[137](https://testingbot.com# "Chrome 137")[136](https://testingbot.com# "Chrome 136")[135](https://testingbot.com# "Chrome 135")[134](https://testingbot.com# "Chrome 134")[133](https://testingbot.com# "Chrome 133")[132](https://testingbot.com# "Chrome 132")[131](https://testingbot.com# "Chrome 131")[130](https://testingbot.com# "Chrome 130")[129](https://testingbot.com# "Chrome 129")[128](https://testingbot.com# "Chrome 128")[127](https://testingbot.com# "Chrome 127")[126](https://testingbot.com# "Chrome 126")[125](https://testingbot.com# "Chrome 125")[124](https://testingbot.com# "Chrome 124")[123](https://testingbot.com# "Chrome 123")[122](https://testingbot.com# "Chrome 122")[121](https://testingbot.com# "Chrome 121")[120](https://testingbot.com# "Chrome 120")[119](https://testingbot.com# "Chrome 119")[118](https://testingbot.com# "Chrome 118")[117](https://testingbot.com# "Chrome 117")[116](https://testingbot.com# "Chrome 116")[115](https://testingbot.com# "Chrome 115")[114](https://testingbot.com# "Chrome 114")[113](https://testingbot.com# "Chrome 113")[112](https://testingbot.com# "Chrome 112")[111](https://testingbot.com# "Chrome 111")[110](https://testingbot.com# "Chrome 110")[109](https://testingbot.com# "Chrome 109")[108](https://testingbot.com# "Chrome 108")[107](https://testingbot.com# "Chrome 107")[106](https://testingbot.com# "Chrome 106")[105](https://testingbot.com# "Chrome 105")[104](https://testingbot.com# "Chrome 104")[103](https://testingbot.com# "Chrome 103")[102](https://testingbot.com# "Chrome 102")[101](https://testingbot.com# "Chrome 101")[100](https://testingbot.com# "Chrome 100")

#### Firefox
[dev](https://testingbot.com# "FF dev")[beta](https://testingbot.com# "FF beta")[146](https://testingbot.com# "FF 146")[145](https://testingbot.com# "FF 145")[144](https://testingbot.com# "FF 144")[143](https://testingbot.com# "FF 143")[142](https://testingbot.com# "FF 142")[141](https://testingbot.com# "FF 141")[140](https://testingbot.com# "FF 140")[139](https://testingbot.com# "FF 139")[138](https://testingbot.com# "FF 138")[137](https://testingbot.com# "FF 137")[136](https://testingbot.com# "FF 136")[135](https://testingbot.com# "FF 135")[134](https://testingbot.com# "FF 134")[133](https://testingbot.com# "FF 133")[132](https://testingbot.com# "FF 132")[131](https://testingbot.com# "FF 131")[130](https://testingbot.com# "FF 130")[129](https://testingbot.com# "FF 129")[128](https://testingbot.com# "FF 128")[127](https://testingbot.com# "FF 127")[126](https://testingbot.com# "FF 126")[125](https://testingbot.com# "FF 125")[124](https://testingbot.com# "FF 124")[123](https://testingbot.com# "FF 123")[122](https://testingbot.com# "FF 122")[121](https://testingbot.com# "FF 121")[120](https://testingbot.com# "FF 120")[119](https://testingbot.com# "FF 119")[118](https://testingbot.com# "FF 118")[117](https://testingbot.com# "FF 117")[116](https://testingbot.com# "FF 116")[115](https://testingbot.com# "FF 115")[114](https://testingbot.com# "FF 114")[113](https://testingbot.com# "FF 113")[112](https://testingbot.com# "FF 112")[111](https://testingbot.com# "FF 111")[110](https://testingbot.com# "FF 110")[109](https://testingbot.com# "FF 109")[108](https://testingbot.com# "FF 108")[107](https://testingbot.com# "FF 107")[106](https://testingbot.com# "FF 106")[105](https://testingbot.com# "FF 105")[104](https://testingbot.com# "FF 104")[103](https://testingbot.com# "FF 103")[102](https://testingbot.com# "FF 102")[101](https://testingbot.com# "FF 101")[100](https://testingbot.com# "FF 100")[99](https://testingbot.com# "FF 99")[98](https://testingbot.com# "FF 98")[97](https://testingbot.com# "FF 97")[96](https://testingbot.com# "FF 96")[95](https://testingbot.com# "FF 95")[94](https://testingbot.com# "FF 94")[93](https://testingbot.com# "FF 93")[92](https://testingbot.com# "FF 92")[91](https://testingbot.com# "FF 91")[90](https://testingbot.com# "FF 90")[89](https://testingbot.com# "FF 89")[88](https://testingbot.com# "FF 88")[87](https://testingbot.com# "FF 87")[86](https://testingbot.com# "FF 86")[85](https://testingbot.com# "FF 85")[84](https://testingbot.com# "FF 84")[83](https://testingbot.com# "FF 83")[82](https://testingbot.com# "FF 82")[81](https://testingbot.com# "FF 81")[80](https://testingbot.com# "FF 80")[79](https://testingbot.com# "FF 79")[78](https://testingbot.com# "FF 78")[77](https://testingbot.com# "FF 77")[76](https://testingbot.com# "FF 76")[75](https://testingbot.com# "FF 75")[74](https://testingbot.com# "FF 74")[73](https://testingbot.com# "FF 73")[72](https://testingbot.com# "FF 72")[71](https://testingbot.com# "FF 71")[70](https://testingbot.com# "FF 70")

#### Edge
[dev](https://testingbot.com# "Edge")[beta](https://testingbot.com# "Edge")[143](https://testingbot.com# "Edge 143")[142](https://testingbot.com# "Edge 142")[141](https://testingbot.com# "Edge 141")[140](https://testingbot.com# "Edge 140")[139](https://testingbot.com# "Edge 139")[138](https://testingbot.com# "Edge 138")[137](https://testingbot.com# "Edge 137")[136](https://testingbot.com# "Edge 136")[135](https://testingbot.com# "Edge 135")[134](https://testingbot.com# "Edge 134")[133](https://testingbot.com# "Edge 133")[132](https://testingbot.com# "Edge 132")[131](https://testingbot.com# "Edge 131")[130](https://testingbot.com# "Edge 130")[129](https://testingbot.com# "Edge 129")[128](https://testingbot.com# "Edge 128")[127](https://testingbot.com# "Edge 127")[126](https://testingbot.com# "Edge 126")[125](https://testingbot.com# "Edge 125")[124](https://testingbot.com# "Edge 124")[123](https://testingbot.com# "Edge 123")[122](https://testingbot.com# "Edge 122")[121](https://testingbot.com# "Edge 121")[120](https://testingbot.com# "Edge 120")[119](https://testingbot.com# "Edge 119")[118](https://testingbot.com# "Edge 118")[117](https://testingbot.com# "Edge 117")[116](https://testingbot.com# "Edge 116")[115](https://testingbot.com# "Edge 115")[114](https://testingbot.com# "Edge 114")[113](https://testingbot.com# "Edge 113")[112](https://testingbot.com# "Edge 112")[111](https://testingbot.com# "Edge 111")[110](https://testingbot.com# "Edge 110")[109](https://testingbot.com# "Edge 109")[108](https://testingbot.com# "Edge 108")[107](https://testingbot.com# "Edge 107")[106](https://testingbot.com# "Edge 106")[105](https://testingbot.com# "Edge 105")[104](https://testingbot.com# "Edge 104")[103](https://testingbot.com# "Edge 103")[102](https://testingbot.com# "Edge 102")[101](https://testingbot.com# "Edge 101")[100](https://testingbot.com# "Edge 100")[99](https://testingbot.com# "Edge 99")[98](https://testingbot.com# "Edge 98")[97](https://testingbot.com# "Edge 97")[96](https://testingbot.com# "Edge 96")[95](https://testingbot.com# "Edge 95")[94](https://testingbot.com# "Edge 94")[93](https://testingbot.com# "Edge 93")[92](https://testingbot.com# "Edge 92")[91](https://testingbot.com# "Edge 91")[90](https://testingbot.com# "Edge 90")[89](https://testingbot.com# "Edge 89")[88](https://testingbot.com# "Edge 88")[87](https://testingbot.com# "Edge 87")[86](https://testingbot.com# "Edge 86")[85](https://testingbot.com# "Edge 85")[84](https://testingbot.com# "Edge 84")[83](https://testingbot.com# "Edge 83")[81](https://testingbot.com# "Edge 81")[80](https://testingbot.com# "Edge 80")

#### Safari
[26](https://testingbot.com# "Safari 26")

### macOS Sequoia
(15.0) (ARM64)

#### Chrome
[143](https://testingbot.com# "Chrome 143")[142](https://testingbot.com# "Chrome 142")[141](https://testingbot.com# "Chrome 141")[140](https://testingbot.com# "Chrome 140")[139](https://testingbot.com# "Chrome 139")[138](https://testingbot.com# "Chrome 138")[137](https://testingbot.com# "Chrome 137")[136](https://testingbot.com# "Chrome 136")[135](https://testingbot.com# "Chrome 135")[134](https://testingbot.com# "Chrome 134")[133](https://testingbot.com# "Chrome 133")[132](https://testingbot.com# "Chrome 132")[131](https://testingbot.com# "Chrome 131")[130](https://testingbot.com# "Chrome 130")[129](https://testingbot.com# "Chrome 129")[128](https://testingbot.com# "Chrome 128")[127](https://testingbot.com# "Chrome 127")[126](https://testingbot.com# "Chrome 126")[125](https://testingbot.com# "Chrome 125")[124](https://testingbot.com# "Chrome 124")[123](https://testingbot.com# "Chrome 123")[122](https://testingbot.com# "Chrome 122")[121](https://testingbot.com# "Chrome 121")[120](https://testingbot.com# "Chrome 120")[119](https://testingbot.com# "Chrome 119")[118](https://testingbot.com# "Chrome 118")[117](https://testingbot.com# "Chrome 117")[116](https://testingbot.com# "Chrome 116")[115](https://testingbot.com# "Chrome 115")[114](https://testingbot.com# "Chrome 114")[113](https://testingbot.com# "Chrome 113")[112](https://testingbot.com# "Chrome 112")[111](https://testingbot.com# "Chrome 111")[110](https://testingbot.com# "Chrome 110")[109](https://testingbot.com# "Chrome 109")[108](https://testingbot.com# "Chrome 108")[107](https://testingbot.com# "Chrome 107")[106](https://testingbot.com# "Chrome 106")[105](https://testingbot.com# "Chrome 105")[104](https://testingbot.com# "Chrome 104")[103](https://testingbot.com# "Chrome 103")[102](https://testingbot.com# "Chrome 102")[101](https://testingbot.com# "Chrome 101")[100](https://testingbot.com# "Chrome 100")

#### Firefox
[dev](https://testingbot.com# "FF dev")[beta](https://testingbot.com# "FF beta")[146](https://testingbot.com# "FF 146")[145](https://testingbot.com# "FF 145")[144](https://testingbot.com# "FF 144")[143](https://testingbot.com# "FF 143")[142](https://testingbot.com# "FF 142")[141](https://testingbot.com# "FF 141")[140](https://testingbot.com# "FF 140")[139](https://testingbot.com# "FF 139")[138](https://testingbot.com# "FF 138")[137](https://testingbot.com# "FF 137")[136](https://testingbot.com# "FF 136")[135](https://testingbot.com# "FF 135")[134](https://testingbot.com# "FF 134")[133](https://testingbot.com# "FF 133")[132](https://testingbot.com# "FF 132")[131](https://testingbot.com# "FF 131")[130](https://testingbot.com# "FF 130")[129](https://testingbot.com# "FF 129")[128](https://testingbot.com# "FF 128")[127](https://testingbot.com# "FF 127")[126](https://testingbot.com# "FF 126")[125](https://testingbot.com# "FF 125")[124](https://testingbot.com# "FF 124")[123](https://testingbot.com# "FF 123")[122](https://testingbot.com# "FF 122")[121](https://testingbot.com# "FF 121")[120](https://testingbot.com# "FF 120")[119](https://testingbot.com# "FF 119")[118](https://testingbot.com# "FF 118")[117](https://testingbot.com# "FF 117")[116](https://testingbot.com# "FF 116")[115](https://testingbot.com# "FF 115")[114](https://testingbot.com# "FF 114")[113](https://testingbot.com# "FF 113")[112](https://testingbot.com# "FF 112")[111](https://testingbot.com# "FF 111")[110](https://testingbot.com# "FF 110")[109](https://testingbot.com# "FF 109")[108](https://testingbot.com# "FF 108")[107](https://testingbot.com# "FF 107")[106](https://testingbot.com# "FF 106")[105](https://testingbot.com# "FF 105")[104](https://testingbot.com# "FF 104")[103](https://testingbot.com# "FF 103")[102](https://testingbot.com# "FF 102")[101](https://testingbot.com# "FF 101")[100](https://testingbot.com# "FF 100")[99](https://testingbot.com# "FF 99")[98](https://testingbot.com# "FF 98")[97](https://testingbot.com# "FF 97")[96](https://testingbot.com# "FF 96")[95](https://testingbot.com# "FF 95")[94](https://testingbot.com# "FF 94")[93](https://testingbot.com# "FF 93")[92](https://testingbot.com# "FF 92")[91](https://testingbot.com# "FF 91")[90](https://testingbot.com# "FF 90")[89](https://testingbot.com# "FF 89")[88](https://testingbot.com# "FF 88")[87](https://testingbot.com# "FF 87")[86](https://testingbot.com# "FF 86")[85](https://testingbot.com# "FF 85")[84](https://testingbot.com# "FF 84")[83](https://testingbot.com# "FF 83")[82](https://testingbot.com# "FF 82")[81](https://testingbot.com# "FF 81")[80](https://testingbot.com# "FF 80")[79](https://testingbot.com# "FF 79")[78](https://testingbot.com# "FF 78")[77](https://testingbot.com# "FF 77")[76](https://testingbot.com# "FF 76")[75](https://testingbot.com# "FF 75")[74](https://testingbot.com# "FF 74")[73](https://testingbot.com# "FF 73")[72](https://testingbot.com# "FF 72")[71](https://testingbot.com# "FF 71")[70](https://testingbot.com# "FF 70")

#### Edge
[beta](https://testingbot.com# "Edge")[dev](https://testingbot.com# "Edge")[143](https://testingbot.com# "Edge 143")[142](https://testingbot.com# "Edge 142")[141](https://testingbot.com# "Edge 141")[140](https://testingbot.com# "Edge 140")[139](https://testingbot.com# "Edge 139")[138](https://testingbot.com# "Edge 138")[137](https://testingbot.com# "Edge 137")[136](https://testingbot.com# "Edge 136")[135](https://testingbot.com# "Edge 135")[134](https://testingbot.com# "Edge 134")[133](https://testingbot.com# "Edge 133")[132](https://testingbot.com# "Edge 132")[131](https://testingbot.com# "Edge 131")[130](https://testingbot.com# "Edge 130")[129](https://testingbot.com# "Edge 129")[128](https://testingbot.com# "Edge 128")[127](https://testingbot.com# "Edge 127")[126](https://testingbot.com# "Edge 126")[125](https://testingbot.com# "Edge 125")[124](https://testingbot.com# "Edge 124")[123](https://testingbot.com# "Edge 123")[122](https://testingbot.com# "Edge 122")[121](https://testingbot.com# "Edge 121")[120](https://testingbot.com# "Edge 120")[119](https://testingbot.com# "Edge 119")[118](https://testingbot.com# "Edge 118")[117](https://testingbot.com# "Edge 117")[116](https://testingbot.com# "Edge 116")[115](https://testingbot.com# "Edge 115")[114](https://testingbot.com# "Edge 114")[113](https://testingbot.com# "Edge 113")[112](https://testingbot.com# "Edge 112")[111](https://testingbot.com# "Edge 111")[110](https://testingbot.com# "Edge 110")[109](https://testingbot.com# "Edge 109")[108](https://testingbot.com# "Edge 108")[107](https://testingbot.com# "Edge 107")[106](https://testingbot.com# "Edge 106")[105](https://testingbot.com# "Edge 105")[104](https://testingbot.com# "Edge 104")[103](https://testingbot.com# "Edge 103")[102](https://testingbot.com# "Edge 102")[101](https://testingbot.com# "Edge 101")[100](https://testingbot.com# "Edge 100")[99](https://testingbot.com# "Edge 99")[98](https://testingbot.com# "Edge 98")[97](https://testingbot.com# "Edge 97")[96](https://testingbot.com# "Edge 96")[95](https://testingbot.com# "Edge 95")[94](https://testingbot.com# "Edge 94")[93](https://testingbot.com# "Edge 93")[92](https://testingbot.com# "Edge 92")[91](https://testingbot.com# "Edge 91")[90](https://testingbot.com# "Edge 90")[89](https://testingbot.com# "Edge 89")[88](https://testingbot.com# "Edge 88")[87](https://testingbot.com# "Edge 87")[86](https://testingbot.com# "Edge 86")[85](https://testingbot.com# "Edge 85")[84](https://testingbot.com# "Edge 84")[83](https://testingbot.com# "Edge 83")[81](https://testingbot.com# "Edge 81")[80](https://testingbot.com# "Edge 80")

#### Safari
[dev](https://testingbot.com# "Safari dev")[18](https://testingbot.com# "Safari 18")

### macOS Sonoma
(14.0) (ARM64)

#### Chrome
[143](https://testingbot.com# "Chrome 143")[142](https://testingbot.com# "Chrome 142")[141](https://testingbot.com# "Chrome 141")[140](https://testingbot.com# "Chrome 140")[139](https://testingbot.com# "Chrome 139")[138](https://testingbot.com# "Chrome 138")[137](https://testingbot.com# "Chrome 137")[136](https://testingbot.com# "Chrome 136")[135](https://testingbot.com# "Chrome 135")[134](https://testingbot.com# "Chrome 134")[133](https://testingbot.com# "Chrome 133")[132](https://testingbot.com# "Chrome 132")[131](https://testingbot.com# "Chrome 131")[130](https://testingbot.com# "Chrome 130")[129](https://testingbot.com# "Chrome 129")[128](https://testingbot.com# "Chrome 128")[127](https://testingbot.com# "Chrome 127")[126](https://testingbot.com# "Chrome 126")[125](https://testingbot.com# "Chrome 125")[124](https://testingbot.com# "Chrome 124")[123](https://testingbot.com# "Chrome 123")[122](https://testingbot.com# "Chrome 122")[121](https://testingbot.com# "Chrome 121")[120](https://testingbot.com# "Chrome 120")[119](https://testingbot.com# "Chrome 119")[118](https://testingbot.com# "Chrome 118")[117](https://testingbot.com# "Chrome 117")[116](https://testingbot.com# "Chrome 116")[115](https://testingbot.com# "Chrome 115")[114](https://testingbot.com# "Chrome 114")[113](https://testingbot.com# "Chrome 113")[112](https://testingbot.com# "Chrome 112")[111](https://testingbot.com# "Chrome 111")[110](https://testingbot.com# "Chrome 110")[109](https://testingbot.com# "Chrome 109")[108](https://testingbot.com# "Chrome 108")[107](https://testingbot.com# "Chrome 107")[106](https://testingbot.com# "Chrome 106")[105](https://testingbot.com# "Chrome 105")[104](https://testingbot.com# "Chrome 104")[103](https://testingbot.com# "Chrome 103")[102](https://testingbot.com# "Chrome 102")[101](https://testingbot.com# "Chrome 101")[100](https://testingbot.com# "Chrome 100")

#### Firefox
[dev](https://testingbot.com# "FF dev")[beta](https://testingbot.com# "FF beta")[146](https://testingbot.com# "FF 146")[145](https://testingbot.com# "FF 145")[144](https://testingbot.com# "FF 144")[143](https://testingbot.com# "FF 143")[142](https://testingbot.com# "FF 142")[141](https://testingbot.com# "FF 141")[140](https://testingbot.com# "FF 140")[139](https://testingbot.com# "FF 139")[138](https://testingbot.com# "FF 138")[137](https://testingbot.com# "FF 137")[136](https://testingbot.com# "FF 136")[135](https://testingbot.com# "FF 135")[134](https://testingbot.com# "FF 134")[133](https://testingbot.com# "FF 133")[132](https://testingbot.com# "FF 132")[131](https://testingbot.com# "FF 131")[130](https://testingbot.com# "FF 130")[129](https://testingbot.com# "FF 129")[128](https://testingbot.com# "FF 128")[127](https://testingbot.com# "FF 127")[126](https://testingbot.com# "FF 126")[125](https://testingbot.com# "FF 125")[124](https://testingbot.com# "FF 124")[123](https://testingbot.com# "FF 123")[122](https://testingbot.com# "FF 122")[121](https://testingbot.com# "FF 121")[120](https://testingbot.com# "FF 120")[119](https://testingbot.com# "FF 119")[118](https://testingbot.com# "FF 118")[117](https://testingbot.com# "FF 117")[116](https://testingbot.com# "FF 116")[115](https://testingbot.com# "FF 115")[114](https://testingbot.com# "FF 114")[113](https://testingbot.com# "FF 113")[112](https://testingbot.com# "FF 112")[111](https://testingbot.com# "FF 111")[110](https://testingbot.com# "FF 110")[109](https://testingbot.com# "FF 109")[108](https://testingbot.com# "FF 108")[107](https://testingbot.com# "FF 107")[106](https://testingbot.com# "FF 106")[105](https://testingbot.com# "FF 105")[104](https://testingbot.com# "FF 104")[103](https://testingbot.com# "FF 103")[102](https://testingbot.com# "FF 102")[101](https://testingbot.com# "FF 101")[100](https://testingbot.com# "FF 100")[99](https://testingbot.com# "FF 99")[98](https://testingbot.com# "FF 98")[97](https://testingbot.com# "FF 97")[96](https://testingbot.com# "FF 96")[95](https://testingbot.com# "FF 95")[94](https://testingbot.com# "FF 94")[93](https://testingbot.com# "FF 93")[92](https://testingbot.com# "FF 92")[91](https://testingbot.com# "FF 91")[90](https://testingbot.com# "FF 90")[89](https://testingbot.com# "FF 89")[88](https://testingbot.com# "FF 88")[87](https://testingbot.com# "FF 87")[86](https://testingbot.com# "FF 86")[85](https://testingbot.com# "FF 85")[84](https://testingbot.com# "FF 84")[83](https://testingbot.com# "FF 83")[82](https://testingbot.com# "FF 82")[81](https://testingbot.com# "FF 81")[80](https://testingbot.com# "FF 80")[79](https://testingbot.com# "FF 79")[78](https://testingbot.com# "FF 78")[77](https://testingbot.com# "FF 77")[76](https://testingbot.com# "FF 76")[75](https://testingbot.com# "FF 75")[74](https://testingbot.com# "FF 74")[73](https://testingbot.com# "FF 73")[72](https://testingbot.com# "FF 72")[71](https://testingbot.com# "FF 71")[70](https://testingbot.com# "FF 70")

#### Edge
[beta](https://testingbot.com# "Edge")[dev](https://testingbot.com# "Edge")[143](https://testingbot.com# "Edge 143")[142](https://testingbot.com# "Edge 142")[141](https://testingbot.com# "Edge 141")[140](https://testingbot.com# "Edge 140")[139](https://testingbot.com# "Edge 139")[138](https://testingbot.com# "Edge 138")[137](https://testingbot.com# "Edge 137")[136](https://testingbot.com# "Edge 136")[135](https://testingbot.com# "Edge 135")[134](https://testingbot.com# "Edge 134")[133](https://testingbot.com# "Edge 133")[132](https://testingbot.com# "Edge 132")[131](https://testingbot.com# "Edge 131")[130](https://testingbot.com# "Edge 130")[129](https://testingbot.com# "Edge 129")[128](https://testingbot.com# "Edge 128")[127](https://testingbot.com# "Edge 127")[126](https://testingbot.com# "Edge 126")[125](https://testingbot.com# "Edge 125")[124](https://testingbot.com# "Edge 124")[123](https://testingbot.com# "Edge 123")[122](https://testingbot.com# "Edge 122")[121](https://testingbot.com# "Edge 121")[120](https://testingbot.com# "Edge 120")[119](https://testingbot.com# "Edge 119")[118](https://testingbot.com# "Edge 118")[117](https://testingbot.com# "Edge 117")[116](https://testingbot.com# "Edge 116")[115](https://testingbot.com# "Edge 115")[114](https://testingbot.com# "Edge 114")[113](https://testingbot.com# "Edge 113")[112](https://testingbot.com# "Edge 112")[111](https://testingbot.com# "Edge 111")[110](https://testingbot.com# "Edge 110")[109](https://testingbot.com# "Edge 109")[108](https://testingbot.com# "Edge 108")[107](https://testingbot.com# "Edge 107")[106](https://testingbot.com# "Edge 106")[105](https://testingbot.com# "Edge 105")[104](https://testingbot.com# "Edge 104")[103](https://testingbot.com# "Edge 103")[102](https://testingbot.com# "Edge 102")[101](https://testingbot.com# "Edge 101")[100](https://testingbot.com# "Edge 100")[99](https://testingbot.com# "Edge 99")[98](https://testingbot.com# "Edge 98")[97](https://testingbot.com# "Edge 97")[96](https://testingbot.com# "Edge 96")[95](https://testingbot.com# "Edge 95")[94](https://testingbot.com# "Edge 94")[93](https://testingbot.com# "Edge 93")[92](https://testingbot.com# "Edge 92")[91](https://testingbot.com# "Edge 91")[90](https://testingbot.com# "Edge 90")[89](https://testingbot.com# "Edge 89")[88](https://testingbot.com# "Edge 88")[87](https://testingbot.com# "Edge 87")[86](https://testingbot.com# "Edge 86")[85](https://testingbot.com# "Edge 85")[84](https://testingbot.com# "Edge 84")[83](https://testingbot.com# "Edge 83")[81](https://testingbot.com# "Edge 81")[80](https://testingbot.com# "Edge 80")

#### Safari
[beta](https://testingbot.com# "Safari beta")[dev](https://testingbot.com# "Safari dev")[17](https://testingbot.com# "Safari 17")

### macOS Ventura
(13.2) (ARM64)

#### Chrome
[beta](https://testingbot.com# "Chrome")[143](https://testingbot.com# "Chrome 143")[142](https://testingbot.com# "Chrome 142")[141](https://testingbot.com# "Chrome 141")[140](https://testingbot.com# "Chrome 140")[139](https://testingbot.com# "Chrome 139")[138](https://testingbot.com# "Chrome 138")[137](https://testingbot.com# "Chrome 137")[136](https://testingbot.com# "Chrome 136")[135](https://testingbot.com# "Chrome 135")[134](https://testingbot.com# "Chrome 134")[133](https://testingbot.com# "Chrome 133")[132](https://testingbot.com# "Chrome 132")[131](https://testingbot.com# "Chrome 131")[130](https://testingbot.com# "Chrome 130")[129](https://testingbot.com# "Chrome 129")[128](https://testingbot.com# "Chrome 128")[127](https://testingbot.com# "Chrome 127")[126](https://testingbot.com# "Chrome 126")[125](https://testingbot.com# "Chrome 125")[124](https://testingbot.com# "Chrome 124")[123](https://testingbot.com# "Chrome 123")[122](https://testingbot.com# "Chrome 122")[121](https://testingbot.com# "Chrome 121")[120](https://testingbot.com# "Chrome 120")[119](https://testingbot.com# "Chrome 119")[118](https://testingbot.com# "Chrome 118")[117](https://testingbot.com# "Chrome 117")[116](https://testingbot.com# "Chrome 116")[115](https://testingbot.com# "Chrome 115")[114](https://testingbot.com# "Chrome 114")[113](https://testingbot.com# "Chrome 113")[112](https://testingbot.com# "Chrome 112")[111](https://testingbot.com# "Chrome 111")[110](https://testingbot.com# "Chrome 110")[109](https://testingbot.com# "Chrome 109")[108](https://testingbot.com# "Chrome 108")[107](https://testingbot.com# "Chrome 107")[106](https://testingbot.com# "Chrome 106")[105](https://testingbot.com# "Chrome 105")[104](https://testingbot.com# "Chrome 104")[103](https://testingbot.com# "Chrome 103")[102](https://testingbot.com# "Chrome 102")[101](https://testingbot.com# "Chrome 101")[100](https://testingbot.com# "Chrome 100")

#### Firefox
[dev](https://testingbot.com# "FF dev")[beta](https://testingbot.com# "FF beta")[146](https://testingbot.com# "FF 146")[145](https://testingbot.com# "FF 145")[144](https://testingbot.com# "FF 144")[143](https://testingbot.com# "FF 143")[142](https://testingbot.com# "FF 142")[141](https://testingbot.com# "FF 141")[140](https://testingbot.com# "FF 140")[139](https://testingbot.com# "FF 139")[138](https://testingbot.com# "FF 138")[137](https://testingbot.com# "FF 137")[136](https://testingbot.com# "FF 136")[135](https://testingbot.com# "FF 135")[134](https://testingbot.com# "FF 134")[133](https://testingbot.com# "FF 133")[132](https://testingbot.com# "FF 132")[131](https://testingbot.com# "FF 131")[130](https://testingbot.com# "FF 130")[129](https://testingbot.com# "FF 129")[128](https://testingbot.com# "FF 128")[127](https://testingbot.com# "FF 127")[126](https://testingbot.com# "FF 126")[125](https://testingbot.com# "FF 125")[124](https://testingbot.com# "FF 124")[123](https://testingbot.com# "FF 123")[122](https://testingbot.com# "FF 122")[121](https://testingbot.com# "FF 121")[120](https://testingbot.com# "FF 120")[119](https://testingbot.com# "FF 119")[118](https://testingbot.com# "FF 118")[117](https://testingbot.com# "FF 117")[116](https://testingbot.com# "FF 116")[115](https://testingbot.com# "FF 115")[114](https://testingbot.com# "FF 114")[113](https://testingbot.com# "FF 113")[112](https://testingbot.com# "FF 112")[111](https://testingbot.com# "FF 111")[110](https://testingbot.com# "FF 110")[109](https://testingbot.com# "FF 109")[108](https://testingbot.com# "FF 108")[107](https://testingbot.com# "FF 107")[106](https://testingbot.com# "FF 106")[105](https://testingbot.com# "FF 105")[104](https://testingbot.com# "FF 104")[103](https://testingbot.com# "FF 103")[102](https://testingbot.com# "FF 102")[101](https://testingbot.com# "FF 101")[100](https://testingbot.com# "FF 100")[99](https://testingbot.com# "FF 99")[98](https://testingbot.com# "FF 98")[97](https://testingbot.com# "FF 97")[96](https://testingbot.com# "FF 96")[95](https://testingbot.com# "FF 95")[94](https://testingbot.com# "FF 94")[93](https://testingbot.com# "FF 93")[92](https://testingbot.com# "FF 92")[91](https://testingbot.com# "FF 91")[90](https://testingbot.com# "FF 90")[89](https://testingbot.com# "FF 89")[88](https://testingbot.com# "FF 88")[87](https://testingbot.com# "FF 87")[86](https://testingbot.com# "FF 86")[85](https://testingbot.com# "FF 85")[84](https://testingbot.com# "FF 84")[83](https://testingbot.com# "FF 83")[82](https://testingbot.com# "FF 82")[81](https://testingbot.com# "FF 81")[80](https://testingbot.com# "FF 80")[79](https://testingbot.com# "FF 79")[78](https://testingbot.com# "FF 78")[77](https://testingbot.com# "FF 77")[76](https://testingbot.com# "FF 76")[75](https://testingbot.com# "FF 75")[74](https://testingbot.com# "FF 74")[73](https://testingbot.com# "FF 73")[72](https://testingbot.com# "FF 72")[71](https://testingbot.com# "FF 71")[70](https://testingbot.com# "FF 70")

#### Edge
[dev](https://testingbot.com# "Edge")[beta](https://testingbot.com# "Edge")[143](https://testingbot.com# "Edge 143")[142](https://testingbot.com# "Edge 142")[141](https://testingbot.com# "Edge 141")[140](https://testingbot.com# "Edge 140")[139](https://testingbot.com# "Edge 139")[138](https://testingbot.com# "Edge 138")[137](https://testingbot.com# "Edge 137")[136](https://testingbot.com# "Edge 136")[135](https://testingbot.com# "Edge 135")[134](https://testingbot.com# "Edge 134")[133](https://testingbot.com# "Edge 133")[132](https://testingbot.com# "Edge 132")[131](https://testingbot.com# "Edge 131")[130](https://testingbot.com# "Edge 130")[129](https://testingbot.com# "Edge 129")[128](https://testingbot.com# "Edge 128")[127](https://testingbot.com# "Edge 127")[126](https://testingbot.com# "Edge 126")[125](https://testingbot.com# "Edge 125")[124](https://testingbot.com# "Edge 124")[123](https://testingbot.com# "Edge 123")[122](https://testingbot.com# "Edge 122")[121](https://testingbot.com# "Edge 121")[120](https://testingbot.com# "Edge 120")[119](https://testingbot.com# "Edge 119")[118](https://testingbot.com# "Edge 118")[117](https://testingbot.com# "Edge 117")[116](https://testingbot.com# "Edge 116")[115](https://testingbot.com# "Edge 115")[114](https://testingbot.com# "Edge 114")[113](https://testingbot.com# "Edge 113")[112](https://testingbot.com# "Edge 112")[111](https://testingbot.com# "Edge 111")[110](https://testingbot.com# "Edge 110")[109](https://testingbot.com# "Edge 109")[108](https://testingbot.com# "Edge 108")[107](https://testingbot.com# "Edge 107")[106](https://testingbot.com# "Edge 106")[105](https://testingbot.com# "Edge 105")[104](https://testingbot.com# "Edge 104")[103](https://testingbot.com# "Edge 103")[102](https://testingbot.com# "Edge 102")[101](https://testingbot.com# "Edge 101")[100](https://testingbot.com# "Edge 100")[99](https://testingbot.com# "Edge 99")[98](https://testingbot.com# "Edge 98")[97](https://testingbot.com# "Edge 97")[96](https://testingbot.com# "Edge 96")[95](https://testingbot.com# "Edge 95")[94](https://testingbot.com# "Edge 94")[93](https://testingbot.com# "Edge 93")[92](https://testingbot.com# "Edge 92")[91](https://testingbot.com# "Edge 91")[90](https://testingbot.com# "Edge 90")[89](https://testingbot.com# "Edge 89")[88](https://testingbot.com# "Edge 88")[87](https://testingbot.com# "Edge 87")[86](https://testingbot.com# "Edge 86")[85](https://testingbot.com# "Edge 85")[84](https://testingbot.com# "Edge 84")[83](https://testingbot.com# "Edge 83")[81](https://testingbot.com# "Edge 81")[80](https://testingbot.com# "Edge 80")

#### Safari
[beta](https://testingbot.com# "Safari beta")[dev](https://testingbot.com# "Safari dev")[16](https://testingbot.com# "Safari 16")

### macOS Monterey
(12.6)

#### Chrome
[beta](https://testingbot.com# "Chrome")[dev](https://testingbot.com# "Chrome")[143](https://testingbot.com# "Chrome 143")[142](https://testingbot.com# "Chrome 142")[141](https://testingbot.com# "Chrome 141")[140](https://testingbot.com# "Chrome 140")[139](https://testingbot.com# "Chrome 139")[138](https://testingbot.com# "Chrome 138")[137](https://testingbot.com# "Chrome 137")[136](https://testingbot.com# "Chrome 136")[135](https://testingbot.com# "Chrome 135")[134](https://testingbot.com# "Chrome 134")[133](https://testingbot.com# "Chrome 133")[132](https://testingbot.com# "Chrome 132")[131](https://testingbot.com# "Chrome 131")[130](https://testingbot.com# "Chrome 130")[129](https://testingbot.com# "Chrome 129")[128](https://testingbot.com# "Chrome 128")[127](https://testingbot.com# "Chrome 127")[126](https://testingbot.com# "Chrome 126")[125](https://testingbot.com# "Chrome 125")[124](https://testingbot.com# "Chrome 124")[123](https://testingbot.com# "Chrome 123")[122](https://testingbot.com# "Chrome 122")[121](https://testingbot.com# "Chrome 121")[120](https://testingbot.com# "Chrome 120")[119](https://testingbot.com# "Chrome 119")[118](https://testingbot.com# "Chrome 118")[117](https://testingbot.com# "Chrome 117")[116](https://testingbot.com# "Chrome 116")[115](https://testingbot.com# "Chrome 115")[114](https://testingbot.com# "Chrome 114")[113](https://testingbot.com# "Chrome 113")[112](https://testingbot.com# "Chrome 112")[111](https://testingbot.com# "Chrome 111")[110](https://testingbot.com# "Chrome 110")[109](https://testingbot.com# "Chrome 109")[108](https://testingbot.com# "Chrome 108")[107](https://testingbot.com# "Chrome 107")[106](https://testingbot.com# "Chrome 106")[105](https://testingbot.com# "Chrome 105")[104](https://testingbot.com# "Chrome 104")[103](https://testingbot.com# "Chrome 103")[102](https://testingbot.com# "Chrome 102")[101](https://testingbot.com# "Chrome 101")[100](https://testingbot.com# "Chrome 100")[99](https://testingbot.com# "Chrome 99")[98](https://testingbot.com# "Chrome 98")[97](https://testingbot.com# "Chrome 97")[96](https://testingbot.com# "Chrome 96")[95](https://testingbot.com# "Chrome 95")[94](https://testingbot.com# "Chrome 94")[93](https://testingbot.com# "Chrome 93")[92](https://testingbot.com# "Chrome 92")[91](https://testingbot.com# "Chrome 91")[90](https://testingbot.com# "Chrome 90")[89](https://testingbot.com# "Chrome 89")[88](https://testingbot.com# "Chrome 88")[87](https://testingbot.com# "Chrome 87")[86](https://testingbot.com# "Chrome 86")[85](https://testingbot.com# "Chrome 85")[84](https://testingbot.com# "Chrome 84")[83](https://testingbot.com# "Chrome 83")[81](https://testingbot.com# "Chrome 81")[80](https://testingbot.com# "Chrome 80")[79](https://testingbot.com# "Chrome 79")[78](https://testingbot.com# "Chrome 78")[77](https://testingbot.com# "Chrome 77")[76](https://testingbot.com# "Chrome 76")[75](https://testingbot.com# "Chrome 75")[74](https://testingbot.com# "Chrome 74")[73](https://testingbot.com# "Chrome 73")[72](https://testingbot.com# "Chrome 72")[71](https://testingbot.com# "Chrome 71")[70](https://testingbot.com# "Chrome 70")[69](https://testingbot.com# "Chrome 69")[68](https://testingbot.com# "Chrome 68")[67](https://testingbot.com# "Chrome 67")[66](https://testingbot.com# "Chrome 66")[65](https://testingbot.com# "Chrome 65")[64](https://testingbot.com# "Chrome 64")[63](https://testingbot.com# "Chrome 63")[62](https://testingbot.com# "Chrome 62")[61](https://testingbot.com# "Chrome 61")[60](https://testingbot.com# "Chrome 60")[59](https://testingbot.com# "Chrome 59")[58](https://testingbot.com# "Chrome 58")[57](https://testingbot.com# "Chrome 57")[56](https://testingbot.com# "Chrome 56")[55](https://testingbot.com# "Chrome 55")[54](https://testingbot.com# "Chrome 54")[53](https://testingbot.com# "Chrome 53")[52](https://testingbot.com# "Chrome 52")[51](https://testingbot.com# "Chrome 51")[50](https://testingbot.com# "Chrome 50")[49](https://testingbot.com# "Chrome 49")[48](https://testingbot.com# "Chrome 48")[47](https://testingbot.com# "Chrome 47")[46](https://testingbot.com# "Chrome 46")[45](https://testingbot.com# "Chrome 45")[44](https://testingbot.com# "Chrome 44")[43](https://testingbot.com# "Chrome 43")[42](https://testingbot.com# "Chrome 42")[41](https://testingbot.com# "Chrome 41")[40](https://testingbot.com# "Chrome 40")[39](https://testingbot.com# "Chrome 39")[38](https://testingbot.com# "Chrome 38")[36](https://testingbot.com# "Chrome 36")

#### Firefox
[dev](https://testingbot.com# "FF dev")[beta](https://testingbot.com# "FF beta")[146](https://testingbot.com# "FF 146")[145](https://testingbot.com# "FF 145")[144](https://testingbot.com# "FF 144")[143](https://testingbot.com# "FF 143")[142](https://testingbot.com# "FF 142")[141](https://testingbot.com# "FF 141")[140](https://testingbot.com# "FF 140")[139](https://testingbot.com# "FF 139")[138](https://testingbot.com# "FF 138")[137](https://testingbot.com# "FF 137")[136](https://testingbot.com# "FF 136")[135](https://testingbot.com# "FF 135")[134](https://testingbot.com# "FF 134")[133](https://testingbot.com# "FF 133")[132](https://testingbot.com# "FF 132")[131](https://testingbot.com# "FF 131")[130](https://testingbot.com# "FF 130")[129](https://testingbot.com# "FF 129")[128](https://testingbot.com# "FF 128")[127](https://testingbot.com# "FF 127")[126](https://testingbot.com# "FF 126")[125](https://testingbot.com# "FF 125")[124](https://testingbot.com# "FF 124")[123](https://testingbot.com# "FF 123")[122](https://testingbot.com# "FF 122")[121](https://testingbot.com# "FF 121")[120](https://testingbot.com# "FF 120")[119](https://testingbot.com# "FF 119")[118](https://testingbot.com# "FF 118")[117](https://testingbot.com# "FF 117")[116](https://testingbot.com# "FF 116")[115](https://testingbot.com# "FF 115")[114](https://testingbot.com# "FF 114")[113](https://testingbot.com# "FF 113")[112](https://testingbot.com# "FF 112")[111](https://testingbot.com# "FF 111")[110](https://testingbot.com# "FF 110")[109](https://testingbot.com# "FF 109")[108](https://testingbot.com# "FF 108")[107](https://testingbot.com# "FF 107")[106](https://testingbot.com# "FF 106")[105](https://testingbot.com# "FF 105")[104](https://testingbot.com# "FF 104")[103](https://testingbot.com# "FF 103")[102](https://testingbot.com# "FF 102")[101](https://testingbot.com# "FF 101")[100](https://testingbot.com# "FF 100")[99](https://testingbot.com# "FF 99")[98](https://testingbot.com# "FF 98")[97](https://testingbot.com# "FF 97")[96](https://testingbot.com# "FF 96")[95](https://testingbot.com# "FF 95")[94](https://testingbot.com# "FF 94")[93](https://testingbot.com# "FF 93")[92](https://testingbot.com# "FF 92")[91](https://testingbot.com# "FF 91")[90](https://testingbot.com# "FF 90")[89](https://testingbot.com# "FF 89")[88](https://testingbot.com# "FF 88")[87](https://testingbot.com# "FF 87")[86](https://testingbot.com# "FF 86")[85](https://testingbot.com# "FF 85")[84](https://testingbot.com# "FF 84")[83](https://testingbot.com# "FF 83")[82](https://testingbot.com# "FF 82")[81](https://testingbot.com# "FF 81")[80](https://testingbot.com# "FF 80")[79](https://testingbot.com# "FF 79")[78](https://testingbot.com# "FF 78")[77](https://testingbot.com# "FF 77")[76](https://testingbot.com# "FF 76")[75](https://testingbot.com# "FF 75")[74](https://testingbot.com# "FF 74")[73](https://testingbot.com# "FF 73")[72](https://testingbot.com# "FF 72")[71](https://testingbot.com# "FF 71")[70](https://testingbot.com# "FF 70")[69](https://testingbot.com# "FF 69")[68](https://testingbot.com# "FF 68")[67](https://testingbot.com# "FF 67")[66](https://testingbot.com# "FF 66")[65](https://testingbot.com# "FF 65")[64](https://testingbot.com# "FF 64")[63](https://testingbot.com# "FF 63")[62](https://testingbot.com# "FF 62")[61](https://testingbot.com# "FF 61")[60](https://testingbot.com# "FF 60")[59](https://testingbot.com# "FF 59")[58](https://testingbot.com# "FF 58")[57](https://testingbot.com# "FF 57")[56](https://testingbot.com# "FF 56")[55](https://testingbot.com# "FF 55")[54](https://testingbot.com# "FF 54")[53](https://testingbot.com# "FF 53")[52](https://testingbot.com# "FF 52")[51](https://testingbot.com# "FF 51")[50](https://testingbot.com# "FF 50")[49](https://testingbot.com# "FF 49")[48](https://testingbot.com# "FF 48")[47](https://testingbot.com# "FF 47")[46](https://testingbot.com# "FF 46")[45](https://testingbot.com# "FF 45")[44](https://testingbot.com# "FF 44")[43](https://testingbot.com# "FF 43")[42](https://testingbot.com# "FF 42")[41](https://testingbot.com# "FF 41")[40](https://testingbot.com# "FF 40")[39](https://testingbot.com# "FF 39")[38](https://testingbot.com# "FF 38")[37](https://testingbot.com# "FF 37")[36](https://testingbot.com# "FF 36")[35](https://testingbot.com# "FF 35")[34](https://testingbot.com# "FF 34")[33](https://testingbot.com# "FF 33")[32](https://testingbot.com# "FF 32")[31](https://testingbot.com# "FF 31")[30](https://testingbot.com# "FF 30")[29](https://testingbot.com# "FF 29")[28](https://testingbot.com# "FF 28")[27](https://testingbot.com# "FF 27")[26](https://testingbot.com# "FF 26")[25](https://testingbot.com# "FF 25")[24](https://testingbot.com# "FF 24")[23](https://testingbot.com# "FF 23")[22](https://testingbot.com# "FF 22")[21](https://testingbot.com# "FF 21")[20](https://testingbot.com# "FF 20")[19](https://testingbot.com# "FF 19")[18](https://testingbot.com# "FF 18")[17](https://testingbot.com# "FF 17")[16](https://testingbot.com# "FF 16")[15](https://testingbot.com# "FF 15")[14](https://testingbot.com# "FF 14")[13](https://testingbot.com# "FF 13")[12](https://testingbot.com# "FF 12")[11](https://testingbot.com# "FF 11")[10](https://testingbot.com# "FF 10")[9](https://testingbot.com# "FF 9")[8](https://testingbot.com# "FF 8")[7](https://testingbot.com# "FF 7")[6](https://testingbot.com# "FF 6")[5](https://testingbot.com# "FF 5")[4](https://testingbot.com# "FF 4")

#### Edge
[dev](https://testingbot.com# "Edge")[143](https://testingbot.com# "Edge 143")[142](https://testingbot.com# "Edge 142")[141](https://testingbot.com# "Edge 141")[140](https://testingbot.com# "Edge 140")[139](https://testingbot.com# "Edge 139")[138](https://testingbot.com# "Edge 138")[137](https://testingbot.com# "Edge 137")[136](https://testingbot.com# "Edge 136")[135](https://testingbot.com# "Edge 135")[134](https://testingbot.com# "Edge 134")[133](https://testingbot.com# "Edge 133")[132](https://testingbot.com# "Edge 132")[131](https://testingbot.com# "Edge 131")[130](https://testingbot.com# "Edge 130")[129](https://testingbot.com# "Edge 129")[128](https://testingbot.com# "Edge 128")[127](https://testingbot.com# "Edge 127")[126](https://testingbot.com# "Edge 126")[125](https://testingbot.com# "Edge 125")[124](https://testingbot.com# "Edge 124")[123](https://testingbot.com# "Edge 123")[122](https://testingbot.com# "Edge 122")[121](https://testingbot.com# "Edge 121")[120](https://testingbot.com# "Edge 120")[119](https://testingbot.com# "Edge 119")[118](https://testingbot.com# "Edge 118")[117](https://testingbot.com# "Edge 117")[116](https://testingbot.com# "Edge 116")[115](https://testingbot.com# "Edge 115")[114](https://testingbot.com# "Edge 114")[113](https://testingbot.com# "Edge 113")[112](https://testingbot.com# "Edge 112")[111](https://testingbot.com# "Edge 111")[110](https://testingbot.com# "Edge 110")[109](https://testingbot.com# "Edge 109")[108](https://testingbot.com# "Edge 108")[107](https://testingbot.com# "Edge 107")[106](https://testingbot.com# "Edge 106")[105](https://testingbot.com# "Edge 105")[104](https://testingbot.com# "Edge 104")[103](https://testingbot.com# "Edge 103")[102](https://testingbot.com# "Edge 102")[101](https://testingbot.com# "Edge 101")[100](https://testingbot.com# "Edge 100")[99](https://testingbot.com# "Edge 99")[98](https://testingbot.com# "Edge 98")[97](https://testingbot.com# "Edge 97")[96](https://testingbot.com# "Edge 96")[95](https://testingbot.com# "Edge 95")[94](https://testingbot.com# "Edge 94")[93](https://testingbot.com# "Edge 93")[92](https://testingbot.com# "Edge 92")[91](https://testingbot.com# "Edge 91")[90](https://testingbot.com# "Edge 90")[89](https://testingbot.com# "Edge 89")[88](https://testingbot.com# "Edge 88")[87](https://testingbot.com# "Edge 87")[86](https://testingbot.com# "Edge 86")[85](https://testingbot.com# "Edge 85")[84](https://testingbot.com# "Edge 84")[83](https://testingbot.com# "Edge 83")[81](https://testingbot.com# "Edge 81")[80](https://testingbot.com# "Edge 80")

#### Opera
[125](https://testingbot.com# "Opera 125")[124](https://testingbot.com# "Opera 124")[123](https://testingbot.com# "Opera 123")[122](https://testingbot.com# "Opera 122")[121](https://testingbot.com# "Opera 121")[120](https://testingbot.com# "Opera 120")[119](https://testingbot.com# "Opera 119")[118](https://testingbot.com# "Opera 118")[117](https://testingbot.com# "Opera 117")[116](https://testingbot.com# "Opera 116")[115](https://testingbot.com# "Opera 115")[114](https://testingbot.com# "Opera 114")[113](https://testingbot.com# "Opera 113")[112](https://testingbot.com# "Opera 112")[111](https://testingbot.com# "Opera 111")[110](https://testingbot.com# "Opera 110")[109](https://testingbot.com# "Opera 109")[108](https://testingbot.com# "Opera 108")[107](https://testingbot.com# "Opera 107")[106](https://testingbot.com# "Opera 106")[105](https://testingbot.com# "Opera 105")[104](https://testingbot.com# "Opera 104")[103](https://testingbot.com# "Opera 103")[102](https://testingbot.com# "Opera 102")[101](https://testingbot.com# "Opera 101")[100](https://testingbot.com# "Opera 100")[99](https://testingbot.com# "Opera 99")[98](https://testingbot.com# "Opera 98")[97](https://testingbot.com# "Opera 97")[96](https://testingbot.com# "Opera 96")[95](https://testingbot.com# "Opera 95")[94](https://testingbot.com# "Opera 94")[93](https://testingbot.com# "Opera 93")[92](https://testingbot.com# "Opera 92")[91](https://testingbot.com# "Opera 91")[90](https://testingbot.com# "Opera 90")[89](https://testingbot.com# "Opera 89")[88](https://testingbot.com# "Opera 88")[87](https://testingbot.com# "Opera 87")[86](https://testingbot.com# "Opera 86")[85](https://testingbot.com# "Opera 85")[84](https://testingbot.com# "Opera 84")[83](https://testingbot.com# "Opera 83")[82](https://testingbot.com# "Opera 82")[81](https://testingbot.com# "Opera 81")[80](https://testingbot.com# "Opera 80")[79](https://testingbot.com# "Opera 79")[78](https://testingbot.com# "Opera 78")[77](https://testingbot.com# "Opera 77")[76](https://testingbot.com# "Opera 76")[75](https://testingbot.com# "Opera 75")[74](https://testingbot.com# "Opera 74")[73](https://testingbot.com# "Opera 73")[72](https://testingbot.com# "Opera 72")[71](https://testingbot.com# "Opera 71")[70](https://testingbot.com# "Opera 70")[69](https://testingbot.com# "Opera 69")[68](https://testingbot.com# "Opera 68")[67](https://testingbot.com# "Opera 67")[66](https://testingbot.com# "Opera 66")[65](https://testingbot.com# "Opera 65")[64](https://testingbot.com# "Opera 64")[63](https://testingbot.com# "Opera 63")[62](https://testingbot.com# "Opera 62")[60](https://testingbot.com# "Opera 60")[59](https://testingbot.com# "Opera 59")[58](https://testingbot.com# "Opera 58")[57](https://testingbot.com# "Opera 57")[56](https://testingbot.com# "Opera 56")[55](https://testingbot.com# "Opera 55")[54](https://testingbot.com# "Opera 54")[53](https://testingbot.com# "Opera 53")[52](https://testingbot.com# "Opera 52")[51](https://testingbot.com# "Opera 51")[50](https://testingbot.com# "Opera 50")

#### Safari
[beta](https://testingbot.com# "Safari beta")[dev](https://testingbot.com# "Safari dev")[15](https://testingbot.com# "Safari 15")

### macOS Big Sur
(11.6)

#### Chrome
[beta](https://testingbot.com# "Chrome")[dev](https://testingbot.com# "Chrome")[138](https://testingbot.com# "Chrome 138")[137](https://testingbot.com# "Chrome 137")[136](https://testingbot.com# "Chrome 136")[135](https://testingbot.com# "Chrome 135")[134](https://testingbot.com# "Chrome 134")[133](https://testingbot.com# "Chrome 133")[132](https://testingbot.com# "Chrome 132")[131](https://testingbot.com# "Chrome 131")[130](https://testingbot.com# "Chrome 130")[129](https://testingbot.com# "Chrome 129")[128](https://testingbot.com# "Chrome 128")[127](https://testingbot.com# "Chrome 127")[126](https://testingbot.com# "Chrome 126")[125](https://testingbot.com# "Chrome 125")[124](https://testingbot.com# "Chrome 124")[123](https://testingbot.com# "Chrome 123")[122](https://testingbot.com# "Chrome 122")[121](https://testingbot.com# "Chrome 121")[120](https://testingbot.com# "Chrome 120")[119](https://testingbot.com# "Chrome 119")[118](https://testingbot.com# "Chrome 118")[117](https://testingbot.com# "Chrome 117")[116](https://testingbot.com# "Chrome 116")[115](https://testingbot.com# "Chrome 115")[114](https://testingbot.com# "Chrome 114")[113](https://testingbot.com# "Chrome 113")[112](https://testingbot.com# "Chrome 112")[111](https://testingbot.com# "Chrome 111")[110](https://testingbot.com# "Chrome 110")[109](https://testingbot.com# "Chrome 109")[108](https://testingbot.com# "Chrome 108")[107](https://testingbot.com# "Chrome 107")[106](https://testingbot.com# "Chrome 106")[105](https://testingbot.com# "Chrome 105")[104](https://testingbot.com# "Chrome 104")[103](https://testingbot.com# "Chrome 103")[102](https://testingbot.com# "Chrome 102")[101](https://testingbot.com# "Chrome 101")[100](https://testingbot.com# "Chrome 100")[99](https://testingbot.com# "Chrome 99")[98](https://testingbot.com# "Chrome 98")[97](https://testingbot.com# "Chrome 97")[96](https://testingbot.com# "Chrome 96")[95](https://testingbot.com# "Chrome 95")[94](https://testingbot.com# "Chrome 94")[93](https://testingbot.com# "Chrome 93")[92](https://testingbot.com# "Chrome 92")[91](https://testingbot.com# "Chrome 91")[90](https://testingbot.com# "Chrome 90")[89](https://testingbot.com# "Chrome 89")[88](https://testingbot.com# "Chrome 88")[87](https://testingbot.com# "Chrome 87")[86](https://testingbot.com# "Chrome 86")[85](https://testingbot.com# "Chrome 85")[84](https://testingbot.com# "Chrome 84")[83](https://testingbot.com# "Chrome 83")[81](https://testingbot.com# "Chrome 81")[80](https://testingbot.com# "Chrome 80")[79](https://testingbot.com# "Chrome 79")[78](https://testingbot.com# "Chrome 78")[77](https://testingbot.com# "Chrome 77")[76](https://testingbot.com# "Chrome 76")[75](https://testingbot.com# "Chrome 75")[74](https://testingbot.com# "Chrome 74")[73](https://testingbot.com# "Chrome 73")[72](https://testingbot.com# "Chrome 72")[71](https://testingbot.com# "Chrome 71")[70](https://testingbot.com# "Chrome 70")[69](https://testingbot.com# "Chrome 69")[68](https://testingbot.com# "Chrome 68")[67](https://testingbot.com# "Chrome 67")[66](https://testingbot.com# "Chrome 66")[65](https://testingbot.com# "Chrome 65")[64](https://testingbot.com# "Chrome 64")[63](https://testingbot.com# "Chrome 63")[62](https://testingbot.com# "Chrome 62")[61](https://testingbot.com# "Chrome 61")[60](https://testingbot.com# "Chrome 60")[59](https://testingbot.com# "Chrome 59")[58](https://testingbot.com# "Chrome 58")[57](https://testingbot.com# "Chrome 57")[56](https://testingbot.com# "Chrome 56")[55](https://testingbot.com# "Chrome 55")[54](https://testingbot.com# "Chrome 54")[53](https://testingbot.com# "Chrome 53")[52](https://testingbot.com# "Chrome 52")[51](https://testingbot.com# "Chrome 51")[50](https://testingbot.com# "Chrome 50")[49](https://testingbot.com# "Chrome 49")[48](https://testingbot.com# "Chrome 48")[47](https://testingbot.com# "Chrome 47")[46](https://testingbot.com# "Chrome 46")[45](https://testingbot.com# "Chrome 45")[44](https://testingbot.com# "Chrome 44")[43](https://testingbot.com# "Chrome 43")[42](https://testingbot.com# "Chrome 42")[41](https://testingbot.com# "Chrome 41")[40](https://testingbot.com# "Chrome 40")[39](https://testingbot.com# "Chrome 39")[38](https://testingbot.com# "Chrome 38")[36](https://testingbot.com# "Chrome 36")

#### Firefox
[dev](https://testingbot.com# "FF dev")[beta](https://testingbot.com# "FF beta")[146](https://testingbot.com# "FF 146")[145](https://testingbot.com# "FF 145")[144](https://testingbot.com# "FF 144")[143](https://testingbot.com# "FF 143")[142](https://testingbot.com# "FF 142")[141](https://testingbot.com# "FF 141")[140](https://testingbot.com# "FF 140")[139](https://testingbot.com# "FF 139")[138](https://testingbot.com# "FF 138")[137](https://testingbot.com# "FF 137")[136](https://testingbot.com# "FF 136")[135](https://testingbot.com# "FF 135")[134](https://testingbot.com# "FF 134")[133](https://testingbot.com# "FF 133")[132](https://testingbot.com# "FF 132")[131](https://testingbot.com# "FF 131")[130](https://testingbot.com# "FF 130")[129](https://testingbot.com# "FF 129")[128](https://testingbot.com# "FF 128")[127](https://testingbot.com# "FF 127")[126](https://testingbot.com# "FF 126")[125](https://testingbot.com# "FF 125")[124](https://testingbot.com# "FF 124")[123](https://testingbot.com# "FF 123")[122](https://testingbot.com# "FF 122")[121](https://testingbot.com# "FF 121")[120](https://testingbot.com# "FF 120")[119](https://testingbot.com# "FF 119")[118](https://testingbot.com# "FF 118")[117](https://testingbot.com# "FF 117")[116](https://testingbot.com# "FF 116")[115](https://testingbot.com# "FF 115")[114](https://testingbot.com# "FF 114")[113](https://testingbot.com# "FF 113")[112](https://testingbot.com# "FF 112")[111](https://testingbot.com# "FF 111")[110](https://testingbot.com# "FF 110")[109](https://testingbot.com# "FF 109")[108](https://testingbot.com# "FF 108")[107](https://testingbot.com# "FF 107")[106](https://testingbot.com# "FF 106")[105](https://testingbot.com# "FF 105")[104](https://testingbot.com# "FF 104")[103](https://testingbot.com# "FF 103")[102](https://testingbot.com# "FF 102")[101](https://testingbot.com# "FF 101")[100](https://testingbot.com# "FF 100")[99](https://testingbot.com# "FF 99")[98](https://testingbot.com# "FF 98")[97](https://testingbot.com# "FF 97")[96](https://testingbot.com# "FF 96")[95](https://testingbot.com# "FF 95")[94](https://testingbot.com# "FF 94")[93](https://testingbot.com# "FF 93")[92](https://testingbot.com# "FF 92")[91](https://testingbot.com# "FF 91")[90](https://testingbot.com# "FF 90")[89](https://testingbot.com# "FF 89")[88](https://testingbot.com# "FF 88")[87](https://testingbot.com# "FF 87")[86](https://testingbot.com# "FF 86")[85](https://testingbot.com# "FF 85")[84](https://testingbot.com# "FF 84")[83](https://testingbot.com# "FF 83")[82](https://testingbot.com# "FF 82")[81](https://testingbot.com# "FF 81")[80](https://testingbot.com# "FF 80")[79](https://testingbot.com# "FF 79")[78](https://testingbot.com# "FF 78")[77](https://testingbot.com# "FF 77")[76](https://testingbot.com# "FF 76")[75](https://testingbot.com# "FF 75")[74](https://testingbot.com# "FF 74")[73](https://testingbot.com# "FF 73")[72](https://testingbot.com# "FF 72")[71](https://testingbot.com# "FF 71")[70](https://testingbot.com# "FF 70")[69](https://testingbot.com# "FF 69")[68](https://testingbot.com# "FF 68")[67](https://testingbot.com# "FF 67")[66](https://testingbot.com# "FF 66")[65](https://testingbot.com# "FF 65")[64](https://testingbot.com# "FF 64")[63](https://testingbot.com# "FF 63")[62](https://testingbot.com# "FF 62")[61](https://testingbot.com# "FF 61")[60](https://testingbot.com# "FF 60")[59](https://testingbot.com# "FF 59")[58](https://testingbot.com# "FF 58")[57](https://testingbot.com# "FF 57")[56](https://testingbot.com# "FF 56")[55](https://testingbot.com# "FF 55")[54](https://testingbot.com# "FF 54")[53](https://testingbot.com# "FF 53")[52](https://testingbot.com# "FF 52")[51](https://testingbot.com# "FF 51")[50](https://testingbot.com# "FF 50")[49](https://testingbot.com# "FF 49")[48](https://testingbot.com# "FF 48")[47](https://testingbot.com# "FF 47")[46](https://testingbot.com# "FF 46")[45](https://testingbot.com# "FF 45")[44](https://testingbot.com# "FF 44")[43](https://testingbot.com# "FF 43")[42](https://testingbot.com# "FF 42")[41](https://testingbot.com# "FF 41")[40](https://testingbot.com# "FF 40")[39](https://testingbot.com# "FF 39")[38](https://testingbot.com# "FF 38")[37](https://testingbot.com# "FF 37")[36](https://testingbot.com# "FF 36")[35](https://testingbot.com# "FF 35")[34](https://testingbot.com# "FF 34")[33](https://testingbot.com# "FF 33")[32](https://testingbot.com# "FF 32")[31](https://testingbot.com# "FF 31")[30](https://testingbot.com# "FF 30")[29](https://testingbot.com# "FF 29")[28](https://testingbot.com# "FF 28")[27](https://testingbot.com# "FF 27")[26](https://testingbot.com# "FF 26")[25](https://testingbot.com# "FF 25")[24](https://testingbot.com# "FF 24")[23](https://testingbot.com# "FF 23")[22](https://testingbot.com# "FF 22")[21](https://testingbot.com# "FF 21")[20](https://testingbot.com# "FF 20")[19](https://testingbot.com# "FF 19")[18](https://testingbot.com# "FF 18")[17](https://testingbot.com# "FF 17")[16](https://testingbot.com# "FF 16")[15](https://testingbot.com# "FF 15")[14](https://testingbot.com# "FF 14")[13](https://testingbot.com# "FF 13")[12](https://testingbot.com# "FF 12")[11](https://testingbot.com# "FF 11")[10](https://testingbot.com# "FF 10")[9](https://testingbot.com# "FF 9")[8](https://testingbot.com# "FF 8")[7](https://testingbot.com# "FF 7")[6](https://testingbot.com# "FF 6")[5](https://testingbot.com# "FF 5")[4](https://testingbot.com# "FF 4")

#### Edge
[138](https://testingbot.com# "Edge 138")[137](https://testingbot.com# "Edge 137")[136](https://testingbot.com# "Edge 136")[135](https://testingbot.com# "Edge 135")[134](https://testingbot.com# "Edge 134")[133](https://testingbot.com# "Edge 133")[132](https://testingbot.com# "Edge 132")[131](https://testingbot.com# "Edge 131")[130](https://testingbot.com# "Edge 130")[129](https://testingbot.com# "Edge 129")[128](https://testingbot.com# "Edge 128")[127](https://testingbot.com# "Edge 127")[126](https://testingbot.com# "Edge 126")[125](https://testingbot.com# "Edge 125")[124](https://testingbot.com# "Edge 124")[123](https://testingbot.com# "Edge 123")[122](https://testingbot.com# "Edge 122")[121](https://testingbot.com# "Edge 121")[120](https://testingbot.com# "Edge 120")[119](https://testingbot.com# "Edge 119")[118](https://testingbot.com# "Edge 118")[117](https://testingbot.com# "Edge 117")[116](https://testingbot.com# "Edge 116")[115](https://testingbot.com# "Edge 115")[114](https://testingbot.com# "Edge 114")[113](https://testingbot.com# "Edge 113")[112](https://testingbot.com# "Edge 112")[111](https://testingbot.com# "Edge 111")[110](https://testingbot.com# "Edge 110")[109](https://testingbot.com# "Edge 109")[108](https://testingbot.com# "Edge 108")[107](https://testingbot.com# "Edge 107")[106](https://testingbot.com# "Edge 106")[105](https://testingbot.com# "Edge 105")[104](https://testingbot.com# "Edge 104")[103](https://testingbot.com# "Edge 103")[102](https://testingbot.com# "Edge 102")[101](https://testingbot.com# "Edge 101")[100](https://testingbot.com# "Edge 100")[99](https://testingbot.com# "Edge 99")[98](https://testingbot.com# "Edge 98")[97](https://testingbot.com# "Edge 97")[96](https://testingbot.com# "Edge 96")[95](https://testingbot.com# "Edge 95")[94](https://testingbot.com# "Edge 94")[93](https://testingbot.com# "Edge 93")[92](https://testingbot.com# "Edge 92")[91](https://testingbot.com# "Edge 91")[90](https://testingbot.com# "Edge 90")[89](https://testingbot.com# "Edge 89")[88](https://testingbot.com# "Edge 88")[87](https://testingbot.com# "Edge 87")[86](https://testingbot.com# "Edge 86")[85](https://testingbot.com# "Edge 85")[84](https://testingbot.com# "Edge 84")[83](https://testingbot.com# "Edge 83")[81](https://testingbot.com# "Edge 81")[80](https://testingbot.com# "Edge 80")

#### Opera
[122](https://testingbot.com# "Opera 122")[121](https://testingbot.com# "Opera 121")[120](https://testingbot.com# "Opera 120")[119](https://testingbot.com# "Opera 119")[118](https://testingbot.com# "Opera 118")[117](https://testingbot.com# "Opera 117")[116](https://testingbot.com# "Opera 116")[115](https://testingbot.com# "Opera 115")[114](https://testingbot.com# "Opera 114")[113](https://testingbot.com# "Opera 113")[112](https://testingbot.com# "Opera 112")[111](https://testingbot.com# "Opera 111")[110](https://testingbot.com# "Opera 110")[109](https://testingbot.com# "Opera 109")[108](https://testingbot.com# "Opera 108")[107](https://testingbot.com# "Opera 107")[106](https://testingbot.com# "Opera 106")[105](https://testingbot.com# "Opera 105")[104](https://testingbot.com# "Opera 104")[103](https://testingbot.com# "Opera 103")[102](https://testingbot.com# "Opera 102")[101](https://testingbot.com# "Opera 101")[100](https://testingbot.com# "Opera 100")[99](https://testingbot.com# "Opera 99")[98](https://testingbot.com# "Opera 98")[97](https://testingbot.com# "Opera 97")[96](https://testingbot.com# "Opera 96")[95](https://testingbot.com# "Opera 95")[94](https://testingbot.com# "Opera 94")[93](https://testingbot.com# "Opera 93")[92](https://testingbot.com# "Opera 92")[91](https://testingbot.com# "Opera 91")[90](https://testingbot.com# "Opera 90")[89](https://testingbot.com# "Opera 89")[88](https://testingbot.com# "Opera 88")[87](https://testingbot.com# "Opera 87")[86](https://testingbot.com# "Opera 86")[85](https://testingbot.com# "Opera 85")[84](https://testingbot.com# "Opera 84")[83](https://testingbot.com# "Opera 83")[82](https://testingbot.com# "Opera 82")[81](https://testingbot.com# "Opera 81")[80](https://testingbot.com# "Opera 80")[79](https://testingbot.com# "Opera 79")[78](https://testingbot.com# "Opera 78")[77](https://testingbot.com# "Opera 77")[76](https://testingbot.com# "Opera 76")[75](https://testingbot.com# "Opera 75")[74](https://testingbot.com# "Opera 74")[73](https://testingbot.com# "Opera 73")[72](https://testingbot.com# "Opera 72")[71](https://testingbot.com# "Opera 71")[70](https://testingbot.com# "Opera 70")[69](https://testingbot.com# "Opera 69")[68](https://testingbot.com# "Opera 68")[67](https://testingbot.com# "Opera 67")[66](https://testingbot.com# "Opera 66")[65](https://testingbot.com# "Opera 65")[64](https://testingbot.com# "Opera 64")[63](https://testingbot.com# "Opera 63")[62](https://testingbot.com# "Opera 62")[60](https://testingbot.com# "Opera 60")[59](https://testingbot.com# "Opera 59")[58](https://testingbot.com# "Opera 58")[57](https://testingbot.com# "Opera 57")[56](https://testingbot.com# "Opera 56")[55](https://testingbot.com# "Opera 55")[54](https://testingbot.com# "Opera 54")[53](https://testingbot.com# "Opera 53")[52](https://testingbot.com# "Opera 52")[51](https://testingbot.com# "Opera 51")[50](https://testingbot.com# "Opera 50")

#### Safari
[14](https://testingbot.com# "Safari 14")

### macOS Catalina
(10.15)

#### Chrome
[beta](https://testingbot.com# "Chrome")[dev](https://testingbot.com# "Chrome")[128](https://testingbot.com# "Chrome 128")[127](https://testingbot.com# "Chrome 127")[126](https://testingbot.com# "Chrome 126")[125](https://testingbot.com# "Chrome 125")[124](https://testingbot.com# "Chrome 124")[123](https://testingbot.com# "Chrome 123")[122](https://testingbot.com# "Chrome 122")[121](https://testingbot.com# "Chrome 121")[120](https://testingbot.com# "Chrome 120")[119](https://testingbot.com# "Chrome 119")[118](https://testingbot.com# "Chrome 118")[117](https://testingbot.com# "Chrome 117")[116](https://testingbot.com# "Chrome 116")[115](https://testingbot.com# "Chrome 115")[114](https://testingbot.com# "Chrome 114")[113](https://testingbot.com# "Chrome 113")[112](https://testingbot.com# "Chrome 112")[111](https://testingbot.com# "Chrome 111")[110](https://testingbot.com# "Chrome 110")[109](https://testingbot.com# "Chrome 109")[108](https://testingbot.com# "Chrome 108")[107](https://testingbot.com# "Chrome 107")[106](https://testingbot.com# "Chrome 106")[105](https://testingbot.com# "Chrome 105")[104](https://testingbot.com# "Chrome 104")[103](https://testingbot.com# "Chrome 103")[102](https://testingbot.com# "Chrome 102")[101](https://testingbot.com# "Chrome 101")[100](https://testingbot.com# "Chrome 100")[99](https://testingbot.com# "Chrome 99")[98](https://testingbot.com# "Chrome 98")[97](https://testingbot.com# "Chrome 97")[96](https://testingbot.com# "Chrome 96")[95](https://testingbot.com# "Chrome 95")[94](https://testingbot.com# "Chrome 94")[93](https://testingbot.com# "Chrome 93")[92](https://testingbot.com# "Chrome 92")[91](https://testingbot.com# "Chrome 91")[90](https://testingbot.com# "Chrome 90")[89](https://testingbot.com# "Chrome 89")[88](https://testingbot.com# "Chrome 88")[87](https://testingbot.com# "Chrome 87")[86](https://testingbot.com# "Chrome 86")[85](https://testingbot.com# "Chrome 85")[84](https://testingbot.com# "Chrome 84")[83](https://testingbot.com# "Chrome 83")[81](https://testingbot.com# "Chrome 81")[80](https://testingbot.com# "Chrome 80")[79](https://testingbot.com# "Chrome 79")[78](https://testingbot.com# "Chrome 78")[77](https://testingbot.com# "Chrome 77")[76](https://testingbot.com# "Chrome 76")[75](https://testingbot.com# "Chrome 75")[74](https://testingbot.com# "Chrome 74")[73](https://testingbot.com# "Chrome 73")[72](https://testingbot.com# "Chrome 72")[71](https://testingbot.com# "Chrome 71")[70](https://testingbot.com# "Chrome 70")[69](https://testingbot.com# "Chrome 69")[68](https://testingbot.com# "Chrome 68")[67](https://testingbot.com# "Chrome 67")[66](https://testingbot.com# "Chrome 66")[65](https://testingbot.com# "Chrome 65")[64](https://testingbot.com# "Chrome 64")[63](https://testingbot.com# "Chrome 63")[62](https://testingbot.com# "Chrome 62")[61](https://testingbot.com# "Chrome 61")[60](https://testingbot.com# "Chrome 60")[59](https://testingbot.com# "Chrome 59")[58](https://testingbot.com# "Chrome 58")[57](https://testingbot.com# "Chrome 57")[56](https://testingbot.com# "Chrome 56")[55](https://testingbot.com# "Chrome 55")[54](https://testingbot.com# "Chrome 54")[53](https://testingbot.com# "Chrome 53")[52](https://testingbot.com# "Chrome 52")[51](https://testingbot.com# "Chrome 51")[50](https://testingbot.com# "Chrome 50")[49](https://testingbot.com# "Chrome 49")[48](https://testingbot.com# "Chrome 48")[47](https://testingbot.com# "Chrome 47")[46](https://testingbot.com# "Chrome 46")[45](https://testingbot.com# "Chrome 45")[44](https://testingbot.com# "Chrome 44")[43](https://testingbot.com# "Chrome 43")[42](https://testingbot.com# "Chrome 42")[41](https://testingbot.com# "Chrome 41")[40](https://testingbot.com# "Chrome 40")[39](https://testingbot.com# "Chrome 39")[38](https://testingbot.com# "Chrome 38")[36](https://testingbot.com# "Chrome 36")

#### Firefox
[dev](https://testingbot.com# "FF dev")[beta](https://testingbot.com# "FF beta")[146](https://testingbot.com# "FF 146")[145](https://testingbot.com# "FF 145")[144](https://testingbot.com# "FF 144")[143](https://testingbot.com# "FF 143")[142](https://testingbot.com# "FF 142")[141](https://testingbot.com# "FF 141")[140](https://testingbot.com# "FF 140")[139](https://testingbot.com# "FF 139")[138](https://testingbot.com# "FF 138")[137](https://testingbot.com# "FF 137")[136](https://testingbot.com# "FF 136")[135](https://testingbot.com# "FF 135")[134](https://testingbot.com# "FF 134")[133](https://testingbot.com# "FF 133")[132](https://testingbot.com# "FF 132")[131](https://testingbot.com# "FF 131")[130](https://testingbot.com# "FF 130")[129](https://testingbot.com# "FF 129")[128](https://testingbot.com# "FF 128")[127](https://testingbot.com# "FF 127")[126](https://testingbot.com# "FF 126")[125](https://testingbot.com# "FF 125")[124](https://testingbot.com# "FF 124")[123](https://testingbot.com# "FF 123")[122](https://testingbot.com# "FF 122")[121](https://testingbot.com# "FF 121")[120](https://testingbot.com# "FF 120")[119](https://testingbot.com# "FF 119")[118](https://testingbot.com# "FF 118")[117](https://testingbot.com# "FF 117")[116](https://testingbot.com# "FF 116")[115](https://testingbot.com# "FF 115")[114](https://testingbot.com# "FF 114")[113](https://testingbot.com# "FF 113")[112](https://testingbot.com# "FF 112")[111](https://testingbot.com# "FF 111")[110](https://testingbot.com# "FF 110")[109](https://testingbot.com# "FF 109")[108](https://testingbot.com# "FF 108")[107](https://testingbot.com# "FF 107")[106](https://testingbot.com# "FF 106")[105](https://testingbot.com# "FF 105")[104](https://testingbot.com# "FF 104")[103](https://testingbot.com# "FF 103")[102](https://testingbot.com# "FF 102")[101](https://testingbot.com# "FF 101")[100](https://testingbot.com# "FF 100")[99](https://testingbot.com# "FF 99")[98](https://testingbot.com# "FF 98")[97](https://testingbot.com# "FF 97")[96](https://testingbot.com# "FF 96")[95](https://testingbot.com# "FF 95")[94](https://testingbot.com# "FF 94")[93](https://testingbot.com# "FF 93")[92](https://testingbot.com# "FF 92")[91](https://testingbot.com# "FF 91")[90](https://testingbot.com# "FF 90")[89](https://testingbot.com# "FF 89")[88](https://testingbot.com# "FF 88")[87](https://testingbot.com# "FF 87")[86](https://testingbot.com# "FF 86")[85](https://testingbot.com# "FF 85")[84](https://testingbot.com# "FF 84")[83](https://testingbot.com# "FF 83")[82](https://testingbot.com# "FF 82")[81](https://testingbot.com# "FF 81")[80](https://testingbot.com# "FF 80")[79](https://testingbot.com# "FF 79")[78](https://testingbot.com# "FF 78")[77](https://testingbot.com# "FF 77")[76](https://testingbot.com# "FF 76")[75](https://testingbot.com# "FF 75")[74](https://testingbot.com# "FF 74")[73](https://testingbot.com# "FF 73")[72](https://testingbot.com# "FF 72")[71](https://testingbot.com# "FF 71")[70](https://testingbot.com# "FF 70")[69](https://testingbot.com# "FF 69")[68](https://testingbot.com# "FF 68")[67](https://testingbot.com# "FF 67")[66](https://testingbot.com# "FF 66")[65](https://testingbot.com# "FF 65")[64](https://testingbot.com# "FF 64")[63](https://testingbot.com# "FF 63")[62](https://testingbot.com# "FF 62")[61](https://testingbot.com# "FF 61")[60](https://testingbot.com# "FF 60")[59](https://testingbot.com# "FF 59")[58](https://testingbot.com# "FF 58")[57](https://testingbot.com# "FF 57")[56](https://testingbot.com# "FF 56")[55](https://testingbot.com# "FF 55")[54](https://testingbot.com# "FF 54")[53](https://testingbot.com# "FF 53")[52](https://testingbot.com# "FF 52")[51](https://testingbot.com# "FF 51")[50](https://testingbot.com# "FF 50")[49](https://testingbot.com# "FF 49")[48](https://testingbot.com# "FF 48")[47](https://testingbot.com# "FF 47")[46](https://testingbot.com# "FF 46")[45](https://testingbot.com# "FF 45")[44](https://testingbot.com# "FF 44")[43](https://testingbot.com# "FF 43")[42](https://testingbot.com# "FF 42")[41](https://testingbot.com# "FF 41")[40](https://testingbot.com# "FF 40")[39](https://testingbot.com# "FF 39")[38](https://testingbot.com# "FF 38")[37](https://testingbot.com# "FF 37")[36](https://testingbot.com# "FF 36")[35](https://testingbot.com# "FF 35")[34](https://testingbot.com# "FF 34")[33](https://testingbot.com# "FF 33")[32](https://testingbot.com# "FF 32")[31](https://testingbot.com# "FF 31")[30](https://testingbot.com# "FF 30")[29](https://testingbot.com# "FF 29")[28](https://testingbot.com# "FF 28")[27](https://testingbot.com# "FF 27")[26](https://testingbot.com# "FF 26")[25](https://testingbot.com# "FF 25")[24](https://testingbot.com# "FF 24")[23](https://testingbot.com# "FF 23")[22](https://testingbot.com# "FF 22")[21](https://testingbot.com# "FF 21")[20](https://testingbot.com# "FF 20")[19](https://testingbot.com# "FF 19")[18](https://testingbot.com# "FF 18")[17](https://testingbot.com# "FF 17")[16](https://testingbot.com# "FF 16")[15](https://testingbot.com# "FF 15")[14](https://testingbot.com# "FF 14")[13](https://testingbot.com# "FF 13")[12](https://testingbot.com# "FF 12")[11](https://testingbot.com# "FF 11")[10](https://testingbot.com# "FF 10")[9](https://testingbot.com# "FF 9")[8](https://testingbot.com# "FF 8")[7](https://testingbot.com# "FF 7")[6](https://testingbot.com# "FF 6")[5](https://testingbot.com# "FF 5")[4](https://testingbot.com# "FF 4")

#### Edge
[122](https://testingbot.com# "Edge 122")[121](https://testingbot.com# "Edge 121")[120](https://testingbot.com# "Edge 120")[119](https://testingbot.com# "Edge 119")[118](https://testingbot.com# "Edge 118")[117](https://testingbot.com# "Edge 117")[116](https://testingbot.com# "Edge 116")[115](https://testingbot.com# "Edge 115")[114](https://testingbot.com# "Edge 114")[113](https://testingbot.com# "Edge 113")[112](https://testingbot.com# "Edge 112")[111](https://testingbot.com# "Edge 111")[110](https://testingbot.com# "Edge 110")[109](https://testingbot.com# "Edge 109")[108](https://testingbot.com# "Edge 108")[107](https://testingbot.com# "Edge 107")[106](https://testingbot.com# "Edge 106")[105](https://testingbot.com# "Edge 105")[104](https://testingbot.com# "Edge 104")[103](https://testingbot.com# "Edge 103")[102](https://testingbot.com# "Edge 102")[101](https://testingbot.com# "Edge 101")[100](https://testingbot.com# "Edge 100")[99](https://testingbot.com# "Edge 99")[98](https://testingbot.com# "Edge 98")[97](https://testingbot.com# "Edge 97")[96](https://testingbot.com# "Edge 96")[95](https://testingbot.com# "Edge 95")[94](https://testingbot.com# "Edge 94")[93](https://testingbot.com# "Edge 93")[92](https://testingbot.com# "Edge 92")[91](https://testingbot.com# "Edge 91")[90](https://testingbot.com# "Edge 90")[89](https://testingbot.com# "Edge 89")[88](https://testingbot.com# "Edge 88")[87](https://testingbot.com# "Edge 87")[86](https://testingbot.com# "Edge 86")[85](https://testingbot.com# "Edge 85")[84](https://testingbot.com# "Edge 84")[83](https://testingbot.com# "Edge 83")[81](https://testingbot.com# "Edge 81")[80](https://testingbot.com# "Edge 80")

#### Opera
[125](https://testingbot.com# "Opera 125")[124](https://testingbot.com# "Opera 124")[123](https://testingbot.com# "Opera 123")[122](https://testingbot.com# "Opera 122")[121](https://testingbot.com# "Opera 121")[120](https://testingbot.com# "Opera 120")[119](https://testingbot.com# "Opera 119")[118](https://testingbot.com# "Opera 118")[117](https://testingbot.com# "Opera 117")[116](https://testingbot.com# "Opera 116")[115](https://testingbot.com# "Opera 115")[114](https://testingbot.com# "Opera 114")[113](https://testingbot.com# "Opera 113")[112](https://testingbot.com# "Opera 112")[111](https://testingbot.com# "Opera 111")[110](https://testingbot.com# "Opera 110")[109](https://testingbot.com# "Opera 109")[108](https://testingbot.com# "Opera 108")[107](https://testingbot.com# "Opera 107")[106](https://testingbot.com# "Opera 106")[105](https://testingbot.com# "Opera 105")[104](https://testingbot.com# "Opera 104")[103](https://testingbot.com# "Opera 103")[102](https://testingbot.com# "Opera 102")[101](https://testingbot.com# "Opera 101")[100](https://testingbot.com# "Opera 100")[99](https://testingbot.com# "Opera 99")[98](https://testingbot.com# "Opera 98")[97](https://testingbot.com# "Opera 97")[96](https://testingbot.com# "Opera 96")[95](https://testingbot.com# "Opera 95")[94](https://testingbot.com# "Opera 94")[93](https://testingbot.com# "Opera 93")[92](https://testingbot.com# "Opera 92")[91](https://testingbot.com# "Opera 91")[90](https://testingbot.com# "Opera 90")[89](https://testingbot.com# "Opera 89")[88](https://testingbot.com# "Opera 88")[87](https://testingbot.com# "Opera 87")[86](https://testingbot.com# "Opera 86")[85](https://testingbot.com# "Opera 85")[84](https://testingbot.com# "Opera 84")[83](https://testingbot.com# "Opera 83")[82](https://testingbot.com# "Opera 82")[81](https://testingbot.com# "Opera 81")[80](https://testingbot.com# "Opera 80")[79](https://testingbot.com# "Opera 79")[78](https://testingbot.com# "Opera 78")[77](https://testingbot.com# "Opera 77")[76](https://testingbot.com# "Opera 76")[75](https://testingbot.com# "Opera 75")[74](https://testingbot.com# "Opera 74")[73](https://testingbot.com# "Opera 73")[72](https://testingbot.com# "Opera 72")[71](https://testingbot.com# "Opera 71")[70](https://testingbot.com# "Opera 70")[69](https://testingbot.com# "Opera 69")[68](https://testingbot.com# "Opera 68")[67](https://testingbot.com# "Opera 67")[66](https://testingbot.com# "Opera 66")[65](https://testingbot.com# "Opera 65")[64](https://testingbot.com# "Opera 64")[63](https://testingbot.com# "Opera 63")[62](https://testingbot.com# "Opera 62")[60](https://testingbot.com# "Opera 60")[59](https://testingbot.com# "Opera 59")[58](https://testingbot.com# "Opera 58")[57](https://testingbot.com# "Opera 57")[56](https://testingbot.com# "Opera 56")[55](https://testingbot.com# "Opera 55")[54](https://testingbot.com# "Opera 54")[53](https://testingbot.com# "Opera 53")[52](https://testingbot.com# "Opera 52")[51](https://testingbot.com# "Opera 51")[50](https://testingbot.com# "Opera 50")

#### Safari
[13](https://testingbot.com# "Safari 13")

### macOS Mojave
(10.14)

#### Chrome
[116](https://testingbot.com# "Chrome 116")[115](https://testingbot.com# "Chrome 115")[114](https://testingbot.com# "Chrome 114")[113](https://testingbot.com# "Chrome 113")[112](https://testingbot.com# "Chrome 112")[111](https://testingbot.com# "Chrome 111")[110](https://testingbot.com# "Chrome 110")[109](https://testingbot.com# "Chrome 109")[108](https://testingbot.com# "Chrome 108")[107](https://testingbot.com# "Chrome 107")[106](https://testingbot.com# "Chrome 106")[105](https://testingbot.com# "Chrome 105")[104](https://testingbot.com# "Chrome 104")[103](https://testingbot.com# "Chrome 103")[102](https://testingbot.com# "Chrome 102")[101](https://testingbot.com# "Chrome 101")[100](https://testingbot.com# "Chrome 100")[99](https://testingbot.com# "Chrome 99")[98](https://testingbot.com# "Chrome 98")[97](https://testingbot.com# "Chrome 97")[96](https://testingbot.com# "Chrome 96")[95](https://testingbot.com# "Chrome 95")[94](https://testingbot.com# "Chrome 94")[93](https://testingbot.com# "Chrome 93")[92](https://testingbot.com# "Chrome 92")[91](https://testingbot.com# "Chrome 91")[90](https://testingbot.com# "Chrome 90")[89](https://testingbot.com# "Chrome 89")[88](https://testingbot.com# "Chrome 88")[87](https://testingbot.com# "Chrome 87")[86](https://testingbot.com# "Chrome 86")[85](https://testingbot.com# "Chrome 85")[84](https://testingbot.com# "Chrome 84")[83](https://testingbot.com# "Chrome 83")[81](https://testingbot.com# "Chrome 81")[80](https://testingbot.com# "Chrome 80")[79](https://testingbot.com# "Chrome 79")[78](https://testingbot.com# "Chrome 78")[77](https://testingbot.com# "Chrome 77")[76](https://testingbot.com# "Chrome 76")[75](https://testingbot.com# "Chrome 75")[74](https://testingbot.com# "Chrome 74")[73](https://testingbot.com# "Chrome 73")[72](https://testingbot.com# "Chrome 72")[71](https://testingbot.com# "Chrome 71")[70](https://testingbot.com# "Chrome 70")[69](https://testingbot.com# "Chrome 69")[68](https://testingbot.com# "Chrome 68")[67](https://testingbot.com# "Chrome 67")[66](https://testingbot.com# "Chrome 66")[65](https://testingbot.com# "Chrome 65")[64](https://testingbot.com# "Chrome 64")[63](https://testingbot.com# "Chrome 63")[62](https://testingbot.com# "Chrome 62")[61](https://testingbot.com# "Chrome 61")[60](https://testingbot.com# "Chrome 60")[59](https://testingbot.com# "Chrome 59")[58](https://testingbot.com# "Chrome 58")[57](https://testingbot.com# "Chrome 57")[56](https://testingbot.com# "Chrome 56")[55](https://testingbot.com# "Chrome 55")[54](https://testingbot.com# "Chrome 54")[53](https://testingbot.com# "Chrome 53")[52](https://testingbot.com# "Chrome 52")[51](https://testingbot.com# "Chrome 51")[50](https://testingbot.com# "Chrome 50")[49](https://testingbot.com# "Chrome 49")[48](https://testingbot.com# "Chrome 48")[47](https://testingbot.com# "Chrome 47")[46](https://testingbot.com# "Chrome 46")[45](https://testingbot.com# "Chrome 45")[44](https://testingbot.com# "Chrome 44")[43](https://testingbot.com# "Chrome 43")[42](https://testingbot.com# "Chrome 42")[41](https://testingbot.com# "Chrome 41")[40](https://testingbot.com# "Chrome 40")[39](https://testingbot.com# "Chrome 39")[38](https://testingbot.com# "Chrome 38")[36](https://testingbot.com# "Chrome 36")

#### Firefox
[115](https://testingbot.com# "FF 115")[114](https://testingbot.com# "FF 114")[113](https://testingbot.com# "FF 113")[112](https://testingbot.com# "FF 112")[111](https://testingbot.com# "FF 111")[110](https://testingbot.com# "FF 110")[109](https://testingbot.com# "FF 109")[108](https://testingbot.com# "FF 108")[107](https://testingbot.com# "FF 107")[106](https://testingbot.com# "FF 106")[105](https://testingbot.com# "FF 105")[104](https://testingbot.com# "FF 104")[103](https://testingbot.com# "FF 103")[102](https://testingbot.com# "FF 102")[101](https://testingbot.com# "FF 101")[100](https://testingbot.com# "FF 100")[99](https://testingbot.com# "FF 99")[98](https://testingbot.com# "FF 98")[97](https://testingbot.com# "FF 97")[96](https://testingbot.com# "FF 96")[95](https://testingbot.com# "FF 95")[94](https://testingbot.com# "FF 94")[93](https://testingbot.com# "FF 93")[92](https://testingbot.com# "FF 92")[91](https://testingbot.com# "FF 91")[90](https://testingbot.com# "FF 90")[89](https://testingbot.com# "FF 89")[88](https://testingbot.com# "FF 88")[87](https://testingbot.com# "FF 87")[86](https://testingbot.com# "FF 86")[85](https://testingbot.com# "FF 85")[84](https://testingbot.com# "FF 84")[83](https://testingbot.com# "FF 83")[82](https://testingbot.com# "FF 82")[81](https://testingbot.com# "FF 81")[80](https://testingbot.com# "FF 80")[79](https://testingbot.com# "FF 79")[78](https://testingbot.com# "FF 78")[77](https://testingbot.com# "FF 77")[76](https://testingbot.com# "FF 76")[75](https://testingbot.com# "FF 75")[74](https://testingbot.com# "FF 74")[73](https://testingbot.com# "FF 73")[72](https://testingbot.com# "FF 72")[71](https://testingbot.com# "FF 71")[70](https://testingbot.com# "FF 70")[69](https://testingbot.com# "FF 69")[68](https://testingbot.com# "FF 68")[67](https://testingbot.com# "FF 67")[66](https://testingbot.com# "FF 66")[65](https://testingbot.com# "FF 65")[64](https://testingbot.com# "FF 64")[63](https://testingbot.com# "FF 63")[62](https://testingbot.com# "FF 62")[61](https://testingbot.com# "FF 61")[60](https://testingbot.com# "FF 60")[59](https://testingbot.com# "FF 59")[58](https://testingbot.com# "FF 58")[57](https://testingbot.com# "FF 57")[56](https://testingbot.com# "FF 56")[55](https://testingbot.com# "FF 55")[54](https://testingbot.com# "FF 54")[53](https://testingbot.com# "FF 53")[52](https://testingbot.com# "FF 52")[51](https://testingbot.com# "FF 51")[50](https://testingbot.com# "FF 50")[49](https://testingbot.com# "FF 49")[48](https://testingbot.com# "FF 48")[47](https://testingbot.com# "FF 47")[46](https://testingbot.com# "FF 46")[45](https://testingbot.com# "FF 45")[44](https://testingbot.com# "FF 44")[43](https://testingbot.com# "FF 43")[42](https://testingbot.com# "FF 42")[41](https://testingbot.com# "FF 41")[40](https://testingbot.com# "FF 40")[39](https://testingbot.com# "FF 39")[38](https://testingbot.com# "FF 38")[37](https://testingbot.com# "FF 37")[36](https://testingbot.com# "FF 36")[35](https://testingbot.com# "FF 35")[34](https://testingbot.com# "FF 34")[33](https://testingbot.com# "FF 33")[32](https://testingbot.com# "FF 32")[31](https://testingbot.com# "FF 31")[30](https://testingbot.com# "FF 30")[29](https://testingbot.com# "FF 29")[28](https://testingbot.com# "FF 28")[27](https://testingbot.com# "FF 27")[26](https://testingbot.com# "FF 26")[25](https://testingbot.com# "FF 25")[24](https://testingbot.com# "FF 24")[23](https://testingbot.com# "FF 23")[22](https://testingbot.com# "FF 22")[21](https://testingbot.com# "FF 21")[20](https://testingbot.com# "FF 20")[19](https://testingbot.com# "FF 19")[18](https://testingbot.com# "FF 18")[17](https://testingbot.com# "FF 17")[16](https://testingbot.com# "FF 16")[15](https://testingbot.com# "FF 15")[14](https://testingbot.com# "FF 14")[13](https://testingbot.com# "FF 13")[12](https://testingbot.com# "FF 12")[11](https://testingbot.com# "FF 11")[10](https://testingbot.com# "FF 10")[9](https://testingbot.com# "FF 9")[8](https://testingbot.com# "FF 8")[7](https://testingbot.com# "FF 7")[6](https://testingbot.com# "FF 6")[5](https://testingbot.com# "FF 5")[4](https://testingbot.com# "FF 4")

#### Edge
[116](https://testingbot.com# "Edge 116")[115](https://testingbot.com# "Edge 115")[114](https://testingbot.com# "Edge 114")[113](https://testingbot.com# "Edge 113")[112](https://testingbot.com# "Edge 112")[111](https://testingbot.com# "Edge 111")[110](https://testingbot.com# "Edge 110")[109](https://testingbot.com# "Edge 109")[108](https://testingbot.com# "Edge 108")[107](https://testingbot.com# "Edge 107")[106](https://testingbot.com# "Edge 106")[105](https://testingbot.com# "Edge 105")[104](https://testingbot.com# "Edge 104")[103](https://testingbot.com# "Edge 103")[102](https://testingbot.com# "Edge 102")[101](https://testingbot.com# "Edge 101")[100](https://testingbot.com# "Edge 100")[99](https://testingbot.com# "Edge 99")[98](https://testingbot.com# "Edge 98")[97](https://testingbot.com# "Edge 97")[96](https://testingbot.com# "Edge 96")[95](https://testingbot.com# "Edge 95")[94](https://testingbot.com# "Edge 94")[93](https://testingbot.com# "Edge 93")[92](https://testingbot.com# "Edge 92")[91](https://testingbot.com# "Edge 91")[90](https://testingbot.com# "Edge 90")[89](https://testingbot.com# "Edge 89")[88](https://testingbot.com# "Edge 88")[87](https://testingbot.com# "Edge 87")[86](https://testingbot.com# "Edge 86")[85](https://testingbot.com# "Edge 85")[84](https://testingbot.com# "Edge 84")[83](https://testingbot.com# "Edge 83")[81](https://testingbot.com# "Edge 81")[80](https://testingbot.com# "Edge 80")[79](https://testingbot.com# "Edge 79")

#### Opera
[102](https://testingbot.com# "Opera 102")[101](https://testingbot.com# "Opera 101")[100](https://testingbot.com# "Opera 100")[99](https://testingbot.com# "Opera 99")[98](https://testingbot.com# "Opera 98")[97](https://testingbot.com# "Opera 97")[96](https://testingbot.com# "Opera 96")[95](https://testingbot.com# "Opera 95")[94](https://testingbot.com# "Opera 94")[93](https://testingbot.com# "Opera 93")[92](https://testingbot.com# "Opera 92")[91](https://testingbot.com# "Opera 91")[90](https://testingbot.com# "Opera 90")[89](https://testingbot.com# "Opera 89")[88](https://testingbot.com# "Opera 88")[87](https://testingbot.com# "Opera 87")[86](https://testingbot.com# "Opera 86")[85](https://testingbot.com# "Opera 85")[84](https://testingbot.com# "Opera 84")[83](https://testingbot.com# "Opera 83")[82](https://testingbot.com# "Opera 82")[81](https://testingbot.com# "Opera 81")[80](https://testingbot.com# "Opera 80")[79](https://testingbot.com# "Opera 79")[78](https://testingbot.com# "Opera 78")[77](https://testingbot.com# "Opera 77")[76](https://testingbot.com# "Opera 76")[75](https://testingbot.com# "Opera 75")[74](https://testingbot.com# "Opera 74")[73](https://testingbot.com# "Opera 73")[72](https://testingbot.com# "Opera 72")[71](https://testingbot.com# "Opera 71")[70](https://testingbot.com# "Opera 70")[69](https://testingbot.com# "Opera 69")[68](https://testingbot.com# "Opera 68")[67](https://testingbot.com# "Opera 67")[66](https://testingbot.com# "Opera 66")[65](https://testingbot.com# "Opera 65")[64](https://testingbot.com# "Opera 64")[63](https://testingbot.com# "Opera 63")[62](https://testingbot.com# "Opera 62")[60](https://testingbot.com# "Opera 60")[59](https://testingbot.com# "Opera 59")[58](https://testingbot.com# "Opera 58")[57](https://testingbot.com# "Opera 57")[56](https://testingbot.com# "Opera 56")[55](https://testingbot.com# "Opera 55")[54](https://testingbot.com# "Opera 54")[53](https://testingbot.com# "Opera 53")[52](https://testingbot.com# "Opera 52")[51](https://testingbot.com# "Opera 51")[50](https://testingbot.com# "Opera 50")

#### Safari
[12](https://testingbot.com# "Safari 12")

### macOS High Sierra
(10.13)

#### Chrome
[116](https://testingbot.com# "Chrome 116")[115](https://testingbot.com# "Chrome 115")[114](https://testingbot.com# "Chrome 114")[113](https://testingbot.com# "Chrome 113")[112](https://testingbot.com# "Chrome 112")[111](https://testingbot.com# "Chrome 111")[110](https://testingbot.com# "Chrome 110")[109](https://testingbot.com# "Chrome 109")[108](https://testingbot.com# "Chrome 108")[107](https://testingbot.com# "Chrome 107")[106](https://testingbot.com# "Chrome 106")[105](https://testingbot.com# "Chrome 105")[104](https://testingbot.com# "Chrome 104")[103](https://testingbot.com# "Chrome 103")[102](https://testingbot.com# "Chrome 102")[101](https://testingbot.com# "Chrome 101")[100](https://testingbot.com# "Chrome 100")[99](https://testingbot.com# "Chrome 99")[98](https://testingbot.com# "Chrome 98")[97](https://testingbot.com# "Chrome 97")[96](https://testingbot.com# "Chrome 96")[95](https://testingbot.com# "Chrome 95")[94](https://testingbot.com# "Chrome 94")[93](https://testingbot.com# "Chrome 93")[92](https://testingbot.com# "Chrome 92")[91](https://testingbot.com# "Chrome 91")[90](https://testingbot.com# "Chrome 90")[89](https://testingbot.com# "Chrome 89")[88](https://testingbot.com# "Chrome 88")[87](https://testingbot.com# "Chrome 87")[86](https://testingbot.com# "Chrome 86")[85](https://testingbot.com# "Chrome 85")[84](https://testingbot.com# "Chrome 84")[83](https://testingbot.com# "Chrome 83")[81](https://testingbot.com# "Chrome 81")[80](https://testingbot.com# "Chrome 80")[79](https://testingbot.com# "Chrome 79")[78](https://testingbot.com# "Chrome 78")[77](https://testingbot.com# "Chrome 77")[76](https://testingbot.com# "Chrome 76")[75](https://testingbot.com# "Chrome 75")[74](https://testingbot.com# "Chrome 74")[73](https://testingbot.com# "Chrome 73")[72](https://testingbot.com# "Chrome 72")[71](https://testingbot.com# "Chrome 71")[70](https://testingbot.com# "Chrome 70")[69](https://testingbot.com# "Chrome 69")[68](https://testingbot.com# "Chrome 68")[67](https://testingbot.com# "Chrome 67")[66](https://testingbot.com# "Chrome 66")[65](https://testingbot.com# "Chrome 65")[64](https://testingbot.com# "Chrome 64")[63](https://testingbot.com# "Chrome 63")[62](https://testingbot.com# "Chrome 62")[61](https://testingbot.com# "Chrome 61")[60](https://testingbot.com# "Chrome 60")[59](https://testingbot.com# "Chrome 59")[58](https://testingbot.com# "Chrome 58")[57](https://testingbot.com# "Chrome 57")[56](https://testingbot.com# "Chrome 56")[55](https://testingbot.com# "Chrome 55")[54](https://testingbot.com# "Chrome 54")[53](https://testingbot.com# "Chrome 53")[52](https://testingbot.com# "Chrome 52")[51](https://testingbot.com# "Chrome 51")[50](https://testingbot.com# "Chrome 50")[49](https://testingbot.com# "Chrome 49")[48](https://testingbot.com# "Chrome 48")[47](https://testingbot.com# "Chrome 47")[46](https://testingbot.com# "Chrome 46")[45](https://testingbot.com# "Chrome 45")[44](https://testingbot.com# "Chrome 44")[43](https://testingbot.com# "Chrome 43")[42](https://testingbot.com# "Chrome 42")[41](https://testingbot.com# "Chrome 41")[40](https://testingbot.com# "Chrome 40")[39](https://testingbot.com# "Chrome 39")[38](https://testingbot.com# "Chrome 38")[36](https://testingbot.com# "Chrome 36")

#### Firefox
[115](https://testingbot.com# "FF 115")[114](https://testingbot.com# "FF 114")[113](https://testingbot.com# "FF 113")[112](https://testingbot.com# "FF 112")[111](https://testingbot.com# "FF 111")[110](https://testingbot.com# "FF 110")[109](https://testingbot.com# "FF 109")[108](https://testingbot.com# "FF 108")[107](https://testingbot.com# "FF 107")[106](https://testingbot.com# "FF 106")[105](https://testingbot.com# "FF 105")[104](https://testingbot.com# "FF 104")[103](https://testingbot.com# "FF 103")[102](https://testingbot.com# "FF 102")[101](https://testingbot.com# "FF 101")[100](https://testingbot.com# "FF 100")[99](https://testingbot.com# "FF 99")[98](https://testingbot.com# "FF 98")[97](https://testingbot.com# "FF 97")[96](https://testingbot.com# "FF 96")[95](https://testingbot.com# "FF 95")[94](https://testingbot.com# "FF 94")[93](https://testingbot.com# "FF 93")[92](https://testingbot.com# "FF 92")[91](https://testingbot.com# "FF 91")[90](https://testingbot.com# "FF 90")[89](https://testingbot.com# "FF 89")[88](https://testingbot.com# "FF 88")[87](https://testingbot.com# "FF 87")[86](https://testingbot.com# "FF 86")[85](https://testingbot.com# "FF 85")[84](https://testingbot.com# "FF 84")[83](https://testingbot.com# "FF 83")[82](https://testingbot.com# "FF 82")[81](https://testingbot.com# "FF 81")[80](https://testingbot.com# "FF 80")[79](https://testingbot.com# "FF 79")[78](https://testingbot.com# "FF 78")[77](https://testingbot.com# "FF 77")[76](https://testingbot.com# "FF 76")[75](https://testingbot.com# "FF 75")[74](https://testingbot.com# "FF 74")[73](https://testingbot.com# "FF 73")[72](https://testingbot.com# "FF 72")[71](https://testingbot.com# "FF 71")[70](https://testingbot.com# "FF 70")[69](https://testingbot.com# "FF 69")[68](https://testingbot.com# "FF 68")[67](https://testingbot.com# "FF 67")[66](https://testingbot.com# "FF 66")[65](https://testingbot.com# "FF 65")[64](https://testingbot.com# "FF 64")[63](https://testingbot.com# "FF 63")[62](https://testingbot.com# "FF 62")[61](https://testingbot.com# "FF 61")[60](https://testingbot.com# "FF 60")[59](https://testingbot.com# "FF 59")[58](https://testingbot.com# "FF 58")[57](https://testingbot.com# "FF 57")[56](https://testingbot.com# "FF 56")[55](https://testingbot.com# "FF 55")[54](https://testingbot.com# "FF 54")[53](https://testingbot.com# "FF 53")[52](https://testingbot.com# "FF 52")[51](https://testingbot.com# "FF 51")[50](https://testingbot.com# "FF 50")[49](https://testingbot.com# "FF 49")[48](https://testingbot.com# "FF 48")[47](https://testingbot.com# "FF 47")[46](https://testingbot.com# "FF 46")[45](https://testingbot.com# "FF 45")[44](https://testingbot.com# "FF 44")[43](https://testingbot.com# "FF 43")[42](https://testingbot.com# "FF 42")[41](https://testingbot.com# "FF 41")[40](https://testingbot.com# "FF 40")[39](https://testingbot.com# "FF 39")[38](https://testingbot.com# "FF 38")[37](https://testingbot.com# "FF 37")[36](https://testingbot.com# "FF 36")[35](https://testingbot.com# "FF 35")[34](https://testingbot.com# "FF 34")[33](https://testingbot.com# "FF 33")[32](https://testingbot.com# "FF 32")[31](https://testingbot.com# "FF 31")[30](https://testingbot.com# "FF 30")[29](https://testingbot.com# "FF 29")[28](https://testingbot.com# "FF 28")[27](https://testingbot.com# "FF 27")[26](https://testingbot.com# "FF 26")[25](https://testingbot.com# "FF 25")[24](https://testingbot.com# "FF 24")[23](https://testingbot.com# "FF 23")[22](https://testingbot.com# "FF 22")[21](https://testingbot.com# "FF 21")[20](https://testingbot.com# "FF 20")[19](https://testingbot.com# "FF 19")[18](https://testingbot.com# "FF 18")[17](https://testingbot.com# "FF 17")[16](https://testingbot.com# "FF 16")[15](https://testingbot.com# "FF 15")[14](https://testingbot.com# "FF 14")[13](https://testingbot.com# "FF 13")[12](https://testingbot.com# "FF 12")[11](https://testingbot.com# "FF 11")[10](https://testingbot.com# "FF 10")[9](https://testingbot.com# "FF 9")[8](https://testingbot.com# "FF 8")[7](https://testingbot.com# "FF 7")[6](https://testingbot.com# "FF 6")[5](https://testingbot.com# "FF 5")[4](https://testingbot.com# "FF 4")

#### Opera
[102](https://testingbot.com# "Opera 102")[101](https://testingbot.com# "Opera 101")[100](https://testingbot.com# "Opera 100")[99](https://testingbot.com# "Opera 99")[98](https://testingbot.com# "Opera 98")[97](https://testingbot.com# "Opera 97")[96](https://testingbot.com# "Opera 96")[95](https://testingbot.com# "Opera 95")[94](https://testingbot.com# "Opera 94")[93](https://testingbot.com# "Opera 93")[92](https://testingbot.com# "Opera 92")[91](https://testingbot.com# "Opera 91")[90](https://testingbot.com# "Opera 90")[89](https://testingbot.com# "Opera 89")[88](https://testingbot.com# "Opera 88")[87](https://testingbot.com# "Opera 87")[86](https://testingbot.com# "Opera 86")[85](https://testingbot.com# "Opera 85")[84](https://testingbot.com# "Opera 84")[83](https://testingbot.com# "Opera 83")[82](https://testingbot.com# "Opera 82")[81](https://testingbot.com# "Opera 81")[80](https://testingbot.com# "Opera 80")[79](https://testingbot.com# "Opera 79")[78](https://testingbot.com# "Opera 78")[77](https://testingbot.com# "Opera 77")[76](https://testingbot.com# "Opera 76")[75](https://testingbot.com# "Opera 75")[74](https://testingbot.com# "Opera 74")[73](https://testingbot.com# "Opera 73")[72](https://testingbot.com# "Opera 72")[71](https://testingbot.com# "Opera 71")[70](https://testingbot.com# "Opera 70")[69](https://testingbot.com# "Opera 69")[68](https://testingbot.com# "Opera 68")[67](https://testingbot.com# "Opera 67")[66](https://testingbot.com# "Opera 66")[65](https://testingbot.com# "Opera 65")[64](https://testingbot.com# "Opera 64")[63](https://testingbot.com# "Opera 63")[62](https://testingbot.com# "Opera 62")[60](https://testingbot.com# "Opera 60")[59](https://testingbot.com# "Opera 59")[58](https://testingbot.com# "Opera 58")[57](https://testingbot.com# "Opera 57")[56](https://testingbot.com# "Opera 56")[55](https://testingbot.com# "Opera 55")[54](https://testingbot.com# "Opera 54")[53](https://testingbot.com# "Opera 53")[52](https://testingbot.com# "Opera 52")[51](https://testingbot.com# "Opera 51")[50](https://testingbot.com# "Opera 50")

#### Safari
[11](https://testingbot.com# "Safari 11")

### Linux
(Ubuntu 22.04)

#### Chrome
[beta](https://testingbot.com# "Chrome")[dev](https://testingbot.com# "Chrome")[143](https://testingbot.com# "Chrome 143")[142](https://testingbot.com# "Chrome 142")[141](https://testingbot.com# "Chrome 141")[140](https://testingbot.com# "Chrome 140")[139](https://testingbot.com# "Chrome 139")[138](https://testingbot.com# "Chrome 138")[137](https://testingbot.com# "Chrome 137")[136](https://testingbot.com# "Chrome 136")[135](https://testingbot.com# "Chrome 135")[134](https://testingbot.com# "Chrome 134")[133](https://testingbot.com# "Chrome 133")[132](https://testingbot.com# "Chrome 132")[131](https://testingbot.com# "Chrome 131")[130](https://testingbot.com# "Chrome 130")[129](https://testingbot.com# "Chrome 129")[128](https://testingbot.com# "Chrome 128")[127](https://testingbot.com# "Chrome 127")[126](https://testingbot.com# "Chrome 126")[125](https://testingbot.com# "Chrome 125")[124](https://testingbot.com# "Chrome 124")[123](https://testingbot.com# "Chrome 123")[122](https://testingbot.com# "Chrome 122")[121](https://testingbot.com# "Chrome 121")[120](https://testingbot.com# "Chrome 120")[119](https://testingbot.com# "Chrome 119")[118](https://testingbot.com# "Chrome 118")[117](https://testingbot.com# "Chrome 117")[116](https://testingbot.com# "Chrome 116")[115](https://testingbot.com# "Chrome 115")[114](https://testingbot.com# "Chrome 114")[113](https://testingbot.com# "Chrome 113")[112](https://testingbot.com# "Chrome 112")[111](https://testingbot.com# "Chrome 111")[110](https://testingbot.com# "Chrome 110")[109](https://testingbot.com# "Chrome 109")[108](https://testingbot.com# "Chrome 108")[107](https://testingbot.com# "Chrome 107")[106](https://testingbot.com# "Chrome 106")[105](https://testingbot.com# "Chrome 105")[104](https://testingbot.com# "Chrome 104")[103](https://testingbot.com# "Chrome 103")[102](https://testingbot.com# "Chrome 102")[101](https://testingbot.com# "Chrome 101")[100](https://testingbot.com# "Chrome 100")[99](https://testingbot.com# "Chrome 99")[98](https://testingbot.com# "Chrome 98")[97](https://testingbot.com# "Chrome 97")[96](https://testingbot.com# "Chrome 96")[95](https://testingbot.com# "Chrome 95")[94](https://testingbot.com# "Chrome 94")[93](https://testingbot.com# "Chrome 93")[92](https://testingbot.com# "Chrome 92")[91](https://testingbot.com# "Chrome 91")[90](https://testingbot.com# "Chrome 90")[89](https://testingbot.com# "Chrome 89")[88](https://testingbot.com# "Chrome 88")[87](https://testingbot.com# "Chrome 87")[86](https://testingbot.com# "Chrome 86")[85](https://testingbot.com# "Chrome 85")[84](https://testingbot.com# "Chrome 84")[83](https://testingbot.com# "Chrome 83")[81](https://testingbot.com# "Chrome 81")[80](https://testingbot.com# "Chrome 80")[79](https://testingbot.com# "Chrome 79")[78](https://testingbot.com# "Chrome 78")[77](https://testingbot.com# "Chrome 77")[76](https://testingbot.com# "Chrome 76")[75](https://testingbot.com# "Chrome 75")[74](https://testingbot.com# "Chrome 74")[73](https://testingbot.com# "Chrome 73")[72](https://testingbot.com# "Chrome 72")[71](https://testingbot.com# "Chrome 71")[70](https://testingbot.com# "Chrome 70")[69](https://testingbot.com# "Chrome 69")[68](https://testingbot.com# "Chrome 68")[67](https://testingbot.com# "Chrome 67")[66](https://testingbot.com# "Chrome 66")[65](https://testingbot.com# "Chrome 65")[64](https://testingbot.com# "Chrome 64")[63](https://testingbot.com# "Chrome 63")[62](https://testingbot.com# "Chrome 62")[61](https://testingbot.com# "Chrome 61")[60](https://testingbot.com# "Chrome 60")[59](https://testingbot.com# "Chrome 59")[58](https://testingbot.com# "Chrome 58")[57](https://testingbot.com# "Chrome 57")[56](https://testingbot.com# "Chrome 56")[55](https://testingbot.com# "Chrome 55")[54](https://testingbot.com# "Chrome 54")[53](https://testingbot.com# "Chrome 53")[52](https://testingbot.com# "Chrome 52")[51](https://testingbot.com# "Chrome 51")[50](https://testingbot.com# "Chrome 50")[49](https://testingbot.com# "Chrome 49")[48](https://testingbot.com# "Chrome 48")[47](https://testingbot.com# "Chrome 47")[46](https://testingbot.com# "Chrome 46")[45](https://testingbot.com# "Chrome 45")[44](https://testingbot.com# "Chrome 44")[43](https://testingbot.com# "Chrome 43")[42](https://testingbot.com# "Chrome 42")[41](https://testingbot.com# "Chrome 41")[40](https://testingbot.com# "Chrome 40")[39](https://testingbot.com# "Chrome 39")[38](https://testingbot.com# "Chrome 38")[37](https://testingbot.com# "Chrome 37")

#### Firefox
[146](https://testingbot.com# "FF 146")[145](https://testingbot.com# "FF 145")[144](https://testingbot.com# "FF 144")[143](https://testingbot.com# "FF 143")[142](https://testingbot.com# "FF 142")[141](https://testingbot.com# "FF 141")[140](https://testingbot.com# "FF 140")[139](https://testingbot.com# "FF 139")[138](https://testingbot.com# "FF 138")[137](https://testingbot.com# "FF 137")[136](https://testingbot.com# "FF 136")[135](https://testingbot.com# "FF 135")[134](https://testingbot.com# "FF 134")[133](https://testingbot.com# "FF 133")[132](https://testingbot.com# "FF 132")[131](https://testingbot.com# "FF 131")[130](https://testingbot.com# "FF 130")[129](https://testingbot.com# "FF 129")[128](https://testingbot.com# "FF 128")[127](https://testingbot.com# "FF 127")[126](https://testingbot.com# "FF 126")[125](https://testingbot.com# "FF 125")[124](https://testingbot.com# "FF 124")[123](https://testingbot.com# "FF 123")[122](https://testingbot.com# "FF 122")[121](https://testingbot.com# "FF 121")[120](https://testingbot.com# "FF 120")[119](https://testingbot.com# "FF 119")[118](https://testingbot.com# "FF 118")[117](https://testingbot.com# "FF 117")[116](https://testingbot.com# "FF 116")[115](https://testingbot.com# "FF 115")[114](https://testingbot.com# "FF 114")[113](https://testingbot.com# "FF 113")[112](https://testingbot.com# "FF 112")[111](https://testingbot.com# "FF 111")[110](https://testingbot.com# "FF 110")[109](https://testingbot.com# "FF 109")[108](https://testingbot.com# "FF 108")[107](https://testingbot.com# "FF 107")[106](https://testingbot.com# "FF 106")[105](https://testingbot.com# "FF 105")[104](https://testingbot.com# "FF 104")[103](https://testingbot.com# "FF 103")[102](https://testingbot.com# "FF 102")[101](https://testingbot.com# "FF 101")[100](https://testingbot.com# "FF 100")[99](https://testingbot.com# "FF 99")[98](https://testingbot.com# "FF 98")[97](https://testingbot.com# "FF 97")[96](https://testingbot.com# "FF 96")[95](https://testingbot.com# "FF 95")[94](https://testingbot.com# "FF 94")[93](https://testingbot.com# "FF 93")[92](https://testingbot.com# "FF 92")[91](https://testingbot.com# "FF 91")

#### Opera
[125](https://testingbot.com# "Opera 125")[124](https://testingbot.com# "Opera 124")[123](https://testingbot.com# "Opera 123")[122](https://testingbot.com# "Opera 122")[121](https://testingbot.com# "Opera 121")[120](https://testingbot.com# "Opera 120")[119](https://testingbot.com# "Opera 119")[118](https://testingbot.com# "Opera 118")[117](https://testingbot.com# "Opera 117")[116](https://testingbot.com# "Opera 116")[115](https://testingbot.com# "Opera 115")[114](https://testingbot.com# "Opera 114")[113](https://testingbot.com# "Opera 113")[112](https://testingbot.com# "Opera 112")[111](https://testingbot.com# "Opera 111")[110](https://testingbot.com# "Opera 110")[109](https://testingbot.com# "Opera 109")[108](https://testingbot.com# "Opera 108")[107](https://testingbot.com# "Opera 107")[106](https://testingbot.com# "Opera 106")[105](https://testingbot.com# "Opera 105")[104](https://testingbot.com# "Opera 104")[103](https://testingbot.com# "Opera 103")[102](https://testingbot.com# "Opera 102")[101](https://testingbot.com# "Opera 101")[100](https://testingbot.com# "Opera 100")[99](https://testingbot.com# "Opera 99")[98](https://testingbot.com# "Opera 98")[97](https://testingbot.com# "Opera 97")[96](https://testingbot.com# "Opera 96")[95](https://testingbot.com# "Opera 95")[94](https://testingbot.com# "Opera 94")[93](https://testingbot.com# "Opera 93")[92](https://testingbot.com# "Opera 92")[91](https://testingbot.com# "Opera 91")[90](https://testingbot.com# "Opera 90")[89](https://testingbot.com# "Opera 89")[88](https://testingbot.com# "Opera 88")[87](https://testingbot.com# "Opera 87")[86](https://testingbot.com# "Opera 86")[85](https://testingbot.com# "Opera 85")[84](https://testingbot.com# "Opera 84")[83](https://testingbot.com# "Opera 83")[82](https://testingbot.com# "Opera 82")[81](https://testingbot.com# "Opera 81")[80](https://testingbot.com# "Opera 80")[79](https://testingbot.com# "Opera 79")

### iOS Simulators
#### Phones
##### 26.0
[iPhone 17 Pro Max (26.0)](https://testingbot.com# "iPhone 17 Pro Max - 26.0")[iPhone 17 Pro (26.0)](https://testingbot.com# "iPhone 17 Pro - 26.0")[iPhone 17 (26.0)](https://testingbot.com# "iPhone 17 - 26.0")[iPhone 16e (26.0)](https://testingbot.com# "iPhone 16e - 26.0")[iPhone Air (26.0)](https://testingbot.com# "iPhone Air - 26.0")
##### 18.6
[iPhone 16 Pro Max (18.6)](https://testingbot.com# "iPhone 16 Pro Max - 18.6")[iPhone 16 Pro (18.6)](https://testingbot.com# "iPhone 16 Pro - 18.6")[iPhone 16 Plus (18.6)](https://testingbot.com# "iPhone 16 Plus - 18.6")[iPhone 16 (18.6)](https://testingbot.com# "iPhone 16 - 18.6")[iPhone 16e (18.6)](https://testingbot.com# "iPhone 16e - 18.6")
##### 18.3
[iPhone 16 (18.3)](https://testingbot.com# "iPhone 16 - 18.3")[iPhone 16e (18.3)](https://testingbot.com# "iPhone 16e - 18.3")[iPhone 16 Plus (18.3)](https://testingbot.com# "iPhone 16 Plus - 18.3")[iPhone 16 Pro (18.3)](https://testingbot.com# "iPhone 16 Pro - 18.3")[iPhone 16 Pro Max (18.3)](https://testingbot.com# "iPhone 16 Pro Max - 18.3")
##### 18.0
[iPhone 16 (18.0)](https://testingbot.com# "iPhone 16 - 18.0")[iPhone 16 Plus (18.0)](https://testingbot.com# "iPhone 16 Plus - 18.0")[iPhone 16 Pro (18.0)](https://testingbot.com# "iPhone 16 Pro - 18.0")[iPhone 16 Pro Max (18.0)](https://testingbot.com# "iPhone 16 Pro Max - 18.0")[iPhone SE (3rd generation) (18.0)](https://testingbot.com# "iPhone SE (3rd generation) - 18.0")
##### 17.5
[iPhone 15 (17.5)](https://testingbot.com# "iPhone 15 - 17.5")[iPhone 15 Plus (17.5)](https://testingbot.com# "iPhone 15 Plus - 17.5")[iPhone 15 Pro (17.5)](https://testingbot.com# "iPhone 15 Pro - 17.5")[iPhone 15 Pro Max (17.5)](https://testingbot.com# "iPhone 15 Pro Max - 17.5")[iPhone SE (3rd generation) (17.5)](https://testingbot.com# "iPhone SE (3rd generation) - 17.5")
##### 17.4
[iPhone 15 (17.4)](https://testingbot.com# "iPhone 15 - 17.4")[iPhone 15 Plus (17.4)](https://testingbot.com# "iPhone 15 Plus - 17.4")[iPhone 15 Pro (17.4)](https://testingbot.com# "iPhone 15 Pro - 17.4")[iPhone 15 Pro Max (17.4)](https://testingbot.com# "iPhone 15 Pro Max - 17.4")[iPhone SE (3rd generation) (17.4)](https://testingbot.com# "iPhone SE (3rd generation) - 17.4")
##### 17.2
[iPhone 15 (17.2)](https://testingbot.com# "iPhone 15 - 17.2")[iPhone 15 Plus (17.2)](https://testingbot.com# "iPhone 15 Plus - 17.2")[iPhone 15 Pro (17.2)](https://testingbot.com# "iPhone 15 Pro - 17.2")[iPhone 15 Pro Max (17.2)](https://testingbot.com# "iPhone 15 Pro Max - 17.2")[iPhone SE (3rd generation) (17.2)](https://testingbot.com# "iPhone SE (3rd generation) - 17.2")
##### 17.0
[iPhone 15 (17.0)](https://testingbot.com# "iPhone 15 - 17.0")[iPhone 15 Plus (17.0)](https://testingbot.com# "iPhone 15 Plus - 17.0")[iPhone 15 Pro (17.0)](https://testingbot.com# "iPhone 15 Pro - 17.0")[iPhone 15 Pro Max (17.0)](https://testingbot.com# "iPhone 15 Pro Max - 17.0")[iPhone SE (3rd generation) (17.0)](https://testingbot.com# "iPhone SE (3rd generation) - 17.0")
##### 16.2
[iPhone 14 (16.2)](https://testingbot.com# "iPhone 14 - 16.2")[iPhone 14 Plus (16.2)](https://testingbot.com# "iPhone 14 Plus - 16.2")[iPhone 14 Pro (16.2)](https://testingbot.com# "iPhone 14 Pro - 16.2")[iPhone 14 Pro Max (16.2)](https://testingbot.com# "iPhone 14 Pro Max - 16.2")
##### 16.0
[iPhone 14 (16.0)](https://testingbot.com# "iPhone 14 - 16.0")[iPhone 14 Pro (16.0)](https://testingbot.com# "iPhone 14 Pro - 16.0")[iPhone 14 Pro Max (16.0)](https://testingbot.com# "iPhone 14 Pro Max - 16.0")[iPhone 14 Plus (16.0)](https://testingbot.com# "iPhone 14 Plus - 16.0")[iPhone SE (3rd generation) (16.0)](https://testingbot.com# "iPhone SE (3rd generation) - 16.0")
#### Tablets
##### 26.0
[iPad (A16) (26.0)](https://testingbot.com# "iPad (A16) - 26.0")[iPad Pro (13-inch) (M4) (26.0)](https://testingbot.com# "iPad Pro (13-inch) (M4) - 26.0")[iPad Air 13-inch (M3) (26.0)](https://testingbot.com# "iPad Air 13-inch (M3) - 26.0")[iPad Pro (11-inch) (M4) (26.0)](https://testingbot.com# "iPad Pro (11-inch) (M4) - 26.0")[iPad Air 11-inch (M3) (26.0)](https://testingbot.com# "iPad Air 11-inch (M3) - 26.0")
##### 18.6
[iPad Mini (A17 Pro) (18.6)](https://testingbot.com# "iPad Mini (A17 Pro) - 18.6")[iPad (A16) (18.6)](https://testingbot.com# "iPad (A16) - 18.6")[iPad Air 13-inch (M3) (18.6)](https://testingbot.com# "iPad Air 13-inch (M3) - 18.6")[iPad Pro (13-inch) (M4) (18.6)](https://testingbot.com# "iPad Pro (13-inch) (M4) - 18.6")[iPad Pro (11-inch) (M4) (18.6)](https://testingbot.com# "iPad Pro (11-inch) (M4) - 18.6")[iPad Air 11-inch (M3) (18.6)](https://testingbot.com# "iPad Air 11-inch (M3) - 18.6")
##### 18.3
[iPad (A16) (18.3)](https://testingbot.com# "iPad (A16) - 18.3")[iPad Air 13-inch (M3) (18.3)](https://testingbot.com# "iPad Air 13-inch (M3) - 18.3")[iPad Pro (13-inch) (M4) (18.3)](https://testingbot.com# "iPad Pro (13-inch) (M4) - 18.3")[iPad Pro (11-inch) (M4) (18.3)](https://testingbot.com# "iPad Pro (11-inch) (M4) - 18.3")[iPad Air 11-inch (M3) (18.3)](https://testingbot.com# "iPad Air 11-inch (M3) - 18.3")
##### 18.0
[iPad Pro (13-inch) (M4) (18.0)](https://testingbot.com# "iPad Pro (13-inch) (M4) - 18.0")[iPad Air 13-inch (M2) (18.0)](https://testingbot.com# "iPad Air 13-inch (M2) - 18.0")[iPad Pro (11-inch) (M4) (18.0)](https://testingbot.com# "iPad Pro (11-inch) (M4) - 18.0")[iPad Air 11-inch (M2) (18.0)](https://testingbot.com# "iPad Air 11-inch (M2) - 18.0")
##### 17.5
[iPad Air 13-inch (M2) (17.5)](https://testingbot.com# "iPad Air 13-inch (M2) - 17.5")[iPad Pro (13-inch) (M4) (17.5)](https://testingbot.com# "iPad Pro (13-inch) (M4) - 17.5")[iPad Pro (11-inch) (M4) (17.5)](https://testingbot.com# "iPad Pro (11-inch) (M4) - 17.5")[iPad Air 11-inch (M2) (17.5)](https://testingbot.com# "iPad Air 11-inch (M2) - 17.5")
##### 17.4
[iPad Pro (13-inch) (M4) (17.4)](https://testingbot.com# "iPad Pro (13-inch) (M4) - 17.4")[iPad Air 13-inch (M2) (17.4)](https://testingbot.com# "iPad Air 13-inch (M2) - 17.4")[iPad Pro (11-inch) (M4) (17.4)](https://testingbot.com# "iPad Pro (11-inch) (M4) - 17.4")[iPad Air 11-inch (M2) (17.4)](https://testingbot.com# "iPad Air 11-inch (M2) - 17.4")
##### 17.2
[iPad Pro (12.9-inch) (6th generation) (17.2)](https://testingbot.com# "iPad Pro (12.9-inch) (6th generation) - 17.2")[iPad Pro (11-inch) (4th generation) (17.2)](https://testingbot.com# "iPad Pro (11-inch) (4th generation) - 17.2")[iPad (10th generation) (17.2)](https://testingbot.com# "iPad (10th generation) - 17.2")[iPad mini (6th generation) (17.2)](https://testingbot.com# "iPad mini (6th generation) - 17.2")[iPad Air (5th generation) (17.2)](https://testingbot.com# "iPad Air (5th generation) - 17.2")
##### 17.0
[iPad Pro (12.9-inch) (6th generation) (17.0)](https://testingbot.com# "iPad Pro (12.9-inch) (6th generation) - 17.0")[iPad Pro (11-inch) (4th generation) (17.0)](https://testingbot.com# "iPad Pro (11-inch) (4th generation) - 17.0")[iPad (10th generation) (17.0)](https://testingbot.com# "iPad (10th generation) - 17.0")[iPad mini (6th generation) (17.0)](https://testingbot.com# "iPad mini (6th generation) - 17.0")[iPad Air (5th generation) (17.0)](https://testingbot.com# "iPad Air (5th generation) - 17.0")
##### 16.2
[iPad Pro (12.9-inch) (6th generation) (16.2)](https://testingbot.com# "iPad Pro (12.9-inch) (6th generation) - 16.2")[iPad Pro (11-inch) (4th generation) (16.2)](https://testingbot.com# "iPad Pro (11-inch) (4th generation) - 16.2")[iPad (10th generation) (16.2)](https://testingbot.com# "iPad (10th generation) - 16.2")[iPad Air (5th generation) (16.2)](https://testingbot.com# "iPad Air (5th generation) - 16.2")
##### 16.0
[iPad Pro (12.9-inch) (5th generation) (16.0)](https://testingbot.com# "iPad Pro (12.9-inch) (5th generation) - 16.0")[iPad Pro (11-inch) (3rd generation) (16.0)](https://testingbot.com# "iPad Pro (11-inch) (3rd generation) - 16.0")[iPad (9th generation) (16.0)](https://testingbot.com# "iPad (9th generation) - 16.0")[iPad Air (5th generation) (16.0)](https://testingbot.com# "iPad Air (5th generation) - 16.0")

### Android Emulators
#### Phones
##### 16.0
[Pixel 9 (16.0)](https://testingbot.com# "Pixel 9 - 16.0")
##### 15.0
[Pixel 9 (15.0)](https://testingbot.com# "Pixel 9 - 15.0")
##### 14.0
[Pixel 8 (14.0)](https://testingbot.com# "Pixel 8 - 14.0")
##### 13.0
[Pixel 6a (13.0)](https://testingbot.com# "Pixel 6a - 13.0")
##### 12.0
[Pixel 6 (12.0)](https://testingbot.com# "Pixel 6 - 12.0")
##### 11.0
[Galaxy S21 (11.0)](https://testingbot.com# "Galaxy S21 - 11.0")
##### 10.0
[Pixel 3 (10.0)](https://testingbot.com# "Pixel 3 - 10.0")[Galaxy S10 (10.0)](https://testingbot.com# "Galaxy S10 - 10.0")
##### 9.0
[Galaxy S9 (9.0)](https://testingbot.com# "Galaxy S9 - 9.0")
##### 8.0
[Pixel 2 XL (8.0)](https://testingbot.com# "Pixel 2 XL - 8.0")
##### 7.1
[Pixel 2 (7.1)](https://testingbot.com# "Pixel 2 - 7.1")[Nexus 7 (7.1)](https://testingbot.com# "Nexus 7 - 7.1")
##### 6.0
[Nexus S (6.0)](https://testingbot.com# "Nexus S - 6.0")[Nexus 6 (6.0)](https://testingbot.com# "Nexus 6 - 6.0")[Galaxy S6 (6.0)](https://testingbot.com# "Galaxy S6 - 6.0")[Nexus 4 (6.0)](https://testingbot.com# "Nexus 4 - 6.0")
##### 5.0
[Galaxy S5 (5.0)](https://testingbot.com# "Galaxy S5 - 5.0")[Nexus 1 (5.0)](https://testingbot.com# "Nexus 1 - 5.0")
##### 4.4
[Galaxy S4 (4.4)](https://testingbot.com# "Galaxy S4 - 4.4")[Galaxy Nexus (4.4)](https://testingbot.com# "Galaxy Nexus - 4.4")
#### Tablets
##### 15.0
[Galaxy Tab S9 (15.0)](https://testingbot.com# "Galaxy Tab S9 - 15.0")
##### 12.0
[Galaxy Tab S7 (12.0)](https://testingbot.com# "Galaxy Tab S7 - 12.0")
##### 11.0
[Galaxy Tab S6 (11.0)](https://testingbot.com# "Galaxy Tab S6 - 11.0")
##### 10.0
[Galaxy Tab S5 (10.0)](https://testingbot.com# "Galaxy Tab S5 - 10.0")
##### 9.0
[Galaxy Tab S4 (9.0)](https://testingbot.com# "Galaxy Tab S4 - 9.0")
##### 8.0
[Pixel C (8.0)](https://testingbot.com# "Pixel C - 8.0")
#### Chromeos
##### 14.0
[ChromeOS Medium (14.0)](https://testingbot.com# "ChromeOS Medium - 14.0")[ChromeOS Large (14.0)](https://testingbot.com# "ChromeOS Large - 14.0")[ChromeOS Small (14.0)](https://testingbot.com# "ChromeOS Small - 14.0")
---
URL: https://testingbot.com/support/web-automate/selenium
# Selenium Examples
Run your first Selenium test on the TestingBot browser cloud in no time.
Please pick a framework to see examples on how to quickly run your first browser test.
### [NodeJS](https://testingbot.com/support/web-automate/selenium/nodejs)
Get started with NodeJS testing frameworks and tools.
- [NodeJS](https://testingbot.com/support/web-automate/selenium/nodejs)
- [WebdriverIO](https://testingbot.com/support/web-automate/selenium/nodejs/webdriverio)
- [CodeceptJS](https://testingbot.com/support/web-automate/selenium/nodejs/codeceptjs)
- [Nightwatch](https://testingbot.com/support/web-automate/selenium/nodejs/nightwatch)
- [Protractor](https://testingbot.com/support/web-automate/selenium/nodejs/protractor)
- [Soda](https://testingbot.com/support/web-automate/selenium/nodejs/soda)
- [TestCafe](https://testingbot.com/support/web-automate/selenium/nodejs/testcafe)
- [Hermione](https://testingbot.com/support/web-automate/selenium/nodejs/hermione)
- [Jest](https://testingbot.com/support/web-automate/selenium/nodejs/jest)
### [Java](https://testingbot.com/support/web-automate/selenium/java)
Get started with Java testing frameworks and tools.
- [Java](https://testingbot.com/support/web-automate/selenium/java)
- [JUnit](https://testingbot.com/support/web-automate/selenium/java/junit)
- [Parallel JUnit](https://testingbot.com/support/web-automate/selenium/java/parallel-junit)
- [Selenide](https://testingbot.com/support/web-automate/selenium/java/selenide)
- [TestNG](https://testingbot.com/support/web-automate/selenium/java/testng)
- [TestNG + Cucumber](https://testingbot.com/support/web-automate/selenium/java/testng-cucumber)
### [Python](https://testingbot.com/support/web-automate/selenium/python)
Get started with Python testing frameworks and tools.
- [Python](https://testingbot.com/support/web-automate/selenium/python)
- [PyTest](https://testingbot.com/support/web-automate/selenium/python/pytest)
- [PyUnit](https://testingbot.com/support/web-automate/selenium/python/pyunit)
- [Behave](https://testingbot.com/support/web-automate/selenium/python/behave)
- [Lettuce](https://testingbot.com/support/web-automate/selenium/python/lettuce)
- [Helium](https://testingbot.com/support/web-automate/selenium/python/helium)
- [SeleniumBase](https://testingbot.com/support/web-automate/selenium/python/seleniumbase)
### [.NET](https://testingbot.com/support/web-automate/selenium/csharp)
Get started with .NET testing frameworks and tools.
- [C#](https://testingbot.com/support/web-automate/selenium/csharp)
- [NUnit](https://testingbot.com/support/web-automate/selenium/csharp/nunit)
- [Reqnroll](https://testingbot.com/support/web-automate/selenium/csharp/reqnroll)
- [xUnit](https://testingbot.com/support/web-automate/selenium/csharp/xunit)
- [PNunit](https://testingbot.com/support/web-automate/selenium/csharp/pnunit)
- [SpecFlow](https://testingbot.com/support/web-automate/selenium/csharp/specflow)
- [MSTest](https://testingbot.com/support/web-automate/selenium/csharp/mstest)
### [PHP](https://testingbot.com/support/web-automate/selenium/php)
Get started with PHP testing frameworks and tools.
- [PHP](https://testingbot.com/support/web-automate/selenium/php)
- [Behat](https://testingbot.com/support/web-automate/selenium/php/behat-mink)
- [Codeception](https://testingbot.com/support/web-automate/selenium/php/codeception)
- [Laravel-Dusk](https://testingbot.com/support/web-automate/selenium/php/laravel-dusk)
- [PHPUnit](https://testingbot.com/support/web-automate/selenium/php/phpunit)
- [SimpleTest](https://testingbot.com/support/web-automate/selenium/php/simpletest)
### [Ruby](https://testingbot.com/support/web-automate/selenium/ruby)
Get started with Ruby testing frameworks and tools.
- [Ruby](https://testingbot.com/support/web-automate/selenium/ruby)
- [Capybara](https://testingbot.com/support/web-automate/selenium/ruby/capybara)
- [Cucumber](https://testingbot.com/support/web-automate/selenium/ruby/cucumber)
- [Minitest](https://testingbot.com/support/web-automate/selenium/ruby/minitest)
- [RSpec](https://testingbot.com/support/web-automate/selenium/ruby/rspec)
- [Test::Unit](https://testingbot.com/support/web-automate/selenium/ruby/testunit)
- [Watir](https://testingbot.com/support/web-automate/selenium/ruby/watir)
### [JavaScript](https://testingbot.com/support/web-automate/selenium/javascript)
Get started with JavaScript testing frameworks and tools.
- [JavaScript](https://testingbot.com/support/web-automate/selenium/javascript)
- [Intern](https://testingbot.com/support/web-automate/selenium/javascript/intern)
- [Karma](https://testingbot.com/support/web-automate/selenium/javascript/karma)
### [Appium](https://testingbot.com/support/web-automate/mobile)
Get started with mobile web testing using Appium.
- [Appium Examples](https://testingbot.com/support/web-automate/mobile)

### [Robot Framework](https://testingbot.com/support/web-automate/selenium/robotframework)
Get started with Robot Framework test automation.
- [RobotFramework Examples](https://testingbot.com/support/web-automate/selenium/robotframework)
### Other
Get started with other testing tools and IDEs.
- [Selenium IDE](https://testingbot.com/support/web-automate/selenium/ide)
- [Katalon Studio](https://testingbot.com/support/web-automate/selenium/katalon-studio)
- [Oxygen](https://testingbot.com/support/web-automate/selenium/oxygen)
---
URL: https://testingbot.com/support/web-automate/selenium/annotating-tests
# Updating Tests with Selenium
You can use the TestingBot API to send various test information back to TestingBot: test-name, passed/failed state, build identifier and more.
We've added custom [JavaScript Executor](https://www.selenium.dev/selenium/docs/api/java/org/openqa/selenium/JavascriptExecutor.html) commands which allow you to send back test meta-data to TestingBot, while your test is running.
Below are some examples on how to do this in various programming languages:
[Java](https://testingbot.com#)[NodeJS](https://testingbot.com#)[Python](https://testingbot.com#)[C#](https://testingbot.com#)[Ruby](https://testingbot.com#)[PHP](https://testingbot.com#)
driver.execute_script('tb:test-name=My test')
driver.execute_script('tb:test-result=passed')
((JavascriptExecutor)driver).executeScript("tb:test-name=My test");
((JavascriptExecutor)driver).executeScript("tb:test-result=passed");
$web_driver->executeScript('tb:test-name=My test');
$web_driver->executeScript('tb:test-result=passed');
driver.execute_script('tb:test-name=My test')
driver.execute_script('tb:test-result=passed')
driver.executeScript('tb:test-name=My test')
driver.executeScript('tb:test-result=passed')
((IJavaScriptExecutor)driver).ExecuteScript("tb:test-name=My test");
((IJavaScriptExecutor)driver).ExecuteScript("tb:test-result=passed");
## Set a test name
tb:test-name=My Test Name
Sets the test-name for the currently running test. This name will be visible on TestingBot.
## Break test
tb:break
This will add a breakpoint to the test and pause it, so that you can investigate it manually.
When you go to the test result page on TestingBot, a live session will appear so that you can debug with mouse and keyboard.
## Test Result
tb:test-result=true
Possible values: passed, true, failed, false
This will set the test as passed (`"passed"` or `true`) or failed (`"failed"` or `false`) on TestingBot.
## Test Build
tb:test-build=my build
Sets the test's build name.
## Test Tags
tb:test-tags=tag1,tag2
comma-separated list of tags
Sets the test's tags.
## Test Context
tb:test-context=my context
Logs the given context and prints it on the TestingBot test result page, in the Selenium command list.
## Test Info
tb:test-info={'build':'my first build', 'name':'my new test', 'public':true}
JSON-formatted dictionary with optional keys: `'build'`, `'name'`, `'public'`, `'status_message'`, `'extra'`
Pass in a JSON dictionary with various fields to update the test's meta-data on TestingBot.
Was this page helpful? Yes No
## Looking for More Help?
Have questions or need more information?
You can reach us via the following channels:
- [Email us](https://testingbot.com/contact/new)
- [Join our Slack Channel](https://join.slack.com/t/testingb0t/shared_invite/zt-3bcw9xch-jk19~6XPs_xBrsAgAedkCw)
---
URL: https://testingbot.com/support/web-automate/selenium/capabilities
# Selenium Capabilities Generator
Generate Selenium capabilities for your automated tests. Choose your browser, OS and configuration options to get the exact code you need for Java, Python, NodeJS, C#, Ruby or PHP.
[Selenium](https://testingbot.com/support/web-automate/selenium/capabilities)[Appium](https://testingbot.com/support/app-automate/appium/capabilities)[Puppeteer](https://testingbot.com/support/web-automate/puppeteer/capabilities)[Playwright](https://testingbot.com/support/web-automate/playwright/capabilities)
Browser Environment
Windows 11› Chrome 139
Loading environments...
Please wait while we load the available browsers and platforms.
Resolution800x6001024x7681280x8001280x9601280x10241440x9001680x10501600x12001920x12001920x10802560x1440
Selenium Version4.39.04.38.04.37.04.36.04.35.04.34.04.33.04.32.04.31.04.30.04.29.04.28.14.28.04.27.04.26.04.25.04.24.04.23.14.23.04.22.04.21.04.20.04.19.04.18.14.18.04.17.04.16.14.16.04.15.04.14.14.14.04.13.04.12.14.12.04.11.04.10.04.9.04.8.34.8.24.8.14.8.04.7.04.6.04.5.34.5.24.5.14.5.04.4.04.3.04.2.24.2.14.2.04.1.34.1.24.1.14.1.04.0.04.0.0-beta-44.0.0-beta-34.0.0-beta-24.0.0-beta-14.0.0-alpha-74.0.0-alpha-63.141.593.141.53.141.03.14.03.13.03.12.03.11.03.10.03.9.03.8.13.8.03.7.13.7.03.6.03.5.33.5.23.5.13.5.03.4.03.3.13.3.03.2.03.1.03.0.12.53.12.53.02.52.02.51.02.50.02.49.02.48.22.48.12.48.0
## Project Capabilities
Test NameAllows you to customize the name of the test, as it will appear in the dashboard.
Build NameGroup tests under the same build identifier for easy retrieval.
## Debugging
Record Video
YesNo
Take Screenshot After Each Step
YesNo
Collect Logs
YesNo
## Customization
Headless ModeRun the browser without rendering UI for faster test execution.
YesNo
Geolocation TestingRun the test from a different geographical location.NoneRandom CountryAustraliaBahrainBelgiumBrazilCanadaChileFranceGermanyIndiaItalyJapanNorwaySingaporeSouth AfricaSwedenSwitzerlandUnited Arab EmiratesUnited KingdomUnited States
Timezone ([list of timezones](https://en.wikipedia.org/wiki/List_of_tz_database_time_zones))
Prerun Script ([documentation](https://testingbot.com/support/web-automate/selenium/test-options#prerun))
Upload URLs
Looking for more options? See [all Selenium capabilities](https://testingbot.com/support/web-automate/selenium/test-options).
W3C Protocol
W3C is the newest WebDriver protocol, TestingBot recommends using W3C.
JSONWP
JSONWP is the legacy protocol which is no longer actively maintained.
JavaPythonNodeJSC#RubyPHP
MutableCapabilities capabilities = new MutableCapabilities();
capabilities.setCapability(CapabilityType.BROWSER_NAME, "chrome");
capabilities.setCapability(CapabilityType.BROWSER_VERSION, "latest");
capabilities.setCapability(CapabilityType.PLATFORM_NAME, "Windows 11");
---
URL: https://testingbot.com/support/web-automate/selenium/performance
# Performance Testing Documentation
With this call, you can fetch various performance metrics from the browser, during your test.
With this functionality, you can create tests where you monitor specific pageload time, or any other metric.
If the metric is below a specific threshold that you define, you can make the test fail.
[Ruby](https://testingbot.com#)[Python](https://testingbot.com#)[PHP](https://testingbot.com#)[Java](https://testingbot.com#)[NodeJS](https://testingbot.com#)[C#](https://testingbot.com#)
driver.execute_script("tb:performance")
((JavascriptExecutor) driver).executeScript("tb:performance");
$driver->executeScript("tb:performance");
driver.execute_script("tb:performance")
browser.execute('tb:performance')
((IJavaScriptExecutor)driver).ExecuteScript("tb:performance");
#### Response:
| `pageSize (bytes)` | The size (in bytes) of the page (HTML source). |
| `nrRequests` | How many requests the page made (AJAX/images/...) |
| `load (ms)` | The pageload time of the webpage.
The time it takes for a page to download and diplsay the entire web page.
|
| `domContentLoaded (ms)` | The domContentLoaded duration of the page.
The DOMContentLoaded event fires when the initial HTML document has been completely loaded and parsed, without waiting for stylesheets, images, and subframes to finish loading.
[DOMContentLoaded Info](https://developer.mozilla.org/en-US/docs/Web/Events/DOMContentLoaded) |
| `firstMeaningfulPaint (ms)` |
Indicates how fast your page displays its primary content.
[firstMeaningfulPaint Info](https://developers.google.com/web/tools/lighthouse/audits/first-meaningful-paint) |
| `firstPaint (ms)` | First Paint is triggered when a render (any render) is detected in the browser. |
| `firstContentfulPaint (ms)` |
First Contentful Paint measures the time from navigation to the time when the browser renders the first bit of content from the DOM.
[firstContentfulPaint Info](https://developers.google.com/web/tools/lighthouse/audits/first-contentful-paint) |
#### Example Response:
{
"pageSize" => 396800,
"nrRequests" => 20,
"load" => 1378,
"domContentLoaded" => 585,
"firstMeaningfulPaint" => 0,
"firstPaint" => 348,
"firstContentfulPaint" => 348
}
#### Sample UseCase:
This example demonstrates a test that visits a page, checks the performance and fails the test if the performance is not sufficient.
require "rubygems"
require "selenium-webdriver"
require "selenium/client"
caps = {
:browserName => "chrome",
:version => "latest",
:platform => "WIN10",
:debugging => true
}
urlhub = "https://API_KEY:API_SECRET@hub.testingbot.com/wd/hub"
client = Selenium::WebDriver::Remote::Http::Default.new
client.timeout = 120
@webdriver = Selenium::WebDriver.for :remote, :url => urlhub, :desired_capabilities => caps, :http_client => client
@webdriver.navigate.to "https://testingbot.com/"
performance = @webdriver.execute_script("tb:performance")
assert performance["load"] < 900
@webdriver.quit
Was this page helpful? Yes No
## Looking for More Help?
Have questions or need more information?
You can reach us via the following channels:
- [Email us](https://testingbot.com/contact/new)
- [Join our Slack Channel](https://join.slack.com/t/testingb0t/shared_invite/zt-3bcw9xch-jk19~6XPs_xBrsAgAedkCw)
---
URL: https://testingbot.com/support/web-automate/selenium/uploads
# Uploading with Selenium
With Selenium WebDriver it's possible to test file uploads. You can either specify a file that needs to be uploaded at the [start of your test](https://testingbot.com#before), or upload the file [during your test](https://testingbot.com#during).
## 1. Upload a file before your test starts
With TestingBot you can specify a URL in your desired capabilities which links to the file you want to be present on our test VMs.
TestingBot will then first download the URL and save it on the test VM so your test can use the file.
You specify the download URL as `upload` and use `uploadFilepath` in your desired capabilities to indicate where TestingBot needs to put the file.
[Ruby](https://testingbot.com#)[Python](https://testingbot.com#)[PHP](https://testingbot.com#)[Java](https://testingbot.com#)[NodeJS](https://testingbot.com#)[C#](https://testingbot.com#)
require 'rubygems'
require "test/unit"
require 'selenium-webdriver'
class UploadTest < Test::Unit::TestCase
def setup
caps = Selenium::WebDriver::Remote::Capabilities.chrome
caps.version = "latest"
caps.platform = "WIN10"
caps[:name] = "Test File Upload"
caps[:upload] = "https://testingbot.com/assets/logo-head.png"
caps[:uploadFilepath] = "C:\\test\\logo.png" # use C:\test\filename.ext on Windows and /tmp/filename.ext on Linux/OSX
@driver = Selenium::WebDriver.for(
:remote,
:url => "https://key:secret@hub.testingbot.com/wd/hub",
:desired_capabilities => caps)
end
def test_upload
@driver.navigate.to "http://the-internet.herokuapp.com/upload"
element = @driver.find_element(:id, 'file-upload')
element.send_keys "C:\\test\\logo.png" # use C:\test on Windows and /tmp on Linux/OSX
@driver.find_element(:id, "file-submit").click
assert "logo.png" == @driver.find_element(:id, "uploaded-files").text
end
def teardown
@driver.quit
end
end
import org.openqa.selenium.By;
import org.openqa.selenium.Platform;
import org.openqa.selenium.WebDriver;
import org.openqa.selenium.WebElement;
import org.openqa.selenium.remote.DesiredCapabilities;
import org.openqa.selenium.remote.LocalFileDetector;
import org.openqa.selenium.remote.RemoteWebDriver;
import java.net.URL;
public class JavaSample {
public static final String URL = "https://key:secret@hub.testingbot.com/wd/hub";
public static void main(String[] args) throws Exception {
DesiredCapabilities caps = new DesiredCapabilities();
caps.setCapability("browserName", "chrome");
caps.setCapability("platform", "WIN10");
caps.setCapability("version", "latest");
caps.setCapability("name", "Test File Upload");
caps.setCapability("upload", "https://testingbot.com/assets/logo-head.png");
caps.setCapability("uploadFilepath", "C:\\test\\logo.png");
WebDriver driver = new RemoteWebDriver(new URL(URL), caps);
driver.setFileDetector(new LocalFileDetector());
driver.get("http://the-internet.herokuapp.com/upload");
driver.findElement(By.id("file-upload")).sendKeys("C:\\test\\logo.png");
driver.findElement(By.id("file-submit")).click();
driver.quit();
}
}
get("http://the-internet.herokuapp.com/upload");
$file_input = $driver->findElement(WebDriverBy::id("file-upload"));
$file_input->setFileDetector(new LocalFileDetector());
$file_input->sendKeys("C:\\test\\logo.png");
$driver->findElement(WebDriverBy::id("file-submit"))->click();
sleep(5);
$driver->quit();
?>
from selenium import webdriver
from selenium.webdriver.common.keys import Keys
from selenium.webdriver.common.desired_capabilities import DesiredCapabilities
desired_caps = {
'browserName': 'chrome',
'version': 'latest',
'platform': 'WIN10',
'name': 'Test File Upload',
'upload': 'https://testingbot.com/assets/logo-head.png',
'uploadFilepath': 'C:\\test\\logo.png'
}
driver = webdriver.Remote(
command_executor='https://key:secret@hub.testingbot.com/wd/hub',
desired_capabilities=desired_caps)
driver.get('http://the-internet.herokuapp.com/upload')
driver.find_element_by_id('file-upload').send_keys('C:\\test\\logo.png')
driver.find_element_by_id('file-submit').click()
driver.quit()
var webdriver = require('selenium-webdriver');
var remote = require('selenium-webdriver/remote');
var capabilities = {
'browserName': 'chrome',
'version': 'latest',
'platform': 'WIN10',
'name': 'Test File Upload',
'upload': 'https://testingbot.com/assets/logo-head.png',
'uploadFilepath': 'C:\\test\\logo.png',
'client_key': 'key',
'client_secret': 'secret'
};
var driver = new webdriver.Builder().
usingServer('https://hub.testingbot.com/wd/hub').
withCapabilities(capabilities).
build();
var fs = require('fs');
webdriver.WebDriver.prototype.saveScreenshot = function(filename) {
return driver.takeScreenshot().then(function(data) {
fs.writeFile(filename, data.replace(/^data:image\/png;base64,/,''), 'base64', function(err) {
if(err) throw err;
});
})
};
driver.setFileDetector(new remote.FileDetector);
driver.get('http://the-internet.herokuapp.com/upload').then(function(){
driver.findElement(webdriver.By.id('file-upload')).sendKeys('C:\\test\\logo.png').then(function(){
driver.findElement(webdriver.By.id('file-submit')).click().then(function(){
driver.getTitle().then(function(title) {
console.log(title);
driver.quit();
});
});
});
});
using System;
using OpenQA.Selenium;
using OpenQA.Selenium.Chrome;
using OpenQA.Selenium.Remote;
using System.Text;
namespace SeleniumTest
{
class Program
{
static void Main(string[] args)
{
IWebDriver driver;
ChromeOptions capability = new ChromeOptions();
capability.AddAdditionalCapability("browserName", "Chrome", true);
capability.AddAdditionalCapability("version", "latest", true);
capability.AddAdditionalCapability("platform", "WIN10", true);
capability.AddAdditionalCapability("client_key", "key", true);
capability.AddAdditionalCapability("client_secret", "secret", true);
capability.AddAdditionalCapability("name", "Test File Upload", true);
capability.AddAdditionalCapability("upload", "https://testingbot.com/assets/logo-head.png", true);
capability.AddAdditionalCapability("uploadFilepath", "C:\\test\\logo.png", true);
driver = new RemoteWebDriver(new Uri("https://hub.testingbot.com/wd/hub"), capability);
driver.Navigate().GoToUrl("http://the-internet.herokuapp.com/upload");
var allowsDetection = driver as IAllowsFileDetection;
allowsDetection.FileDetector = new LocalFileDetector();
IWebElement upload = driver.FindElement(By.Id("file-upload"));
upload.SendKeys("C:\\test\\logo.png");
driver.FindElement(By.Id("file-submit")).Click();
driver.Quit();
}
}
}
## 2. Upload a file during your test
You can use `LocalFileDetector` to upload a file from your local computer to the remote VM/device during your test.
In the example below, we'll upload an image, residing on your own computer `/Users/test/logo.png`, via the remote VM/device in the TestingBot cloud to a website.
[Ruby](https://testingbot.com#)[Python](https://testingbot.com#)[PHP](https://testingbot.com#)[Java](https://testingbot.com#)[NodeJS](https://testingbot.com#)[C#](https://testingbot.com#)
require 'rubygems'
require "test/unit"
require 'selenium-webdriver'
class UploadTest < Test::Unit::TestCase
def setup
caps = Selenium::WebDriver::Remote::Capabilities.chrome
caps.version = "latest"
caps.platform = "WIN10"
caps[:name] = "Test File Upload"
@driver = Selenium::WebDriver.for(
:remote,
:url => "https://key:secret@hub.testingbot.com/wd/hub",
:desired_capabilities => caps)
end
def test_upload
@driver.navigate.to "http://the-internet.herokuapp.com/upload"
element = @driver.find_element(:id, 'file-upload')
element.send_keys "/Users/test/logo.png"
@driver.find_element(:id, "file-submit").click
assert "logo.png" == @driver.find_element(:id, "uploaded-files").text
end
def teardown
@driver.quit
end
end
import org.openqa.selenium.By;
import org.openqa.selenium.Platform;
import org.openqa.selenium.WebDriver;
import org.openqa.selenium.WebElement;
import org.openqa.selenium.remote.DesiredCapabilities;
import org.openqa.selenium.remote.LocalFileDetector;
import org.openqa.selenium.remote.RemoteWebDriver;
import java.net.URL;
public class JavaSample {
public static final String URL = "https://key:secret@hub.testingbot.com/wd/hub";
public static void main(String[] args) throws Exception {
DesiredCapabilities caps = new DesiredCapabilities();
caps.setCapability("browserName", "chrome");
caps.setCapability("platform", "WIN10");
caps.setCapability("version", "latest");
caps.setCapability("name", "Test File Upload");
WebDriver driver = new RemoteWebDriver(new URL(URL), caps);
driver.setFileDetector(new LocalFileDetector());
driver.get("http://the-internet.herokuapp.com/upload");
driver.findElement(By.id("file-upload")).sendKeys("/Users/test/logo.png");
driver.findElement(By.id("file-submit")).click();
driver.quit();
}
}
get("http://the-internet.herokuapp.com/upload");
$file_input = $driver->findElement(WebDriverBy::id("file-upload"));
$file_input->setFileDetector(new LocalFileDetector());
$file_input->sendKeys("/Users/test/logo.png");
$driver->findElement(WebDriverBy::id("file-submit"))->click();
sleep(5);
$driver->quit();
?>
from selenium import webdriver
from selenium.webdriver.common.keys import Keys
from selenium.webdriver.common.desired_capabilities import DesiredCapabilities
desired_caps = {
'browserName': 'chrome',
'version': 'latest',
'platform': 'WIN10',
'name': 'Test File Upload'
}
driver = webdriver.Remote(
command_executor='https://key:secret@hub.testingbot.com/wd/hub',
desired_capabilities=desired_caps)
driver.get('http://the-internet.herokuapp.com/upload')
driver.find_element_by_id('file-upload').send_keys('/Users/test/logo.png')
driver.find_element_by_id('file-submit').click()
driver.quit()
const webdriver = require('selenium-webdriver');
const fs = require('fs');
const remote = require('selenium-webdriver/remote');
const capabilities = {
'browserName': 'chrome',
'version': 'latest',
'platform': 'WIN10',
'name': 'Test File Upload',
'client_key': 'key',
'client_secret': 'secret'
};
const driver = new webdriver.Builder().
usingServer('https://hub.testingbot.com/wd/hub').
withCapabilities(capabilities).
build();
webdriver.WebDriver.prototype.saveScreenshot = function(filename) {
return driver.takeScreenshot().then(function(data) {
fs.writeFile(filename, data.replace(/^data:image\/png;base64,/,''), 'base64', function(err) {
if(err) throw err;
});
})
};
driver.setFileDetector(new remote.FileDetector);
driver.get('http://the-internet.herokuapp.com/upload').then(function(){
driver.findElement(webdriver.By.id('file-upload')).sendKeys('/Users/test/logo.png').then(function(){
driver.findElement(webdriver.By.id('file-submit')).click().then(function(){
driver.getTitle().then(function(title) {
console.log(title);
driver.quit();
});
});
});
});
using System;
using OpenQA.Selenium;
using OpenQA.Selenium.Chrome;
using OpenQA.Selenium.Remote;
using System.Text;
namespace SeleniumTest
{
class Program
{
static void Main(string[] args)
{
IWebDriver driver;
ChromeOptions capability = new ChromeOptions();
capability.AddAdditionalCapability("browserName", "Chrome", true);
capability.AddAdditionalCapability("version", "latest", true);
capability.AddAdditionalCapability("platform", "WIN10", true);
capability.AddAdditionalCapability("client_key", "key", true);
capability.AddAdditionalCapability("client_secret", "secret", true);
capability.AddAdditionalCapability("name", "Test File Upload", true);
driver = new RemoteWebDriver(new Uri("https://hub.testingbot.com/wd/hub"), capability);
driver.Navigate().GoToUrl("http://the-internet.herokuapp.com/upload");
var allowsDetection = driver as IAllowsFileDetection;
allowsDetection.FileDetector = new LocalFileDetector();
IWebElement upload = driver.FindElement(By.Id("file-upload"));
upload.SendKeys("/Users/test/logo.png");
driver.FindElement(By.Id("file-submit")).Click();
driver.Quit();
}
}
}
## TestingBot Storage
With [TestingBot Storage](https://testingbot.com/support/api#upload), you can upload your files on our servers.
The advantage of this is that our test VMs can immediately download your file from our own network, which is much faster than downloading from the public internet.
To upload your file with TestingBot Storage, please see [the API upload examples](https://testingbot.com/support/api#upload).
An example of using the uploaded file via TestingBot Storage:
require 'rubygems'
require "test/unit"
require 'selenium-webdriver'
class UploadTest < Test::Unit::TestCase
def setup
caps = Selenium::WebDriver::Remote::Capabilities.firefox
caps.version = "latest"
caps.platform = :WINDOWS
caps[:name] = "Test File Upload"
caps[:upload] = "tb://....." # the unique hash you got back from TestingBot Storage
caps[:uploadFilepath] = "C:\\test\\file.ext" # use C:\test\filename.ext on Windows and /tmp/filename.ext on Linux/OSX
@driver = Selenium::WebDriver.for(
:remote,
:url => "https://key:secret@hub.testingbot.com/wd/hub",
:desired_capabilities => caps)
end
def test_upload
@driver.navigate.to "http://the-internet.herokuapp.com/upload"
element = @driver.find_element(:id, 'file-upload')
element.send_keys "C:\\test\\logo.png" # use C:\test on Windows and /tmp on Linux/OSX
@driver.find_element(:id, "file-submit").click
assert "logo.png" == @driver.find_element(:id, "uploaded-files").text
end
def teardown
@driver.quit
end
end
Was this page helpful? Yes No
## Looking for More Help?
Have questions or need more information?
You can reach us via the following channels:
- [Email us](https://testingbot.com/contact/new)
- [Join our Slack Channel](https://join.slack.com/t/testingb0t/shared_invite/zt-3bcw9xch-jk19~6XPs_xBrsAgAedkCw)
---
URL: https://testingbot.com/support/web-automate/selenium/test-options
# Selenium Test Options
This page offers an overview of all the various options you can specify when starting an automated Selenium test.
The **Selenium-Specific Settings** are required to run automated Selenium tests: `browserName`, `browserVersion` and `platformName`.
The other options are **TestingBot Options** , these allow you to customize your test in terms of specific driver versions, privacy options, platform options and more.
The [Selenium Capabilities generator](https://testingbot.com/support/web-automate/selenium/capabilities) allows you to easily generate the necessary capabilities for your tests.
## Required Selenium Settings
### Browser Name
The name of the browser to run your automated test on. Please see our [list of browsers](https://testingbot.com/support/web-automate/browsers) that we support.
The `browserName` is a required field that needs to be passed to us via Selenium's [Desired Capabilities](https://github.com/SeleniumHQ/selenium/wiki/DesiredCapabilities).
[Ruby](https://testingbot.com#)[Python](https://testingbot.com#)[PHP](https://testingbot.com#)[Java](https://testingbot.com#)[NodeJS](https://testingbot.com#)[C#](https://testingbot.com#)
caps = Selenium::WebDriver::Remote::Capabilities.new
caps["browserName"] = "chrome"
DesiredCapabilities caps = new DesiredCapabilities();
caps.setCapability("browserName", "chrome");
$caps = array(
"browserName" => "chrome"
);
capabilities = {
"browserName" : "chrome"
}
const capabilities = {
"browserName" : "chrome"
}
DesiredCapabilities caps = new DesiredCapabilities();
caps.SetCapability("browserName", "chrome");
**Selenium W3C Example:**
[Ruby](https://testingbot.com#)[Python](https://testingbot.com#)[PHP](https://testingbot.com#)[Java](https://testingbot.com#)[NodeJS](https://testingbot.com#)[C#](https://testingbot.com#)
caps = {
browserName: "chrome"
}
ChromeOptions chromeOpts = new ChromeOptions();
chromeOpts.setExperimentalOption("w3c", true);
MutableCapabilities tbOptions = new MutableCapabilities();
tbOptions.setCapability("key", "api_key");
tbOptions.setCapability("secret", "api_secret");
DesiredCapabilities caps = new DesiredCapabilities();
caps.setCapability(ChromeOptions.CAPABILITY, chromeOpts);
caps.setCapability("tb:options", tbOptions);
caps.setCapability("browserName", "chrome");
$options = new ChromeOptions();
$capabilities = DesiredCapabilities::chrome();
$capabilities->setCapability(ChromeOptions::CAPABILITY, $options);
tbOptions = {
'name': 'W3C Sample'
}
chromeOpts = {
'browserName': "chrome",
'goog:chromeOptions': {'w3c': True},
'tb:options': tbOptions
}
self.driver = webdriver.Remote(remote_url, desired_capabilities=chromeOpts)
driver = await new webdriver.Builder().withCapabilities({
"browserName": 'chrome',
/** Google requires "w3c" to be set in "goog:chromeOptions" as true if you're using ChromeDriver version 74 or lower.
* Based on this commit: https://chromium.googlesource.com/chromium/src/+/2b49880e2481658e0702fd6fe494859bca52b39c
* ChromeDriver now uses w3c by default from version 75+ so setting this option will no longer be a requirement **/
"goog:chromeOptions" : { "w3c" : true },
"tb:options": {
"key": "api_key",
"secret": "api_secret"
}
}).usingServer("https://hub.testingbot.com/wd/hub").build();
var chromeOptions = new ChromeOptions()
{
BrowserVersion = "latest",
PlatformName = "Windows 10",
UseSpecCompliantProtocol = true
};
var tbOptions = new Dictionary
{
["key"] = "api_key",
["secret"] = "api_secret",
["name"] = TestContext.CurrentContext.Test.Name
};
chromeOptions.AddAdditionalCapability("tb:options", tbOptions, true);
driver = new RemoteWebDriver(new Uri("https://hub.testingbot.com/wd/hub"),
chromeOptions.ToCapabilities(), TimeSpan.FromSeconds(600));
### Browser Version
The version of the browser to run your automated test on. Please see our [list of browsers + versions](https://testingbot.com/support/web-automate/browsers) that we support.
The `version` is a required field that needs to be passed to us via Selenium's [Desired Capabilities](https://github.com/SeleniumHQ/selenium/wiki/DesiredCapabilities).
[Ruby](https://testingbot.com#)[Python](https://testingbot.com#)[PHP](https://testingbot.com#)[Java](https://testingbot.com#)[NodeJS](https://testingbot.com#)[C#](https://testingbot.com#)
caps = Selenium::WebDriver::Remote::Capabilities.new
caps["version"] = "81"
DesiredCapabilities caps = new DesiredCapabilities();
caps.setCapability("version", "81");
$caps = array(
"version" => "81"
);
capabilities = {
"version" : "81"
}
const capabilities = {
"version" : "81"
}
DesiredCapabilities caps = new DesiredCapabilities();
caps.SetCapability("version", "81");
**Selenium W3C Example:**
[Ruby](https://testingbot.com#)[Python](https://testingbot.com#)[PHP](https://testingbot.com#)[Java](https://testingbot.com#)[NodeJS](https://testingbot.com#)[C#](https://testingbot.com#)
caps = {
browserName: "chrome",
browserVersion: "106"
}
ChromeOptions chromeOpts = new ChromeOptions();
chromeOpts.setExperimentalOption("w3c", true);
MutableCapabilities tbOptions = new MutableCapabilities();
tbOptions.setCapability("key", "api_key");
tbOptions.setCapability("secret", "api_secret");
DesiredCapabilities caps = new DesiredCapabilities();
caps.setCapability(ChromeOptions.CAPABILITY, chromeOpts);
caps.setCapability("browserVersion", "81");
caps.setCapability("tb:options", tbOptions);
caps.setCapability("browserName", "chrome");
$options = new ChromeOptions();
$capabilities = DesiredCapabilities::chrome();
$capabilities->setVersion(81);
$capabilities->setCapability(ChromeOptions::CAPABILITY, $options);
tbOptions = {
'name': 'W3C Sample'
}
chromeOpts = {
'browserName': "chrome",
'browserVersion': '81',
'goog:chromeOptions': {'w3c': True},
'tb:options': tbOptions
}
self.driver = webdriver.Remote(remote_url, desired_capabilities=chromeOpts)
driver = await new webdriver.Builder().withCapabilities({
"browserName": 'chrome',
"browserVersion": "81",
/** Google requires "w3c" to be set in "goog:chromeOptions" as true if you're using ChromeDriver version 74 or lower.
* Based on this commit: https://chromium.googlesource.com/chromium/src/+/2b49880e2481658e0702fd6fe494859bca52b39c
* ChromeDriver now uses w3c by default from version 75+ so setting this option will no longer be a requirement **/
"goog:chromeOptions" : { "w3c" : true },
"tb:options": {
"key": "api_key",
"secret": "api_secret"
}
}).usingServer("https://hub.testingbot.com/wd/hub").build();
var chromeOptions = new ChromeOptions()
{
BrowserVersion = "81",
PlatformName = "Windows 10",
UseSpecCompliantProtocol = true
};
var tbOptions = new Dictionary
{
["key"] = "api_key",
["secret"] = "api_secret",
["name"] = TestContext.CurrentContext.Test.Name
};
chromeOptions.AddAdditionalCapability("tb:options", tbOptions, true);
driver = new RemoteWebDriver(new Uri("https://hub.testingbot.com/wd/hub"),
chromeOptions.ToCapabilities(), TimeSpan.FromSeconds(600));
Other Options:
- `"version": "*"` : If you use `*` as version, TestingBot will pick a random version.
- `"version": "latest"` : TestingBot will automatically take the latest version. You can also use `latest-1`, `latest-2`, ... to test on the next most recent versions. For example, if the current latest Firefox version is 81 and you use `latest-2`, then the test will run on Firefox 79.
- `"version": "<=16"` : TestingBot will pick a version smaller than or equal to the version you specify with `<=`.
`"version": "16>="` : TestingBot will pick a version higher than or equal to the version you specify with `>=`.
### Platform
Indicates on which operating system the test should run. Please see a [list of platforms](https://testingbot.com/support/web-automate/browsers) that we currently support.
The `platform` is a required field that needs to be passed to us via Selenium's [Desired Capabilities](https://github.com/SeleniumHQ/selenium/wiki/DesiredCapabilities).
[Ruby](https://testingbot.com#)[Python](https://testingbot.com#)[PHP](https://testingbot.com#)[Java](https://testingbot.com#)[NodeJS](https://testingbot.com#)[C#](https://testingbot.com#)
caps = Selenium::WebDriver::Remote::Capabilities.new
caps["platform"] = "Windows 10"
DesiredCapabilities caps = new DesiredCapabilities();
caps.setCapability("platform", "Windows 10");
$caps = array(
"platform" => "Windows 10"
);
capabilities = {
"platform" : "Windows 10"
}
const capabilities = {
"platform" : "Windows 10"
}
DesiredCapabilities caps = new DesiredCapabilities();
caps.SetCapability("platform", "Windows 10");
**Selenium W3C Example:**
[Ruby](https://testingbot.com#)[Python](https://testingbot.com#)[PHP](https://testingbot.com#)[Java](https://testingbot.com#)[NodeJS](https://testingbot.com#)[C#](https://testingbot.com#)
caps = {
platform_name: "Windows 10"
}
ChromeOptions chromeOpts = new ChromeOptions();
chromeOpts.setExperimentalOption("w3c", true);
MutableCapabilities tbOptions = new MutableCapabilities();
tbOptions.setCapability("key", "api_key");
tbOptions.setCapability("secret", "api_secret");
DesiredCapabilities caps = new DesiredCapabilities();
caps.setCapability(ChromeOptions.CAPABILITY, chromeOpts);
caps.setCapability("platformName", "Windows 10");
caps.setCapability("tb:options", tbOptions);
caps.setCapability("browserName", "chrome");
$options = new ChromeOptions();
$capabilities = DesiredCapabilities::chrome();
$capabilities->setPlatform('Windows 10');
$capabilities->setCapability(ChromeOptions::CAPABILITY, $options);
tbOptions = {
'name': 'W3C Sample'
}
chromeOpts = {
'browserName': "chrome",
'platformName': "Windows 10",
'goog:chromeOptions': {'w3c': True},
'tb:options': tbOptions
}
self.driver = webdriver.Remote(remote_url, desired_capabilities=chromeOpts)
driver = await new webdriver.Builder().withCapabilities({
"browserName": 'chrome',
"platformName": 'Windows 10',
/** Google requires "w3c" to be set in "goog:chromeOptions" as true if you're using ChromeDriver version 74 or lower.
* Based on this commit: https://chromium.googlesource.com/chromium/src/+/2b49880e2481658e0702fd6fe494859bca52b39c
* ChromeDriver now uses w3c by default from version 75+ so setting this option will no longer be a requirement **/
"goog:chromeOptions" : { "w3c" : true },
"tb:options": {
"key": "api_key",
"secret": "api_secret"
}
}).usingServer("https://hub.testingbot.com/wd/hub").build();
var chromeOptions = new ChromeOptions()
{
BrowserVersion = "81",
PlatformName = "Windows 10",
UseSpecCompliantProtocol = true
};
var tbOptions = new Dictionary
{
["key"] = "api_key",
["secret"] = "api_secret",
["name"] = TestContext.CurrentContext.Test.Name
};
chromeOptions.AddAdditionalCapability("tb:options", tbOptions, true);
driver = new RemoteWebDriver(new Uri("https://hub.testingbot.com/wd/hub"),
chromeOptions.ToCapabilities(), TimeSpan.FromSeconds(600));
### Device Name
When running a mobile automated test, you'll need to specify on which [mobile device](https://testingbot.com/support/app-automate/devices) (or [simulator/emulator](https://testingbot.com/support/web-automate/browsers)) you want to test.
[Ruby](https://testingbot.com#)[Python](https://testingbot.com#)[Java](https://testingbot.com#)[NodeJS](https://testingbot.com#)[C#](https://testingbot.com#)
caps = {
deviceName: "Samsung S21"
}
ChromeOptions chromeOpts = new ChromeOptions();
chromeOpts.setExperimentalOption("w3c", true);
MutableCapabilities tbOptions = new MutableCapabilities();
tbOptions.setCapability("key", "api_key");
tbOptions.setCapability("secret", "api_secret");
DesiredCapabilities caps = new DesiredCapabilities();
caps.setCapability(ChromeOptions.CAPABILITY, chromeOpts);
caps.setCapability("platformName", "Android");
caps.setCapability("tb:options", tbOptions);
caps.setCapability("appium:deviceName", "Samsung S23");
tbOptions = {
'name': 'W3C Sample'
}
chromeOpts = {
'deviceName': "Samsung S21",
'platformName': "Android",
'goog:chromeOptions': {'w3c': True},
'tb:options': tbOptions
}
self.driver = webdriver.Remote(remote_url, desired_capabilities=chromeOpts)
driver = await new webdriver.Builder().withCapabilities({
"browserName": 'chrome',
"appium:deviceName": 'Samsung S23',
"platformName": 'Android',
"goog:chromeOptions" : { "w3c" : true },
"tb:options": {
"key": "api_key",
"secret": "api_secret"
}
}).usingServer("https://hub.testingbot.com/wd/hub").build();
var chromeOptions = new ChromeOptions()
{
PlatformName = "Android",
UseSpecCompliantProtocol = true
};
var tbOptions = new Dictionary
{
["key"] = "api_key",
["secret"] = "api_secret",
["name"] = TestContext.CurrentContext.Test.Name,
["appium:deviceName"] = "Samsung S23"
};
chromeOptions.AddAdditionalCapability("tb:options", tbOptions, true);
driver = new RemoteWebDriver(new Uri("https://hub.testingbot.com/wd/hub"),
chromeOptions.ToCapabilities(), TimeSpan.FromSeconds(600));
We offer regex/wildcard parameters which you can use to allocate a device:
| Regex Input | Result |
| --- | --- |
| `"iPhone.*"` | This will allocate any available iPhone device (phone) |
| `".*Galaxy.*"` | This will allocate any of the available Galaxy devices (phone or tablet) |
| `"*"` | This will allocate a random available device, either iOS or Android device |
| `"iPhone [8-11]"` | This will allocate either an iPhone 8 or 11 |
| `"iPhone 6.*"` | This will allocate either an iPhone 6 or 6S |
Some Examples:
// find any iPhone, except 6 or 6s
capabilities.setCapability("appium:deviceName", "^(iPhone.*)(?!6|6S)$");
// find any device which name starts with Samsung
capabilities.setCapability("appium:deviceName", "Samsung.*");
### Device Version
You can specify the version of the device you want to target. In case of physical devices, you might want to use regex/wildcard patterns to target a broad range of devices. This way your chance of hitting an occupied device during your automated test decreases significantly.
Instead of only targetting a specific iOS or Android device, you can target a wider range of devices.
[Ruby](https://testingbot.com#)[Python](https://testingbot.com#)[Java](https://testingbot.com#)[NodeJS](https://testingbot.com#)[C#](https://testingbot.com#)
caps = {
version: "(16|17).*"
}
ChromeOptions chromeOpts = new ChromeOptions();
chromeOpts.setExperimentalOption("w3c", true);
MutableCapabilities tbOptions = new MutableCapabilities();
tbOptions.setCapability("key", "api_key");
tbOptions.setCapability("secret", "api_secret");
DesiredCapabilities caps = new DesiredCapabilities();
caps.setCapability(ChromeOptions.CAPABILITY, chromeOpts);
caps.setCapability("appium:platformName", "Android");
caps.setCapability("appium:deviceName", "*");
caps.setCapability("tb:options", tbOptions);
caps.setCapability("appium:version", "(13|14).*");
tbOptions = {
'name': 'W3C Sample'
}
chromeOpts = {
'appium:deviceName': "*",
'appium:version': '(13|14).*'
'platformName': "Android",
'goog:chromeOptions': {'w3c': True}
}
self.driver = webdriver.Remote(remote_url, desired_capabilities=chromeOpts)
driver = await new webdriver.Builder().withCapabilities({
"browserName": 'chrome',
"appium:deviceName": '*',
"appium:version": '(13|14).*',
"platformName": 'Android',
"goog:chromeOptions" : { "w3c" : true },
"tb:options": {
"key": "api_key",
"secret": "api_secret"
}
}).usingServer("https://hub.testingbot.com/wd/hub").build();
var chromeOptions = new ChromeOptions()
{
PlatformName = "Android"
};
var tbOptions = new Dictionary
{
["key"] = "api_key",
["secret"] = "api_secret",
["name"] = TestContext.CurrentContext.Test.Name,
["deviceName"] = "*"
["version"] = "(13|14).*"
};
chromeOptions.AddAdditionalCapability("tb:options", tbOptions, true);
driver = new RemoteWebDriver(new Uri("https://hub.testingbot.com/wd/hub"),
chromeOptions.ToCapabilities(), TimeSpan.FromSeconds(600));
Some Examples:
// target multiple specific versions of an iPhone device
capabilities.setCapability("appium:deviceName", "iPhone.*");
capabilities.setCapability("appium:version", "15.0|14.2|14|13.4|13.3");
// find any Samsung device with Android version 13 or 14
capabilities.setCapability("appium:deviceName", "Samsung.*");
capabilities.setCapability("appium:version", "(13|14).*");
### Tablet Only
You can specify this capability when you only want to allocate a tablet device.
[Ruby](https://testingbot.com#)[Python](https://testingbot.com#)[Java](https://testingbot.com#)[NodeJS](https://testingbot.com#)[C#](https://testingbot.com#)
caps = {
deviceName: "*",
tabletOnly: true
}
ChromeOptions chromeOpts = new ChromeOptions();
chromeOpts.setExperimentalOption("w3c", true);
MutableCapabilities tbOptions = new MutableCapabilities();
tbOptions.setCapability("key", "api_key");
tbOptions.setCapability("secret", "api_secret");
tbOptions.setCapability("tabletOnly", true);
tbOptions.setCapability("deviceName", "*");
DesiredCapabilities caps = new DesiredCapabilities();
caps.setCapability(ChromeOptions.CAPABILITY, chromeOpts);
caps.setCapability("platformName", "Android");
caps.setCapability("tb:options", tbOptions);
tbOptions = {
'name': 'W3C Sample'
}
chromeOpts = {
'deviceName': "*",
'tabletOnly': true,
'platformName': "Android",
'goog:chromeOptions': {'w3c': True},
'tb:options': tbOptions
}
self.driver = webdriver.Remote(remote_url, desired_capabilities=chromeOpts)
driver = await new webdriver.Builder().withCapabilities({
"browserName": 'chrome',
"deviceName": '*',
"platformName": 'Android',
"goog:chromeOptions" : { "w3c" : true },
"tb:options": {
"key": "api_key",
"secret": "api_secret",
"tabletOnly": true
}
}).usingServer("https://hub.testingbot.com/wd/hub").build();
var chromeOptions = new ChromeOptions()
{
PlatformName = "Android",
UseSpecCompliantProtocol = true
};
var tbOptions = new Dictionary
{
["key"] = "api_key",
["secret"] = "api_secret",
["name"] = TestContext.CurrentContext.Test.Name,
["deviceName"] = "*",
["tabletOnly"] = true
};
chromeOptions.AddAdditionalCapability("tb:options", tbOptions, true);
driver = new RemoteWebDriver(new Uri("https://hub.testingbot.com/wd/hub"),
chromeOptions.ToCapabilities(), TimeSpan.FromSeconds(600));
### Phone Only
You can specify this capability when you only want to allocate a phone device.
[Ruby](https://testingbot.com#)[Python](https://testingbot.com#)[Java](https://testingbot.com#)[NodeJS](https://testingbot.com#)[C#](https://testingbot.com#)
caps = {
deviceName: "*",
phoneOnly: true
}
ChromeOptions chromeOpts = new ChromeOptions();
chromeOpts.setExperimentalOption("w3c", true);
MutableCapabilities tbOptions = new MutableCapabilities();
tbOptions.setCapability("key", "api_key");
tbOptions.setCapability("secret", "api_secret");
tbOptions.setCapability("phoneOnly", true);
tbOptions.setCapability("deviceName", "*");
DesiredCapabilities caps = new DesiredCapabilities();
caps.setCapability(ChromeOptions.CAPABILITY, chromeOpts);
caps.setCapability("platformName", "Android");
caps.setCapability("tb:options", tbOptions);
tbOptions = {
'name': 'W3C Sample'
}
chromeOpts = {
'deviceName': "*",
'phoneOnly': true,
'platformName': "Android",
'goog:chromeOptions': {'w3c': True},
'tb:options': tbOptions
}
self.driver = webdriver.Remote(remote_url, desired_capabilities=chromeOpts)
driver = await new webdriver.Builder().withCapabilities({
"browserName": 'chrome',
"deviceName": '*',
"platformName": 'Android',
"goog:chromeOptions" : { "w3c" : true },
"tb:options": {
"key": "api_key",
"secret": "api_secret",
"phoneOnly": true
}
}).usingServer("https://hub.testingbot.com/wd/hub").build();
var chromeOptions = new ChromeOptions()
{
PlatformName = "Android",
UseSpecCompliantProtocol = true
};
var tbOptions = new Dictionary
{
["key"] = "api_key",
["secret"] = "api_secret",
["name"] = TestContext.CurrentContext.Test.Name,
["deviceName"] = "*",
["phoneOnly"] = true
};
chromeOptions.AddAdditionalCapability("tb:options", tbOptions, true);
driver = new RemoteWebDriver(new Uri("https://hub.testingbot.com/wd/hub"),
chromeOptions.ToCapabilities(), TimeSpan.FromSeconds(600));
### Use a specific version of Selenium
By default we use Selenium version `2.53.1` to run your test.
If you wish to use another Selenium version for your test, please specify one of the following available versions:
[Ruby](https://testingbot.com#)[Python](https://testingbot.com#)[PHP](https://testingbot.com#)[Java](https://testingbot.com#)[NodeJS](https://testingbot.com#)[C#](https://testingbot.com#)
caps = Selenium::WebDriver::Remote::Capabilities.new
caps["selenium-version"] = '2.53.1'
DesiredCapabilities caps = new DesiredCapabilities();
caps.setCapability("selenium-version", '2.53.1');
$caps = array(
"selenium-version" => '2.53.1'
);
capabilities = {
"selenium-version" : '2.53.1'
}
const capabilities = {
"selenium-version" : '2.53.1'
}
DesiredCapabilities caps = new DesiredCapabilities();
caps.SetCapability("selenium-version", '2.53.1');
**Selenium W3C Example:**
[Ruby](https://testingbot.com#)[Python](https://testingbot.com#)[PHP](https://testingbot.com#)[Java](https://testingbot.com#)[NodeJS](https://testingbot.com#)[C#](https://testingbot.com#)
caps = {
platformName: "Windows 10",
browserName: "chrome",
browserVersion: "latest",
"tb:options" => {
"selenium-version" : '2.53.1'
}
}
ChromeOptions chromeOpts = new ChromeOptions();
chromeOpts.setExperimentalOption("w3c", true);
MutableCapabilities tbOptions = new MutableCapabilities();
tbOptions.setCapability("key", "api_key");
tbOptions.setCapability("secret", "api_secret");
tbOptions.setCapability("selenium-version", '2.53.1');
DesiredCapabilities caps = new DesiredCapabilities();
caps.setCapability(ChromeOptions.CAPABILITY, chromeOpts);
caps.setCapability("platformName", "Windows 10");
caps.setCapability("tb:options", tbOptions);
caps.setCapability("browserName", "chrome");
$options = new ChromeOptions();
$capabilities = DesiredCapabilities::chrome();
$capabilities->setPlatform('Windows 10');
$capabilities->setCapability('tb:options', array(
'selenium-version' => '2.53.1'
));
$capabilities->setCapability(ChromeOptions::CAPABILITY, $options);
tbOptions = {
'name': 'W3C Sample',
'selenium-version': '2.53.1'
}
chromeOpts = {
'browserName': "chrome",
'platformName': "Windows 10",
'goog:chromeOptions': {'w3c': True},
'tb:options': tbOptions
}
self.driver = webdriver.Remote(remote_url, desired_capabilities=chromeOpts)
driver = await new webdriver.Builder().withCapabilities({
"browserName": 'chrome',
"platformName": 'Windows 10',
/** Google requires "w3c" to be set in "goog:chromeOptions" as true if you're using ChromeDriver version 74 or lower.
* Based on this commit: https://chromium.googlesource.com/chromium/src/+/2b49880e2481658e0702fd6fe494859bca52b39c
* ChromeDriver now uses w3c by default from version 75+ so setting this option will no longer be a requirement **/
"goog:chromeOptions" : { "w3c" : true },
"tb:options": {
"key": "api_key",
"secret": "api_secret",
"selenium-version": '2.53.1'
}
}).usingServer("https://hub.testingbot.com/wd/hub").build();
var chromeOptions = new ChromeOptions()
{
BrowserVersion = "81",
PlatformName = "Windows 10",
UseSpecCompliantProtocol = true
};
var tbOptions = new Dictionary
{
["key"] = "api_key",
["secret"] = "api_secret",
["selenium-version"] = "2.53.1"
};
chromeOptions.AddAdditionalCapability("tb:options", tbOptions, true);
driver = new RemoteWebDriver(new Uri("https://hub.testingbot.com/wd/hub"),
chromeOptions.ToCapabilities(), TimeSpan.FromSeconds(600));
| Value Type | Default Value | Possible Values: |
| --- | --- | --- |
| string | "2.53.1" |
4.39.0
4.38.0
4.37.0
4.36.0
4.35.0
4.34.0
4.33.0
4.32.0
4.31.0
4.30.0
4.29.0
4.28.1
4.28.0
4.27.0
4.26.0
4.25.0
4.24.0
4.23.1
4.23.0
4.22.0
4.21.0
4.20.0
4.19.0
4.18.1
4.18.0
4.17.0
4.16.1
4.16.0
4.15.0
4.14.1
4.14.0
4.13.0
4.12.1
4.12.0
4.11.0
4.10.0
4.9.0
4.8.3
4.8.2
4.8.1
4.8.0
4.7.0
4.6.0
4.5.3
4.5.2
4.5.1
4.5.0
4.4.0
4.3.0
4.2.2
4.2.1
4.2.0
4.1.3
4.1.2
4.1.1
4.1.0
4.0.0
4.0.0-beta-4
4.0.0-beta-3
4.0.0-beta-2
4.0.0-beta-1
4.0.0-alpha-7
4.0.0-alpha-6
3.141.59
3.141.5
3.141.0
3.14.0
3.13.0
3.12.0
3.11.0
3.10.0
3.9.0
3.8.1
3.8.0
3.7.1
3.7.0
3.6.0
3.5.3
3.5.2
3.5.1
3.5.0
3.4.0
3.3.1
3.3.0
3.2.0
3.1.0
3.0.1
2.53.1
2.53.0
2.52.0
2.51.0
2.50.0
2.49.0
2.48.2
2.48.1
2.48.0
|
### Chromedriver
We support using custom ChromeDriver versions during your tests. By default the most recent Chromedriver is used according to the version of Chrome you're testing on.
[Ruby](https://testingbot.com#)[Python](https://testingbot.com#)[PHP](https://testingbot.com#)[Java](https://testingbot.com#)[NodeJS](https://testingbot.com#)[C#](https://testingbot.com#)
caps = Selenium::WebDriver::Remote::Capabilities.new
caps["chromedriverVersion"] = "76.0.3809.25"
DesiredCapabilities caps = new DesiredCapabilities();
caps.setCapability("chromedriverVersion", "76.0.3809.25");
$caps = array(
"chromedriverVersion" => "76.0.3809.25"
);
capabilities = {
"chromedriverVersion" : "76.0.3809.25"
}
const capabilities = {
"chromedriverVersion" : "76.0.3809.25"
}
DesiredCapabilities caps = new DesiredCapabilities();
caps.SetCapability("chromedriverVersion", "76.0.3809.25");
**Selenium W3C Example:**
[Ruby](https://testingbot.com#)[Python](https://testingbot.com#)[PHP](https://testingbot.com#)[Java](https://testingbot.com#)[NodeJS](https://testingbot.com#)[C#](https://testingbot.com#)
caps = {
platformName: "Windows 10",
browserName: "chrome",
browserVersion: "latest",
"tb:options" => {
"chromedriverVersion" : "76.0.3809.25"
}
}
ChromeOptions chromeOpts = new ChromeOptions();
chromeOpts.setExperimentalOption("w3c", true);
MutableCapabilities tbOptions = new MutableCapabilities();
tbOptions.setCapability("key", "api_key");
tbOptions.setCapability("secret", "api_secret");
tbOptions.setCapability("chromedriverVersion", "76.0.3809.25");
DesiredCapabilities caps = new DesiredCapabilities();
caps.setCapability(ChromeOptions.CAPABILITY, chromeOpts);
caps.setCapability("platformName", "Windows 10");
caps.setCapability("tb:options", tbOptions);
caps.setCapability("browserName", "chrome");
$options = new ChromeOptions();
$capabilities = DesiredCapabilities::chrome();
$capabilities->setPlatform('Windows 10');
$capabilities->setCapability('tb:options', array(
'chromedriverVersion' => "76.0.3809.25"
));
$capabilities->setCapability(ChromeOptions::CAPABILITY, $options);
tbOptions = {
'name': 'W3C Sample',
'chromedriverVersion': "76.0.3809.25"
}
chromeOpts = {
'browserName': "chrome",
'platformName': "Windows 10",
'goog:chromeOptions': {'w3c': True},
'tb:options': tbOptions
}
self.driver = webdriver.Remote(remote_url, desired_capabilities=chromeOpts)
driver = await new webdriver.Builder().withCapabilities({
"browserName": 'chrome',
"platformName": 'Windows 10',
/** Google requires "w3c" to be set in "goog:chromeOptions" as true if you're using ChromeDriver version 74 or lower.
* Based on this commit: https://chromium.googlesource.com/chromium/src/+/2b49880e2481658e0702fd6fe494859bca52b39c
* ChromeDriver now uses w3c by default from version 75+ so setting this option will no longer be a requirement **/
"goog:chromeOptions" : { "w3c" : true },
"tb:options": {
"key": "api_key",
"secret": "api_secret",
"chromedriverVersion": "76.0.3809.25"
}
}).usingServer("https://hub.testingbot.com/wd/hub").build();
var chromeOptions = new ChromeOptions()
{
BrowserVersion = "81",
PlatformName = "Windows 10"
};
var tbOptions = new Dictionary
{
["key"] = "api_key",
["secret"] = "api_secret",
["chromedriverVersion"] = "76.0.3809.25"
};
chromeOptions.AddAdditionalCapability("tb:options", tbOptions, true);
driver = new RemoteWebDriver(new Uri("https://hub.testingbot.com/wd/hub"),
chromeOptions.ToCapabilities(), TimeSpan.FromSeconds(600));
| Value Type | Default Value | Possible Values: |
| --- | --- | --- |
| string | "2.46" |
dev
141.0.7390.54
140.0.7339.80
139.0.7207.2
138.0.7153.0
137.0.7117.2
136.0.7064.0
135.0.6999.2
134.0.6958.2
133.0.6943.16
132.0.6811.2
131.0.6778.3
130.0.6669.2
129.0.6614.3
128.0.6613.18
127.0.6533.88
127.0.6485.0
126.0.6423.2
125.0.6422.4
124.0.6367.60
124.0.6356.2
123.0.6262.5
122.0.6253.3
121.0.6154.0
121.0.6129.0
120.0.6099.5
119.0.6045.9
118.0.5979.0
117.0.5938.0
116.0.5845.82
115.0.5790.170
115.0.5790.90
114.0.5735.90
114.0.5735.16
113.0.5672.63
113.0.5672.24
112.0.5615.49
112.0.5615.28
111.0.5563.64
111.0.5563.41
111.0.5563.19
110.0.5481.77
110.0.5481.30
109.0.5414.74
109.0.5414.25
108.0.5359.71
108.0.5359.22
107.0.5304.62
107.0.5304.18
106.0.5249.61
106.0.5249.21
105.0.5195.52
105.0.5195.19
104.0.5112.79
104.0.5112.29
104.0.5112.20
103.0.5060.134
103.0.5060.24
102.0.5005.61
102.0.5005.27
101.0.4951.41
101.0.4951.15
100.0.4896.60
100.0.4896.20
99.0.4844.51
99.0.4844.35
99.0.4844.17
98.0.4758.80
98.0.4758.48
97.0.4692.71
97.0.4692.36
97.0.4692.20
96.0.4664.45
95.0.4638.10
94.0.4606.41
93.0.4577.15
92.0.4515.43
91.0.4472.101
91.0.4472.19
90.0.4430.24
89.0.4389.23
88.0.4324.96
88.0.4324.27
87.0.4280.88
87.0.4280.20
86.0.4240.22
85.0.4183.87
85.0.4183.83
85.0.4183.38
84.0.4147.30
83.0.4103.39
83.0.4103.14
81.0.4044.69
81.0.4044.20
80.0.3987.16
79.0.3945.36
79.0.3945.16
78.0.3904.70
78.0.3904.11
77.0.3865.40
77.0.3865.10
76.0.3809.68
76.0.3809.25
76.0.3809.12
75.0.3770.140
75.0.3770.90
75.0.3770.8
74.0.3729.6
73.0.3683.68
73.0.3683.20
72.0.3626.7
72.0.3626.69
71.0.3578.80
71.0.3578.33
71.0.3578.30
71.0.3578.137
70.0.3538.97
70.0.3538.67
70.0.3538.16
2.46
2.45
2.44
2.43
2.42
2.41
2.40
2.39
2.38
2.37
2.36
2.35
2.34
2.33
2.32
2.31
2.30
2.29
2.28
2.27
2.26
2.25
2.24
2.23
2.22
2.21
2.20
2.19
2.16
2.15
2.14
2.13
2.12
2.10
|
### Internet Explorer Driver (IEDriver)
We provide both 32-bit and 64-bit versions of the Internet Explorer driver. By default we use the 2.53.1 (32-bit) IEDriver for your tests.
We use 32-bit because of a [slow text entry bug](https://github.com/seleniumhq/selenium-google-code-issue-archive/issues/5116) with the 64-bit version.
For our screenshots, we use the 64-bit version, because of a [screenshot problem](https://github.com/seleniumhq/selenium-google-code-issue-archive/issues/5876) with the 32-bit version.
[Ruby](https://testingbot.com#)[Python](https://testingbot.com#)[PHP](https://testingbot.com#)[Java](https://testingbot.com#)[NodeJS](https://testingbot.com#)[C#](https://testingbot.com#)
caps = Selenium::WebDriver::Remote::Capabilities.new
caps["iedriverVersion"] = "2.53.1"
DesiredCapabilities caps = new DesiredCapabilities();
caps.setCapability("iedriverVersion", "2.53.1");
$caps = array(
"iedriverVersion" => "2.53.1"
);
capabilities = {
"iedriverVersion" : "2.53.1"
}
const capabilities = {
"iedriverVersion" : "2.53.1"
}
DesiredCapabilities caps = new DesiredCapabilities();
caps.SetCapability("iedriverVersion", "2.53.1");
**Selenium W3C Example:**
[Ruby](https://testingbot.com#)[Python](https://testingbot.com#)[PHP](https://testingbot.com#)[Java](https://testingbot.com#)[NodeJS](https://testingbot.com#)[C#](https://testingbot.com#)
caps = {
platformName: "Windows 10",
browserName: "internet explorer",
browserVersion: "latest",
"se:ieOptions": {},
"tb:options": {
"iedriverVersion" : "4.8.0",
"selenium-version": "4.8.0"
}
}
InternetExplorerOptions ieOpts = new InternetExplorerOptions();
MutableCapabilities tbOptions = new MutableCapabilities();
tbOptions.setCapability("key", "api_key");
tbOptions.setCapability("secret", "api_secret");
tbOptions.setCapability("iedriverVersion", "4.8.0");
tbOptions.setCapability("selenium-version", "4.8.0");
DesiredCapabilities caps = new DesiredCapabilities();
caps.setCapability("se:ieOptions", ieOpts);
caps.setCapability("platformName", "Windows 10");
caps.setCapability("tb:options", tbOptions);
caps.setCapability("browserName", "internet explorer");
$capabilities = DesiredCapabilities::internetExplorer();
$capabilities->setPlatform('Windows 10');
$capabilities->setCapability('tb:options', array(
'iedriverVersion' => "4.8.0",
'selenium-version' => "4.8.0"
));
$capabilities->setCapability('se:ieOptions', []);
tbOptions = {
'name': 'W3C Sample',
'iedriverVersion': '4.8.0',
'selenium-version': '4.8.0'
}
ieOpts = {
'browserName': "chrome",
'platformName': "Windows 10",
'se:ieOptions': {},
'tb:options': tbOptions
}
self.driver = webdriver.Remote(remote_url, desired_capabilities=ieOpts)
driver = await new webdriver.Builder().withCapabilities({
"browserName": 'internet explorer',
"platformName": 'Windows 10',
"se:ieOptions" : {},
"tb:options": {
"key": "api_key",
"secret": "api_secret",
"iedriverVersion": "4.8.0",
"selenium-version": "4.8.0"
}
}).usingServer("https://hub.testingbot.com/wd/hub").build();
var ieOptions = new InternetExplorerOptions()
{
BrowserVersion = "11",
PlatformName = "Windows 10",
UseSpecCompliantProtocol = true
};
var tbOptions = new Dictionary
{
["key"] = "api_key",
["secret"] = "api_secret",
["iedriverVersion"] = "4.8.0",
["selenium-version"] = "4.8.0"
};
ieOptions.AddAdditionalCapability("tb:options", tbOptions, true);
driver = new RemoteWebDriver(new Uri("https://hub.testingbot.com/wd/hub"),
ieOptions.ToCapabilities(), TimeSpan.FromSeconds(600));
| Value Type | Default Value | Possible Values: |
| --- | --- | --- |
| string | 2.53.1 |
x64\_4.14.0
4.14.0
x64\_4.11.0
4.11.0
x64\_4.10.0
4.10.0
x64\_4.8.1
4.8.1
x64\_4.8.0
4.8.0
x64\_4.7.0
4.7.0
x64\_4.6.0
4.6.0
x64\_4.3.0
4.3.0
x64\_4.2.0
4.2.0
x64\_4.0.0
4.0.0
x64\_3.141.59
3.141.59
x64\_3.141.5
3.141.5
x64\_3.141.0
3.141.0
x64\_3.14.0
3.14.0
x64\_3.13.0
3.13.0
x64\_3.12.0
3.12.0
x64\_3.11.1
3.11.1
x64\_3.11.0
3.11.0
x64\_3.10.0
3.10.0
x64\_3.9.0
3.9.0
x64\_3.8.0
3.8.0
x64\_3.7.0
3.7.0
x64\_3.6.0
3.6.0
x64\_3.5.0
3.5.0
x64\_3.4.0
3.4.0
x64\_3.3.0
3.3.0
x64\_3.2.0
3.2.0
x64\_3.1.0
3.1.0
x64\_2.53.1
2.53.1
x64\_2.53.0
2.53.0
x64\_2.52.2
2.52.2
x64\_2.51.0
2.51.0
x64\_2.50.0
2.50.0
x64\_2.49.0
2.49.0
x64\_2.48.0
2.48.0
x64\_2.47.0
2.47.0
x64\_2.46.0
2.46.0
x64\_2.45.0
2.45.0
x64\_2.42.0
2.42.0
|
### Edge Driver (MicrosoftWebDriver)
EdgeDriver is built by Microsoft to automate the Microsoft Edge Browser.
By default, we make sure that the most recent fully-compatible EdgeDriver is used for every test running on the Microsoft Edge Browser.
[Ruby](https://testingbot.com#)[Python](https://testingbot.com#)[PHP](https://testingbot.com#)[Java](https://testingbot.com#)[NodeJS](https://testingbot.com#)[C#](https://testingbot.com#)
caps = {
"browserName" : "MicrosoftEdge",
"platform": "WINDOWS"
}
caps["edgedriverVersion"] = "110"
DesiredCapabilities caps = new DesiredCapabilities();
caps.setCapability("edgedriverVersion", "110");
$caps = array(
"edgedriverVersion" => "110"
);
capabilities = {
"edgedriverVersion" : "110"
}
const capabilities = {
"edgedriverVersion" : "110",
"ms:edgeOptions": {}
}
var edgeOptions = new EdgeOptions()
{
BrowserVersion = "11",
PlatformName = "Windows 10",
UseSpecCompliantProtocol = true
};
var tbOptions = new Dictionary
{
["key"] = "api_key",
["secret"] = "api_secret",
["edgeDriverVersion"] = "110",
["selenium-version"] = "4.8.0"
};
edgeOptions.AddAdditionalCapability("tb:options", tbOptions, true);
driver = new RemoteWebDriver(new Uri("https://hub.testingbot.com/wd/hub"),
edgeOptions.ToCapabilities(), TimeSpan.FromSeconds(600));
**Selenium W3C Example:**
[Ruby](https://testingbot.com#)[Python](https://testingbot.com#)[PHP](https://testingbot.com#)[Java](https://testingbot.com#)[NodeJS](https://testingbot.com#)[C#](https://testingbot.com#)
caps = {
platformName: "Windows 10",
browserName: "microsoftedge",
browserVersion: "latest",
"tb:options" => {
"edgedriverVersion" : "110"
},
"ms:edgeOptions": {}
}
EdgeOptions edgeOpts = new EdgeOptions();
edgeOpts.setExperimentalOption("w3c", true);
MutableCapabilities tbOptions = new MutableCapabilities();
tbOptions.setCapability("key", "api_key");
tbOptions.setCapability("secret", "api_secret");
tbOptions.setCapability("edgedriverVersion", "110");
DesiredCapabilities caps = new DesiredCapabilities();
caps.setCapability(EdgeOptions.CAPABILITY, edgeOpts);
caps.setCapability("platformName", "Windows 10");
caps.setCapability("tb:options", tbOptions);
caps.setCapability("browserName", "chrome");
$options = new EdgeOptions();
$capabilities = DesiredCapabilities::chrome();
$capabilities->setPlatform('Windows 10');
$capabilities->setCapability('tb:options', array(
'edgedriverVersion' => "110"
));
$capabilities->setCapability('ms:edgeOptions', array());
$capabilities->setCapability(EdgeOptions::CAPABILITY, $options);
tbOptions = {
'name': 'W3C Sample',
'edgedriverVersion': '110'
}
chromeOpts = {
'browserName': "chrome",
'platformName': "Windows 10",
'tb:options': tbOptions,
'ms:edgeOptions': ''
}
self.driver = webdriver.Remote(remote_url, desired_capabilities=chromeOpts)
let driver = await new webdriver.Builder().withCapabilities({
"browserName": 'microsoftedge',
"platformName": 'Windows 10',
"ms:edgeOptions" : {},
"tb:options": {
"key": "api_key",
"secret": "api_secret",
"edgedriverVersion": "110"
}
}).usingServer("https://hub.testingbot.com/wd/hub").build();
var edgeOptions = new EdgeOptions()
{
BrowserVersion = "latest",
PlatformName = "Windows 10",
UseSpecCompliantProtocol = true
};
var tbOptions = new Dictionary
{
["key"] = "api_key",
["secret"] = "api_secret",
["edgedriverVersion"] = "110"
};
edgeOptions.AddAdditionalCapability("tb:options", tbOptions, true);
driver = new RemoteWebDriver(new Uri("https://hub.testingbot.com/wd/hub"),
edgeOptions.ToCapabilities(), TimeSpan.FromSeconds(600));
| Value Type | Default Value | Possible Values: |
| --- | --- | --- |
| string | 15063 |
141
140
139
138
137
136
135
134
133
132
131
130
129
128
127
126
125
124
123
122
121
120
119
118
117
116
115
114
113
112
111
110
109
108
107
106
105
104
103
102
101
100
99
98
97
96
95
94
93
92
91
90
89
88
87
86
85
84
83
81
dev
insiders
16299
15063
14393
|
### Firefox Driver (Geckodriver)
For Firefox 47 and up, webdriver tests on Firefox need to use [Mozilla's GeckoDriver](https://github.com/mozilla/geckodriver).
Specify this option to choose which Geckodriver we should use. By default, we use the version that is most compatible with the Firefox version you request.
[Ruby](https://testingbot.com#)[Python](https://testingbot.com#)[PHP](https://testingbot.com#)[Java](https://testingbot.com#)[NodeJS](https://testingbot.com#)[C#](https://testingbot.com#)
caps = Selenium::WebDriver::Remote::Capabilities.new
caps["geckodriverVersion"] = "0.28.0"
DesiredCapabilities caps = new DesiredCapabilities();
caps.setCapability("geckodriverVersion", "0.28.0");
$caps = array(
"geckodriverVersion" => "0.28.0"
);
capabilities = {
"geckodriverVersion" : "0.28.0"
}
const capabilities = {
"geckodriverVersion" : "0.28.0"
}
DesiredCapabilities caps = new DesiredCapabilities();
caps.SetCapability("geckodriverVersion", "0.28.0");
**Selenium W3C Example:**
[Ruby](https://testingbot.com#)[Python](https://testingbot.com#)[PHP](https://testingbot.com#)[Java](https://testingbot.com#)[NodeJS](https://testingbot.com#)[C#](https://testingbot.com#)
caps = {
platformName: "Windows 10",
browserName: "firefox",
browserVersion: "latest",
"tb:options": {
"geckodriverVersion" : "0.28.0"
},
"moz:firefoxOptions": {}
}
FirefoxOptions ffOptions = new FirefoxOptions();
ffOptions.setExperimentalOption("w3c", true);
MutableCapabilities tbOptions = new MutableCapabilities();
tbOptions.setCapability("key", "api_key");
tbOptions.setCapability("secret", "api_secret");
tbOptions.setCapability("geckodriverVersion", "0.28.0");
DesiredCapabilities caps = new DesiredCapabilities();
caps.setCapability(FirefoxOptions.CAPABILITY, ffOptions);
caps.setCapability("platformName", "Windows 10");
caps.setCapability("tb:options", tbOptions);
caps.setCapability("browserName", "firefox");
$options = new FirefoxOptions();
$capabilities = DesiredCapabilities::firefox();
$capabilities->setPlatform('Windows 10');
$capabilities->setCapability('tb:options', array(
'geckodriverVersion' => "0.28.0"
));
$capabilities->setCapability('moz:firefoxOptions', array());
$capabilities->setCapability(FirefoxOptions::CAPABILITY, $options);
tbOptions = {
'name': 'W3C Sample',
'geckodriverVersion': "0.28.0"
}
chromeOpts = {
'browserName': "firefox",
'platformName': "Windows 10",
'tb:options': tbOptions,
'moz:firefoxOptions': {}
}
self.driver = webdriver.Remote(remote_url, desired_capabilities=chromeOpts)
driver = await new webdriver.Builder().withCapabilities({
"browserName": 'firefox',
"platformName": 'Windows 10',
"tb:options": {
"key": "api_key",
"secret": "api_secret",
"geckodriverVersion": "0.28.0"
},
'moz:firefoxOptions': {}
}).usingServer("https://hub.testingbot.com/wd/hub").build();
var ffOptions = new FirefoxOptions()
{
BrowserVersion = "latest",
PlatformName = "Windows 10",
UseSpecCompliantProtocol = true
};
var tbOptions = new Dictionary
{
["key"] = "api_key",
["secret"] = "api_secret",
["geckodriverVersion"] = "0.28.0"
};
ffOptions.AddAdditionalCapability("tb:options", tbOptions, true);
driver = new RemoteWebDriver(new Uri("https://hub.testingbot.com/wd/hub"),
ffOptions.ToCapabilities(), TimeSpan.FromSeconds(600));
| Value Type | Default Value | Possible Values: |
| --- | --- | --- |
| string | 0.28.0 |
0.36.0
0.35.0
0.34.0
0.33.0
0.32.2
0.32.1
0.32.0
0.31.0
0.30.0
0.29.1
0.29.0
0.28.0
0.27.0
0.26.0
0.25.0
0.24.0
0.23.0
0.22.0
0.21.0
0.20.1
0.19.1
0.19.0
0.18.0
0.17.0
0.16.1
0.16.0
0.15.0
0.14.0
0.13.0
0.12.0
0.11.0
0.10.0
0.9.0
0.8.0
0.7.1
0.6.2
|
### Opera Driver
Opera uses the [Chromium OperaDriver](https://github.com/operasoftware/operachromiumdriver/releases) to automate Opera Desktop Browsers.
Specify this option to choose which OperaDriver we should use. By default, we use the version that is most compatible with the Opera version you request.
[Ruby](https://testingbot.com#)[Python](https://testingbot.com#)[PHP](https://testingbot.com#)[Java](https://testingbot.com#)[NodeJS](https://testingbot.com#)[C#](https://testingbot.com#)
caps = Selenium::WebDriver::Remote::Capabilities.new
caps["operaDriverVersion"] = "90.0.4430.85"
DesiredCapabilities caps = new DesiredCapabilities();
caps.setCapability("operaDriverVersion", "90.0.4430.85");
$caps = array(
"operaDriverVersion" => "90.0.4430.85"
);
capabilities = {
"operaDriverVersion" : "90.0.4430.85"
}
const capabilities = {
"operaDriverVersion" : "90.0.4430.85"
}
DesiredCapabilities caps = new DesiredCapabilities();
caps.SetCapability("operaDriverVersion", "90.0.4430.85");
**Selenium W3C Example:**
[Ruby](https://testingbot.com#)[Python](https://testingbot.com#)[PHP](https://testingbot.com#)[Java](https://testingbot.com#)[NodeJS](https://testingbot.com#)[C#](https://testingbot.com#)
caps = {
platformName: "Windows 10",
browserName: "opera",
browserVersion: "latest",
"tb:options" => {
"operaDriverVersion" : "90.0.4430.85"
}
}
OperaOptions operaOpts = new OperaOptions();
MutableCapabilities tbOptions = new MutableCapabilities();
tbOptions.setCapability("key", "api_key");
tbOptions.setCapability("secret", "api_secret");
tbOptions.setCapability("operaDriverVersion", "90.0.4430.85");
DesiredCapabilities caps = new DesiredCapabilities();
caps.setCapability(OperaOptions.CAPABILITY, chromeOpts);
caps.setCapability("platformName", "Windows 10");
caps.setCapability("tb:options", tbOptions);
caps.setCapability("browserName", "opera");
$options = new ChromeOptions();
$capabilities = DesiredCapabilities::chrome();
$capabilities->setPlatform('Windows 10');
$capabilities->setBrowserName('opera');
$capabilities->setCapability('tb:options', array(
'operaDriverVersion' => "90.0.4430.85"
));
$capabilities->setCapability(ChromeOptions::CAPABILITY, $options);
tbOptions = {
'name': 'W3C Sample',
'operaDriverVersion': "90.0.4430.85"
}
chromeOpts = {
'browserName': "opera",
'platformName': "Windows 10",
'tb:options': tbOptions
}
self.driver = webdriver.Remote(remote_url, desired_capabilities=chromeOpts)
driver = await new webdriver.Builder().withCapabilities({
"browserName": 'opera',
"platformName": 'Windows 10',
"tb:options": {
"key": "api_key",
"secret": "api_secret",
"operaDriverVersion": "90.0.4430.85"
}
}).usingServer("https://hub.testingbot.com/wd/hub").build();
var operaOptions = new OperaOptions()
{
BrowserVersion = "81",
PlatformName = "Windows 10",
UseSpecCompliantProtocol = true
};
var tbOptions = new Dictionary
{
["key"] = "api_key",
["secret"] = "api_secret",
["operaDriverVersion"] = "90.0.4430.85"
};
chromeOptions.AddAdditionalCapability("tb:options", tbOptions, true);
driver = new RemoteWebDriver(new Uri("https://hub.testingbot.com/wd/hub"),
operaOptions.ToCapabilities(), TimeSpan.FromSeconds(600));
| Value Type | Default Value | Possible Values: |
| --- | --- | --- |
| string | 87.0.4280.67 |
139.0.7258.156
138.0.7204.251
137.0.7151.122
135.0.7049.115
134.0.6998.205
133.0.6943.143
132.0.6834.209
131.0.6778.86
130.0.6723.137
128.0.6613.162
127.0.6533.120
126.0.6478.127
125.0.6422.143
124.0.6367.62
123.0.6312.59
122.0.6261.95
121.0.6167.140
120.0.6099.200
119.0.6045.124
118.0.5993.89
117.0.5938.132
116.0.5845.97
115.0.5790.171
114.0.5735.110
113.0.5672.127
112.0.5615.87
111.0.5563.65
110.0.5481.100
109.0.5414.120
108.0.5359.99
107.0.5304.88
106.0.5249.119
105.0.5195.102
104.0.5112.81
103.0.5060.66
102.0.5005.61
101.0.4951.64
100.0.4896.127
99.0.4844.51
98.0.4758.82
97.0.4692.71
96.0.4664.45
95.0.4638.54
94.0.4606.61
93.0.4577.63
92.0.4515.107
91.0.4472.77
90.0.4430.85
89.0.4389.82
88.0.4324.104
87.0.4280.67
86.0.4240.80
85.0.4183.102
84.0.4147.89
83.0.4103.97
81.0.4044.113
80.0.3987.100
79.0.3945.79
78.0.3904.87
77.0.3865.120
76.0.3809.132
75.0.3770.100
2.45
2.42
2.41
2.40
2.38
2.37
2.36
2.35
2.33
2.32
2.30
2.229
2.27
2.26
2.25
2.24
2.23
2.22
|
### Taking screenshots during your tests
By default we do not capture screenshots at every step of your test. If you wish to take a screenshot for every step, please add this capability (set to `true`) to your request.
[Ruby](https://testingbot.com#)[Python](https://testingbot.com#)[PHP](https://testingbot.com#)[Java](https://testingbot.com#)[NodeJS](https://testingbot.com#)[C#](https://testingbot.com#)
caps = Selenium::WebDriver::Remote::Capabilities.new
caps["screenshot"] = true
DesiredCapabilities caps = new DesiredCapabilities();
caps.setCapability("screenshot", true);
$caps = array(
"screenshot" => true
);
capabilities = {
"screenshot" : True
}
const capabilities = {
"screenshot" : true
}
DesiredCapabilities caps = new DesiredCapabilities();
caps.SetCapability("screenshot", true);
**Selenium W3C Example:**
[Ruby](https://testingbot.com#)[Python](https://testingbot.com#)[PHP](https://testingbot.com#)[Java](https://testingbot.com#)[NodeJS](https://testingbot.com#)[C#](https://testingbot.com#)
caps = {
platformName: "Windows 10",
browserName: "chrome",
browserVersion: "latest",
"tb:options" => {
screenshot: true
}
}
ChromeOptions chromeOpts = new ChromeOptions();
chromeOpts.setExperimentalOption("w3c", true);
MutableCapabilities tbOptions = new MutableCapabilities();
tbOptions.setCapability("key", "api_key");
tbOptions.setCapability("secret", "api_secret");
tbOptions.setCapability("screenshot", true);
DesiredCapabilities caps = new DesiredCapabilities();
caps.setCapability(ChromeOptions.CAPABILITY, chromeOpts);
caps.setCapability("platformName", "Windows 10");
caps.setCapability("tb:options", tbOptions);
caps.setCapability("browserName", "chrome");
$options = new ChromeOptions();
$capabilities = DesiredCapabilities::chrome();
$capabilities->setPlatform('Windows 10');
$capabilities->setCapability('tb:options', array(
'screenshot' => true
));
$capabilities->setCapability(ChromeOptions::CAPABILITY, $options);
tbOptions = {
'name': 'W3C Sample',
'screenshot': True
}
chromeOpts = {
'browserName': "chrome",
'platformName': "Windows 10",
'goog:chromeOptions': {'w3c': True},
'tb:options': tbOptions
}
self.driver = webdriver.Remote(remote_url, desired_capabilities=chromeOpts)
driver = await new webdriver.Builder().withCapabilities({
"browserName": 'chrome',
"platformName": 'Windows 10',
/** Google requires "w3c" to be set in "goog:chromeOptions" as true if you're using ChromeDriver version 74 or lower.
* Based on this commit: https://chromium.googlesource.com/chromium/src/+/2b49880e2481658e0702fd6fe494859bca52b39c
* ChromeDriver now uses w3c by default from version 75+ so setting this option will no longer be a requirement **/
"goog:chromeOptions" : { "w3c" : true },
"tb:options": {
"key": "api_key",
"secret": "api_secret",
"screenshot": true
}
}).usingServer("https://hub.testingbot.com/wd/hub").build();
var chromeOptions = new ChromeOptions()
{
BrowserVersion = "81",
PlatformName = "Windows 10",
UseSpecCompliantProtocol = true
};
var tbOptions = new Dictionary
{
["key"] = "api_key",
["secret"] = "api_secret",
["screenshot"] = true
};
chromeOptions.AddAdditionalCapability("tb:options", tbOptions, true);
driver = new RemoteWebDriver(new Uri("https://hub.testingbot.com/wd/hub"),
chromeOptions.ToCapabilities(), TimeSpan.FromSeconds(600));
| Value Type | Default Value |
| --- | --- |
| boolean | false |
### Make a video of your tests
By default we record a video of your test, which is accessible in the member area. If you do not wish to have this, you can disable it with this option.
Video should not slow down your test considerably.
[Ruby](https://testingbot.com#)[Python](https://testingbot.com#)[PHP](https://testingbot.com#)[Java](https://testingbot.com#)[NodeJS](https://testingbot.com#)[C#](https://testingbot.com#)
caps = Selenium::WebDriver::Remote::Capabilities.new
caps["screenrecorder"] = true
DesiredCapabilities caps = new DesiredCapabilities();
caps.setCapability("screenrecorder", true);
$caps = array(
"screenrecorder" => true
);
capabilities = {
"screenrecorder" : True
}
const capabilities = {
"screenrecorder" : true
}
DesiredCapabilities caps = new DesiredCapabilities();
caps.SetCapability("screenrecorder", true);
**Selenium W3C Example:**
[Ruby](https://testingbot.com#)[Python](https://testingbot.com#)[PHP](https://testingbot.com#)[Java](https://testingbot.com#)[NodeJS](https://testingbot.com#)[C#](https://testingbot.com#)
caps = {
platformName: "Windows 10",
browserName: "chrome",
browserVersion: "latest",
"tb:options" => {
screenrecorder: true
}
}
ChromeOptions chromeOpts = new ChromeOptions();
chromeOpts.setExperimentalOption("w3c", true);
MutableCapabilities tbOptions = new MutableCapabilities();
tbOptions.setCapability("key", "api_key");
tbOptions.setCapability("secret", "api_secret");
tbOptions.setCapability("screenrecorder", true);
DesiredCapabilities caps = new DesiredCapabilities();
caps.setCapability(ChromeOptions.CAPABILITY, chromeOpts);
caps.setCapability("platformName", "Windows 10");
caps.setCapability("tb:options", tbOptions);
caps.setCapability("browserName", "chrome");
$options = new ChromeOptions();
$capabilities = DesiredCapabilities::chrome();
$capabilities->setPlatform('Windows 10');
$capabilities->setCapability('tb:options', array(
'screenrecorder' => true
));
$capabilities->setCapability(ChromeOptions::CAPABILITY, $options);
tbOptions = {
'name': 'W3C Sample',
'screenrecorder': True
}
chromeOpts = {
'browserName': "chrome",
'platformName': "Windows 10",
'goog:chromeOptions': {'w3c': True},
'tb:options': tbOptions
}
self.driver = webdriver.Remote(remote_url, desired_capabilities=chromeOpts)
driver = await new webdriver.Builder().withCapabilities({
"browserName": 'chrome',
"platformName": 'Windows 10',
/** Google requires "w3c" to be set in "goog:chromeOptions" as true if you're using ChromeDriver version 74 or lower.
* Based on this commit: https://chromium.googlesource.com/chromium/src/+/2b49880e2481658e0702fd6fe494859bca52b39c
* ChromeDriver now uses w3c by default from version 75+ so setting this option will no longer be a requirement **/
"goog:chromeOptions" : { "w3c" : true },
"tb:options": {
"key": "api_key",
"secret": "api_secret",
"screenrecorder": true
}
}).usingServer("https://hub.testingbot.com/wd/hub").build();
var chromeOptions = new ChromeOptions()
{
BrowserVersion = "81",
PlatformName = "Windows 10",
UseSpecCompliantProtocol = true
};
var tbOptions = new Dictionary
{
["key"] = "api_key",
["secret"] = "api_secret",
["screenrecorder"] = true
};
chromeOptions.AddAdditionalCapability("tb:options", tbOptions, true);
driver = new RemoteWebDriver(new Uri("https://hub.testingbot.com/wd/hub"),
chromeOptions.ToCapabilities(), TimeSpan.FromSeconds(600));
| Value Type | Default Value |
| --- | --- |
| boolean | true |
### Test Privacy
Make the test results for this test public so that everyone can access the results.
[Ruby](https://testingbot.com#)[Python](https://testingbot.com#)[PHP](https://testingbot.com#)[Java](https://testingbot.com#)[NodeJS](https://testingbot.com#)[C#](https://testingbot.com#)
caps = Selenium::WebDriver::Remote::Capabilities.new
caps["public"] = false
DesiredCapabilities caps = new DesiredCapabilities();
caps.setCapability("public", false);
$caps = array(
"public" => false
);
capabilities = {
"public" : False
}
const capabilities = {
"public" : false
}
DesiredCapabilities caps = new DesiredCapabilities();
caps.SetCapability("public", false);
**Selenium W3C Example:**
[Ruby](https://testingbot.com#)[Python](https://testingbot.com#)[PHP](https://testingbot.com#)[Java](https://testingbot.com#)[NodeJS](https://testingbot.com#)[C#](https://testingbot.com#)
caps = {
platformName: "Windows 10",
browserName: "chrome",
browserVersion: "latest",
"tb:options" => {
"public" : false
}
}
ChromeOptions chromeOpts = new ChromeOptions();
chromeOpts.setExperimentalOption("w3c", true);
MutableCapabilities tbOptions = new MutableCapabilities();
tbOptions.setCapability("key", "api_key");
tbOptions.setCapability("secret", "api_secret");
tbOptions.setCapability("public", false);
DesiredCapabilities caps = new DesiredCapabilities();
caps.setCapability(ChromeOptions.CAPABILITY, chromeOpts);
caps.setCapability("platformName", "Windows 10");
caps.setCapability("tb:options", tbOptions);
caps.setCapability("browserName", "chrome");
$options = new ChromeOptions();
$capabilities = DesiredCapabilities::chrome();
$capabilities->setPlatform('Windows 10');
$capabilities->setCapability('tb:options', array(
'public' => 130
));
$capabilities->setCapability(ChromeOptions::CAPABILITY, $options);
tbOptions = {
'public': False
}
chromeOpts = {
'browserName': "chrome",
'platformName': "Windows 10",
'goog:chromeOptions': {'w3c': True},
'tb:options': tbOptions
}
self.driver = webdriver.Remote(remote_url, desired_capabilities=chromeOpts)
driver = await new webdriver.Builder().withCapabilities({
"browserName": 'chrome',
"platformName": 'Windows 10',
/** Google requires "w3c" to be set in "goog:chromeOptions" as true if you're using ChromeDriver version 74 or lower.
* Based on this commit: https://chromium.googlesource.com/chromium/src/+/2b49880e2481658e0702fd6fe494859bca52b39c
* ChromeDriver now uses w3c by default from version 75+ so setting this option will no longer be a requirement **/
"goog:chromeOptions" : { "w3c" : true },
"tb:options": {
"key": "api_key",
"secret": "api_secret",
"public": false
}
}).usingServer("https://hub.testingbot.com/wd/hub").build();
var chromeOptions = new ChromeOptions()
{
BrowserVersion = "81",
PlatformName = "Windows 10",
UseSpecCompliantProtocol = true
};
var tbOptions = new Dictionary
{
["key"] = "api_key",
["secret"] = "api_secret",
["public"] = false
};
chromeOptions.AddAdditionalCapability("tb:options", tbOptions, true);
driver = new RemoteWebDriver(new Uri("https://hub.testingbot.com/wd/hub"),
chromeOptions.ToCapabilities(), TimeSpan.FromSeconds(600));
| Value Type | Default Value |
| --- | --- |
| boolean | false |
### Blacklist hostnames
The hostnames you specify will be pointed to localhost instead of their real destination. This means you can speed up tests by blocking third party content which you don't need and slows down your test.
[Ruby](https://testingbot.com#)[Python](https://testingbot.com#)[PHP](https://testingbot.com#)[Java](https://testingbot.com#)[NodeJS](https://testingbot.com#)[C#](https://testingbot.com#)
caps = Selenium::WebDriver::Remote::Capabilities.new
caps["blacklist"] = "site1.com,site2.com"
DesiredCapabilities caps = new DesiredCapabilities();
caps.setCapability("blacklist", "site1.com,site2.com");
$caps = array(
"blacklist" => "site1.com,site2.com"
);
capabilities = {
"blacklist" : "site1.com,site2.com"
}
const capabilities = {
"blacklist" : "site1.com,site2.com"
}
DesiredCapabilities caps = new DesiredCapabilities();
caps.SetCapability("blacklist", "site1.com,site2.com");
**Selenium W3C Example:**
[Ruby](https://testingbot.com#)[Python](https://testingbot.com#)[PHP](https://testingbot.com#)[Java](https://testingbot.com#)[NodeJS](https://testingbot.com#)[C#](https://testingbot.com#)
caps = {
platformName: "Windows 10",
browserName: "chrome",
browserVersion: "latest",
"tb:options" => {
"blacklist" : "site1.com,site2.com"
}
}
ChromeOptions chromeOpts = new ChromeOptions();
chromeOpts.setExperimentalOption("w3c", true);
MutableCapabilities tbOptions = new MutableCapabilities();
tbOptions.setCapability("key", "api_key");
tbOptions.setCapability("secret", "api_secret");
tbOptions.setCapability("blacklist", "site1.com,site2.com");
DesiredCapabilities caps = new DesiredCapabilities();
caps.setCapability(ChromeOptions.CAPABILITY, chromeOpts);
caps.setCapability("platformName", "Windows 10");
caps.setCapability("tb:options", tbOptions);
caps.setCapability("browserName", "chrome");
$options = new ChromeOptions();
$capabilities = DesiredCapabilities::chrome();
$capabilities->setPlatform('Windows 10');
$capabilities->setCapability('tb:options', array(
'blacklist' => "site1.com,site2.com"
));
$capabilities->setCapability(ChromeOptions::CAPABILITY, $options);
tbOptions = {
'blacklist': "site1.com,site2.com"
}
chromeOpts = {
'browserName': "chrome",
'platformName': "Windows 10",
'goog:chromeOptions': {'w3c': True},
'tb:options': tbOptions
}
self.driver = webdriver.Remote(remote_url, desired_capabilities=chromeOpts)
driver = await new webdriver.Builder().withCapabilities({
"browserName": 'chrome',
"platformName": 'Windows 10',
/** Google requires "w3c" to be set in "goog:chromeOptions" as true if you're using ChromeDriver version 74 or lower.
* Based on this commit: https://chromium.googlesource.com/chromium/src/+/2b49880e2481658e0702fd6fe494859bca52b39c
* ChromeDriver now uses w3c by default from version 75+ so setting this option will no longer be a requirement **/
"goog:chromeOptions" : { "w3c" : true },
"tb:options": {
"key": "api_key",
"secret": "api_secret",
"blacklist": "site1.com,site2.com"
}
}).usingServer("https://hub.testingbot.com/wd/hub").build();
var chromeOptions = new ChromeOptions()
{
BrowserVersion = "81",
PlatformName = "Windows 10",
UseSpecCompliantProtocol = true
};
var tbOptions = new Dictionary
{
["key"] = "api_key",
["secret"] = "api_secret",
["blacklist"] = "site1.com,site2.com"
};
chromeOptions.AddAdditionalCapability("tb:options", tbOptions, true);
driver = new RemoteWebDriver(new Uri("https://hub.testingbot.com/wd/hub"),
chromeOptions.ToCapabilities(), TimeSpan.FromSeconds(600));
| Value Type |
| --- |
| string (comma-separated) |
### Customize Logging
By default, TestingBot records logs of all Selenium actions and its drivers.
Set this option to `false` if you don't want TestingBot to record anything (for example, if you have sensitive data).
You will not see any test logs in our member dashboard.
Set to `strip-parameters` to prevent the POST/GET parameters from being logged on the TestingBot test detail page (does not affect other logs like Selenium logs, Chromedriver logs, ...).
[Ruby](https://testingbot.com#)[Python](https://testingbot.com#)[PHP](https://testingbot.com#)[Java](https://testingbot.com#)[NodeJS](https://testingbot.com#)[C#](https://testingbot.com#)
caps = Selenium::WebDriver::Remote::Capabilities.new
caps["recordLogs"] = true
DesiredCapabilities caps = new DesiredCapabilities();
caps.setCapability("recordLogs", true);
$caps = array(
"recordLogs" => true
);
capabilities = {
"recordLogs" : True
}
const capabilities = {
"recordLogs" : true
}
DesiredCapabilities caps = new DesiredCapabilities();
caps.SetCapability("recordLogs", true);
**Selenium W3C Example:**
[Ruby](https://testingbot.com#)[Python](https://testingbot.com#)[PHP](https://testingbot.com#)[Java](https://testingbot.com#)[NodeJS](https://testingbot.com#)[C#](https://testingbot.com#)
caps = {
platformName: "Windows 10",
browserName: "chrome",
browserVersion: "latest",
"tb:options" => {
"recordLogs" : true
}
}
ChromeOptions chromeOpts = new ChromeOptions();
chromeOpts.setExperimentalOption("w3c", true);
MutableCapabilities tbOptions = new MutableCapabilities();
tbOptions.setCapability("key", "api_key");
tbOptions.setCapability("secret", "api_secret");
tbOptions.setCapability("recordLogs", true);
DesiredCapabilities caps = new DesiredCapabilities();
caps.setCapability(ChromeOptions.CAPABILITY, chromeOpts);
caps.setCapability("platformName", "Windows 10");
caps.setCapability("tb:options", tbOptions);
caps.setCapability("browserName", "chrome");
$options = new ChromeOptions();
$capabilities = DesiredCapabilities::chrome();
$capabilities->setPlatform('Windows 10');
$capabilities->setCapability('tb:options', array(
'recordLogs' => true
));
$capabilities->setCapability(ChromeOptions::CAPABILITY, $options);
tbOptions = {
'recordLogs': True
}
chromeOpts = {
'browserName': "chrome",
'platformName': "Windows 10",
'goog:chromeOptions': {'w3c': True},
'tb:options': tbOptions
}
self.driver = webdriver.Remote(remote_url, desired_capabilities=chromeOpts)
driver = await new webdriver.Builder().withCapabilities({
"browserName": 'chrome',
"platformName": 'Windows 10',
/** Google requires "w3c" to be set in "goog:chromeOptions" as true if you're using ChromeDriver version 74 or lower.
* Based on this commit: https://chromium.googlesource.com/chromium/src/+/2b49880e2481658e0702fd6fe494859bca52b39c
* ChromeDriver now uses w3c by default from version 75+ so setting this option will no longer be a requirement **/
"goog:chromeOptions" : { "w3c" : true },
"tb:options": {
"key": "api_key",
"secret": "api_secret",
"recordLogs": true
}
}).usingServer("https://hub.testingbot.com/wd/hub").build();
var chromeOptions = new ChromeOptions()
{
BrowserVersion = "81",
PlatformName = "Windows 10",
UseSpecCompliantProtocol = true
};
var tbOptions = new Dictionary
{
["key"] = "api_key",
["secret"] = "api_secret",
["recordLogs"] = true
};
chromeOptions.AddAdditionalCapability("tb:options", tbOptions, true);
driver = new RemoteWebDriver(new Uri("https://hub.testingbot.com/wd/hub"),
chromeOptions.ToCapabilities(), TimeSpan.FromSeconds(600));
| Value Type | Default Value | Possible Values: |
| --- | --- | --- |
| string | "true" | `true`, `false`, or `strip-parameters` |
### Custom Time Zones
Change the Time Zone of the Virtual Machine to the Time Zone you specify. You can find a [list of timezones on Wikipedia](https://en.wikipedia.org/wiki/List_of_tz_database_time_zones). Only location names are supported (not their paths). See some examples below:
[Ruby](https://testingbot.com#)[Python](https://testingbot.com#)[PHP](https://testingbot.com#)[Java](https://testingbot.com#)[NodeJS](https://testingbot.com#)[C#](https://testingbot.com#)
caps = Selenium::WebDriver::Remote::Capabilities.new
caps["timeZone"] = "Etc/UTC"
DesiredCapabilities caps = new DesiredCapabilities();
caps.setCapability("timeZone", "Etc/UTC");
$caps = array(
"timeZone" => "Etc/UTC"
);
capabilities = {
"timeZone" : "Etc/UTC"
}
const capabilities = {
"timeZone" : "Etc/UTC"
}
DesiredCapabilities caps = new DesiredCapabilities();
caps.SetCapability("timeZone", "Etc/UTC");
**Selenium W3C Example:**
[Ruby](https://testingbot.com#)[Python](https://testingbot.com#)[PHP](https://testingbot.com#)[Java](https://testingbot.com#)[NodeJS](https://testingbot.com#)[C#](https://testingbot.com#)
caps = {
platformName: "Windows 10",
browserName: "chrome",
browserVersion: "latest",
"tb:options" => {
"timeZone" : "Etc/UTC"
}
}
ChromeOptions chromeOpts = new ChromeOptions();
chromeOpts.setExperimentalOption("w3c", true);
MutableCapabilities tbOptions = new MutableCapabilities();
tbOptions.setCapability("key", "api_key");
tbOptions.setCapability("secret", "api_secret");
tbOptions.setCapability("timeZone", "Etc/UTC");
DesiredCapabilities caps = new DesiredCapabilities();
caps.setCapability(ChromeOptions.CAPABILITY, chromeOpts);
caps.setCapability("platformName", "Windows 10");
caps.setCapability("tb:options", tbOptions);
caps.setCapability("browserName", "chrome");
$options = new ChromeOptions();
$capabilities = DesiredCapabilities::chrome();
$capabilities->setPlatform('Windows 10');
$capabilities->setCapability('tb:options', array(
'timeZone' => "Etc/UTC"
));
$capabilities->setCapability(ChromeOptions::CAPABILITY, $options);
tbOptions = {
'timeZone': "Etc/UTC"
}
chromeOpts = {
'browserName': "chrome",
'platformName': "Windows 10",
'goog:chromeOptions': {'w3c': True},
'tb:options': tbOptions
}
self.driver = webdriver.Remote(remote_url, desired_capabilities=chromeOpts)
driver = await new webdriver.Builder().withCapabilities({
"browserName": 'chrome',
"platformName": 'Windows 10',
/** Google requires "w3c" to be set in "goog:chromeOptions" as true if you're using ChromeDriver version 74 or lower.
* Based on this commit: https://chromium.googlesource.com/chromium/src/+/2b49880e2481658e0702fd6fe494859bca52b39c
* ChromeDriver now uses w3c by default from version 75+ so setting this option will no longer be a requirement **/
"goog:chromeOptions" : { "w3c" : true },
"tb:options": {
"key": "api_key",
"secret": "api_secret",
"timeZone": "Etc/UTC"
}
}).usingServer("https://hub.testingbot.com/wd/hub").build();
var chromeOptions = new ChromeOptions()
{
BrowserVersion = "81",
PlatformName = "Windows 10",
UseSpecCompliantProtocol = true
};
var tbOptions = new Dictionary
{
["key"] = "api_key",
["secret"] = "api_secret",
["timeZone"] = "Etc/UTC"
};
chromeOptions.AddAdditionalCapability("tb:options", tbOptions, true);
driver = new RemoteWebDriver(new Uri("https://hub.testingbot.com/wd/hub"),
chromeOptions.ToCapabilities(), TimeSpan.FromSeconds(600));
| Value Type | Default Value | Possible Values: |
| --- | --- | --- |
| string | "Etc/UTC" | [List of timezones](https://en.wikipedia.org/wiki/List_of_tz_database_time_zones) |
### Change Screen Resolution
Will adjust the screen resolution during your test.
[Ruby](https://testingbot.com#)[Python](https://testingbot.com#)[PHP](https://testingbot.com#)[Java](https://testingbot.com#)[NodeJS](https://testingbot.com#)[C#](https://testingbot.com#)
caps = Selenium::WebDriver::Remote::Capabilities.new
caps["screen-resolution"] = "1280x1024"
DesiredCapabilities caps = new DesiredCapabilities();
caps.setCapability("screen-resolution", "1280x1024");
$caps = array(
"screen-resolution" => "1280x1024"
);
capabilities = {
"screen-resolution" : "1280x1024"
}
const capabilities = {
"screen-resolution" : "1280x1024"
}
DesiredCapabilities caps = new DesiredCapabilities();
caps.SetCapability("screen-resolution", "1280x1024");
**Selenium W3C Example:**
[Ruby](https://testingbot.com#)[Python](https://testingbot.com#)[PHP](https://testingbot.com#)[Java](https://testingbot.com#)[NodeJS](https://testingbot.com#)[C#](https://testingbot.com#)
caps = {
platformName: "Windows 10",
browserName: "chrome",
browserVersion: "latest",
"tb:options" => {
"screen-resolution" : "1280x1024"
}
}
ChromeOptions chromeOpts = new ChromeOptions();
chromeOpts.setExperimentalOption("w3c", true);
MutableCapabilities tbOptions = new MutableCapabilities();
tbOptions.setCapability("key", "api_key");
tbOptions.setCapability("secret", "api_secret");
tbOptions.setCapability("screen-resolution", "1280x1024");
DesiredCapabilities caps = new DesiredCapabilities();
caps.setCapability(ChromeOptions.CAPABILITY, chromeOpts);
caps.setCapability("platformName", "Windows 10");
caps.setCapability("tb:options", tbOptions);
caps.setCapability("browserName", "chrome");
$options = new ChromeOptions();
$capabilities = DesiredCapabilities::chrome();
$capabilities->setPlatform('Windows 10');
$capabilities->setCapability('tb:options', array(
'screen-resolution' => "1280x1024"
));
$capabilities->setCapability(ChromeOptions::CAPABILITY, $options);
tbOptions = {
'screen-resolution': "My Test Name"
}
chromeOpts = {
'browserName': "chrome",
'platformName': "Windows 10",
'goog:chromeOptions': {'w3c': True},
'tb:options': tbOptions
}
self.driver = webdriver.Remote(remote_url, desired_capabilities=chromeOpts)
driver = await new webdriver.Builder().withCapabilities({
"browserName": 'chrome',
"platformName": 'Windows 10',
/** Google requires "w3c" to be set in "goog:chromeOptions" as true if you're using ChromeDriver version 74 or lower.
* Based on this commit: https://chromium.googlesource.com/chromium/src/+/2b49880e2481658e0702fd6fe494859bca52b39c
* ChromeDriver now uses w3c by default from version 75+ so setting this option will no longer be a requirement **/
"goog:chromeOptions" : { "w3c" : true },
"tb:options": {
"key": "api_key",
"secret": "api_secret",
"screen-resolution": "1280x1024"
}
}).usingServer("https://hub.testingbot.com/wd/hub").build();
var chromeOptions = new ChromeOptions()
{
BrowserVersion = "81",
PlatformName = "Windows 10",
UseSpecCompliantProtocol = true
};
var tbOptions = new Dictionary
{
["key"] = "api_key",
["secret"] = "api_secret",
["screen-resolution"] = "1280x1024"
};
chromeOptions.AddAdditionalCapability("tb:options", tbOptions, true);
driver = new RemoteWebDriver(new Uri("https://hub.testingbot.com/wd/hub"),
chromeOptions.ToCapabilities(), TimeSpan.FromSeconds(600));
| Value Type | Default Value | |
| --- | --- | --- |
| string | "1280x1024" |
| Platform | Resolutions |
| --- | --- |
| Windows/Linux |
800x600
1024x768
1152x864
1280x768
1280x800
1280x960
1280x1024
1400x1050
1600x1200
1680x1050
1920x1080
1920x1200
2560x1440
|
| macOS |
800x600
1024x768
1280x768
1280x800
1280x960
1280x1024
1366x768
1440x900
1600x900
1600x1200
1680x1050
1920x1080
1920x1200
2048x1536
|
|
### Customize OS
When you specify a prerun file, we will first download the file and execute it (with optional prerun-arguments).
This is useful when you want to customize/add software before your test starts.
[Ruby](https://testingbot.com#)[Python](https://testingbot.com#)[PHP](https://testingbot.com#)[Java](https://testingbot.com#)[NodeJS](https://testingbot.com#)[C#](https://testingbot.com#)
caps = Selenium::WebDriver::Remote::Capabilities.new
caps["prerun"] = "https://..."
DesiredCapabilities caps = new DesiredCapabilities();
caps.setCapability("prerun", "https://...");
$caps = array(
"prerun" => "https://..."
);
capabilities = {
"prerun" : "https://..."
}
const capabilities = {
"prerun" : "https://..."
}
DesiredCapabilities caps = new DesiredCapabilities();
caps.SetCapability("prerun", "https://...");
**Selenium W3C Example:**
[Ruby](https://testingbot.com#)[Python](https://testingbot.com#)[PHP](https://testingbot.com#)[Java](https://testingbot.com#)[NodeJS](https://testingbot.com#)[C#](https://testingbot.com#)
caps = {
platformName: "Windows 10",
browserName: "chrome",
browserVersion: "latest",
"tb:options" => {
"prerun" : "https://..."
}
}
ChromeOptions chromeOpts = new ChromeOptions();
chromeOpts.setExperimentalOption("w3c", true);
MutableCapabilities tbOptions = new MutableCapabilities();
tbOptions.setCapability("key", "api_key");
tbOptions.setCapability("secret", "api_secret");
tbOptions.setCapability("prerun", "https://...");
DesiredCapabilities caps = new DesiredCapabilities();
caps.setCapability(ChromeOptions.CAPABILITY, chromeOpts);
caps.setCapability("platformName", "Windows 10");
caps.setCapability("tb:options", tbOptions);
caps.setCapability("browserName", "chrome");
$options = new ChromeOptions();
$capabilities = DesiredCapabilities::chrome();
$capabilities->setPlatform('Windows 10');
$capabilities->setCapability('tb:options', array(
'prerun' => "https://..."
));
$capabilities->setCapability(ChromeOptions::CAPABILITY, $options);
tbOptions = {
'prerun': "https://..."
}
chromeOpts = {
'browserName': "chrome",
'platformName': "Windows 10",
'goog:chromeOptions': {'w3c': True},
'tb:options': tbOptions
}
self.driver = webdriver.Remote(remote_url, desired_capabilities=chromeOpts)
driver = await new webdriver.Builder().withCapabilities({
"browserName": 'chrome',
"platformName": 'Windows 10',
/** Google requires "w3c" to be set in "goog:chromeOptions" as true if you're using ChromeDriver version 74 or lower.
* Based on this commit: https://chromium.googlesource.com/chromium/src/+/2b49880e2481658e0702fd6fe494859bca52b39c
* ChromeDriver now uses w3c by default from version 75+ so setting this option will no longer be a requirement **/
"goog:chromeOptions" : { "w3c" : true },
"tb:options": {
"key": "api_key",
"secret": "api_secret",
"prerun": "https://..."
}
}).usingServer("https://hub.testingbot.com/wd/hub").build();
var chromeOptions = new ChromeOptions()
{
BrowserVersion = "81",
PlatformName = "Windows 10",
UseSpecCompliantProtocol = true
};
var tbOptions = new Dictionary
{
["key"] = "api_key",
["secret"] = "api_secret",
["prerun"] = "https://..."
};
chromeOptions.AddAdditionalCapability("tb:options", tbOptions, true);
driver = new RemoteWebDriver(new Uri("https://hub.testingbot.com/wd/hub"),
chromeOptions.ToCapabilities(), TimeSpan.FromSeconds(600));
| Value Type |
| --- |
| string (URL) |
"prerun-args" : "-a -b -c ..."
| Value Type |
| --- |
| string |
With [TestingBot Storage](https://testingbot.com/support/api#upload), you can upload your executable on our servers.
The advantage of this is that our test VMs can immediately download your executable from our own network, which is much faster than downloading from the public internet.
Once the file is uploaded via TestingBot Storage, you can use `"prerun" : "tb://..."`
### Edit hostnames
You can specify an array of objects containing the keys `ip` and `domain`. We will write these values to the hosts file of the VM.
[Ruby](https://testingbot.com#)[Python](https://testingbot.com#)[PHP](https://testingbot.com#)[Java](https://testingbot.com#)[NodeJS](https://testingbot.com#)[C#](https://testingbot.com#)
caps = Selenium::WebDriver::Remote::Capabilities.new
caps["hosts"] = [{ ip: '127.0.0.1', domain: 'mydomain' }]
DesiredCapabilities caps = new DesiredCapabilities();
caps.setCapability("hosts", [{ ip: '127.0.0.1', domain: 'mydomain' }]);
$caps = array(
"hosts" => [{ ip: '127.0.0.1', domain: 'mydomain' }]
);
capabilities = {
"hosts" : [{ ip: '127.0.0.1', domain: 'mydomain' }]
}
const capabilities = {
"hosts" : [{ ip: '127.0.0.1', domain: 'mydomain' }]
}
DesiredCapabilities caps = new DesiredCapabilities();
caps.SetCapability("hosts", [{ ip: '127.0.0.1', domain: 'mydomain' }]);
**Selenium W3C Example:**
[Ruby](https://testingbot.com#)[Python](https://testingbot.com#)[PHP](https://testingbot.com#)[Java](https://testingbot.com#)[NodeJS](https://testingbot.com#)[C#](https://testingbot.com#)
caps = {
platformName: "Windows 10",
browserName: "chrome",
browserVersion: "latest",
"tb:options" => {
"hosts" : [{ ip: '127.0.0.1', domain: 'mydomain' }]
}
}
ChromeOptions chromeOpts = new ChromeOptions();
chromeOpts.setExperimentalOption("w3c", true);
MutableCapabilities tbOptions = new MutableCapabilities();
tbOptions.setCapability("key", "api_key");
tbOptions.setCapability("secret", "api_secret");
tbOptions.setCapability("hosts", [{ ip: '127.0.0.1', domain: 'mydomain' }]);
DesiredCapabilities caps = new DesiredCapabilities();
caps.setCapability(ChromeOptions.CAPABILITY, chromeOpts);
caps.setCapability("platformName", "Windows 10");
caps.setCapability("tb:options", tbOptions);
caps.setCapability("browserName", "chrome");
$options = new ChromeOptions();
$capabilities = DesiredCapabilities::chrome();
$capabilities->setPlatform('Windows 10');
$capabilities->setCapability('tb:options', array(
'hosts' => [{ ip: '127.0.0.1', domain: 'mydomain' }]
));
$capabilities->setCapability(ChromeOptions::CAPABILITY, $options);
tbOptions = {
'hosts': [{ ip: '127.0.0.1', domain: 'mydomain' }]
}
chromeOpts = {
'browserName': "chrome",
'platformName': "Windows 10",
'goog:chromeOptions': {'w3c': True},
'tb:options': tbOptions
}
self.driver = webdriver.Remote(remote_url, desired_capabilities=chromeOpts)
driver = await new webdriver.Builder().withCapabilities({
"browserName": 'chrome',
"platformName": 'Windows 10',
/** Google requires "w3c" to be set in "goog:chromeOptions" as true if you're using ChromeDriver version 74 or lower.
* Based on this commit: https://chromium.googlesource.com/chromium/src/+/2b49880e2481658e0702fd6fe494859bca52b39c
* ChromeDriver now uses w3c by default from version 75+ so setting this option will no longer be a requirement **/
"goog:chromeOptions" : { "w3c" : true },
"tb:options": {
"key": "api_key",
"secret": "api_secret",
"hosts": [{ ip: '127.0.0.1', domain: 'mydomain' }]
}
}).usingServer("https://hub.testingbot.com/wd/hub").build();
var chromeOptions = new ChromeOptions()
{
BrowserVersion = "81",
PlatformName = "Windows 10",
UseSpecCompliantProtocol = true
};
var tbOptions = new Dictionary
{
["key"] = "api_key",
["secret"] = "api_secret",
["hosts"] = [{ ip: '127.0.0.1', domain: 'mydomain' }]
};
chromeOptions.AddAdditionalCapability("tb:options", tbOptions, true);
driver = new RemoteWebDriver(new Uri("https://hub.testingbot.com/wd/hub"),
chromeOptions.ToCapabilities(), TimeSpan.FromSeconds(600));
| Value Type |
| --- |
| array of objects `({ ip: "", domain: "" })` |
### Upload file
When you specify an URL (`upload`) and fileName (`uploadFilepath`), we will automatically download the file from the URL and save it in the uploadFilepath.
[Ruby](https://testingbot.com#)[Python](https://testingbot.com#)[PHP](https://testingbot.com#)[Java](https://testingbot.com#)[NodeJS](https://testingbot.com#)[C#](https://testingbot.com#)
caps = Selenium::WebDriver::Remote::Capabilities.new
caps["upload"] = "https://..."
DesiredCapabilities caps = new DesiredCapabilities();
caps.setCapability("upload", "https://...");
$caps = array(
"upload" => "https://..."
);
capabilities = {
"upload" : "https://..."
}
const capabilities = {
"upload" : "https://..."
}
DesiredCapabilities caps = new DesiredCapabilities();
caps.SetCapability("upload", "https://...");
**Selenium W3C Example:**
[Ruby](https://testingbot.com#)[Python](https://testingbot.com#)[PHP](https://testingbot.com#)[Java](https://testingbot.com#)[NodeJS](https://testingbot.com#)[C#](https://testingbot.com#)
caps = {
platformName: "Windows 10",
browserName: "chrome",
browserVersion: "latest",
"tb:options" => {
"upload" : "https://..."
}
}
ChromeOptions chromeOpts = new ChromeOptions();
chromeOpts.setExperimentalOption("w3c", true);
MutableCapabilities tbOptions = new MutableCapabilities();
tbOptions.setCapability("key", "api_key");
tbOptions.setCapability("secret", "api_secret");
tbOptions.setCapability("upload", "https://...");
DesiredCapabilities caps = new DesiredCapabilities();
caps.setCapability(ChromeOptions.CAPABILITY, chromeOpts);
caps.setCapability("platformName", "Windows 10");
caps.setCapability("tb:options", tbOptions);
caps.setCapability("browserName", "chrome");
$options = new ChromeOptions();
$capabilities = DesiredCapabilities::chrome();
$capabilities->setPlatform('Windows 10');
$capabilities->setCapability('tb:options', array(
'upload' => "https://..."
));
$capabilities->setCapability(ChromeOptions::CAPABILITY, $options);
tbOptions = {
'upload': "https://..."
}
chromeOpts = {
'browserName': "chrome",
'platformName': "Windows 10",
'goog:chromeOptions': {'w3c': True},
'tb:options': tbOptions
}
self.driver = webdriver.Remote(remote_url, desired_capabilities=chromeOpts)
driver = await new webdriver.Builder().withCapabilities({
"browserName": 'chrome',
"platformName": 'Windows 10',
/** Google requires "w3c" to be set in "goog:chromeOptions" as true if you're using ChromeDriver version 74 or lower.
* Based on this commit: https://chromium.googlesource.com/chromium/src/+/2b49880e2481658e0702fd6fe494859bca52b39c
* ChromeDriver now uses w3c by default from version 75+ so setting this option will no longer be a requirement **/
"goog:chromeOptions" : { "w3c" : true },
"tb:options": {
"key": "api_key",
"secret": "api_secret",
"upload": "https://..."
}
}).usingServer("https://hub.testingbot.com/wd/hub").build();
var chromeOptions = new ChromeOptions()
{
BrowserVersion = "81",
PlatformName = "Windows 10",
UseSpecCompliantProtocol = true
};
var tbOptions = new Dictionary
{
["key"] = "api_key",
["secret"] = "api_secret",
["upload"] = "https://..."
};
chromeOptions.AddAdditionalCapability("tb:options", tbOptions, true);
driver = new RemoteWebDriver(new Uri("https://hub.testingbot.com/wd/hub"),
chromeOptions.ToCapabilities(), TimeSpan.FromSeconds(600));
| Value Type |
| --- |
| string (URL) |
We recommend using these directories to save your files: For Windows (`C:\test\`), for Linux/macOS: (`/tmp/`).
You can also use the home directory tilde to specify the user's directory: `~/Desktop/sample.pdf`
Example:
"uploadFilepath" : "C:\\test\\myfile.ext"
Example (Selenium 4):
"tb:options" : {
"uploadFilepath" : "C:\\test\\myfile.ext"
}
| Value Type |
| --- |
| string (URL) |
### Upload Multiple Files
Specify an array of objects, containing keys `url` and `filePath`. We will automatically download these files and put them in the filePaths you specify.
We recommend using these directories to save your files: For Windows (`C:\test\`), for Linux/macOS: (`/tmp/`).
You can also use the home directory tilde to specify the user's directory: `~/Desktop/sample.pdf`
[Ruby](https://testingbot.com#)[Python](https://testingbot.com#)[PHP](https://testingbot.com#)[Java](https://testingbot.com#)[NodeJS](https://testingbot.com#)[C#](https://testingbot.com#)
caps = Selenium::WebDriver::Remote::Capabilities.new
caps["uploadMultiple"] = [{ url: "", filePath: "" }]
DesiredCapabilities caps = new DesiredCapabilities();
caps.setCapability("uploadMultiple", [{ url: "", filePath: "" }]);
$caps = array(
"uploadMultiple" => [{ url: "", filePath: "" }]
);
capabilities = {
"uploadMultiple" : [{ url: "", filePath: "" }]
}
const capabilities = {
"uploadMultiple" : [{ url: "", filePath: "" }]
}
DesiredCapabilities caps = new DesiredCapabilities();
caps.SetCapability("uploadMultiple", [{ url: "", filePath: "" }]);
**Selenium W3C Example:**
[Ruby](https://testingbot.com#)[Python](https://testingbot.com#)[PHP](https://testingbot.com#)[Java](https://testingbot.com#)[NodeJS](https://testingbot.com#)[C#](https://testingbot.com#)
caps = {
platformName: "Windows 10",
browserName: "chrome",
browserVersion: "latest",
"tb:options" => {
"uploadMultiple" : [{ url: "", filePath: "" }]
}
}
ChromeOptions chromeOpts = new ChromeOptions();
chromeOpts.setExperimentalOption("w3c", true);
MutableCapabilities tbOptions = new MutableCapabilities();
tbOptions.setCapability("key", "api_key");
tbOptions.setCapability("secret", "api_secret");
tbOptions.setCapability("uploadMultiple", [{ url: "", filePath: "" }]);
DesiredCapabilities caps = new DesiredCapabilities();
caps.setCapability(ChromeOptions.CAPABILITY, chromeOpts);
caps.setCapability("platformName", "Windows 10");
caps.setCapability("tb:options", tbOptions);
caps.setCapability("browserName", "chrome");
$options = new ChromeOptions();
$capabilities = DesiredCapabilities::chrome();
$capabilities->setPlatform('Windows 10');
$capabilities->setCapability('tb:options', array(
'uploadMultiple' => [{ url: "", filePath: "" }]
));
$capabilities->setCapability(ChromeOptions::CAPABILITY, $options);
tbOptions = {
'uploadMultiple': [{ url: "", filePath: "" }]
}
chromeOpts = {
'browserName': "chrome",
'platformName': "Windows 10",
'goog:chromeOptions': {'w3c': True},
'tb:options': tbOptions
}
self.driver = webdriver.Remote(remote_url, desired_capabilities=chromeOpts)
driver = await new webdriver.Builder().withCapabilities({
"browserName": 'chrome',
"platformName": 'Windows 10',
/** Google requires "w3c" to be set in "goog:chromeOptions" as true if you're using ChromeDriver version 74 or lower.
* Based on this commit: https://chromium.googlesource.com/chromium/src/+/2b49880e2481658e0702fd6fe494859bca52b39c
* ChromeDriver now uses w3c by default from version 75+ so setting this option will no longer be a requirement **/
"goog:chromeOptions" : { "w3c" : true },
"tb:options": {
"key": "api_key",
"secret": "api_secret",
"uploadMultiple": [{ url: "", filePath: "" }]
}
}).usingServer("https://hub.testingbot.com/wd/hub").build();
var chromeOptions = new ChromeOptions()
{
BrowserVersion = "81",
PlatformName = "Windows 10",
UseSpecCompliantProtocol = true
};
var tbOptions = new Dictionary
{
["key"] = "api_key",
["secret"] = "api_secret",
["uploadMultiple"] = [{ url: "", filePath: "" }]
};
chromeOptions.AddAdditionalCapability("tb:options", tbOptions, true);
driver = new RemoteWebDriver(new Uri("https://hub.testingbot.com/wd/hub"),
chromeOptions.ToCapabilities(), TimeSpan.FromSeconds(600));
| Value Type |
| --- |
| array of objects, `{ url: "", filePath: "" }` |
### Geolocation Testing
We provide an option where you can specify from which country you'd like to run the test from.
Once you specify this option, the virtual machine we provision for your test will be configured to use a proxy in the country you specified.
[Ruby](https://testingbot.com#)[Python](https://testingbot.com#)[PHP](https://testingbot.com#)[Java](https://testingbot.com#)[NodeJS](https://testingbot.com#)[C#](https://testingbot.com#)
caps = Selenium::WebDriver::Remote::Capabilities.new
caps["testingbot.geoCountryCode"] = "DE"
DesiredCapabilities caps = new DesiredCapabilities();
caps.setCapability("testingbot.geoCountryCode", "DE");
$caps = array(
"testingbot.geoCountryCode" => "DE"
);
capabilities = {
"testingbot.geoCountryCode" : "DE"
}
const capabilities = {
"testingbot.geoCountryCode" : "DE"
}
DesiredCapabilities caps = new DesiredCapabilities();
caps.SetCapability("testingbot.geoCountryCode", "DE");
**Selenium W3C Example:**
[Ruby](https://testingbot.com#)[Python](https://testingbot.com#)[PHP](https://testingbot.com#)[Java](https://testingbot.com#)[NodeJS](https://testingbot.com#)[C#](https://testingbot.com#)
caps = {
platformName: "Windows 10",
browserName: "chrome",
browserVersion: "latest",
"tb:options" => {
"testingbot.geoCountryCode" : "DE"
}
}
ChromeOptions chromeOpts = new ChromeOptions();
chromeOpts.setExperimentalOption("w3c", true);
MutableCapabilities tbOptions = new MutableCapabilities();
tbOptions.setCapability("key", "api_key");
tbOptions.setCapability("secret", "api_secret");
tbOptions.setCapability("testingbot.geoCountryCode", "DE");
DesiredCapabilities caps = new DesiredCapabilities();
caps.setCapability(ChromeOptions.CAPABILITY, chromeOpts);
caps.setCapability("platformName", "Windows 10");
caps.setCapability("tb:options", tbOptions);
caps.setCapability("browserName", "chrome");
$options = new ChromeOptions();
$capabilities = DesiredCapabilities::chrome();
$capabilities->setPlatform('Windows 10');
$capabilities->setCapability('tb:options', array(
'testingbot.geoCountryCode' => "DE"
));
$capabilities->setCapability(ChromeOptions::CAPABILITY, $options);
tbOptions = {
'testingbot.geoCountryCode': "DE"
}
chromeOpts = {
'browserName': "chrome",
'platformName': "Windows 10",
'goog:chromeOptions': {'w3c': True},
'tb:options': tbOptions
}
self.driver = webdriver.Remote(remote_url, desired_capabilities=chromeOpts)
driver = await new webdriver.Builder().withCapabilities({
"browserName": 'chrome',
"platformName": 'Windows 10',
/** Google requires "w3c" to be set in "goog:chromeOptions" as true if you're using ChromeDriver version 74 or lower.
* Based on this commit: https://chromium.googlesource.com/chromium/src/+/2b49880e2481658e0702fd6fe494859bca52b39c
* ChromeDriver now uses w3c by default from version 75+ so setting this option will no longer be a requirement **/
"goog:chromeOptions" : { "w3c" : true },
"tb:options": {
"key": "api_key",
"secret": "api_secret",
"testingbot.geoCountryCode": "DE"
}
}).usingServer("https://hub.testingbot.com/wd/hub").build();
var chromeOptions = new ChromeOptions()
{
BrowserVersion = "81",
PlatformName = "Windows 10",
UseSpecCompliantProtocol = true
};
var tbOptions = new Dictionary
{
["key"] = "api_key",
["secret"] = "api_secret",
["testingbot.geoCountryCode"] = "DE"
};
chromeOptions.AddAdditionalCapability("tb:options", tbOptions, true);
driver = new RemoteWebDriver(new Uri("https://hub.testingbot.com/wd/hub"),
chromeOptions.ToCapabilities(), TimeSpan.FromSeconds(600));
Specify `testingbot.geoCountryCode` with one of the following country codes:
- **'\*'** : this will take a random country from the list below
- **'AU'** : Australia
- **'BH'** : Bahrain
- **'BE'** : Belgium
- **'BR'** : Brazil
- **'CA'** : Canada
- **'CL'** : Chile
- **'FR'** : France
- **'DE'** : Germany
- **'IN'** : India
- **'IT'** : Italy
- **'JP'** : Japan
- **'NO'** : Norway
- **'SG'** : Singapore
- **'ZA'** : South Africa
- **'SE'** : Sweden
- **'CH'** : Switzerland
- **'AE'** : United Arab Emirates
- **'GB'** : United Kingdom
- **'US'** : United States
**Important:** this does not work on Android 4.4
### Localhost Testing
By default, the TestingBot remote VMs are not able to access your localhost, as they are running in a separate network. However, you can use the `localhost` address to access your local web server when using the [TestingBot Tunnel](https://testingbot.com/support/tunnel).
Once you have the TestingBot Tunnel running, these localhost ports will be forwarded to your machine:
- 80
- 443
- 8080
- 3030
- 3000
- 3001
- 3400
You can also specify additional ports to forward by using the `localHttpPorts` capability.
If the localhost port is expecting SSL traffic, you can specify the port in the `localHttpsPorts` capability.
[Java](https://testingbot.com#)[NodeJS](https://testingbot.com#)[C#](https://testingbot.com#)[Python](https://testingbot.com#)[Ruby](https://testingbot.com#)[PHP](https://testingbot.com#)
caps = {
"tb:options" => {
"localHttpPorts" : [3002, 8081]
}
}
MutableCapabilities tbOptions = new MutableCapabilities();
tbOptions.setCapability("localHttpPorts", [3002, 8081]);
DesiredCapabilities caps = new DesiredCapabilities();
caps.setCapability("tb:options", tbOptions);
$options = new ChromeOptions();
$capabilities = DesiredCapabilities::chrome();
$capabilities->setCapability('tb:options', array(
"localHttpPorts" => [3002, 8081]
));
$capabilities->setCapability(ChromeOptions::CAPABILITY, $options);
tbOptions = {
'localHttpPorts': [3002, 8081]
}
chromeOpts = {
'browserName': "chrome",
'platformName': "Windows 10",
'tb:options': tbOptions
}
self.driver = webdriver.Remote(remote_url, desired_capabilities=chromeOpts)
driver = await new webdriver.Builder().withCapabilities({
"tb:options": {
"localHttpPorts": [3002, 8081]
}
}).usingServer("https://hub.testingbot.com/wd/hub").build();
var chromeOptions = new ChromeOptions()
{
BrowserVersion = "latest",
PlatformName = "Windows 10",
UseSpecCompliantProtocol = true
};
var tbOptions = new Dictionary
{
["testingbot.localHttpPorts"] = [3002, 8081]
};
chromeOptions.AddAdditionalCapability("tb:options", tbOptions, true);
driver = new RemoteWebDriver(new Uri("https://hub.testingbot.com/wd/hub"),
chromeOptions.ToCapabilities(), TimeSpan.FromSeconds(600));
### Change Test Name
Add a name to this test, which will show up in our member area and API.
[Ruby](https://testingbot.com#)[Python](https://testingbot.com#)[PHP](https://testingbot.com#)[Java](https://testingbot.com#)[NodeJS](https://testingbot.com#)[C#](https://testingbot.com#)
caps = Selenium::WebDriver::Remote::Capabilities.new
caps["name"] = "My Test Name"
DesiredCapabilities caps = new DesiredCapabilities();
caps.setCapability("name", "My Test Name");
$caps = array(
"name" => "My Test Name"
);
capabilities = {
"name" : "My Test Name"
}
const capabilities = {
"name" : "My Test Name"
}
DesiredCapabilities caps = new DesiredCapabilities();
caps.SetCapability("name", "My Test Name");
**Selenium W3C Example:**
[Ruby](https://testingbot.com#)[Python](https://testingbot.com#)[PHP](https://testingbot.com#)[Java](https://testingbot.com#)[NodeJS](https://testingbot.com#)[C#](https://testingbot.com#)
caps = {
platformName: "Windows 10",
browserName: "chrome",
browserVersion: "latest",
"tb:options" => {
"name" : "My Test Name"
}
}
ChromeOptions chromeOpts = new ChromeOptions();
chromeOpts.setExperimentalOption("w3c", true);
MutableCapabilities tbOptions = new MutableCapabilities();
tbOptions.setCapability("key", "api_key");
tbOptions.setCapability("secret", "api_secret");
tbOptions.setCapability("name", "My Test Name");
DesiredCapabilities caps = new DesiredCapabilities();
caps.setCapability(ChromeOptions.CAPABILITY, chromeOpts);
caps.setCapability("platformName", "Windows 10");
caps.setCapability("tb:options", tbOptions);
caps.setCapability("browserName", "chrome");
$options = new ChromeOptions();
$capabilities = DesiredCapabilities::chrome();
$capabilities->setPlatform('Windows 10');
$capabilities->setCapability('tb:options', array(
'name' => "My Test Name"
));
$capabilities->setCapability(ChromeOptions::CAPABILITY, $options);
tbOptions = {
'name': "My Test Name"
}
chromeOpts = {
'browserName': "chrome",
'platformName': "Windows 10",
'goog:chromeOptions': {'w3c': True},
'tb:options': tbOptions
}
self.driver = webdriver.Remote(remote_url, desired_capabilities=chromeOpts)
driver = await new webdriver.Builder().withCapabilities({
"browserName": 'chrome',
"platformName": 'Windows 10',
/** Google requires "w3c" to be set in "goog:chromeOptions" as true if you're using ChromeDriver version 74 or lower.
* Based on this commit: https://chromium.googlesource.com/chromium/src/+/2b49880e2481658e0702fd6fe494859bca52b39c
* ChromeDriver now uses w3c by default from version 75+ so setting this option will no longer be a requirement **/
"goog:chromeOptions" : { "w3c" : true },
"tb:options": {
"key": "api_key",
"secret": "api_secret",
"name": "My Test Name"
}
}).usingServer("https://hub.testingbot.com/wd/hub").build();
var chromeOptions = new ChromeOptions()
{
BrowserVersion = "81",
PlatformName = "Windows 10",
UseSpecCompliantProtocol = true
};
var tbOptions = new Dictionary
{
["key"] = "api_key",
["secret"] = "api_secret",
["name"] = "My Test Name"
};
chromeOptions.AddAdditionalCapability("tb:options", tbOptions, true);
driver = new RemoteWebDriver(new Uri("https://hub.testingbot.com/wd/hub"),
chromeOptions.ToCapabilities(), TimeSpan.FromSeconds(600));
| Value Type | Default Value |
| --- | --- |
| string | unnamed test |
### Group Tests
A key you can use to group certain tests in the same build (for example in Jenkins).
The builds will appear in our member area.
[Ruby](https://testingbot.com#)[Python](https://testingbot.com#)[PHP](https://testingbot.com#)[Java](https://testingbot.com#)[NodeJS](https://testingbot.com#)[C#](https://testingbot.com#)
caps = Selenium::WebDriver::Remote::Capabilities.new
caps["build"] = "My First Build"
DesiredCapabilities caps = new DesiredCapabilities();
caps.setCapability("build", "My First Build");
$caps = array(
"build" => "My First Build"
);
capabilities = {
"build" : "My First Build"
}
const capabilities = {
"build" : "My First Build"
}
DesiredCapabilities caps = new DesiredCapabilities();
caps.SetCapability("build", "My First Build");
**Selenium W3C Example:**
[Ruby](https://testingbot.com#)[Python](https://testingbot.com#)[PHP](https://testingbot.com#)[Java](https://testingbot.com#)[NodeJS](https://testingbot.com#)[C#](https://testingbot.com#)
caps = {
platformName: "Windows 10",
browserName: "chrome",
browserVersion: "latest",
"tb:options" => {
"build" : "My First Build"
}
}
ChromeOptions chromeOpts = new ChromeOptions();
chromeOpts.setExperimentalOption("w3c", true);
MutableCapabilities tbOptions = new MutableCapabilities();
tbOptions.setCapability("key", "api_key");
tbOptions.setCapability("secret", "api_secret");
tbOptions.setCapability("build", "My First Build");
DesiredCapabilities caps = new DesiredCapabilities();
caps.setCapability(ChromeOptions.CAPABILITY, chromeOpts);
caps.setCapability("platformName", "Windows 10");
caps.setCapability("tb:options", tbOptions);
caps.setCapability("browserName", "chrome");
$options = new ChromeOptions();
$capabilities = DesiredCapabilities::chrome();
$capabilities->setPlatform('Windows 10');
$capabilities->setCapability('tb:options', array(
'build' => "My First Build"
));
$capabilities->setCapability(ChromeOptions::CAPABILITY, $options);
tbOptions = {
'build': "My First Build"
}
chromeOpts = {
'browserName': "chrome",
'platformName': "Windows 10",
'goog:chromeOptions': {'w3c': True},
'tb:options': tbOptions
}
self.driver = webdriver.Remote(remote_url, desired_capabilities=chromeOpts)
driver = await new webdriver.Builder().withCapabilities({
"browserName": 'chrome',
"platformName": 'Windows 10',
/** Google requires "w3c" to be set in "goog:chromeOptions" as true if you're using ChromeDriver version 74 or lower.
* Based on this commit: https://chromium.googlesource.com/chromium/src/+/2b49880e2481658e0702fd6fe494859bca52b39c
* ChromeDriver now uses w3c by default from version 75+ so setting this option will no longer be a requirement **/
"goog:chromeOptions" : { "w3c" : true },
"tb:options": {
"key": "api_key",
"secret": "api_secret",
"build": "My First Build"
}
}).usingServer("https://hub.testingbot.com/wd/hub").build();
var chromeOptions = new ChromeOptions()
{
BrowserVersion = "81",
PlatformName = "Windows 10",
UseSpecCompliantProtocol = true
};
var tbOptions = new Dictionary
{
["key"] = "api_key",
["secret"] = "api_secret",
["build"] = "My First Build"
};
chromeOptions.AddAdditionalCapability("tb:options", tbOptions, true);
driver = new RemoteWebDriver(new Uri("https://hub.testingbot.com/wd/hub"),
chromeOptions.ToCapabilities(), TimeSpan.FromSeconds(600));
| Value Type |
| --- |
| string |
### Idle Timeout
The maximum amount of time a browser will wait before proceeding to the next step in your test.
[Ruby](https://testingbot.com#)[Python](https://testingbot.com#)[PHP](https://testingbot.com#)[Java](https://testingbot.com#)[NodeJS](https://testingbot.com#)[C#](https://testingbot.com#)
caps = Selenium::WebDriver::Remote::Capabilities.new
caps["idletimeout"] = 130
DesiredCapabilities caps = new DesiredCapabilities();
caps.setCapability("idletimeout", 130);
$caps = array(
"idletimeout" => 130
);
capabilities = {
"idletimeout" : 130
}
const capabilities = {
"idletimeout" : 130
}
DesiredCapabilities caps = new DesiredCapabilities();
caps.SetCapability("idletimeout", 130);
**Selenium W3C Example:**
[Ruby](https://testingbot.com#)[Python](https://testingbot.com#)[PHP](https://testingbot.com#)[Java](https://testingbot.com#)[NodeJS](https://testingbot.com#)[C#](https://testingbot.com#)
caps = {
platformName: "Windows 10",
browserName: "chrome",
browserVersion: "latest",
"tb:options" => {
"idletimeout" : 130
}
}
ChromeOptions chromeOpts = new ChromeOptions();
chromeOpts.setExperimentalOption("w3c", true);
MutableCapabilities tbOptions = new MutableCapabilities();
tbOptions.setCapability("key", "api_key");
tbOptions.setCapability("secret", "api_secret");
tbOptions.setCapability("idletimeout", 130);
DesiredCapabilities caps = new DesiredCapabilities();
caps.setCapability(ChromeOptions.CAPABILITY, chromeOpts);
caps.setCapability("platformName", "Windows 10");
caps.setCapability("tb:options", tbOptions);
caps.setCapability("browserName", "chrome");
$options = new ChromeOptions();
$capabilities = DesiredCapabilities::chrome();
$capabilities->setPlatform('Windows 10');
$capabilities->setCapability('tb:options', array(
'idletimeout' => 130
));
$capabilities->setCapability(ChromeOptions::CAPABILITY, $options);
tbOptions = {
'idletimeout': 130
}
chromeOpts = {
'browserName': "chrome",
'platformName': "Windows 10",
'goog:chromeOptions': {'w3c': True},
'tb:options': tbOptions
}
self.driver = webdriver.Remote(remote_url, desired_capabilities=chromeOpts)
driver = await new webdriver.Builder().withCapabilities({
"browserName": 'chrome',
"platformName": 'Windows 10',
/** Google requires "w3c" to be set in "goog:chromeOptions" as true if you're using ChromeDriver version 74 or lower.
* Based on this commit: https://chromium.googlesource.com/chromium/src/+/2b49880e2481658e0702fd6fe494859bca52b39c
* ChromeDriver now uses w3c by default from version 75+ so setting this option will no longer be a requirement **/
"goog:chromeOptions" : { "w3c" : true },
"tb:options": {
"key": "api_key",
"secret": "api_secret",
"idletimeout": 130
}
}).usingServer("https://hub.testingbot.com/wd/hub").build();
var chromeOptions = new ChromeOptions()
{
BrowserVersion = "81",
PlatformName = "Windows 10",
UseSpecCompliantProtocol = true
};
var tbOptions = new Dictionary
{
["key"] = "api_key",
["secret"] = "api_secret",
["idletimeout"] = 130
};
chromeOptions.AddAdditionalCapability("tb:options", tbOptions, true);
driver = new RemoteWebDriver(new Uri("https://hub.testingbot.com/wd/hub"),
chromeOptions.ToCapabilities(), TimeSpan.FromSeconds(600));
| Value Type | Default Value |
| --- | --- |
| int (specify number of seconds) | 130 seconds |
### Maximum Test Duration
The maximum duration for a single test. This is a safeguard to prevent bad tests from using up your credits.
We generally recommend to keep tests short (less than 10 minutes). It's better to split up large tests in smaller individual tests.
This keeps your tests fast and allows for more parallelization of your tests.
[Ruby](https://testingbot.com#)[Python](https://testingbot.com#)[PHP](https://testingbot.com#)[Java](https://testingbot.com#)[NodeJS](https://testingbot.com#)[C#](https://testingbot.com#)
caps = Selenium::WebDriver::Remote::Capabilities.new
caps["maxduration"] = 1800
DesiredCapabilities caps = new DesiredCapabilities();
caps.setCapability("maxduration", 1800);
$caps = array(
"maxduration" => 1800
);
capabilities = {
"maxduration" : 1800
}
const capabilities = {
"maxduration" : 1800
}
DesiredCapabilities caps = new DesiredCapabilities();
caps.SetCapability("maxduration", 1800);
**Selenium W3C Example:**
[Ruby](https://testingbot.com#)[Python](https://testingbot.com#)[PHP](https://testingbot.com#)[Java](https://testingbot.com#)[NodeJS](https://testingbot.com#)[C#](https://testingbot.com#)
caps = {
platformName: "Windows 10",
browserName: "chrome",
browserVersion: "latest",
"tb:options" => {
"maxduration" : 1800
}
}
ChromeOptions chromeOpts = new ChromeOptions();
chromeOpts.setExperimentalOption("w3c", true);
MutableCapabilities tbOptions = new MutableCapabilities();
tbOptions.setCapability("key", "api_key");
tbOptions.setCapability("secret", "api_secret");
tbOptions.setCapability("maxduration", 1800);
DesiredCapabilities caps = new DesiredCapabilities();
caps.setCapability(ChromeOptions.CAPABILITY, chromeOpts);
caps.setCapability("platformName", "Windows 10");
caps.setCapability("tb:options", tbOptions);
caps.setCapability("browserName", "chrome");
$options = new ChromeOptions();
$capabilities = DesiredCapabilities::chrome();
$capabilities->setPlatform('Windows 10');
$capabilities->setCapability('tb:options', array(
'maxduration' => 1800
));
$capabilities->setCapability(ChromeOptions::CAPABILITY, $options);
tbOptions = {
'maxduration': 1800
}
chromeOpts = {
'browserName': "chrome",
'platformName': "Windows 10",
'goog:chromeOptions': {'w3c': True},
'tb:options': tbOptions
}
self.driver = webdriver.Remote(remote_url, desired_capabilities=chromeOpts)
driver = await new webdriver.Builder().withCapabilities({
"browserName": 'chrome',
"platformName": 'Windows 10',
/** Google requires "w3c" to be set in "goog:chromeOptions" as true if you're using ChromeDriver version 74 or lower.
* Based on this commit: https://chromium.googlesource.com/chromium/src/+/2b49880e2481658e0702fd6fe494859bca52b39c
* ChromeDriver now uses w3c by default from version 75+ so setting this option will no longer be a requirement **/
"goog:chromeOptions" : { "w3c" : true },
"tb:options": {
"key": "api_key",
"secret": "api_secret",
"maxduration": 1800
}
}).usingServer("https://hub.testingbot.com/wd/hub").build();
var chromeOptions = new ChromeOptions()
{
BrowserVersion = "81",
PlatformName = "Windows 10",
UseSpecCompliantProtocol = true
};
var tbOptions = new Dictionary
{
["key"] = "api_key",
["secret"] = "api_secret",
["maxduration"] = 1800
};
chromeOptions.AddAdditionalCapability("tb:options", tbOptions, true);
driver = new RemoteWebDriver(new Uri("https://hub.testingbot.com/wd/hub"),
chromeOptions.ToCapabilities(), TimeSpan.FromSeconds(600));
| Value Type | Default Value |
| --- | --- |
| int (specify number of seconds) | 1800 seconds (30 minutes) |
### Custom Metadata
Send along custom data, for example your release, server, commit hash, ...
This will show up on the test detail page in the TestingBot member area.
[Ruby](https://testingbot.com#)[Python](https://testingbot.com#)[PHP](https://testingbot.com#)[Java](https://testingbot.com#)[NodeJS](https://testingbot.com#)[C#](https://testingbot.com#)
caps = Selenium::WebDriver::Remote::Capabilities.new
caps["extra"] = "Extra Information"
DesiredCapabilities caps = new DesiredCapabilities();
caps.setCapability("extra", "Extra Information");
$caps = array(
"extra" => "Extra Information"
);
capabilities = {
"extra" : "Extra Information"
}
const capabilities = {
"extra" : "Extra Information"
}
DesiredCapabilities caps = new DesiredCapabilities();
caps.SetCapability("extra", "Extra Information");
**Selenium W3C Example:**
[Ruby](https://testingbot.com#)[Python](https://testingbot.com#)[PHP](https://testingbot.com#)[Java](https://testingbot.com#)[NodeJS](https://testingbot.com#)[C#](https://testingbot.com#)
caps = {
platformName: "Windows 10",
browserName: "chrome",
browserVersion: "latest",
"tb:options" => {
"extra" : "Extra Information"
}
}
ChromeOptions chromeOpts = new ChromeOptions();
chromeOpts.setExperimentalOption("w3c", true);
MutableCapabilities tbOptions = new MutableCapabilities();
tbOptions.setCapability("key", "api_key");
tbOptions.setCapability("secret", "api_secret");
tbOptions.setCapability("extra", "Extra Information");
DesiredCapabilities caps = new DesiredCapabilities();
caps.setCapability(ChromeOptions.CAPABILITY, chromeOpts);
caps.setCapability("platformName", "Windows 10");
caps.setCapability("tb:options", tbOptions);
caps.setCapability("browserName", "chrome");
$options = new ChromeOptions();
$capabilities = DesiredCapabilities::chrome();
$capabilities->setPlatform('Windows 10');
$capabilities->setCapability('tb:options', array(
'extra' => "Extra Information"
));
$capabilities->setCapability(ChromeOptions::CAPABILITY, $options);
tbOptions = {
'extra': "Extra Information"
}
chromeOpts = {
'browserName': "chrome",
'platformName': "Windows 10",
'goog:chromeOptions': {'w3c': True},
'tb:options': tbOptions
}
self.driver = webdriver.Remote(remote_url, desired_capabilities=chromeOpts)
driver = await new webdriver.Builder().withCapabilities({
"browserName": 'chrome',
"platformName": 'Windows 10',
/** Google requires "w3c" to be set in "goog:chromeOptions" as true if you're using ChromeDriver version 74 or lower.
* Based on this commit: https://chromium.googlesource.com/chromium/src/+/2b49880e2481658e0702fd6fe494859bca52b39c
* ChromeDriver now uses w3c by default from version 75+ so setting this option will no longer be a requirement **/
"goog:chromeOptions" : { "w3c" : true },
"tb:options": {
"key": "api_key",
"secret": "api_secret",
"extra": "Extra Information"
}
}).usingServer("https://hub.testingbot.com/wd/hub").build();
var chromeOptions = new ChromeOptions()
{
BrowserVersion = "81",
PlatformName = "Windows 10",
UseSpecCompliantProtocol = true
};
var tbOptions = new Dictionary
{
["key"] = "api_key",
["secret"] = "api_secret",
["extra"] = "Extra Information"
};
chromeOptions.AddAdditionalCapability("tb:options", tbOptions, true);
driver = new RemoteWebDriver(new Uri("https://hub.testingbot.com/wd/hub"),
chromeOptions.ToCapabilities(), TimeSpan.FromSeconds(600));
| Value Type |
| --- |
| string |
### Load custom browser extensions
If you specify this desired capability with the URL to your Chrome extension's `.crx` file, Safari App/Web extension file, or Firefox addon's `.xpi` file, we will download the extension, which will be added to the browser before your test starts.
More information is available in the [automated browser extension testing documentation](https://testingbot.com/support/web-automate/selenium/browser-extension).
[Ruby](https://testingbot.com#)[Python](https://testingbot.com#)[PHP](https://testingbot.com#)[Java](https://testingbot.com#)[NodeJS](https://testingbot.com#)[C#](https://testingbot.com#)
caps = Selenium::WebDriver::Remote::Capabilities.new
caps["load-extension"] = "https://..."
DesiredCapabilities caps = new DesiredCapabilities();
caps.setCapability("load-extension", "https://...");
$caps = array(
"load-extension" => "https://..."
);
capabilities = {
"load-extension" : "https://..."
}
const capabilities = {
"load-extension" : "https://..."
}
DesiredCapabilities caps = new DesiredCapabilities();
caps.SetCapability("load-extension", "https://...");
**Selenium W3C Example:**
[Ruby](https://testingbot.com#)[Python](https://testingbot.com#)[PHP](https://testingbot.com#)[Java](https://testingbot.com#)[NodeJS](https://testingbot.com#)[C#](https://testingbot.com#)
caps = {
platformName: "Windows 10",
browserName: "chrome",
browserVersion: "latest",
"tb:options" => {
"load-extension" : "https://..."
}
}
ChromeOptions chromeOpts = new ChromeOptions();
chromeOpts.setExperimentalOption("w3c", true);
MutableCapabilities tbOptions = new MutableCapabilities();
tbOptions.setCapability("key", "api_key");
tbOptions.setCapability("secret", "api_secret");
tbOptions.setCapability("load-extension", "https://...");
DesiredCapabilities caps = new DesiredCapabilities();
caps.setCapability(ChromeOptions.CAPABILITY, chromeOpts);
caps.setCapability("platformName", "Windows 10");
caps.setCapability("tb:options", tbOptions);
caps.setCapability("browserName", "chrome");
$options = new ChromeOptions();
$capabilities = DesiredCapabilities::chrome();
$capabilities->setPlatform('Windows 10');
$capabilities->setCapability('tb:options', array(
'load-extension' => "https://..."
));
$capabilities->setCapability(ChromeOptions::CAPABILITY, $options);
tbOptions = {
'load-extension': "https://..."
}
chromeOpts = {
'browserName': "chrome",
'platformName': "Windows 10",
'goog:chromeOptions': {'w3c': True},
'tb:options': tbOptions
}
self.driver = webdriver.Remote(remote_url, desired_capabilities=chromeOpts)
driver = await new webdriver.Builder().withCapabilities({
"browserName": 'chrome',
"platformName": 'Windows 10',
/** Google requires "w3c" to be set in "goog:chromeOptions" as true if you're using ChromeDriver version 74 or lower.
* Based on this commit: https://chromium.googlesource.com/chromium/src/+/2b49880e2481658e0702fd6fe494859bca52b39c
* ChromeDriver now uses w3c by default from version 75+ so setting this option will no longer be a requirement **/
"goog:chromeOptions" : { "w3c" : true },
"tb:options": {
"key": "api_key",
"secret": "api_secret",
"load-extension": "https://..."
}
}).usingServer("https://hub.testingbot.com/wd/hub").build();
var chromeOptions = new ChromeOptions()
{
BrowserVersion = "81",
PlatformName = "Windows 10",
UseSpecCompliantProtocol = true
};
var tbOptions = new Dictionary
{
["key"] = "api_key",
["secret"] = "api_secret",
["load-extension"] = "https://..."
};
chromeOptions.AddAdditionalCapability("tb:options", tbOptions, true);
driver = new RemoteWebDriver(new Uri("https://hub.testingbot.com/wd/hub"),
chromeOptions.ToCapabilities(), TimeSpan.FromSeconds(600));
| Browser | Supported Format | Example |
| --- | --- | --- |
| Chrome | `.zip` file, containing the extension source code (`manifest.json`, `src/ directory`, ...) | `https://.../extension.zip` |
| Firefox | `.zip` file, containing the extension source code (`manifest.json`, `src/ directory`, `lib/ directory`, ...) | `https://.../extension.zip` |
| Edge | `.zip` file, containing the extension source code (`manifest.json`, `src/ directory`, ...) | `https://.../extension.zip` |
| Safari (and Safari Technology Preview) | `Safari Web Extension, Safari App Extension or .safariextz` file | `https://.../extension.zip or https://.../extension.safariextz` |
With [TestingBot Storage](https://testingbot.com/support/api#upload), you can upload your executable on our servers.
The advantage of this is that our test VMs can immediately download your executable from our own network, which is much faster than downloading from the public internet.
Once the file is uploaded via TestingBot Storage, you can use `"prerun" : "tb://..."`
### Grouping
Specify in which groups you want to see the test results. You can group results to have an easy overview of tests across projects.
[Ruby](https://testingbot.com#)[Python](https://testingbot.com#)[PHP](https://testingbot.com#)[Java](https://testingbot.com#)[NodeJS](https://testingbot.com#)[C#](https://testingbot.com#)
caps = Selenium::WebDriver::Remote::Capabilities.new
caps["groups"] = "group1,group2"
DesiredCapabilities caps = new DesiredCapabilities();
caps.setCapability("groups", "group1,group2");
$caps = array(
"groups" => "group1,group2"
);
capabilities = {
"groups" : "group1,group2"
}
const capabilities = {
"groups" : "group1,group2"
}
DesiredCapabilities caps = new DesiredCapabilities();
caps.SetCapability("groups", "group1,group2");
**Selenium W3C Example:**
[Ruby](https://testingbot.com#)[Python](https://testingbot.com#)[PHP](https://testingbot.com#)[Java](https://testingbot.com#)[NodeJS](https://testingbot.com#)[C#](https://testingbot.com#)
caps = {
platformName: "Windows 10",
browserName: "chrome",
browserVersion: "latest",
"tb:options" => {
"groups" : "group1,group2"
}
}
ChromeOptions chromeOpts = new ChromeOptions();
chromeOpts.setExperimentalOption("w3c", true);
MutableCapabilities tbOptions = new MutableCapabilities();
tbOptions.setCapability("key", "api_key");
tbOptions.setCapability("secret", "api_secret");
tbOptions.setCapability("groups", "group1,group2");
DesiredCapabilities caps = new DesiredCapabilities();
caps.setCapability(ChromeOptions.CAPABILITY, chromeOpts);
caps.setCapability("platformName", "Windows 10");
caps.setCapability("tb:options", tbOptions);
caps.setCapability("browserName", "chrome");
$options = new ChromeOptions();
$capabilities = DesiredCapabilities::chrome();
$capabilities->setPlatform('Windows 10');
$capabilities->setCapability('tb:options', array(
'groups' => "group1,group2"
));
$capabilities->setCapability(ChromeOptions::CAPABILITY, $options);
tbOptions = {
'groups': "group1,group2"
}
chromeOpts = {
'browserName': "chrome",
'platformName': "Windows 10",
'goog:chromeOptions': {'w3c': True},
'tb:options': tbOptions
}
self.driver = webdriver.Remote(remote_url, desired_capabilities=chromeOpts)
driver = await new webdriver.Builder().withCapabilities({
"browserName": 'chrome',
"platformName": 'Windows 10',
/** Google requires "w3c" to be set in "goog:chromeOptions" as true if you're using ChromeDriver version 74 or lower.
* Based on this commit: https://chromium.googlesource.com/chromium/src/+/2b49880e2481658e0702fd6fe494859bca52b39c
* ChromeDriver now uses w3c by default from version 75+ so setting this option will no longer be a requirement **/
"goog:chromeOptions" : { "w3c" : true },
"tb:options": {
"key": "api_key",
"secret": "api_secret",
"groups": "group1,group2"
}
}).usingServer("https://hub.testingbot.com/wd/hub").build();
var chromeOptions = new ChromeOptions()
{
BrowserVersion = "81",
PlatformName = "Windows 10",
UseSpecCompliantProtocol = true
};
var tbOptions = new Dictionary
{
["key"] = "api_key",
["secret"] = "api_secret",
["groups"] = "group1,group2"
};
chromeOptions.AddAdditionalCapability("tb:options", tbOptions, true);
driver = new RemoteWebDriver(new Uri("https://hub.testingbot.com/wd/hub"),
chromeOptions.ToCapabilities(), TimeSpan.FromSeconds(600));
| Value Type |
| --- |
| string (comma-separated) |
### AutoClicker
Specify one or more of the possible options below to have TestingBot automatically click certain dialogs which are unable to be automated via Selenium WebDriver.
[Ruby](https://testingbot.com#)[Python](https://testingbot.com#)[PHP](https://testingbot.com#)[Java](https://testingbot.com#)[NodeJS](https://testingbot.com#)[C#](https://testingbot.com#)
caps = Selenium::WebDriver::Remote::Capabilities.new
caps["autoclick"] = []
DesiredCapabilities caps = new DesiredCapabilities();
caps.setCapability("autoclick", []);
$caps = array(
"autoclick" => []
);
capabilities = {
"autoclick" : []
}
const capabilities = {
"autoclick" : []
}
DesiredCapabilities caps = new DesiredCapabilities();
caps.SetCapability("autoclick", []);
**Selenium W3C Example:**
[Ruby](https://testingbot.com#)[Python](https://testingbot.com#)[PHP](https://testingbot.com#)[Java](https://testingbot.com#)[NodeJS](https://testingbot.com#)[C#](https://testingbot.com#)
caps = {
platformName: "Windows 10",
browserName: "chrome",
browserVersion: "latest",
"tb:options" => {
"autoclick" : []
}
}
ChromeOptions chromeOpts = new ChromeOptions();
chromeOpts.setExperimentalOption("w3c", true);
MutableCapabilities tbOptions = new MutableCapabilities();
tbOptions.setCapability("key", "api_key");
tbOptions.setCapability("secret", "api_secret");
tbOptions.setCapability("autoclick", []);
DesiredCapabilities caps = new DesiredCapabilities();
caps.setCapability(ChromeOptions.CAPABILITY, chromeOpts);
caps.setCapability("platformName", "Windows 10");
caps.setCapability("tb:options", tbOptions);
caps.setCapability("browserName", "chrome");
$options = new ChromeOptions();
$capabilities = DesiredCapabilities::chrome();
$capabilities->setPlatform('Windows 10');
$capabilities->setCapability('tb:options', array(
'autoclick' => []
));
$capabilities->setCapability(ChromeOptions::CAPABILITY, $options);
tbOptions = {
'autoclick': []
}
chromeOpts = {
'browserName': "chrome",
'platformName': "Windows 10",
'goog:chromeOptions': {'w3c': True},
'tb:options': tbOptions
}
self.driver = webdriver.Remote(remote_url, desired_capabilities=chromeOpts)
driver = await new webdriver.Builder().withCapabilities({
"browserName": 'chrome',
"platformName": 'Windows 10',
/** Google requires "w3c" to be set in "goog:chromeOptions" as true if you're using ChromeDriver version 74 or lower.
* Based on this commit: https://chromium.googlesource.com/chromium/src/+/2b49880e2481658e0702fd6fe494859bca52b39c
* ChromeDriver now uses w3c by default from version 75+ so setting this option will no longer be a requirement **/
"goog:chromeOptions" : { "w3c" : true },
"tb:options": {
"key": "api_key",
"secret": "api_secret",
"autoclick": []
}
}).usingServer("https://hub.testingbot.com/wd/hub").build();
var chromeOptions = new ChromeOptions()
{
BrowserVersion = "81",
PlatformName = "Windows 10",
UseSpecCompliantProtocol = true
};
var tbOptions = new Dictionary
{
["key"] = "api_key",
["secret"] = "api_secret",
["autoclick"] = []
};
chromeOptions.AddAdditionalCapability("tb:options", tbOptions, true);
driver = new RemoteWebDriver(new Uri("https://hub.testingbot.com/wd/hub"),
chromeOptions.ToCapabilities(), TimeSpan.FromSeconds(600));
| Value Type | Possible Values: |
| --- | --- |
| array of options | `chrome_extension_add`, `chrome_extension_permissions_allow` |
### Sikuli
Specify an URL to a zip-file containing one or more `.sikulu` projects. These will automatically start before your test runs, so that you can do certain automated tasks which Selenium cannot do (clicking native dialogs, ...)
Find more information regarding [Sikuli Cloud Testing](https://testingbot.com/support/other/sikuli).
[Ruby](https://testingbot.com#)[Python](https://testingbot.com#)[PHP](https://testingbot.com#)[Java](https://testingbot.com#)[NodeJS](https://testingbot.com#)[C#](https://testingbot.com#)
caps = Selenium::WebDriver::Remote::Capabilities.new
caps["sikuli"] = "https://..."
DesiredCapabilities caps = new DesiredCapabilities();
caps.setCapability("sikuli", "https://...");
$caps = array(
"sikuli" => "https://..."
);
capabilities = {
"sikuli" : "https://..."
}
const capabilities = {
"sikuli" : "https://..."
}
DesiredCapabilities caps = new DesiredCapabilities();
caps.SetCapability("sikuli", "https://...");
**Selenium W3C Example:**
[Ruby](https://testingbot.com#)[Python](https://testingbot.com#)[PHP](https://testingbot.com#)[Java](https://testingbot.com#)[NodeJS](https://testingbot.com#)[C#](https://testingbot.com#)
caps = {
platformName: "Windows 10",
browserName: "chrome",
browserVersion: "latest",
"tb:options" => {
"sikuli" : []
}
}
ChromeOptions chromeOpts = new ChromeOptions();
chromeOpts.setExperimentalOption("w3c", true);
MutableCapabilities tbOptions = new MutableCapabilities();
tbOptions.setCapability("key", "api_key");
tbOptions.setCapability("secret", "api_secret");
tbOptions.setCapability("sikuli", []);
DesiredCapabilities caps = new DesiredCapabilities();
caps.setCapability(ChromeOptions.CAPABILITY, chromeOpts);
caps.setCapability("platformName", "Windows 10");
caps.setCapability("tb:options", tbOptions);
caps.setCapability("browserName", "chrome");
$options = new ChromeOptions();
$capabilities = DesiredCapabilities::chrome();
$capabilities->setPlatform('Windows 10');
$capabilities->setCapability('tb:options', array(
'sikuli' => []
));
$capabilities->setCapability(ChromeOptions::CAPABILITY, $options);
tbOptions = {
'sikuli': []
}
chromeOpts = {
'browserName': "chrome",
'platformName': "Windows 10",
'goog:chromeOptions': {'w3c': True},
'tb:options': tbOptions
}
self.driver = webdriver.Remote(remote_url, desired_capabilities=chromeOpts)
driver = await new webdriver.Builder().withCapabilities({
"browserName": 'chrome',
"platformName": 'Windows 10',
/** Google requires "w3c" to be set in "goog:chromeOptions" as true if you're using ChromeDriver version 74 or lower.
* Based on this commit: https://chromium.googlesource.com/chromium/src/+/2b49880e2481658e0702fd6fe494859bca52b39c
* ChromeDriver now uses w3c by default from version 75+ so setting this option will no longer be a requirement **/
"goog:chromeOptions" : { "w3c" : true },
"tb:options": {
"key": "api_key",
"secret": "api_secret",
"sikuli": []
}
}).usingServer("https://hub.testingbot.com/wd/hub").build();
var chromeOptions = new ChromeOptions()
{
BrowserVersion = "81",
PlatformName = "Windows 10",
UseSpecCompliantProtocol = true
};
var tbOptions = new Dictionary
{
["key"] = "api_key",
["secret"] = "api_secret",
["sikuli"] = []
};
chromeOptions.AddAdditionalCapability("tb:options", tbOptions, true);
driver = new RemoteWebDriver(new Uri("https://hub.testingbot.com/wd/hub"),
chromeOptions.ToCapabilities(), TimeSpan.FromSeconds(600));
| Value Type |
| --- |
| string (URL to zipped Sikuli project) |
Was this page helpful? Yes No
## Looking for More Help?
Have questions or need more information?
You can reach us via the following channels:
- [Email us](https://testingbot.com/contact/new)
- [Join our Slack Channel](https://join.slack.com/t/testingb0t/shared_invite/zt-3bcw9xch-jk19~6XPs_xBrsAgAedkCw)
---
URL: https://testingbot.com/support/web-automate/selenium/network
### Available Commands:
- [Throttle Network](https://testingbot.com#throttle)
- [Intercept/Mock Network](https://testingbot.com#intercept)
- [Network Log](https://testingbot.com#network)
# Custom WebDriver Commands by TestingBot
TestingBot has added custom WebDriver commands for Chrome and Microsoft Edge browsers.
With these custom commands, you can **retrieve various metrics** , **throttle network speed** and **monitor/adjust network requests** during your test.
These custom commands can be used with WebDriver's `JavascriptExecutor`.
**Important:** to be able to use these commands, **you need to pass** `debugging: true` in your desired capabilities.
## Throttle Network
#### Description:
This call allows you to throttle network speed, or even simulate no network connection (offline-mode).
[Java](https://testingbot.com#)[NodeJS](https://testingbot.com#)[C#](https://testingbot.com#)[Python](https://testingbot.com#)[Ruby](https://testingbot.com#)[PHP](https://testingbot.com#)
driver.execute_script("tb:throttle", "3G")
# or
driver.execute_script("tb:throttle", {
"downloadSpeed": 10 * 1024,
"uploadSpeed": 10 * 1024,
"latency": 0,
"loss": 0
})
((JavascriptExecutor) driver).executeScript("tb:throttle", "3G");
// or
Map throttleMap = new HashMap<>();
throttleMap.put("downloadSpeed", 10 * 1024);
throttleMap.put("uploadSpeed", 10 * 1024);
throttleMap.put("latency", 0);
throttleMap.put("loss", 0);
((JavascriptExecutor) driver).executeScript("tb:throttle", throttleMap);
$driver->executeScript("tb:throttle", ["3G"]);
// or
$driver->executeScript("tb:throttle", [
"downloadSpeed" => 10 * 1024,
"uploadSpeed" => 10 * 1024,
"latency" => 0,
"loss" => 0
]);
driver.execute_script("tb:throttle", "3G")
# or
driver.execute_script("tb:throttle", {
"downloadSpeed": 10 * 1024,
"uploadSpeed": 10 * 1024,
"latency": 0,
"loss": 0
})
await driver.executeScript('tb:throttle', '3G');
// or
await driver.executeScript('tb:throttle', {
"downloadSpeed": 10 * 1024,
"uploadSpeed": 10 * 1024,
"latency": 0,
"loss": 0
});
((IJavaScriptExecutor)driver).ExecuteScript("tb:throttle", "3G");
// or
((IJavaScriptExecutor)driver).ExecuteScript("tb:throttle", "{\"downloadSpeed\":10240, \"uploadSpeed\": 10240, \"latency\": 0, \"loss\": 0}");
#### Options:
| `tb:throttle`
Specifying a predefined condition |
Condition | Download Speed (kb/sec) | Upload Speed (kb/sec) | Latency (ms) || `airplane`
Simulate Offline Mode | 0 | 0 | 0 |
| `disable`
Default - useful if you want to undo the `offline` command. | no throttle | no throttle | no throttle |
| `edge` | 250 | 150 | 300 |
| `3G` | 400 | 100 | 100 |
| `4G` | 18000 | 9000 | 100 |
|
| `tb:throttle`
Specify custom settings |
`downloadSpeed` | `uploadSpeed` | `latency` || ... kb / sec | ... kb / sec | ... ms |
|
## Intercept/Mock
#### Description:
With these commands, you can intercept and even fake responses during your test.
Blacklist requests, add/modify headers, mock responses, ...
The `url` parameter supports wildcard statements, for example: `https://www.testingbot.com/*`.
### Redirect a URL
Instructs Chrome/Edge to redirect to `redirect` upon navigating to `url`.
[Java](https://testingbot.com#)[NodeJS](https://testingbot.com#)[C#](https://testingbot.com#)[Python](https://testingbot.com#)[Ruby](https://testingbot.com#)[PHP](https://testingbot.com#)
driver.execute_script("tb:intercept", {
"redirect": "https://www.google.com",
"url": "https://testingbot.com",
})
Map interceptMap = new HashMap<>();
interceptMap.put("redirect", "https://www.google.com");
interceptMap.put("url", "https://testingbot.com");
((JavascriptExecutor) driver).executeScript("tb:intercept", interceptMap);
$driver->executeScript("tb:intercept", [
"redirect" => "https://google.com",
"url" => "https://testingbot.com"
]);
driver.execute_script("tb:intercept", {
"redirect": "https://google.com",
"url": "https://testingbot.com"
})
await driver.executeScript('tb:intercept', {
"redirect": "https://google.com",
"url": "https://testingbot.com"
});
((IJavaScriptExecutor)driver).ExecuteScript("tb:intercept", "{\"redirect\":\"https://www.google.com\", \"url\": \"https://testingbot.com\"}");
### Trigger Failure
Allows you to return a specific error for a specific request.
[Possible errors](https://chromedevtools.github.io/devtools-protocol/tot/Network#type-ErrorReason):
- Failed
- Aborted
- TimedOut
- AccessDenied
- ConnectionClosed
- ConnectionReset
- ConnectionRefused
- ConnectionAborted
- ConnectionFailed
- NameNotResolved
- InternetDisconnected
- AddressUnreachable
- BlockedByClient
- BlockedByResponse
[Java](https://testingbot.com#)[NodeJS](https://testingbot.com#)[C#](https://testingbot.com#)[Ruby](https://testingbot.com#)[Python](https://testingbot.com#)[PHP](https://testingbot.com#)
driver.execute_script("tb:intercept", {
"error": "ConnectionRefused",
"url": "https://testingbot.com"
})
Map interceptMap = new HashMap<>();
interceptMap.put("error", "ConnectionRefused");
interceptMap.put("url", "https://testingbot.com");
((JavascriptExecutor) driver).executeScript("tb:intercept", interceptMap);
$driver->executeScript("tb:intercept", [
"error" => "ConnectionRefused",
"url" => "https://testingbot.com"
]);
driver.execute_script("tb:intercept", {
"error": "ConnectionRefused",
"url": "https://testingbot.com"
})
await driver.executeScript('tb:intercept', {
"error": "ConnectionRefused",
"url": "https://testingbot.com"
});
((IJavaScriptExecutor)driver).ExecuteScript("tb:intercept", "{\"error\":\"ConnectionRefused\", \"url\": \"https://testingbot.com\"}");
### Mock Response
Allows you to return a different response (body or headers).
[Java](https://testingbot.com#)[NodeJS](https://testingbot.com#)[C#](https://testingbot.com#)[Python](https://testingbot.com#)[Ruby](https://testingbot.com#)[PHP](https://testingbot.com#)
driver.execute_script("tb:intercept", {
"response": {
"statusCode": 200,
"headers": {
"x-a-header": "Sample"
},
"body": "Hello World"
},
"url": "https://testingbot.com"
})
Map mockMap = new HashMap<>();
Map headersMap = new HashMap<>();
headersMap.put("x-a-header", "Sample");
Map responseMap = new HashMap<>();
responseMap.put("statusCode", 200);
responseMap.put("headers", headersMap);
responseMap.put("body", "Hello World");
mockMap.put("response", responseMap);
mockMap.put("url", "https://testingbot.com");
((JavascriptExecutor) driver).executeScript("tb:intercept", mockMap);
$driver->executeScript("tb:intercept", [
"response" => [
"statusCode" => 200,
"headers" => [
"x-a-header" => "Sample"
],
"body" => "Hello World"
],
"url" => "https://testingbot.com"
]);
driver.execute_script("tb:intercept", {
"response": {
"statusCode": 200,
"headers": {
"x-a-header": "Sample"
},
"body": "Hello World"
},
"url": "https://testingbot.com"
})
await driver.executeScript('tb:intercept', {
"response": {
"statusCode": 200,
"headers": {
"x-a-header": "Sample"
},
"body": "Hello World"
},
"url": "https://testingbot.com"
});
((IJavaScriptExecutor)driver).ExecuteScript("tb:intercept", "{\"response\":{\"statusCode\": 200, \"headers\": { \"x-a-header\": \"Sample\"}, \"body\": \"Hello World\" }, \"url\": \"https://testingbot.com\"}");
## Retrieve Network Log
#### Description:
With the `tb:network` command you can fetch a log of network calls from Chrome and Microsoft Edge.
[Java](https://testingbot.com#)[NodeJS](https://testingbot.com#)[C#](https://testingbot.com#)[Python](https://testingbot.com#)[Ruby](https://testingbot.com#)[PHP](https://testingbot.com#)
driver.execute_script("tb:network")
((JavascriptExecutor) driver).executeScript("tb:network");
$driver->executeScript("tb:network");
driver.execute_script("tb:network")
await driver.executeScript('tb:network');
((IJavaScriptExecutor)driver).ExecuteScript("tb:network");
Was this page helpful? Yes No
## Looking for More Help?
Have questions or need more information?
You can reach us via the following channels:
- [Email us](https://testingbot.com/contact/new)
- [Join our Slack Channel](https://join.slack.com/t/testingb0t/shared_invite/zt-3bcw9xch-jk19~6XPs_xBrsAgAedkCw)
---
URL: https://testingbot.com/support/web-automate/selenium/php
### PHP Examples:
- [Behat](https://testingbot.com/support/web-automate/selenium/php/behat-mink)
- [Codeception](https://testingbot.com/support/web-automate/selenium/php/codeception)
- [Laravel Dusk](https://testingbot.com/support/web-automate/selenium/php/laravel-dusk)
- [PHPUnit](https://testingbot.com/support/web-automate/selenium/php/phpunit)
- [SimpleTest](https://testingbot.com/support/web-automate/selenium/php/simpletest)
# PHP Automated Testing
Let's start with making sure PHP is available on your system.
**For Windows:**
- You can download PHP for Windows from [PHP For Windows](https://windows.php.net/download/).
- Run the installer and follow the setup wizard to install PHP.
**For Linux:**
sudo apt-get install curl libcurl3 libcurl3-dev php
**For macOS:**
PHP should already be present on macOS by default.
[](https://testingbot.com#)
about:blank
See our [PHP example repository](https://github.com/testingbot/php-phpunit-example) for a first example on how to run PHP tests in parallel on TestingBot.
## Installation
With TestingBot you can easily run your automated tests with [any PHP test framework](https://testingbot.com#frameworks), here's a first example with **php-webdriver** :
php composer.phar require php-webdriver/webdriver
Save the example code below in a file called `sampletest.php`
"WINDOWS", "browserName"=>"chrome", "version" => "latest", "name" => "First Test"), 120000
);
$web_driver->get("https://google.com");
$element = $web_driver->findElement(WebDriverBy::name("q"));
if($element) {
$element->sendKeys("TestingBot");
$element->submit();
}
print $web_driver->getTitle();
$web_driver->quit();
?>
You can now run this test:
php sampletest.php
### Configuring capabilities
To run your existing tests on TestingBot, your tests will need to be configured to use the TestingBot remote machines. If the test was running on your local machine or network, you can simply change your existing test like this:
**Before:**
$web_driver = RemoteWebDriver::create("http://localhost:4444/wd/hub",
array("platform"=>"WINDOWS", "browserName"=>"chrome"), 120000);
**After:**
$web_driver = RemoteWebDriver::create(
"https://api_key:api_secret@hub.testingbot.com/wd/hub",
array("platform"=>"WINDOWS", "browserName"=>"chrome"), 120000);
## Specify Browsers & Devices
To let TestingBot know on which browser/platform/device you want to run your test on, you need to specify the browsername, version, OS and other optional options in the capabilities field.
$web_driver = RemoteWebDriver::create(
"http://api_key:api_secret@hub.testingbot.com/wd/hub",
$caps, 120000);
To see how to do this, please select a combination of browser, version and platform in the drop-down menus below.
Windows 11› Chrome 139
Loading environments...
Please wait while we load the available browsers and platforms.
## Testing Internal Websites
We've built [TestingBot Tunnel](https://testingbot.com/support/tunnel), to provide you with a secure way to run tests against your staged/internal webapps.
Please see our [TestingBot Tunnel documentation](https://testingbot.com/support/tunnel) for more information about this easy to use tunneling solution.
The example below shows how to easily run a PHP WebDriver test with our Tunnel:
1. [Download our tunnel](https://testingbot.com/support/tunnel) and start the tunnel:
java -jar testingbot-tunnel.jar key secret
2. Adjust your test: instead of pointing to `'hub.testingbot.com/wd/hub'` like the example above - change it to point to your tunnel's IP address.
Assuming you run the tunnel on the same machine you run your tests, change to `'localhost:4445/wd/hub'`. localhost is the machine running the tunnel, 4445 is the default port of the tunnel.
This way your test will go securely through the tunnel to TestingBot and back:
"WINDOWS", "browserName"=>"firefox", "version" => "latest", "name" => "First Test"), 120000
);
$web_driver->get("https://google.com");
$element = $web_driver->findElement(WebDriverBy::name("q"));
if($element) {
$element->sendKeys("TestingBot");
$element->submit();
}
print $web_driver->getTitle();
$web_driver->quit();
?>
## Run tests in Parallel
Parallel Testing means running the same test, or multiple tests, simultaneously. This greatly reduces your total testing time.
You can run the same tests on all different browser configurations or run different tests all on the same browser configuration.
TestingBot has a large grid of machines and browsers, which means you can use our service to do efficient parallel testing. It is one of the key features we provide to greatly cut down on your total testing time.
To run tests in parallel, we recommend using [Paratest](https://github.com/brianium/paratest), which makes it very easy to run multiple PHPUnit tests simultaneously.
vendor/bin/paratest -p 8 -f --phpunit=vendor/bin/phpunit WebdriverTest.php
The command above will run your tests in 8 separate processes (8 tests at once).
### Queuing
Every plan we provide comes with a limit of parallel tests.
If you exceed the number of parallel tests assigned to your account, TestingBot will queue the additional tests (for up to 6 minutes) and run the tests as soon as slots become available.
## Mark tests as passed/failed
As TestingBot has no way to determine whether your test passed or failed (it is determined by your business logic), we offer a way to send the test status back to TestingBot. This is useful if you want to see if a test succeeded or failed from the TestingBot member area.
You can use our [PHP API client](https://github.com/testingbot/testingbot-php) to report back test results.
$api = new TestingBot\TestingBotAPI($apiKey, $apiSecret);
$api->updateJob($web_driver->getSessionID(), array('name' => 'mytest', 'success' => true));
## Other PHP Framework examples
- [Behat](https://testingbot.com/support/web-automate/selenium/php/behat-mink)
Behat is a BDD framework which runs on PHP.
Mink is used for its browser emulation and works nicely together with Behat.
- [Codeception](https://testingbot.com/support/web-automate/selenium/php/codeception)
Codeception is a BDD-styled PHP testing framework.
This testing framework offers good Selenium support.
- [Laravel Dusk](https://testingbot.com/support/web-automate/selenium/php/laravel-dusk)
Laravel Dusk provides an easy-to-use browser automation testing framework.
- [PHPUnit](https://testingbot.com/support/web-automate/selenium/php/phpunit)
PHPUnit is the most popular unit testing framework for PHP.
It comes with good Selenium WebDriver support and is easy to set up.
- [SimpleTest](https://testingbot.com/support/web-automate/selenium/php/simpletest)
SimpleTest is a framework for unit testing, web site testing and mock objects for PHP.
Was this page helpful? Yes No
## Looking for More Help?
Have questions or need more information?
You can reach us via the following channels:
- [Email us](https://testingbot.com/contact/new)
- [Join our Slack Channel](https://join.slack.com/t/testingb0t/shared_invite/zt-3bcw9xch-jk19~6XPs_xBrsAgAedkCw)
---
URL: https://testingbot.com/support/web-automate/selenium/php/behat-mink
# Behat Automated Testing
See our [Behat 2 example](https://github.com/testingbot/behat-selenium-sample) or [Behat 3 example](https://github.com/testingbot/behat-selenium-sample/tree/behat3) for some simple examples on how to run Behat tests on TestingBot.
TestingBot supports Selenium tests using Behat. It's very easy to create or convert Behat tests to use our Selenium Grid.
Behat is a Behavior-Driven Development framework for PHP. You can find more information on the [Behat Documentation Pages](https://docs.behat.org/en/latest/).
## Installation
Make sure you have `Composer` installed:
curl http://getcomposer.org/installer | php
First make sure you've installed Behat. See this example with PHP Composer:
php composer.phar install
Next, let's create the necessary files:
**composer.json** :
{
"require": {
"behat/behat": "2.5.*@stable",
"facebook/webdriver": "dev-master",
"symfony/yaml": "*"
},
"config": {
"bin-dir": "bin/"
},
"scripts": {
"test": "composer single && composer parallel",
"single": "./vendor/behat/behat/bin/behat --config=config/single.conf.yml",
"parallel": "CONFIG_FILE=config/parallel.conf.yml /usr/bin/env php lib/parallel.php"
},
"autoload": {
"classmap": ["lib/"]
}
}
Now we can create a simple testcase, written in Behat:
**features/single/single.feature**
Feature: Google Search Functionality
Scenario: Can find search results
Given I am on "https://www.google.com/ncr"
When I search for "Google"
Then I should see "Google"
**lib/TestingBotContext.php** :
$value) {
if (!array_key_exists($key, $caps))
$caps[$key] = $value;
}
self::$driver = RemoteWebDriver::create($url, $caps);
}
/** @AfterFeature */
public static function tearDown()
{
self::$driver->quit();
}
}
?>
**features/bootstrap/FeatureContext.php** :
get($url);
}
/** @When /^I search for "([^"]*)"$/ */
public function iSearchFor($searchText) {
$element = self::$driver->findElement(WebDriverBy::name("q"));
$element->sendKeys($searchText);
$element->submit();
sleep(5);
}
/** @Then /^I get title as "([^"]*)"$/ */
public function iShouldGet($string) {
$title = self::$driver->getTitle();
if ((string) $string !== $title) {
throw new Exception("Expected title: '". $string. "'' Actual is: '". $title. "'");
}
}
/** @Then /^I should see "([^"]*)"$/ */
public function iShouldSee($string) {
$source = self::$driver->getPageSource();
if (strpos($source, $string) === false) {
throw new Exception("Expected to see: '". $string. "'' Actual is: '". $source. "'");
}
}
}
To actually run this test, we first need to add some TestingBot settings to `config/single.conf.yml`
default:
paths:
features: '../features/single'
bootstrap: '../features/bootstrap'
context:
parameters:
testingbot:
server: "hub.testingbot.com"
user: "key"
key: "secret"
capabilities:
build: "behat-selenium-sample"
name: "single-behat-test"
environments:
-
browserName: chrome
version: latest
platform: Win10
You can now run this test on TestingBot using the following command:
php composer.phar single
## Specify Browsers & Devices
To let TestingBot know on which browser/platform/device you want to run your test on, you need to specify the browsername, version, OS and other optional options in the capabilities field.
Windows 11› Chrome 139
Loading environments...
Please wait while we load the available browsers and platforms.
## Testing Internal Websites
We've built [TestingBot Tunnel](https://testingbot.com/support/tunnel), to provide you with a secure way to run tests against your staged/internal webapps.
Please see our [TestingBot Tunnel documentation](https://testingbot.com/support/tunnel) for more information about this easy to use tunneling solution.
The example below shows how to easily run a PHP WebDriver test with our Tunnel:
1. [Download TestingBot Tunnel](https://testingbot.com/support/tunnel) and start the tunnel:
java -jar testingbot-tunnel.jar key secret
2. Adjust your test: instead of pointing to `'hub.testingbot.com/wd/hub'` like the example above - change it to point to your tunnel's IP address.
Assuming you run the tunnel on the same machine you run your tests, change to `'localhost:4445/wd/hub'`. localhost is the machine running the tunnel, 4445 is the default port of the tunnel.
This way your test will go securely through the tunnel to TestingBot and back:
default:
paths:
features: '../features/single'
bootstrap: '../features/bootstrap'
context:
parameters:
testingbot:
server: "localhost:4445"
user: "key"
key: "secret"
## Run tests in Parallel
Parallel Testing means running the same test, or multiple tests, simultaneously. This greatly reduces your total testing time.
You can run the same tests on all different browser configurations or run different tests all on the same browser configuration.
TestingBot has a large grid of machines and browsers, which means you can use our service to do efficient parallel testing. It is one of the key features we provide to greatly cut down on your total testing time.
### Queuing
Every plan we provide comes with a limit of parallel tests.
If you exceed the number of parallel tests assigned to your account, TestingBot will queue the additional tests (for up to 6 minutes) and run the tests as soon as slots become available.
## Other PHP Framework examples
- [Behat](https://testingbot.com/support/web-automate/selenium/php/behat-mink)
Behat is a BDD framework which runs on PHP.
Mink is used for its browser emulation and works nicely together with Behat.
- [Codeception](https://testingbot.com/support/web-automate/selenium/php/codeception)
Codeception is a BDD-styled PHP testing framework.
This testing framework offers good Selenium support.
- [Laravel Dusk](https://testingbot.com/support/web-automate/selenium/php/laravel-dusk)
Laravel Dusk provides an easy-to-use browser automation testing framework.
- [PHPUnit](https://testingbot.com/support/web-automate/selenium/php/phpunit)
PHPUnit is the most popular unit testing framework for PHP.
It comes with good Selenium WebDriver support and is easy to set up.
- [SimpleTest](https://testingbot.com/support/web-automate/selenium/php/simpletest)
SimpleTest is a framework for unit testing, web site testing and mock objects for PHP.
Was this page helpful? Yes No
## Looking for More Help?
Have questions or need more information?
You can reach us via the following channels:
- [Email us](https://testingbot.com/contact/new)
- [Join our Slack Channel](https://join.slack.com/t/testingb0t/shared_invite/zt-3bcw9xch-jk19~6XPs_xBrsAgAedkCw)
---
URL: https://testingbot.com/support/web-automate/selenium/php/codeception
# Codeception Automated Testing
See our [CodeCeption example repository](https://github.com/testingbot/php-codeception-example) for a simple example on how to run CodeCeption tests in parallel on TestingBot.
We start with a simple test:
php codecept.phar generate:cept acceptance Welcome
Make sure you set these values in `tests/acceptance.suite.yml`
class_name: AcceptanceTester
env:
chrome:
modules:
enabled:
- WebDriver
config:
WebDriver:
url: 'https://www.google.com'
host: 'hub.testingbot.com'
port: 80
browser: chrome
capabilities:
'client_key': 'REPLACE_ME'
'client_secret': 'REPLACE_ME'
'platform' : 'Windows'
'name': 'Sample Codeception Tests'
firefox:
modules:
enabled:
- WebDriver
config:
WebDriver:
url: 'https://www.google.com'
host: 'hub.testingbot.com'
port: 80
browser: firefox
capabilities:
'client_key': 'REPLACE_ME'
'client_secret': 'REPLACE_ME'
'platform': LINUX
'name': 'Sample Codeception Tests'
Now we can run a basic example where we search for TestingBot on Google:
wantTo('Search TestingBot on Google');
$I->amOnPage('/');
$I->see('Google');
$I->fillField('q', 'TestingBot');
$I->click('btnG');
$I->see('TestingBot');
?>
Additional settings can be found on the [Codeception WebDriver Module page](https://codeception.com/docs/modules/WebDriver).
## Specify Browsers & Devices
To let TestingBot know on which browser/platform/device you want to run your test on, you need to specify the browsername, version, OS and other optional options in the capabilities field.
To see how to do this, please select a combination of browser, version and platform in the drop-down menus below.
Windows 11› Chrome 139
Loading environments...
Please wait while we load the available browsers and platforms.
## Mark tests as passed/failed
As TestingBot has no way to determine whether your test passed or failed (it is determined by your business logic), we offer a way to send the test status back to TestingBot. This is useful if you want to see if a test succeeded or failed from the TestingBot member area.
We've created an extension for Codeception: [testingbot/codeception-extension](https://github.com/testingbot/codeception-extension)
By including this in your tests, Codeception will automatically send back test-meta data to TestingBot (test name, success/failure, ...)
## Testing Internal Websites
We've built [TestingBot Tunnel](https://testingbot.com/support/tunnel), to provide you with a secure way to run tests against your staged/internal webapps.
Please see our [TestingBot Tunnel documentation](https://testingbot.com/support/tunnel) for more information about this easy to use tunneling solution.") %\>
The example below shows how to easily run a Codeception test with our Tunnel:
1. [Download our tunnel](https://testingbot.com/support/tunnel) and start the tunnel:
java -jar testingbot-tunnel.jar key secret
2. Adjust your test: instead of pointing to `'hub.testingbot.com/wd/hub'` like the example above - change it to point to your tunnel's IP address.
Assuming you run the tunnel on the same machine you run your tests, change to `'localhost:4445/wd/hub'`. localhost is the machine running the tunnel, 4445 is the default port of the tunnel.
This way your test will go securely through the tunnel to TestingBot and back. Edit the configuration in `tests/acceptance.suite.yml`:
class_name: AcceptanceTester
env:
chrome:
modules:
enabled:
- WebDriver
config:
WebDriver:
url: 'https://www.google.com'
host: 'localhost'
port: 4445
browser: chrome
capabilities:
'client_key': 'REPLACE_ME'
'client_secret': 'REPLACE_ME'
'platform' : 'Windows'
'name': 'Sample Codeception Tests'
## Run tests in Parallel
Parallel Testing means running the same test, or multiple tests, simultaneously. This greatly reduces your total testing time.
You can run the same tests on all different browser configurations or run different tests all on the same browser configuration.
TestingBot has a large grid of machines and browsers, which means you can use our service to do efficient parallel testing. It is one of the key features we provide to greatly cut down on your total testing time.
Please see [CodeCeption Parallel Execution Docs](https://codeception.com/docs/ParallelExecution) for more information on how to run tests in parallel with [Robo-paracept](https://github.com/Codeception/robo-paracept).
### Queuing
Every plan we provide comes with a limit of parallel tests.
If you exceed the number of parallel tests assigned to your account, TestingBot will queue the additional tests (for up to 6 minutes) and run the tests as soon as slots become available.
## Other PHP Framework examples
- [Behat](https://testingbot.com/support/web-automate/selenium/php/behat-mink)
Behat is a BDD framework which runs on PHP.
Mink is used for its browser emulation and works nicely together with Behat.
- [Codeception](https://testingbot.com/support/web-automate/selenium/php/codeception)
Codeception is a BDD-styled PHP testing framework.
This testing framework offers good Selenium support.
- [Laravel Dusk](https://testingbot.com/support/web-automate/selenium/php/laravel-dusk)
Laravel Dusk provides an easy-to-use browser automation testing framework.
- [PHPUnit](https://testingbot.com/support/web-automate/selenium/php/phpunit)
PHPUnit is the most popular unit testing framework for PHP.
It comes with good Selenium WebDriver support and is easy to set up.
- [SimpleTest](https://testingbot.com/support/web-automate/selenium/php/simpletest)
SimpleTest is a framework for unit testing, web site testing and mock objects for PHP.
Was this page helpful? Yes No
## Looking for More Help?
Have questions or need more information?
You can reach us via the following channels:
- [Email us](https://testingbot.com/contact/new)
- [Join our Slack Channel](https://join.slack.com/t/testingb0t/shared_invite/zt-3bcw9xch-jk19~6XPs_xBrsAgAedkCw)
---
URL: https://testingbot.com/support/web-automate/selenium/php/laravel-dusk
# Laravel Automated Testing
Let's start with making sure PHP is available on your system.
**For Windows:**
- You can download PHP for Windows from [PHP For Windows](https://windows.php.net/download/).
- Run the installer and follow the setup wizard to install PHP.
**For Linux:**
sudo apt-get install curl libcurl3 libcurl3-dev php
**For macOS:**
brew install php
## Installation
- Make sure you have [Composer installed](https://getcomposer.org/).
- Install the [Laravel Dusk Framework](https://laravel.com/docs/master/dusk) and other dependencies creating this `composer.json` file:
- Install the dependencies by running:
- Install the necessary Dusk files:
## Configuration
If you followed the steps above, you should now have a `tests/DuskTestCase.php` file.
You can now generate a sample test file, for example with:
php artisan dusk:make LoginTest
To connect your test with TestingBot, you'll need to edit the `tests/DuskTestCase.php` file with the following contents:
protected function driver()
{
$capabilities = DesiredCapabilities::chrome();
$capabilities->setCapability('platformName', 'WIN10');
$capabilities->setCapability('browserVersion', 'latest');
$capabilities->setCapability('tb:options', [
'key' => env('TESTINGBOT_KEY'),
'secret' => env('TESTINGBOT_SECRET'),
'name' => $this->getName()
]);
return RemoteWebDriver::create(
'https://hub.testingbot.com/wd/hub',
$capabilities,
120000
);
}
To run the test, please enter this command:
php artisan dusk
### Configuring capabilities
To run your existing tests on TestingBot, your tests will need to be configured to use the TestingBot remote machines. If the test was running on your local machine or network, you can simply change your existing test like this:
**Before:**
$capabilities = DesiredCapabilities::chrome();
$web_driver = RemoteWebDriver::create(
'http://localhost:4444/wd/hub',
$capabilities
);
**After:**
$capabilities = DesiredCapabilities::chrome();
$capabilities->setCapability('platformName', 'WIN10');
$capabilities->setCapability('browserVersion', 'latest');
$capabilities->setCapability('tb:options', [
'key' => env('TESTINGBOT_KEY'),
'secret' => env('TESTINGBOT_SECRET')
]);
$web_driver = RemoteWebDriver::create(
'https://hub.testingbot.com/wd/hub',
$capabilities
);
## Specify Browsers & Devices
To let TestingBot know on which browser/platform/device you want to run your test on, you need to specify the browsername, version, OS and other optional options in the capabilities field.
$capabilities->setCapability('tb:options', [
'key' => env('TESTINGBOT_KEY'),
'secret' => env('TESTINGBOT_SECRET')
]);
$web_driver = RemoteWebDriver::create(
'https://hub.testingbot.com/wd/hub',
$capabilities
);
To see how to do this, please select a combination of browser, version and platform in the drop-down menus below.
Windows 11› Chrome 139
Loading environments...
Please wait while we load the available browsers and platforms.
## Testing Internal Websites
We've built [TestingBot Tunnel](https://testingbot.com/support/tunnel), to provide you with a secure way to run tests against your staged/internal webapps.
Please see our [TestingBot Tunnel documentation](https://testingbot.com/support/tunnel) for more information about this easy to use tunneling solution.
The example below shows how to easily run a Laravel Dusk test with our Tunnel:
1. [Download our tunnel](https://testingbot.com/support/tunnel) and start the tunnel:
java -jar testingbot-tunnel.jar key secret
2. Adjust your test: instead of pointing to `'hub.testingbot.com/wd/hub'` like the example above - change it to point to your tunnel's IP address.
Assuming you run the tunnel on the same machine you run your tests, change to `'localhost:4445/wd/hub'`. localhost is the machine running the tunnel, 4445 is the default port of the tunnel.
This way your test will go securely through the tunnel to TestingBot and back:
protected function driver()
{
$capabilities = DesiredCapabilities::firefox();
$capabilities->setCapability('platformName', 'WIN10');
$capabilities->setCapability('browserVersion', 'latest');
$capabilities->setCapability('tb:options', [
'key' => env('TESTINGBOT_KEY'),
'secret' => env('TESTINGBOT_SECRET')
]);
return RemoteWebDriver::create(
'http://localhost:4445/wd/hub',
$capabilities,
120000
);
}
## Other PHP Framework examples
- [Behat](https://testingbot.com/support/web-automate/selenium/php/behat-mink)
Behat is a BDD framework which runs on PHP.
Mink is used for its browser emulation and works nicely together with Behat.
- [Codeception](https://testingbot.com/support/web-automate/selenium/php/codeception)
Codeception is a BDD-styled PHP testing framework.
This testing framework offers good Selenium support.
- [PHPUnit](https://testingbot.com/support/web-automate/selenium/php/phpunit)
PHPUnit is the most popular unit testing framework for PHP.
It comes with good Selenium WebDriver support and is easy to set up.
- [SimpleTest](https://testingbot.com/support/web-automate/selenium/php/simpletest)
SimpleTest is a framework for unit testing, web site testing and mock objects for PHP.
Was this page helpful? Yes No
## Looking for More Help?
Have questions or need more information?
You can reach us via the following channels:
- [Email us](https://testingbot.com/contact/new)
- [Join our Slack Channel](https://join.slack.com/t/testingb0t/shared_invite/zt-3bcw9xch-jk19~6XPs_xBrsAgAedkCw)
---
URL: https://testingbot.com/support/web-automate/selenium/php/phpunit
# PHPUnit Automated Testing
See our [PHPUnit example repository](https://github.com/testingbot/php-phpunit-example) for a simple example on how to run PHPUnit tests in parallel on TestingBot.
Let's start with making sure PHP is available on your system.
**For Windows:**
- You can download PHP for Windows from [PHP For Windows](https://windows.php.net/download/).
- Run the installer and follow the setup wizard to install PHP.
**For Linux:**
sudo apt-get install curl libcurl3 libcurl3-dev php
**For macOS:**
PHP should already be present on macOS by default.
## Installation
- Make sure you have [Composer installed](https://getcomposer.org/).
- Install PHPUnit by running this command in your terminal:
## PHPUnit Example
Require the PHP-WebDriver client like this:
php composer.phar require facebook/webdriver
Now, you can paste this example code in file called `WebDriverTest.php`
_session = RemoteWebDriver::create("https://api_key:api_secret@hub.testingbot.com/wd/hub",
array('platform' => "WINDOWS", "version" => 'latest', 'browserName' => 'chrome'), 120000
);
}
public function tearDown()
{
$this->sendTestStatusToTestingBot();
$this->_session->quit();
unset($this->_session);
parent::tearDown();
}
public function testTitle()
{
$this->_session->get('https://www.google.com/');
$this->assertEquals('Google', $this->_session->getTitle());
}
protected function sendTestStatusToTestingBot()
{
$sessionID = $this->_session->getSessionID();
$postData = array(
'session_id' => $sessionID,
'client_key' => "api_key",
'client_secret' => "api_secret",
'test[status_message]' => $this->getStatusMessage(),
'test[success]' => !$this->hasFailed(),
'test[name]' => $this->toString()
);
$data = http_build_query($postData);
$curl = curl_init();
curl_setopt($curl, CURLOPT_URL, "https://api.testingbot.com/v1/tests/" . $postData['session_id']);
curl_setopt($curl, CURLOPT_CUSTOMREQUEST, "PUT");
curl_setopt($curl, CURLOPT_RETURNTRANSFER, true);
curl_setopt($curl, CURLOPT_USERPWD, $postData['client_key'] . ":" . $postData['client_secret']);
curl_setopt($curl, CURLOPT_POSTFIELDS, $data);
$response = curl_exec($curl);
curl_close($curl);
}
}
To run the test, please enter this command:
./vendor/bin/phpunit WebDriverTest.php
### Configuring capabilities
To run your existing tests on TestingBot, your tests will need to be configured to use the TestingBot remote machines. If the test was running on your local machine or network, you can simply change your existing test like this:
**Before:**
$web_driver = RemoteWebDriver::create("http://localhost:4444/wd/hub",
array("platform"=>"WINDOWS", "browserName"=>"chrome"), 120000);
**After:**
$web_driver = RemoteWebDriver::create(
"https://api_key:api_secret@hub.testingbot.com/wd/hub",
array("platform"=>"WINDOWS", "browserName"=>"chrome"), 120000);
## Specify Browsers & Devices
To let TestingBot know on which browser/platform/device you want to run your test on, you need to specify the browsername, version, OS and other optional options in the capabilities field.
$web_driver = RemoteWebDriver::create(
"http://api_key:api_secret@hub.testingbot.com/wd/hub",
$caps, 120000);
To see how to do this, please select a combination of browser, version and platform in the drop-down menus below.
Windows 11› Chrome 139
Loading environments...
Please wait while we load the available browsers and platforms.
## Testing Internal Websites
We've built [TestingBot Tunnel](https://testingbot.com/support/tunnel), to provide you with a secure way to run tests against your staged/internal webapps.
Please see our [TestingBot Tunnel documentation](https://testingbot.com/support/tunnel) for more information about this easy to use tunneling solution.
The example below shows how to easily run a PHP WebDriver test with our Tunnel:
1. [Download our tunnel](https://testingbot.com/support/tunnel) and start the tunnel:
java -jar testingbot-tunnel.jar key secret
2. Adjust your test: instead of pointing to `'hub.testingbot.com/wd/hub'` like the example above - change it to point to your tunnel's IP address.
Assuming you run the tunnel on the same machine you run your tests, change to `'localhost:4445/wd/hub'`. localhost is the machine running the tunnel, 4445 is the default port of the tunnel.
This way your test will go securely through the tunnel to TestingBot and back:
_session = RemoteWebDriver::create("http://api_key:api_secret@localhost:4445/wd/hub",
array('platform' => "WINDOWS", "version" => 'latest', 'browserName' => 'firefox'), 120000
);
}
public function testTitle()
{
$this->_session->get('https://www.google.com/');
$this->assertEquals('Google', $this->_session->title());
}
}
## Run tests in Parallel
Parallel Testing means running the same test, or multiple tests, simultaneously. This greatly reduces your total testing time.
You can run the same tests on all different browser configurations or run different tests all on the same browser configuration.
TestingBot has a large grid of machines and browsers, which means you can use our service to do efficient parallel testing. It is one of the key features we provide to greatly cut down on your total testing time.
To run tests in parallel, we recommend using [Paratest](https://github.com/brianium/paratest), which makes it very easy to run multiple PHPUnit tests simultaneously.
vendor/bin/paratest -p 8 -f --phpunit=vendor/bin/phpunit WebdriverTest.php
The command above will run your tests in 8 separate processes (8 tests at once).
### Queuing
Every plan we provide comes with a limit of parallel tests.
If you exceed the number of parallel tests assigned to your account, TestingBot will queue the additional tests (for up to 6 minutes) and run the tests as soon as slots become available.
## Mark tests as passed/failed
As TestingBot has no way to determine whether your test passed or failed (it is determined by your business logic), we offer a way to send the test status back to TestingBot. This is useful if you want to see if a test succeeded or failed from the TestingBot member area.
You can use our [PHP API client](https://github.com/testingbot/testingbot-php) to report back test results.
$api = new TestingBot\TestingBotAPI($apiKey, $apiSecret);
$api->updateJob($web_driver->getSessionID(), array('name' => 'mytest', 'success' => true));
## Other PHP Framework examples
- [Behat](https://testingbot.com/support/web-automate/selenium/php/behat-mink)
Behat is a BDD framework which runs on PHP.
Mink is used for its browser emulation and works nicely together with Behat.
- [Codeception](https://testingbot.com/support/web-automate/selenium/php/codeception)
Codeception is a BDD-styled PHP testing framework.
This testing framework offers good Selenium support.
- [Laravel Dusk](https://testingbot.com/support/web-automate/selenium/php/laravel-dusk)
Laravel Dusk provides an easy-to-use browser automation testing framework.
- [PHPUnit](https://testingbot.com/support/web-automate/selenium/php/phpunit)
PHPUnit is the most popular unit testing framework for PHP.
It comes with good Selenium WebDriver support and is easy to set up.
- [SimpleTest](https://testingbot.com/support/web-automate/selenium/php/simpletest)
SimpleTest is a framework for unit testing, web site testing and mock objects for PHP.
Was this page helpful? Yes No
## Looking for More Help?
Have questions or need more information?
You can reach us via the following channels:
- [Email us](https://testingbot.com/contact/new)
- [Join our Slack Channel](https://join.slack.com/t/testingb0t/shared_invite/zt-3bcw9xch-jk19~6XPs_xBrsAgAedkCw)
---
URL: https://testingbot.com/support/web-automate/selenium/php/simpletest
# SimpleTest Automated Testing
You can find more information about SimpleTest on the [SimpleTest Repo](https://github.com/simpletest/simpletest).
To use the example below, you'll need to download [php-webdriver](https://github.com/php-webdriver/php-webdriver) as well.
"WINDOWS", "browserName" => "chrome", "version" => "latest"), 120000
);
$web_driver->get("https://www.google.com");
$this->assertEquals("Google", $web_driver->getTitle());
$element = $web_driver->findElement(WebDriverBy::name("q"));
if ($element) {
$element->sendKeys("TestingBot");
$element->submit();
}
$web_driver->quit();
}
function assertEquals($text, $value) {
if ($text === $value)
return true;
else
return false;
}
}
## Specify Browsers & Devices
To let TestingBot know on which browser/platform/device you want to run your test on, you need to specify the browsername, version, OS and other optional options in the capabilities field.
$web_driver = RemoteWebDriver::create(
"http://api_key:api_secret@hub.testingbot.com/wd/hub",
$caps, 120000);
To see how to do this, please select a combination of browser, version and platform in the drop-down menus below.
Windows 11› Chrome 139
Loading environments...
Please wait while we load the available browsers and platforms.
## Testing Internal Websites
We've built [TestingBot Tunnel](https://testingbot.com/support/tunnel), to provide you with a secure way to run tests against your staged/internal webapps.
Please see our [TestingBot Tunnel documentation](https://testingbot.com/support/tunnel) for more information about this easy to use tunneling solution.
The example below shows how to easily run a SimpleTest WebDriver test with our Tunnel:
1. [Download our tunnel](https://testingbot.com/support/tunnel) and start the tunnel:
java -jar testingbot-tunnel.jar key secret
2. Adjust your test: instead of pointing to `'hub.testingbot.com/wd/hub'` like the example above - change it to point to your tunnel's IP address.
Assuming you run the tunnel on the same machine you run your tests, change to `'localhost:4445/wd/hub'`. localhost is the machine running the tunnel, 4445 is the default port of the tunnel.
This way your test will go securely through the tunnel to TestingBot and back:
"WINDOWS", "browserName" => "chrome", "version" => "latest"), 120000
);
$web_driver->get("https://www.google.com");
$this->assertEquals("Google", $web_driver->getTitle());
$element = $web_driver->findElement(WebDriverBy::name("q"));
if ($element) {
$element->sendKeys("TestingBot");
$element->submit();
}
$web_driver->quit();
}
function assertEquals($text, $value) {
if ($text === $value) return true;
return false;
}
}
## Run tests in Parallel
Parallel Testing means running the same test, or multiple tests, simultaneously. This greatly reduces your total testing time.
You can run the same tests on all different browser configurations or run different tests all on the same browser configuration.
TestingBot has a large grid of machines and browsers, which means you can use our service to do efficient parallel testing. It is one of the key features we provide to greatly cut down on your total testing time.
To run tests in parallel, we recommend using [Paratest](https://github.com/brianium/paratest), which makes it very easy to run multiple PHPUnit tests simultaneously.
vendor/bin/paratest -p 8 -f --phpunit=vendor/bin/phpunit WebdriverTest.php
The command above will run your tests in 8 separate processes (8 tests at once).
### Queuing
Every plan we provide comes with a limit of parallel tests.
If you exceed the number of parallel tests assigned to your account, TestingBot will queue the additional tests (for up to 6 minutes) and run the tests as soon as slots become available.
## Mark tests as passed/failed
As TestingBot has no way to determine whether your test passed or failed (it is determined by your business logic), we offer a way to send the test status back to TestingBot. This is useful if you want to see if a test succeeded or failed from the TestingBot member area.
You can use our [PHP API client](https://github.com/testingbot/testingbot-php) to report back test results.
$api = new TestingBot\TestingBotAPI($apiKey, $apiSecret);
$api->updateJob($web_driver->getSessionID(), array('name' => 'mytest', 'success' => true));
## Other PHP Framework examples
- [Behat](https://testingbot.com/support/web-automate/selenium/php/behat-mink)
Behat is a BDD framework which runs on PHP.
Mink is used for its browser emulation and works nicely together with Behat.
- [Codeception](https://testingbot.com/support/web-automate/selenium/php/codeception)
Codeception is a BDD-styled PHP testing framework.
This testing framework offers good Selenium support.
- [Laravel Dusk](https://testingbot.com/support/web-automate/selenium/php/laravel-dusk)
Laravel Dusk provides an easy-to-use browser automation testing framework.
- [PHPUnit](https://testingbot.com/support/web-automate/selenium/php/phpunit)
PHPUnit is the most popular unit testing framework for PHP.
It comes with good Selenium WebDriver support and is easy to set up.
- [SimpleTest](https://testingbot.com/support/web-automate/selenium/php/simpletest)
SimpleTest is a framework for unit testing, web site testing and mock objects for PHP.
Was this page helpful? Yes No
## Looking for More Help?
Have questions or need more information?
You can reach us via the following channels:
- [Email us](https://testingbot.com/contact/new)
- [Join our Slack Channel](https://join.slack.com/t/testingb0t/shared_invite/zt-3bcw9xch-jk19~6XPs_xBrsAgAedkCw)
---
URL: https://testingbot.com/support/web-automate/selenium/java
### Java Examples:
- [JUnit](https://testingbot.com/support/web-automate/selenium/java/junit)
- [Parallel JUnit](https://testingbot.com/support/web-automate/selenium/java/parallel-junit)
- [Selenide](https://testingbot.com/support/web-automate/selenium/java/selenide)
- [TestNG](https://testingbot.com/support/web-automate/selenium/java/testng)
- [TestNG + Cucumber](https://testingbot.com/support/web-automate/selenium/java/testng-cucumber)
# Java Automated Testing
Let's start with making sure Java is available on your system. We recommend Java 11 or newer (LTS versions like 11, 17 or 21).
**For Windows:**
- Download Java from [Eclipse Adoptium](https://adoptium.net/) or [Oracle](https://www.oracle.com/java/technologies/downloads/).
- Run the installer and follow the setup wizard.
- Verify the installation: `java -version`
**For Linux (Debian/Ubuntu):**
sudo apt-get install openjdk-17-jdk
**For macOS:**
brew install openjdk@17
Alternatively, download from [Eclipse Adoptium](https://adoptium.net/).
## Example
With TestingBot you can easily run your automated tests with [any Java test framework](https://testingbot.com#frameworks). Here's a simple example to get started:
### Dependencies
Add the Selenium dependency to your project:
**Maven (pom.xml):**
org.seleniumhq.selenium
selenium-java
4.39.0
**Gradle (build.gradle):**
implementation 'org.seleniumhq.selenium:selenium-java:4.39.0'
Alternatively, you can [download the JAR files](https://www.selenium.dev/downloads/) `(selenium-java-*.zip)` manually.
### Basic Test
import org.openqa.selenium.WebDriver;
import org.openqa.selenium.chrome.ChromeOptions;
import org.openqa.selenium.remote.RemoteWebDriver;
import java.net.URL;
import java.util.HashMap;
import java.util.Map;
public class JavaSample {
public static final String KEY = "KEY";
public static final String SECRET = "SECRET";
public static final String URL = "https://" + KEY + ":" + SECRET + "@hub.testingbot.com/wd/hub";
public static void main(String[] args) throws Exception {
ChromeOptions options = new ChromeOptions();
Map tbOptions = new HashMap<>();
tbOptions.put("name", "My First Test");
tbOptions.put("platform", "WIN10");
options.setCapability("tb:options", tbOptions);
WebDriver driver = null;
try {
driver = new RemoteWebDriver(new URL(URL), options);
driver.get("https://testingbot.com");
System.out.println("Page title is: " + driver.getTitle());
} finally {
if (driver != null) {
driver.quit();
}
}
}
}
This test will start a remote Chrome browser on Windows 10, open the TestingBot website and print the title of the page.
This test does not make any assertions or verifications, but it's a quick intro in how to run a Java test on TestingBot.
Make sure to always stop your test (`driver.quit()`), otherwise it will continue running, leading to a timeout.
### Configuring capabilities
To run your existing tests on TestingBot, your tests will need to be configured to use the TestingBot remote machines. If the test was running on your local machine or network, you can simply change your existing test like this:
**Before:**
WebDriver driver = new FirefoxDriver();
**After:**
FirefoxOptions options = new FirefoxOptions();
WebDriver driver = new RemoteWebDriver(
new URL("https://key:secret@hub.testingbot.com/wd/hub"),
options
);
## Specify Browsers & Devices
To let TestingBot know on which browser/platform/device you want to run your test on, you need to specify the browsername, version, OS and other optional options in the capabilities field.
Windows 11› Chrome 139
Loading environments...
Please wait while we load the available browsers and platforms.
## Testing Internal Websites
We've built [TestingBot Tunnel](https://testingbot.com/support/tunnel), to provide you with a secure way to run tests against your staged/internal webapps.
Please see our [TestingBot Tunnel documentation](https://testingbot.com/support/tunnel) for more information about this easy to use tunneling solution.
The example below shows how to easily run a Java test with our Tunnel:
1. [Download our tunnel](https://testingbot.com/support/tunnel) and start the tunnel:
java -jar testingbot-tunnel.jar key secret
2. Adjust your test: instead of pointing to `'hub.testingbot.com/wd/hub'` like the example above - change it to point to your tunnel's IP address.
Assuming you run the tunnel on the same machine you run your tests, change to `'localhost:4445/wd/hub'`. localhost is the machine running the tunnel, 4445 is the default port of the tunnel.
This way your test will go securely through the tunnel to TestingBot and back:
import org.openqa.selenium.WebDriver;
import org.openqa.selenium.chrome.ChromeOptions;
import org.openqa.selenium.remote.RemoteWebDriver;
import java.net.URL;
import java.util.HashMap;
import java.util.Map;
public class JavaSample {
public static final String KEY = "KEY";
public static final String SECRET = "SECRET";
public static final String URL = "http://" + KEY + ":" + SECRET + "@localhost:4445/wd/hub";
public static void main(String[] args) throws Exception {
ChromeOptions options = new ChromeOptions();
Map tbOptions = new HashMap<>();
tbOptions.put("name", "Tunnel Test");
tbOptions.put("platform", "WIN10");
options.setCapability("tb:options", tbOptions);
WebDriver driver = null;
try {
driver = new RemoteWebDriver(new URL(URL), options);
driver.get("http://localhost:3000"); // Your internal website
System.out.println("Page title is: " + driver.getTitle());
} finally {
if (driver != null) {
driver.quit();
}
}
}
}
## Run tests in Parallel
Parallel Testing means running the same test, or multiple tests, simultaneously. This greatly reduces your total testing time.
You can run the same tests on all different browser configurations or run different tests all on the same browser configuration.
TestingBot has a large grid of machines and browsers, which means you can use our service to do efficient parallel testing. It is one of the key features we provide to greatly cut down on your total testing time.
Please see our [Parallel JUnit documentation](https://testingbot.com/support/web-automate/selenium/java/parallel-junit) for parallel testing.
### Queuing
Every plan we provide comes with a limit of parallel tests.
If you exceed the number of parallel tests assigned to your account, TestingBot will queue the additional tests (for up to 6 minutes) and run the tests as soon as slots become available.
## Mark Tests as Passed or Failed
To mark your test as passed or failed, or to send additional metadata to TestingBot, you can use our [API](https://testingbot.com/support/api).
We provide a [Java client library](https://github.com/testingbot/testingbot-java) to help you interact with the TestingBot API easily.
**Maven:**
com.testingbot
testingbotrest
1.0.10
**Gradle:**
implementation 'com.testingbot:testingbotrest:1.0.10'
Once integrated into your test suite, you can programmatically update the test status and send metadata such as test name, build ID, or tags to TestingBot.
import com.testingbot.comingbotrest.TestingbotREST;
import java.util.HashMap;
import java.util.Map;
@After
public void tearDown() throws Exception {
TestingbotREST api = new TestingbotREST("key", "secret");
Map data = new HashMap<>();
data.put("success", "1");
data.put("name", "My Test");
api.updateTest(driver.getSessionId().toString(), data);
driver.quit();
}
## Other Java Framework examples
- [JUnit](https://testingbot.com/support/web-automate/selenium/java/junit)
JUnit is a unit testing framework for the Java programming language.
- [Parallel JUnit](https://testingbot.com/support/web-automate/selenium/java/parallel-junit)
By running multiple JUnit tests at the same time you can cut down on overall test time.
- [TestNG](https://testingbot.com/support/web-automate/selenium/java/testng)
TestNG is a framework similar to JUnit and NUnit, which supports some additional commands and features.
- [TestNG + Cucumber](https://testingbot.com/support/web-automate/selenium/java/testng-cucumber)
Run tests with TestNG and BDD Cucumber.
- [Selenide](https://testingbot.com/support/web-automate/selenium/java/selenide)
Selenide is a Java-based test framework that provides a simple and concise API for writing Selenium tests.
Was this page helpful? Yes No
## Looking for More Help?
Have questions or need more information?
You can reach us via the following channels:
- [Email us](https://testingbot.com/contact/new)
- [Join our Slack Channel](https://join.slack.com/t/testingb0t/shared_invite/zt-3bcw9xch-jk19~6XPs_xBrsAgAedkCw)
---
URL: https://testingbot.com/support/web-automate/selenium/java/junit
# Set up your first Java test with JUnit
See our [JUnit example repository](https://github.com/testingbot/java-junit-example) for a simple example on how to run JUnit tests in parallel on TestingBot.
Below is a JUnit test example, showing you how to run a JUnit test on TestingBot
import org.junit.After;
import org.junit.Before;
import org.junit.Test;
import static org.junit.Assert.assertEquals;
import org.openqa.selenium.WebDriver;
import org.openqa.selenium.chrome.ChromeOptions;
import org.openqa.selenium.remote.RemoteWebDriver;
import java.net.URL;
import java.time.Duration;
import java.util.HashMap;
import java.util.Map;
public class SimpleTest {
private WebDriver driver;
@Before
public void setUp() throws Exception {
ChromeOptions options = new ChromeOptions();
Map tbOptions = new HashMap<>();
tbOptions.put("name", "My JUnit Test");
tbOptions.put("platform", "WIN10");
options.setCapability("tb:options", tbOptions);
String key = System.getenv("TB_KEY");
String secret = System.getenv("TB_SECRET");
driver = new RemoteWebDriver(
new URL("https://" + key + ":" + secret + "@hub.testingbot.com/wd/hub"),
options
);
driver.manage().timeouts().implicitlyWait(Duration.ofSeconds(30));
}
@Test
public void testSimple() throws Exception {
driver.get("https://www.google.com");
assertEquals("Google", driver.getTitle());
}
@After
public void tearDown() throws Exception {
if (driver != null) {
driver.quit();
}
}
}
### Configuring capabilities
To run your existing tests on TestingBot, your tests will need to be configured to use the TestingBot remote machines. If the test was running on your local machine or network, you can simply change your existing test like this:
**Before:**
WebDriver driver = new FirefoxDriver();
**After:**
FirefoxOptions options = new FirefoxOptions();
WebDriver driver = new RemoteWebDriver(
new URL("https://key:secret@hub.testingbot.com/wd/hub"),
options
);
## Specify Browsers & Devices
To let TestingBot know on which browser/platform/device you want to run your test on, you need to specify the browsername, version, OS and other optional options in the capabilities field.
Windows 11› Chrome 139
Loading environments...
Please wait while we load the available browsers and platforms.
## Testing Internal Websites
We've built [TestingBot Tunnel](https://testingbot.com/support/tunnel), to provide you with a secure way to run tests against your staged/internal webapps.
Please see our [TestingBot Tunnel documentation](https://testingbot.com/support/tunnel) for more information about this easy to use tunneling solution.
The example below shows how to easily run a JUnit test with our Tunnel:
1. [Download our tunnel](https://testingbot.com/support/tunnel) and start the tunnel:
java -jar testingbot-tunnel.jar key secret
2. Adjust your test: instead of pointing to `'hub.testingbot.com/wd/hub'` like the example above - change it to point to your tunnel's IP address.
Assuming you run the tunnel on the same machine you run your tests, change to `'localhost:4445/wd/hub'`. localhost is the machine running the tunnel, 4445 is the default port of the tunnel.
This way your test will go securely through the tunnel to TestingBot and back:
import org.junit.After;
import org.junit.Before;
import org.junit.Test;
import static org.junit.Assert.assertEquals;
import org.openqa.selenium.WebDriver;
import org.openqa.selenium.chrome.ChromeOptions;
import org.openqa.selenium.remote.RemoteWebDriver;
import java.net.URL;
import java.time.Duration;
import java.util.HashMap;
import java.util.Map;
public class SimpleTest {
private WebDriver driver;
@Before
public void setUp() throws Exception {
ChromeOptions options = new ChromeOptions();
Map tbOptions = new HashMap<>();
tbOptions.put("name", "Tunnel Test");
tbOptions.put("platform", "WIN10");
options.setCapability("tb:options", tbOptions);
String key = System.getenv("TB_KEY");
String secret = System.getenv("TB_SECRET");
driver = new RemoteWebDriver(
new URL("http://" + key + ":" + secret + "@localhost:4445/wd/hub"),
options
);
driver.manage().timeouts().implicitlyWait(Duration.ofSeconds(30));
}
@Test
public void testSimple() throws Exception {
driver.get("http://localhost:3000"); // Your internal website
assertEquals("My App", driver.getTitle());
}
@After
public void tearDown() throws Exception {
if (driver != null) {
driver.quit();
}
}
}
## Run tests in Parallel
Parallel Testing means running the same test, or multiple tests, simultaneously. This greatly reduces your total testing time.
You can run the same tests on all different browser configurations or run different tests all on the same browser configuration.
TestingBot has a large grid of machines and browsers, which means you can use our service to do efficient parallel testing. It is one of the key features we provide to greatly cut down on your total testing time.
Please see our [Parallel JUnit documentation](https://testingbot.com/support/web-automate/selenium/java/parallel-junit) for parallel testing.
### Queuing
Every plan we provide comes with a limit of parallel tests.
If you exceed the number of parallel tests assigned to your account, TestingBot will queue the additional tests (for up to 6 minutes) and run the tests as soon as slots become available.
## Mark tests as passed/failed
To mark your test as passed or failed, or to send additional metadata to TestingBot, you can use our [API](https://testingbot.com/support/api).
We provide a [Java client library](https://github.com/testingbot/testingbot-java) to help you interact with the TestingBot API easily.
**Maven:**
com.testingbot
testingbotrest
1.0.10
**Gradle:**
implementation 'com.testingbot:testingbotrest:1.0.10'
Once integrated into your test suite, you can programmatically update the test status and send metadata such as test name, build ID, or tags to TestingBot.
import com.testingbot.comingbotrest.TestingbotREST;
import java.util.HashMap;
import java.util.Map;
@After
public void tearDown() throws Exception {
TestingbotREST api = new TestingbotREST("key", "secret");
Map data = new HashMap<>();
data.put("success", "1");
data.put("name", "My Test");
api.updateTest(driver.getSessionId().toString(), data);
driver.quit();
}
## Other Java Framework examples
- [JUnit](https://testingbot.com/support/web-automate/selenium/java/junit)
JUnit is a unit testing framework for the Java programming language.
- [Parallel JUnit](https://testingbot.com/support/web-automate/selenium/java/parallel-junit)
By running multiple JUnit tests at the same time you can cut down on overall test time.
- [TestNG](https://testingbot.com/support/web-automate/selenium/java/testng)
TestNG is a framework similar to JUnit and NUnit, which supports some additional commands and features.
- [TestNG + Cucumber](https://testingbot.com/support/web-automate/selenium/java/testng-cucumber)
Run tests with TestNG and BDD Cucumber.
- [Selenide](https://testingbot.com/support/web-automate/selenium/java/selenide)
Selenide is a Java-based test framework that provides a simple and concise API for writing Selenium tests.
Was this page helpful? Yes No
## Looking for More Help?
Have questions or need more information?
You can reach us via the following channels:
- [Email us](https://testingbot.com/contact/new)
- [Join our Slack Channel](https://join.slack.com/t/testingb0t/shared_invite/zt-3bcw9xch-jk19~6XPs_xBrsAgAedkCw)
---
URL: https://testingbot.com/support/web-automate/selenium/java/parallel-junit
# Speed up JUnit tests by running them in parallel
By running multiple JUnit tests at the same time you can cut down on overall test time.
## Helper class needed to run JUnit tests in parallel
import java.util.concurrent.ExecutorService;
import java.util.concurrent.Executors;
import java.util.concurrent.TimeUnit;
import org.junit.runners.Parameterized;
import org.junit.runners.model.RunnerScheduler;
public class Parallelized extends Parameterized {
private static class ThreadPoolScheduler implements RunnerScheduler {
private ExecutorService executor;
public ThreadPoolScheduler() {
String threads = System.getProperty("junit.parallel.threads", "16");
int numThreads = Integer.parseInt(threads);
executor = Executors.newFixedThreadPool(numThreads);
}
@Override
public void finished() {
executor.shutdown();
try {
executor.awaitTermination(10, TimeUnit.MINUTES);
} catch (InterruptedException exc) {
throw new RuntimeException(exc);
}
}
@Override
public void schedule(Runnable childStatement) {
executor.submit(childStatement);
}
}
public Parallelized(Class klass) throws Throwable {
super(klass);
setScheduler(new ThreadPoolScheduler());
}
}
Below is a JUnit Test example, which uses the above helper class to run the test in parallel.
import java.io.File;
import java.io.IOException;
import java.net.URL;
import java.util.HashMap;
import java.util.LinkedList;
import java.util.Map;
import org.apache.commons.io.FileUtils;
import org.junit.After;
import org.junit.Before;
import org.junit.Test;
import org.junit.runner.RunWith;
import org.junit.runners.Parameterized;
import org.openqa.selenium.OutputType;
import org.openqa.selenium.TakesScreenshot;
import org.openqa.selenium.WebDriver;
import org.openqa.selenium.chrome.ChromeOptions;
import org.openqa.selenium.remote.RemoteWebDriver;
@RunWith(Parallelized.class)
public class JUnitParallel {
private String platform;
private String browserName;
private String browserVersion;
@Parameterized.Parameters
public static LinkedList getEnvironments() throws Exception {
LinkedList env = new LinkedList<>();
env.add(new String[]{"WIN10", "chrome", "latest"});
env.add(new String[]{"WIN10", "firefox", "latest"});
env.add(new String[]{"WIN10", "MicrosoftEdge", "latest"});
// Add more browser configurations here
return env;
}
public JUnitParallel(String platform, String browserName, String browserVersion) {
this.platform = platform;
this.browserName = browserName;
this.browserVersion = browserVersion;
}
private WebDriver driver;
@Before
public void setUp() throws Exception {
ChromeOptions options = new ChromeOptions();
options.setCapability("browserName", browserName);
options.setCapability("browserVersion", browserVersion);
options.setCapability("platformName", platform);
Map tbOptions = new HashMap<>();
tbOptions.put("name", "Parallel JUnit Test");
options.setCapability("tb:options", tbOptions);
driver = new RemoteWebDriver(
new URL("https://key:secret@hub.testingbot.com/wd/hub"),
options
);
}
@Test
public void testSimple() throws Exception {
driver.get("https://www.google.com");
String title = driver.getTitle();
System.out.println("Page title is: " + title);
File srcFile = ((TakesScreenshot) driver).getScreenshotAs(OutputType.FILE);
try {
FileUtils.copyFile(srcFile, new File("Screenshot.png"));
} catch (IOException e) {
e.printStackTrace();
}
}
@After
public void tearDown() throws Exception {
driver.quit();
}
}
## Specify Browsers & Devices
To let TestingBot know on which browser/platform/device you want to run your test on, you need to specify the browsername, version, OS and other optional options in the capabilities field.
Windows 11› Chrome 139
Loading environments...
Please wait while we load the available browsers and platforms.
## Testing Internal Websites
We've built [TestingBot Tunnel](https://testingbot.com/support/tunnel), to provide you with a secure way to run tests against your staged/internal webapps.
Please see our [TestingBot Tunnel documentation](https://testingbot.com/support/tunnel) for more information about this easy to use tunneling solution.
The example below shows how to easily run a JUnit test with our Tunnel:
1. [Download our tunnel](https://testingbot.com/support/tunnel) and start the tunnel:
java -jar testingbot-tunnel.jar key secret
2. Adjust your test: instead of pointing to `'hub.testingbot.com/wd/hub'` like the example above - change it to point to your tunnel's IP address.
Assuming you run the tunnel on the same machine you run your tests, change to `'localhost:4445/wd/hub'`. localhost is the machine running the tunnel, 4445 is the default port of the tunnel.
This way your test will go securely through the tunnel to TestingBot and back:
@Before
public void setUp() throws Exception {
ChromeOptions options = new ChromeOptions();
options.setCapability("browserName", browserName);
options.setCapability("browserVersion", browserVersion);
options.setCapability("platformName", platform);
Map tbOptions = new HashMap<>();
tbOptions.put("name", "Parallel Tunnel Test");
options.setCapability("tb:options", tbOptions);
driver = new RemoteWebDriver(
new URL("http://key:secret@localhost:4445/wd/hub"),
options
);
}
## Mark tests as passed/failed
To see if a test passed or not in our member area, or to send additional meta-data to TestingBot, you need to use our [API](https://testingbot.com/support/api).
TestingBot has a [Java client](https://github.com/testingbot/testingbot-java) for using the TestingBot API.
**Maven:**
com.testingbot
testingbotrest
1.0.10
**Gradle:**
implementation 'com.testingbot:testingbotrest:1.0.10'
Once included with your tests, you can send back test status and other meta-data to TestingBot:
import com.testingbot.comingbotrest.TestingbotREST;
import java.util.HashMap;
import java.util.Map;
@After
public void tearDown() throws Exception {
TestingbotREST api = new TestingbotREST("key", "secret");
Map data = new HashMap<>();
data.put("success", "1");
data.put("name", "My Test");
api.updateTest(driver.getSessionId().toString(), data);
driver.quit();
}
## Other Java Framework examples
- [JUnit](https://testingbot.com/support/web-automate/selenium/java/junit)
JUnit is a unit testing framework for the Java programming language.
- [Parallel JUnit](https://testingbot.com/support/web-automate/selenium/java/parallel-junit)
By running multiple JUnit tests at the same time you can cut down on overall test time.
- [TestNG](https://testingbot.com/support/web-automate/selenium/java/testng)
TestNG is a framework similar to JUnit and NUnit, which supports some additional commands and features.
- [TestNG + Cucumber](https://testingbot.com/support/web-automate/selenium/java/testng-cucumber)
Run tests with TestNG and BDD Cucumber.
Was this page helpful? Yes No
## Looking for More Help?
Have questions or need more information?
You can reach us via the following channels:
- [Email us](https://testingbot.com/contact/new)
- [Join our Slack Channel](https://join.slack.com/t/testingb0t/shared_invite/zt-3bcw9xch-jk19~6XPs_xBrsAgAedkCw)
---
URL: https://testingbot.com/support/web-automate/selenium/java/selenide
# Selenide Automated Testing
TestingBot has a [Selenide example GitHub project](https://github.com/testingbot/java-testng-selenide-example) available. This contains an example on how to run Selenide tests with TestingBot.
Selenide is a Java-based test framework, capable of using Selenium WebDriver to test websites on (remote) browsers. You can use Selenide in combination with a test framework such as JUnit, TestNG, Cucumber and others. The syntax used by Selenide is short, it uses a concise API that makes your test code shorter and perhaps more readable.
To get started, let's go over all the necessary steps required to run your first test with TestNG and Selenide, using TestingBot's remote browsers.
## Prerequisites
Let's start with making sure Java is available on your system. Starting with Selenide 7, at least Java 17 is required.
**For Windows:**
- You can download Java for Windows from [Java.com](https://www.java.com/en/download/manual.jsp)
- Run the installer and follow the setup wizard to install Java.
**For Linux (Debian/Ubuntu):**
sudo apt-get install openjdk-17-jdk
**For macOS:**
brew install openjdk@17
Alternatively, download from [Eclipse Adoptium](https://adoptium.net/).
## Set up pom.xml dependencies
Now we can specify which dependencies we need to be able to run a test. Create a new file called `pom.xml` and make sure to define at least the following dependencies:
- `com.codeborne:selenide``org.testng:testng``org.seleniumhq.selenium:selenium-java`