Appium is an open-source framework, designed to run automated tests on physical mobile devices, as well as on iOS Simulators and Android Emulators.
This tutorial will focus on using Appium for automated testing. We will provide some tips and tricks, performance optimizations and ways to use Appium Inspector to troubleshoot your native mobile app testing.
What is Appium and why do I need it?
This is a good Appium interview question to start with: what is Appium and why would I need to use it?
Appium is an open-source project which allows you to run automated tests on iOS and Android devices, both physical and emulators/simulators.
You can automatically control and test both native mobile apps and hybrid mobile apps (for example apps with a WebView).
Appium is cross-platform: you can write and run tests on both Windows, macOS and Linux and run tests on iOS, Android and Windows devices.
The project is compatible with WebDriver's W3C protocol. There are language bindings available for Java, C#, Ruby, Javascript and other popular languages and test frameworks.
Behind the scenes, Appium will instruct the mobile app through either Android Espresso or Apple's XCUITest to control the mobile app. You can run tests against mobile Safari, Chrome, Firefox, Samsung Browser, Opera and others.
If you are looking to do automated testing, either app testing or website testing, then we definitely recommend checking out Appium.
TestingBot provides a 100% compatible Appium grid; consisting of iOS simulators, Android emulators and physical devices, ready for your automated mobile app testing.
How can I get started with Appium?
Appium is written in NodeJS (Javascript), so you will need to install it via either npm i appium or yarn add appium.
Depending on the mobile devices or emulators/simulators you want to test on, you will need to install this on either a Linux, macOS or Windows operating system.
Once installed, you can verify if everything is set up correctly to start using Appium. You can use the appium-doctor utility for this.
Simply install with npm install -g appium-doctor and then run appium-doctor with either a --ios or --android argument flag.
Once everything is installed and verified, you can start Appium by running this command in a terminal window: $ appium.
This will start a service on Appium's default port: 4723.
You are now ready to start your first test with an Appium client (or WebDriver client, as it's the same protocol). For an example, see the Javascript code snippet below:
// javascript
const opts = {
  path: '/wd/hub',
  port: 4723,
  capabilities: {
    platformName: "Android",
    platformVersion: "12",
    deviceName: "Android Emulator",
    browserName: "chrome"
  }
};

async function main () {
  const client = await wdio.remote(opts);
  await client.deleteSession();
}

main();
This will start an automated Chrome session on the Android Emulator (version 12), which you've configured on your system.
There's no actions yet in the snippet, so the only thing this will do is open and close an Android emulator.
The upcoming Appium 2.0 edition, which offers a new driver and plugin ecosystem, with decoupled drivers and improved standardisation, can be installed like this:
Copynpm install -g appium@next
Optimize the performance of your Appium tests
Appium comes with over 100 different configuration capabilities which you can fine-tune for performance.
We'll go over the most popular capabilities that may affect the performance of your Appium test sessions. Some are used by both iOS and Android, others can only be used by either iOS or Android.
-
noReset:
By default Appium will reset as much as possible in between sessions. Artifacts that may impact tests are removed, to guarantee a pristine state for every session. If you do not require this, setting this to
falsewill speed up execution. -
fullReset:
This will try to do a more thorough reset than the default reset. Only use this if you really have to.
-
isHeadless:
Setting this to
truewill launch your simulator or emulator without a visible UI. This will increase performance because there's no UI to be updated during the tests.
-
autoGrantPermission:
Set this capability to
trueto allow Appium to automatically determine your app permissions and grant them at the start of the test. -
appWaitPackage / appWaitActivity:
An Android app consists of at least one activity. Often times, the activity used to launch the application is not identical to the activity which the user interacts with. Sometimes you might have to tell Appium which activity to wait for, before starting the test session. Use the
appWaitPackageorappWaitActivitycapability to tell Appium to wait until an activity is active. -
skipUnlock:
Appium uses a helper app to check if the device or emulator under test is locked. If it is, Appium will try to unlock it. If you know the device or emulator is not locked, you can specify
trueto skip this step, which should save a couple of seconds at the start of the test. -
skipDeviceInitialization:
If you pass
truewith this capability, Appium will not install the io.appium.settings helper app. If you know this settings app is already installed on the device, then enabling this should shave off a couple of seconds. -
skipServerInstallation:
If you are using
UiAutomator2as automation method, then Appium needs to install appium-uiautomator2-server on the device. If you know this is already present on the device, then enabling this capability will skip this step and should improve test startup time. -
ignoreUnimportantViews:
If you enable this capability, Appium will be able to find elements using XPath locators considerably faster. The reason for this is that Android uses two modes for layout hierarchy: normal and compressed. Enabling this will use the compressed hierarchy, which should be faster.
-
iosInstallPause:
If you have a large iOS app, it might take a while to launch. Use this capability, specifying the number of milliseconds, to let Appium know how long to wait before starting the test.
-
maxTypingFrequency:
This capability specifies the maximum speed when typing on an iOS device or simulator. The higher you set this, the faster your test will be. The default is 60.
-
realDeviceScreenshotter:
This will use the idevicescreenshot program, which is part of libimobiledevice, to capture screenshots. It should be more performant on physical devices, compared to the default screenshot utility used by Appium.
-
simpleIsVisibleCheck:
This will use a simpler visible check than the default one used by WebDriverAgent. It might be less stable, but should be faster.
What is Appium Inspector (or Appium Desktop)?
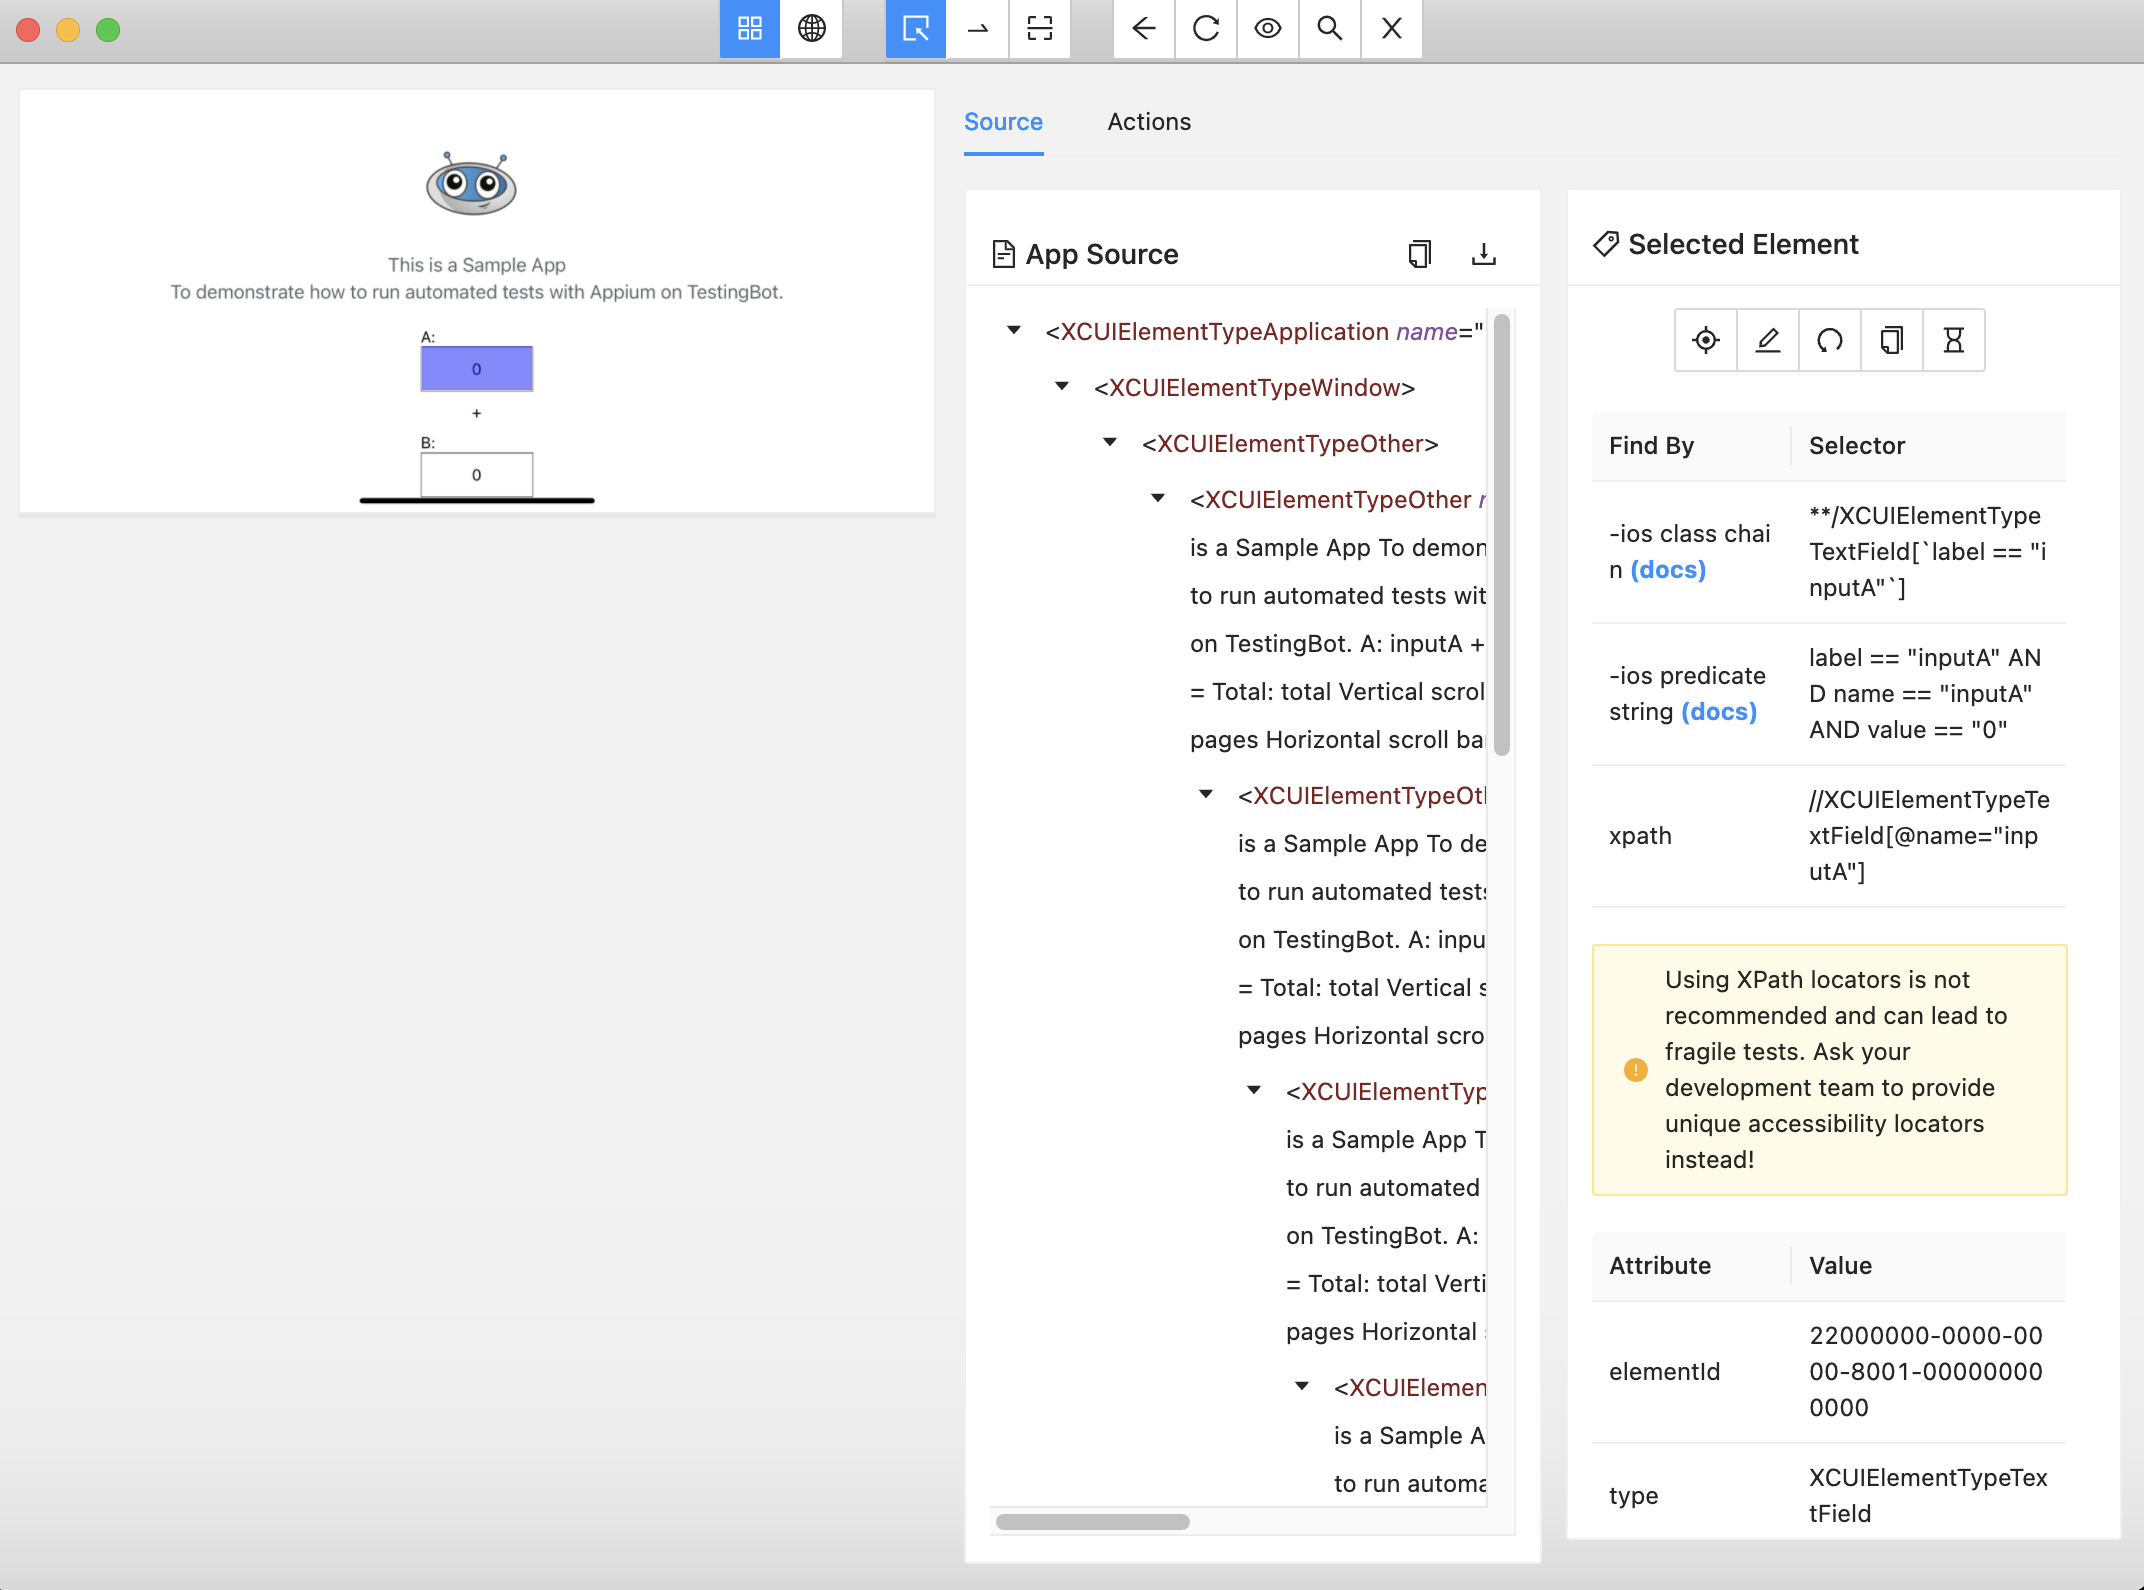
Appium Inspector, formerly known as Appium Desktop, is a GUI inspector for mobile iOS and Android apps.
You can use the inspector to locate and identify UI elements in a mobile application, through the element hierarchy of a specific view.
Appium Inspector is updated regularly and can be downloaded from the Appium Desktop page.
Many developers and QA use the inspector to copy element locators, which can be used in automated Appium test scripts. Please see the list below for more details on which locators you can use.
- class name: find an element by its class name
- id: find an element by its id (which is unique)
- name: find an element by its name
- xpath: use XPath to identify an UI element
- accessibility id: the accessibility id can be used to find an element. It is good practice to use accessibility IDs for all your UI elements.
-
-ios predicate string: Predicate Format Strings allow for basic matching of elements according to multiple element attributes, including
name,value,label,type,visibleand more. - -ios class chain: this is like a hybrid between XPath and iOS predicate strings, implemented by Appium to make hierarchical queries more performant. More information is available on the Class Chain Queries documentation page.
- css selector: use the CSS selector. This only works for tests against websites, not native mobile apps.
- link text or partial link text: find an element through its link text, web only.
- tag name: find an element by its tag
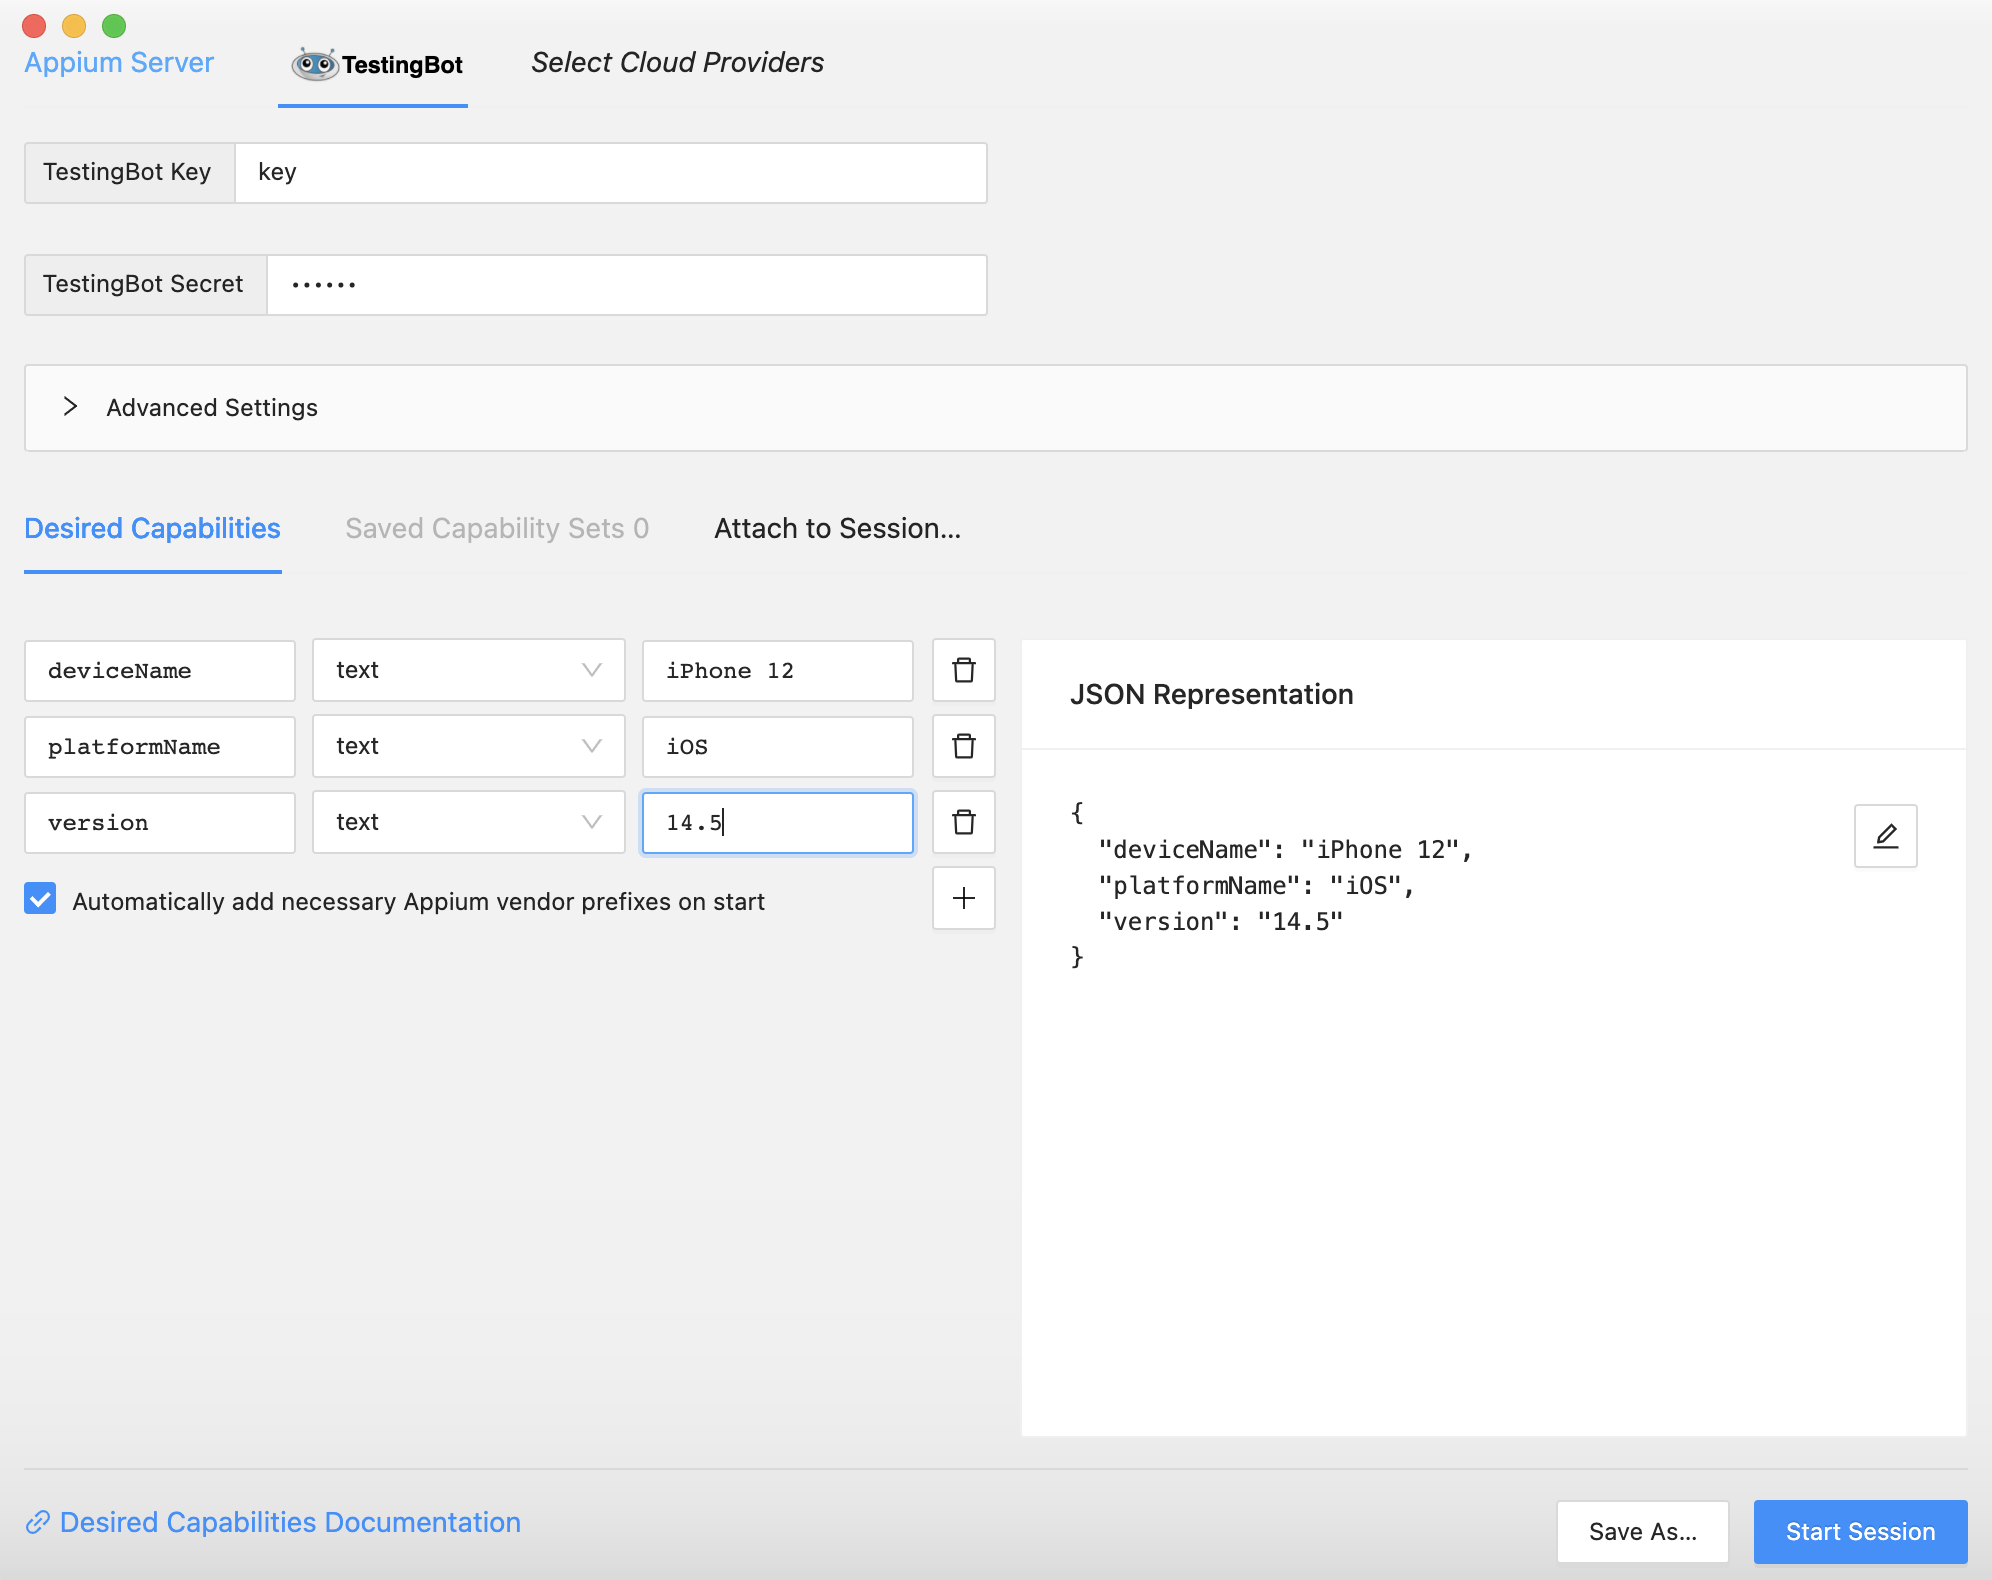
TestingBot is included as a Cloud Provider in Appium Inspector.
Simply enable TestingBot as a cloud provider, to start using Appium Inspector with the TestingBot Real Device cloud.

Once enabled, add your TestingBot credentials and the capabilities you want to use to immediately start inspecting apps on physical iOS and Android devices.
Simply click a UI element through the live view, or view hierarchy, to retrieve the element attributes, XPath locator, iOS class chain or predicate strings and more.

How do I test native mobile apps and hybrid apps with Appium?
To start testing native mobile apps with Appium, first download and install Appium from the Appium Website.
Next, make sure the device you want to test on is connected to your computer, through USB cable for example.
Start Appium by running the appium command. You should see a message that Appium has successfully started and is listening on port 4723.
Now you can start writing your first automated test, to run on the physical device connected to your computer, via Appium.
For this example, let's use WebDriverIO, which is a popular framework, designed to run automated tests.
Install WebDriverIO, with the command below:
npm install webdriverioYou can now copy and paste this Hello World example to run your first test.
const opts = {
  path: '/wd/hub',
  port: 4723,
  capabilities: {
    platformName: "Android",
    platformVersion: "12",
    deviceName: "Android Emulator",
    app: "/path/to/the/downloaded/ApiDemos-debug.apk",
    appPackage: "io.appium.android.apis",
    appActivity: ".view.TextFields",
    automationName: "UiAutomator2"
  }
};

async function main () {
  const client = await wdio.remote(opts);

  await client.deleteSession();
}

main();
To use the example above, please make sure to download the example apk file and specify its path.
Of course, the example above is not really a test, as it does not assert anything.
Let's change that by performing some actions and verifying if the actions were successful.
We will lookup an element through its locator, type something in the input field, fetch the input's value and verify if it equals to what we have typed.
async function main () {
  const client = await wdio.remote(opts);

  const field = await client.$("android.widget.EditText");
  await field.setValue("Hello World!");
  const value = await field.getText();
  assert.strictEqual(value, "Hello World!");

  await client.deleteSession();
}
Appium testing in the Cloud
Testing on multiple devices means buying, setting up and maintaining multiple physical devices, which is both costly and time-consuming.
Take advantage of TestingBot's cloud based grid, consisting of both iOS and Android physical devices to run your automated mobile app tests.
Setting up Appium Cloud Testing on TestingBot is as simple as changing some configuration settings in your existing tests. Once configured, you will be able to run simultaneous tests on actual devices such as iPhones, iPads, Pixel and Samsung devices.
