In this blog post we'll highlight how easy it is to start testing websites with .NET framework 4 or .NET framework 3 and C#. NUnit is built for all .NET languages and is basically a unit testing framework. It's written in C# and integrates nicely with .NET and its features/syntax.
You can use NUnit with Visual Studio or MonoDevelop. In this example we'll use MonoDevelop simply because it's supported on multiple platforms. If you don't have MonoDevelop yet, you can get it here.
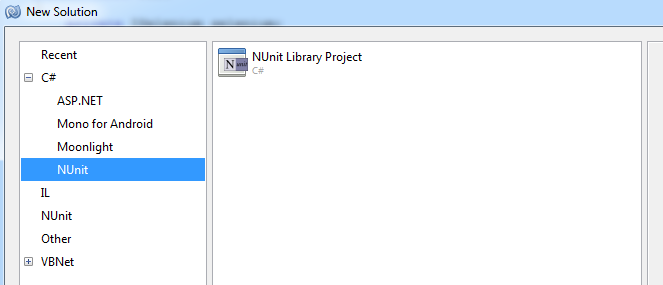
After installing MonoDevelop, create a new C# NUnit Library Project.

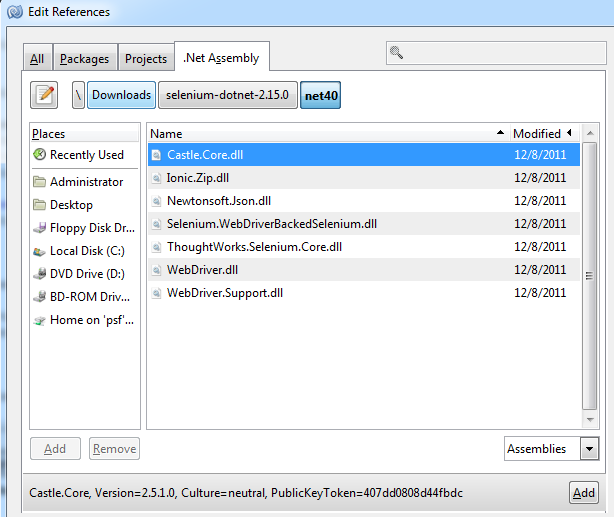
We can now start running unit tests with C#. To use Selenium in your unit tests, you'll need to download the official C# Selenium client. Once you've unzipped the file, you'll have DLL files (in net40 and net35 folders, we're using .NET 4 so net40 folder). You need to add these DLL files to your NUnit project.
In MonoDevelop click Project - Edit References. Browse to your unpacked folder and select all the DLL files, click the add button.

You can now use the Selenium library in your unit test. In its basic form, a unit test looks like:
using NUnit.Framework;
using System;
using Selenium;
using System.Web;
using System.Text;
using System.Net;
using OpenQA.Selenium;
using OpenQA.Selenium.Remote;

namespace Test
{
  [TestFixture()]
  public class Test
  {
    private IWebDriver driver;

        [SetUp]
        public void Init()
        {
            DesiredCapabilities capabilities = DesiredCapabilities.InternetExplorer();
            capabilities.SetCapability(CapabilityType.Version, "8");
      capabilities.SetCapability("api_key", "...");
            capabilities.SetCapability("api_secret", "...");

            driver = new RemoteWebDriver(
                new Uri("http://hub.testingbot.com:4444/wd/hub/"), capabilities);
        }

        [Test]
        public void TestCase()
        {
            driver.Navigate().GoToUrl("http://www.google.com");
            StringAssert.Contains("Google", driver.Title);
        }

        [TearDown]
        public void Cleanup()
        {
            driver.Quit();
        }
  }
}
The DesiredCapabilities capabilities = DesiredCapabilities.InternetExplorer(); indicates we want to run our test on an Internet Explorer browser.
The CapabilityType.Version means we want to run it on version 8 of Internet Explorer. Don't forget to set the api_key and api_secret values to the key and secret you received from us (available in our member area).
Every testcase we want to build should have a [Test] annotation above its function and indicate to the driver the URL that the browser should open. For example in our TestCase function we send Selenium the command to navigate to the Google website. We then assert (verify/test) that the title of the current page (Google's Homepage) is Google (which it is).
To run this test, click the Run menu item and click Run.
The test will now run on our Grid and should give back results in moments.
Run your Selenium tests in C# for free on our browsers with our free trial account. If you should have questions or remarks, please leave a comment.