Jenkins Plugin
We maintain a plugin for Jenkins which integrates TestingBot's services inside Jenkins.
- Run your tests through our secure tunnel between your staging environment (Jenkins) and our grid.
- See a video and screenshots of every test from inside Jenkins.
- Displays a detailed list of Selenium steps, metadata, log files and errors.
- Report test success results to TestingBot.
- Supports Jenkins Credentials and Pipeline (Jenkinsfile).
The plugin's Wiki on Jenkin's website provides the information required to install, configure and use our plugin.
1. Installation
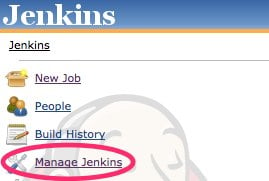
Click the "Manage Jenkins" link from the Jenkins homepage.
2. Choose Manage Plugins
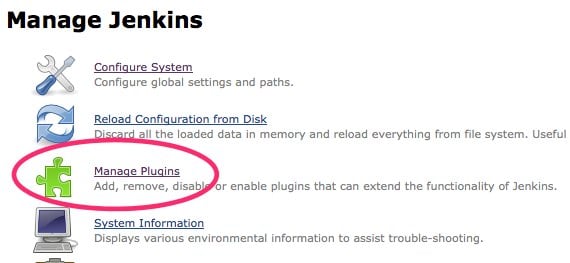
Click the "Manage Plugins" button.
3. Install our plugin
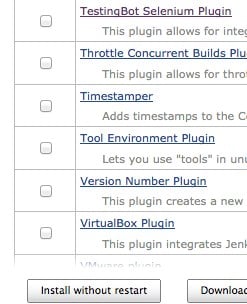
Click "Available" and look for our TestingBot plugin.
Check the box next to our plugin and click "Install without restart"
4. Configuration

Go to Manage Jenkins > Configure System, scroll down to where you can enter the TestingBot credentials. Add your API key and secret, which you can obtain from our member area.
5. Setting up the Build Environment
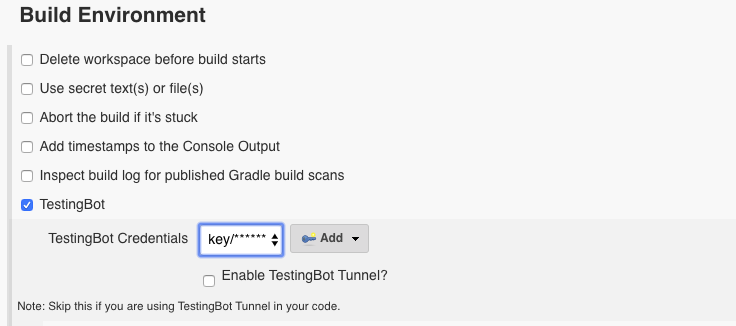
In the Build Environment section, enable the 'TestingBot' option. The API key you entered previously should be visible there, together with an option to use the TestingBot Tunnel during your build.
6. Embedded TestingBot Reports
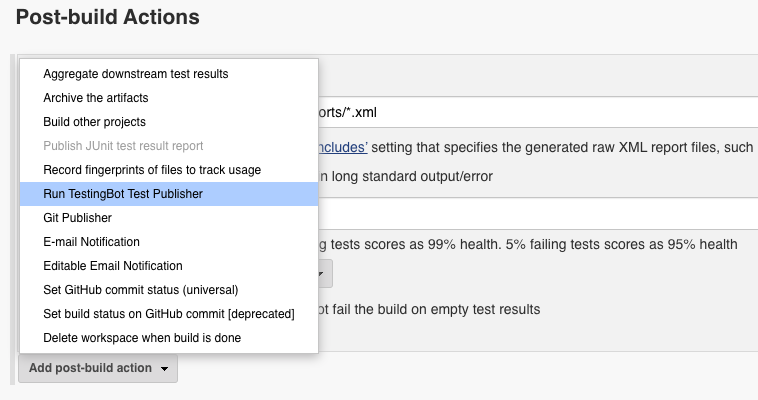
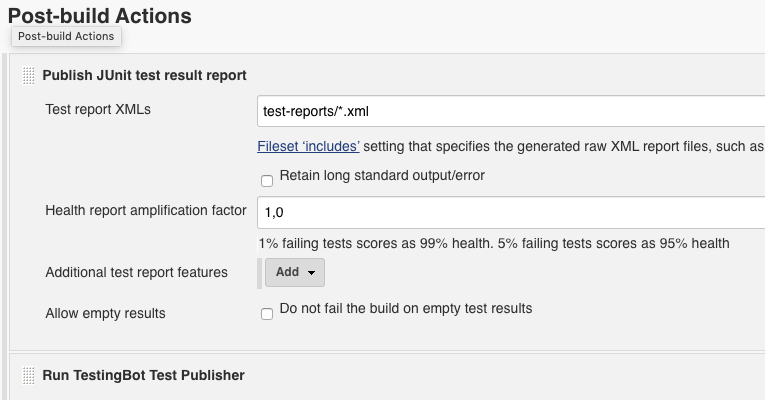
The plugin will parse the JUnit test result files in the post-build step to associate test results with TestingBot jobs. Please make sure that the JUnit plugin is installed.
Click on Add post-build action in Post-build Actions. Make sure you enable Publish JUnit test result report and point to the correct test report files (for example test-reports/*.xml).
7. Results
 Important:
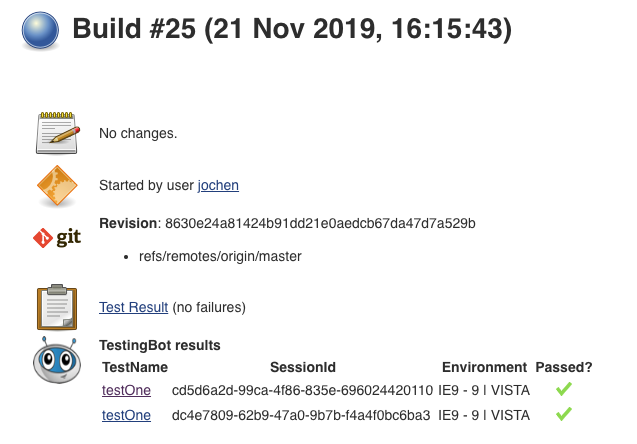
To see the result (logs/video/screenshots) of your test, your test needs to output "TestingBotSessionID=xxx"
If you're using JUnit reporting, the TestingBotSessionID=xxx needs to be in a <system-out>xxx</system-out> tag in the JUnit report XML file.
Our plugin will use this sessionID (the Selenium WebDriver sessionId) to show the correct test details for your test.
For more information, see our JUnit WebDriver example.
Jenkins Pipeline
The plugin provides support for Jenkins' Pipelines (Jenkinsfile).
Currently the plugin offers these commands:
-
testingbot(String credentialId) -
testingbotTunnel(credentialsId: '', options: ' -d -a') -
testingbotPublisher()
The testingbot() command requires a credentialId) which is the Id you can find on the Jenkins Credentials page, the unique Id connected to the TestingBot API key and Secret you entered previously. This command will set environment variables which you can use in your test, including TB_KEY) and TB_SECRET).
The testingbotTunnel() command requires both a credentialId and options. The options are the options you can specify with the TestingBot Tunnel.
This will start the tunnel before your job runs. Once the job finishes, the tunnel will be shutdown.
testingbotPublisher() will try to read the JUnit report files and show the test results from TestingBot.
An Example:
pipeline {
   agent any

   tools {
      // Install the Maven version configured as "M3" and add it to the path.
      maven "M3"
      ant "ant"
   }

   stages {
      stage('Build') {
         steps {
            // Get some code from a GitHub repository
            git 'https://github.com/testingbot/Jenkins-Demo.git'

            testingbot('251ca561abdfewf285') {
               testingbotTunnel(credentialsId: '251ca561abdfewf285', options: '-d') {
                    sh "ant test"
               }
            }
         }

         post {
            success {
               junit 'test-reports/*.xml'
            }
            always {
                testingbotPublisher()
            }
         }
      }
   }
}